


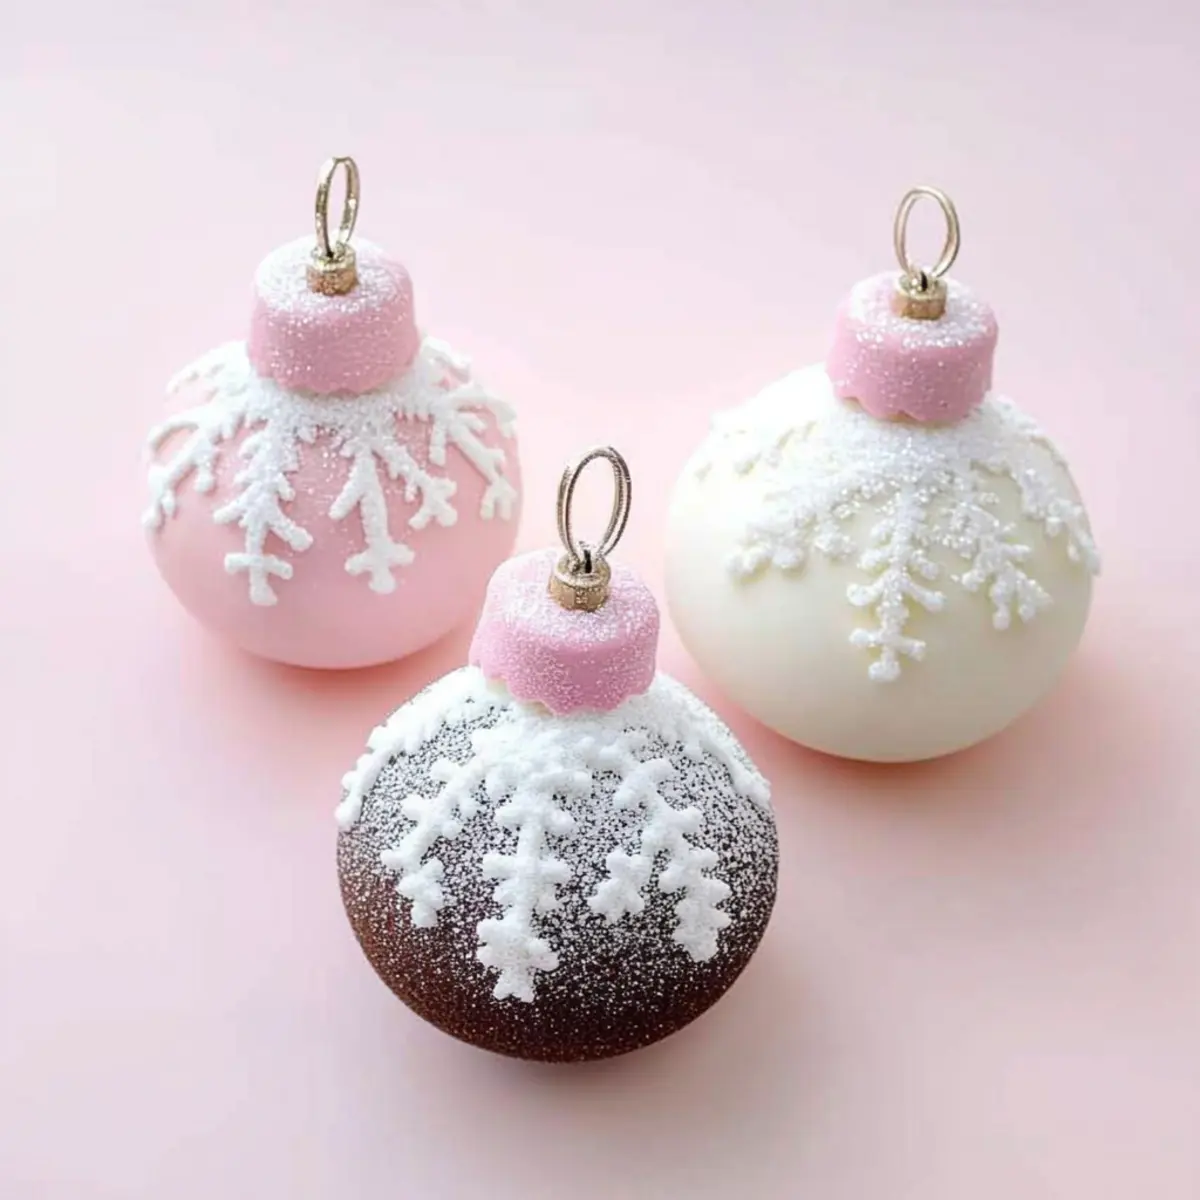
While decorating the tree one winter’s evening, I couldn’t help but marvel at the delightful ornaments that graced its branches. Inspired by their whimsical charm, I decided to transform that holiday spirit into something truly edible—introducing my Sparkly Christmas Ornament Cakes! These visually appealing treats combine a rich chocolate cake with smooth Swiss meringue buttercream, all wrapped in a colorful chocolate shell. Not only do they make a stunning centerpiece for any festive gathering, but they are also surprisingly easy to customize, allowing you to match them perfectly to your holiday theme. Whether you’re looking to impress your guests or simply delight yourself, these ornament cakes will bring joy to your seasonal celebrations. Ready to sprinkle a little magic into your holiday baking? Let’s get started!
Why Are These Cakes So Special?
Uniquely Festive: These sparkling ornament cakes bring a touch of holiday magic to your dessert table, capturing the spirit of the season in each delightful bite.
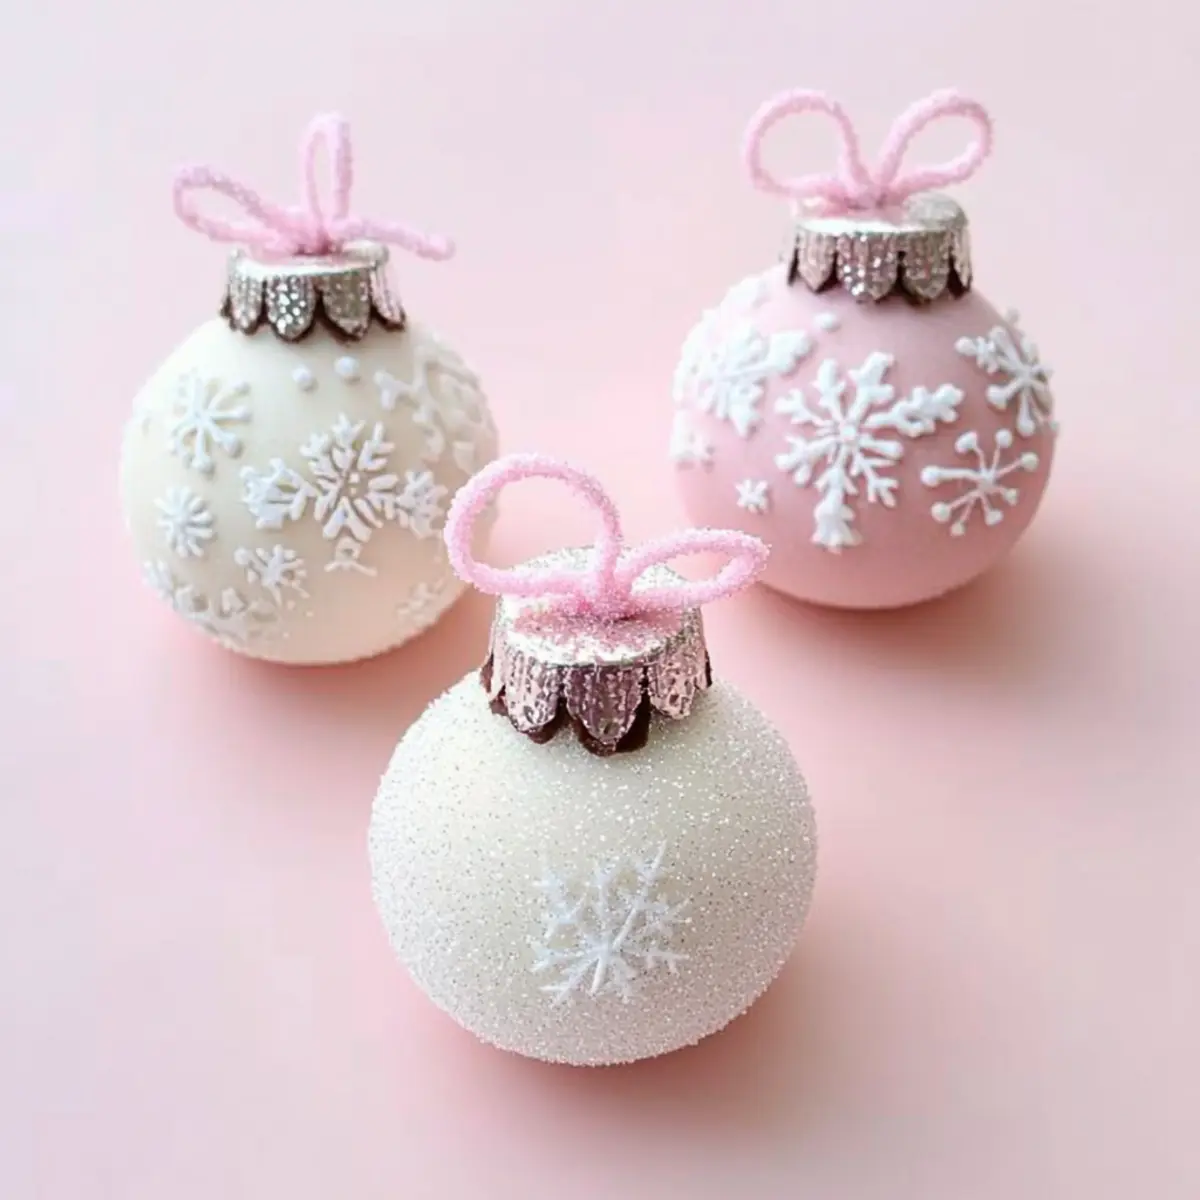
Customizable Joy: Whether you prefer traditional red and green or a winter wonderland theme, the vibrant sanding sugars can be tailored to your holiday décor.
Deliciously Decadent: With a rich chocolate cake layered with creamy Swiss meringue buttercream, every bite is a heavenly experience sure to excite your taste buds.
Easy to Make: Don’t be intimidated! With straightforward steps and accessible ingredients, you can whip up these impressive treats even if you’re a novice baker.
Perfect for Gifting: These charming cakes are ideal for holiday gatherings or sweet gifts, making them a delightful surprise for friends and family alike.
If you enjoy festive baking, consider trying other delightful recipes like Nutella Pancakes Blend or Chocolate Chip Pancakes for more delicious ideas!
Christmas Ornament Cake Ingredients
Here’s everything you need to create these delightful Christmas Ornament Cakes!
For the Cake
• Small Sheet Cake – Use a rich chocolate cake for a decadent base, but feel free to experiment with your favorite flavors!
For the Buttercream
• Swiss Meringue Buttercream – This creamy frosting adds a perfect balance of sweetness to the rich cake layers.
For the Chocolate Shell
• White Candy Coating – Essential for creating the colorful chocolate shell; adding candy colors can accommodate your theme.
For the Mold
• Ball Mold – The key to shaping your cakes into lovely spherical ornaments; an affordable chocolate mold makes this process effortless.
• Peanut Butter Cup Mold – A great alternative for vegan options when making chocolate shells.
For the Decorations
• White Fondant – Perfect for crafting loops and decorative elements; marshmallow fondant is a suitable substitute if needed!
• Snowflake Plunger Cutter – Easily creates adorable snowflake shapes to enhance your festive cakes.
• Piping Gel – This acts as an adhesive for sand sugars and fondant decorations.
• Round Cookie Cutters (2” and 2.5”) – Ideal for cutting your cake layers into perfect circles.
For the Finishing Touches
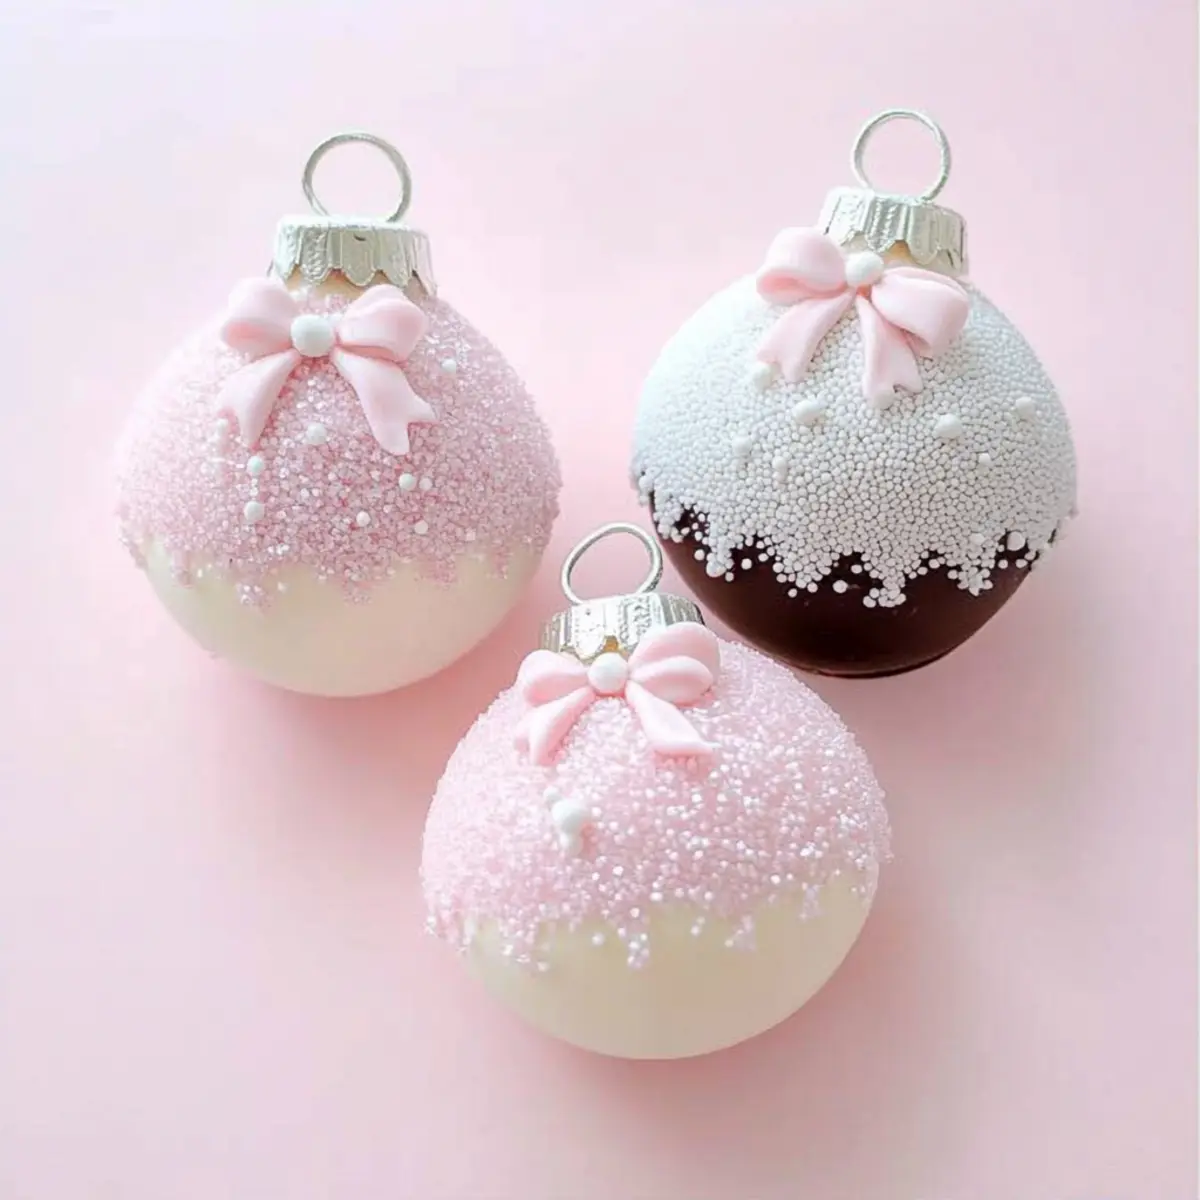
• Light Pink Sanding Sugar – Sprinkle this for a lovely pop of color on your cakes that matches Christmas cheer.
• White Sanding Sugar – Add a snow-like finish to your ornament cakes for a festive look.
• Light Green Sanding Sugar – Use this to bring more vibrant colors to your holiday creations.
With these Christmas Ornament Cake ingredients, you’re all set to create a sparkling centerpiece for your holiday celebrations!
Step‑by‑Step Instructions for Christmas Ornament Cakes
Step 1: Prepare Candy Coating
Begin by melting 12 ounces of white candy coating in the microwave on half power for approximately 1 to 2 minutes. Stir every 30 seconds until smooth and fully melted, being careful not to overheat. Once ready, this will serve as the colorful shell that encases your sparkly Christmas Ornament Cakes.
Step 2: Line Molds
Spoon the melted candy coating into the peanut butter cup molds. Ensure each cavity is generously filled, then place in the freezer for about 10 minutes. This chilling time allows the coating to set firmly, making it easy to pop them out later for your delicious ornament shapes.
Step 3: Create Fondant Loops
While your molds are freezing, take white fondant and roll it into small worm-like shapes, about 2 inches long. Bend and cut each at the base to form loops, which will serve as the hanging elements for your ornament cakes. Set these aside to dry and firm up as you continue the process.
Step 4: Make Snowflakes
Roll out your fondant thinly on a clean surface and use a snowflake plunger cutter to cut out charming snowflakes. Aim for a few dozen to adequately decorate your cakes. Place them aside to dry completely, allowing them to keep their shape for when you’re ready to assemble.
Step 5: Mold Cake Layers
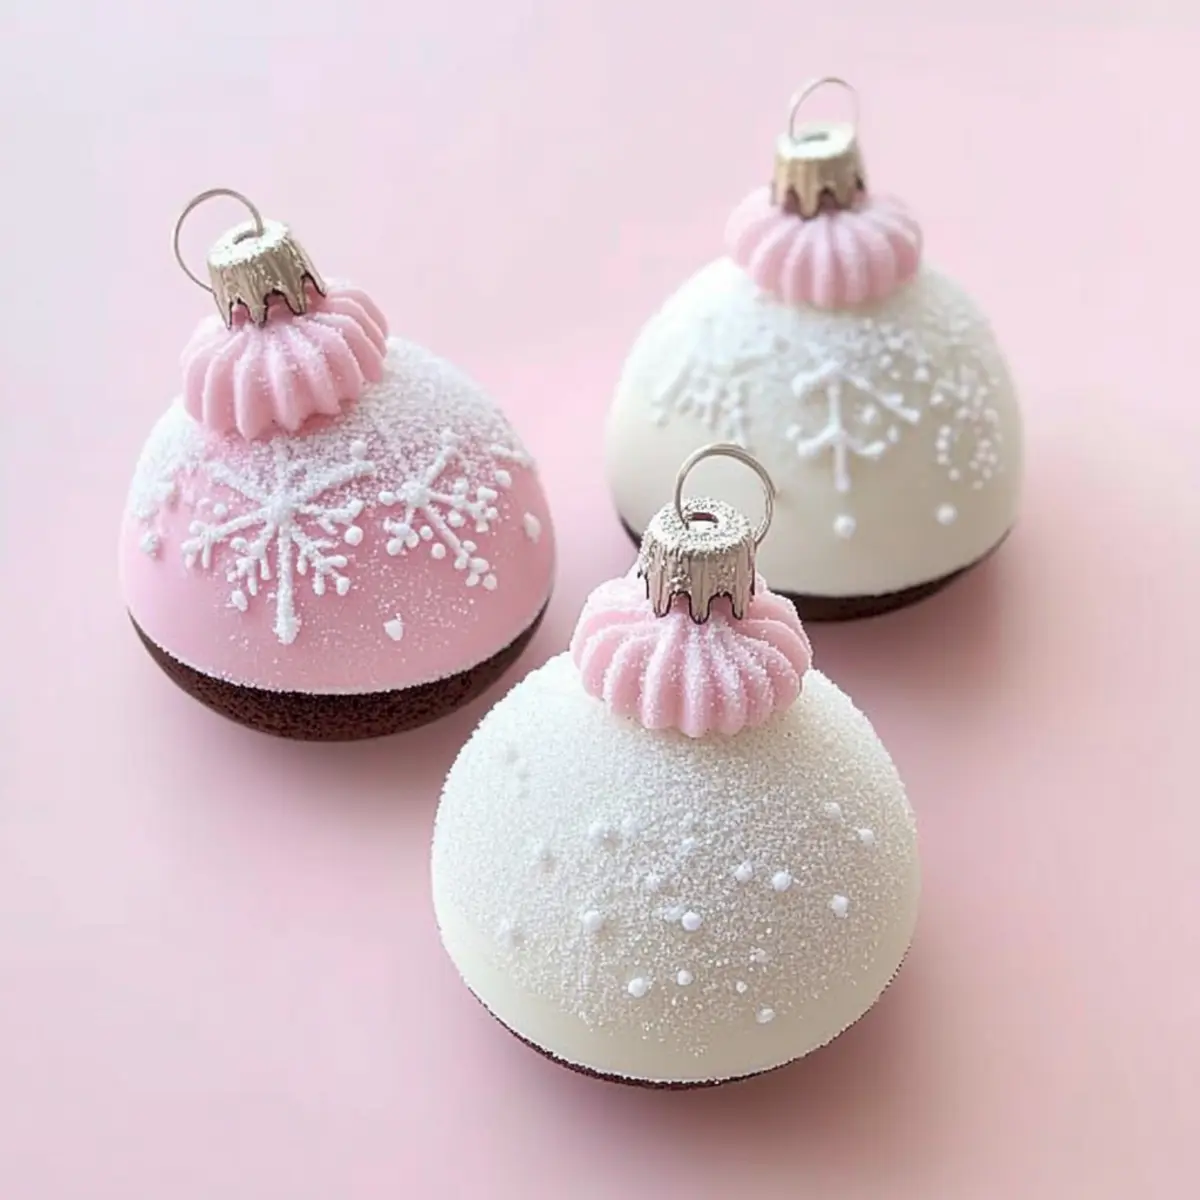
Cut your rich chocolate sheet cake into layers using 2-inch and 2.5-inch round cookie cutters to create perfect circles. In your ball mold, alternate placing the cake rounds and a layer of Swiss meringue buttercream, putting pressure gently after each addition. This ensures your sparkly Christmas Ornament Cakes are compact and delightful.
Step 6: Seal with Candy Coating
Spread a generous layer of the melted candy coating on the back of the layered cake inside the mold. Ensure coverage of the edges for a professional finish and then freeze again for about 10 minutes to harden, creating a tight seal that will hold your ornament cakes together beautifully.
Step 7: Final Assembly
Carefully flip your cakes out of the molds once set and let them sit to reach room temperature for about 5-10 minutes. Using the remaining melted candy coating, attach the tops of your ornament cakes, sealing securely while ensuring they are assembled without gaps.
Step 8: Decorate
To finish your Christmas Ornament Cakes, brush selected areas with piping gel where you’d like the sanding sugars to adhere. Generously sprinkle your choice of light pink, white, and light green sanding sugars over the wet areas and affix the fondant loops and snowflakes using extra melted candy coating for a festive touch.
Expert Tips for Christmas Ornament Cakes
-
Mind the Temperature: Ensure your candy coating is melted at half power to prevent burning. Too hot will ruin the smooth texture needed for your chocolate shells.
-
Clean Edges Matter: Use a clean edge when applying melted coating to your molds. This keeps your ornament cakes looking professional and polished!
-
Drying Time is Key: Allow your cakes to dry completely before decorating. This prevents melting and ensures that each layer stays beautifully intact.
-
Decorative Details: Consider using parchment paper beneath your cakes when applying sanding sugar; it makes for easy cleanup and prevents sticking.
-
Layering Technique: When filling the ball mold, alternate layers of cake and Swiss buttercream to maintain the perfect balance of flavor in your Christmas Ornament Cakes.
Storage Tips for Christmas Ornament Cakes
-
Room Temperature: Store in an airtight container at room temperature for up to 3 days, ensuring they stay fresh and delightful for your holiday gatherings.
-
Fridge: If you need to extend freshness, you can refrigerate the cakes for up to a week, but let them come to room temperature before serving to enjoy the best texture.
-
Freezer: For longer storage, freeze the decorated ornament cakes wrapped tightly in plastic wrap for up to a month. Thaw overnight in the fridge before enjoying again.
-
Reheating: These cakes are best served chilled or at room temperature. Avoid reheating, as it may compromise the beautiful chocolate shell and soft buttercream inside.
Make Ahead Options
These Christmas Ornament Cakes are truly a lifesaver for busy holiday bakers! To simplify your preparations, you can create the chocolate shells and fondant decorations up to 3 days ahead. Just melt the white candy coating and mold it into shapes, then store them in an airtight container at room temperature to keep them fresh. You can also bake the cake layers and store them wrapped tightly in plastic wrap or an airtight container in the fridge for up to 2 days. When you’re ready to assemble, layer the cake with Swiss meringue buttercream and seal with the candy coating. This way, you can have your festive treats ready with minimal effort right before serving, ensuring deliciousness remains intact for all your holiday gatherings!
Christmas Ornament Cakes Variations
Feel free to sprinkle your own creativity into these festive cakes and make them uniquely yours!
-
Flavor Twist: Try a vanilla or red velvet cake instead of chocolate for a delightful flavor variation. Each bite offers a new surprise!
-
Theme Colors: Use blue and silver sanding sugars to create a stunning winter wonderland look that will dazzle your guests. Consider blending colorful themes for a whimsical approach!
-
Personalized Touch: Pipe names or sweet messages onto each ornament cake to make them special for guests—an edible keepsake they’ll cherish!
-
Nut-Free Option: Replace the peanut butter cup and use silicone molds instead for a nut-free alternative while maintaining the gorgeous shape.
-
Vegan Delight: Substitute eggs in the cake with applesauce and use a vegan buttercream for a compassionate yet scrumptious version that everyone can enjoy.
-
Spice it Up: Add a pinch of cinnamon or nutmeg to the cake batter for a cozy holiday flavor that lifts the spirit of the season!
-
Textured Addition: Fold in finely chopped nuts or dried fruits into the cake layers for added texture and richness, making your ornament cakes even more inviting.
-
Sustainable Sweets: Utilize leftover cake scraps from other baking adventures to create mini ornament cakes; just stack and mold them for a delightful sweet treat!
If you’re looking for more playful recipes, why not check out these charming Chocolate Chip Pancakes to start your mornings on a festive note? Or indulge in some Chocolate Fudge Cupcakes for a year-round delight!
What to Serve with Christmas Ornament Cakes
These delightful treats not only sparkle on their own but also pair wonderfully with a variety of festive accompaniments for a complete holiday experience.
-
Rich Hot Chocolate: Indulge in a warm, creamy hot chocolate topped with fluffy marshmallows, enhancing the overall decadence of your dessert table.
-
Whipped Cream: A dollop of light and airy whipped cream elevates each bite, balancing flavors and adding a comforting, creamy element.
-
Peppermint Bark: The crunchy sweetness of peppermint bark offers a delightful contrast to the moist chocolate ornament cakes, adding a refreshing holiday twist.
-
Spiced Apple Cider: A warm mug of spiced apple cider complements the rich chocolate, creating a cozy atmosphere perfect for gatherings.
-
Fruit Platter: Brighten up your table with a vibrant fruit platter featuring fresh berries and citrus—their tartness will beautifully contrast the sweetness of your cakes.
-
Sugar Cookies: Serve with classic sugar cookies decorated with festive icing, providing a traditional touch that resonates with holiday cheer.
-
Eggnog: For a truly festive drink, pair with creamy eggnog. Its rich, spiced flavors enhance the sweetness of the ornament cakes beautifully.
-
Chocolate Mousse: A side of chocolate mousse deepens the indulgent chocolate experience, perfect for those with a serious sweet tooth.
-
Bourbon or Irish Coffee: For adult gatherings, a warm bourbon or Irish coffee can add a special touch to your festive dessert spread, warming both the heart and the belly.
Christmas Ornament Cakes Recipe FAQs
What kind of chocolate cake should I use?
Absolutely! A rich chocolate cake is recommended for these Christmas Ornament Cakes since it pairs perfectly with the smooth Swiss meringue buttercream. However, feel free to experiment with other cake flavors like vanilla or red velvet to suit your taste and holiday theme!
How should I store these ornament cakes?
You can store your Christmas Ornament Cakes in an airtight container at room temperature for up to 3 days. If you need a little extra longevity, refrigerate them for up to a week. Just remember to let them come to room temperature before serving to maintain that delightful texture.
Can I freeze these cakes? How do I do it?
Certainly! To freeze your decorated Christmas Ornament Cakes, wrap each cake tightly in plastic wrap and place them in an airtight container, which will protect them from freezer burn. They can be stored this way for up to 1 month. When you’re ready to enjoy them, thaw in the fridge overnight before serving for the best results.
What should I do if my candy coating is too thick?
Very common question! If you find your candy coating is too thick, you can thin it out by adding a teaspoon of vegetable oil or cocoa butter while it’s melting. This will help achieve a smoother consistency that’s easier to work with when coating your cakes.
Can I use fondant alternatives for decoration?
Yes, you can! While white fondant provides excellent results, marshmallow fondant is also a fantastic substitute as it’s easier to handle and deliciously sweet. Just ensure to allow it to firm up after shaping for the best application on your Christmas Ornament Cakes.
Are there any allergy considerations for these cakes?
Absolutely! Be mindful of ingredient allergens, especially if serving to guests. Check for any nut allergies, as some chocolate coatings may be processed in facilities with nuts. For a nut-free option, ensure to use candy coating that is confirmed to be nut-free. Make sure to inform your guests about ingredient choices, especially regarding the buttercream and decorations!
Delightful Christmas Ornament Cakes to Brighten Your Holidays
Ingredients
Equipment
Method
- Prepare Candy Coating: Melt the white candy coating in the microwave for 1 to 2 minutes, stirring every 30 seconds until smooth.
- Line Molds: Spoon melted coating into the peanut butter cup molds and freeze for 10 minutes.
- Create Fondant Loops: Roll white fondant into worm-like shapes and bend them to form loops.
- Make Snowflakes: Roll out fondant and cut out snowflakes with the plunger cutter.
- Mold Cake Layers: Cut chocolate cake into circles and alternate layers with buttercream in the ball mold.
- Seal with Candy Coating: Spread melted candy coating over the layered cake, freeze for 10 minutes.
- Final Assembly: Flip cakes out of molds, let sit to room temperature, then attach tops with remaining candy coating.
- Decorate: Brush areas with piping gel and sprinkle sanding sugars, adding fondant loops and snowflakes.