


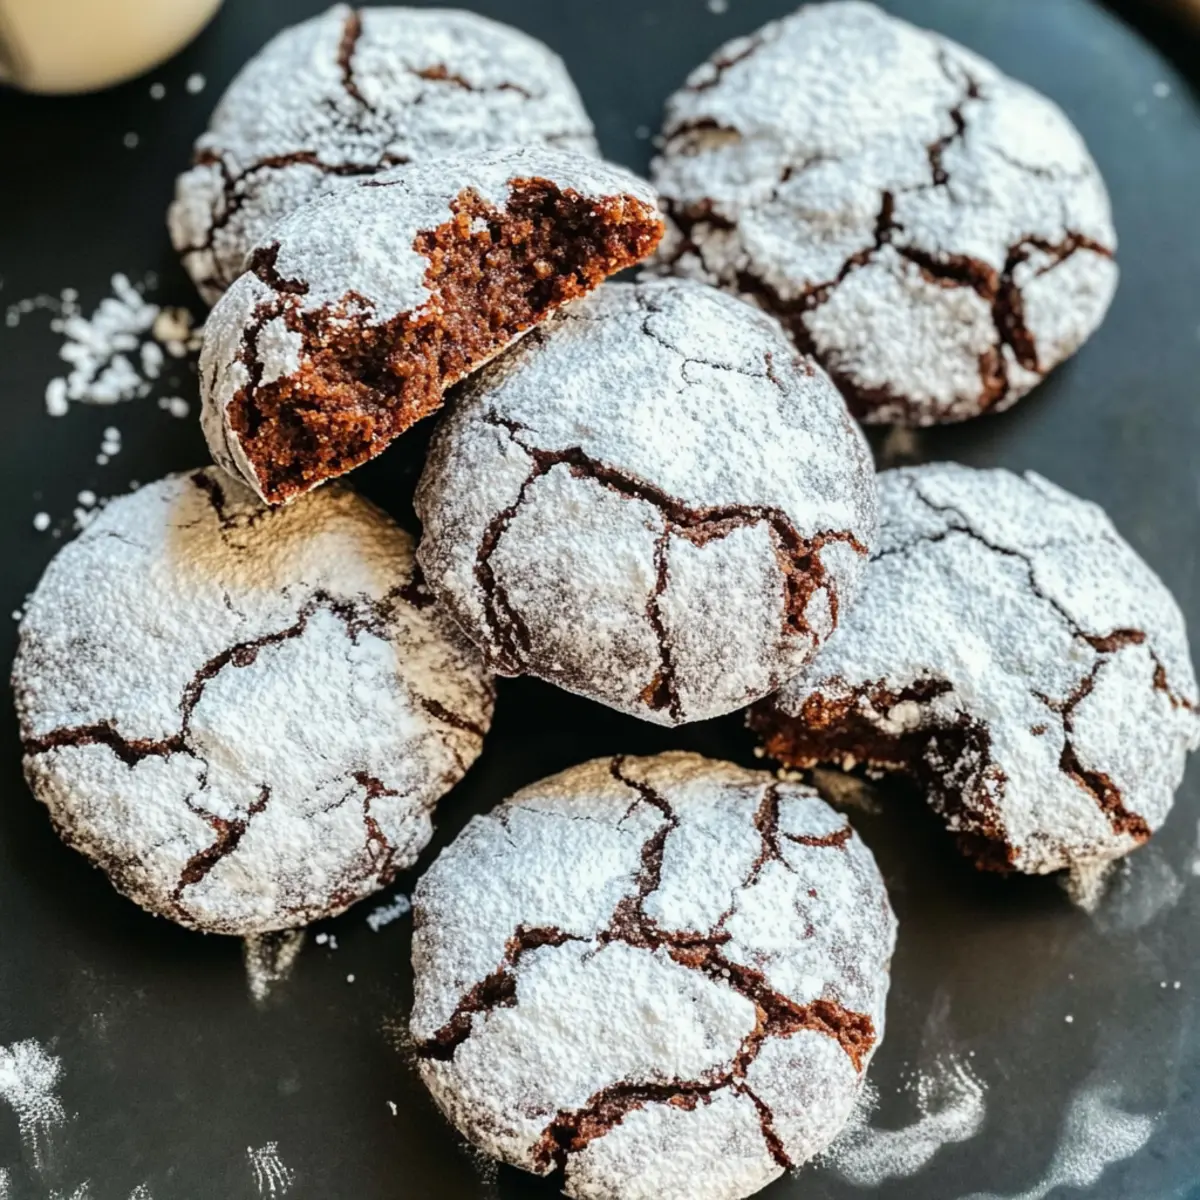
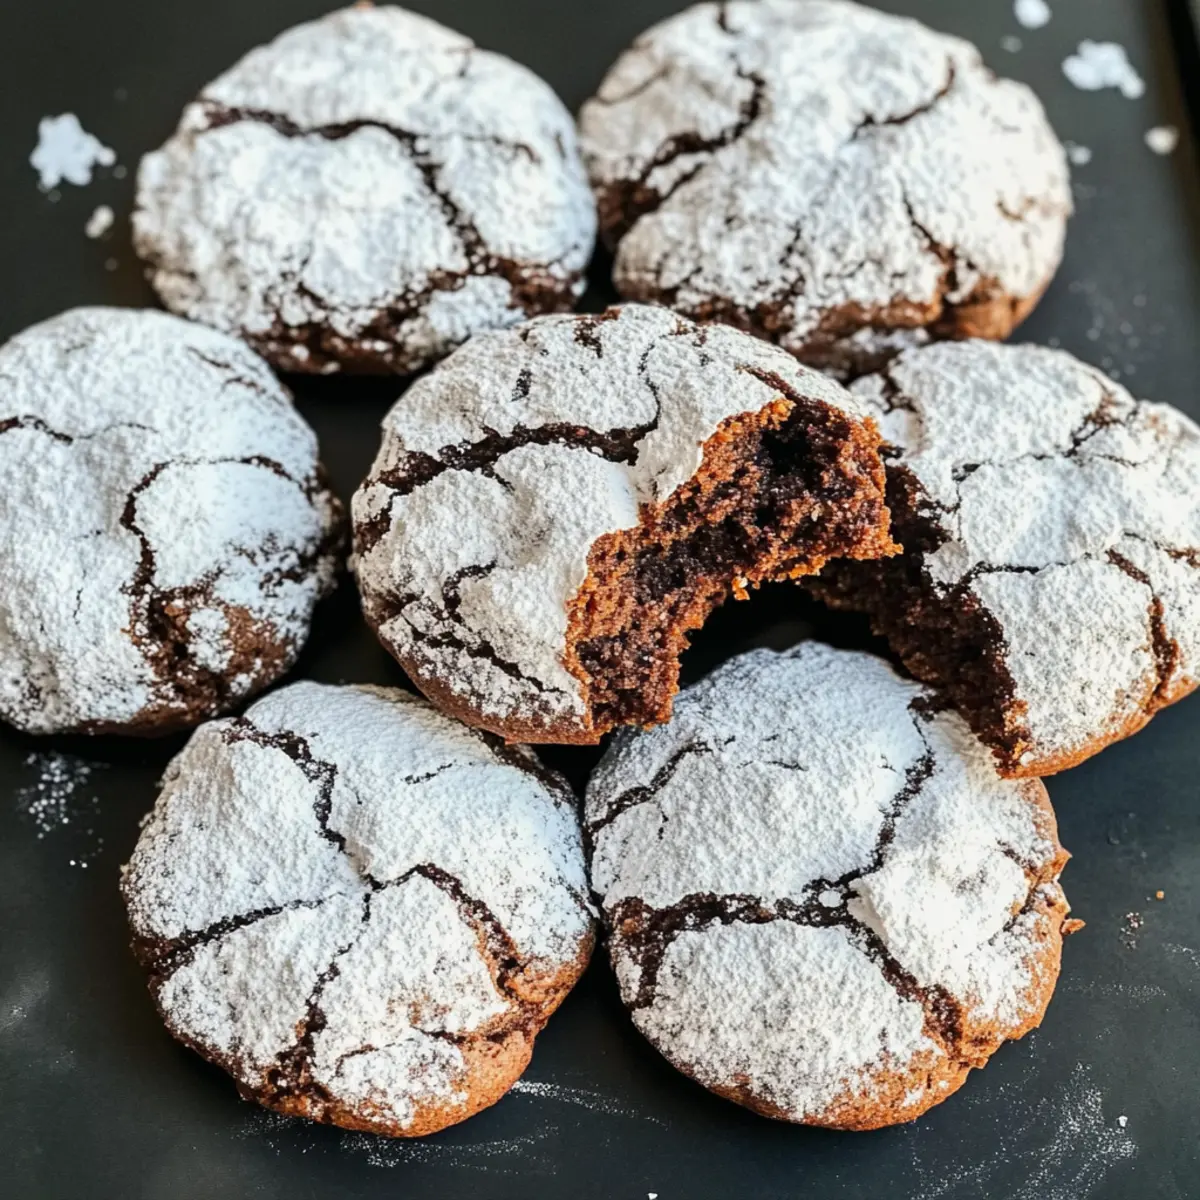
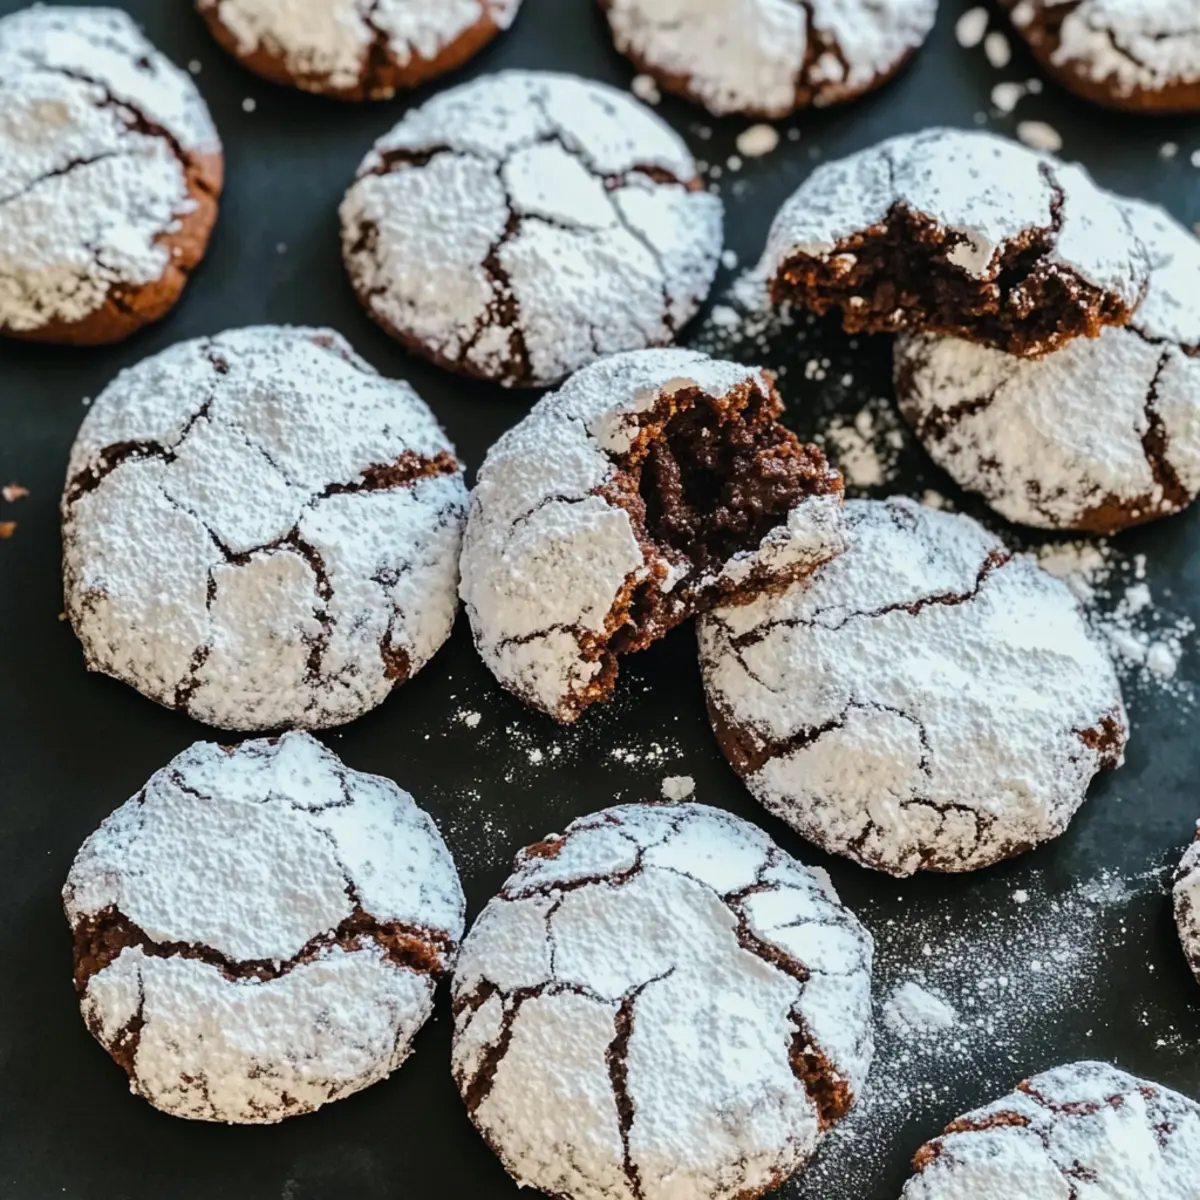
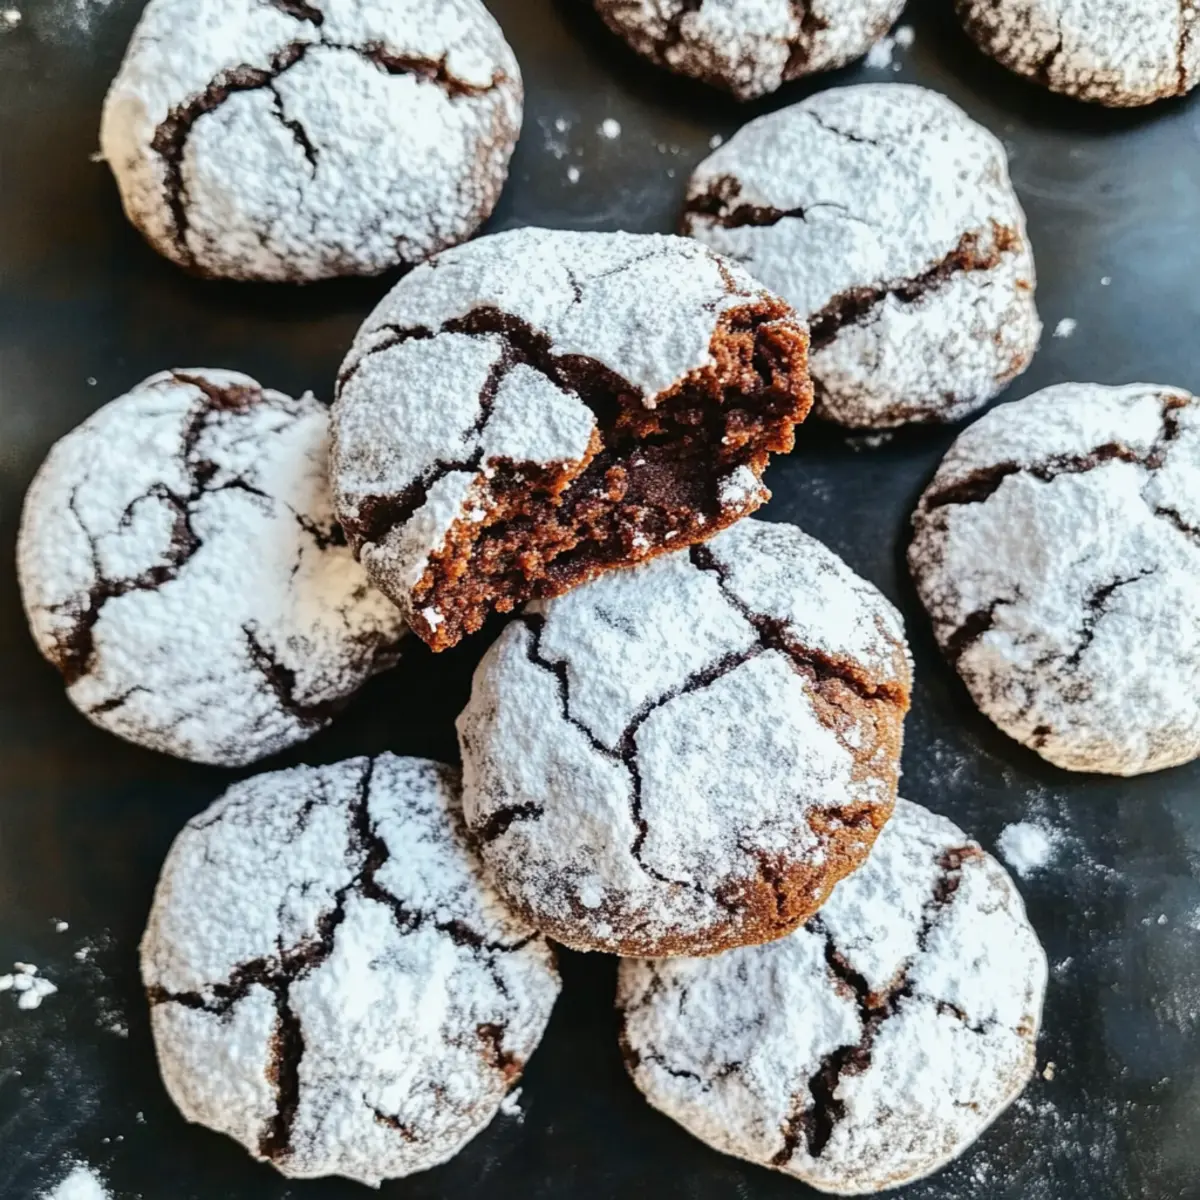
I’ll never forget the first time I pulled a tray of cookies from the oven, the sweet, warm aroma instantly filling my kitchen. Among all the delicious treats, Chocolate Crinkle Cookies stand out with their appealing snow-like coating and a perfect combination of crispy and fudgy textures. These delightful cookies are not just a feast for the eyes; they are incredibly simple to whip up, making them an ideal choice for those cozy holiday gatherings. Plus, they make for a heartfelt gift that every chocolate lover will cherish! If you’re ready to impress friends and family with a classic that pairs beautifully with a warm cup of coffee or milk, let’s dive into the charming world of baking these irresistible treats. Curious to discover the secrets behind achieving that perfect crinkle?
How Do You Achieve Perfect Crinkles?
Simplicity: This recipe is a breeze, making it accessible for bakers of all skill levels.
Visually Stunning: The contrast of the crackled, powdered sugar coating against the rich chocolate is a showstopper for any occasion.
Decadent Flavor: Each bite is a harmonious blend of fudginess and crispiness that will satisfy any chocolate craving.
Versatile Options: Feel free to experiment with different chocolate types or add nuts for unique twists!
Perfect for Gifting: These cookies make a heartfelt, homemade gift that is sure to impress loved ones during the holidays or any special occasion.
Create a memorable moment by serving these delightful cookies with a warm cup of coffee; they’re just as charming as Chocolate Fudge Cupcakes or Easter Chocolate Lasagna. Enjoy the baking experience and discover why they’re a favorite!
Chocolate Crinkle Cookies Ingredients
For the Cookie Dough
- Dark Chocolate – Provides rich flavor and fudginess; use semi-sweet chocolate if preferred.
- Unsalted Butter – Adds moisture and richness; no substitution recommended for this ingredient.
- Large Eggs – Acts as a binder and helps create a light structure; room temperature eggs work best.
- Sugar – Sweetens the cookies and contributes to the chewy texture; can be replaced with brown sugar for added flavor depth.
- Vanilla Extract – Enhances the overall flavor; optional, but recommended for added depth.
- All-Purpose Flour – Gives structure to the cookies; ensure it’s measured properly—spoon and level for accuracy.
- Salt – Balances sweetness and enhances flavor; important for flavor development—do not omit.
- Baking Powder – Acts as a leavening agent to help the cookies rise slightly; essential for the right texture.
- Powdered Sugar – For coating; provides the signature crackled appearance—can be omitted for a different look, but alters presentation.
Indulge in the joy of making Chocolate Crinkle Cookies this holiday season!
Step‑by‑Step Instructions for Chocolate Crinkle Cookies
Step 1: Melt Chocolate and Butter
Begin by chopping the dark chocolate into small pieces and placing it in a microwave-safe bowl with the unsalted butter. Heat the mixture in the microwave on medium power for 30-second intervals, stirring in between, until melted and smooth. This should take about 1 to 2 minutes total. Set aside to cool slightly before using.
Step 2: Beat Eggs and Sugar
In a stand mixer, beat the large eggs and sugar together on high speed until they triple in volume and turn light in color, which usually takes around 10-15 minutes. Once fluffy, gently fold in the cooled chocolate and butter mixture along with the vanilla extract. This creates a rich base for your chocolate crinkle cookies.
Step 3: Combine Dry Ingredients
In a separate bowl, sift together the all-purpose flour, baking powder, and salt to ensure even distribution. Gradually mix the dry ingredients into the wet chocolate mixture, using a spatula to combine until you no longer see streaks of flour. This creates the perfect cookie dough texture for your Chocolate Crinkle Cookies.
Step 4: Chill the Dough
Cover the cookie dough tightly with plastic wrap or place it in an airtight container. Chill in the refrigerator for at least 4 hours, or ideally overnight, to enhance the flavors and ensure the dough firms up. This step is essential to achieve the desired fudgy interior and crinkly exterior.
Step 5: Preheat the Oven
When ready to bake, preheat your oven to 350°F (175°C). Line a baking sheet with parchment paper to prevent the cookies from sticking. It’s important to prepare the baking sheet while the oven heats up, so you can quickly bake the cookies once you’re ready to form them.
Step 6: Form and Coat the Cookies
Using a cookie scoop or your hands, form the chilled dough into balls about 1 inch in diameter. Roll each ball thoroughly in powdered sugar, ensuring they’re well-coated for that signature snowy appearance. Space them 2 inches apart on the prepared baking sheet, as they will spread while baking.
Step 7: Bake the Cookies
Place the baking sheet in the preheated oven and bake the cookies for 12-15 minutes. Keep an eye on them; they should have a crisp exterior but remain soft in the center. The iconic crinkle will form during baking, creating that beautiful texture characteristic of Chocolate Crinkle Cookies.
Step 8: Cool and Serve
Once baked, remove the cookies from the oven and let them cool on the baking sheet for about 5 minutes before transferring them to a wire rack. Allow them to cool completely to enhance their fudgy consistency. Serve these delightful Chocolate Crinkle Cookies warm or at room temperature alongside a glass of milk or coffee!
Make Ahead Options
These Chocolate Crinkle Cookies are a fantastic choice for busy home cooks looking to save time! You can prepare the cookie dough up to 24 hours in advance; simply chill it in the refrigerator wrapped tightly with plastic wrap. If you’re planning ahead further, the shaped dough balls can be frozen for up to 2 months—perfect for fresh, warm cookies on demand! To maintain quality, ensure the dough is well-sealed to prevent freezer burn. When you’re ready to bake, simply roll the frozen dough balls in powdered sugar and bake directly from the freezer, adding a couple of extra minutes to the cooking time. Enjoy delicious, homemade cookie magic with minimal effort!
What to Serve with Chocolate Crinkle Cookies
These delightful treats beckon for the perfect companions, making every bite a celebration of flavors and textures.
-
Creamy Vanilla Ice Cream: The richness of vanilla ice cream contrasts beautifully with the warm, fudgy center of the cookies, creating a harmonious balance that’s pure bliss.
-
Steaming Cup of Hot Cocoa: Pair these cookies with a rich cup of hot cocoa, allowing the flavors to blend in a delightful chocolate explosion. It’s a cozy match made in heaven!
-
Fresh Berries: A touch of tartness from fresh raspberries or strawberries elevates the flavor, adding a refreshing note to the indulgence. The bright color also adds visual appeal to your dessert spread.
-
Whipped Cream Topping: A dollop of freshly whipped cream on the side adds a fluffy texture and creaminess that complements the cookies’ richness perfectly.
-
Chocolate Ganache Drizzle: Drizzling some warm chocolate ganache takes it over the top, enhancing the chocolate experience while giving a decadent feel to your dessert.
-
Chilled Almond Milk: Light and nutty, almond milk offers a refreshing balance that’s ideal for cleansing the palate between bites of these rich cookies.
-
Caramel Sauce: A drizzle of warm caramel brings a sweet, buttery flavor that beautifully contrasts the deep cocoa of the cookies, creating a luscious combination.
-
Nutty Espresso: A robust shot of espresso pairs wonderfully with Chocolate Crinkle Cookies, providing a caffeine kick and balancing the sweetness perfectly.
Invite your loved ones to experience these pairings—each one a small delight that elevates every cookie bite!
Chocolate Crinkle Cookies Variations
Explore the possibilities to make these chocolate crinkle cookies uniquely yours with fun twists and substitutions!
-
Milk Chocolate: Swap dark chocolate for milk chocolate to create a sweeter cookie that appeals to all ages. The sugariness will delight those with a sweet tooth!
-
Nutty Delight: Toss in chopped walnuts or pecans to add a lovely crunch and earthy flavor to your cookies. This brings a delightful contrast to the soft chocolatey center.
-
Peppermint Twist: Add a touch of peppermint extract for a festive flavor during the holiday season. These minty cookies will transport you to winter wonderlands with each bite!
-
Flour Alternatives: For a gluten-free version, replace all-purpose flour with a gluten-free flour blend. You’ll retain that chewy texture while accommodating dietary preferences.
-
Cocoa Boost: Mix in a tablespoon or two of cocoa powder for an even richer chocolate flavor. This intensifies the chocolate experience, making it irresistible to chocoholics.
-
Spicy Kick: Add a pinch of cayenne pepper or chili powder for a surprising heat that complements the sweetness. This adventurous twist will leave your taste buds dancing!
-
Chocolate Chips: Fold in chocolate chips (white, dark, or milk) into the dough for an extra gooey experience. These melty pockets of goodness will take the classic cookie to the next level.
You can easily create various delicious pairings, such as serving these cookies with a refreshing cup of coffee or indulging in a sweet treat reminiscent of your favorite Chocolate Fudge Cupcakes. Enjoy the baking journey!
Storage Tips for Chocolate Crinkle Cookies
Room Temperature: Store your baked cookies in an airtight container at room temperature for up to 1 week to maintain their chewy texture.
Fridge: If you want to keep them fresh for a little longer, you can refrigerate them for up to 2 weeks. Allow them to come to room temperature before serving for the best taste.
Freezer: For longer storage, freeze the cookie dough balls for up to 2 months. When ready to bake, simply take them out and bake directly from frozen, adding a couple of extra minutes to the baking time.
Reheating: If you’d like to enjoy them warm, gently reheat leftover cookies in the microwave for about 10-15 seconds. This will restore that soft and fudgy texture that makes Chocolate Crinkle Cookies such a treat!
Expert Tips for Chocolate Crinkle Cookies
- Chill Time Essential: The longer you chill the dough (4 hours or overnight), the better the texture and flavor will be. Don’t skip this step!
- Rolling Technique: Roll cookie balls quickly after chilling to maintain their cold temperature; this helps achieve the perfect crinkle.
- Bake with Care: Keep a close eye on the cookies while baking. Remove them when the edges are firm but the center is still soft to avoid overbaking.
- Powdered Sugar Tip: For an even coverage, roll the cookies in powdered sugar twice—once before baking and once immediately after they come out of the oven!
- Storage Secrets: Store cookies in an airtight container at room temperature to maintain their softness, or freeze the dough balls to bake fresh cookies later.
Enjoy creating these delightful Chocolate Crinkle Cookies that everyone will love!
Chocolate Crinkle Cookies Recipe FAQs
What kind of chocolate should I use for the best flavor?
For the richest flavor and fudginess, I recommend using high-quality dark chocolate. Semi-sweet chocolate also works well if you prefer a slightly sweeter taste. Look for chocolate with at least 70% cocoa content for a more intense flavor.
How long can I store the Chocolate Crinkle Cookies?
You can store your baked cookies in an airtight container at room temperature for up to 1 week. If you want to keep them fresh for longer, refrigerate them for up to 2 weeks, allowing them to return to room temperature before serving.
Can I freeze the cookie dough?
Absolutely! You can freeze the cookie dough balls for up to 2 months. To freeze, simply form the dough into balls, place them on a baking sheet to firm up in the freezer for 1-2 hours, then transfer them to a freezer-safe bag or container. When you’re ready to bake, there’s no need to thaw—just add a couple of extra minutes to your baking time for perfectly fresh cookies.
What should I do if my cookies spread too much while baking?
If your cookies spread more than expected, it’s likely that the dough wasn’t chilled long enough. Always chill the dough for at least 4 hours or even overnight for optimal results. Additionally, ensure that your butter is softened but not melted when combined with the chocolate, as this can also contribute to spreading.
Are Chocolate Crinkle Cookies safe for pets to eat?
No, chocolate is toxic to pets, particularly dogs and cats. Even small amounts can lead to serious health issues, including vomiting, diarrhea, and even more severe complications. Always keep your delicious Chocolate Crinkle Cookies safely out of reach of your furry friends!
Decadent Chocolate Crinkle Cookies for Ultimate Indulgence
Ingredients
Equipment
Method
- Begin by chopping the dark chocolate into small pieces and placing it in a microwave-safe bowl with the unsalted butter. Heat the mixture in the microwave on medium power for 30-second intervals, stirring in between, until melted and smooth. This should take about 1 to 2 minutes total. Set aside to cool slightly before using.
- In a stand mixer, beat the large eggs and sugar together on high speed until they triple in volume and turn light in color, which usually takes around 10-15 minutes. Once fluffy, gently fold in the cooled chocolate and butter mixture along with the vanilla extract.
- In a separate bowl, sift together the all-purpose flour, baking powder, and salt to ensure even distribution. Gradually mix the dry ingredients into the wet chocolate mixture until you no longer see streaks of flour.
- Cover the cookie dough tightly with plastic wrap or place it in an airtight container. Chill in the refrigerator for at least 4 hours, or ideally overnight.
- When ready to bake, preheat your oven to 350°F (175°C). Line a baking sheet with parchment paper.
- Using a cookie scoop or your hands, form the chilled dough into balls about 1 inch in diameter. Roll each ball thoroughly in powdered sugar, ensuring they’re well-coated. Space them 2 inches apart on the prepared baking sheet.
- Place the baking sheet in the preheated oven and bake the cookies for 12-15 minutes. Keep an eye on them; they should have a crisp exterior but remain soft in the center.
- Once baked, remove the cookies from the oven and let them cool on the baking sheet for about 5 minutes before transferring them to a wire rack.