


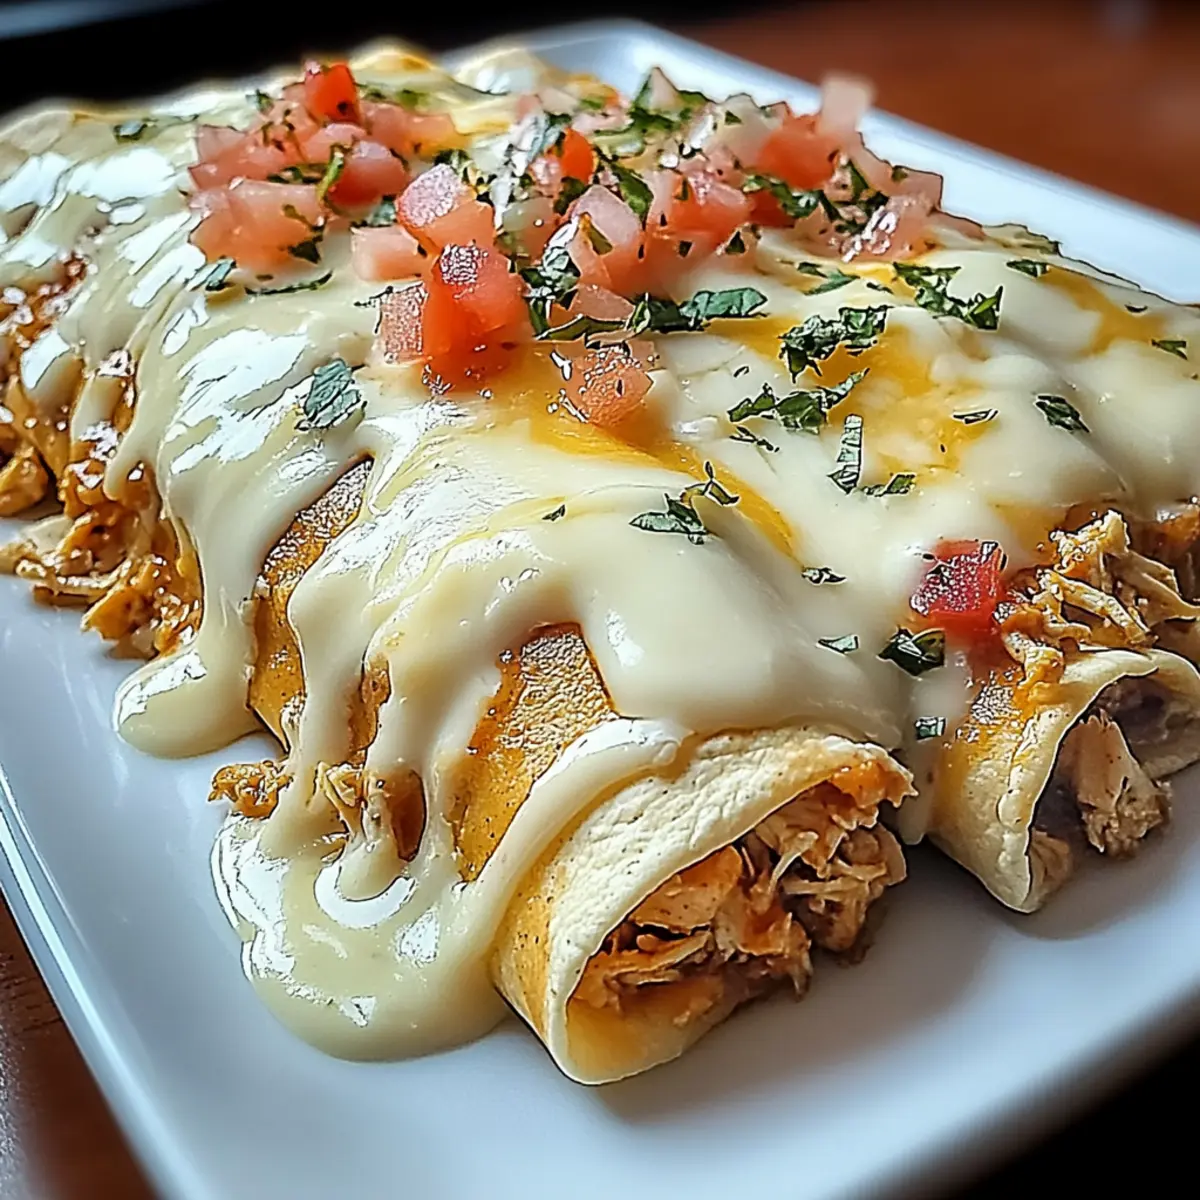
A whiff of melted cheese and spices wafting from the oven can brighten even the busiest of weeknights. That’s the magic of my Queso Chicken Enchiladas—a dish that wraps up comfort and flavor in a warm tortilla blanket. This family-friendly recipe is not only quick to assemble, taking just 10 minutes of prep, but it also offers the flexibility to cater to everyone’s taste buds. Whether you’re a meat lover or a staunch vegetarian, you can create a filling packed with your favorite ingredients and spices. Plus, the use of corn tortillas opens up gluten-free options! Ready to dive into a deliciously cheesy experience that will have your loved ones asking for seconds? Let’s get cooking!
Why is this recipe a must-try?
Simplicity, this Queso Chicken Enchiladas dish is a breeze to whip up, taking only 10 minutes of prep time. Customizable, you can easily tailor the filling to suit every palate, whether it’s switching to beans for a vegetarian option or tossing in extra veggies. Flavor-packed, the combination of gooey queso and seasoned chicken creates a comforting meal that brings everyone around the table. Crowd-pleaser, kids and adults alike will fall in love with this dish, often begging for seconds! Quick and flexible, you can make it ahead for those busy weeknights and still enjoy that cheesy goodness later or try it with gluten-free tortillas. This recipe is perfect for adding variety to your dinner routine!
Queso Chicken Enchiladas Ingredients
For the Filling
• Shredded Chicken – Main protein providing flavor and structure; use rotisserie chicken for convenience.
• Taco Seasoning – Adds robust flavor to the filling; homemade seasoning can offer a milder taste.
• Sour Cream – Contributes creaminess and tanginess; substitute Greek yogurt for a healthier option.
• Shredded Cheddar Cheese – Main cheese in the filling for richness; Monterey Jack or pepper jack work for varied flavor.
• Chopped Green Chilies – Offers a mild heat; omit for a milder dish or use diced jalapeños for a spicier kick.
For the Queso Sauce
• Cubed Velveeta – Creates a creamy queso sauce; consider using reduced-fat cheese for a lighter version.
• Diced Tomatoes with Green Chilies – Adds moisture and flavor to the sauce; use undrained for a thicker consistency.
For the Enchiladas
• Tortillas – The wrap for the enchiladas; choose corn for gluten-free options or flour/whole-wheat for preferences.
Let’s get ready to embrace the cheesy goodness of these Queso Chicken Enchiladas! Each bite is an invitation to enjoy a comforting meal that can adapt to anyone’s taste.
Step‑by‑Step Instructions for Queso Chicken Enchiladas
Step 1: Preheat the Oven
Begin by preheating your oven to 350°F (175°C) to ensure an even bake for the Queso Chicken Enchiladas. This step is crucial for achieving that bubbly, golden finish. While the oven heats, you can gather your ingredients and prepare your workspace, making the process more seamless.
Step 2: Mix the Filling
In a large mixing bowl, combine shredded chicken, taco seasoning, sour cream, shredded cheddar cheese, and chopped green chilies. Stir these ingredients together thoroughly until well blended, ensuring every bite of your Queso Chicken Enchiladas is packed with flavor. Set the mixture aside for a few moments while you prepare the sauce.
Step 3: Melt the Queso
Place a saucepan over medium-high heat and add cubed Velveeta along with the undrained diced tomatoes with green chilies. Stir continuously as the cheese melts to create a creamy queso sauce, watching for a smooth and velvety consistency, which should take about 5-7 minutes. Remove from heat once fully melted.
Step 4: Fill the Tortillas
Lay the tortillas flat on a clean surface. Spoon approximately ½ to ¾ cup of the chicken filling onto each tortilla, spreading it evenly across the center. Roll the tortillas tightly, ensuring the filling stays securely inside. This step is essential for keeping the filling contained while baking and serving.
Step 5: Arrange the Enchiladas
Grease a 9×13-inch casserole dish lightly to prevent sticking, then carefully place the rolled tortillas seam-side down into the dish. Arrange them snugly side by side, allowing enough space for the heat to circulate during baking. This ensures every inch of your Queso Chicken Enchiladas gets that delicious cheesy goodness.
Step 6: Pour the Queso Sauce
Evenly pour the melted queso sauce over the arranged enchiladas, covering them generously. Make sure each enchilada is well coated with the creamy sauce to achieve that comforting, indulgent flavor everyone loves. If desired, sprinkle additional shredded cheese on top for an extra cheesy finish.
Step 7: Bake the Enchiladas
Place the casserole dish in the preheated oven and bake for 20–25 minutes, or until the top is bubbly and golden brown. Keep an eye on the enchiladas toward the end of the baking time, as you want to avoid overbaking. The enticing aroma will fill your kitchen, signaling that dinner is almost ready!
Make Ahead Options
These Queso Chicken Enchiladas are perfect for busy home cooks looking to save time during the week! You can assemble the enchiladas and store them in the refrigerator for up to 24 hours before baking. Just be sure to add your queso sauce right before placing them in the oven to keep that creamy texture intact. For even more flexibility, you can also prepare the filling in advance and refrigerate it for up to 3 days; this allows the flavors to meld beautifully. When you’re ready to serve, simply roll the tortillas, pour on the sauce, and bake as directed for a meal that’s just as delicious on day two as it is fresh!
Storage Tips for Queso Chicken Enchiladas
- Fridge: Store uneaten enchiladas in an airtight container for up to 3 days. Ensure the lid is sealed tightly to maintain freshness.
- Freezer: For long-term storage, wrap individual portions in plastic wrap and place in a freezer-safe container. They can last for up to 3 months.
- Reheating: To enjoy leftovers, reheat individual servings in the microwave for about 2–3 minutes or in the oven at 350°F (175°C) for 15–20 minutes, until heated through.
- Make-Ahead: You can prepare Queso Chicken Enchiladas in advance. Assemble and refrigerate without baking, adding the cheese and baking just before serving for best results.
What to Serve with Queso Chicken Enchiladas
Pair your enchiladas with delightful sides that enhance the comforting flavors of this cheesy dish.
- Mexican Rice: Fluffy and infused with spices, this classic side adds a hearty balance to the richness of the enchiladas.
- Refried Beans: Creamy and flavorful, they offer a satisfying texture contrast and boost the protein content of your meal.
- Fresh Guacamole: This cool and creamy dip provides a refreshing element, complementing the warmth and spice of the enchiladas perfectly.
- Corn Salad: A bright and zesty salad featuring sweet corn, peppers, and lime dressing brings a burst of freshness and color to your plate.
- Cilantro Lime Rice: The zesty pop of lime and fresh cilantro enhances your meal’s brightness, harmonizing beautifully with the cheesy enchiladas.
- Chips and Salsa: Crunchy tortilla chips paired with zesty salsa make for a fun appetizer, setting the stage for your delicious enchiladas.
For drinks, a Margarita or Horchata would be a delightful pairing, offering a refreshing sip between bites. To satisfy your sweet tooth, consider serving with a side of Churros drizzled with chocolate sauce, adding a festive touch to your meal.
Expert Tips for Queso Chicken Enchiladas
-
Avoid Overfilling: Ensure your tortillas aren’t packed too tightly; overfilling can lead to messy rolling and bursting enchiladas during baking.
-
Melt Cheese Gently: Use medium heat to melt the Velveeta for your queso sauce. If clumpy, whisk in a splash of milk to regain creaminess.
-
Baking Time Matters: Keep a close eye on your enchiladas as they bake. Overbaking can dry them out, while perfect timing results in a gooey delight.
-
Flexible Ingredients: Feel free to mix in your favorite spices or vegetables. Customizing your Queso Chicken Enchiladas makes them even more personal and delicious.
-
Make-Ahead Option: Assemble the enchiladas ahead of time and refrigerate them. Just add the queso sauce right before baking for a fresh meal.
Queso Chicken Enchiladas Variations & Substitutions
Feel free to get creative with your Queso Chicken Enchiladas and make them truly your own!
-
Vegetarian Option: Swap shredded chicken for black beans or lentils, giving you a hearty and protein-packed alternative.
-
Extra Veggies: Fold in fresh spinach, zucchini, or bell peppers into the filling for added nutrition and vibrant color. These add a lovely crunch and enhance the dish’s flavor profile.
-
Spicier Kick: Toss in diced jalapeños for an extra punch of heat, making the dish perfect for spice lovers. The heat will beautifully contrast with the creamy queso.
-
Cheese Variety: Mix different types of cheese like Monterey Jack or pepper jack for a unique flavor twist. Each type brings its own depth, making your enchiladas an irresistible treat.
-
Single Serving Delight: Use ramekins to create individual enchiladas for a fun presentation, great for entertaining or meal prepping.
-
Gluten-Free Option: Choose corn tortillas to ensure your enchiladas are gluten-free, so everyone at the table can enjoy this comforting dish.
-
Lighter Version: Consider using reduced-fat cheese or substituting sour cream with Greek yogurt for a healthier twist without sacrificing flavor.
-
Seasoned To Taste: Experiment with your favorite spices or add a touch of cumin or smoked paprika to elevate the flavors and make your enchiladas truly unique. Customizing with spices can really harmonize the filling with the queso sauce.
The possibilities are endless, so dive into the kitchen and craft a version of Queso Chicken Enchiladas that your family will adore!
Queso Chicken Enchiladas Recipe FAQs
How do I select ripe avocados for garnishing?
Absolutely! When selecting avocados, look for ones that yield slightly when gently squeezed but are not overly soft. Dark green or black skin often indicates ripeness, but you’ll want to avoid ones with dark spots all over, as they may be overripe or spoiled.
How should I store leftover Queso Chicken Enchiladas?
To keep your delicious enchiladas fresh, store any leftovers in an airtight container for up to 3 days in the refrigerator. Make sure to seal it tightly to prevent them from drying out, and enjoy them as a tasty next-day meal!
Can I freeze Queso Chicken Enchiladas?
Very! To freeze, wrap individual portions tightly in plastic wrap and place them in a freezer-safe container or a resealable bag. They will maintain their taste and texture for up to 3 months. When you’re ready to eat, simply thaw in the refrigerator overnight and reheat in the oven at 350°F (175°C).
What should I do if my queso sauce is lumpy?
I often make creamy sauces for a smooth texture! If your queso sauce turns out lumpy, don’t fret. Just whisk in a splash of milk over medium heat, stirring continuously until the lumps dissolve and you achieve a velvety sauce. Avoid overheating, as it could further exacerbate the lumps.
Are there any allergy considerations with this recipe?
Yes! When preparing Queso Chicken Enchiladas, be mindful of common allergens. If cooking for someone with dairy allergies, consider using dairy-free cheese and Greek yogurt alternatives. For gluten-sensitive individuals, opt for corn tortillas to ensure a delicious gluten-free meal!
Can I prepare the enchiladas ahead of time?
Definitely! You can assemble your Queso Chicken Enchiladas up to a day in advance. Just prepare everything and place the unbaked assembly in the fridge. When it’s time to eat, pour the queso sauce over them and bake as directed. This is a fantastic time-saver for busy weeknights!
Queso Chicken Enchiladas: Flavorful Comfort in Every Bite
Ingredients
Equipment
Method
- Preheat your oven to 350°F (175°C) to ensure an even bake.
- In a large mixing bowl, combine shredded chicken, taco seasoning, sour cream, shredded cheddar cheese, and chopped green chilies.
- In a saucepan, melt cubed Velveeta with the undrained diced tomatoes with green chilies, stirring continuously until smooth.
- Lay tortillas flat and spoon ½ to ¾ cup of the chicken filling onto each, rolling them tightly.
- Grease a 9x13-inch casserole dish and arrange the rolled tortillas seam-side down.
- Pour the melted queso sauce over the arranged enchiladas, ensuring they are well coated.
- Bake in the preheated oven for 20–25 minutes, or until bubbly and golden brown.