


On a sun-soaked afternoon, as laughter echoes from the backyard, I find myself rummaging through the pantry for a delightful dessert that will make the day even sweeter. Enter the No-Bake Frozen Chocolate Mudslide Pie—a blissful creation that effortlessly balances indulgent chocolate with a refreshing treat, making it perfect for summer gatherings! With its easy prep and minimal bake time, you can whip this dessert up in a flash, leaving you plenty of moments to relish with friends and family. This pie not only dazzles the taste buds with its creamy filling and airy whipped topping but also showcases a sophisticated flair, ensuring it’s a hit at any event. Curious about how to create this crowd-pleaser and impress your guests? Let’s dive into the recipe!
Why is this dessert a must-try?
Irresistible Creaminess: The luscious filling, combining chocolate and coffee, creates a dreamy texture that will leave you wanting more.
Hassle-Free Preparation: With its no-bake nature, this pie demands minimal effort, perfect for those who favor quick, delicious desserts.
Crowd-Pleasing Flavor: A rich blend of chocolate, combined with a hint of tang from sour cream, makes it an impressive dessert for any gathering.
Customizable Delight: You can easily adapt it, experimenting with different flavor extracts or adding crushed cookies to the crust for added flair.
Chill and Serve: Its ideal for hot days, providing a refreshing treat that holds up well in the freezer—perfect for last-minute celebrations! Don’t forget to check out our tips for storage and serving ideas to make the most of this delightful dessert!
Frozen Chocolate Mudslide Pie Ingredients
• Here’s everything you’ll need to create this delicious no-bake dessert!
For the Pie Crust
- Pre-made chocolate pie crust – This time-saving option provides a sturdy base for your indulgent pie.
For the Filling
- Semi-sweet chocolate chips – Melting them results in a rich chocolate flavor; feel free to use dark chocolate for a more intense taste.
- Instant coffee granules – These boost the chocolate flavor; brewed coffee can also work if you’re looking for a more robust coffee essence.
- Hot water – Used to dissolve the coffee granules for optimal flavor.
- Sour cream – Adds creaminess with a delightful tang; swap with plain Greek yogurt for a lighter take.
- Sugar – Adjust according to your sweetness preference to balance the rich chocolate.
- Vanilla extract – For added depth, opt for pure vanilla for the best flavor.
For the Topping
- Heavy whipping cream – This creates a fluffy, rich layer on top; Cool Whip is an alternative but may not be as stable.
- Powdered sugar – Sweetens your topping and helps stabilize the whipped cream; reduce for a less sweet topping.
- Cocoa powder – Enhances the chocolate flavor of the whipped topping.
- Mini chocolate chips – These are optional, but they add an appealing crunch and visual flair to your dessert.
Now, that you have all the ingredients, you can easily whip up this frozen chocolate mudslide pie that’s sure to delight everyone at your summer gathering!
Step‑by‑Step Instructions for No-Bake Frozen Chocolate Mudslide Pie
Step 1: Melt the Chocolate
Begin by melting 1 cup of semi-sweet chocolate chips in a heatproof bowl set over a saucepan of simmering water, stirring until smooth and glossy. This process should take about 5-7 minutes. Once melted, remove it from heat and allow the chocolate to cool for 10 minutes, ensuring it thickens gently and doesn’t burn.
Step 2: Prepare the Coffee Mixture
In a medium bowl, combine 1 teaspoon of hot water with the instant coffee granules, stirring well. Let this sit for about 2 minutes to activate the coffee. Then, add in the sour cream, sugar, and vanilla extract, whisking until the mixture is creamy and uniform, ensuring the coffee truly enhances the overall chocolate flavor.
Step 3: Combine and Pour
Mix the cooled melted chocolate into the prepared coffee mixture, stirring thoroughly until fully incorporated and creamy. This rich filling will develop the luscious taste of the No-Bake Frozen Chocolate Mudslide Pie. Once mixed, carefully pour the filling into the pre-made chocolate pie crust, smoothing the top with a spatula to create an even layer.
Step 4: Chill the Pie
Cover the pie with plastic wrap and place it in the refrigerator to chill for about 4 hours. This step is crucial, allowing the filling to set properly. While it chills, it thickens to a dreamy consistency, ensuring a delightful experience when served.
Step 5: Prepare the Whipped Topping
After the cooling time, it’s time to make the topping! In a mixing bowl, whip the heavy whipping cream, powdered sugar, and cocoa powder using an electric mixer on medium-high speed until stiff peaks form, about 2-3 minutes. This fluffy mixture will beautifully complement the rich chocolate filling of the Mudslide Pie.
Step 6: Assemble and Freeze
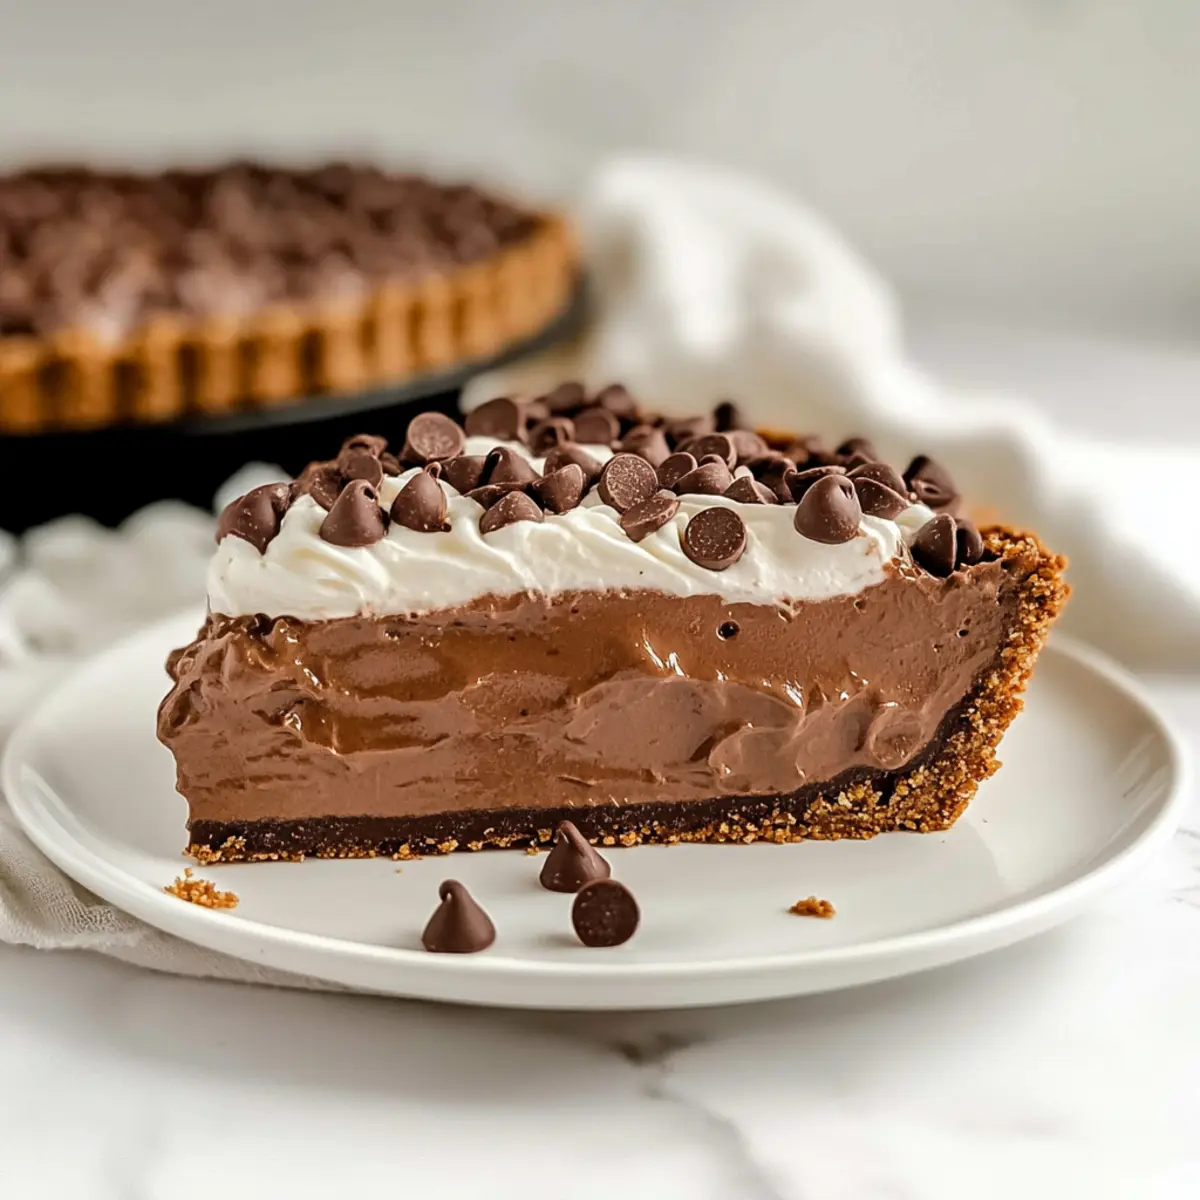
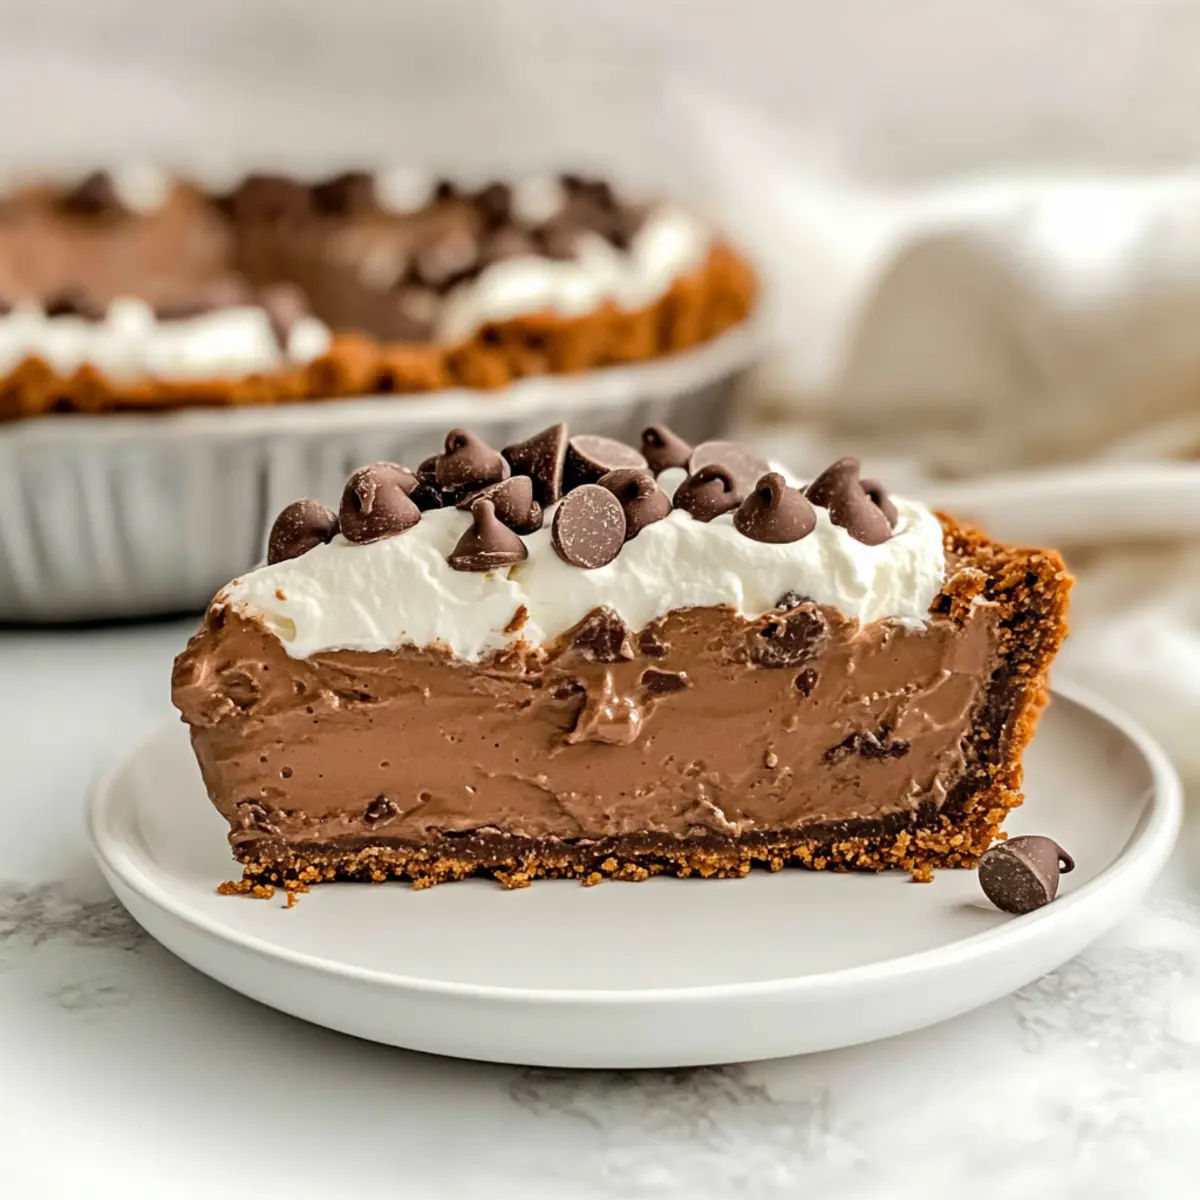
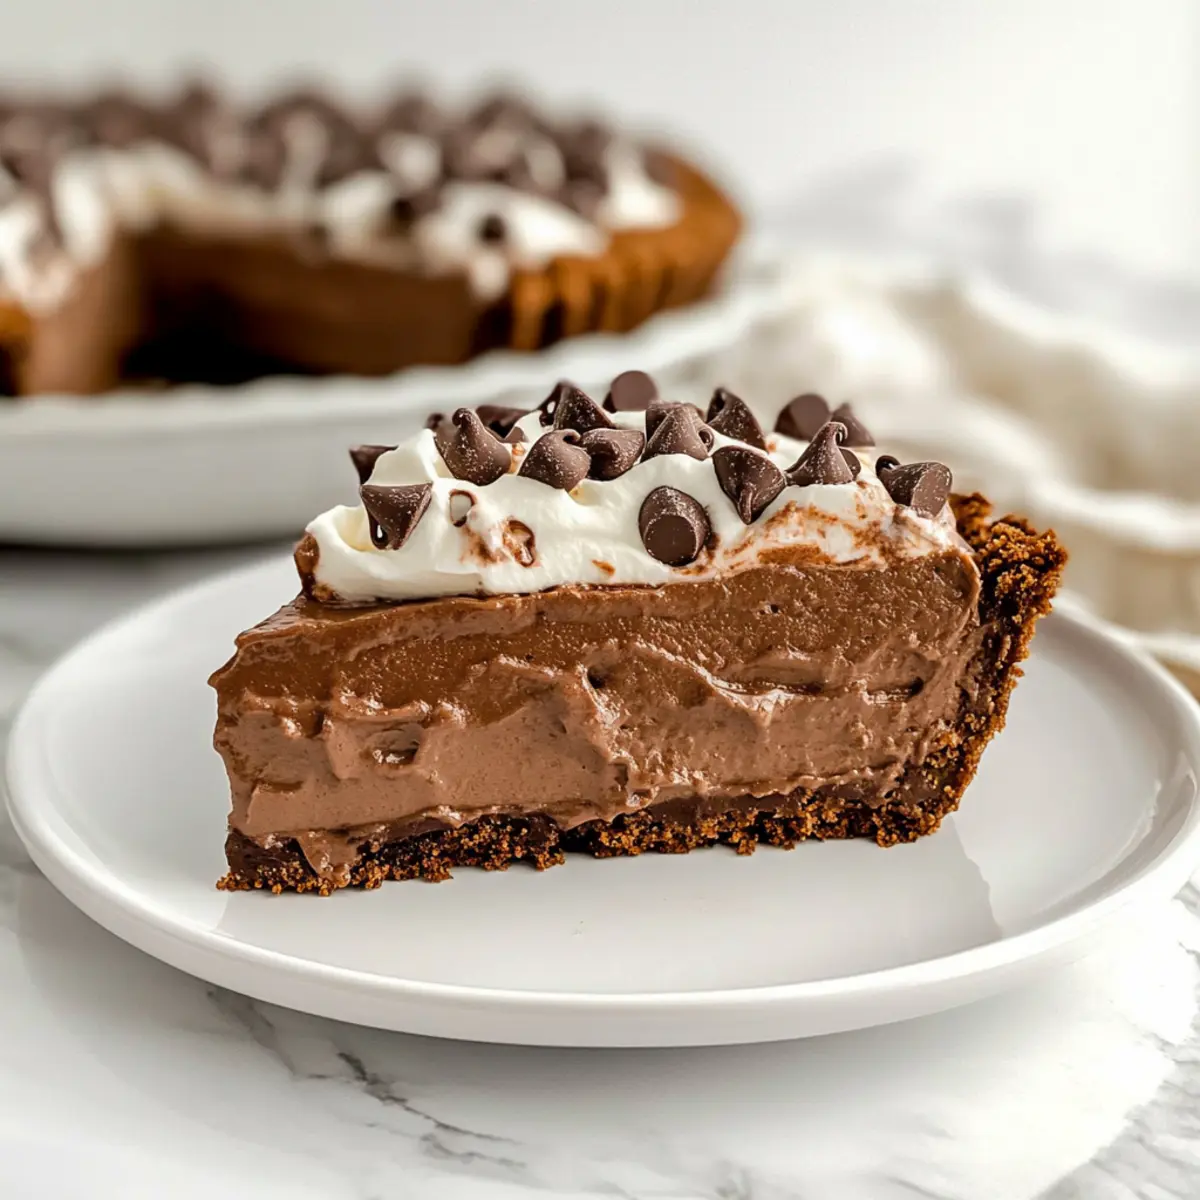
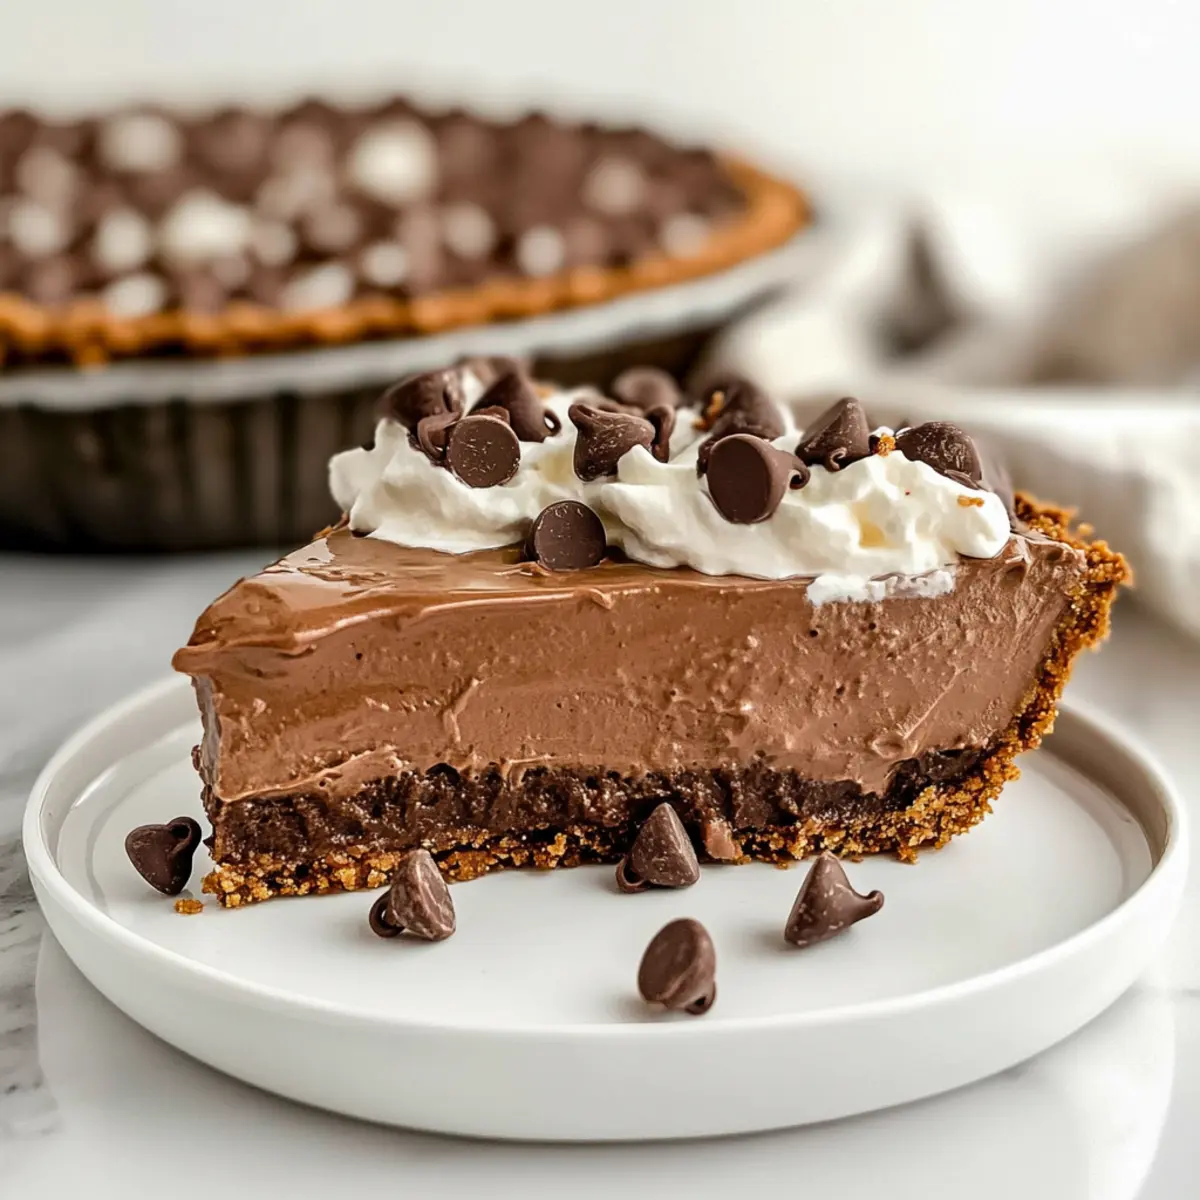
Once the filling is firm, spread the whipped topping evenly over the chocolate layer using a spatula for a smooth finish. For an enticing touch, sprinkle mini chocolate chips on top, adding texture and visual appeal. Now, return the pie to the freezer for a minimum of 6 hours to ensure it holds its shape and texture when sliced.
Step 7: Slice and Serve
After freezing, remove the pie from the freezer and allow it to sit for about 10 minutes for easy slicing. Use a sharp knife to cut through the creamy layers, serving each slice cold. The No-Bake Frozen Chocolate Mudslide Pie is now ready to impress your guests with its rich flavors and delightful texture.
Variations & Substitutions for Frozen Chocolate Mudslide Pie
Feel free to personalize this indulgent Frozen Chocolate Mudslide Pie with these delightful twists that elevate the flavors!
-
Dairy-Free: Use coconut cream instead of heavy whipping cream and almond milk yogurt instead of sour cream for a luscious, dairy-free version.
-
Chocolate Lovers: Swap out semi-sweet chocolate chips for a mix of dark chocolate and milk chocolate for a deeper, more complex flavor.
-
Nutty Texture: Add crushed almonds or walnuts into the crust for a delightful crunch that contrasts perfectly with the creamy filling.
-
Coffee Kick: Boost the coffee flavor by replacing instant coffee granules with espresso powder; it enhances the chocolate profile brilliantly.
-
Fruity Infusion: Layer in some raspberry or cherry preserves under the whipped topping for a fruity burst with each bite—simply divine!
-
Spicy Surprise: For a hint of warmth, sprinkle a dash of cayenne pepper into the chocolate filling for an exciting flavor adventure.
-
Minty Fresh: Incorporate a few drops of peppermint extract into the whipped cream topping for a refreshing mint chocolate experience.
-
Gourmet Topping: Elevate the presentation by drizzling homemade chocolate ganache over the top before adding mini chocolate chips.
These variations not only cater to different tastes but also allow you to create a personalized experience that your friends and family are sure to love. Enjoy experimenting, and don’t forget to serve with a scoop of your favorite ice cream for an added treat! For more inspiration on dessert pairings, check out our tips on What to Serve with This Recipe.
Make Ahead Options
These No-Bake Frozen Chocolate Mudslide Pies are perfect for meal prep enthusiasts looking to save time! You can prepare the filling up to 24 hours in advance, ensuring it’s fully cooled and stored in the refrigerator wrapped tightly to maintain its creamy texture. The pie can be assembled and frozen for up to 3 days without losing its delightful flavors. When you’re ready to serve, simply thaw the pie in the refrigerator for about 10 minutes before slicing. By prepping ahead of time, you’ll create a show-stopping dessert with minimal effort, allowing you to focus on enjoying your time with family and friends!
How to Store and Freeze Frozen Chocolate Mudslide Pie
- Fridge: Keep the pie covered in the fridge for up to 3 days; this will maintain its creamy texture, making it perfect for those spontaneous sweet cravings.
- Freezer: For longer storage, wrap the frozen pie tightly in plastic wrap and foil, allowing it to stay fresh for up to two weeks.
- Thawing: To serve, remove the pie from the freezer and let it thaw slightly for about 10 minutes before slicing; this makes cutting through the chocolate filling much easier.
- Reheating: There’s no need to reheat this dessert; serve it cold directly from the freezer for the best experience of your no-bake chocolate mudslide pie!
What to Serve with Frozen Chocolate Mudslide Pie
As you gather with friends and family, complement this indulgent chocolate treat with delightful pairings that elevate your dessert experience.
-
Fresh Berries: The tartness of strawberries, raspberries, or blueberries cuts through the rich sweetness of the pie, adding a refreshing contrast that brightens each bite.
-
Whipped Cream: A dollop of lightly sweetened whipped cream enhances the creamy texture while adding an elegant finishing touch to every slice.
-
Espresso or Coffee: A robust cup of espresso or a warm coffee brings out the chocolate and coffee notes in the pie, making for a comforting, indulgent experience.
-
Chocolate Sauce Drizzle: A glossy drizzle of chocolate sauce adds a decadent touch, inviting a deeper chocolate flavor that enhances the delightful pie.
-
Mint Leaves: Fresh mint leaves not only brighten the presentation but their subtle flavor offers a refreshing balance to the richness of the pie—a truly sophisticated pairing.
-
Vanilla Ice Cream: Serve alongside a scoop of vanilla ice cream for a classic contrast of hot and cold—a delightful way to enjoy the pie’s creamy decadence and enhance every bite.
-
Almond Milkshake: A chilled almond milkshake can provide a nutty flavor that smoothly complements the chocolate, creating a delightful pairing for those warm summer days.
Each of these suggestions promises to enhance your Frozen Chocolate Mudslide Pie experience, making your gathering unforgettable.
Helpful Tricks for Frozen Chocolate Mudslide Pie
-
Cool the Chocolate: Ensure the melted chocolate cools completely before adding to the sour cream mixture; this helps prevent curdling.
-
Chill Time Matters: Refrigerate the pie for at least 4 hours before serving to allow the filling to set properly and firm up, resulting in a delightful texture.
-
Heavy Cream Whipping: Whip the heavy cream until stiff peaks form for stable topping. If it’s overbeaten, it may become grainy—stop once the peaks hold their shape.
-
Flavor Adaptation: Feel free to swap in dark chocolate for a deeper chocolate flavor in your frozen chocolate mudslide pie; it’s a lovely way to enhance the taste.
-
Serving Simplicity: When serving, let the pie sit out for about 10 minutes before slicing; this makes for easier cuts and a more enjoyable experience.
Frozen Chocolate Mudslide Pie Recipe FAQs
How do I select ripe ingredients for this dessert?
Absolutely! For the best flavor, choose high-quality semi-sweet chocolate chips—look for ones that have a shiny appearance without any dull spots, indicating freshness. When selecting sour cream, opt for a brand with a smooth consistency and creamy texture; avoid any with dark spots or an off smell.
What’s the best way to store the chocolate mudslide pie?
To keep your Frozen Chocolate Mudslide Pie fresh, wrap it tightly in plastic wrap and store it in the freezer for up to two weeks. In the refrigerator, it can be kept covered for up to 3 days. If you’re storing leftovers, make sure they are well-wrapped to prevent freezer burn.
Can I freeze this dessert? If so, how?
Yes, this pie can be frozen! After assembling, tightly wrap the pie in plastic wrap and then cover it with foil for extra protection. Be sure to freeze it for a minimum of 6 hours to let it firm up. When ready to serve, remove from the freezer and let it thaw for about 10 minutes before slicing. Enjoy the creamy texture!
What should I do if the whipped cream doesn’t whip properly?
Very often, the key to perfect whipped cream is to start with cold equipment! Ensure your mixing bowl and beaters are chilled before whipping the heavy cream. If you accidentally overbeat it, creating a grainy texture, try gently folding in a little more cold cream until smooth again.
Are there any dietary considerations to keep in mind?
Indeed! If you’re serving this to guests with dietary restrictions, you can substitute the sour cream with plain Greek yogurt for a lighter option. Also, the pie is not suitable for pets, particularly due to chocolate content. Always check for allergies, especially to dairy or chocolate when preparing this dessert.
No-Bake Frozen Chocolate Mudslide Pie That Melts Hearts
Ingredients
Equipment
Method
- Melt the chocolate by placing semi-sweet chocolate chips in a heatproof bowl over a saucepan of simmering water, stirring until smooth and glossy, about 5-7 minutes. Allow to cool for 10 minutes.
- In a medium bowl, combine hot water and instant coffee granules. Let sit for 2 minutes, then whisk in sour cream, sugar, and vanilla extract until smooth.
- Mix the cooled melted chocolate into the coffee mixture until creamy. Pour filling into the pre-made chocolate pie crust and smooth the top with a spatula.
- Cover the pie with plastic wrap and refrigerate for at least 4 hours until set.
- Whip heavy cream, powdered sugar, and cocoa powder in a mixing bowl until stiff peaks form, about 2-3 minutes.
- Spread the whipped topping evenly over the pie and sprinkle mini chocolate chips on top. Freeze for a minimum of 6 hours.
- Remove from the freezer and let it sit for about 10 minutes for easy slicing. Serve slices cold.