


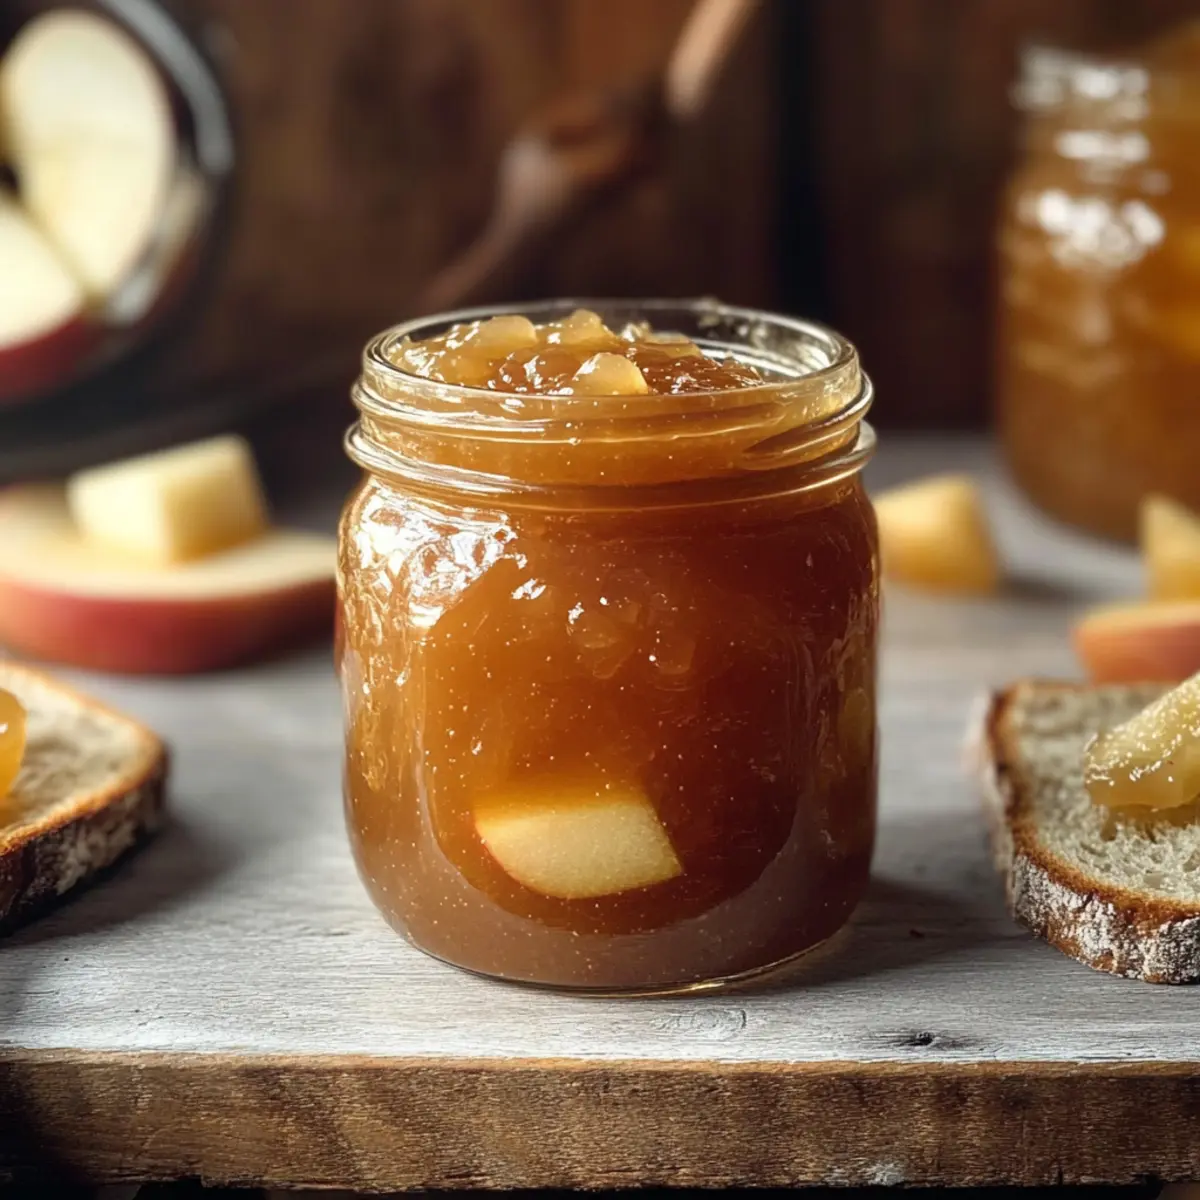
As the leaves turn crimson and gold, there’s something magical about the smell of apples wafting through the kitchen. This homemade apple jam is my go-to recipe for capturing the very essence of autumn, transforming simple apples, sugar, and lemon juice into a comforting spread. With just three ingredients, this gluten-free delight is not only quick to whip up but also serves as the perfect canvas for your morning toast or as a charming gift for loved ones. The chunky texture and natural sweetness combined with a hint of tartness make this jam an irresistible treat. Are you ready to create a little taste of fall in your own kitchen?
Why is Homemade Apple Jam So Special?
Simplicity at Its Core: With just three simple ingredients, this homemade apple jam makes preserving flavors easy for anyone, even novice cooks!
Versatile Delight: Great for spreading on toast, using in pastries, or glazing meats, it’s versatile enough to complement any meal.
Natural Sweetness: Packed with fresh apples, this jam enhances your dish’s taste without artificial additives, keeping it wholesome and gluten-free.
Quick to Prepare: In just a few steps, you can craft this delightful jam, making it the perfect weekend project.
Plus, if you’re looking to elevate your recipes further, don’t miss out on experimenting with spices or alternative fruits for unique versions!
Homemade Apple Jam Ingredients
For the Jam
- Chopped apples – Use a mix of sweet and tart apples for depth of flavor.
- Granulated sugar – Adjust sugar to taste; alternative sweeteners may affect the jam’s consistency.
- Lemon juice – Freshly squeezed provides the best flavor; bottled can be used if necessary.
Step‑by‑Step Instructions for Homemade Apple Jam: Sweet & Tart 3-Ingredient Bliss
Step 1: Combine the Ingredients
In a large bowl, mix together the chopped apples, granulated sugar, and freshly squeezed lemon juice. Gently stir until the apples are well coated in sugar. Cover the bowl with plastic wrap and refrigerate for at least 4 hours, or overnight if possible. This process, known as maceration, allows the apples to release their juices, resulting in a flavorful base for your homemade apple jam.
Step 2: Prepare for Cooking
Before you start cooking, place a small plate in the freezer; you’ll use it later to test the jam’s gel consistency. Remove the bowl from the fridge and strain the macerated apple mixture over a saucepan. Reserve the liquid that has accumulated, as you’ll boil it to enhance the flavor and ensure the perfect candy-like texture in your apple jam.
Step 3: Boil the Reserved Liquid
Pour the reserved liquid into the saucepan and bring it to a rapid boil over medium-high heat. Keep an eye on it, stirring occasionally to prevent burning. Once it starts bubbling energetically, reduce the heat slightly and let it boil for about 5 minutes. This helps dissolve the sugar fully and concentrates the apple flavors, setting the stage for your delicious apple jam.
Step 4: Add the Apples
After boiling the liquid, carefully add the strained apple pieces back into the saucepan. Stir well to combine. Continue cooking over medium-high heat for 20-30 minutes, stirring occasionally to ensure the mixture doesn’t stick to the bottom. You’ll notice the apples beginning to soften and the mixture thickening—this is when the magic of homemade apple jam starts to happen!
Step 5: Test for Gel Consistency
To check if your homemade apple jam has reached the right gel consistency, use the cold plate that you set in the freezer earlier. Drop a spoonful of the jam onto the plate, then push it with your finger. If it wrinkles and holds its shape, it’s ready. If it’s still runny, continue cooking for another 5 minutes, testing again until you achieve that perfect thick spread.
Step 6: Fill the Jars
Once your apple jam has the desired consistency, remove it from the heat. Carefully fill sterilized jars with the hot apple jam, ensuring to leave about 1/4 inch of headspace at the top. Wipe the rims of the jars with a clean cloth to remove any residue. This step is crucial for a good seal, helping your homemade apple jam stay fresh and delicious!
Step 7: Process the Jars
To preserve your homemade apple jam, process the filled jars in a water bath canner. Bring a large pot of water to a boil, then lower the jars into the boiling water. Boil for 10 minutes to create a vacuum seal. After processing, let the jars sit in the hot water for an additional 5 minutes before carefully removing them. This ensures your jars are sealed properly for long-term storage.
Step 8: Cool and Check Seals
After processing, place the jars on a clean kitchen towel or cooling rack and allow them to cool completely at room temperature. Once cooled, press down on the center of each lid; if it doesn’t bounce back, it’s sealed properly. Your homemade apple jam is now ready to be enjoyed, whether spread on toast or gifted to friends and family!
Homemade Apple Jam Variations & Substitutions
Feel free to let your creativity shine by customizing this homemade apple jam to fit your taste!
- Spiced Up: Add a teaspoon of cinnamon or nutmeg for a warm, cozy flavor. This twist brings the essence of autumn right into your kitchen!
- Fruity Fusion: Swap out a portion of apples with chopped pears or peaches for a delightful twist. The mix creates a unique flavor profile that’s simply irresistible.
- Brown Sugar Boost: Use brown sugar instead of granulated sugar for a deeper, caramel-like flavor. This variation adds richness and a hint of molasses you’ll absolutely love!
- Chia Jam: For a healthy touch, incorporate chia seeds. They not only thicken the jam naturally but also add a nutritional boost, making it superbly wholesome.
- Herby Notes: Infuse chopped fresh herbs like rosemary or thyme during cooking for a savory version. This unexpected flavor adventure pairs beautifully with cheese boards.
- Citrusy Zing: Add orange or ginger zest to the mix for a refreshing citrus punch. It brightens the flavor and awakens your taste buds, perfect for morning toast or pastries.
- Heat Things Up: Stir in a pinch of cayenne pepper or red pepper flakes for a spicy kick. It’s a surprising yet delightful blend with the sweetness of the apples!
- Nutty Texture: Fold in chopped nuts like walnuts or pecans before jarring the jam. This adds a rustic crunch that transforms your spread into a gourmet treat!
If you’re looking for additional inspiration, explore making a balsamic reduction or even experimenting with preserving techniques to take your homemade creations to the next level!
Make Ahead Options
These homemade apple jam preparations are perfect for busy home cooks looking to save time! You can macerate the chopped apples, sugar, and lemon juice up to 24 hours in advance, making it easy to grab and cook when ready. Just refrigerate the mixture, as this helps the flavors meld beautifully. On the day you plan to finish the jam, simply strain the mixture, boil the reserved liquid, and follow the remaining steps to create your delicious spread. This prep-ahead technique not only enhances the flavors but also ensures your homemade apple jam is just as delightful when you serve it later!
Expert Tips for Homemade Apple Jam
-
Use Fresh Apples: Choose a mix of sweet and tart apples for the best flavor. Overripe or under-ripe apples can affect the sweetness level; aim for perfectly ripe apples.
-
Maceration Matters: Allowing the apples to macerate for at least 4 hours ensures they release enough juice for a flavorful jam. Don’t skip this crucial step!
-
Monitor Cooking Time: Overcooking can lead to a thick, syrupy texture. Stir occasionally and test regularly for gel consistency to avoid this common mistake.
-
Seal with Care: Ensure your jars are properly sterilized for safe long-term storage. Residue on the rim can prevent a good seal, leading to spoilage.
-
Experiment with Flavors: Try adding spices like cinnamon or nutmeg, or mix in other fruits like pears for a delightful twist to your homemade apple jam!
How to Store and Freeze Homemade Apple Jam
-
Room Temperature: Store opened jars of homemade apple jam in a cool, dark place for up to 1 month. Once opened, keep refrigerated.
-
Fridge: Unopened jars of apple jam can last in the refrigerator for up to 1 month after processing. Once opened, consume within 3 weeks for the best flavor.
-
Freezer: For longer storage, freeze jam in airtight freezer containers or freezer-safe jars, leaving space for expansion. It can last for up to 1 year in the freezer.
-
Reheating: When ready to use frozen homemade apple jam, thaw it in the fridge overnight. Warm gently on the stove over low heat for a spreadable consistency.
What to Serve with Homemade Apple Jam
Homemade apple jam brings a touch of warmth and sweetness to your table, making it a delightful addition to various meals.
-
Creamy Yogurt Parfait: Layering tangy yogurt with homemade apple jam and granola creates a heavenly breakfast treat perfect for any time of day.
-
Buttery Toast: A warm slice of freshly made toast slathered with homemade apple jam brings cozy comfort and the irresistible aroma of baked bread.
-
Savory Cheese Platter: Pair your jam with sharp cheeses like cheddar or brie for a perfect sweet and salty balance that will charm your guests.
-
Fluffy Pancakes: Drizzle homemade apple jam over pancakes instead of syrup for a unique twist that enhances your morning routine with fruity goodness.
-
Roasted Chicken Glaze: Brush a layer of jam over roasted chicken before slicing for a sweet glaze, adding depth and flavor during dinner.
-
Classic Peanut Butter Sandwich: Spread on peanut butter for a comforting sandwich that balances the nutty flavor with the sweetness of the apples, perfect for kids and adults alike.
-
Baked Brie: Top a wheel of brie with a generous spoonful of homemade apple jam and bake for a gooey, savory appetizer that’s sure to impress at gatherings.
-
Sparkling Cider: Enjoy a chilled glass of sparkling apple cider alongside your meal for a refreshing complement that accentuates the jam’s fruity flavors.
Homemade Apple Jam Recipe FAQs
How do I choose the best apples for this jam?
Absolutely! For the best homemade apple jam, select a mix of sweet and tart apples. Varieties like Honeycrisp or Fuji mixed with Granny Smith work wonderfully together. Look for apples that are firm and free from dark spots, ensuring they’re ripe but not overripe.
How should I store my homemade apple jam?
Once opened, store your homemade apple jam in the refrigerator for up to 1 month. Unopened jars, processed properly, can last in a cool, dark place for a month too. Always ensure lids are tightly sealed to maintain freshness.
Can I freeze homemade apple jam?
Very! To freeze your homemade apple jam, simply ladle it into airtight freezer containers or freezer-safe jars. Make sure to leave about an inch of space at the top since the jam will expand as it freezes. It can last up to 1 year without losing flavor!
What should I do if my jam didn’t thicken?
If your jam didn’t achieve the desired thickness, don’t worry! You can simply return it to the pot and cook it over medium-high heat for an additional 5 to 10 minutes. Use the cold plate test again to check for gel consistency. If it wrinkles when pushed, you’re good to go!
Can I make this jam if I have dietary restrictions?
Absolutely! This homemade apple jam is gluten-free and made with just natural ingredients. However, if you’re concerned about sugar, you can experiment with alternative sweeteners like honey or agave, though they may alter the jam’s texture slightly.
Is this jam safe for my pets?
I recommend caution! While apples are generally safe for dogs, the high sugar content makes this jam less ideal for pets. Always consult your vet before introducing any new foods to your furry friends, especially sugary treats!
Homemade Apple Jam: Sweet & Tart 3-Ingredient Bliss
Ingredients
Equipment
Method
- In a large bowl, mix together the chopped apples, granulated sugar, and freshly squeezed lemon juice. Cover and refrigerate for at least 4 hours.
- Remove the bowl from the fridge and strain the macerated apple mixture over a saucepan, reserving the liquid.
- Pour the reserved liquid into the saucepan and bring it to a rapid boil over medium-high heat, stirring occasionally.
- After boiling the liquid, add the strained apple pieces back into the saucepan and stir well.
- Continue cooking over medium-high heat for 20-30 minutes, stirring occasionally until the mixture thickens.
- To check for gel consistency, drop a spoonful of the jam onto a cold plate. If it wrinkles, it's ready.
- Remove from heat and fill sterilized jars with the hot apple jam, leaving about 1/4 inch of headspace.
- Process the filled jars in a boiling water bath for 10 minutes and then allow to cool completely.
- Once cooled, check seals before storing or giving as gifts.