


As I stood in my kitchen, stealthily unwrapping a pack of Oreos, I couldn’t shake the thought of transforming a beloved classic into something unexpected. Enter Oreo Sushi Rolls—an inventive no-bake dessert that marries the familiar comfort of cookies-and-cream flavor with the fun twist of sushi. Best of all, these delightful rolls are incredibly easy to whip up and make for a show-stopping party treat or a playful family dessert night! With a creamy cheesecake-style filling and a glossy chocolate drizzle, they’re sure to bring smiles all around. Are you ready to impress your friends and family with this creative confection? Let’s dive in!

Why Are Oreo Sushi Rolls a Must-Try?
Irresistible Fun: These Oreo Sushi Rolls are a unique twist on a favorite dessert, combining the classic cookies-and-cream flavor with playful presentation.
No-Bake Ease: With simple ingredients and easy steps, you can prepare this treat without any baking skills required. Perfect for last-minute dessert!
Crowd-Pleasing Appeal: Your guests will be wowed by these visually stunning rolls, making them ideal for parties or family gatherings.
Versatile Variations: Experiment with different flavors by using various Oreo types or adding mix-ins like chocolate chips that everyone will enjoy!
Quick Prep: These rolls come together in no time, allowing you to spend less time in the kitchen and more time enjoying with loved ones.
Oreo Sushi Rolls Ingredients
• Gather the essentials for this delightful no-bake treat!
For the Dough
- Oreo cookies – The base layer offering that signature chocolate flavor; feel free to swap with Golden Oreos for a lighter look.
- Cream cheese – Creates a creamy filling; make sure it’s softened for seamless mixing.
- Powdered sugar – Sweetens the filling without grittiness; essential for a smooth texture.
- Pinch of salt – Balances the sweetness and enhances all the flavors in this Oreo Sushi Rolls creation.
For the Filling
- Vanilla extract – Adds a rich flavor note; use pure extract for the best results.
- Whipped topping – Lightens the filling, adding fluffiness; can be substituted with homemade whipped cream for a fresher taste.
For the Topping
- Chocolate syrup – Drizzled on top for that beautiful finish and indulgent richness; choose your favorite brand or make your own.
- Crushed Oreo crumbs – These enhance texture and give a decorative touch to the finished rolls; set aside some from the main batch.
- Mini Oreo cookies – Optional garnish for an adorable finishing touch that brings flair to your presentation.
Step‑by‑Step Instructions for Oreo Sushi Rolls
Step 1: Prepare Oreos
Start by crushing the Oreo cookies into fine crumbs using a food processor or by placing them in a zip-top bag and rolling with a rolling pin. Ensure you set aside 2 tablespoons of these crumbs for later use as topping. This crumb mixture will form the outer layer of your Oreo Sushi Rolls, providing that delightful chocolate flavor.
Step 2: Make Dough
In a mixing bowl, combine the majority of the Oreo crumbs with 4 oz of softened cream cheese. Use a hand mixer or spatula to mix until a soft, cohesive dough forms, about 2 minutes. The mixture should be smooth and pliable, resembling cookie dough. This will serve as the base of your Oreo Sushi Rolls, creating a tasty foundation.
Step 3: Prepare Filling
In a separate bowl, blend the remaining cream cheese with powdered sugar, vanilla extract, and a pinch of salt. Mix on medium speed until the mixture is smooth and creamy, about 3 minutes. Gently fold in the whipped topping until fully combined and fluffy. This creamy filling will add a luscious texture to your Oreo Sushi Rolls.
Step 4: Roll Dough
Place the Oreo dough between two sheets of parchment paper. Using a rolling pin, roll the dough into a rectangle about 1/4 inch thick. Carefully peel off the top sheet of parchment paper, making sure the dough remains intact. This step is crucial as it will shape your Oreo Sushi Rolls nicely, preparing them for the filling.
Step 5: Add Filling
Spread the prepared filling evenly over the rolled-out Oreo dough, leaving about a 1/2 inch border along the edges. Use a spatula to ensure even coverage for the best results. Once covered, carefully lift one edge of the parchment paper to start rolling the dough tightly from the long side, creating a log shape that will be your Oreo Sushi Roll.
Step 6: Chill
Wrap the log tightly in the parchment paper, ensuring it holds its shape, and place it in the refrigerator. Chill for at least 2 hours, which helps the filling set and the roll firm up. This step is essential for getting clean slices later, ensuring that your Oreo Sushi Rolls maintain their structure.
Step 7: Slice and Serve
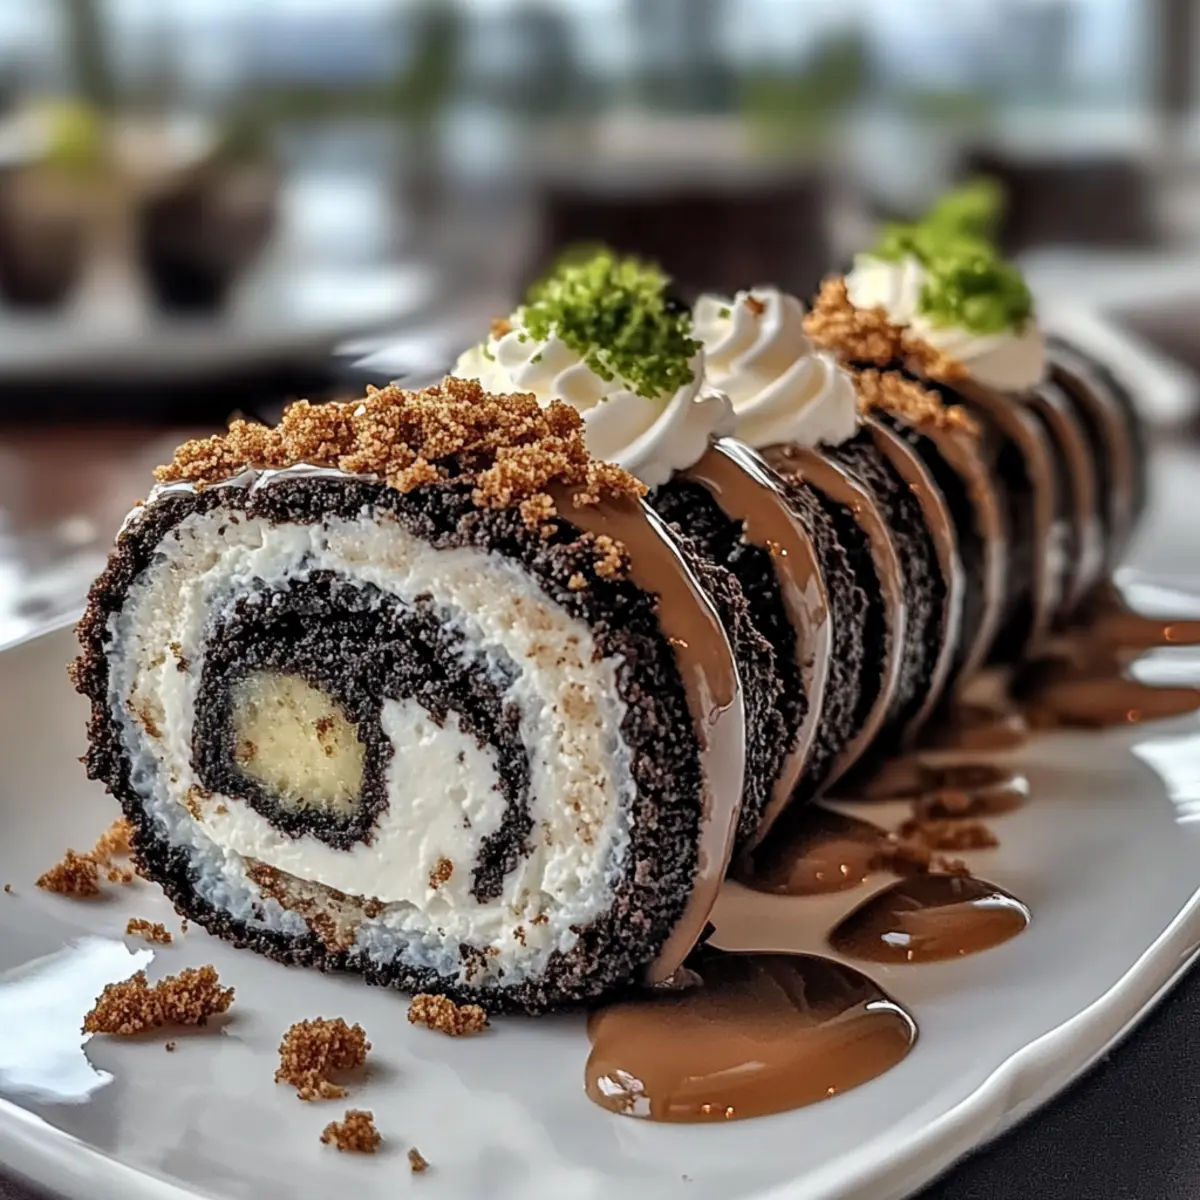
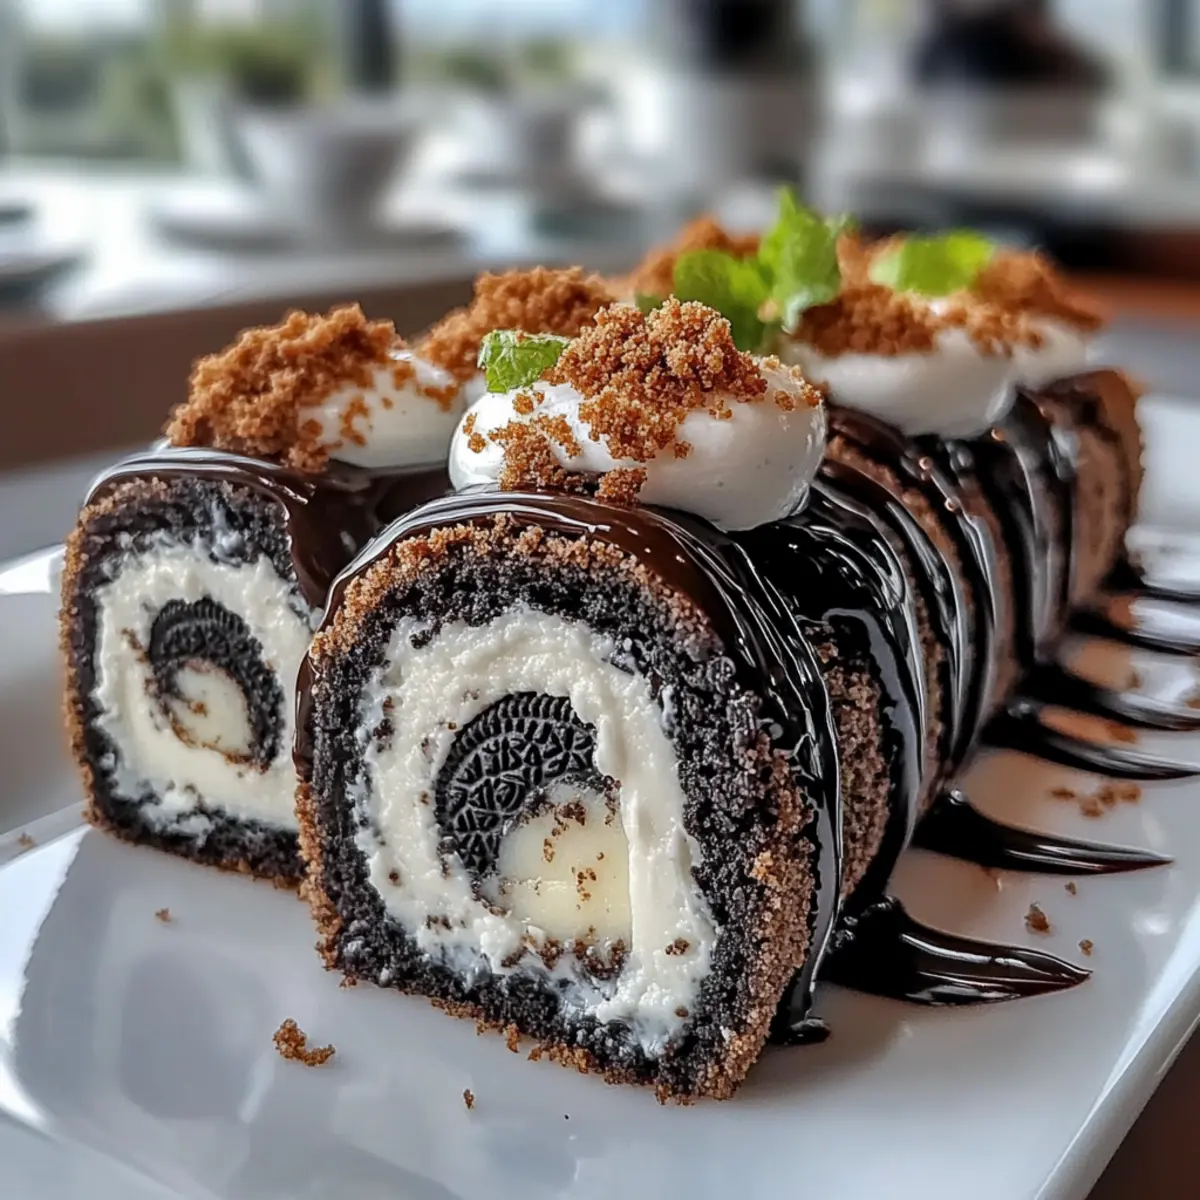
Once chilled and firm, unwrap the log and transfer it to a cutting board. Using a sharp knife, slice the log into thick rounds, about 1 inch each. Drizzle the slices with chocolate syrup, top with the reserved Oreo crumbs, and place mini Oreos on top for a decorative finish. Your Oreo Sushi Rolls are now ready to delight!
Oreo Sushi Rolls: Creative Variations to Try
Feel free to elevate these delightful rolls with some fun flavor twists and unique substitutes that will get everyone talking!
-
Flavored Oreos: Use mint, peanut butter, or seasonal variations of Oreos for a fresh flavor twist. The different cookie bases can bring new dimensions to your rolls, making them even more exciting!
-
Dairy-Free: Substitute cream cheese with a dairy-free alternative like cashew cheese or coconut cream. This swap doesn’t just cater to dietary needs; it creates a rich and creamy consistency that everyone will adore.
-
Nutty Twist: Add finely chopped nuts or nut butter into the filling for an added crunch. Incorporating almonds or a bit of peanut butter can enhance both the flavor and texture, giving your rolls a delightful surprise.
-
Chocolate Chip Upgrade: Incorporate mini chocolate chips into the filling for extra bursts of rich chocolate goodness. They’ll not only intensify the sweetness, but also add a lovely chewy texture that complements the softness of the cream cheese filling.
-
Fruit Addition: Mix in some finely chopped strawberries or raspberries for a fruity twist. This not only adds a pop of color but also balances the sweetness of the Oreo with a refreshing mouthfeel.
-
Spicy Kick: Drizzle a bit of chili chocolate sauce on top for an unexpected heat that pairs surprisingly well with the sweet creamy filling. It’s an adventurous touch for those ready to spice things up!
-
Homemade Whipped Cream: Instead of whipped topping, use homemade whipped cream. By whipping heavy cream with a touch of powdered sugar, you can enjoy a fresher, richer flavor that complements the rolls wonderfully.
-
Make a Cake Roll: Transform these sushi rolls into a cake roll by layering chocolate cake with the Oreo filling instead. It’s a delightful way to create a decadent dessert that takes the concept to a new level!
For more inspiration on how to make your desserts shine, consider exploring fun toppings for your favorite desserts or learn how to use different flavor extracts for a unique touch (find out how here). The possibilities are endless when it comes to these Oreo Sushi Rolls!
What to Serve with Oreo Sushi Rolls
Transport yourself to a delightful dessert experience by pairing these fun rolls with the perfect companions.
-
Vanilla Ice Cream: The creamy richness adds a delightful contrast to the crunchy and chewy texture of the rolls, making every bite a sweet adventure.
-
Fresh Strawberries: Their juicy brightness complements the cookies-and-cream flavor, bringing a refreshing touch that balances the sweetness of the dessert.
-
Chocolate Drizzle: A simple extra layer of chocolate syrup intensifies the flavor profile, inviting an indulgent experience that chocolate lovers will adore.
-
Fruit Salad: A medley of vibrant fresh fruits adds a beautiful pop of color and a lightness that makes your dessert spread feel complete and enticing.
-
Whipped Cream: Topped with a dollop of freshly whipped cream, your Oreo Sushi Rolls get an extra touch of luxury, inviting everyone into a delightful dessert moment.
-
Sparkling Water: A bubbly beverage, like sparkling water with a slice of lemon, refreshes the palate between bites, making your dessert ensemble not only appealing but also enjoyable!
-
Mint Chocolate Chip Cookies: For cookie lovers, this pairing beautifully combines the cookie essence with the refreshing hint of mint, echoing the flavors of your Oreo creation.
-
Espresso: A shot of rich, robust espresso offers a delightful contrast to the sweetness of the rolls and elevates the entire dessert experience with its bold flavor.
-
Mini Fruit Tarts: These delightful mini desserts add a crispy shell and creamy filling, enhancing the encounter while echoing the sushi rolls’ playful aesthetic!
-
Chocolate Milkshake: Rich and thick, a delicious chocolate milkshake creates a nostalgic experience, amplifying the fun and decadent nature of the Oreo Sushi Rolls.
Expert Tips for Oreo Sushi Rolls
-
Dough Consistency: Ensure your Oreo dough isn’t too dry; it should be pliable. If needed, knead a bit more with softened cream cheese for the best texture.
-
Chill For Success: Never skip the refrigeration step! Chilling is vital for maintaining roll shape and making slicing easier.
-
Cutting Technique: Use a sharp knife to slice your rolls; clean, swift cuts help preserve the filling and present beautifully.
-
Serving Fresh: For the best presentation, slice the rolls just before serving. This keeps the filling intact and visually appealing.
-
Creative Customization: Experiment with different Oreos or add-ins like sprinkles or flavored extracts to personalize your Oreo Sushi Rolls for any occasion.
Make Ahead Options
These Oreo Sushi Rolls are perfect for busy home cooks looking to save time on dessert preparations! You can prepare the dough and filling up to 24 hours in advance, saving you time the day of your gathering. Simply crush the Oreo cookies and mix them with cream cheese to form the dough. For the filling, blend the remaining cream cheese, powdered sugar, and vanilla extract until smooth and fold in the whipped topping. After assembling the log, wrap it tightly in parchment paper and refrigerate. To maintain quality, ensure it’s well-wrapped to prevent drying out. When ready to serve, just slice into rounds, drizzle with chocolate syrup, and enjoy these delicious Oreo Sushi Rolls!
Storage Tips for Oreo Sushi Rolls
Fridge: Keep cut Oreo Sushi Rolls in an airtight container in the fridge for up to 4 days to maintain freshness and flavor.
Freezer: For longer storage, freeze the whole roll before slicing. Wrap it tightly in plastic wrap, and it can last up to 2 months.
Thawing: Thaw the frozen roll in the refrigerator for a few hours before slicing to prevent filling from becoming too soft.
Reheating: These rolls are best enjoyed cold or at room temperature—no reheating necessary!
Oreo Sushi Rolls Recipe FAQs
How do I choose the right Oreos for this recipe?
Absolutely! For Oreo Sushi Rolls, you can stick with classic regular Oreos for that nostalgic cookies-and-cream flavor. However, don’t hesitate to experiment with different varieties like Golden Oreos for a light twist or seasonal flavors like Pumpkin Spice or Peppermint for a festive touch. Just keep in mind that these changes will alter both flavor and appearance slightly.
What’s the best way to store leftover Oreo Sushi Rolls?
Very! To keep your delicious Oreo Sushi Rolls fresh, store the cut pieces in an airtight container in the refrigerator. They will last up to 4 days. If you want to enjoy them longer, freeze the uncut log wrapped tightly in plastic wrap for up to 2 months. Just remember to thaw it in the fridge for a few hours before slicing!
Can I freeze Oreo Sushi Rolls after making them?
Absolutely! Freezing these luscious rolls is easy. Wrap the whole roll tightly in plastic wrap and then place it in a freezer-safe bag to prevent freezer burn. They can be stored this way for up to 2 months. When you’re ready to enjoy, simply thaw in the refrigerator for a few hours before slicing. This chilling method helps the filling firm back up!
What should I do if my dough is too dry?
No worries! If your Oreo dough feels too dry or crumbly, it might just need a bit more cream cheese to bring it together. Start by adding small amounts and kneading gently until it reaches the right consistency—pliable and soft. An alternative is to try using a bit of melted butter to moisten the dough if it’s still challenging.
Can I make these Oreo Sushi Rolls suitable for a gluten-free diet?
Yes, indeed! To make Oreo Sushi Rolls gluten-free, simply look for gluten-free Oreo alternatives. Brands like Glutino or other specialty options provide a delightful cookie base that will work perfectly in this recipe. Just ensure all other ingredients, especially the cream cheese and whipped topping, are also gluten-free.
Are Oreo Sushi Rolls safe for pets?
Not at all! It’s essential to keep these Oreo Sushi Rolls away from pets. The primary ingredients—including chocolate and cream cheese—can be harmful or even toxic to dogs and cats. Always make sure to enjoy these treats yourself and keep them securely stored out of reach from curious furry friends!

Oreo Sushi Rolls: A Fun No-Bake Treat for Everyone
Ingredients
Equipment
Method
- Crush Oreo cookies into fine crumbs using a food processor or zip-top bag.
- Combine majority of the Oreo crumbs with softened cream cheese until a soft dough forms.
- Blend remaining cream cheese with powdered sugar, vanilla extract, and salt until smooth. Fold in whipped topping.
- Roll Oreo dough into a rectangle between two sheets of parchment paper.
- Spread filling evenly over rolled-out dough and roll tightly to form a log shape.
- Chill the log in the refrigerator for at least 2 hours to set.
- Slice log into thick rounds and drizzle with chocolate syrup, topping with reserved Oreo crumbs and mini Oreos.