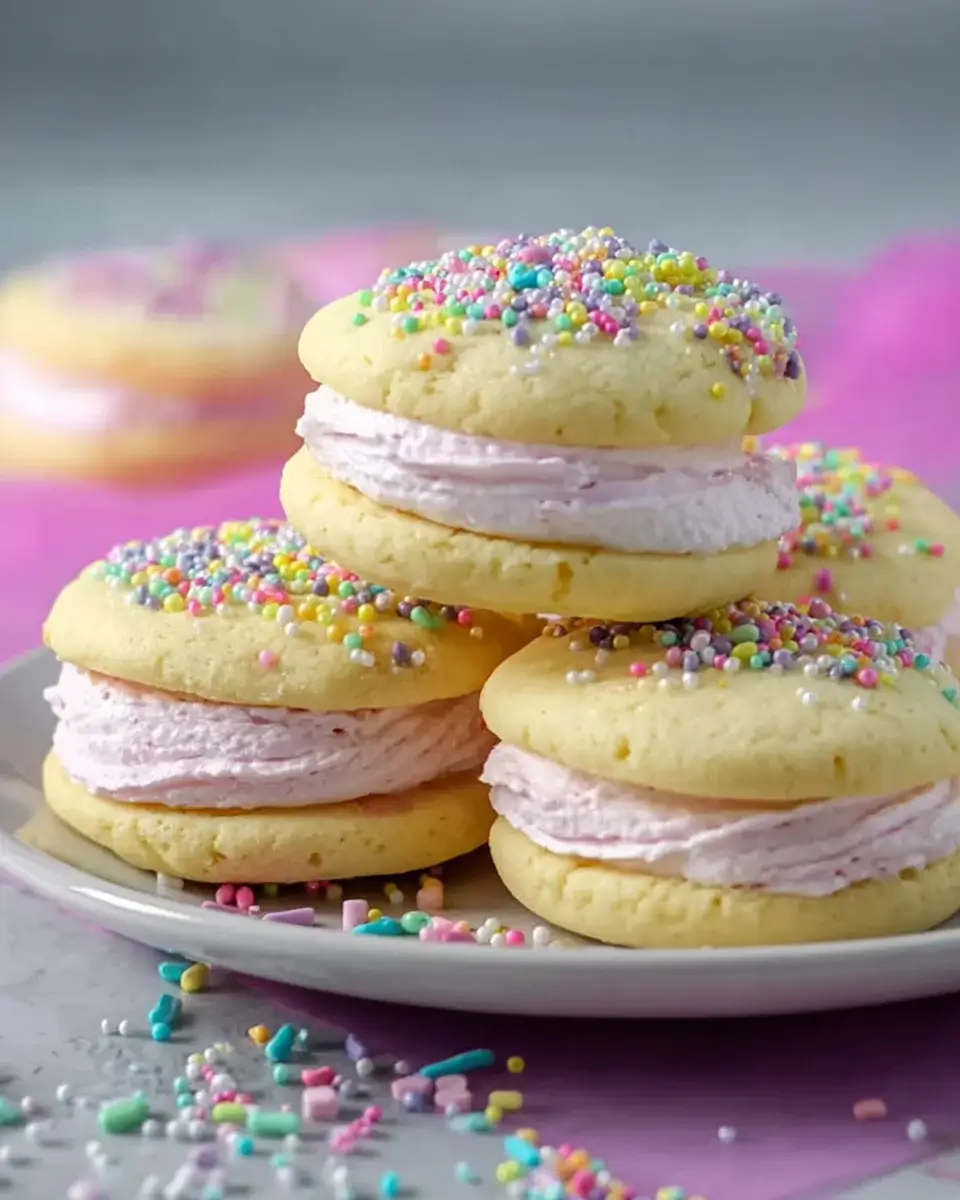
Introduction to Easter Whoopie Pies
Spring is in the air, and with it comes the joy of Easter celebrations! What better way to embrace the season than with delightful Easter Whoopie Pies? These sweet treats are not just a feast for the eyes; they’re a quick solution for busy days filled with family gatherings and egg hunts. I remember making these with my kids, their laughter filling the kitchen as we smeared frosting and created our own little masterpieces. Whether you’re looking to impress loved ones or simply indulge your sweet tooth, these whoopie pies are the perfect festive treat!
Why You’ll Love This Easter Whoopie Pies
Easter Whoopie Pies are a delightful blend of ease and flavor. They come together quickly, making them perfect for last-minute dessert needs. The rich chocolatey goodness paired with creamy filling is a taste sensation that will have everyone coming back for seconds. Plus, they’re fun to make! Gather the family, and let the creativity flow as you decorate these festive treats. Who wouldn’t love a sweet bite of nostalgia?
Ingredients for Easter Whoopie Pies
Gathering the right ingredients is the first step to creating these delightful Easter Whoopie Pies. Here’s what you’ll need:
- All-purpose flour: This is the backbone of your whoopie pies, providing structure and texture.
- Baking powder and baking soda: These leavening agents help your pies rise, giving them that perfect fluffy texture.
- Salt: Just a pinch enhances the flavors and balances the sweetness.
- Cocoa powder: The star of the show! It adds rich chocolate flavor, making these pies irresistible.
- Granulated sugar: Sweetens the batter, creating a delightful contrast with the filling.
- Brown sugar: Adds moisture and a hint of caramel flavor, making the pies even more delicious.
- Unsalted butter: Softened butter creates a creamy texture and rich taste in the batter.
- Eggs: They bind everything together and add moisture, ensuring a tender crumb.
- Vanilla extract: A splash of vanilla elevates the flavor profile, making each bite more aromatic.
- Whole milk: This adds moisture and richness to the batter, keeping it soft and tender.
- Powdered sugar (for filling): This sweetens the filling and gives it that smooth, creamy texture.
- Unsalted butter (for filling): Softened butter makes the filling rich and spreadable.
- Vanilla extract (for filling): Just like in the batter, it enhances the flavor of the filling.
- Milk (for filling): A little milk helps achieve the perfect consistency for spreading.
For those looking to get creative, consider adding a few drops of food coloring to the filling for a festive touch. You can also swap out the cocoa powder for a flavored cake mix, like red velvet or lemon, for a fun twist. Exact measurements for these ingredients can be found at the bottom of the article, ready for printing!
How to Make Easter Whoopie Pies
Creating these Easter Whoopie Pies is a delightful journey that fills your kitchen with sweet aromas. Follow these simple steps, and you’ll have a batch of festive treats ready to impress!
Step 1: Preheat and Prepare
Start by preheating your oven to 350°F. This is crucial for achieving that perfect bake. While the oven warms up, line two baking sheets with parchment paper. This will prevent sticking and make cleanup a breeze.
Step 2: Mix Dry Ingredients
In a medium bowl, whisk together the all-purpose flour, baking powder, baking soda, salt, and cocoa powder. This step ensures that the leavening agents are evenly distributed, which is key for fluffy whoopie pies.
Step 3: Cream Butter and Sugars
In a large bowl, beat together the granulated sugar, brown sugar, and softened butter until the mixture is light and fluffy. This usually takes about 3-4 minutes. This creamy base is what makes your whoopie pies rich and delicious.
Step 4: Add Eggs and Vanilla
Next, add the eggs one at a time, mixing well after each addition. Then, stir in the vanilla extract. This not only adds moisture but also infuses your batter with a lovely aroma that will have everyone eager to taste.
Step 5: Combine Wet and Dry Ingredients
Gradually add the dry ingredients to the wet mixture, alternating with the whole milk. Start and end with the dry ingredients. This method helps maintain a smooth batter, ensuring your whoopie pies turn out perfectly.
Step 6: Shape the Batter
Using a spoon or cookie scoop, drop rounded tablespoons of batter onto the prepared baking sheets. Make sure to space them about 2 inches apart. This allows for even baking and prevents them from merging into one giant cookie!
Step 7: Bake
Bake the whoopie pies for 10-12 minutes, or until the tops spring back when lightly pressed. This is the moment of truth! You want them to be perfectly cooked, so keep an eye on them.
Step 8: Cool and Prepare Filling
Once baked, allow the whoopie pies to cool on the baking sheets for 5 minutes. Then, transfer them to wire racks to cool completely. While they cool, prepare the filling by beating together the powdered sugar, softened butter, vanilla extract, and milk until smooth and creamy.
Step 9: Assemble the Whoopie Pies
Finally, it’s time to assemble! Spread a generous amount of filling on the flat side of one cake and top it with another cake, flat side down. This creates that delightful sandwich effect that makes whoopie pies so special. Repeat with the remaining cakes and filling, and enjoy your festive treats!

Tips for Success
- Make sure your butter is softened for easy mixing; it should be slightly warm to the touch.
- Use a cookie scoop for uniform batter portions, ensuring even baking.
- Don’t overmix the batter; mix until just combined for the best texture.
- Let the whoopie pies cool completely before adding the filling to prevent melting.
- Experiment with flavors by adding extracts like almond or mint to the filling.
Equipment Needed
- Baking sheets: If you don’t have parchment paper, greasing the sheets works too.
- Mixing bowls: A large bowl for the batter and a medium bowl for dry ingredients.
- Whisk: A fork can work in a pinch for mixing dry ingredients.
- Cookie scoop: A tablespoon works just fine for portioning the batter.
- Wire racks: If you lack these, a plate can serve for cooling the pies.
Variations of Easter Whoopie Pies
- Red Velvet Whoopie Pies: Swap the cocoa powder for red velvet cake mix for a vibrant twist that’s perfect for Easter.
- Lemon Whoopie Pies: Use lemon cake mix instead of chocolate and add lemon zest to the filling for a refreshing citrus flavor.
- Peanut Butter Filling: Replace the vanilla filling with a creamy peanut butter filling for a nutty, indulgent treat.
- Gluten-Free Option: Substitute all-purpose flour with a gluten-free flour blend to accommodate dietary needs.
- Mini Whoopie Pies: Use a teaspoon to drop smaller amounts of batter for bite-sized versions that are perfect for sharing.
Serving Suggestions for Easter Whoopie Pies
- Pair with a scoop of vanilla ice cream for an indulgent dessert experience.
- Serve alongside fresh fruit, like strawberries or raspberries, for a refreshing contrast.
- Drizzle with chocolate or caramel sauce for an extra touch of sweetness.
- Present on a colorful platter to enhance the festive vibe.
- Enjoy with a cup of coffee or tea for a delightful afternoon treat.

FAQs about Easter Whoopie Pies
As you embark on your journey to create these delightful Easter Whoopie Pies, you might have a few questions. Here are some common queries that can help you along the way:
Can I make the whoopie pies ahead of time?
Absolutely! You can bake the cakes a day in advance. Just store them in an airtight container. Assemble them with the filling on the day you plan to serve for the best texture.
How do I store leftover whoopie pies?
Store any leftovers in an airtight container at room temperature for up to three days. If you want to keep them longer, refrigerate them for up to a week.
Can I freeze Easter Whoopie Pies?
Yes! Freeze the assembled whoopie pies in a single layer on a baking sheet. Once frozen, transfer them to a freezer-safe container. They can last up to three months in the freezer.
What can I use instead of cocoa powder?
If you want a different flavor, try using a flavored cake mix, like vanilla or lemon. This gives you a unique twist on the classic whoopie pie!
How can I make the filling more festive?
For a fun touch, add a few drops of food coloring to the filling. You can also mix in sprinkles or flavored extracts to elevate the taste and appearance!
Final Thoughts
Creating Easter Whoopie Pies is more than just baking; it’s about making memories. The laughter of family, the sweet aroma wafting through the kitchen, and the joy of sharing these delightful treats bring a sense of warmth to any gathering. Each bite is a reminder of the simple pleasures in life, making them perfect for celebrating the season. Whether you’re enjoying them with loved ones or savoring a quiet moment with a cup of coffee, these whoopie pies are sure to bring smiles. So roll up your sleeves, get baking, and let the festivities begin!
Easter Whoopie Pies are the perfect festive treat!
Ingredients
Method
- Preheat your oven to 350°F. Line two baking sheets with parchment paper.
- In a medium bowl, whisk together the flour, baking powder, baking soda, salt, and cocoa powder. Set aside.
- In a large bowl, beat together the granulated sugar, brown sugar, and softened butter until light and fluffy, about 3-4 minutes.
- Add the eggs one at a time, mixing well after each addition, then stir in the vanilla extract.
- Gradually add the dry ingredients to the wet mixture, alternating with the milk, starting and ending with the dry ingredients. Mix until just combined.
- Drop rounded tablespoons of batter onto the prepared baking sheets, spacing them about 2 inches apart.
- Bake for 10-12 minutes, or until the tops spring back when lightly pressed. Allow to cool on the baking sheets for 5 minutes before transferring to wire racks to cool completely.
- For the filling, beat together the powdered sugar, softened butter, vanilla extract, and milk until smooth and creamy.
- Once the whoopie pie cakes are completely cool, spread a generous amount of filling on the flat side of one cake and top with another cake, flat side down. Repeat with remaining cakes and filling.
Nutrition
Notes
- For a fun twist, try adding a few drops of food coloring to the filling for a festive look.
- You can also substitute the cocoa powder with a flavored cake mix for different whoopie pie variations, such as red velvet or lemon.


