


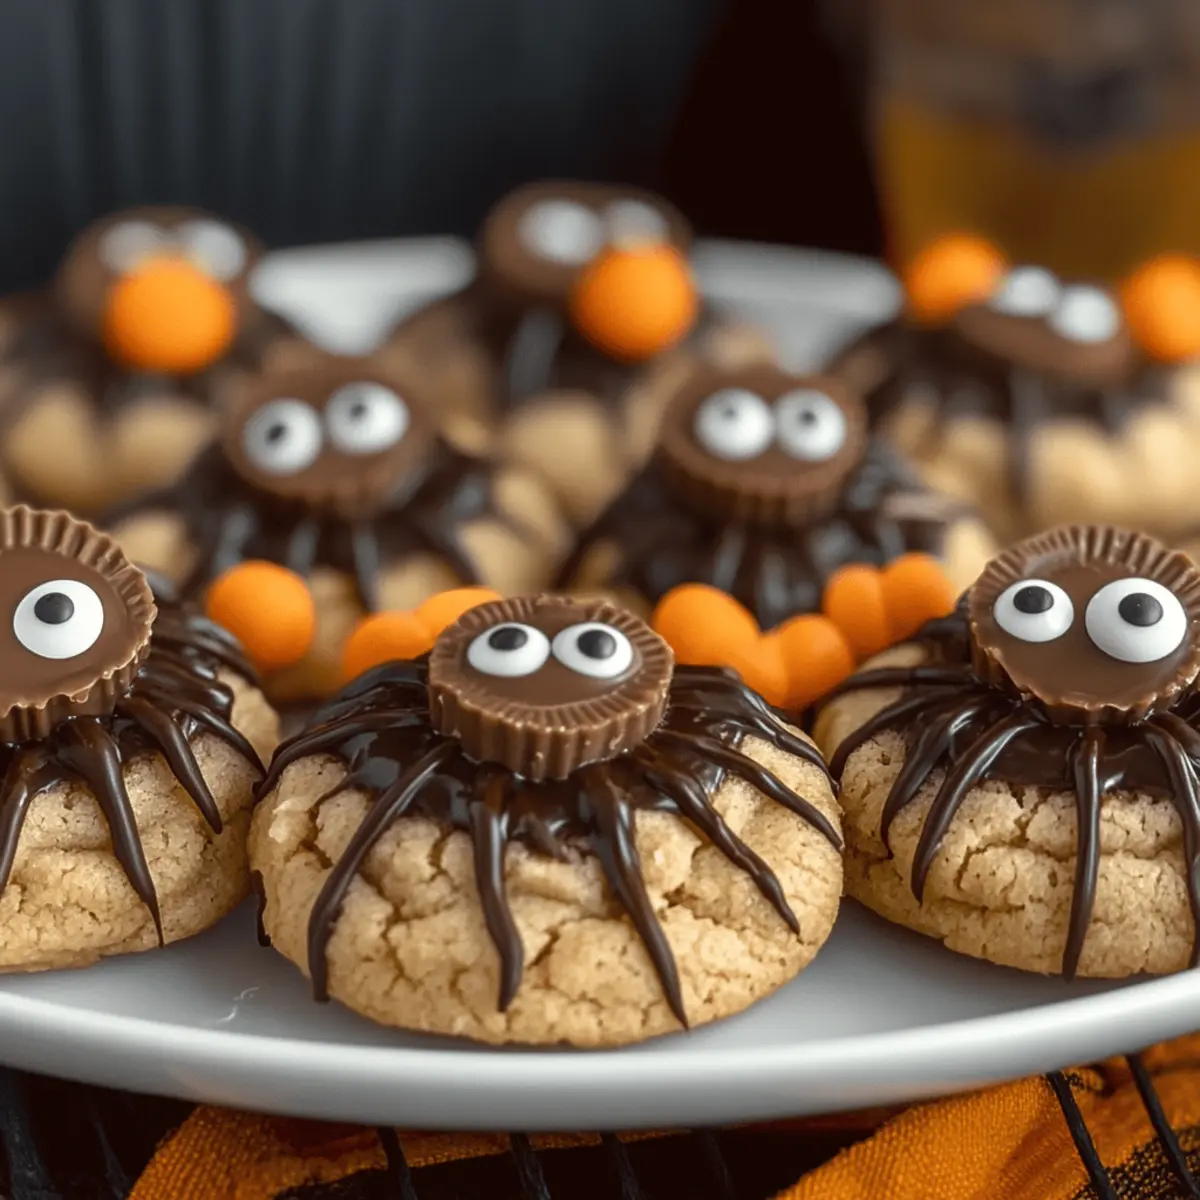
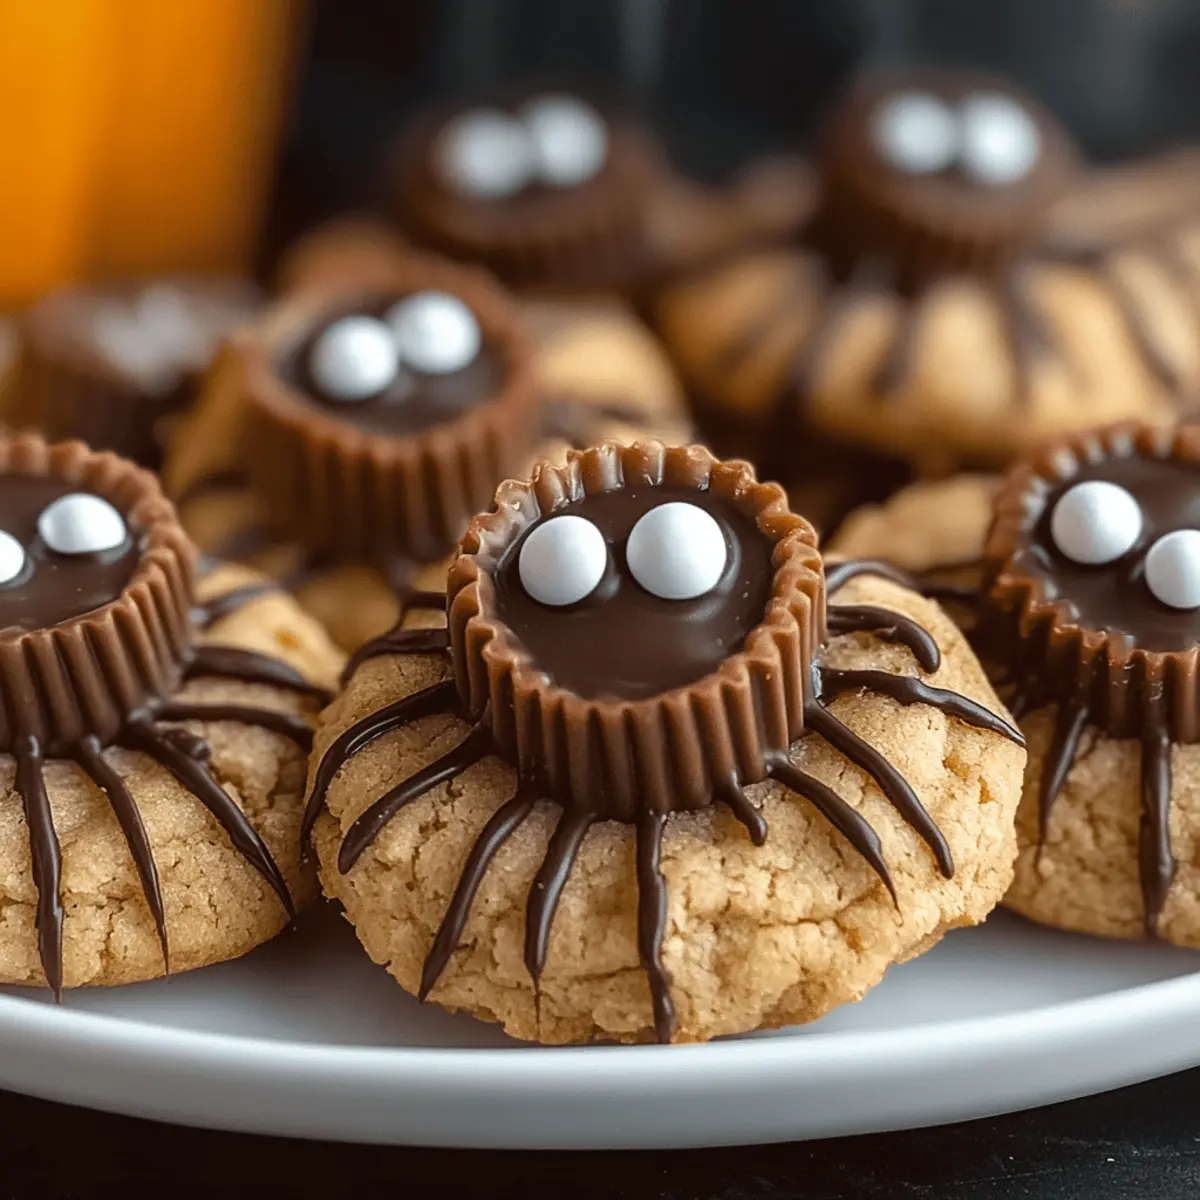
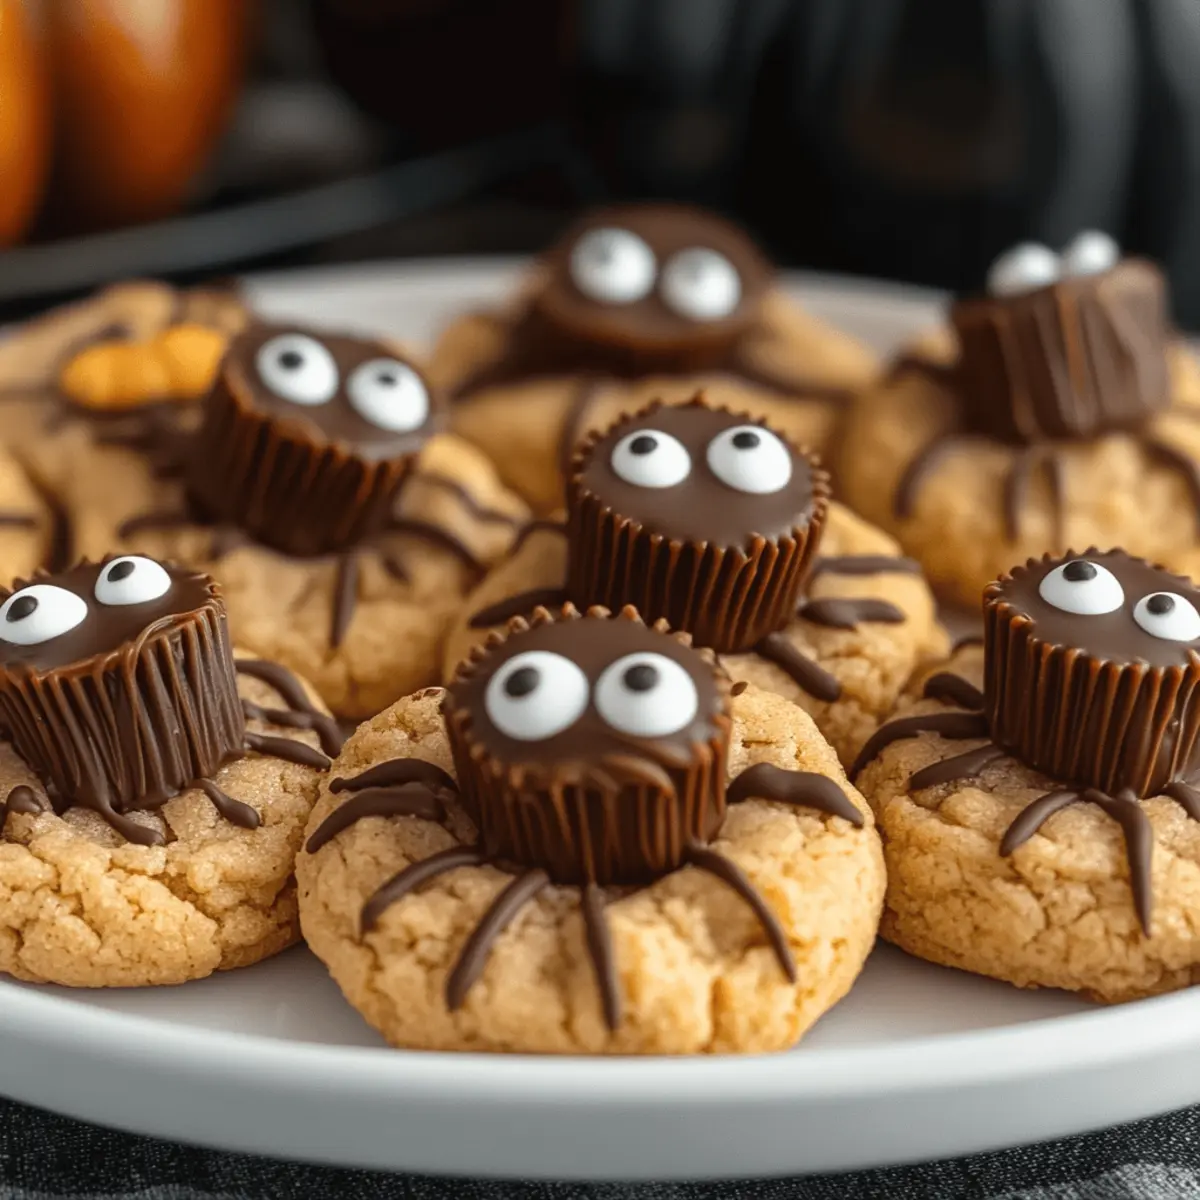
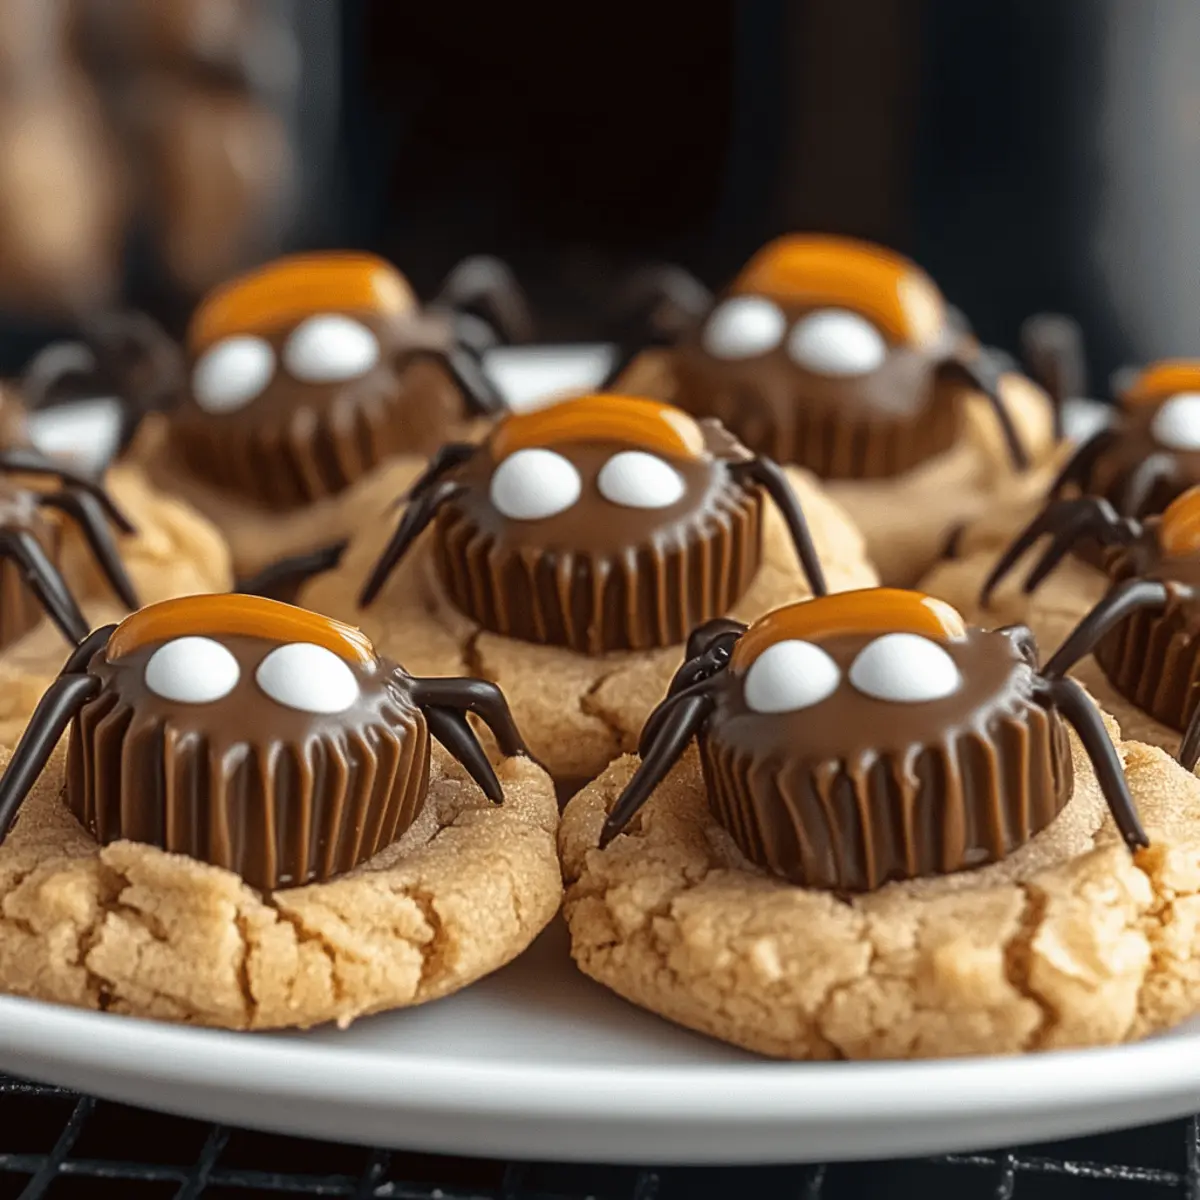
As the first leaves of fall begin to crunch underfoot, I feel a spark of excitement for the upcoming Halloween festivities. Enter my delightful Peanut Butter Spider Cookies, a perfect blend of sweetness and spookiness that’s sure to capture the playful spirit of the season. These cookies are not just adorable but also incredibly easy to whip up—ideal for those busy evenings when you’re juggling treats for school parties or family gatherings. Each soft and chewy cookie, crowned with a mini Reese’s cup and chocolate legs, becomes a show-stopping delight that even the pickiest snackers won’t resist. Who wouldn’t want to share these cute, eerie bites at their Halloween gathering? Ready to scare up some fun in the kitchen?
Why Are Peanut Butter Spider Cookies Special?
Simplicity: This recipe is a breeze, making it perfect for both novice and experienced bakers.
Adorable Presentation: With their spooky spider design, these cookies are sure to be a hit at Halloween parties, captivating both kids and adults.
Flavor Fusion: The rich peanut butter pairs beautifully with the chocolate, creating a delightful sweet and nutty experience.
Versatility: You can swap peanut butter for almond butter or make them gluten-free without losing any taste!
Make-Ahead Option: Prepare the dough in advance and keep it in your freezer for instant Halloween cheer anytime.
Crowd-Pleaser: These cookies are not just fun to make but are also a guaranteed hit, making them perfect for school events or family gatherings.
Peanut Butter Spider Cookies Ingredients
For the Cookie Base
• Unsalted Butter – Provides richness and moisture; use room temperature for best results.
• Brown Sugar – Adds sweetness and a hint of caramel flavor; perfect for that chewy texture.
• Granulated Sugar – Essential for sweetness and helps stabilize the cookie structure.
• Creamy Peanut Butter – Main flavor component offering a nutty taste; avoid natural peanut butter for consistency.
• Large Egg – Binds ingredients together and aids in rising.
• Vanilla Extract – Enhances the overall flavor profile of the cookies.
• All-Purpose Flour – Gives structure to the cookies; can be substituted with gluten-free flour like King Arthur’s 1:1 blend if desired.
• Baking Soda – Helps cookies rise and achieve a fluffy texture.
• Baking Powder – Provides additional lift for perfectly soft cookies.
• Salt – Balances sweetness and enhances the overall flavor.
• Granulated Sugar (for rolling) – Coats the cookies for a delightful, sweet outer crunch.
For the Decorations
• Mini Reese’s Peanut Butter Cups – Serve as the eye-catching centerpiece of the cookies.
• Semi-Sweet Chocolate Chips – Perfect for creating spider legs and attaching candy eyes.
• Candy Eyeballs – A fun decorative element to complete the spooky spider theme.
These Peanut Butter Spider Cookies are not only easy to make but also offer a delightful and creative twist for your Halloween celebrations!
Step‑by‑Step Instructions for Peanut Butter Spider Cookies
Step 1: Chill Reese’s
Begin your Halloween baking by unwrapping 24 mini Reese’s peanut butter cups and placing them in the freezer. This chilling step, which should take roughly 30 minutes, will help them hold their shape when added to the warm cookies later.
Step 2: Prep Oven
While the Reese’s cups chill, preheat your oven to 350°F (175°C). This temperature is crucial for achieving perfectly baked peanut butter spider cookies that are soft in the center with a slightly crispy edge. Prepare a baking sheet by lining it with parchment paper to prevent sticking.
Step 3: Cream Butter and Sugars
In a mixing bowl, beat together ½ cup of softened unsalted butter, ½ cup of brown sugar, and ¼ cup of granulated sugar using a hand mixer or stand mixer. Mix until the mixture is light and fluffy, about 2-3 minutes. The whipped texture should look creamy and pale, creating a luscious base for your cookie dough.
Step 4: Add Wet Ingredients
Incorporate 1 cup of creamy peanut butter, 1 large egg, and 1 teaspoon of vanilla extract into your butter-sugar mixture. Mix on medium speed until everything is well combined, approximately 1-2 minutes. The mixture should be smooth and uniform, giving your cookies their delightful nutty flavor.
Step 5: Combine Dry Ingredients
In a separate bowl, whisk together 1 ¼ cups of all-purpose flour, 1 teaspoon of baking soda, ½ teaspoon of baking powder, and a pinch of salt. Gradually add this dry mix to your wet mixture, stirring until just combined. Be careful not to overmix; your dough should be soft and slightly sticky, perfect for shaping.
Step 6: Form Cookies
Using a tablespoon, scoop out portions of dough and roll them into balls about 1 inch in diameter. Roll each ball in granulated sugar for a sweet outer crunch. Place the sugar-coated cookie balls onto your prepared baking sheet, leaving roughly 2 inches between them for spreading.
Step 7: Bake
Bake your peanut butter spider cookies in the preheated oven for 8-11 minutes. Keep an eye on them—they should be lightly golden on the edges but still soft in the center. The sweet aroma of peanut butter and sugar will fill your kitchen, creating a delightful anticipation for the spooky treats to come.
Step 8: Cool & Add Reese’s
Remove the freshly baked cookies from the oven and allow them to cool on the baking sheet for about 15-20 minutes. Once they are cool enough to handle, gently press a chilled Reese’s cup into the center of each cookie, letting it sink slightly for a perfect spider body.
Step 9: Melt Chocolate
Melt ½ cup of semi-sweet chocolate chips in the microwave, heating in 20-second intervals and stirring until smooth. With a spoon or piping bag, create spider legs by drizzling the melted chocolate over each cookie. Quickly place candy eyeballs on top of the Reese’s before the chocolate hardens to complete the fun spider look.
Peanut Butter Spider Cookies Variations
Feel free to mix things up and make these cookies uniquely yours—your creativity will shine through with every bite!
- Nut-Free: Swap peanut butter for sunflower seed butter for a fun, nut-free alternative. It’s just as creamy and delicious!
- Gluten-Free: Use a gluten-free flour blend, like King Arthur’s 1:1, to ensure everyone can enjoy these spooky treats without concern.
- Dairy-Free: Go dairy-free by using vegan butter and dairy-free chocolate chips; the cookies will still taste phenomenal!
- Flavor Twist: Add a pinch of cinnamon or pumpkin spice for an irresistible fall flavor that perfectly complements Halloween festivities.
- Extra Crunch: Stir in chopped peanuts or walnuts into the dough for a delightful crunch that brings a new texture to each bite.
- Chocolate Lovers: Use dark chocolate for the legs instead of semi-sweet for an indulgent treat. The deeper flavor adds a special touch.
- Candy Corn Decoration: Instead of candy eyeballs, try using candy corn to give your cookies an extra festive Halloween vibe. Everyone will love the new look!
- Spicy Kick: For those who enjoy a little heat, incorporate a touch of cayenne pepper into the cookie dough for a surprising twist.
These cookie variations can turn a delightful treat into a unique celebration of flavors! And if you’re inclined to enjoy more creative cookies, consider these Blueberry Breakfast Cookies for breakfast, or perhaps the delicious dishes featured in Cowboy Butter Chicken. Your options are endless!
Storage Tips for Peanut Butter Spider Cookies
Room Temperature: Store your Peanut Butter Spider Cookies in an airtight container at room temperature for up to 3 days to maintain freshness and flavor.
Freezer: If you want to keep them longer, freeze the cookies for up to 3 months. Layer them with parchment paper in a freezer-safe container to prevent sticking.
Reheating: When you’re ready to enjoy frozen cookies, allow them to thaw at room temperature for about 30 minutes. If you prefer warm cookies, reheat them in the microwave for a few seconds.
Make-Ahead Option: You can also prepare the cookie dough in advance and freeze it. Shape the dough into balls, place them on a baking sheet, and freeze until firm. Then transfer to a ziplock bag for easy baking later!
What to Serve with Peanut Butter Spider Cookies
As the scent of freshly baked cookies wafts through your home, it’s the perfect moment to think about what delightful sides and sips will elevate your Halloween festivities.
-
Glass of Milk: A classic pairing! Rich, cold milk beautifully balances the sweetness of the cookies, making every bite even more delicious.
-
Spooky Punch: A vibrant, fruity punch with gummy worms or eyeball candies adds a playful touch to your Halloween gathering. It’s a fun, thematic drink that complements the cookies perfectly.
-
Chocolate-Covered Pretzels: Salty and sweet, these crunchy treats provide a satisfying contrast to the soft, chewy cookie. They can also be shaped into weird formations for added Halloween fun!
-
Caramel Apple Slices: Crisp apple slices drizzled with caramel sauce deliver a fresh, fruity element that cuts through the richness of the cookies. They’re a seasonal favorite that guests will love.
-
Pumpkin Spice Latte: For a cozy touch, serve a warm pumpkin spice latte that echoes the flavors of fall. The creamy drink enhances the overall autumn vibe of your Halloween spread.
-
Meringue Ghosts: Light and airy, these cookie-ish treats not only add a bit of whimsy to your dessert table but also create an interesting textural contrast when enjoyed alongside spider cookies.
-
Candy Corn Medley: A mix of candy corn, nuts, and chocolate bits can make for a delightful sweet-and-salty nibble. It’s an easy way to celebrate Halloween flavors while snacking.
-
Pomegranate Seeds: Their bright color and juicy burst add a lovely freshness that lightens up your cookie treat. Plus, they bring a seasonal twist without overshadowing the cookies!
These suggestions will not only enhance the spooky charm of your Peanut Butter Spider Cookies but also create a festive atmosphere your friends and family will adore.
Make Ahead Options
These Peanut Butter Spider Cookies are a fantastic treat to prepare in advance, saving you time on busy days! You can mix the cookie dough and refrigerate it for up to 3 days or freeze it for up to 3 months. Just scoop the dough into balls, roll them in sugar, and store them in an airtight container or freezer bag. When you’re ready to bake, simply preheat your oven and bake the frozen cookies straight from the freezer for a few extra minutes. For the best quality, avoid adding the Reese’s cups and decorations until just before serving, ensuring your cookies are just as fresh and delightful as the moment you baked them!
Expert Tips for Peanut Butter Spider Cookies
Chill the Reese’s: Always freeze the mini Reese’s cups before baking; this prevents them from melting too much and losing their shape.
Roll in Sugar: Don’t skip rolling the cookie dough balls in granulated sugar; it adds a delightful crunch to the outer layer.
Avoid Overmixing: Be cautious not to overmix your dough; it can make the cookies tough instead of soft and chewy.
Use Room Temperature Ingredients: Ensure your butter and egg are at room temperature for better mixing, resulting in a smoother cookie dough.
Cooling Time: Allow the cookies to cool properly before pressing in the Reese’s; this helps avoid breaking and maintains their shape.
Storage Tips: Keep your Peanut Butter Spider Cookies in an airtight container at room temperature for up to three days, or freeze for longer freshness.
Peanut Butter Spider Cookies Recipe FAQs
How do I choose ripe ingredients for Peanut Butter Spider Cookies?
Absolutely! When selecting peanut butter, opt for creamy varieties without added sugar for the best consistency. Ensure your unsalted butter is at room temperature, as this helps create a fluffy dough. For eggs, use large eggs stored in a cool place—check for freshness by placing them in water; if they sink, they’re good to go!
How should I store my Peanut Butter Spider Cookies and for how long?
Very simply! Store your Peanut Butter Spider Cookies in an airtight container at room temperature for up to 3 days. To keep them fresh longer, layer them with parchment paper and place them in the fridge. The flavor and texture will remain delightful.
Can I freeze these cookies for later?
Absolutely! To freeze your Peanut Butter Spider Cookies, place them in a single layer in a freezer-safe container lined with parchment paper, ensuring they don’t stick together. You can freeze them for up to 3 months. When you’re ready to enjoy some cookie goodness, simply thaw them at room temperature for about 30 minutes.
What if my cookies turned out flat?
No worries! If your cookies ended up flat, it could be due to not using enough flour or the baking soda being expired. Make sure to properly measure your flour; using the spoon-and-level method is best. Always check the expiration dates on your baking soda and powder to ensure they are active. If flattening happens again, consider chilling the dough for about 30 minutes before baking.
Are there any dietary considerations with Peanut Butter Spider Cookies?
Indeed! For those with nut allergies, substitute peanut butter with sunflower seed butter for a similar taste without the allergens. If gluten is a concern, use a gluten-free flour blend—like King Arthur’s 1:1 flour—to create a safe treat for everyone. Always double-check the packaging for hidden ingredients, especially in candy decorations!
Can pets eat these cookies?
Absolutely not! While peanut butter is safe for dogs in moderation, the sugars and chocolate in these cookies can be harmful to pets. Always keep baked goods out of reach from furry friends to keep them safe and healthy. Instead, consider making special pet-friendly treats if you want to share the fun!
Spooky Peanut Butter Spider Cookies for Halloween Delights
Ingredients
Equipment
Method
- Chill Reese's: Unwrap and freeze 24 mini Reese's peanut butter cups for about 30 minutes.
- Prep Oven: Preheat your oven to 350°F (175°C) and line a baking sheet with parchment paper.
- Cream Butter and Sugars: Beat together unsalted butter, brown sugar, and granulated sugar until light and fluffy.
- Add Wet Ingredients: Mix in creamy peanut butter, egg, and vanilla extract until well combined.
- Combine Dry Ingredients: Whisk together flour, baking soda, baking powder, and salt, then gradually mix into wet ingredients.
- Form Cookies: Scoop dough and roll into 1-inch balls; roll in granulated sugar before placing on the baking sheet.
- Bake: Bake for 8-11 minutes until lightly golden on edges. Cool on baking sheet for 15-20 minutes.
- Cool & Add Reese's: Once cool enough, press a chilled Reese's cup into the center of each cookie.
- Melt Chocolate: Melt semi-sweet chocolate chips and drizzle to create spider legs, adding candy eyeballs before it hardens.