


As I stood in my kitchen, the smell of sizzling ground beef began to fill the air, blending perfectly with the anticipation of a fun family dinner. Enter the Cheeseburger Quesadillas—a dish that transforms the classic cheeseburger into a crispy, gooey experience everyone will love. In just 20 minutes, you can dish out these gluten-free delights that not only please the little ones but also satisfy adult cravings after a long day. It’s the ideal weeknight dinner that turns meal prep into a delightful escape from takeout. Want to know how this easy yet scrumptious recipe can change your dinner game? Let me share the secrets that will have you grabbing for seconds!
Why are Cheeseburger Quesadillas a must-try?
Quick and Easy: With just 20 minutes from start to finish, these quesadillas are the ultimate solution for busy weeknights.
Kid-Friendly Fun: Your little ones will love the interactive experience of customizing their own quesadillas with toppings!
Flavor Explosion: The combination of savory ground beef, melted cheese, and special sauce creates a cheesy, satisfying taste that rivals any restaurant dish.
Versatile Options: Feel free to experiment with ingredients by adding sautéed veggies or swapping proteins, making it a recipe you’ll want to revisit again and again.
Crispy Perfection: The crispy tortillas provide the perfect contrast to the gooey interior, making every bite a delightful experience that will have everyone coming back for more.
Want an even heartier meal? Check out my Cheeseburger Soup Comforting recipe for another family favorite!
Cheeseburger Quesadillas Ingredients
• For the Tortillas
- Gluten-Free Tortillas – The crunchy base of these quesadillas! Substitution Note: Regular flour tortillas can be used if gluten isn’t a concern.
• For the Filling
- Ground Beef – The heartiness of the dish. Note: Feel free to substitute with turkey or plant-based ground meat for a lighter option.
- Cheddar Cheese – Adds melty creaminess and fantastic flavor. Substitution Note: Monterey Jack or mozzarella work beautifully in this recipe.
- Special Sauce – A delightful blend that enhances the burger flavor; mix mayonnaise, ketchup, and mustard to taste. Substitution Note: Store-bought burger sauce is a quick alternative.
• For the Toppings
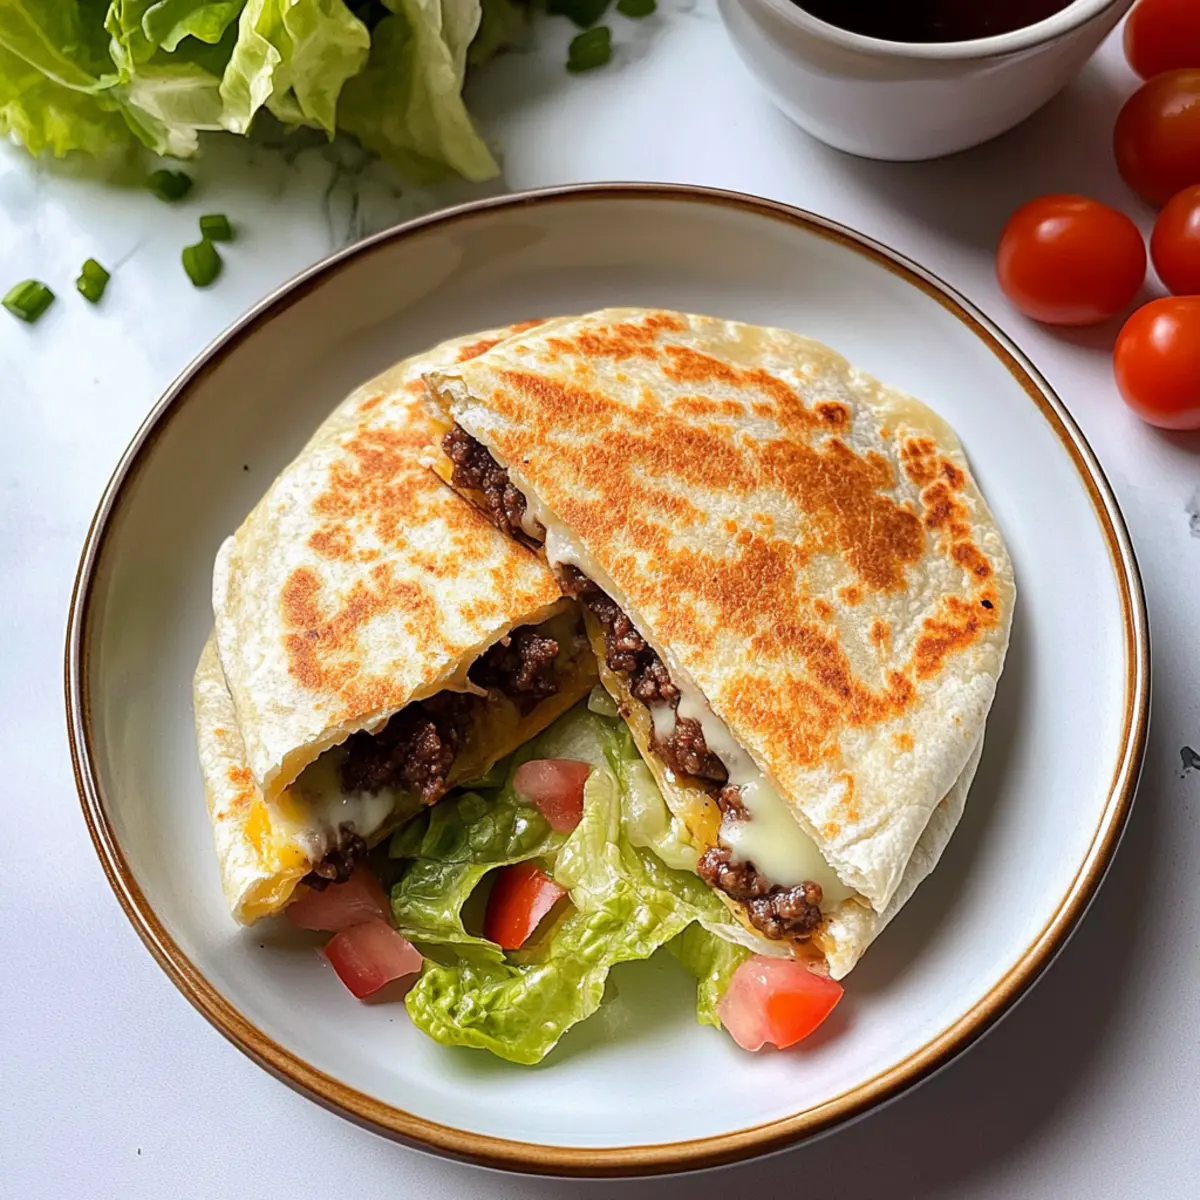
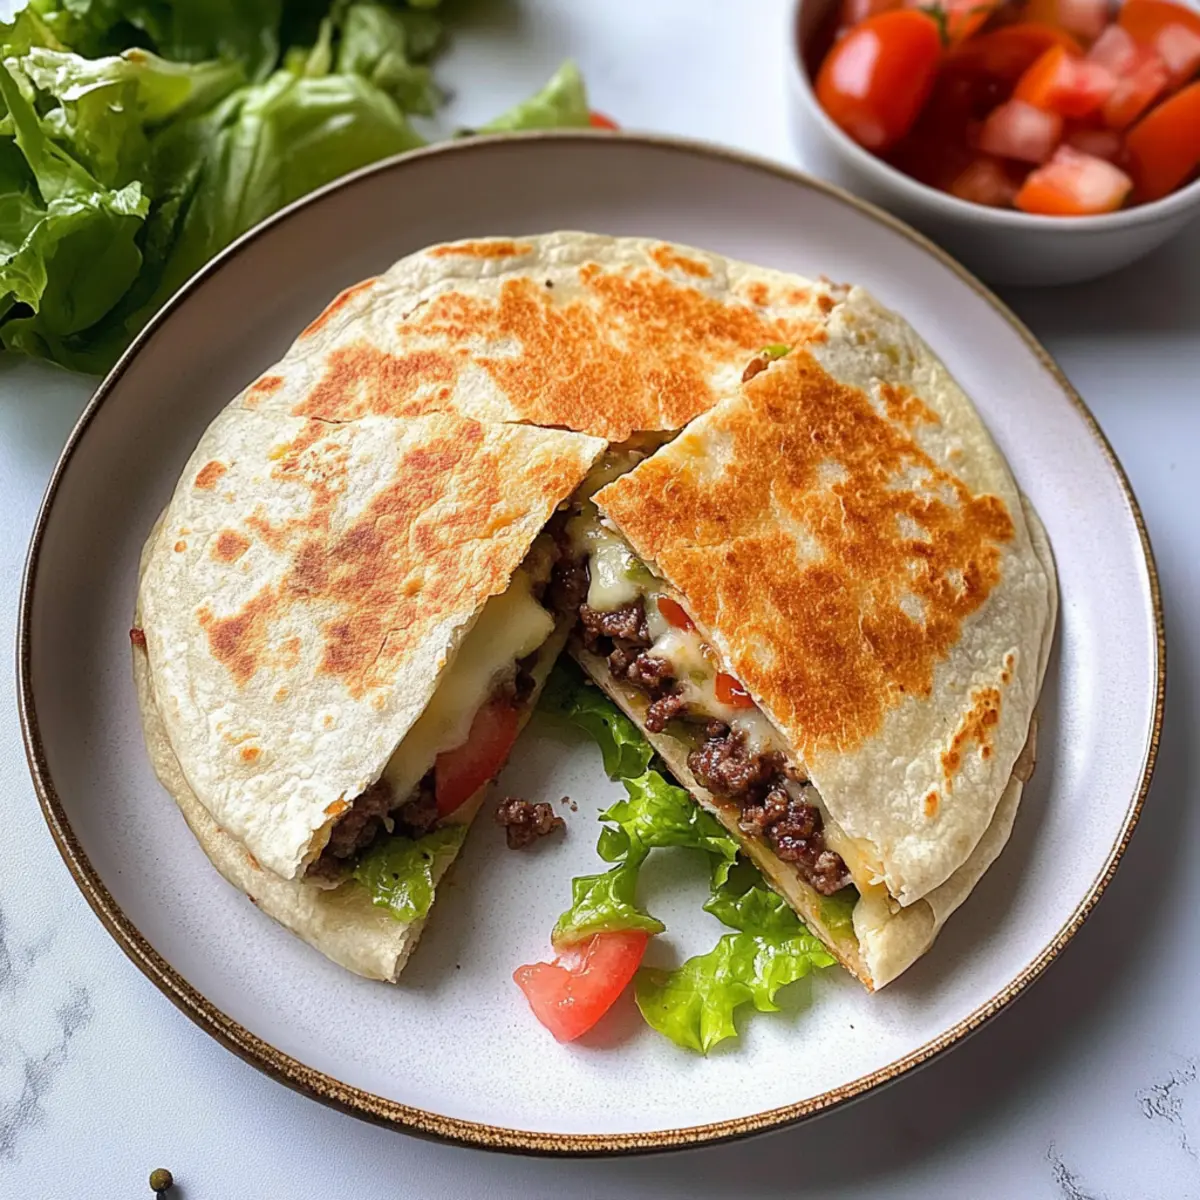
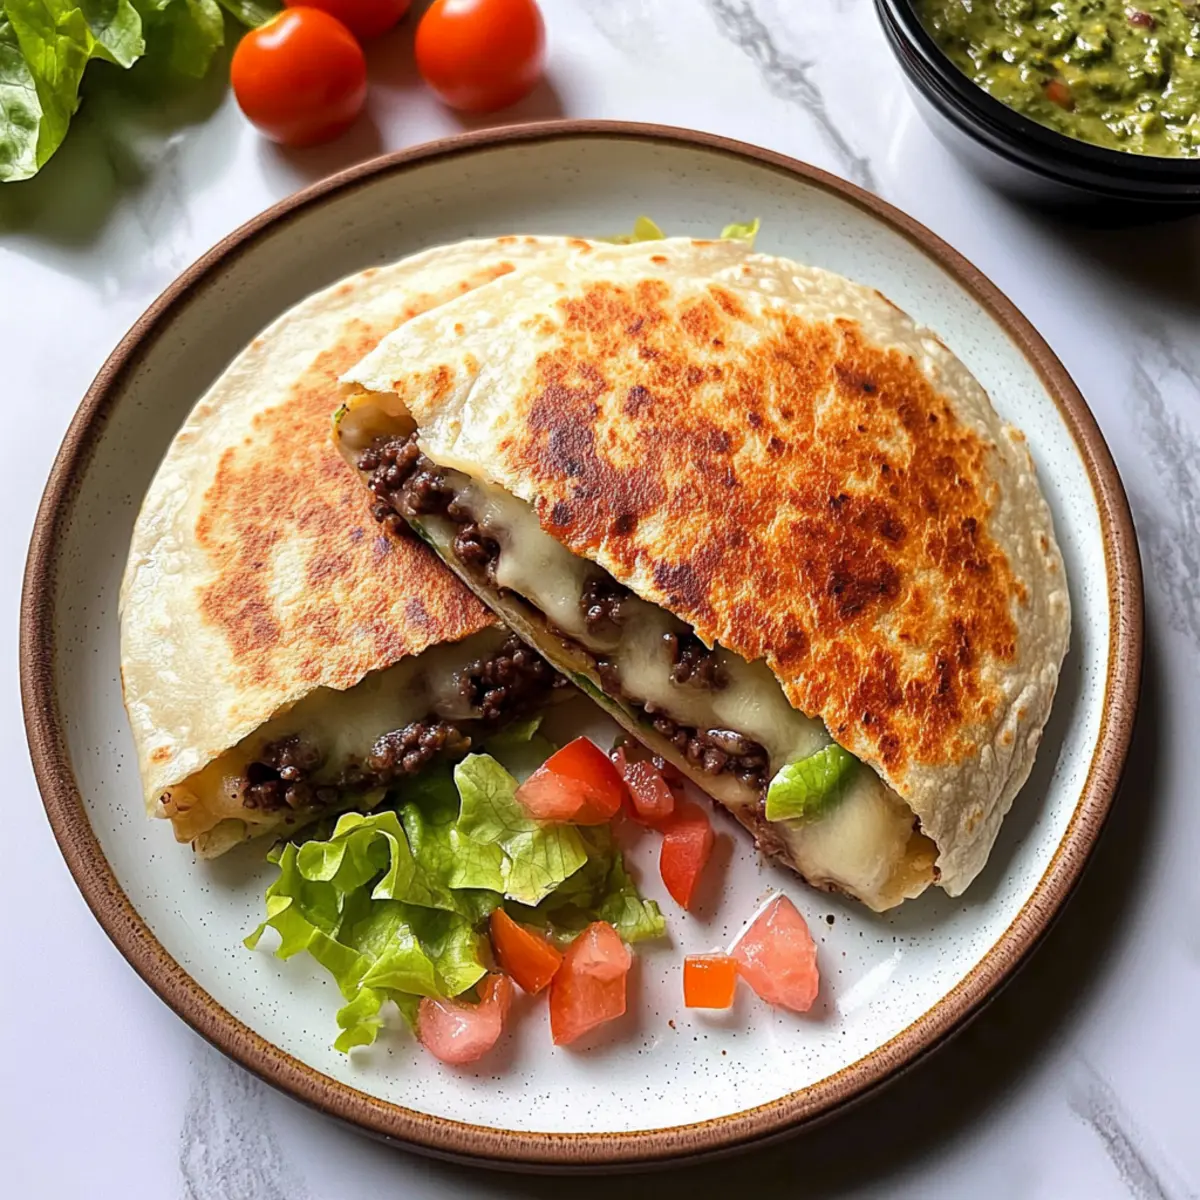
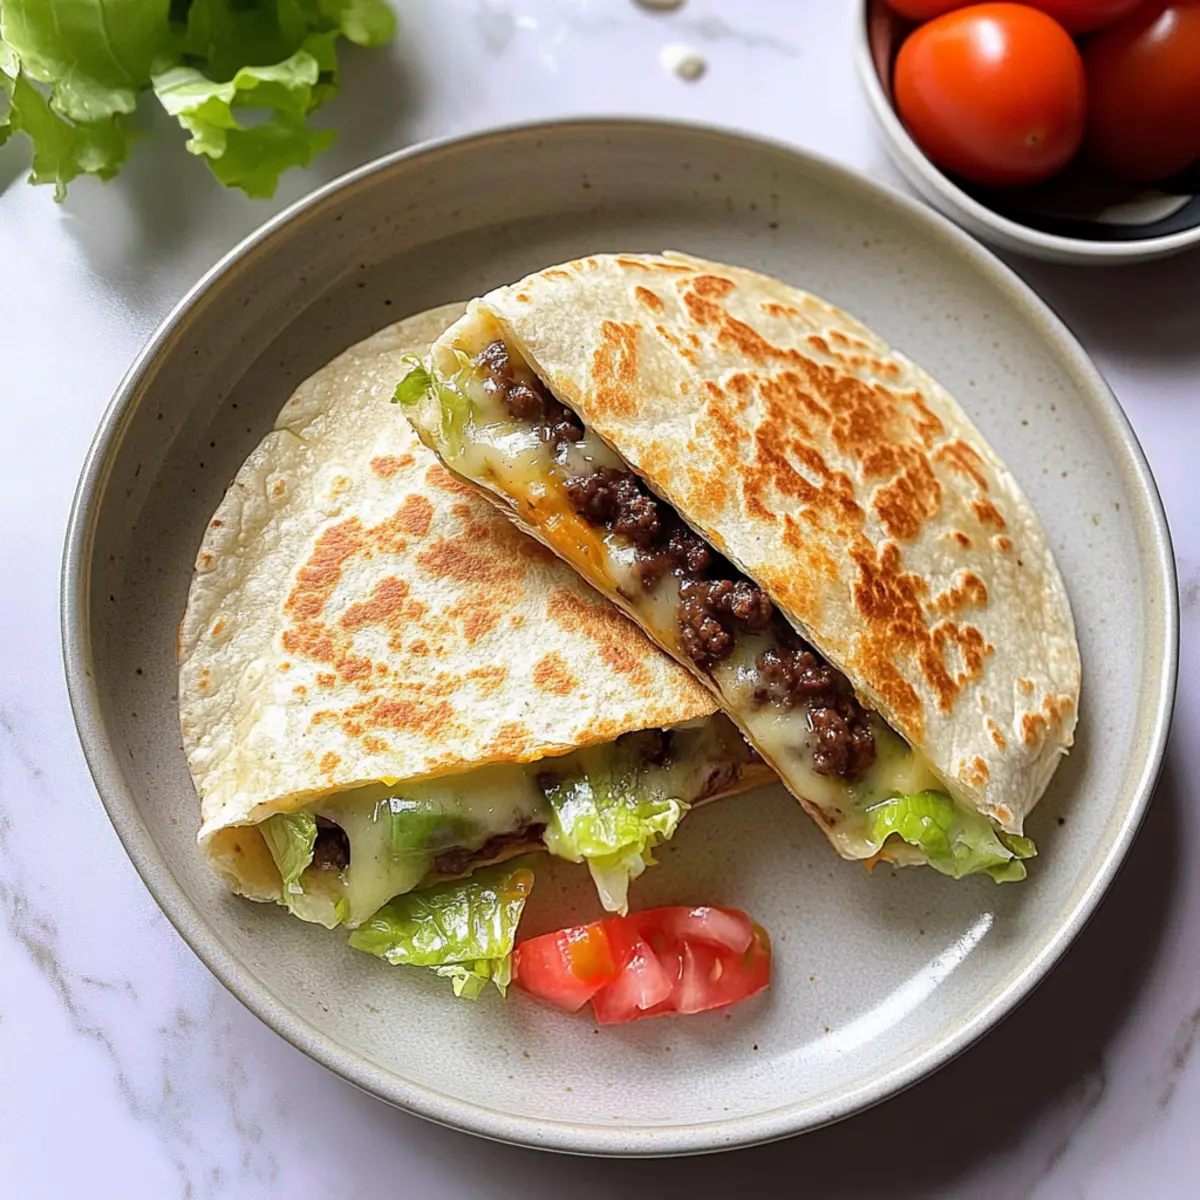
- Vegetables (e.g., lettuce, tomatoes, avocado) – Optional toppings that bring freshness and nutrition to your meal.
Step‑by‑Step Instructions for Cheeseburger Quesadillas
Step 1: Cook the Beef
In a skillet over medium heat, add your ground beef and cook for about 5-7 minutes, stirring occasionally until it’s browned and fully cooked. Use a spatula to break up the meat as it cooks. Make sure there are no pink bits left, and you can drain any excess fat if necessary to keep the quesadilla filling nice and flavorful.
Step 2: Prepare the Tortilla
Place a clean skillet on low heat and add your first gluten-free tortilla. Allow it to warm up for about 1-2 minutes until it becomes slightly pliable. This ensures a crispy outside while the inside stays melty and gooey. Keep an eye on it; you want it warm, not browned at this stage.
Step 3: Layer the Ingredients
On one half of the warmed tortilla, evenly spread a generous scoop of the cooked ground beef, followed by a handful of cheddar cheese. Drizzle some special sauce over the top for that classic cheeseburger flavor. Make sure the cheese covers the beef for optimal melting and deliciousness with your Cheeseburger Quesadillas.
Step 4: Fold and Cook
Carefully fold the tortilla in half over the filling, pressing it down slightly. Increase the skillet heat to medium and cook the quesadilla for about 3-4 minutes on one side, until the tortilla is golden brown and crispy. Then, flip and cook the other side for another 3-4 minutes, ensuring the cheese melts perfectly inside.
Step 5: Repeat the Process
Remove the first quesadilla from the skillet and let it rest for a minute before cutting. Return to the stove, lower the heat slightly, and repeat the layering and cooking process with the remaining tortillas and filling. Keep the completed quesadillas warm in a low oven if needed, making this a great way to serve the whole family together!
Step 6: Serve Your Quesadillas
Slice the quesadillas into wedges and serve them warm with additional toppings like fresh lettuce, ripe avocados, or sliced tomatoes as desired. This final touch not only enhances the flavor but adds freshness and color to your Cheeseburger Quesadillas, making them appealing and irresistible.
Expert Tips for Cheeseburger Quesadillas
-
Skillet Temperature: Ensure your skillet is preheated for crispy, golden-brown tortillas; a cold pan can lead to soggy quesadillas.
-
Don’t Overstuff: Use a moderate amount of filling to avoid breakage during cooking; too much can make flipping difficult.
-
Cheese Matters: For the best melt, use a cheese that stretches well like cheddar or Monterey Jack in your Cheeseburger Quesadillas.
-
Fresh Toppings: Incorporate a variety of fresh toppings like tomatoes and avocados just before serving for a delightful crunch.
-
Cook Evenly: Flip quesadillas gently and check for an even golden color on both sides to achieve that perfect crispy texture.
Make Ahead Options
These Cheeseburger Quesadillas are ideal for meal prep enthusiasts looking to save time during busy weeknights! You can prepare the ground beef filling up to 3 days in advance; simply cook it, let it cool, and store it in an airtight container in the refrigerator. For even easier assembly, you can pre-chop any vegetables and keep them ready to go. When you’re ready to serve, warm the filling in a skillet, layer it on your tortillas with cheese, and cook as directed. This approach ensures your quesadillas are just as delicious and fresh, making them the perfect solution for stress-free dinners.
How to Store and Freeze Cheeseburger Quesadillas
Fridge: Store leftover quesadillas in an airtight container in the refrigerator for up to 3 days. This helps retain flavor and prevents them from drying out.
Freezer: For longer storage, wrap the quesadillas tightly in plastic wrap and aluminum foil before placing them in a freezer bag. They can be frozen for up to 2 months.
Reheating: To reheat, thaw in the fridge overnight, then warm in a skillet over medium heat to restore crispiness. Alternatively, use an oven at 350°F (175°C) for about 10-15 minutes.
Serving Tips: Always check the internal temperature when reheating to ensure it’s heated thoroughly before serving your Cheeseburger Quesadillas again.
Cheeseburger Quesadillas Variations & Substitutions
Embrace the joy of customizing your Cheeseburger Quesadillas with unique twists that will tickle your taste buds!
- Vegetarian Delight: Substitute ground beef with black beans or lentils for a plant-based twist. It adds protein while keeping the flavors rich.
- Spicy Kick: Add diced jalapeños or pepper jack cheese for a fiery delight. This will elevate your quesadillas with that perfect spicy kick!
- Cheesy Upgrade: Experiment with a blend of cheeses, like gouda and pepper jack for a melty, flavorful experience that’s sure to satisfy any cheese lover.
- BBQ Flavor: Mix in some barbecue sauce with the beef for a sweet and smoky flavor. This twist offers a delightful change from the traditional cheeseburger taste!
- Zesty Extras: Incorporate fresh cilantro, lime juice, or pickled onions to enhance the flavor profile with a zesty finish. Your taste buds will dance!
- Crunchy Veggie: Add thinly sliced bell peppers or spinach for extra crunch and nutrients. These veggies not only add vibrancy but also a satisfying texture!
- Taco Fusion: Sprinkle in some taco seasoning for a fun fusion twist. It transforms your quesadillas into a mouthwatering Mexican-inspired delight!
Feel free to explore these options and make the recipe your own! Want another cozy meal idea? Check out my Cheeseburger Soup Comforting recipe that takes comfort food to another level!
What to Serve with Cheeseburger Quesadillas
The perfect meal transforms dinnertime into a delightful experience, and these quesadillas are just the beginning!
- Creamy Guacamole: Adds a smooth texture and fresh flavor, perfectly balancing the savory quesadillas.
- Spicy Salsa: A zesty kick that complements the cheeseburger essence while bringing bright colors to your plate.
- Crispy French Fries: A nostalgic pairing that adds crunch, making for an ultimate comfort food feast.
- Garden Salad: Fresh greens and veggies provide a crisp, refreshing contrast to the warm, cheesy quesadillas.
- Coleslaw: This tangy, crunchy side enhances the flavors while bringing a bit of crunch and creaminess to each bite.
- Sweet Corn on the Cob: Grilled or boiled, the sweetness of corn makes for a lovely balance to the savory quesadilla flavors.
- Cheesy Nachos: Perfect for sharing and soaking up any leftover special sauce; a crowd-pleaser at any dinner table.
- Horchata: This creamy, cinnamon-infused beverage adds a soothing element that beautifully complements the meal.
Cheeseburger Quesadillas Recipe FAQs
How do I choose the right ground beef for my Cheeseburger Quesadillas?
Absolutely! When selecting ground beef, look for something that is fresh with a good fat-to-lean ratio. I usually opt for 80% lean since it offers great flavor without being too greasy. Avoid any packages with dark spots or a strange smell, as freshness is key.
What’s the best way to store leftover Cheeseburger Quesadillas?
Very! Place your leftovers in an airtight container in the refrigerator. They can be kept for up to 3 days. For best results, reheat them in a skillet over medium heat to maintain that crispy texture—nobody wants a soggy quesadilla!
Can I freeze Cheeseburger Quesadillas for later?
Absolutely! To freeze, wrap each quesadilla tightly in plastic wrap followed by aluminum foil to avoid freezer burn. Place them in a freezer bag and store for up to 2 months. When you’re ready to enjoy, simply thaw them overnight in the fridge before reheating, ensuring they’re evenly warmed.
What if my quesadillas are soggy when I cook them?
No worries! If your quesadillas come out soggy, it might be due to overfilling or cooking them on too low of a heat. Start by ensuring your skillet is preheated well before adding any quesadillas. If they are overstuffed, limit your fillings to avoid breaking them apart during cooking.
Are there any dietary considerations to keep in mind for my Cheeseburger Quesadillas?
Very much so! If you’re cooking for someone with gluten sensitivities, always double-check that your tortillas and any additional ingredients are certified gluten-free. Additionally, consider swapping the ground beef for ground turkey or plant-based meat options for a lighter or vegetarian-friendly dish. It’s always a good idea to ask about allergies before serving!
How can I jazz up my Cheeseburger Quesadillas?
Absolutely! To elevate your quesadillas, mix in sautéed onions or bell peppers with the ground beef. You could also add spices like garlic powder or smoked paprika to the beef as it cooks for an extra flavor kick. Don’t be afraid to customize with your favorite toppings and sauces!
Cheeseburger Quesadillas: Quick, Crispy, Family-Friendly Delight
Ingredients
Equipment
Method
- In a skillet over medium heat, add your ground beef and cook for about 5-7 minutes, stirring occasionally until it’s browned and fully cooked. Use a spatula to break up the meat as it cooks.
- Place a clean skillet on low heat and add your first gluten-free tortilla. Allow it to warm up for about 1-2 minutes until it becomes slightly pliable.
- On one half of the warmed tortilla, evenly spread a generous scoop of the cooked ground beef, followed by a handful of cheddar cheese. Drizzle some special sauce over the top.
- Carefully fold the tortilla in half over the filling, pressing it down slightly. Increase the skillet heat to medium and cook the quesadilla for about 3-4 minutes on one side, until the tortilla is golden brown and crispy.
- Remove the first quesadilla from the skillet and let it rest for a minute before cutting. Return to the stove, lower the heat slightly, and repeat the layering and cooking process with the remaining tortillas and filling.
- Slice the quesadillas into wedges and serve them warm with additional toppings like fresh lettuce, ripe avocados, or sliced tomatoes as desired.