


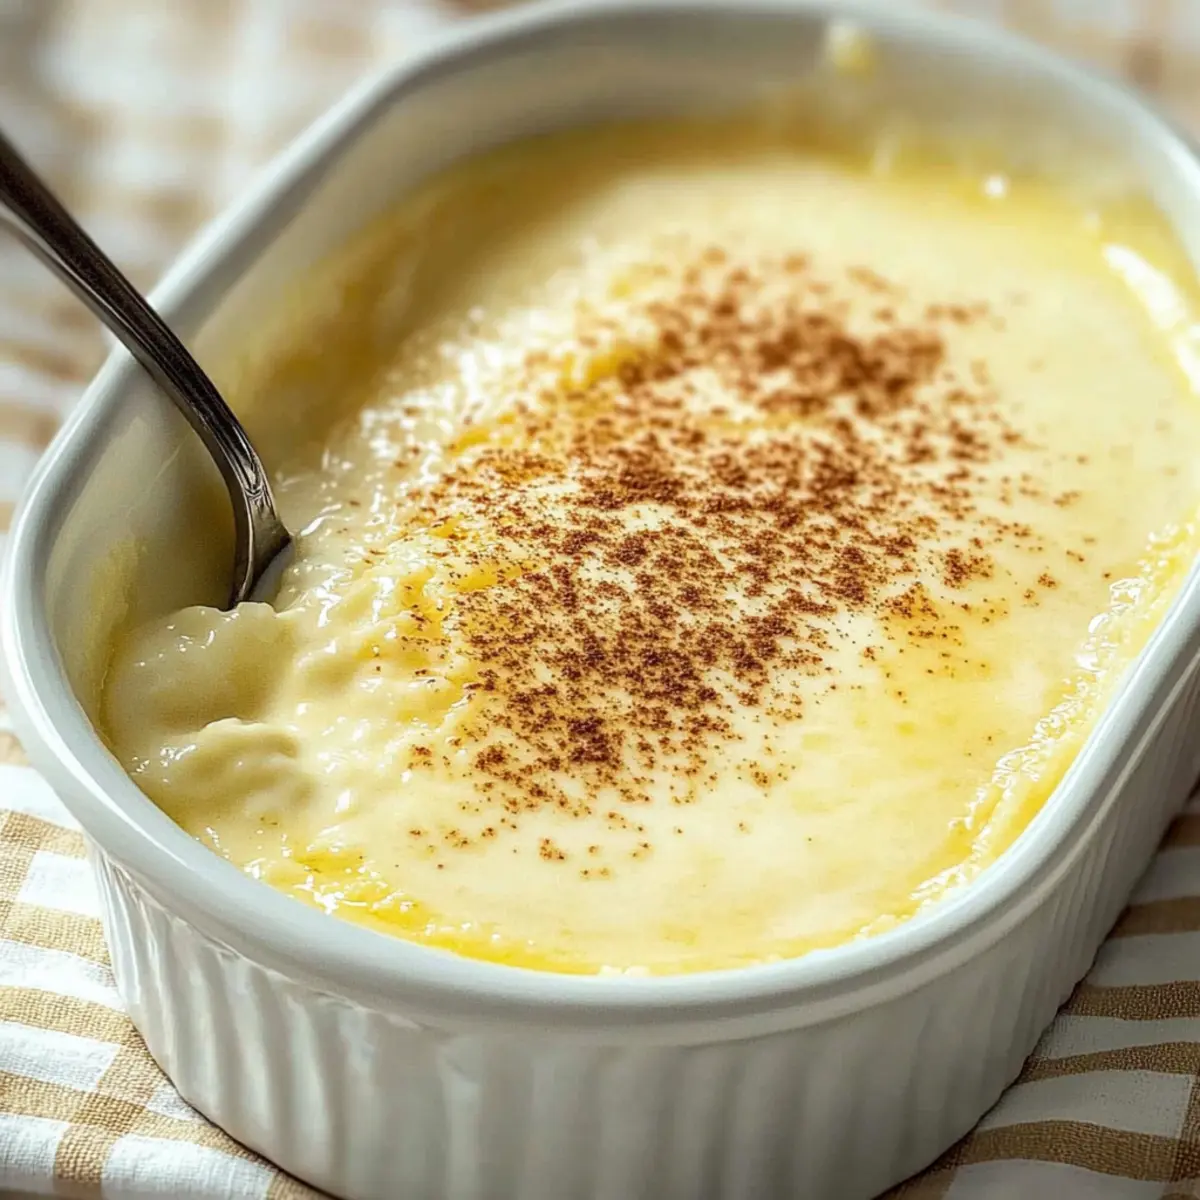
As the aroma of baking wafts through my kitchen, I find myself transported to cherished moments spent around the family table. This Creamy Vanilla Custard with Nutmeg is more than just a dessert; it’s a comforting hug in a bowl, inviting everyone to savor its delightful richness. Crafted with simple ingredients, it offers the ease of preparation for busy home chefs while also promising an elegant finish that can impress any guest. Whether enjoyed on its own or adorned with fresh fruits, this gluten-free treat is a versatile classic that brings joy and nostalgia to every bite. What flavors or toppings will you choose to elevate your custard adventure?
Why is this custard recipe so special?
Comforting and nostalgic, this vanilla custard evokes sweet memories of family gatherings. Easy to make, it requires just a handful of ingredients, making it perfect for both novice cooks and seasoned chefs alike. Versatile in flavor, try adding almond extract or your favorite seasonal fruits for a personal touch. Gluten-free and nut-free, it’s a dessert that everyone can enjoy! Elegant presentation transforms a simple recipe into a sophisticated dish that will impress any guest. Make sure to also check out our tips on serving suggestions to enhance your serving experience!
Creamy Vanilla Custard Ingredients
• Indulge in the classic flavors!
For the Custard
- Whole Milk – Provides creaminess and richness; you can use 2% for a lighter texture, but expect less creaminess.
- Sugar – Sweetens the custard; stick to the recipe for the perfect balance of sweetness.
- Eggs – Essential for structure and creamy texture; always use large eggs for best results.
- Salt – Enhances flavors; just a pinch goes a long way in elevating the taste.
- Vanilla Extract – Adds a warm, aromatic flavor; feel free to substitute with almond extract for a unique twist.
- Ground Nutmeg – A cozy, warm spice to sprinkle on top; it complements the creamy vanilla perfectly.
Step‑by‑Step Instructions for Creamy Vanilla Custard with Nutmeg
Step 1: Preheat the Oven
Begin by preheating your oven to 350°F (175°C). This temperature is ideal for baking the custard gently and ensuring it sets perfectly. As the oven warms up, gather your baking equipment, including a 1.5-quart round baking dish and a larger pan for the water bath.
Step 2: Warm the Milk
In a medium saucepan over low heat, warm the whole milk until small bubbles form around the edges—this usually takes about 5–7 minutes. Stir gently to prevent scorching, and remove it from the heat once you see those bubbles. This warming step is crucial for dissolving the sugar and helping the eggs blend smoothly without curdling.
Step 3: Whisk the Egg Mixture
In a mixing bowl, whisk together the eggs, sugar, and salt until just combined, about 1–2 minutes. Aim for a uniform mixture without overbeating; this will help maintain the creamy texture of your Creamy Vanilla Custard with Nutmeg. It’s best to use a hand whisk or an electric mixer on a low setting.
Step 4: Combine the Milk and Eggs
Slowly pour the warm milk into the egg mixture while continuously stirring to avoid curdling. This process should take about 1–2 minutes, allowing the ingredients to blend seamlessly. The warmth of the milk will help to temper the eggs, creating a silky custard base.
Step 5: Strain the Mixture
Using a wire strainer, strain the custard mixture into your prepared baking dish to catch any bits of cooked egg. This step ensures a smooth texture for your finished product. Once strained, lightly dust the top with ground nutmeg, adding a cozy aroma to your custard.
Step 6: Prepare the Water Bath
Place the baking dish inside a larger pan and fill the outer pan with hot water until it reaches about ½ inch up the sides of the inner dish. This gentle water bath method helps the custard bake evenly and prevents it from becoming grainy. Ensure both pans are stable before transferring them to the oven.
Step 7: Bake the Custard
Carefully place the pans in the oven and bake for approximately 55 minutes. To check for doneness, insert a knife into the center of the custard; it should come out clean yet the custard should still have a slight jiggle. This visual cue indicates that your Creamy Vanilla Custard is perfectly baked.
Step 8: Cool and Chill
Once baked, remove the custard from the water bath and let it cool on a wire rack for about 30 minutes. After it has cooled, refrigerate for at least a couple of hours or overnight. Chilling allows the flavors to meld beautifully and gives the custard a luscious texture.
Make Ahead Options
These Creamy Vanilla Custards with Nutmeg are perfect for busy home cooks looking to save time while still delivering a delightful dessert! You can prepare the custard mixture up to 24 hours in advance by following all the steps through baking and cooling. Simply cover the chilled custard with plastic wrap to prevent it from absorbing other odors in the fridge. For optimal flavor and texture, allow it to chill for at least a couple of hours or preferably overnight before serving. When you’re ready to indulge, simply slice, and enjoy it cold, or warm it gently in the oven for a cozy touch. With this make-ahead approach, you’ll have a creamy, comforting dessert ready at a moment’s notice!
Creamy Vanilla Custard Variations
Get ready to explore delightful twists on this classic recipe that will make your taste buds dance!
- Almond Extract: Swap vanilla for almond extract for a nutty flavor that adds a unique depth to your custard.
- Citrus Zest: Grate lemon or orange zest into the mixture for a refreshing citrusy burst. Bright and inviting!
- Chocolate Delight: Incorporate melted or cocoa powder into the base for a rich and luscious chocolate custard—perfect for chocolate lovers!
- Fruit-Filled Wonder: Top the chilled custard with seasonal fresh berries, sliced bananas, or roasted peaches for a fruity explosion. Each bite becomes a treasure!
- Spicy Twist: Add a pinch of cinnamon or ginger along with the nutmeg for a warm and inviting spiced version. Comforting and aromatic!
- Vegan Option: Substitute eggs with silken tofu or a chia seed mix combined with coconut milk for a creamy, plant-based delight.
- Salted Caramel: Drizzle homemade salted caramel sauce over the top before serving for a sweet-savory contrast that’s utterly indulgent!
- Heel the Heat: For a little kick, mix in a tiny pinch of cayenne pepper or top with spicy candied nuts, adding an unexpected layer of excitement to each mouthful!
Whether you’re adjusting for dietary preferences or simply looking to elevate your culinary experience, these variations are sure to create delightful memories at your table! Need more tips? Consider exploring how to serve with seasonal fruits for an added burst of flavor.
Expert Tips for Creamy Vanilla Custard
-
Water Bath Wisdom: Always use a water bath to ensure even cooking and prevent a grainy texture in your Creamy Vanilla Custard. This gentle method enhances the custard’s creamy consistency.
-
Oven Accuracy: Calibrate your oven with an oven thermometer; even slight temperature discrepancies can lead to curdled custard. Achieving the right temperature is essential for perfect baking.
-
Cool Before Chilling: Let the custard cool at room temperature for about 30 minutes before refrigerating. This helps maintain consistency and prevents excess condensation.
-
Strain for Smoothness: Don’t skip the straining step! Straining the mixture ensures a silky-smooth custard by removing any cooked egg bits that can disrupt texture.
-
Overnight Magic: For the best flavor and texture, let the custard chill overnight. This allows flavors to meld beautifully, making every bite a nostalgic treat!
How to Store and Freeze Creamy Vanilla Custard
Fridge: Store the creamy vanilla custard in an airtight container in the refrigerator for up to 3 days. This helps preserve its silky texture while preventing it from absorbing any fridge odors.
Freezer: For longer storage, freeze the custard in a freezer-safe container for up to 2 months. Thaw it overnight in the fridge before serving, but note that the texture may change slightly.
Reheating: If enjoying the custard warm, gently reheat it in a microwave safe dish, covered, at medium power. Heat in 15–30 second intervals, stirring in between until warmed through without becoming hot or curdled.
Serving: Enhance your custard experience by serving it chilled with seasonal fresh fruits or a sprinkle of nutmeg, making this gluten-free dessert a true delight!
What to Serve with Creamy Vanilla Custard with Nutmeg
Indulging in the rich textures of this dessert opens the door to a world of delightful pairings that elevate your dining experience.
-
Fresh Berries: The tart sweetness of strawberries or blueberries cuts through the creaminess, adding a vibrant pop of color and flavor.
-
Crunchy Biscotti: This crisp treat provides a delightful contrast to the smooth custard, offering just the right amount of crunch with each bite.
-
Citrus Salad: A refreshing blend of citrus fruits brings a bright and zesty element to each spoonful, balancing the custard’s richness beautifully.
-
Homemade Whipped Cream: Light and airy, a dollop of freshly whipped cream enhances the custard’s creamy texture while adding extra indulgence—an irresistible combination.
-
Dark Chocolate Shavings: For chocolate lovers, a sprinkle of dark chocolate adds depth and sophistication to your dessert, making it feel extra decadent.
-
Spiced Apple Compote: Warm, cinnamon-spiced apples create a comforting pairing, introducing warmth and a touch of sweetness that complements the nutmeg brilliantly.
-
Vanilla Ice Cream: A scoop of vanilla ice cream alongside the custard takes indulgence up a notch; the combination of warm and cold creates a luxurious texture experience.
-
Tea or Coffee: Pair with a soothing cup of herbal tea or a rich espresso to balance the sweetness, making for a relaxing end to your meal.
Creamy Vanilla Custard with Nutmeg Recipe FAQs
How can I tell if the eggs are fresh enough to use?
Absolutely! Fresh eggs are a must for custard. A simple freshness test involves placing the eggs in a bowl of water; if they sink, they’re fresh. If they float, they’re no longer good. Also, check for any off smells when cracked open.
What should I do if my custard turned out grainy?
Very! A grainy texture usually results from curdled eggs due to overheating or not mixing the warm milk slowly enough into the egg mixture. To avoid this, always warm your milk gently and temper the eggs by pouring in the milk slowly while stirring continuously. If your custard does end up grainy, you can try blending it again until smooth.
How should I store the custard after making it?
You can store your Creamy Vanilla Custard in an airtight container in the refrigerator for up to 3 days. Just remember to chill it completely before covering to prevent condensation, which could affect its texture. I often cover it tightly to avoid absorbing any fridge odors.
Can I freeze the custard to use later?
Yes! To freeze, place your custard in a freezer-safe container, leaving some space for expansion, and seal it tightly. It can be frozen for up to 2 months. When you’re ready to enjoy, thaw it overnight in the fridge. Just a heads-up: the texture may change slightly but should still be delicious!
What’s a good way to enhance the custard’s flavor?
Definitely! You can blend in different extracts like almond or even citrus zest for a fresh twist. For toppings, I recommend adding seasonal fruits such as berries or sliced peaches just before serving to elevate the flavors further!
Is this custard safe for people with nut allergies?
Yes! As long as you stick to the basic recipe without any nut-based substitutes, it’s completely nut-free. Always check labels on any ingredients to ensure they’re allergy-friendly, especially with extracts or pre-packaged items. Enjoy knowing it’s a dessert suitable for everyone!
Creamy Vanilla Custard with Nutmeg
Ingredients
Equipment
Method
- Preheat your oven to 350°F (175°C).
- In a medium saucepan over low heat, warm the whole milk until small bubbles form around the edges, about 5–7 minutes.
- Whisk together the eggs, sugar, and salt in a mixing bowl until just combined, about 1–2 minutes.
- Slowly pour the warm milk into the egg mixture while continuously stirring to avoid curdling.
- Strain the custard mixture into your prepared baking dish to catch any cooked egg bits.
- Place the baking dish inside a larger pan and fill the outer pan with hot water until it reaches about ½ inch up the sides of the inner dish.
- Bake for approximately 55 minutes, checking doneness by inserting a knife in the center.
- Remove the custard from the water bath and let it cool on a wire rack for about 30 minutes, then refrigerate for at least a couple of hours or overnight.