


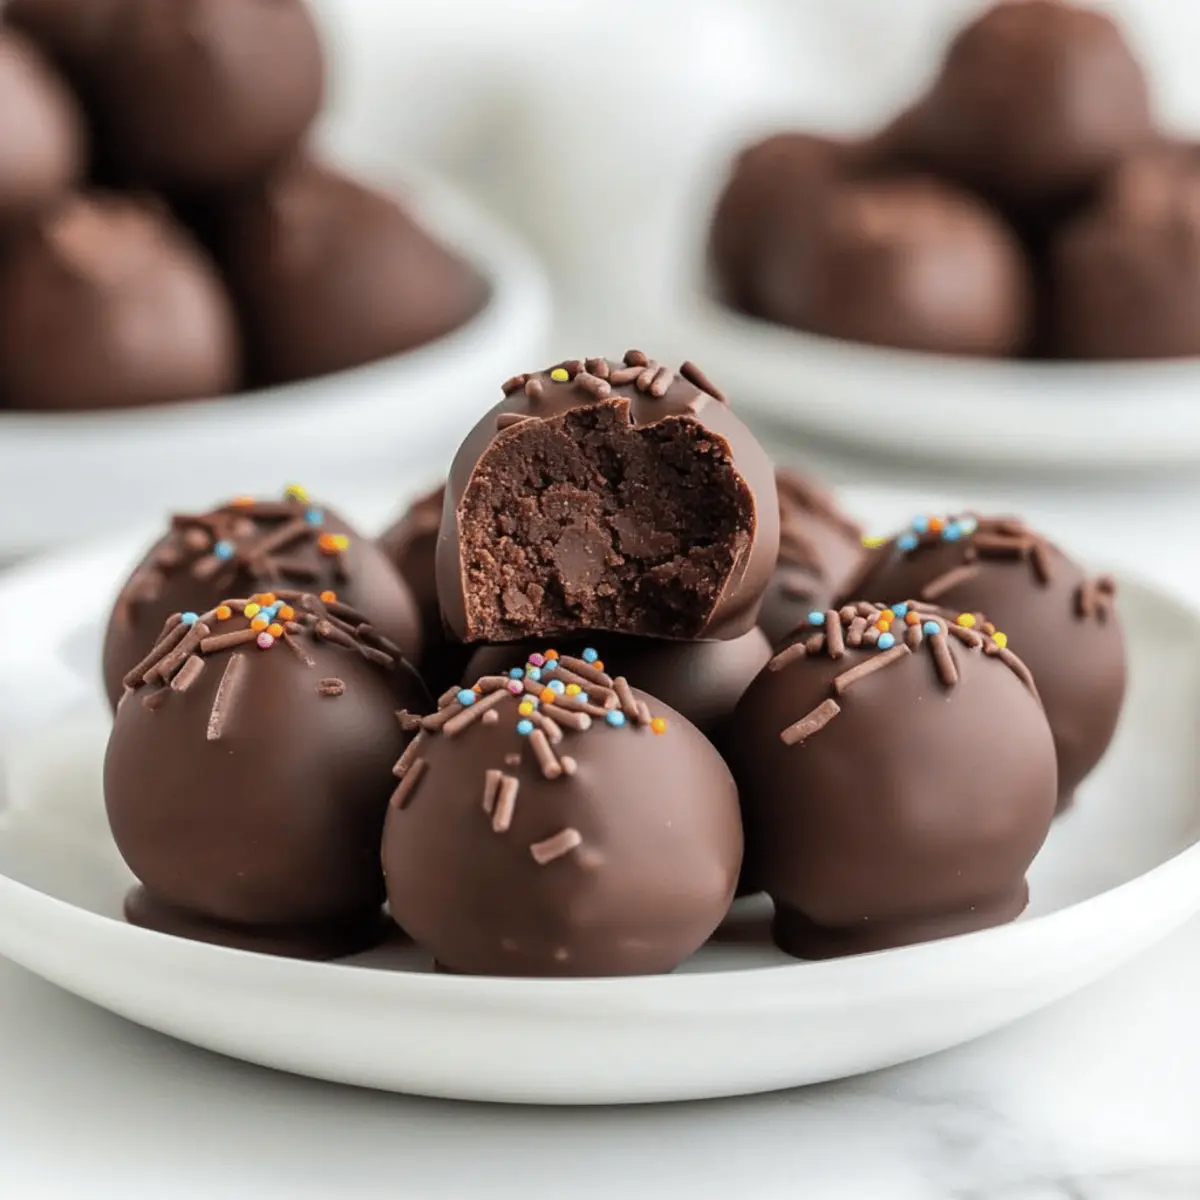
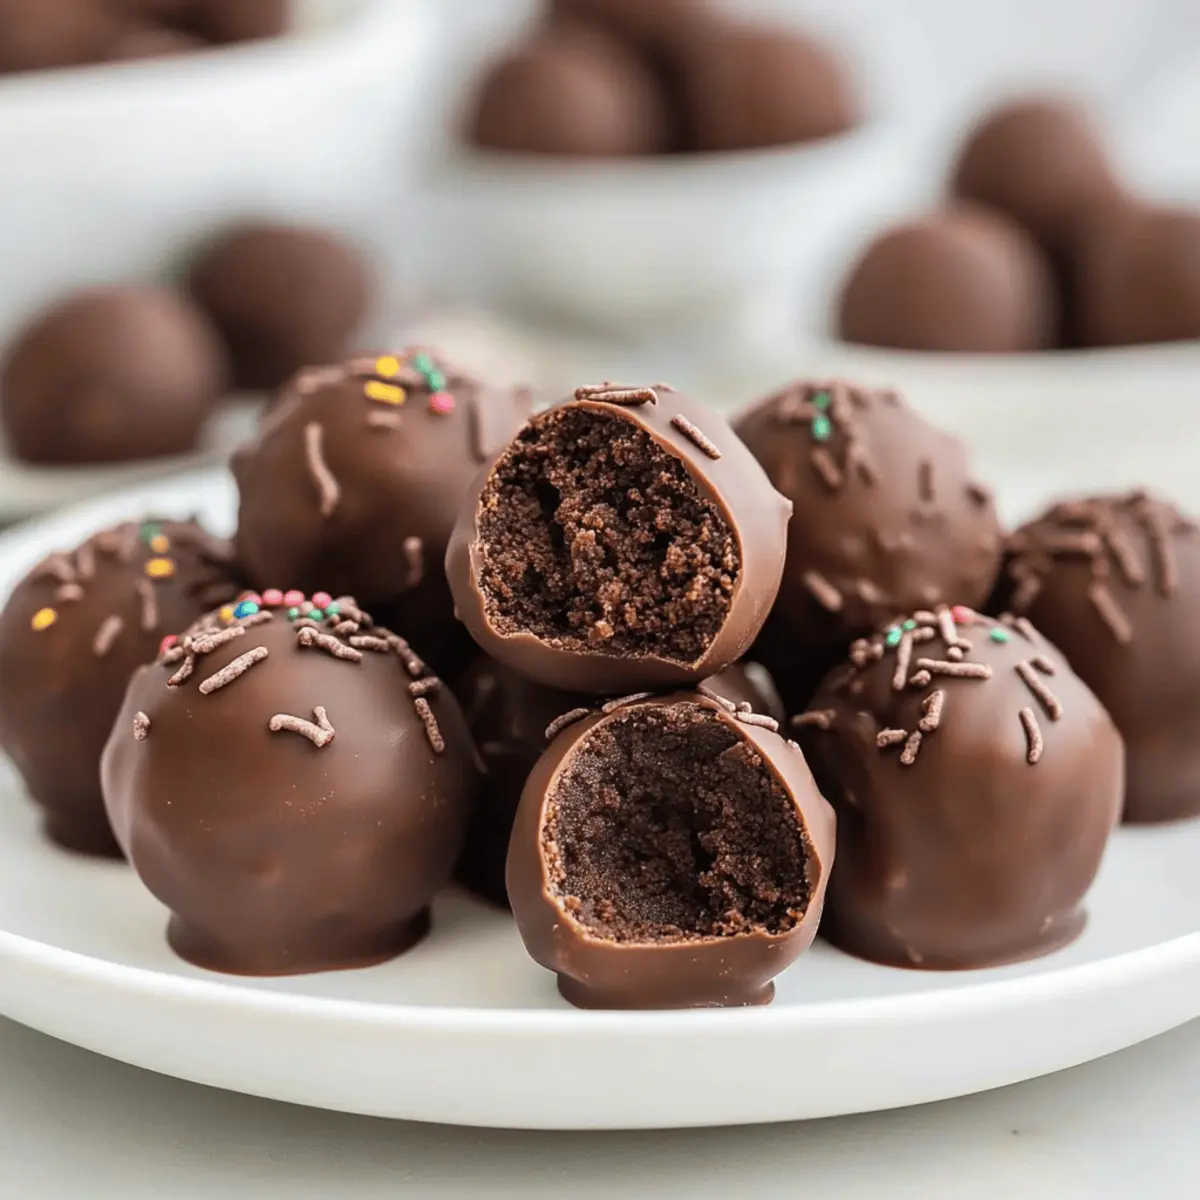
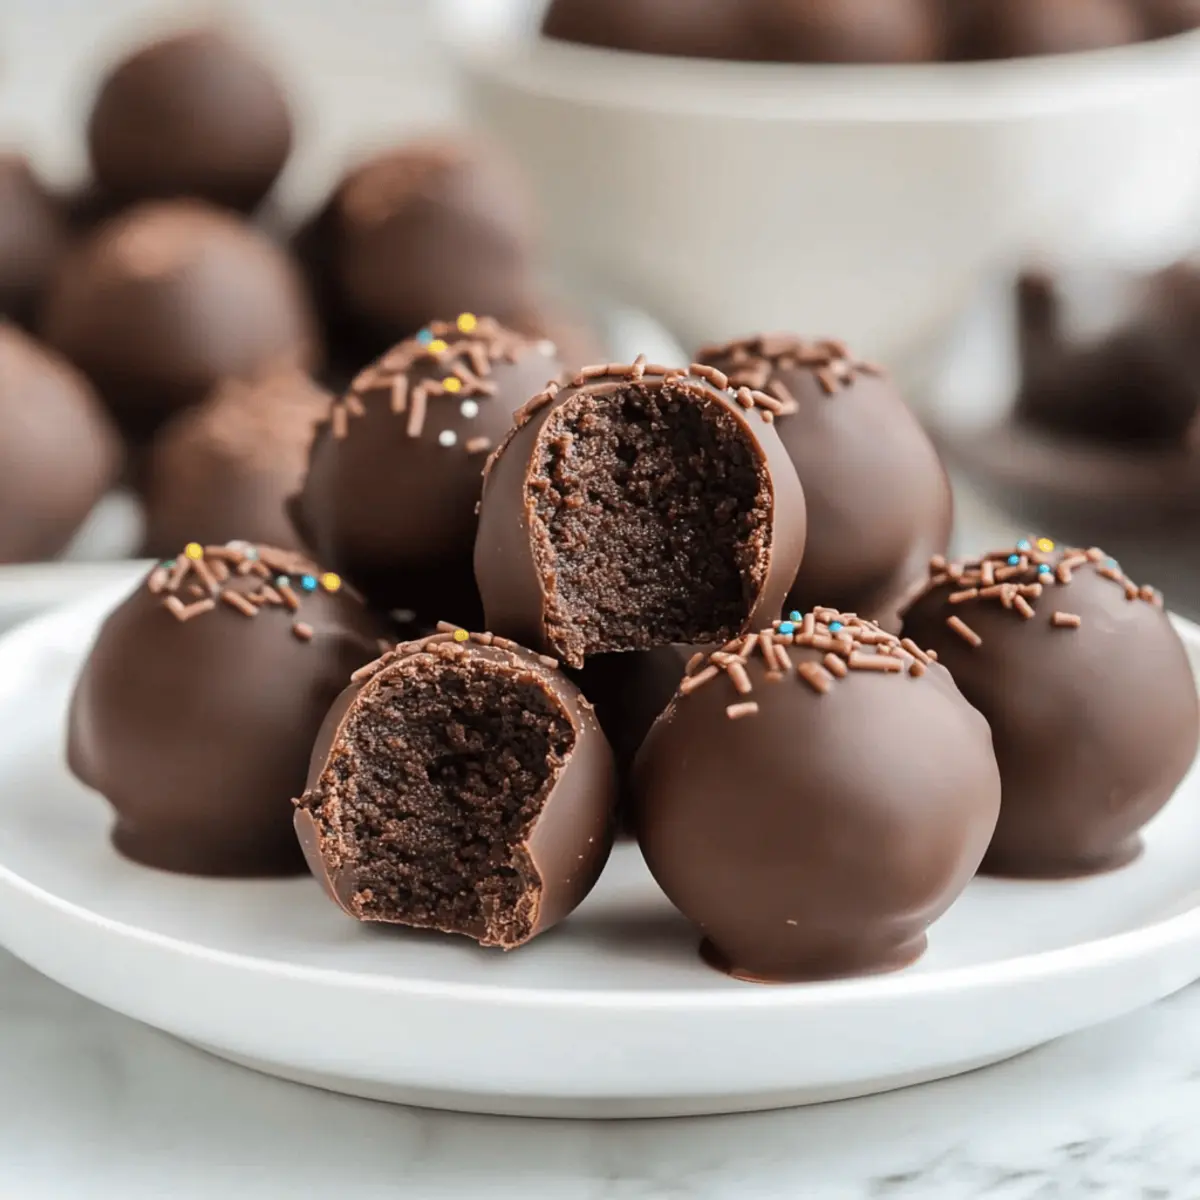
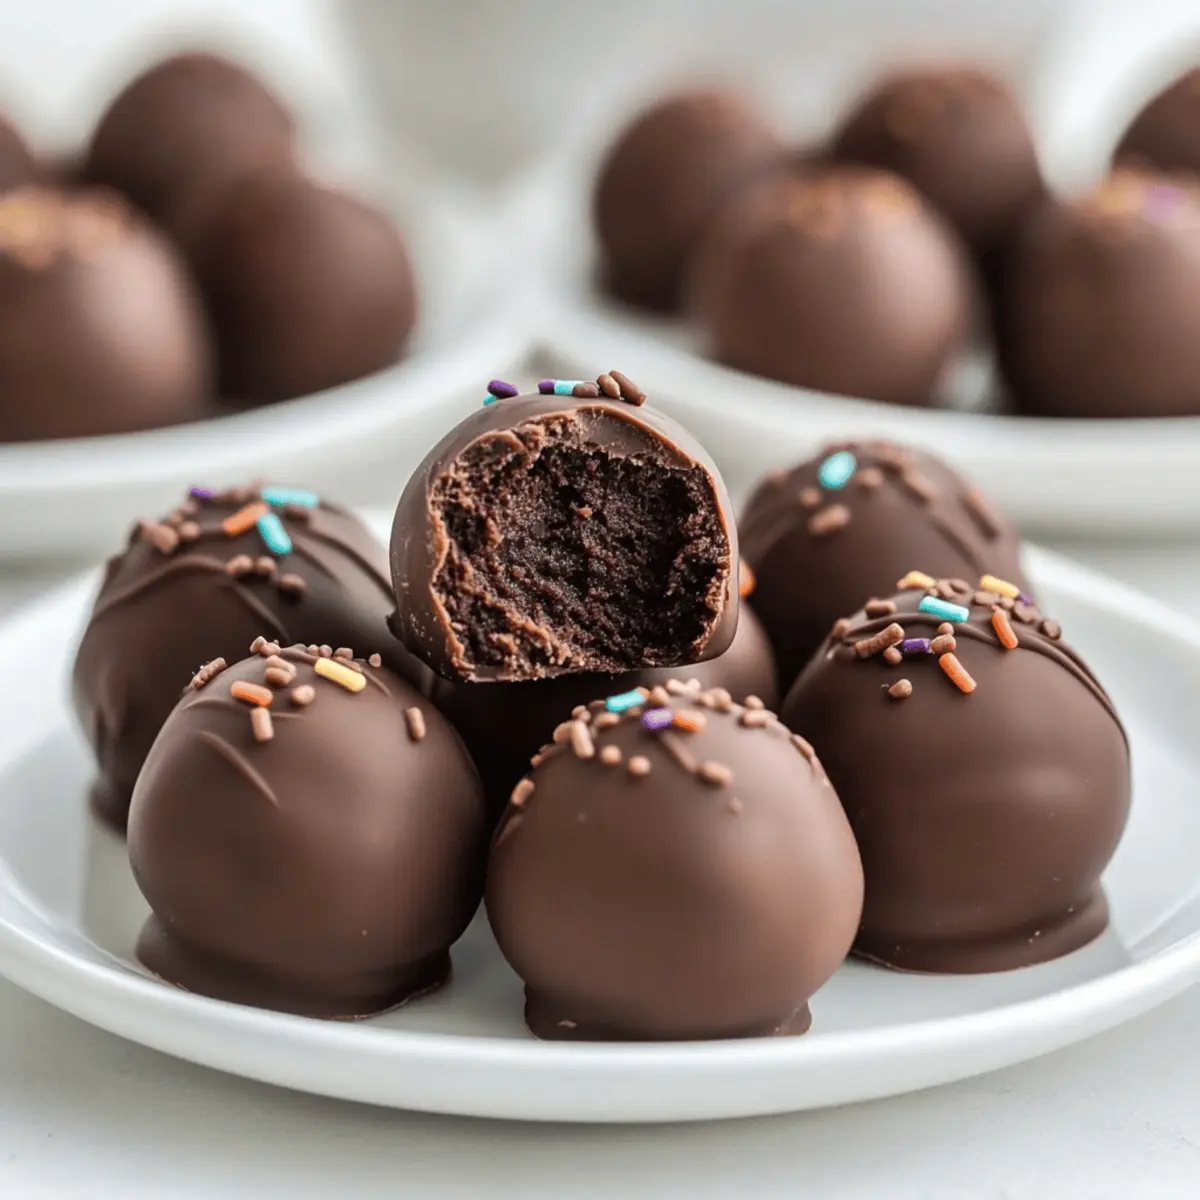
“Can you believe how easy it is to turn a simple box of brownie mix into something utterly delightful?” That’s how I felt the first time I whipped up these Easy Brownie Truffles. They meld together fudgy brownie goodness with a creamy cream cheese filling, all enveloped in a glossy chocolate shell. Not only are these treats a breeze to make—perfect for those last-minute dessert cravings—but they also bring a touch of elegance to any holiday gathering. Whether you’re surprising your loved ones with homemade gifts or simply indulging yourself after a long day, these truffles are sure to impress. And let’s not forget, they’re customizable too! Thinking of trying a Gingerbread Truffle or perhaps an Oreo Cookie variation? What flavor combination will inspire you today?
Why Are These Truffles so Irresistible?
Delightfully Easy: The simplicity of using a box of brownie mix means anyone can whip these up, even novice bakers.
Crowd-Pleasing Treats: Their rich chocolate flavor and smooth cream cheese center tantalize the taste buds—perfect for gatherings!
Customizable Fun: With endless variations like Gingerbread Truffles or Baileys Truffles, you can tailor them to fit any occasion.
Elegant Presentation: Charming and beautiful, they make perfect homemade gifts that impress loved ones, especially during the holidays!
Quick Indulgence: Ready in about an hour, they save time without sacrificing taste—ideal for last-minute dessert cravings.
Whether you’re in the mood for a cozy night in or looking for a delightful gift, these Easy Brownie Truffles are bound to become your go-to dessert!
Easy Brownie Truffles Ingredients
• Perfect for making your own homemade delights!
For the Truffles
- Box of Brownie Mix (18 ounces) – The base that brings rich chocolate flavor to your Easy Brownie Truffles.
- Full-fat Brick-style Cream Cheese (8 ounces) – Ensures the truffles have a creamy, smooth texture; avoid whipped for best results.
- Chocolate Melting Wafers (3 cups) – Coats the truffles in a luscious chocolate shell; chocolate chips can be used in a pinch.
For Decoration
- Sprinkles – Adds a fun pop of color and texture; feel free to experiment with different types for festive occasions.
Step‑by‑Step Instructions for Easy Brownie Truffles
Step 1: Prepare the Brownies
Preheat your oven to the temperature specified on the brownie mix box, typically around 350°F (175°C). Grease a 9×13-inch baking pan and pour in the brownie mix batter. Bake for about 20-25 minutes until a toothpick inserted in the center comes out with a few moist crumbs. Allow the brownies to cool completely in the pan on a wire rack for about 30 minutes.
Step 2: Mix the Brownies and Cream Cheese
Once cooled, scoop the brownies into a large mixing bowl, discarding the firmer edges for a smooth texture. Using an electric mixer, add 8 ounces of room temperature cream cheese to the brownie mix. Beat at medium speed until the mixture is thoroughly combined and creamy—this may take about 2-3 minutes. The mixture should be smooth with no lumps, creating a luscious filling for your Easy Brownie Truffles.
Step 3: Shape the Truffles
With clean hands or a small cookie scoop, shape the brownie mixture into 1-tablespoon-sized balls and place them on a parchment-lined baking sheet. Ensure the truffles are compact and uniform in size for even coating. Once shaped, cover the baking sheet with plastic wrap and freeze the truffles for about 30 minutes until they are solid enough to dip in chocolate.
Step 4: Melt the Chocolate Coating
While the truffles are chilling, prepare the chocolate coating. Place 3 cups of chocolate melting wafers in a microwave-safe bowl. Heat in 30-second intervals, stirring after each interval until completely melted and smooth—this should take about 1-2 minutes. If using chocolate chips, follow the same method, ensuring your chocolate is silky for a beautiful finish on your Easy Brownie Truffles.
Step 5: Dip the Truffles
Remove the truffles from the freezer and work quickly to dip them. Use a fork to lower each truffle into the melted chocolate, ensuring an even coating. Allow any excess chocolate to drip off before returning the truffles to the parchment-lined baking sheet. Repeat this process for all truffles, coating them in a rich chocolate layer that transforms them into mouthwatering confections.
Step 6: Decorate and Chill
While the chocolate is still wet, sprinkle your favorite toppings, like colorful sprinkles, over each truffle for a festive touch. Once decorated, refrigerate the truffles for about 15-20 minutes, or until the chocolate coating has completely set. This final chill ensures the truffles retain their shape and have a delightful crunch when you take a bite of your delicious Easy Brownie Truffles.
Easy Brownie Truffles Variations
Do you want to shake things up? These delightful truffles can take on a whole new personality with just a few tweaks!
-
Gluten-Free: Swap the regular brownie mix for a gluten-free variant to enjoy these truffles without worry. Perfect for those who love chocolate but need a dietary twist!
-
Vegan Twist: Use a plant-based brownie mix and substitute cream cheese with vegan cream cheese for a dessert that everyone can enjoy. You’ll still experience that rich, fudgy goodness!
-
Espresso Infusion: Add 1-2 tablespoons of espresso powder to the brownie mixture for a mocha flavor that dances on your palate. It’s the perfect pick-me-up treat during a cozy afternoon.
-
Gingerbread Cheer: For a seasonal twist, mix ground ginger and cinnamon into the brownie batter and finish with white chocolate melting wafers. A delightful taste of the holidays in every bite!
-
Nutty Delight: Fold in finely chopped nuts, like walnuts or hazelnuts, into your brownie mixture before shaping into truffles. This adds a delightful crunch and depth to your Easy Brownie Truffles.
-
Baileys Indulgence: Swap out some of the cream cheese for Baileys Irish Cream for an adult treat that’s rich and creamy with a hint of liqueur magic. These are perfect for after-dinner snacking!
-
Citrus Zest: Add a teaspoon of lemon zest to your brownie and cream cheese mixture for a refreshing flavor explosion—embracing a zing that complements the chocolate beautifully!
-
Better Than Takeout: Feeling adventurous? Experiment with the flavors of your favorite desserts! Try incorporating elements from Better Than Takeout dishes for creative fusion ideas that excite your taste buds.
With these variations, you’ll find endless possibilities to create your perfect batch of Easy Brownie Truffles. What will you try first?
What to Serve with Easy Brownie Truffles
Indulging in these delightful truffles opens up a world of pairing possibilities that elevate your dessert experience.
- Rich Coffee: A robust cup of coffee balances the sweetness, enhancing the chocolate flavor while providing a comforting warmth.
- Vanilla Ice Cream: Creamy vanilla ice cream offers a delightful contrast, creating a luscious duo that melts together beautifully.
- Fresh Berries: Ripe strawberries or raspberries bring a burst of freshness and acidity, perfectly complementing the richness of the truffles.
- Champagne: Bubbly champagne adds an elegant touch, making these truffles feel extra special for celebrations or romantic evenings.
- Chocolate Dipped Fruit: For a chocolate lover’s delight, pair the truffles with chocolate-dipped strawberries or bananas for an indulgent snack.
- Nutty Biscotti: Crunchy biscotti with a hint of almond or hazelnut is perfect for dipping alongside these truffles, adding a satisfying crunch.
- Whipped Cream: Light and fluffy whipped cream softens the richness, providing a light and airy counterpart that enhances each bite.
- Dessert Wine: A glass of dessert wine like Port or Moscato melds beautifully with the chocolate, bringing out deeper flavors in each sweet treat.
- Mini Cupcake Liners: Presenting truffles in colorful mini cupcake liners not only looks stunning but adds a fun touch to your dessert table.
- DIY Dessert Boards: Create a dessert board with truffles, assorted nuts, fruits, and cheeses for a delightful assortment that’s perfect for sharing.
How to Store and Freeze Easy Brownie Truffles
Room Temperature: Keep the truffles at room temperature for up to 2 hours; after that, they should be refrigerated to maintain freshness.
Fridge: Store in an airtight container in the refrigerator for up to one week, ensuring the truffles remain fresh and delicious for your indulgent moments.
Freezer: For longer storage, freeze truffles in a single layer for up to two months; once solid, transfer them to an airtight container or freezer bag.
Reheating: Thaw frozen Easy Brownie Truffles in the fridge overnight before serving; avoid microwaving as it may alter their texture.
Make Ahead Options
These Easy Brownie Truffles are perfect for busy home cooks looking to save time without sacrificing flavor! You can prepare the brownie base and cream cheese mixture, rolling them into balls, up to 24 hours in advance and store them in the refrigerator. Simply freeze the truffles as instructed for about 30 minutes, then place them in a sealed container to maintain their shape and quality. When you’re ready to dip and decorate, just follow the melting and coating instructions, and you’ll have your delightful treats ready to impress in no time. The truffles will be just as delicious, offering a sweet solution to quick dessert cravings!
Expert Tips for Easy Brownie Truffles
• Use Room Temperature Ingredients: Make sure the cream cheese is at room temperature for easy blending; cold cream cheese can result in lumpy truffles.
• Chill for Firmness: If the brownie mixture feels too soft to shape into balls, pop it in the fridge for an additional 30 minutes—this helps keep your Easy Brownie Truffles from getting too sticky.
• Mind the Chocolate: Take care when melting chocolate by stirring every 20 seconds to prevent scorching; smooth melted chocolate creates a beautiful coating for your truffles.
• Keep Consistency: Avoid adding liquid flavorings directly; if you want to enhance flavor, adjust the cream cheese quantity accordingly to maintain the right texture.
• Decorate Quickly: Add sprinkles and toppings before the chocolate hardens; this ensures they adhere well and make your truffles look festive and inviting.
Easy Brownie Truffles Recipe FAQs
How do I choose the right brownie mix?
Absolutely! When selecting your brownie mix, look for one that emphasizes rich chocolate flavor. You can also opt for gluten-free versions if needed. Just be mindful of the baking instructions as different brands may vary slightly.
What’s the best way to store my truffles?
I recommend storing your truffles in an airtight container in the refrigerator for up to one week. This keeps them fresh and ready to enjoy at a moment’s notice. If you prefer them at room temperature, just remember they’ll stay good for about 2 hours before needing to be refrigerated again.
Can I freeze Easy Brownie Truffles?
Certainly! To freeze your truffles, place them in a single layer on a baking sheet and freeze until solid, about 1-2 hours. Then, transfer them to an airtight container or a freezer bag for up to two months. When you’re ready to enjoy, simply thaw them in the fridge overnight. No need to rush with the microwave!
What should I do if the truffle mixture is too soft to shape?
Very good question! If your mixture feels sticky and is challenging to roll, pop it in the fridge for another 30 minutes. This cooling period firms up the mixture, making it easier to form consistent 1-tablespoon-sized balls.
Are there any dietary considerations for these truffles?
Yes! Keep in mind that the cream cheese can be a dietary concern for some, as it contains dairy. If you need a dairy-free option, try using a plant-based cream cheese substitute. Just ensure you stick to the same measurements for consistency!
Decadent Easy Brownie Truffles That Melt in Your Mouth
Ingredients
Equipment
Method
- Preheat your oven to the temperature specified on the brownie mix box, typically around 350°F (175°C). Grease a 9x13-inch baking pan and pour in the brownie mix batter. Bake for about 20-25 minutes until a toothpick inserted in the center comes out with a few moist crumbs. Allow the brownies to cool completely in the pan on a wire rack for about 30 minutes.
- Once cooled, scoop the brownies into a large mixing bowl, discarding the firmer edges for a smooth texture. Using an electric mixer, add 8 ounces of room temperature cream cheese to the brownie mix. Beat at medium speed until the mixture is thoroughly combined and creamy—this may take about 2-3 minutes. The mixture should be smooth with no lumps.
- With clean hands or a small cookie scoop, shape the brownie mixture into 1-tablespoon-sized balls and place them on a parchment-lined baking sheet. Ensure the truffles are compact and uniform in size for even coating. Once shaped, cover the baking sheet with plastic wrap and freeze the truffles for about 30 minutes until they are solid enough to dip in chocolate.
- While the truffles are chilling, prepare the chocolate coating. Place 3 cups of chocolate melting wafers in a microwave-safe bowl. Heat in 30-second intervals, stirring after each interval until completely melted and smooth—this should take about 1-2 minutes.
- Remove the truffles from the freezer and work quickly to dip them. Use a fork to lower each truffle into the melted chocolate, ensuring an even coating. Allow any excess chocolate to drip off before returning the truffles to the parchment-lined baking sheet.
- While the chocolate is still wet, sprinkle your favorite toppings, like colorful sprinkles, over each truffle for a festive touch. Once decorated, refrigerate the truffles for about 15-20 minutes, or until the chocolate coating has completely set.