


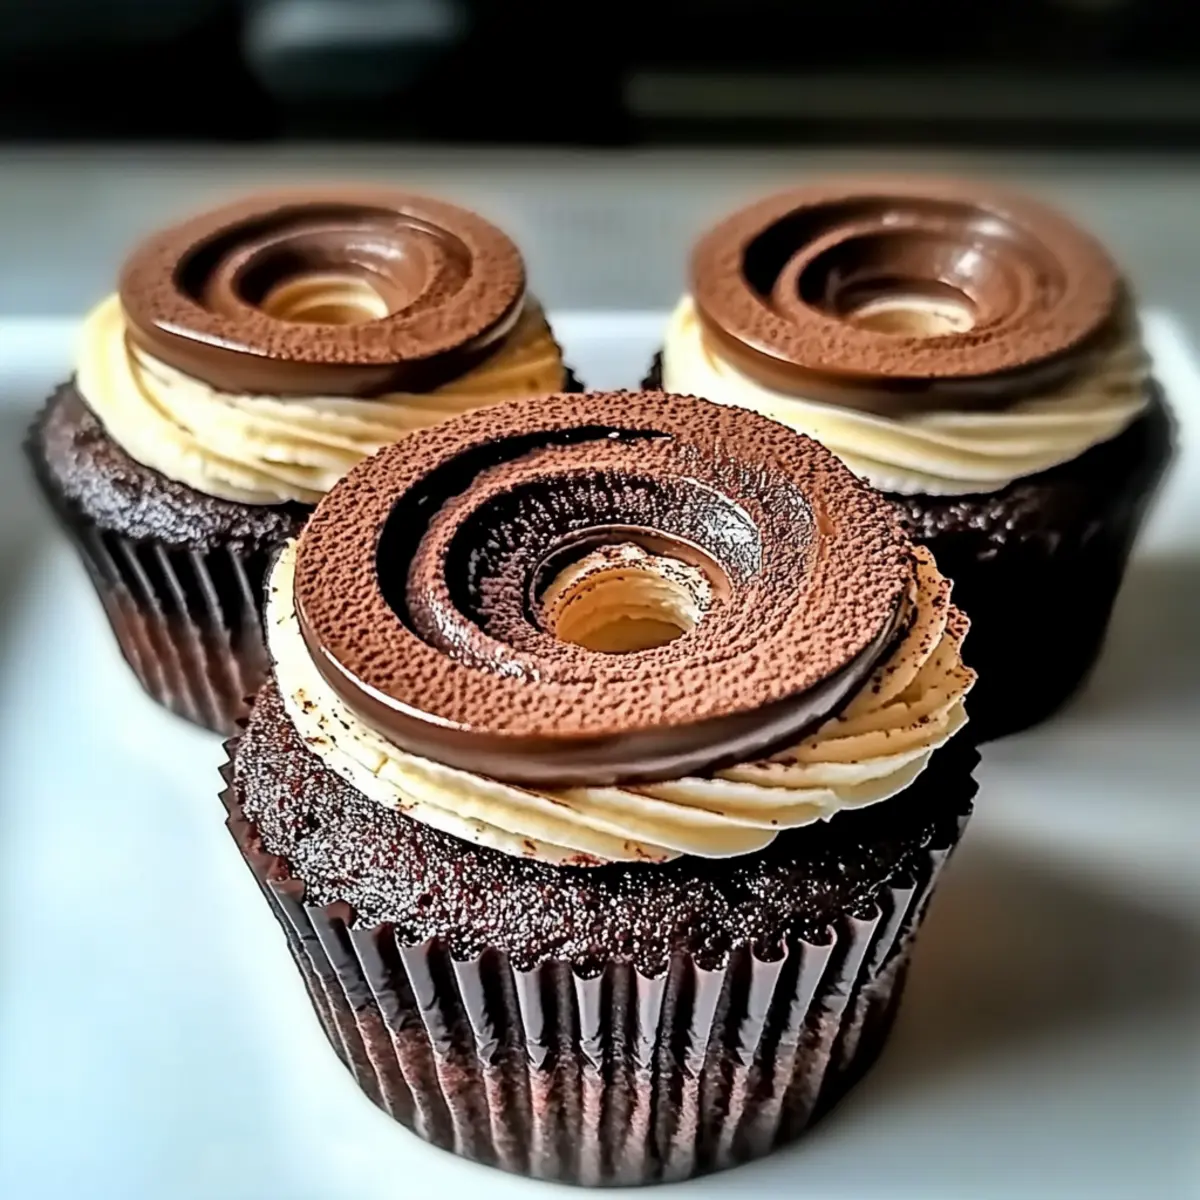
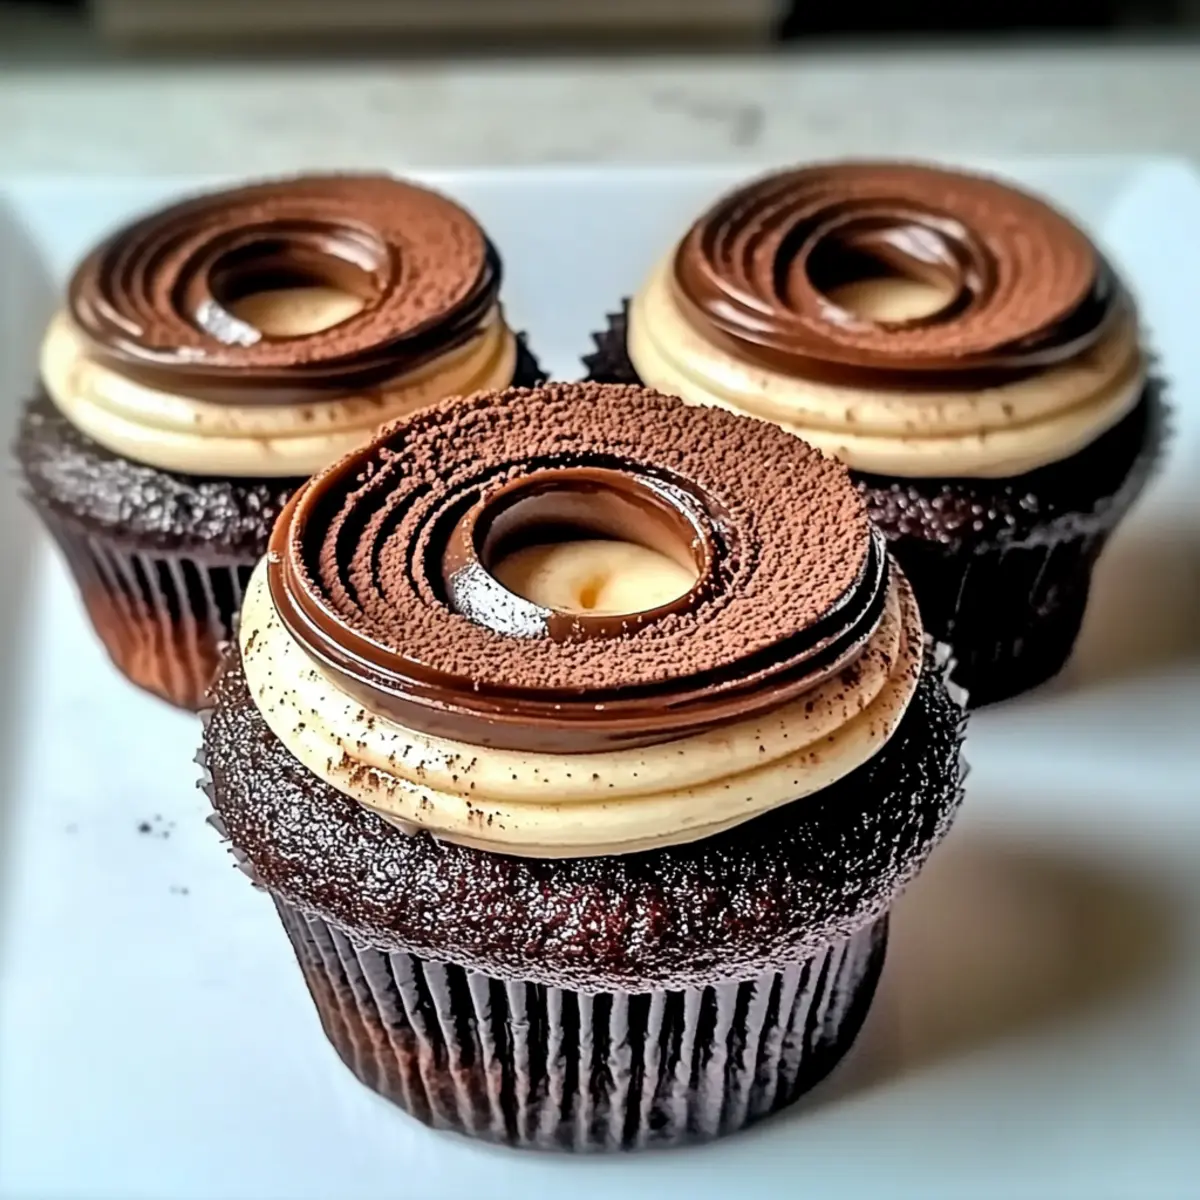
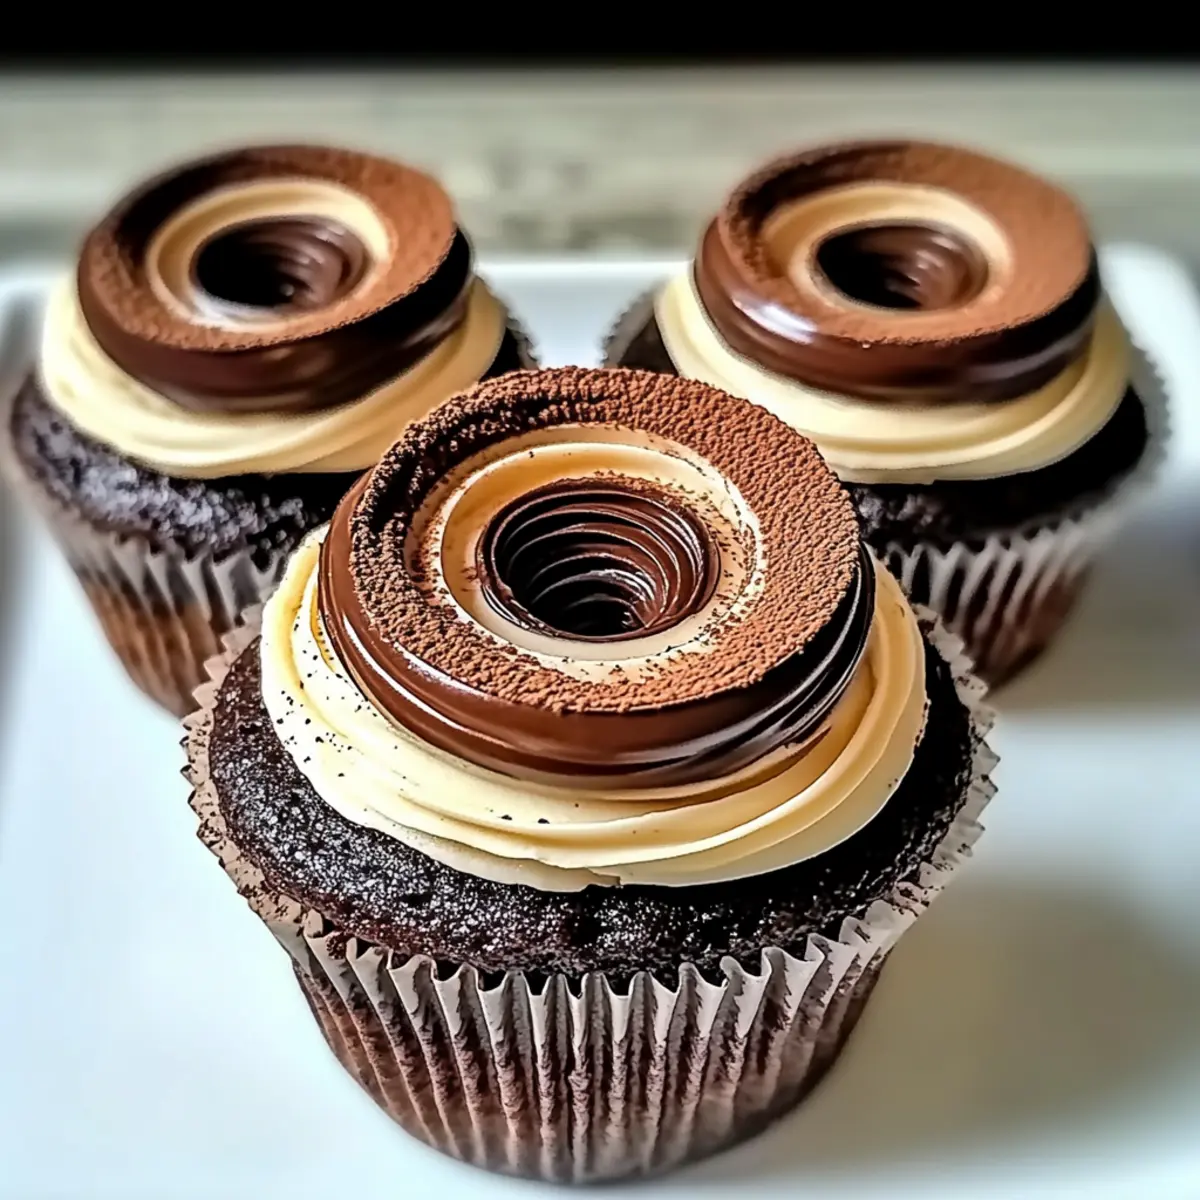
As I stood in my kitchen, the aroma of rich coffee and sweet chocolate wafted through the air, instantly transporting me to my favorite café in Italy. Today, I’m excited to share my recipe for Gluten-Free Chocolate Tiramisu Cupcakes, a delectable treat that combines the classic flavors of traditional tiramisu into an easy-to-make dessert. These delightful cupcakes are quick to prepare and versatile, making them perfect for any occasion—be it a family gathering or a cozy night in. Plus, they cater to various dietary needs, proving that indulgence doesn’t have to be off-limits. Curious to see how a touch of espresso mascarpone can elevate your baking game? Let’s dive in!
Why Are These Cupcakes So Irresistible?
Indulgent Flavor: Each bite offers a delightful combination of rich chocolate and bold espresso that pays homage to classic tiramisu.
Quick Prep: With easy-to-follow steps, these cupcakes come together in no time—perfect for when cravings strike!
Diet-Friendly: Gluten-free and adaptable with dairy-free options, everyone can savor this tasty treat.
Versatile Variations: Feel free to get creative by adding your favorite flavors, like berries or liqueurs, for a personalized touch.
Crowd-Pleasing Appeal: These cupcakes are a surefire hit at gatherings, sure to impress friends and family alike.
Elevate your dessert table with these irresistible delights; they’re just as special as traditional tiramisu!
Gluten-Free Tiramisu Cupcake Ingredients
• Get ready to whip up some indulgence with these delightful cupcakes!
For the Cupcakes
- Gluten-Free All-Purpose Flour – Substitute standard flour to ensure everyone can enjoy these treats.
- Cocoa Powder – Opt for dark cocoa to unlock deep chocolate depths in every bite.
- Baking Powder – Freshness is key here; it helps keep your cupcakes light and fluffy.
- Granulated Sugar – Sweetens the batter wonderfully; consider coconut sugar for a healthier twist.
- Eggs – They provide the moisture and structure; if you’re vegan, flax eggs are a fantastic substitute!
- Almond Milk – A great dairy-free option to keep the cupcakes moist and delicious.
- Vegetable Oil – Keeps the cupcakes juicy; melted butter works beautifully too.
- Espresso – Infuses that authentic tiramisu flavor; instant coffee can work if you’re in a pinch.
- Mascarpone Cheese – The secret to a creamy filling; ricotta can be a lighter alternative.
- Additional Cocoa Powder (for dusting) – This adds a lovely finish and extra chocolatey goodness!
These Gluten-Free Chocolate Tiramisu Cupcakes are a true testament to indulgence meeting dietary needs, and you won’t want to miss out!
Step-by-Step Instructions for Gluten-Free Chocolate Tiramisu Cupcakes
Step 1: Preheat the Oven
Begin by preheating your oven to 350°F (175°C). While the oven warms up, prepare a muffin tin by lining it with cupcake liners, ensuring they’re securely positioned to hold the batter as it rises. This initial step sets the stage for those delightful Gluten-Free Chocolate Tiramisu Cupcakes!
Step 2: Mix Dry Ingredients
In a large mixing bowl, whisk together your gluten-free all-purpose flour, cocoa powder, baking powder, and granulated sugar. Make sure the mixture is smooth and well-blended with no lumps. This combination will serve as the foundation of your rich and indulgent cupcakes, so take your time to ensure it’s combined thoroughly.
Step 3: Combine Wet Ingredients
In a separate bowl, crack the eggs and whisk them together with the almond milk and vegetable oil until the mixture is smooth and well incorporated. This step is crucial for achieving the perfect texture in your cupcakes, so whisk vigorously to combine these ingredients thoroughly before moving on to the next stage.
Step 4: Blend Mixtures
Gently pour the wet mixture from the previous step into the bowl of dry ingredients, stirring carefully with a spatula or wooden spoon. Mix just until the ingredients are combined; be careful not to overmix, as this can lead to dense cupcakes. You want a batter that’s smooth but still fluffy for your Gluten-Free Chocolate Tiramisu Cupcakes.
Step 5: Fill Liners
Using a scoop or tablespoon, fill the cupcake liners about two-thirds full with the prepared batter. This will allow enough room for the cupcakes to rise beautifully without overflowing during baking. As you fill the liners, keep an eye out for even amounts to ensure uniform baking.
Step 6: Bake
Place the filled muffin tin into the preheated oven and bake for 18-20 minutes. To check for doneness, insert a toothpick into the center of a cupcake; it should come out clean or with a few moist crumbs attached. This step is crucial to ensure your cupcakes are cooked through but still moist.
Step 7: Cool
Once the cupcakes are baked to perfection, remove them from the oven and let them cool in the tin for about 5 minutes. After this brief resting period, carefully transfer the cupcakes to a wire rack. Allow them to cool completely before adding the delicious filling.
Step 8: Prepare Filling
In a mixing bowl, use an electric mixer to whip together the mascarpone cheese and espresso until it reaches a fluffy consistency. This creamy espresso mascarpone mixture will serve as a delectable filling for your cupcakes, so ensure it’s light and airy for the best flavor experience.
Step 9: Fill Cupcakes
Once the cupcakes are completely cool, use a small knife or cupcake corer to hollow out the center of each cupcake. Fill each hollow with the whipped espresso mascarpone mixture, ensuring every bite of your gluten-free chocolate tiramisu cupcakes is rich and indulgent.
Step 10: Dust and Serve
To finish, dust the tops of the filled cupcakes with additional cocoa powder for an elegant touch. This final flourish enhances not only the appearance but also the chocolate flavor of your delectable Gluten-Free Chocolate Tiramisu Cupcakes. Serve them up and delight your guests!
Gluten-Free Tiramisu Cupcake Variations
Feel free to get creative with our delightful Chocolate Tiramisu Cupcakes for a personalized twist that everyone will love!
- Gluten-Free: Use a gluten-free all-purpose flour blend to ensure the cupcakes remain deliciously fluffy without gluten.
- Dairy-Free: Swap out the mascarpone for coconut cream and replace milk with almond milk for a creamy, dairy-free delight.
- Nutty Flavor: Add chopped hazelnuts or walnuts to the batter for a lovely crunch that complements the chocolatey richness.
- Berry Bliss: Fold in fresh raspberries or diced strawberries to the cupcake batter for a fruity freshness that elevates every bite.
- Flavor Twists: Experiment by mixing in flavored liqueurs, such as coffee or hazelnut, into the espresso mascarpone for an adult-only treat.
- Chocolate Lovers: Boost the chocolate flavor by incorporating mini chocolate chips or using dark chocolate cocoa powder for the batter.
- Citrus Zest: Grate some orange or lemon zest into the mascarpone filling to add a refreshing citrus note that balances the richness.
- Heat It Up: For a spicy kick, sprinkle a pinch of cayenne pepper into the batter or the mascarpone filling to surprise and delight your taste buds.
Let your imagination run wild! Each variation brings a unique twist to this classic dessert, making your kitchen adventures all the more exciting.
Storage Tips for Chocolate Tiramisu Cupcakes
Room Temperature: Store your cupcakes in an airtight container for up to 1 day to maintain their freshness and texture.
Fridge: Keep the Chocolate Tiramisu Cupcakes in the refrigerator for up to 3 days. Make sure they are in a sealed container to prevent them from drying out.
Freezer: Wrap individual cupcakes in plastic wrap or foil and freeze for up to 2 months. To enjoy later, simply thaw in the refrigerator before filling.
Reheating: If you prefer your cupcakes warm, briefly heat them in the microwave for about 10-15 seconds, but be cautious not to overheat, which could melt the filling.
Make Ahead Options
These Gluten-Free Chocolate Tiramisu Cupcakes are perfect for busy home cooks looking to save time without sacrificing flavor! You can bake the cupcakes up to 24 hours in advance; simply allow them to cool completely, then store them in an airtight container at room temperature. The delicious espresso mascarpone filling can be prepared up to 3 days ahead—just keep it refrigerated in a separate container to maintain its creamy texture. When you’re ready to serve, hollow out each cupcake and fill with the prepared mascarpone mixture, then dust with cocoa powder for a stunning finish. This way, you’ll have a decadent treat ready to impress your guests with minimal last-minute effort!
What to Serve with Gluten-Free Chocolate Tiramisu Cupcakes
Indulge in a glorious dessert experience that delights the senses and complements your decadent treat in style.
- Rich Vanilla Ice Cream: Creamy ice cream provides a sweet contrast to the rich chocolate and coffee flavors, enhancing the experience with each bite.
- Fresh Berries: Whether strawberries, raspberries, or blueberries, their tartness balances the sweetness of the cupcakes, offering a refreshing contrast that brightens every mouthful.
- Dollop of Whipped Cream: A light and fluffy whipped cream serves as the perfect topping, adding a touch of elegance and creaminess that enhances the overall richness of the dessert.
- Espresso or Coffee: Elevate your tasting experience with a hot cup of espresso or rich coffee, echoing the cupcake’s espresso infusion and providing a comforting warmth.
- Chocolate-Covered Strawberries: Luxuriate in the chocolate with these fruity bites that make for a delightful pairing, balancing flavors and textures effortlessly.
- Mint Chocolate Chip Milkshake: The cool, minty shake adds a fun twist that harmonizes beautifully with the chocolate tiramisu flavor profile while cooling down the palate.
- Chocolate Sauce Drizzle: For an extra touch of decadence, drizzle some chocolate sauce over your cupcakes. The added richness will make each bite a true chocolate lover’s dream!
Tips for the Best Chocolate Tiramisu Cupcakes
Fresh Ingredients: Use fresh baking powder to ensure your cupcakes rise beautifully; old ingredients can lead to dense cupcakes.
Mix with Care: Avoid overmixing the batter—gentle folding keeps the cupcakes light and fluffy, a must for gluten-free chocolate tiramisu cupcakes.
Cool Completely: Allow the cupcakes to cool entirely before filling; this prevents the mascarpone mixture from melting and keeps it intact.
Hollow Out Wisely: Take time to hollow out the centers of the cupcakes evenly for the perfect amount of espresso mascarpone filling in each bite.
Dust for Delight: A light dusting of cocoa powder gives your cupcakes a finished look and enhances the rich chocolate flavor.
Chocolate Tiramisu Cupcakes Recipe FAQs
What kind of gluten-free flour should I use?
Absolutely! For the best results, I recommend a high-quality gluten-free all-purpose flour blend. This ensures your cupcakes have the right structure and texture. If you have a specific brand that you prefer, just make sure it contains xanthan gum, as it helps mimic the elasticity of wheat flour.
How should I store the cupcakes to keep them fresh?
To maintain their deliciousness, store your cupcakes in an airtight container at room temperature for up to 1 day. If you need to keep them longer, placing them in the refrigerator can extend their shelf life to about 3 days. Just make sure they are sealed well to avoid drying out—nobody likes a dry cupcake!
Can I freeze Chocolate Tiramisu Cupcakes?
Yes, you can! To freeze, wrap each cupcake individually in plastic wrap or aluminum foil, then place them in a freezer-safe bag or container. They will stay fresh for up to 2 months. When you’re ready to enjoy them, thaw in the refrigerator overnight before adding the espresso mascarpone filling.
What if my cupcakes turn out dense?
No worries! If you find your cupcakes are dense, it’s often due to overmixing the batter or using old baking powder. Be sure to mix gently until just combined and check the freshness of your baking powder before starting. A light touch and fresh ingredients really make a difference!
Are these cupcakes safe for people with nut allergies?
While almond milk is a great substitute for dairy, it may not be suitable for those with nut allergies. Instead, you can use oat milk or another dairy-free alternative. Always double-check ingredient labels if you’re making these for someone with allergies to ensure safety!
What are some variations I can try with this recipe?
Very! You can personalize your Chocolate Tiramisu Cupcakes with a range of add-ins. Adding mini chocolate chips to the batter can boost the chocolate flavor, while a splash of your favorite liqueur or some fresh berries in the filling can create a unique twist. Go wild with your creativity!

Gluten-Free Chocolate Tiramisu Cupcakes That Impress Every Time
Ingredients
Equipment
Method
- Preheat the oven to 350°F (175°C) and line a muffin tin with cupcake liners.
- Whisk together gluten-free flour, cocoa powder, baking powder, and granulated sugar in a large mixing bowl.
- In a separate bowl, whisk eggs, almond milk, and vegetable oil until smooth.
- Pour the wet mixture into the dry ingredients and stir until just combined.
- Fill the cupcake liners about two-thirds full with the batter.
- Bake for 18-20 minutes, until a toothpick comes out clean or with a few moist crumbs.
- Cool in the tin for 5 minutes before transferring to a wire rack to cool completely.
- Whip mascarpone cheese and espresso in a mixing bowl until fluffy.
- Hollow out the center of each cupcake and fill with the whipped mascarpone mixture.
- Dust the tops with additional cocoa powder before serving.