


A warm kitchen filled with the scent of freshly baked bread is my happy place. Today, I’m thrilled to share a recipe that transforms your breakfast routine: Homemade Gluten-Free English Muffins. These delightful treats boast a soft and chewy texture, perfectly crafted with all the necessary nooks for toasting and slathering with your favorite toppings. What’s more, they are quick to prepare and packed with high protein, making them not only a gluten-free staple but also a nutritious kick-start to your day. Whether you’re a seasoned chef or just starting your culinary journey, these muffins will inspire you to say goodbye to store-bought options. Curious about how easy it is to whip these up? Let’s dive in!
Why are gluten-free muffins so amazing?
Freshly Baked Goodness: The aroma of warm, gluten-free English muffins will fill your kitchen with an irresistible scent, promising delicious breakfast moments.
Simplicity Made Delicious: With straightforward steps, even novice bakers can confidently create a delightful treat.
Protein-Packed: Enjoy all the benefits of a high-protein breakfast without compromising on taste.
Versatile Toppings: Top them with anything from classic butter and jam to savory spreads, making every bite unique!
Freezing Convenience: Make a batch ahead of time and store them for quick, nutritious breakfasts in the future. It’s a perfect way to avoid bland, fast food options!
Gluten-Free English Muffin Ingredients
For the Muffin Base
- Instant Yeast – Essential for leavening, helping create that fluffy muffin texture; always check for freshness by ensuring it foams.
- Sugar – Sweetens the mixture and activates the yeast for optimal rise.
- Warm Milk (¾ cup) – Adds moisture and richness; can substitute with lactose-free or dairy-free options.
- Warm Water (¾ cup) – Activates the yeast for a perfect dough consistency.
- Apple Cider Vinegar (2 tsp) – Contributes to a fluffier texture by providing an acidic environment; feel free to swap with white vinegar.
- Egg (1) – Adds richness; for a vegan version, a flax egg works perfectly as a substitute.
- Butter (3 tbsp, melted) – Enhances flavor and moisture; substitute with dairy-free butter if desired.
- Gluten-Free Mulino Caputo Fioreglut Flour (2 ¾ cups) – Delivers elasticity similar to traditional flour; using alternatives may hinder the recipe’s success.
- Salt (2 tsp) – Elevates flavor significantly in your muffins.
For the Finishing Touch
- Cornmeal (½ cup) – Sprinkled on baking sheets, it helps achieve that delightful, crispy crust.
Enjoy making these gluten-free English muffins that are not just delicious but a nourishing start to your day!
Step‑by‑Step Instructions for Gluten-Free English Muffins
Step 1: Activate Yeast
In a stand mixer bowl, combine 2 teaspoons of sugar with ¾ cup warm milk and ¾ cup warm water. Sprinkle in 2 teaspoons of instant yeast, then let the mixture sit undisturbed for about 10 minutes, until it becomes foamy. This step is essential for achieving that perfect rise in your gluten-free English muffins.
Step 2: Mix Wet Ingredients
Once the yeast is foamy, add 2 teaspoons of apple cider vinegar, 1 egg, and 3 tablespoons of melted butter into the bowl. Using the paddle attachment of your stand mixer, mix on medium speed until the mixture is well-combined and smooth. This mixture creates the flavorful base for your muffins.
Step 3: Combine with Flour
Gradually incorporate 2 ¾ cups of Gluten-Free Mulino Caputo Fioreglut Flour into the wet mix, adding 2 teaspoons of salt halfway through. Beat the mixture on medium speed for about 3-4 minutes, until the dough is sticky and elastic. It’s important to avoid adding excessive flour, as this can affect the texture of your gluten-free English muffins.
Step 4: First Rise
Transfer the sticky dough to a lightly oiled bowl, covering it with a clean kitchen towel. Allow the dough to rise in a warm, draft-free spot for about 1 hour or until it has doubled in size. This first rise is crucial for developing the airy texture that makes these muffins so delightful.
Step 5: Shape Muffins
After the dough has risen, lightly flour a clean surface and turn the dough out onto it. Gently flatten the dough to about 1 inch thick and use a cookie cutter to cut out rounds. Place the muffins onto parchment-lined baking sheets sprinkled with cornmeal, which adds a crispy touch to the exterior.
Step 6: Second Rise
Cover the shaped muffins with a kitchen towel and allow them to rise for another 30 minutes. This second rise provides the muffins with their light texture and allows for additional expansion. During this time, prepare an evenly heated skillet for cooking.
Step 7: Cooking
Preheat a skillet over medium-low heat and sprinkle the bottom with cornmeal to prevent sticking. Carefully transfer the muffins to the skillet and cook each side for about 5-6 minutes, until they turn golden brown and sound hollow when tapped. This method creates that delightful crust while keeping the inside soft and fluffy.
Step 8: Serving
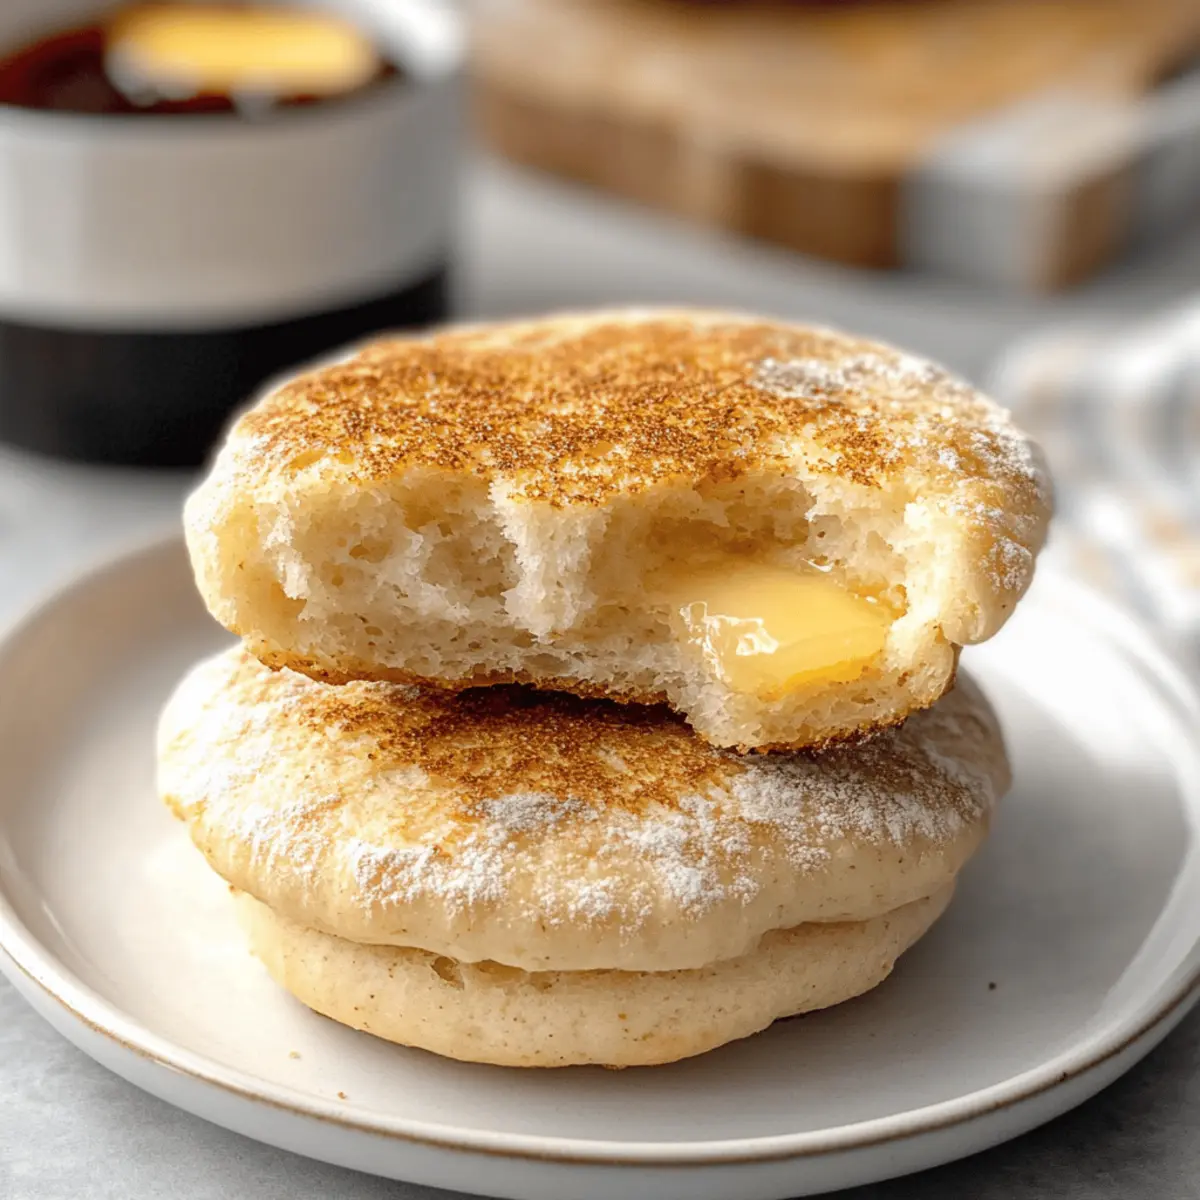
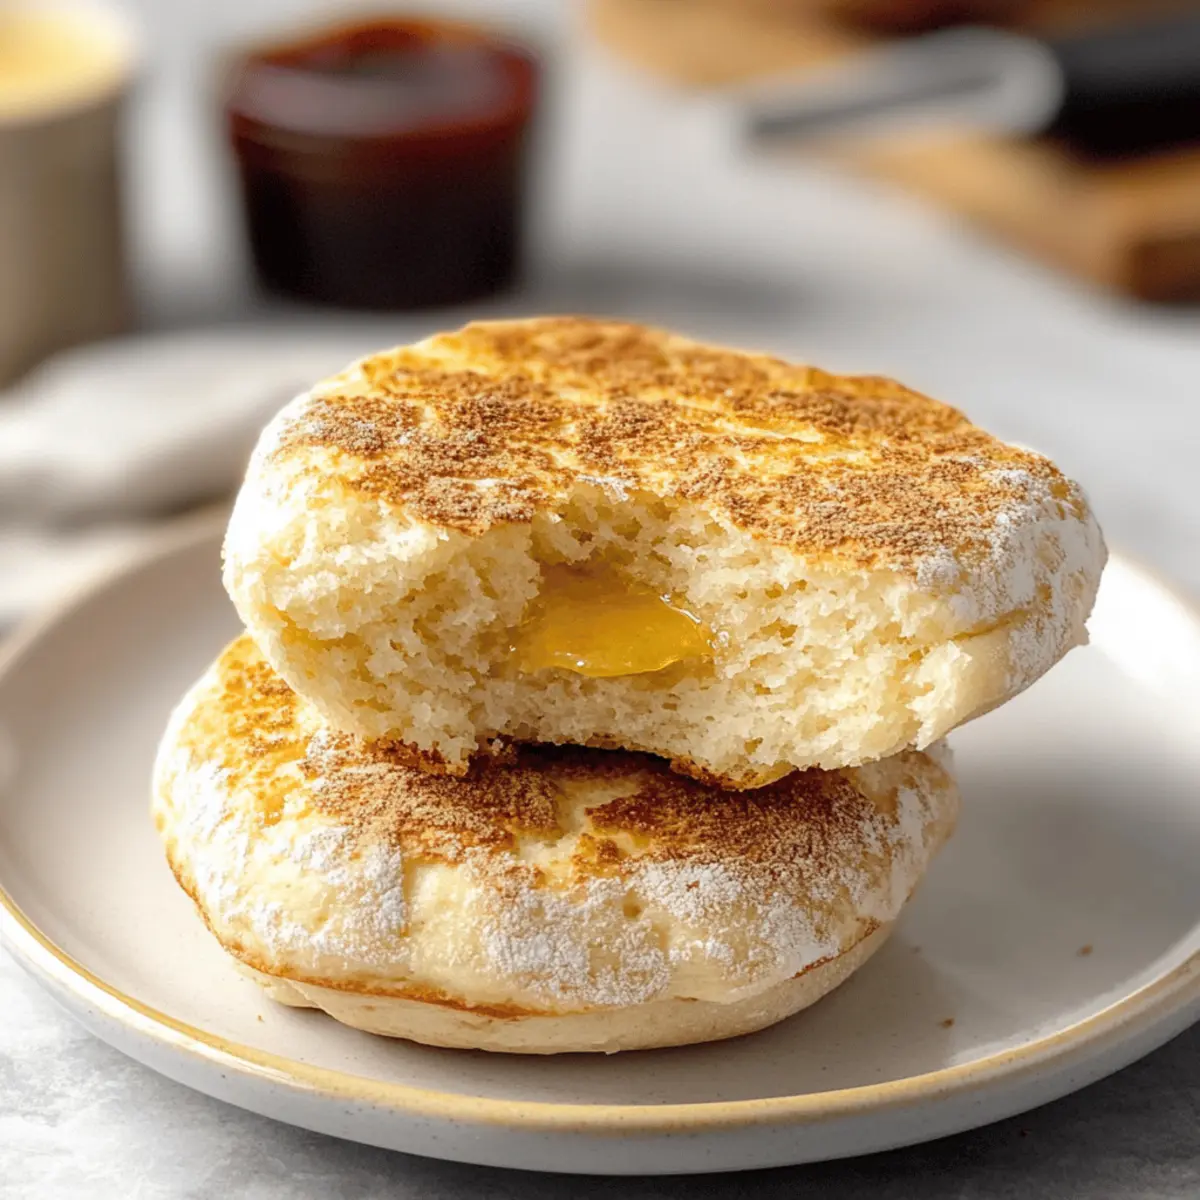
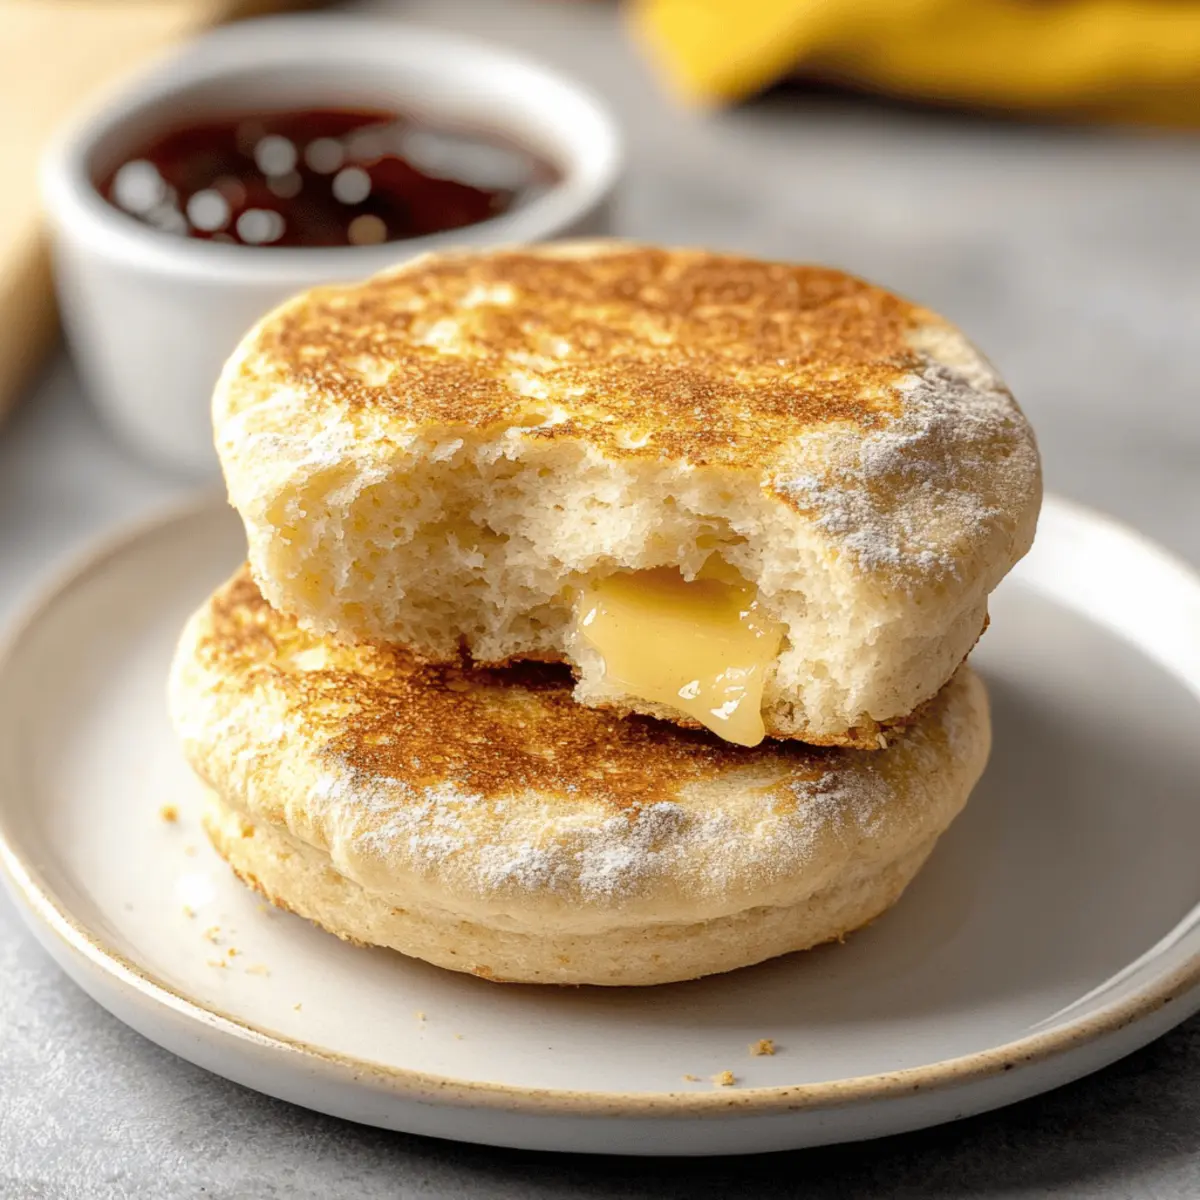
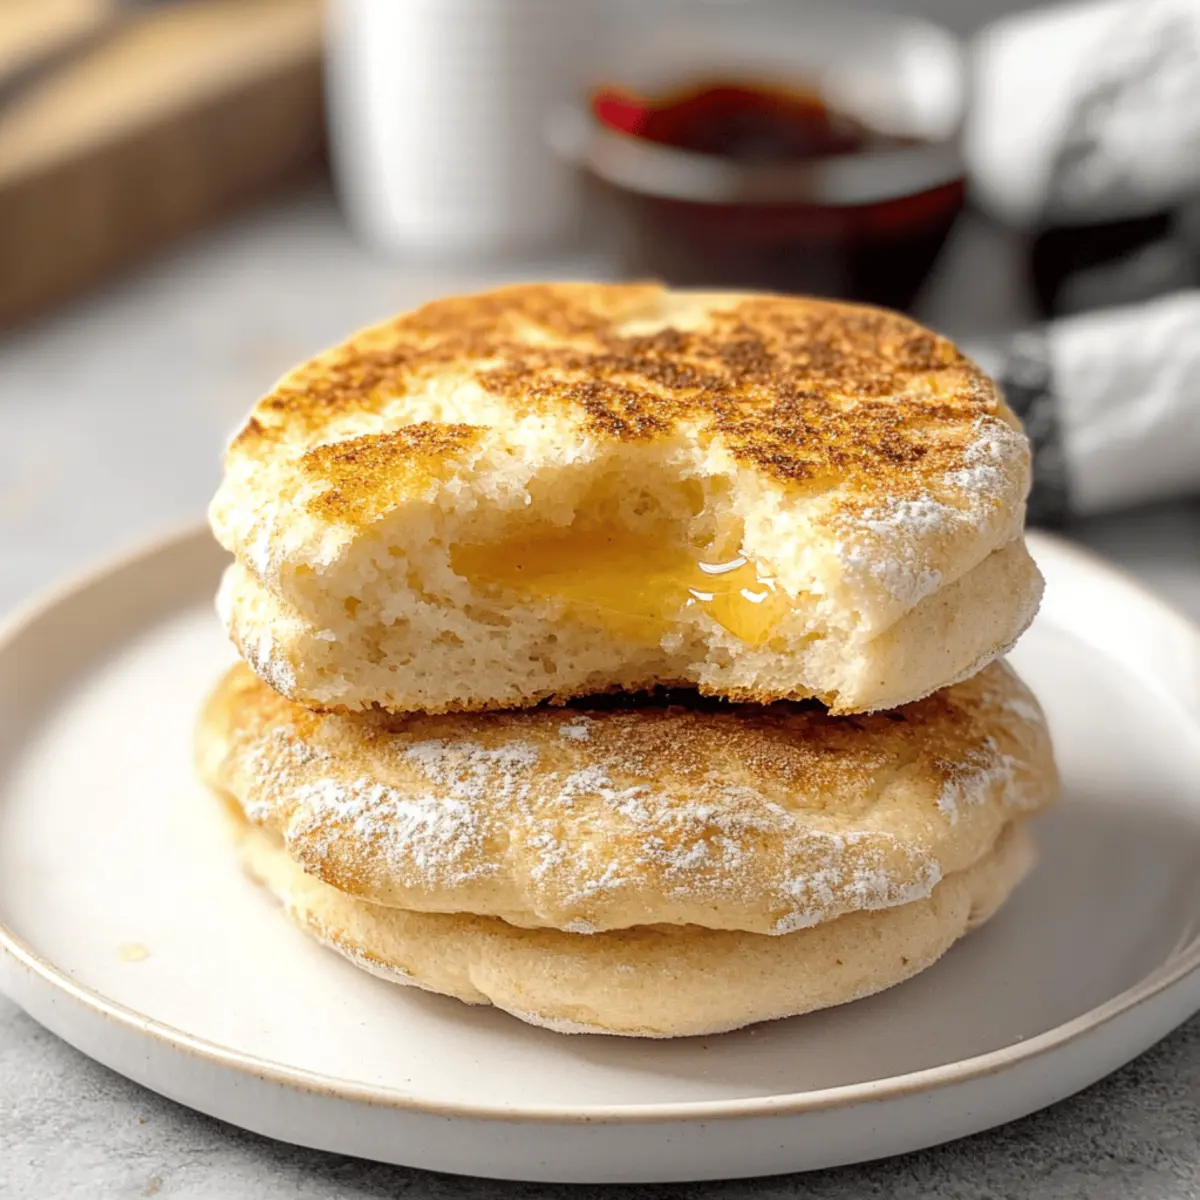
Once cooked, remove the gluten-free English muffins from the skillet and let them cool slightly. To serve, split each muffin with a fork, toast them if you prefer, and enjoy with your favorite spreads or toppings. The final result will showcase nooks and crannies, ideal for holding butter, jam, or other delicious toppings!
What to Serve with Homemade Gluten-Free English Muffins
Transform breakfast into something special with the perfect accompaniments that complement the soft, chewy delight of your English muffins.
- Creamy Avocado Spread: Smooth and rich, this spread adds healthy fats and a refreshing taste that enhances your muffins beautifully.
- Classic Jam or Marmalade: Sweet, fruity preserves bring a burst of flavor and a touch of nostalgia, making every bite pure bliss.
- Scrambled Eggs: Light and fluffy, they offer a protein-packed side that pairs perfectly with the muffins’ texture.
- Smoked Salmon Platter: The savory depth of smoked salmon, paired with cream cheese and capers, makes for a gourmet breakfast experience.
- Fruit Salad: Fresh, vibrant fruits add a sweet and zesty contrast, awakening your palate and balancing the meal. Think of juicy berries, melon, and citrus!
- Nut Butter Delight: Spread almond or peanut butter for an indulgent yet wholesome option, rich with essential nutrients and flavor.
- Herbed Cream Cheese: Blend cream cheese with fresh herbs for a sophisticated twist, elevating your muffins from simple to sublime.
- Fresh Brewed Coffee: Pair your muffins with a cup of your favorite coffee to create the ultimate comforting breakfast experience.
- Honey Drizzle: A simple drizzle of honey adds a natural sweetness that complements the muffins’ baked goodness perfectly.
- Chai Tea Latte: Warm and aromatic, this complement is perfect for a cozy morning and enhances the homemade vibe of your breakfast.
How to Store and Freeze Gluten-Free English Muffins
Fridge: Store your gluten-free English muffins in an airtight container for up to 2 days to maintain freshness. To enjoy, simply slice, toast, and add your favorite toppings.
Freezer: For longer storage, freeze the muffins by wrapping each one tightly in plastic wrap and placing them in a freezer-safe bag or container. They can be frozen for up to 3 months; just thaw before toasting for a delightful breakfast treat.
Reheating: When you’re ready to enjoy them, simply toast the muffins straight from the fridge or freezer. This brings back their chewy texture and allows for perfect crispy edges!
Make-Ahead: If you’d like to prep ahead of time, consider making a batch on the weekend to have these delicious gluten-free English muffins ready for busy weekdays!
Make Ahead Options
These homemade gluten-free English muffins are perfect for meal prep and can save you time on busy mornings! You can prepare the dough up to 24 hours in advance. Simply follow the steps to mix the dough, then cover it and refrigerate overnight. This slow rise not only enhances the flavor but also maintains the muffins’ soft texture. When you’re ready to bake, take the dough out of the fridge, allow it to come to room temperature for about 30 minutes, shape the muffins, and let them rise for another 30 minutes before cooking. With this method, you’ll have warm, delicious gluten-free English muffins ready with minimal effort!
Expert Tips for Gluten-Free English Muffins
- Check Yeast Freshness: Always ensure your yeast is fresh by looking for foam during activation; stale yeast leads to flat muffins.
- Avoid Excess Flour: Resist the urge to add too much flour to your sticky dough, as this can hinder the gluten-free muffins from rising properly.
- Warm Rising Environment: Create a warm, draft-free setting for the first rise; this is essential for achieving those light and airy muffins.
- Use the Right Flour: Stick to Gluten-Free Mulino Caputo Fioreglut Flour; other flours may not yield the desired texture and softness.
- Cook Slowly: Maintain medium-low heat while cooking; rushing this process can result in raw centers and excessively browned exteriors.
Gluten-Free English Muffins: Customization Delight
Feel free to let your creativity flourish by tailoring these muffins to your taste and dietary needs!
- Savory Spin: Add herbs like rosemary or thyme to the dough for a flavorful twist that complements cheesy toppings beautifully.
- Sweeten the Deal: Mix in cinnamon and a touch of honey or maple syrup for a warm, cozy flavor, perfect for breakfast.
- Nuts & Seeds: Toss in chopped nuts or seeds for added texture and crunch. A sprinkle of sunflower seeds can create a delightful nutty flavor!
- Spicy Kick: Incorporate a pinch of cayenne pepper or crushed red pepper flakes into the dough to give your muffins a surprising heat.
- Dairy-Free Delight: Replace butter with coconut oil and use a plant-based milk to ensure these muffins stay dairy-free without sacrificing flavor.
- Fruit Fusion: Add dried fruits like cranberries or apricots to boost sweetness and provide a chewy contrast to the soft muffins.
- Breakfast Sandwich Base: Shape into larger rounds to create the perfect base for egg and cheese breakfast sandwiches for a hearty morning meal.
- Try Different Flours: If you’re adventurous, experiment with a different gluten-free flour blend to see how it influences taste and texture.
With endless possibilities to customize, you’ll never tire of these gluten-free English muffins! If you ever want to explore more creative topping ideas, check out my guide on creative muffin toppings for additional inspiration.
Gluten-Free English Muffins Recipe FAQs
Which type of flour is best for gluten-free muffins?
Absolutely! Using Gluten-Free Mulino Caputo Fioreglut Flour is highly recommended for this recipe. This specific flour has elasticity that closely mimics traditional wheat flour, ensuring your muffins turn out soft and chewy. Alternatives may not produce the same delightful texture, so it’s best to stick with this variety for the best results.
How should I store my gluten-free English muffins?
To keep your muffins fresh, store them in an airtight container at room temperature for up to 2 days. I often keep them on the counter, but if you want to extend their life, consider refrigerating them. Just be sure to toast them to revive the taste and texture when you’re ready to enjoy!
Can I freeze gluten-free English muffins?
Absolutely! For longer storage, wrap each muffin tightly in plastic wrap, then place them in a freezer-safe bag or container. They can be stored in the freezer for up to 3 months. When you want to eat one, simply thaw it at room temperature, then toast to your desired crispiness to bring back that fresh-baked taste.
What can I do if my muffins don’t rise properly?
If you find that your muffins aren’t rising, the most likely culprit is stale yeast. Always ensure your yeast is fresh—check for foaming during the activation step. Also, create a warm environment for rising; sometimes, placing the dough in a slightly heated oven can help. If the dough feels too sticky, avoid adding extra flour, which can inhibit rising.
Are gluten-free muffins suitable for all dietary needs?
Yes! These gluten-free English muffins cater to various dietary needs, including those who are gluten intolerant. You can also make them vegan by substituting the egg with a flax egg (1 tablespoon flaxseed meal mixed with 2.5 tablespoons water). Just remember to check all your ingredient labels for potential allergens.
How can I customize my gluten-free English muffins?
Very! Feel free to experiment with mix-ins like herbs, spices, or even cheese for a savory twist. For sweet versions, consider adding dried fruits or chocolate chips. The toppings are limitless; think about spreading nut butter, cream cheese, or even using them as a base for breakfast sandwiches!
Gluten-Free English Muffins: Soft, Chewy Breakfast Bliss
Ingredients
Equipment
Method
- In a stand mixer bowl, combine 2 teaspoons of sugar with ¾ cup warm milk and ¾ cup warm water. Sprinkle in 2 teaspoons of instant yeast, then let the mixture sit undisturbed for about 10 minutes, until foamy.
- Once the yeast is foamy, add 2 teaspoons of apple cider vinegar, 1 egg, and 3 tablespoons of melted butter. Mix on medium speed until well combined.
- Gradually incorporate 2 ¾ cups of Gluten-Free Mulino Caputo Fioreglut Flour and 2 teaspoons of salt halfway through. Beat on medium speed for about 3-4 minutes until the dough is sticky and elastic.
- Transfer the sticky dough to a lightly oiled bowl, cover with a kitchen towel, and let it rise in a warm spot for about 1 hour until doubled in size.
- After rising, lightly flour a surface and turn the dough out onto it. Flatten to about 1 inch thick and cut out rounds with a cookie cutter.
- Place the muffins on parchment-lined baking sheets sprinkled with cornmeal and cover with a kitchen towel for another 30 minutes.
- Preheat a skillet over medium-low heat, sprinkle cornmeal, and carefully transfer muffins to the skillet. Cook each side for about 5-6 minutes until golden brown.
- Remove muffins from the skillet, let them cool slightly, then split with a fork, toast if preferred, and enjoy with your favorite toppings.