


As the oven timer dings, the warm aroma of peanut butter wafts through my kitchen, instantly bringing back cherished memories of holiday baking with loved ones. I have always been enamored by the classic Peanut Butter Blossoms, with their irresistible combination of nutty goodness and sweet chocolate, and now I’m thrilled to share my gluten-free twist on this timeless treat. These Gluten Free Peanut Butter Blossoms are incredibly simple to whip up, taking just 30 minutes from mixing bowl to cookie jar. Not only do they make for the perfect holiday dessert, but they’re also a great flourless option for anyone looking to indulge without the gluten. With a soft and chewy texture topped with a delightful dark chocolate kiss, these cookies are bound to be a hit at any gathering. So, are you ready to fill your kitchen with the comforting aroma of fresh-baked cookies? Let’s dive into this delightful recipe together!

Why are these cookies irresistible?
Simplicity at its core: This recipe requires just a handful of ingredients, making it easy for anyone to tackle.
Light and fluffy: The soft, chewy texture paired with a rich chocolate kiss creates a treat that’s pure comfort.
A crowd pleaser: Perfect for holiday gatherings, these gluten-free cookies will impress even those who aren’t gluten-sensitive.
Versatile options available: Swap out peanut butter or add chocolate chips for a personalized touch.
Quick and easy: Ready in just 30 minutes, they fit perfectly into busy schedules without compromising taste!
Make these delightful Gluten Free Peanut Butter Blossoms your go-to recipe, whether for a celebration or a cozy treat at home.
Gluten Free Peanut Butter Blossoms Ingredients
For the Dough
- Natural Peanut Butter – Provides rich flavor and structure; opt for organic without hydrogenated oils for the best results.
- Brown Coconut Sugar – A delicious sweetener that enhances flavor; can be swapped with granulated or light brown sugar.
- Large Egg – Acts as a binder, giving the cookies their delightful chewy texture.
- Vanilla Extract – Adds warmth and depth to the cookie’s overall flavor profile.
- Baking Soda – Helps the cookies rise slightly for that perfect texture.
- Sea Salt – A pinch balances the sweetness and enhances the peanut butter flavor.
For Rolling
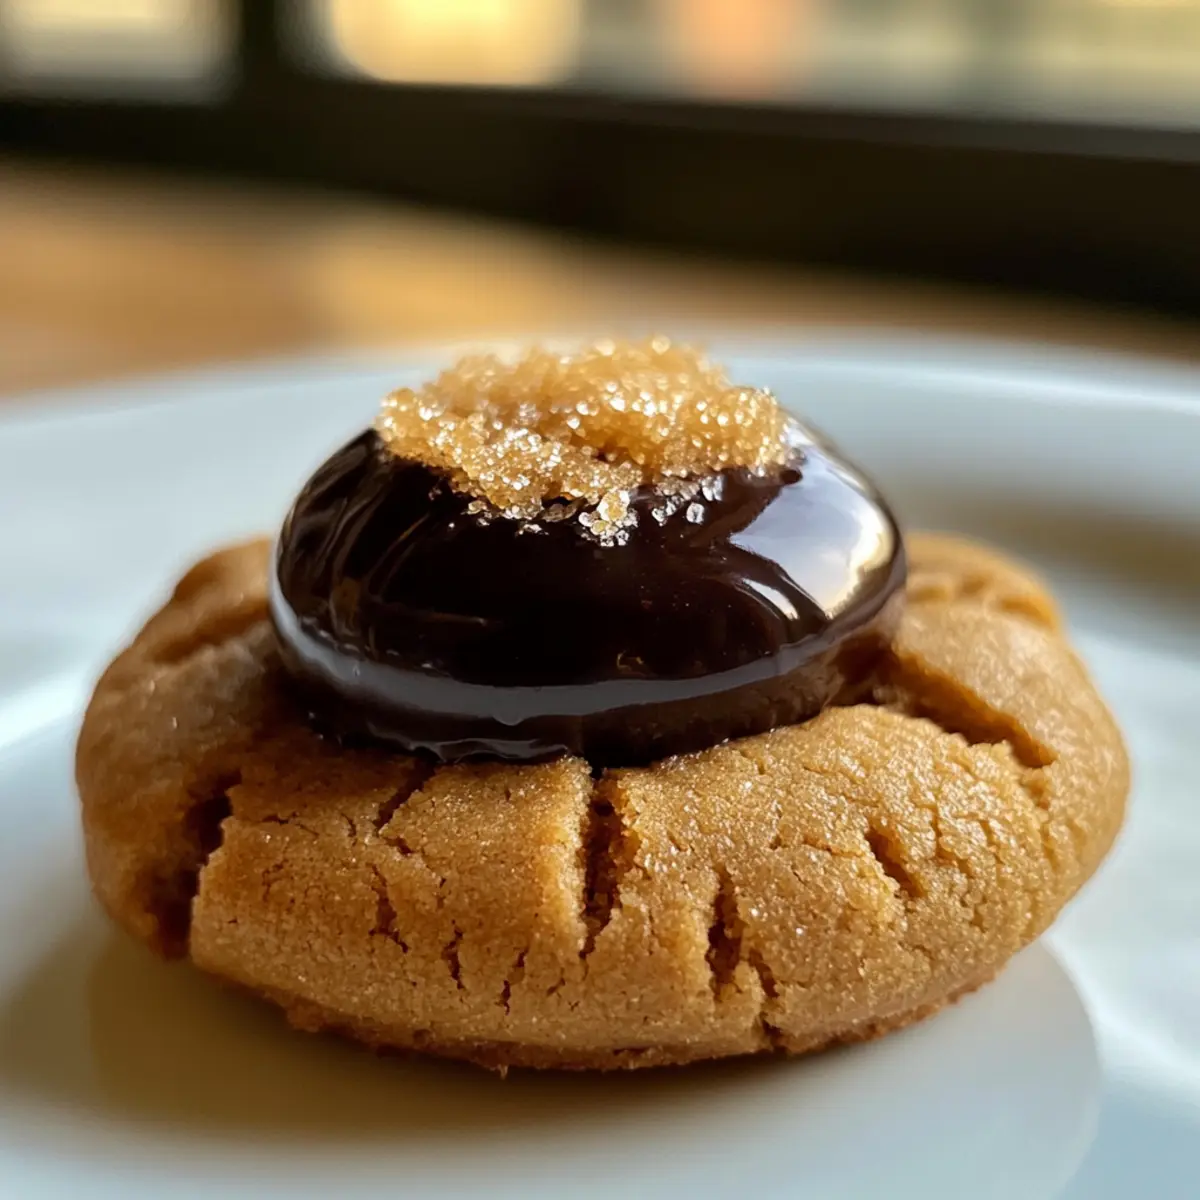
- Granulated Sugar – Provides a sweet, crunchy coating when rolling the dough balls, adding a delightful texture.
For the Topping
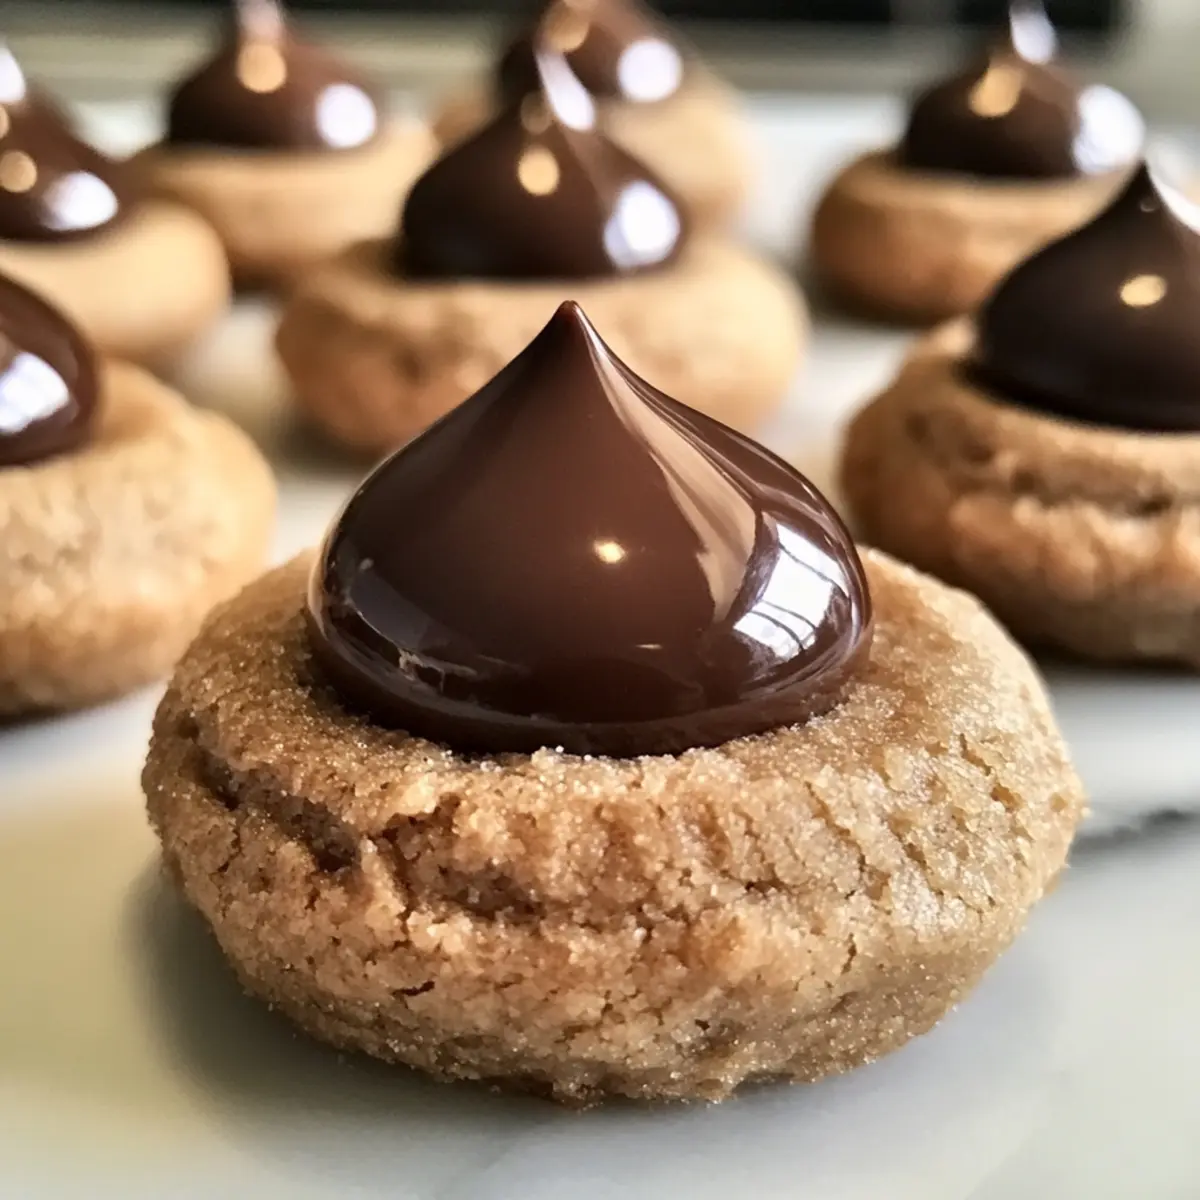
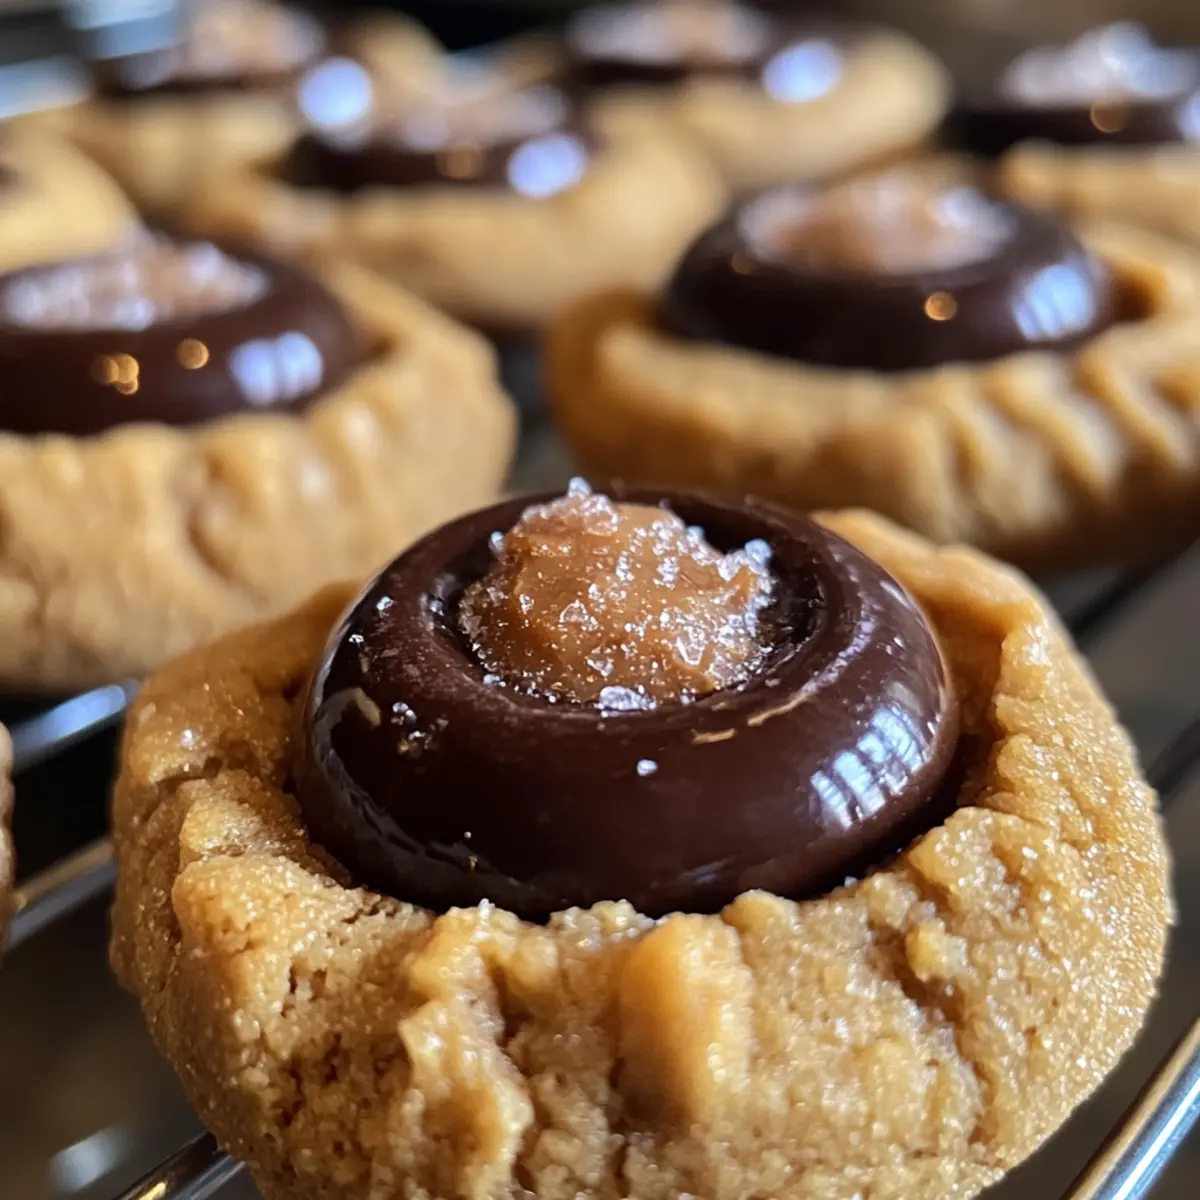
- Dark Chocolate Kisses – Adds a rich, melty finish on top of each cookie, creating a delightful contrast to the nutty peanut butter.
These delightful Gluten Free Peanut Butter Blossoms are bound to steal the show at any gathering!
Step‑by‑Step Instructions for Gluten Free Peanut Butter Blossoms
Step 1: Preheat the Oven
Begin by preheating your oven to 350°F (175°C). While the oven heats up, line a baking sheet with parchment paper to ensure your cookies will bake evenly and won’t stick. This small step sets the stage for your delightful Gluten Free Peanut Butter Blossoms.
Step 2: Mix the Cookie Dough
In a large mixing bowl, combine 1 cup of natural peanut butter, 1 cup of brown coconut sugar, 1 large egg, 1 teaspoon of vanilla extract, 1 teaspoon of baking soda, and a pinch of sea salt. Use a wooden spoon or electric mixer to blend the ingredients until they form a smooth and cohesive dough, which should take about 2-3 minutes.
Step 3: Shape the Dough Balls
Spoon about 1.5 inches of dough and roll it into a ball using your hands. Pour granulated sugar into a small bowl and roll each dough ball in the sugar until evenly coated, creating that delicious crunchy exterior. This step adds the perfect touch of sweetness and texture to your cookies.
Step 4: Prepare for Baking
Place the rolled sugar-coated dough balls on the prepared baking sheet, ensuring each one has at least 1 inch of space between them. Gently flatten each ball slightly with your hand to help them spread as they bake. This will guarantee your Gluten Free Peanut Butter Blossoms have that lovely, chewy texture.
Step 5: Bake the Cookies
Slide the baking sheet into the preheated oven and bake your cookies for about 10 minutes. Keep an eye on them; they should look slightly golden and set around the edges when done. This is the perfect time when your kitchen will start smelling heavenly!
Step 6: Add the Chocolate Kisses
As soon as your cookies come out of the oven, gently press a dark chocolate kiss into the center of each cookie while they are still hot. The warmth of the cookie will help melt the chocolate just enough to create a delightful topping that complements the peanut butter flavor.
Step 7: Cool and Serve
Transfer the cookies to a wire rack and let them cool completely before serving. This cooling period allows the chocolate kisses to set perfectly. Your delicious Gluten Free Peanut Butter Blossoms are now ready to be shared or savored with that warm, nutty flavor and melty chocolate on top!
How to Store and Freeze Gluten Free Peanut Butter Blossoms
-
Room Temperature: Store cookies in an airtight container at room temperature for up to 3 days to keep them soft and chewy.
-
Fridge: If you prefer a slightly firmer texture, you can refrigerate the cookies in an airtight container for up to 5 days.
-
Freezer: Freeze cooled cookies in a single layer on a baking sheet, then transfer to an airtight container for up to 3 months. Thaw in the refrigerator before enjoying!
-
Reheating: To bring back their delightful freshness, reheat frozen cookies in the microwave for about 10-15 seconds or in the oven at 350°F for 5 minutes.
Gluten Free Peanut Butter Blossoms Variations
Feel free to add your personal touch to these delightful cookies and explore different flavor profiles!
-
Crunchy Peanut Butter: Use crunchy peanut butter for added texture and a delightful crunch in every bite.
-
Nut-Free Alternative: Switch to sunflower seed butter for a nut-free, allergy-friendly cookie without sacrificing flavor.
-
Sweetener Swap: Experiment with maple syrup or honey for a natural sweetener that adds a unique twist to the cookie’s flavor.
-
Chocolate Variation: Replace dark chocolate kisses with milk chocolate or caramel-filled kisses to cater to your taste preferences.
-
Extra Flavor: Add a sprinkle of cinnamon or a dash of espresso powder for a warm, aromatic twist that elevates your cookies to new heights.
-
Protein Boost: Stir in some protein powder to make these cookies not only indulgent but also a great post-workout treat!
-
Spicy Kick: For those who enjoy a bit of heat, consider adding a touch of cayenne pepper or chili powder to the dough for a surprising kick.
-
Add-ins Galore: Fold in mini chocolate chips, chopped nuts, or dried fruits for new textures and flavors in your cookies.
Don’t be afraid to try these variations and make this recipe truly your own! If you love baking, consider pairing these cookies with a refreshing cup of homemade chai tea or a rich glass of almond milk. They also make a delightful treat alongside a slice of your favorite chocolate cake. Enjoy your baking adventure!
Make Ahead Options
These Gluten Free Peanut Butter Blossoms are perfect for busy home cooks looking to save time without sacrificing flavor! You can prepare the cookie dough up to 24 hours in advance by mixing all the ingredients and storing the dough in an airtight container in the refrigerator. This not only enhances the cookie’s flavor but also makes it incredibly convenient for last-minute baking. When you’re ready to enjoy these delicious cookies, simply scoop and roll the dough balls in sugar, place them on a baking sheet, and bake as directed. If you need even more time, baked cookies can be stored in an airtight container at room temperature for up to 3 days, keeping them heavenly soft and chewy. Enjoy the ease and taste of freshly baked Gluten Free Peanut Butter Blossoms any day of the week!
Expert Tips for Gluten Free Peanut Butter Blossoms
- Choose the Right Peanut Butter: Use natural peanut butter without added sugars or hydrogenated oils to maintain the clean flavor. Creamy or crunchy both work well!
- Don’t Overbake: Keep a close watch during baking; cookies should be just set and golden around the edges for the best chewy texture.
- Chill Dough for Better Shape: If the dough is too sticky, refrigerate it for 15-20 minutes. This helps the cookies hold their shape while baking.
- Custom Sweetness: If you prefer a less sweet cookie, reduce the sugar slightly; try using natural sweeteners that align with your dietary preferences.
- Experiment with Toppings: Feel free to swap dark chocolate kisses with different chocolates, or even add nuts or seeds to the cookie dough for a personalized twist.
Embrace these tips as you create these delightful Gluten Free Peanut Butter Blossoms that everyone will love!
What to Serve with Gluten Free Peanut Butter Blossoms
Imagine a cozy gathering where the aroma of fresh, nutty cookies fills the air, perfectly complemented by delightful pairings that elevate your dessert experience.
-
Rich Hot Chocolate: A warm mug of hot chocolate creates a cozy pairing, enhancing the cookies’ nutty sweetness. Perfect for chilly days!
-
Vanilla Bean Ice Cream: The creamy, smooth texture of vanilla ice cream provides a delightful contrast to the chewy cookie. It’s an indulgent treat that can balance the flavors beautifully.
-
Fresh Berries: A mix of strawberries and raspberries adds vibrant acidity and brightness, cutting through the richness of the cookies. Their freshness provides a lovely burst of flavor with each bite.
-
Cup of Coffee: A hot cup of coffee enhances the deep, nutty flavors of the cookies. Its robust notes make for a perfect afternoon pick-me-up.
-
Honeyed Yogurt: Serve a dollop of honey yogurt alongside the cookies for a creamy, slightly tangy addition that balances the sweetness beautifully.
-
Chocolate Milkshake: Indulge in a chocolate milkshake for a nostalgic pairing that kids and adults alike will love. The thick, cool shake creates a stunning contrast with the warm cookies.
-
Caramel Drizzle: Drizzle warm caramel sauce over your cookies for added decadence. The rich, buttery flavor complements the peanut butter delightfully.
-
Chai Tea: A spiced chai tea enhances the flavors of the cookies while adding a warm and inviting aroma. Perfect for a comforting afternoon break!
Enjoy these pairings that make indulging in Gluten Free Peanut Butter Blossoms even more memorable!
Gluten Free Peanut Butter Blossoms Recipe FAQs
How do I choose the right peanut butter for these cookies?
Absolutely! For the best flavor and texture, opt for natural peanut butter without hydrogenated oils or added sugars. Organic varieties are wonderful and will lend a clean, rich taste to your cookies. Both creamy and crunchy types work beautifully, so feel free to use whichever you prefer!
How should I store my Gluten Free Peanut Butter Blossoms?
To keep the cookies fresh and soft, store them in an airtight container at room temperature for up to 3 days. If you’d like to extend their shelf life slightly, refrigerating them in a sealed container can keep them fresh for up to 5 days.
Can I freeze these cookies? If so, how?
Yes, you absolutely can! To freeze your Gluten Free Peanut Butter Blossoms, start by placing them in a single layer on a baking sheet and freeze until firm. Then, transfer the cookies to an airtight container or freezer bag, ensuring they are separated by parchment paper, and they can last for up to 3 months. When you’re ready to enjoy, thaw them in the refrigerator or microwave for about 10-15 seconds.
What if my cookies turn out too dry or crumbly?
If you find your cookies are too dry, it could be due to overbaking or using dry peanut butter. Make sure to check them at the 10-minute mark and remove them as soon as they are set but still soft. If they cool down too much and are crumbly, a quick fix would be to add a teaspoon of warm water to the dough and mix it gently until the consistency improves.
Are these cookies suitable for everyone, including those with allergies?
Always consider allergies and dietary preferences! These Gluten Free Peanut Butter Blossoms are nut-based, so they’re not suitable for nut allergies. For nut-free options, sunflower seed butter works well! Always be sure to check any labels for cross-contamination if you’re cooking for someone with severe allergies.
Can I use a different type of sweetener in this recipe?
Very! If you’re looking for alternatives, you can substitute the brown coconut sugar with granulated sugar or even natural sweeteners like honey or maple syrup, but this may alter the texture. If you do, reduce the amount slightly, as these liquids are generally sweeter.
Gluten Free Peanut Butter Blossoms to Delight Your Taste Buds
Ingredients
Equipment
Method
- Preheat your oven to 350°F (175°C) and line a baking sheet with parchment paper.
- In a large mixing bowl, combine peanut butter, coconut sugar, egg, vanilla extract, baking soda, and sea salt until smooth.
- Roll dough into 1.5-inch balls and coat each ball in granulated sugar.
- Place the sugar-coated dough balls on the lined baking sheet with at least 1 inch apart.
- Bake for about 10 minutes until slightly golden and set around the edges.
- Press a dark chocolate kiss into the center of each cookie as soon as they come out of the oven.
- Allow the cookies to cool on a wire rack before serving.