


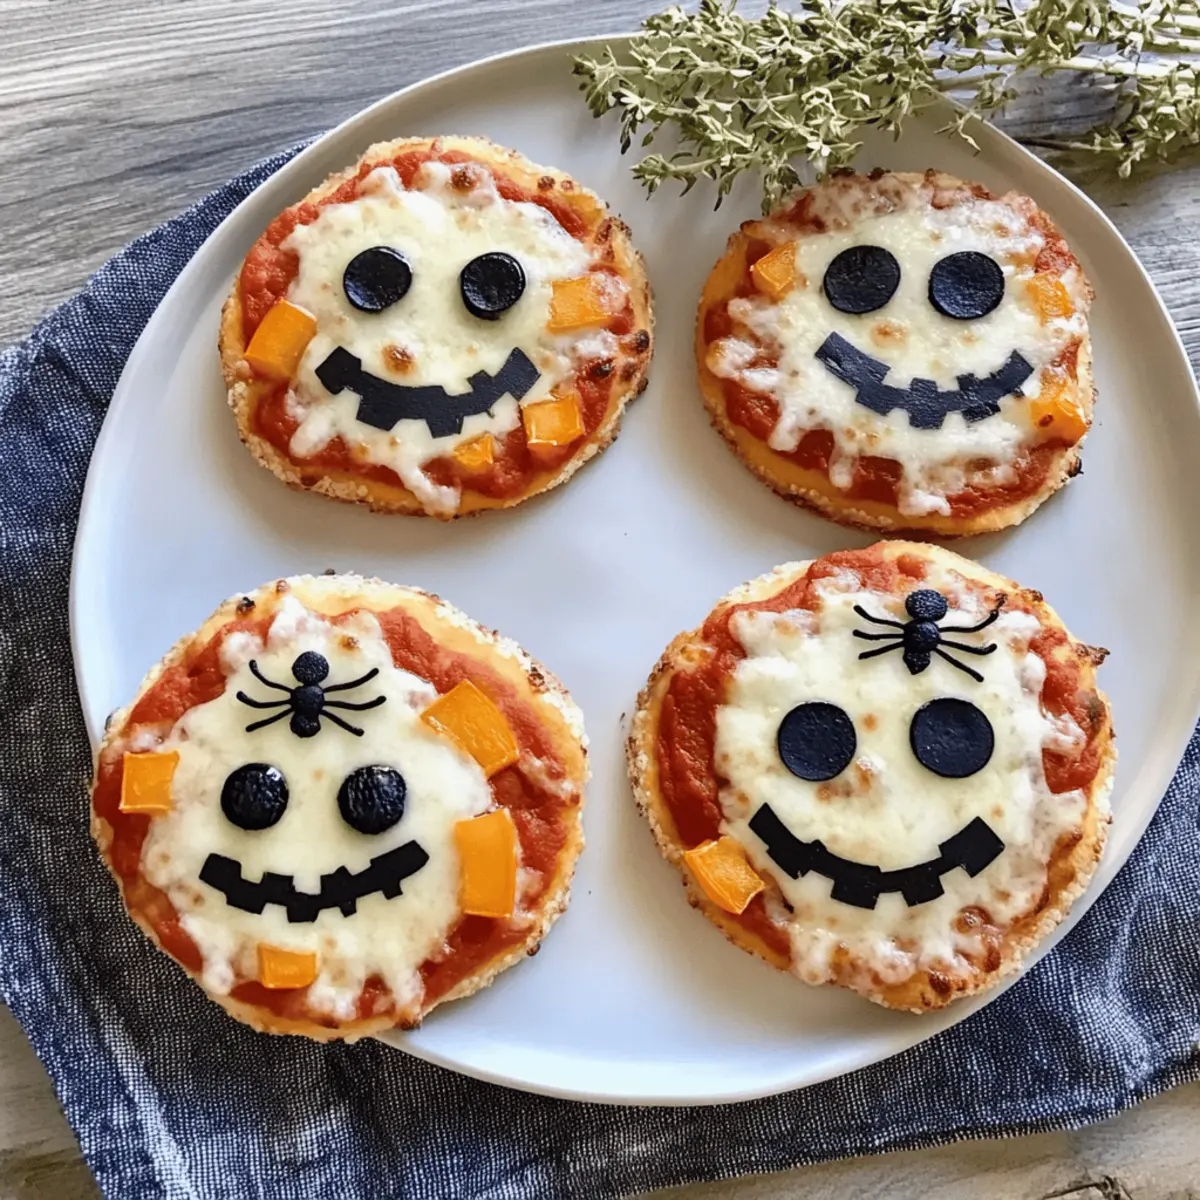
As the oven warms, a delightful aroma fills the kitchen, hinting at the spooky fun ahead. Halloween Mini Pizzas are not just a feast for the eyes; they promise a playful culinary adventure that the whole family can enjoy. With customizable toppings—from mischievous olive-slice spiders to cheerful bell-pepper jack-o’-lanterns—these mini pizzas are perfect for pizza parties, Halloween gatherings, or even a cozy movie night at home. Beyond their fun, festive vibe, they are quick to whip up and make for hassle-free snacks or meals that kids can help create. Who wouldn’t want to dive into a snack that’s both delicious and creatively themed? Get ready to unleash your inner chef, and let’s bring some spooky magic to your table!
Why Are These Mini Pizzas a Hit?
Fun and Creative: Each pizza offers a chance for creative expression, letting kids personalize their spooky snacks with their favorite toppings.
Quick Preparation: They come together in a snap, making them an ideal last-minute treat for unexpected guests or Halloween gatherings.
Customizable Flavors: Whether you prefer classic cheese or adventurous toppings like pesto or vegan cheese, these pizzas are entirely customizable to suit any palate.
Family-Friendly Fun: Perfect for all ages, these mini pizzas turn ordinary cooking into an enjoyable family bonding activity that sparks laughter and creativity.
Deliciously Versatile: Serve them as snacks, appetizers, or even part of a spooky snack board for your upcoming parties, and watch your guests’ faces light up!
Halloween Mini Pizzas Ingredients
For the Crusts
• Mini Pizza Crusts – Personal-sized bases that are perfect for each guest; consider gluten-free pita or cauliflower crusts for dietary needs.
For the Sauce
• Pizza Sauce – This flavorful foundation enhances every bite; choose homemade for an extra touch of love or store-bought for convenience.
For the Cheese
• Mozzarella Cheese – Offers that classic melty texture that everyone loves; opt for vegan cheese if you want a dairy-free option.
• Part-Skim String Cheese – Fun to pull apart, creating mummy-style “bandages” for your creepy creations.
For the Toppings
• Black Olives – Slice these for spooky spiders or eyes, adding a hint of brininess to your mini pizzas.
• Mini Pepperoni – Optional but gives a delightful kick; skip it for a vegetarian-friendly pizza.
• Orange & Green Bell Peppers – Slice these for cheerful jack-o’-lantern smiles to brighten up the scene.
For Garnish
• Fresh Basil – A sprinkle of this fragrant herb adds freshness and color; parsley can be a lovely substitute if needed.
For Baking
• Olive Oil Spray – A light mist keeps the crusts from sticking to the baking sheet, ensuring a perfect bake every time.
With these ingredients, your Halloween Mini Pizzas will not only be a delightful culinary adventure but also a treat that captures the spirit of the spooky season!
Step‑by‑Step Instructions for Halloween Mini Pizzas
Step 1: Preheat the Oven
Begin your spooky adventure by preheating the oven to 425°F (220°C). While it warms, grab a baking sheet and lightly mist it with olive oil spray to prevent your Halloween mini pizzas from sticking. This critical first step ensures a lovely, crispy crust when they bake to perfection.
Step 2: Sauce the Crusts
Take your mini pizza crusts and spread 1-2 tablespoons of pizza sauce on each one, leaving a small border around the edges. This makes for a delightful saucy base that will serve as a canvas for all the whimsical toppings. Make sure the sauce is evenly distributed for consistent flavor in every bite.
Step 3: Add the Cheese
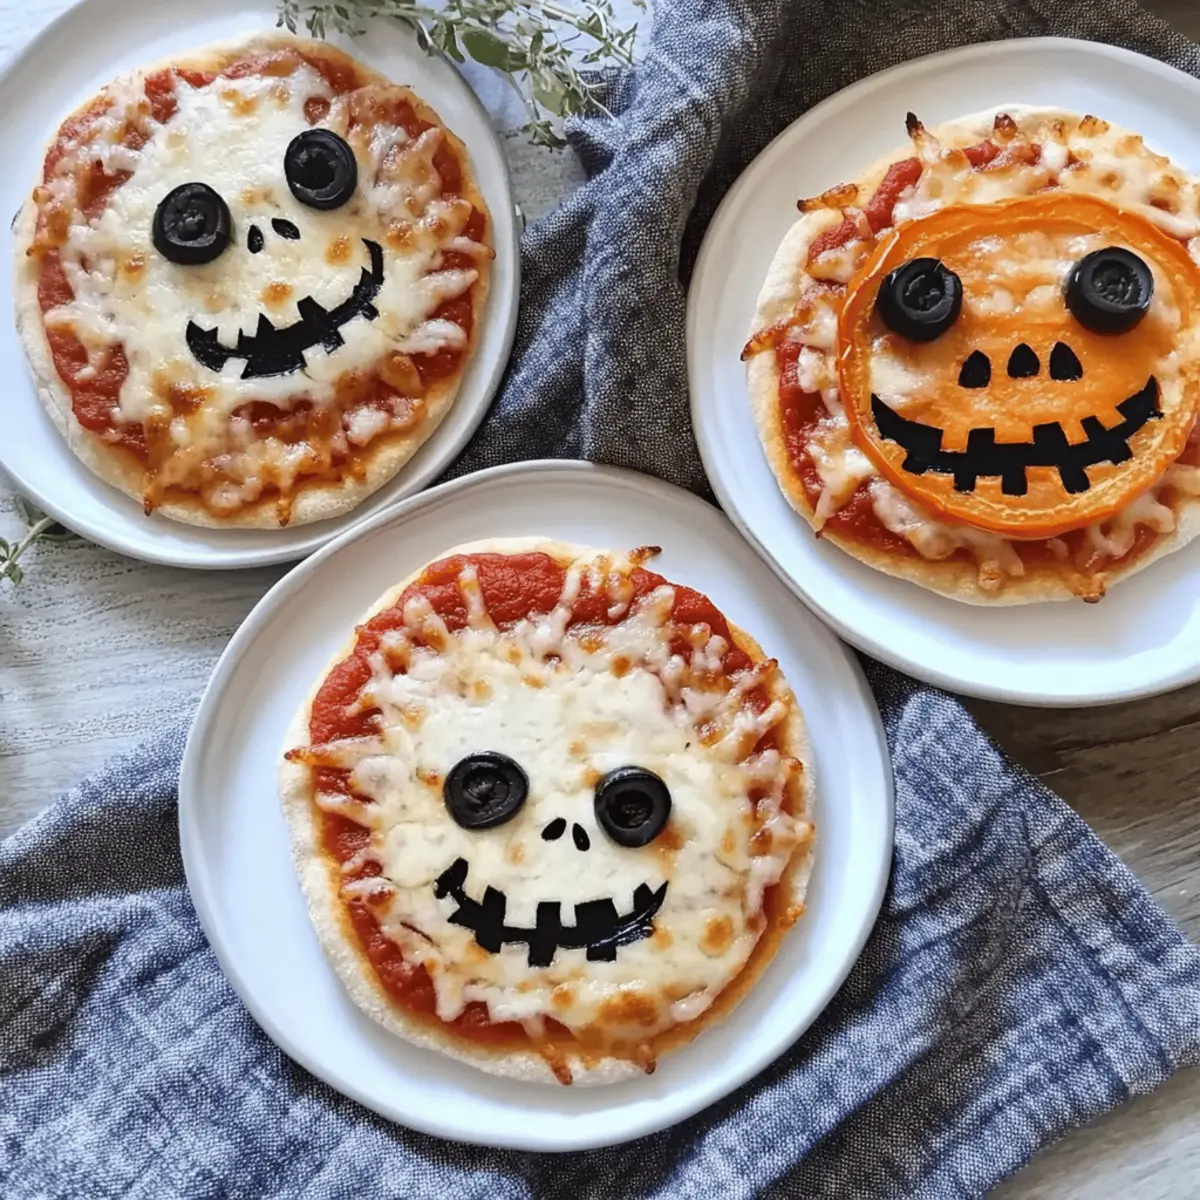
Now, sprinkle shredded mozzarella cheese generously over half of the mini pizzas, ensuring a good layer for that ooey-gooey effect. For the other half, pull apart part-skim string cheese to create charming mummy “bandages.” This technique not only tastes delicious but also adds a fun and festive flair to your Halloween mini pizzas.
Step 4: Decorate with Toppings
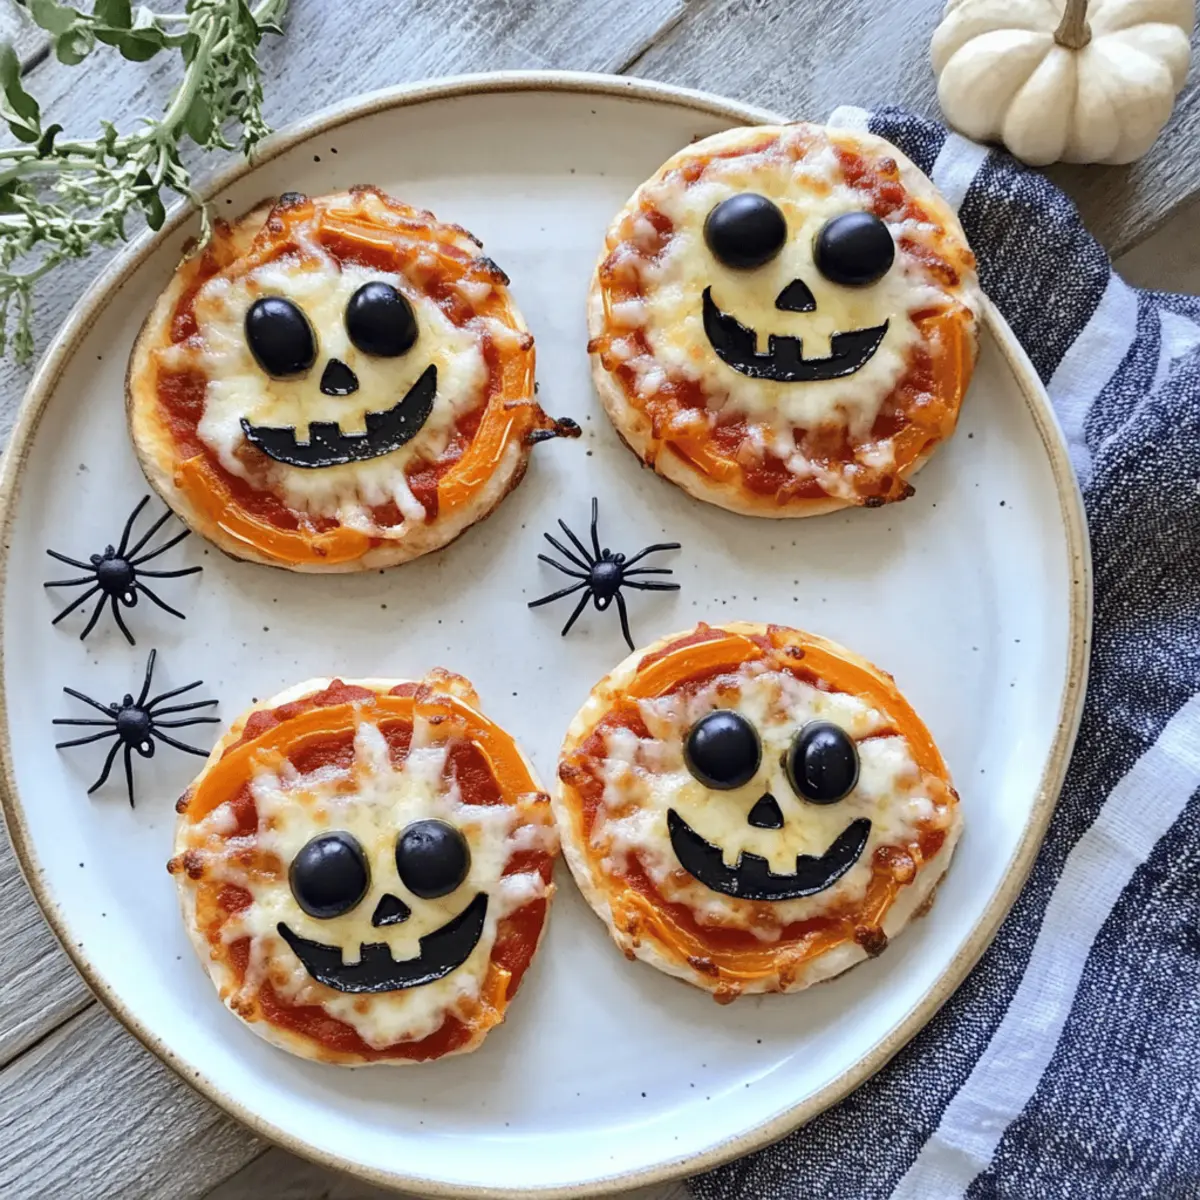
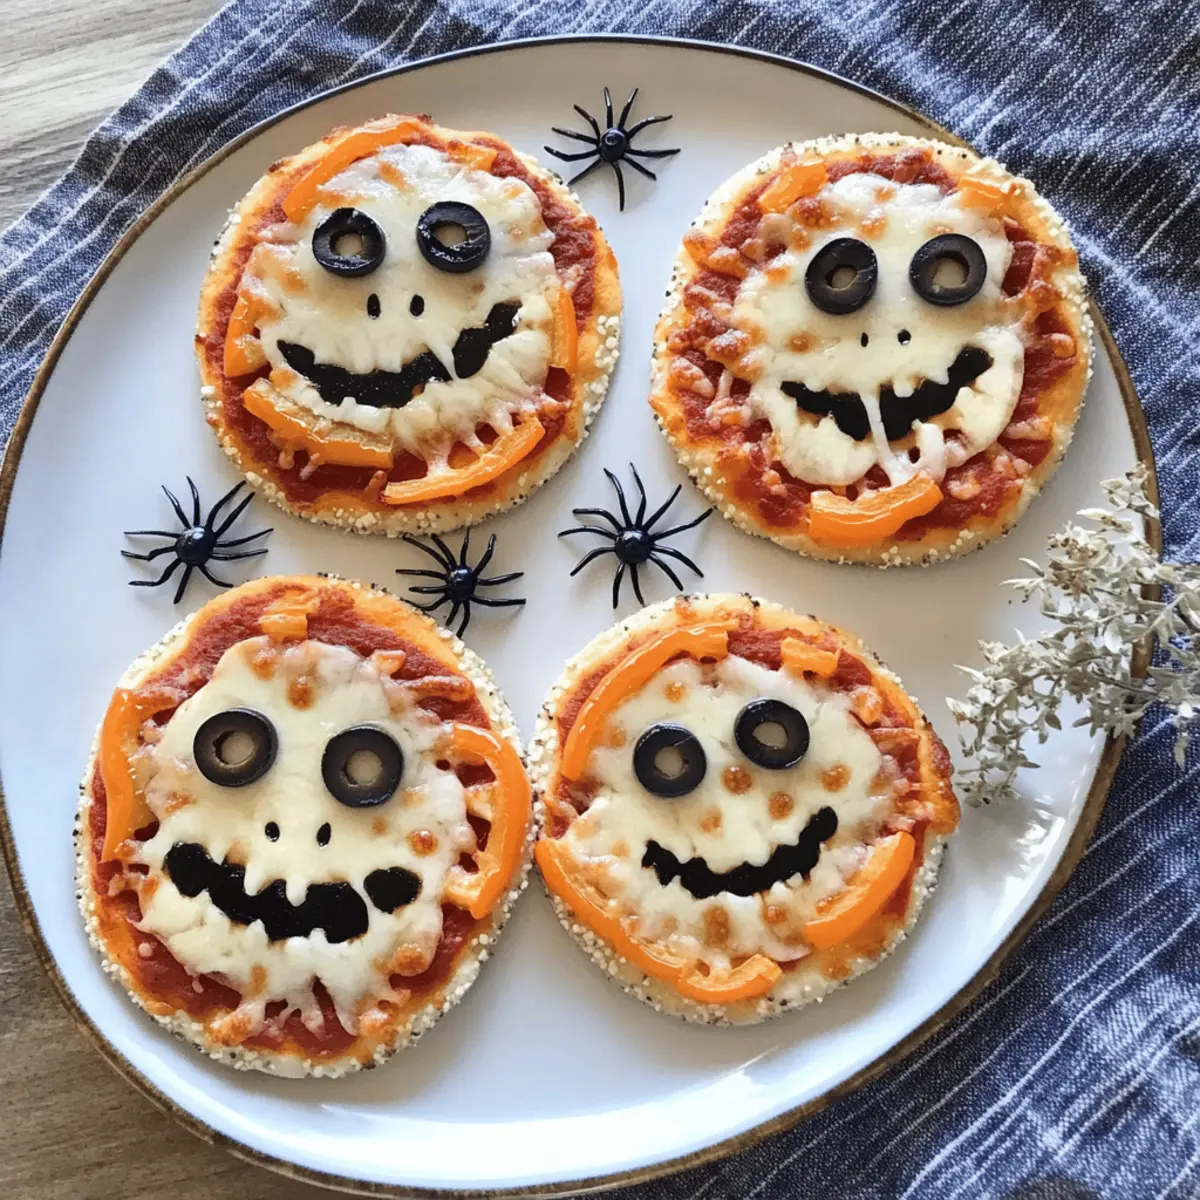
It’s time for creative expression! Decorate each pizza using black olive slices to form spooky spiders or creepy eyes, and add bell pepper strips to create vibrant jack-o’-lantern smiles. If you’re using mini pepperoni, scatter those on top for extra flavor and fun. This step allows kids to personalize their spooky creations!
Step 5: Bake to Perfection
Place your decorated mini pizzas in the preheated oven and bake for 10-12 minutes. Keep an eye on them as they cook; look for golden brown crusts and bubbling, melted cheese to indicate they’re ready. Remember to rotate the baking sheet halfway through to ensure even cooking and perfect doneness.
Step 6: Cool and Garnish
Once your Halloween mini pizzas are done baking, carefully remove the baking sheet from the oven and let them cool for 2 minutes. This brief resting time allows the cheese to set slightly. Before serving, garnish the pizzas with fresh basil for a pop of color and flavor that enhances this delightful treat.
What to Serve with Halloween Mini Pizzas
Create a festive and delicious spread that makes your Halloween celebration extra special with these delightful pairing ideas.
-
Crispy Garlic Bread: The buttery, garlicky flavor complements the pizza beautifully, adding a warm, savory touch to your spooky feast.
-
Colorful Veggie Platter: Fresh, crunchy vegetables like carrots, celery, and cherry tomatoes dipped in ranch dressing offer a refreshing contrast to spicy and cheesy treats.
-
Cheesy Breadsticks: Golden, cheesy breadsticks are the perfect accompaniment, creating a satisfying pairing that is sure to be a hit with both kids and adults alike.
-
Fruit Skewers: Sweet, vibrant fruit skewers add a burst of color to your table and provide a healthy, refreshing option among the savory snacks.
-
Spooky Punch: A fun, themed drink like a fizzy orange and black juice punch will delight guests and tie the spooky theme into every element of the meal.
-
Pumpkin Spice Cookies: For dessert, serve these delightful cookies to satisfy that sweet tooth, perfectly echoing the spirit of the season while tasting fantastic!
Storage Tips for Halloween Mini Pizzas
Fridge: Store leftovers in an airtight container in the fridge for up to 3 days. Layer with parchment paper to keep the crusts crispy and avoid sticking.
Freezer: Assemble unbaked Halloween mini pizzas and freeze them for up to 1 month. Simply place them on a baking sheet, wrap tightly in plastic wrap, and transfer to a freezer bag.
Reheating: For the best texture, reheat in an air fryer or oven. Preheat to 375°F (190°C) and bake for about 5-7 minutes until heated through and crispy. Avoid microwaving to prevent a soggy crust.
Make-Ahead: Prepare mini pizzas in advance for quick snacks; they are perfect for spontaneous Halloween gatherings or busy nights.
Expert Tips for Halloween Mini Pizzas
Encourage Creativity: Let kids choose their toppings to make every mini pizza unique. This not only enhances their enjoyment but also makes for memorable family moments.
Prepare Ahead: You can assemble the Halloween mini pizzas in advance and freeze them unbaked. They’ll be ready to pop in the oven when you’re short on time!
Avoid Soggy Crusts: Lightly misting the baking sheet with olive oil ensures the crusts stay crispy. Don’t skip this step for the best texture!
Mix and Match Toppings: Feel free to play with different vegetables, cheeses, and sauces to find your perfect combination. This customization keeps things exciting every time you make them!
Storage Tips: Store any leftovers in an airtight container for up to 3 days. Stack them with parchment paper in between to prevent sticking.
Reheat Wisely: Use an air fryer or oven to reheat leftover Halloween mini pizzas. This method retains the crispy texture better than a microwave.
Halloween Mini Pizzas Variations & Substitutions
Unleash your creative side by customizing these delightful mini pizzas to suit your tastes and dietary needs!
- Gluten-Free: Use gluten-free mini pizza crusts or cauliflower crusts for a delicious alternative that everyone can enjoy.
- Dairy-Free: Swap mozzarella cheese with vegan cheese shreds for a dairy-free delight that maintains cheesy goodness.
- Extra Veggies: Amp up the nutrition by adding spinach, sliced mushrooms, or roasted red peppers as additional toppings.
- Spicy Kick: Drizzle a bit of sriracha or sprinkle red pepper flakes to bring some heat to your spooky pizzas. A dash of spice adds an exciting twist to the flavor!
- Pesto Base: Replace pizza sauce with pesto for a herby, gourmet touch that elevates these mini pizzas to another level of deliciousness.
- Different Cheeses: Try cheddar or pepper jack cheese for a bold flavor; mixing different cheeses can create a delightful taste experience.
- Fun Shapes: Use cookie cutters to make fun shapes out of tortillas or flatbreads as your crusts for an even more playful presentation.
- Antipasto Toppings: Get adventurous by adding sliced roasted red peppers, artichokes, or even prosciutto for gourmet mini pizzas that are sure to impress.
No matter what variations you choose, these Halloween Mini Pizzas are bound to be a thrilling culinary adventure! For some tasty side items, consider serving them alongside a charming Halloween-themed salad or a pitch-perfect apple cider to complete the festive mood. Enjoy the fun of cooking and the joy of sharing these spooky delights with those you love!
Make Ahead Options
These Halloween Mini Pizzas are perfect for busy families looking to save time during the festive season! You can assemble them up to 24 hours in advance; simply prepare the crusts with sauce and cheese, then cover tightly in the fridge. If you’re aiming for a longer storage solution, you can freeze the uncooked mini pizzas for up to 1 month. Just remember to use parchment paper between them to prevent sticking. When ready to enjoy, preheat your oven and bake from frozen for 12-15 minutes, or until bubbly and golden. With these make-ahead options, you’ll have a fun, delicious treat ready in no time, making your Halloween celebrations even easier!
Halloween Mini Pizzas Recipe FAQs
How do I choose the best mini pizza crusts?
Absolutely! When selecting mini pizza crusts, look for ones that are firm and free from any visible damage. If you prefer gluten-free options, gluten-free pita or cauliflower crusts can work wonderfully too. Always check the expiration date for freshness.
What is the best way to store leftover Halloween mini pizzas?
Leftover Halloween mini pizzas should be stored in an airtight container in the fridge for up to 3 days. To keep the crust from getting soggy, layer parchment paper between the pizzas to prevent them from sticking together.
Can I freeze Halloween mini pizzas? How?
Very much so! To freeze unbaked Halloween mini pizzas, assemble them on a baking sheet and then wrap each one tightly in plastic wrap. Place them in a freezer bag and freeze for up to 1 month. When you’re ready to bake, simply remove the wrap and bake them straight from the freezer; add a few extra minutes to the baking time for even cooking.
What toppings can I use for dietary restrictions?
If you’re catering to dietary needs, no worries! Consider using dairy-free cheese options for vegan diets, and swap in a variety of colorful veggies like spinach or mushrooms instead of traditional toppings. For gluten-free diets, using cauliflower or gluten-free pita crusts is a great choice.
What’s the best way to reheat leftover Halloween mini pizzas?
To reheat your leftover Halloween mini pizzas and keep them crispy, preheat the oven to 375°F (190°C). Place the pizzas on a baking sheet and bake for about 5-7 minutes, until they’re heated through and their crust is nice and crispy. Avoid microwaving, as this can lead to a soft, soggy crust that lacks that fresh-baked texture.
What if my pizza crusts turn out soggy?
If your pizza crusts end up soggy, it’s often due to excess moisture from the toppings or not pre-baking the crusts. To troubleshoot, be sure to lightly mist the baking sheet and avoid overloading with sauce or toppings. Par-baking the crusts for 5 minutes before adding sauce and toppings can also help maintain a nice, crispy base.
Halloween Mini Pizzas: Fun, Easy Treats for Spooky Celebrations
Ingredients
Equipment
Method
- Preheat the oven to 425°F (220°C) and mist a baking sheet with olive oil spray.
- Spread 1-2 tablespoons of pizza sauce on each mini pizza crust, leaving a small border around the edges.
- Sprinkle shredded mozzarella cheese on half of the mini pizzas and part-skim string cheese on the other half.
- Decorate with black olive slices, bell pepper strips, and mini pepperoni if using.
- Bake in the preheated oven for 10-12 minutes until the cheese is bubbling and the crust is golden brown.
- Remove from oven and let cool for 2 minutes, then garnish with fresh basil before serving.