


As I rummaged through my pantry last week, a delightful idea struck me: Halloween Mummy Cookies! These charming fudgy treats aren’t just show-stoppers; they’re a fun, interactive baking experience that brings families together during the spookiest season of the year. With their rich chocolate flavor and whimsical mummy decorations, these cookies are sure to capture the hearts of both kids and adults alike. Plus, they’re incredibly quick to prepare and easy to decorate, making them the ultimate dessert for Halloween parties or cozy gatherings. Ready to roll up your sleeves and create these delightful little mummies? Let’s dive into the recipe!
What makes Halloween Mummy Cookies special?
Fudgy Chocolate Goodness: These cookies offer a rich, fudgy chocolate flavor that will delight any sweet tooth.
Easy to Decorate: With simple buttercream piping and candy eyes, the decorating process is fun for all ages.
Perfect for Gatherings: Make these cookies your centerpiece at Halloween parties, bringing smiles to guests of all ages.
Time-Saving Treats: Ready in under an hour, they fit perfectly into any busy October schedule.
Versatile Options: Experiment with different toppings or add a twist with caramel chips for an exciting variation. If you’re looking for another quick treat, try my Blueberry Breakfast Cookies for a delicious morning boost!
Halloween Mummy Cookie Ingredients
For the Cookie Base
- Butter – Adds moisture and richness to the cookies; substitute with margarine for a dairy-free option.
- Granulated Sugar – Provides sweetness and helps with cookie structure; can be partially replaced with coconut sugar for a lower GI option.
- Dark Brown Sugar – Adds depth of flavor and moisture; substitute with light brown sugar if necessary.
- Egg – Binds the ingredients and contributes to moisture; flax egg can be used as a vegan substitute.
- Egg Yolk – Enhances richness and texture; you can omit if only using a whole egg.
- Vanilla Extract – Adds aromatic flavor; use pure vanilla for the best taste.
For the Fudgy Dough
- All-Purpose Flour – Provides structure to the cookies; substitute with a 1:1 gluten-free flour blend for gluten-free options.
- Cocoa Powder – Provides that rich chocolate flavor; Dutch-processed cocoa can be used for a deeper taste.
- Baking Powder & Baking Soda – Ensure they are fresh for the optimal rise of your cookies.
- Salt – Balances sweetness; use kosher salt for better control over saltiness.
For the Vanilla Buttercream
- Powdered Sugar – Delivers sweetness and a smooth texture to the buttercream.
- Milk – Adds moisture; feel free to use any milk type or substitute with non-dairy milk.
With these Halloween Mummy Cookies ingredients, you’re all set to create an enchanting treat that will surely bring festive cheer to your gatherings!
Step‑by‑Step Instructions for Halloween Mummy Cookies
Step 1: Prepare Butter
Start by melting your butter in a microwave-safe bowl until fully liquefied, then let it cool to room temperature for about 20 minutes in the fridge. This cooling process is essential to ensure the melted butter doesn’t cook the eggs when mixed. It sets a smooth base for your Halloween Mummy Cookies.
Step 2: Mix Wet Ingredients
In a large mixing bowl, whisk together the granulated sugar, dark brown sugar, egg, egg yolk, and vanilla extract along with the cooled butter until well combined. Aim for a smooth consistency, where sugar is thoroughly dissolved, and the mixture appears slightly fluffy. This step creates the moisture necessary for those fudgy centers in your cookies.
Step 3: Combine Dry Ingredients
In a separate bowl, whisk together the all-purpose flour, cocoa powder, baking powder, baking soda, and salt. This method ensures an even distribution of the leavening agents and cocoa throughout your dough. Gradually add this dry mixture to the wet ingredients, mixing until just combined to maintain the rich, fudgy texture of your Halloween Mummy Cookies.
Step 4: Chill Dough
Cover the mixing bowl with plastic wrap or a damp towel and refrigerate the cookie dough for 30 minutes. Chilling is an essential step as it helps enhance the texture of the cookies and prevents them from spreading too much while baking. Meanwhile, you can prepare your baking sheets and other baking essentials.
Step 5: Preheat Oven
While the dough is cooling, preheat your oven to 350°F (175°C). Line your baking sheets with parchment paper to prevent sticking and ensure even baking. This preparation not only saves time later but sets the stage for that perfect batch of Halloween Mummy Cookies.
Step 6: Form Cookies
Once the dough is chilled, scoop generous portions (about 2 oz or ¼ cup each) and roll them into balls. Place the dough balls on the prepared baking sheets, flattening each slightly. Ensure there is enough space between each cookie (about 2 inches apart) as they will expand while baking. Aim to fit six per tray for even baking.
Step 7: Bake
Bake the cookies in the preheated oven for 9-10 minutes, watching for the edges to firm up while the centers remain soft. The cookies will look slightly puffed and may still appear a bit underbaked, which is okay as they will continue to cook on the tray. After baking, allow them to cool on the baking sheet for about 3 minutes before transferring them to a wire rack.
Step 8: Make Buttercream
To make the vanilla buttercream, beat together the powdered sugar, softened butter, vanilla extract, and enough milk until the mixture reaches a smooth and spreadable consistency. It should be creamy, but not too runny, and hold its shape well for decorating. This sweet topping will help your Halloween Mummy Cookies come to life!
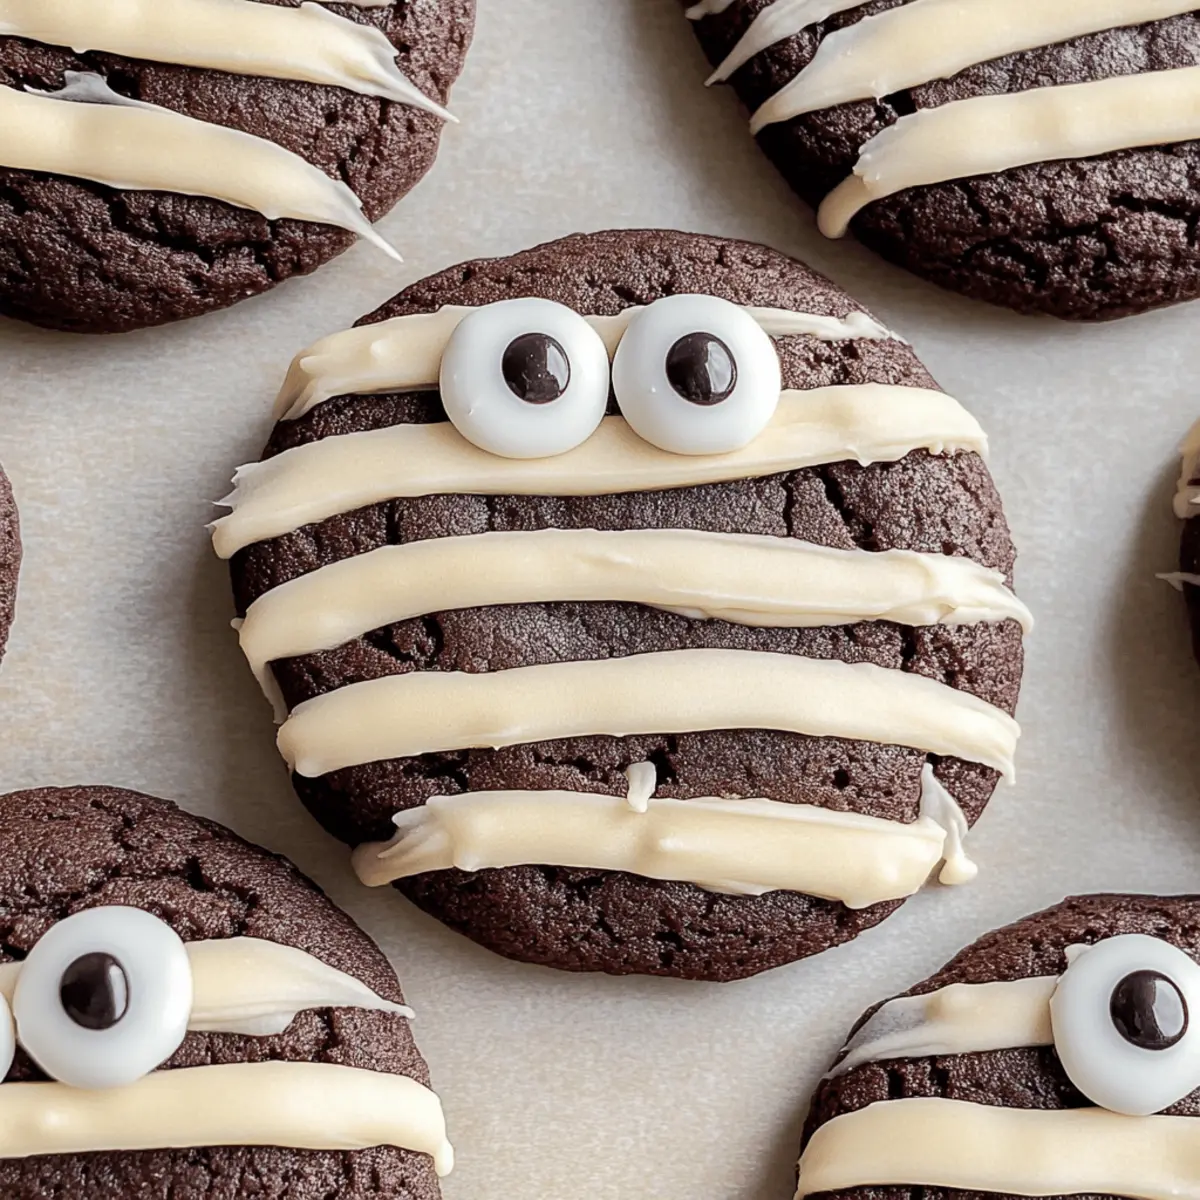
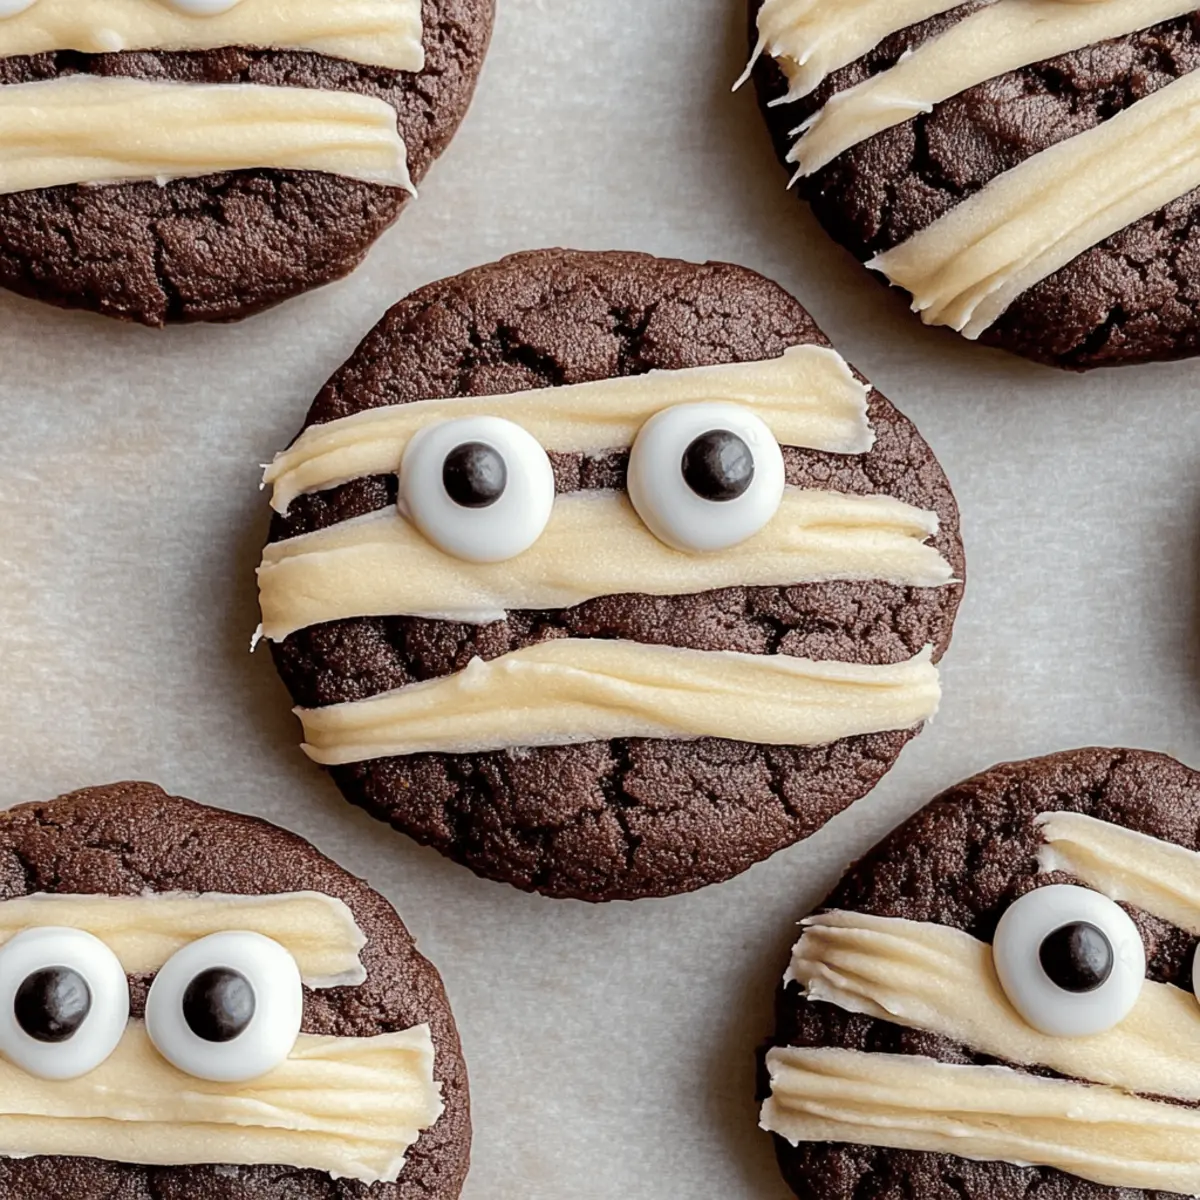
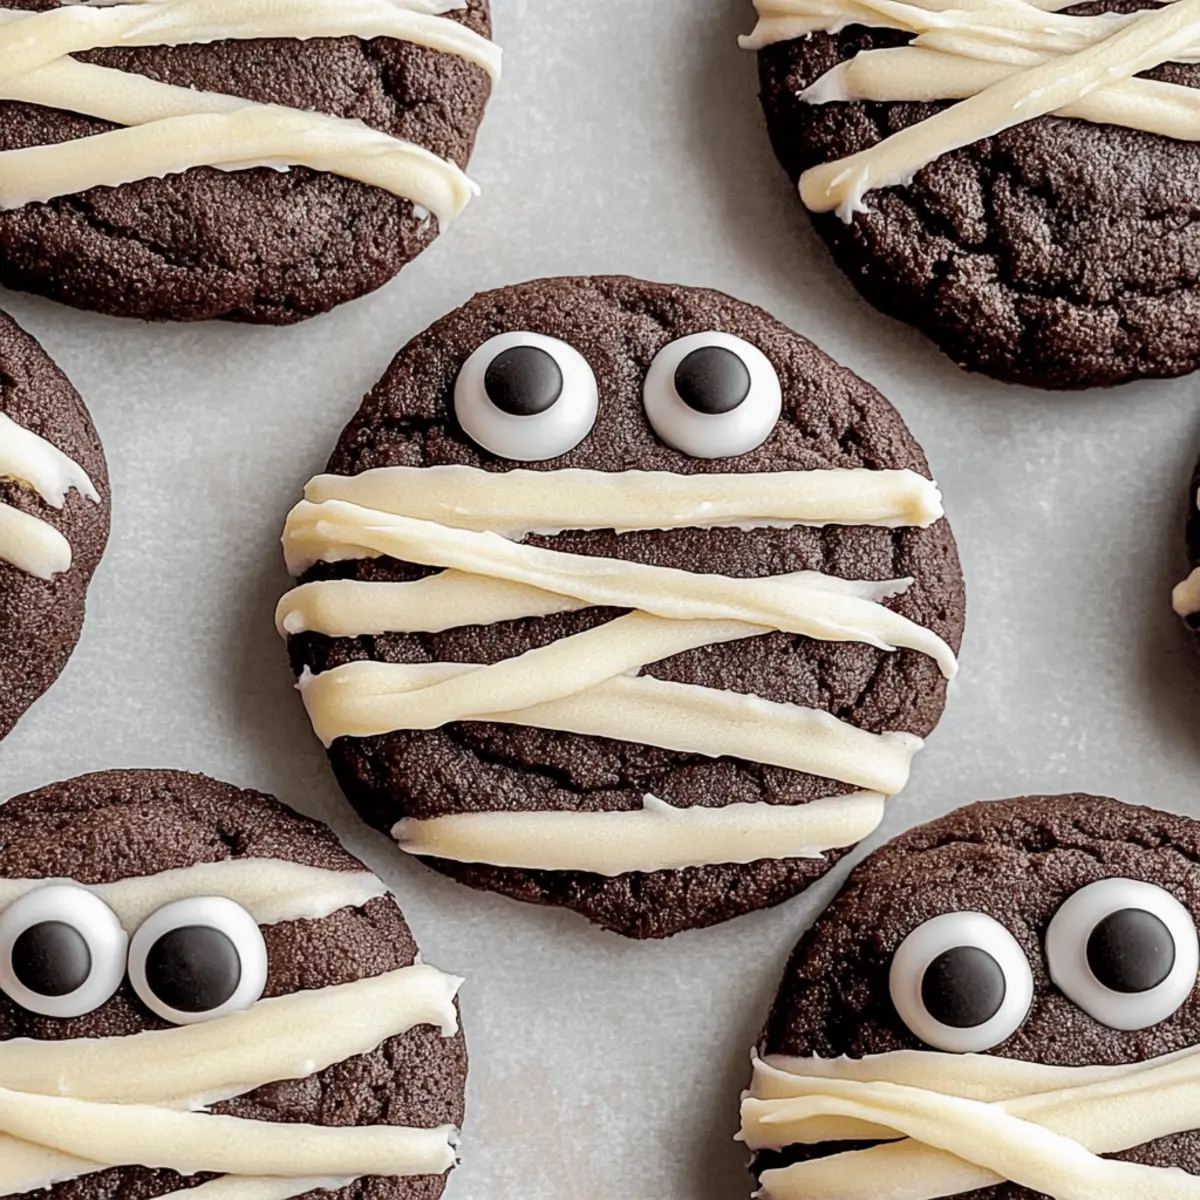
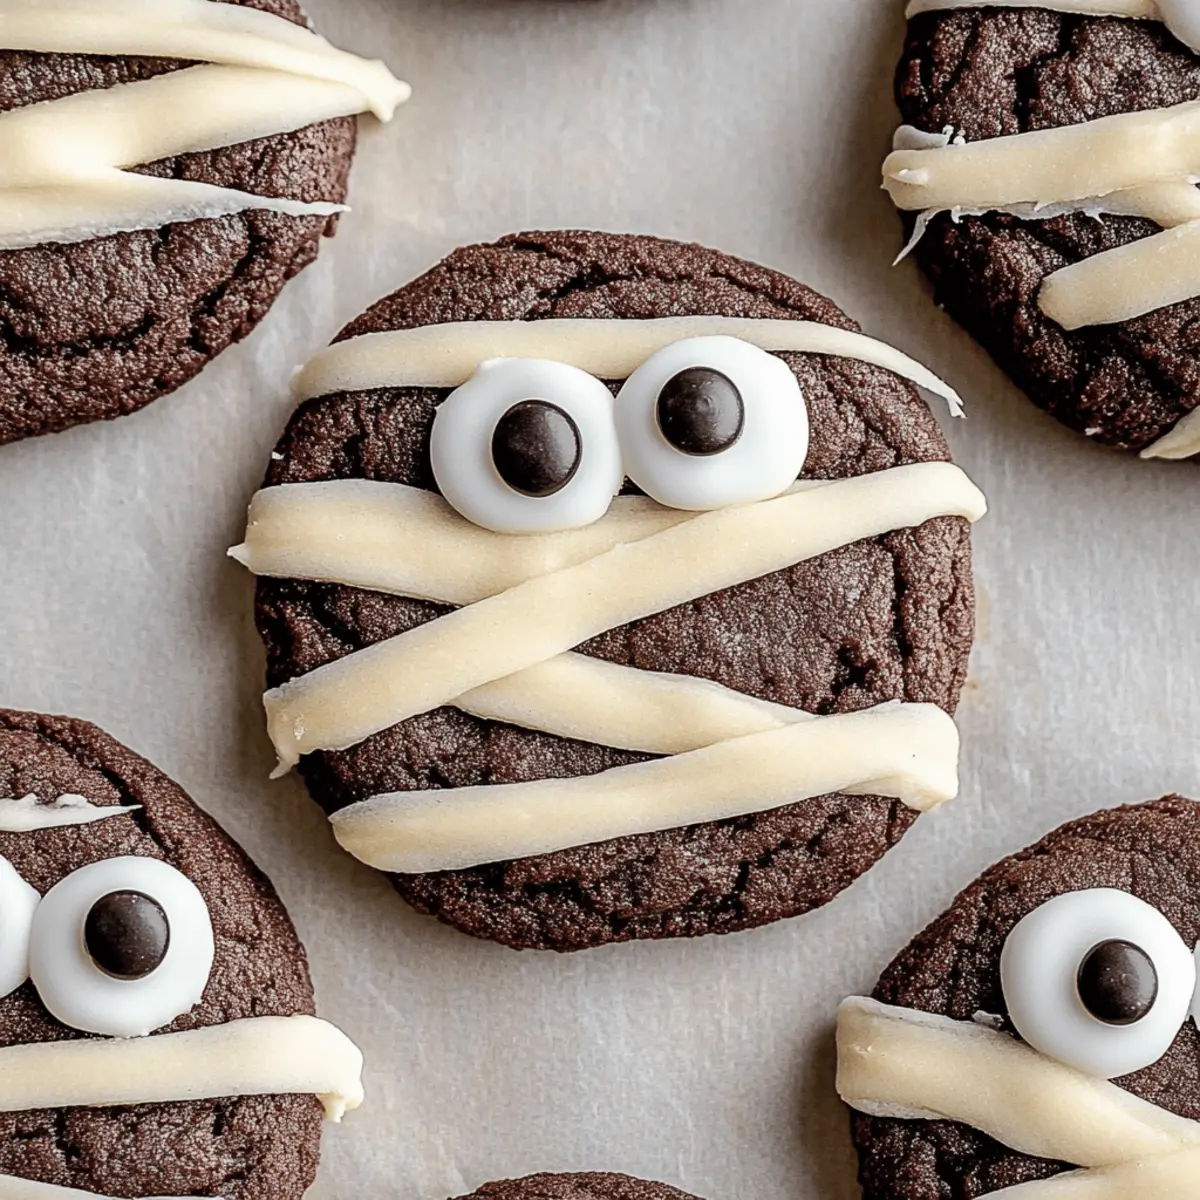
Step 9: Decorate Cookies
Once the cookies are completely cooled, pipe the buttercream onto the cookies in a fun, draped pattern resembling mummy wrappings. Add candy eyes on top for that adorable, spooky touch, and feel free to get creative! These decorations are a delightful way to engage everyone in the Halloween spirit while making your cookies stand out.
Halloween Mummy Cookies Variations & Substitutions
Get ready to put your own spin on these delightful Halloween Mummy Cookies! With a little creativity, you can make them truly unique and cater to your family’s tastes.
-
Dairy-Free: Substitute butter with coconut oil or margarine, and use almond or oat milk in your buttercream for a delicious non-dairy twist.
-
Gluten-Free: Replace all-purpose flour with a 1:1 gluten-free flour blend to make these cookies accessible for gluten-sensitive friends.
-
Nutty Flavor: Add finely chopped walnuts or pecans to the dough for a delightful crunch that complements the fudgy texture beautifully.
-
Spicy Kick: Incorporate a teaspoon of cayenne or chili powder into the batter for a surprising heat that contrasts perfectly with the sweetness.
-
Pumpkin Spice Twist: For a seasonal boost, add a tablespoon of pumpkin spice to the cookie dough—it’s perfect for that cozy fall flavor.
-
Chocolate Chip Delight: Fold in semi-sweet or dark chocolate chips for a double chocolate experience that will leave chocolate lovers in bliss.
-
Coconut Flakes: Mix in unsweetened shredded coconut to the dough for fun texture and a hint of tropical flavor—perfect for those seeking something different.
-
Decorative Icing: Use vibrant colored icing to create creative designs or seasonal themes beyond Halloween, allowing you to customize each cookie for any occasion!
Explore these fun variations to keep your baking exciting! And if you’re in the mood for something quick and delicious in the morning, don’t forget to try my Blueberry Breakfast Cookies for a delightful start to your day.
Expert Tips for Halloween Mummy Cookies
-
Cool the Butter: Always let the melted butter cool before mixing. This prevents cooking the eggs and helps achieve a fudgy texture in your cookies.
-
Chill the Dough: Don’t skip refrigerating the dough for 30 minutes. This crucial step enhances the cookies’ texture and keeps them from spreading too much while baking.
-
Piping Precision: Use a piping bag with a small tip for decorating. This allows for better control when creating mummy band patterns with the buttercream, making your Halloween Mummy Cookies truly stand out.
-
Watch Baking Time: Be mindful of the baking time; cookies should be slightly underbaked to keep that chewy center. They will firm up while cooling, ensuring the perfect fudgy bite.
-
Storage Solutions: Keep any leftover cookie dough in an airtight container in the fridge for up to a day, or freeze it for up to 30 days for a stress-free baking experience later on.
What to Serve with Halloween Mummy Cookies
These fudgy, spooky treats create an enchanting experience that calls for some delightful companions for a complete Halloween celebration!
-
Pumpkin Spice Latte: The warm, spiced flavors in this classic drink beautifully complement the rich chocolate of the cookies, creating a comforting pairing. Picture sipping this cozy beverage alongside your freshly baked mummies—pure bliss!
-
Caramel Apples: Enjoying these crunchy, sweet treats will add a lovely contrast to the gooeyness of the cookies while keeping the Halloween spirit alive. Drizzled with melted chocolate and sprinkled with nuts, they make for an inviting display.
-
Chocolate Milkshake: A creamy chocolate milkshake is a nostalgic favorite that pairs perfectly with these cookies. The combination of textures will leave everyone wanting more, combining blissfully rich notes of chocolate.
-
Gummy Worms and Candy Corn: These festive candies add a playful touch that echoes the Halloween theme. Scatter them around your cookie platter for a fun surprise that kids will adore.
-
Spiced Hot Cider: This warm, spiced beverage serves as a perfect counterpart to the fudgy cookies. The hints of cinnamon and cloves enhance the chocolatey richness in every bite.
-
Vanilla Ice Cream: A scoop of creamy vanilla ice cream next to these cookies creates a delightful contrast of temperatures. The melting ice cream adds a dreamy texture, making each bite an unforgettable experience.
-
Cinnamon Sugar Doughnuts: For a festive twist, serve some mini doughnuts dusted with cinnamon sugar. They echo the comforting autumn flavors while providing a playful textural variety on your dessert table.
-
Halloween-themed Fruit Platter: Sliced apples, oranges, and berries arranged creatively can add a refreshing touch to your spread. A little sweetness from fruit helps lighten the rich indulgence of the cookies.
Enjoy celebrating this spooktacular season with these delightful pairings!
Make Ahead Options
These Halloween Mummy Cookies are perfect for busy home cooks looking to save time during the festive season! You can prepare the cookie dough up to 24 hours in advance; simply mix and chill it, then wrap it tightly in plastic wrap before refrigerating. Alternatively, if you’re planning even further ahead, the dough can be frozen for up to 30 days—just thaw overnight in the fridge before baking. When you’re ready to enjoy your cookies, scoop, form, and bake them as directed. This way, you’ll have fresh, fudgy Halloween Mummy Cookies that are just as delicious, ready to impress your family and friends without any last-minute stress!
How to Store and Freeze Halloween Mummy Cookies
Room Temperature: Store cookies in an airtight container at room temperature for up to 3 days to maintain freshness and softness.
Fridge: If you live in a warmer climate, keep the cookies in the fridge for up to a week, but let them come to room temperature before enjoying for the best taste.
Freezer: For longer storage, place cookies in an airtight container separated by parchment paper and freeze for up to 2 months. Thaw at room temperature before serving.
Reheating: To restore the fudgy texture, gently reheat chilled or frozen cookies in the microwave for about 10-15 seconds—just enough to warm them slightly. Enjoy your Halloween Mummy Cookies!
Halloween Mummy Cookies Recipe FAQs
How do I choose the right cocoa powder for my Halloween Mummy Cookies?
When selecting cocoa powder, I recommend using Dutch-processed cocoa for a deeper, more intense chocolate flavor. However, if you have natural cocoa powder on hand, it works perfectly as well. Just keep in mind that using Dutch-processed may affect the rise of your cookies due to the difference in acidity.
How can I store leftover Halloween Mummy Cookies?
These delicious cookies can be stored in an airtight container at room temperature for up to 3 days. If you live in a warmer climate, you may want to keep them in the fridge for up to a week. Just remember to allow them to come to room temperature for the best flavor before enjoying!
Can I freeze Halloween Mummy Cookies?
Absolutely! For freezing, place your fully cooled cookies in an airtight container, layering them with parchment paper to prevent sticking. You can freeze them for up to 2 months. When you’re ready to enjoy, simply thaw them at room temperature for a few hours, or use a microwave for a quick reheat (around 10-15 seconds) to restore that fudgy texture.
What can I do if my cookie dough is too sticky?
If your dough is sticky, it could be due to the butter not being cooled enough or too much moisture in the mixture. I suggest chilling it longer (up to 60 minutes) which should help firm it up. If it’s still sticky after chilling, try adding a tablespoon of flour at a time until you reach a workable consistency.
Are there any allergy considerations I should be aware of when making these cookies?
Definitely! If anyone has allergies, you can easily adapt this recipe. For a dairy-free version, replace the butter with margarine or coconut oil. To make it egg-free, use a flax egg (1 tablespoon of ground flaxseed mixed with 3 tablespoons of water, let sit for 5 minutes). Also, consider using a gluten-free flour blend for those with gluten sensitivities. Always check ingredient labels if you’re unsure!
Fudgy Halloween Mummy Cookies for Spooky Sweet Fun
Ingredients
Equipment
Method
- Step 1: Prepare Butter - Melt butter and cool.
- Step 2: Mix Wet Ingredients - Combine sugars, egg, yolk, vanilla, and cooled butter.
- Step 3: Combine Dry Ingredients - Mix flour, cocoa, baking powder, baking soda, and salt.
- Step 4: Chill Dough - Refrigerate cookie dough for 30 minutes.
- Step 5: Preheat Oven - Preheat to 350°F (175°C) and prepare baking sheets.
- Step 6: Form Cookies - Roll dough into balls and place on sheets.
- Step 7: Bake - Bake for 9-10 minutes, cool on baking sheet.
- Step 8: Make Buttercream - Beat together all buttercream ingredients.
- Step 9: Decorate Cookies - Pipe buttercream and add candy eyes.