


As I poured the sugar into the mixing bowl, a wave of nostalgia washed over me, transporting me back to holiday baking sessions spent with family. This year, I’m excited to whip up a batch of Easy Meringue Trees, a delightful holiday treat that adds a whimsical touch to any festive gathering. Not only are these meringue trees incredibly easy to make with just five ingredients, but they also offer a light and airy crunch that leaves everyone wanting more. Plus, they’re gluten-free, making them a joyous addition for all your holiday guests. With each delightful bite, you’ll find the perfect balance of crispy outside and chewy center, reminiscent of all the cozy, cherished moments together. Are you ready to elevate your dessert game this holiday season? Let’s dive into this delightful recipe!

Why are Meringue Trees a Must-Try?
Simplicity at Its Best: With just five ingredients, making these meringue trees is a breeze, perfect for both novice and seasoned bakers.
Versatile Flavors: Whether you prefer vanilla or almond extract, the flavor options can easily suit any festive theme or personal taste.
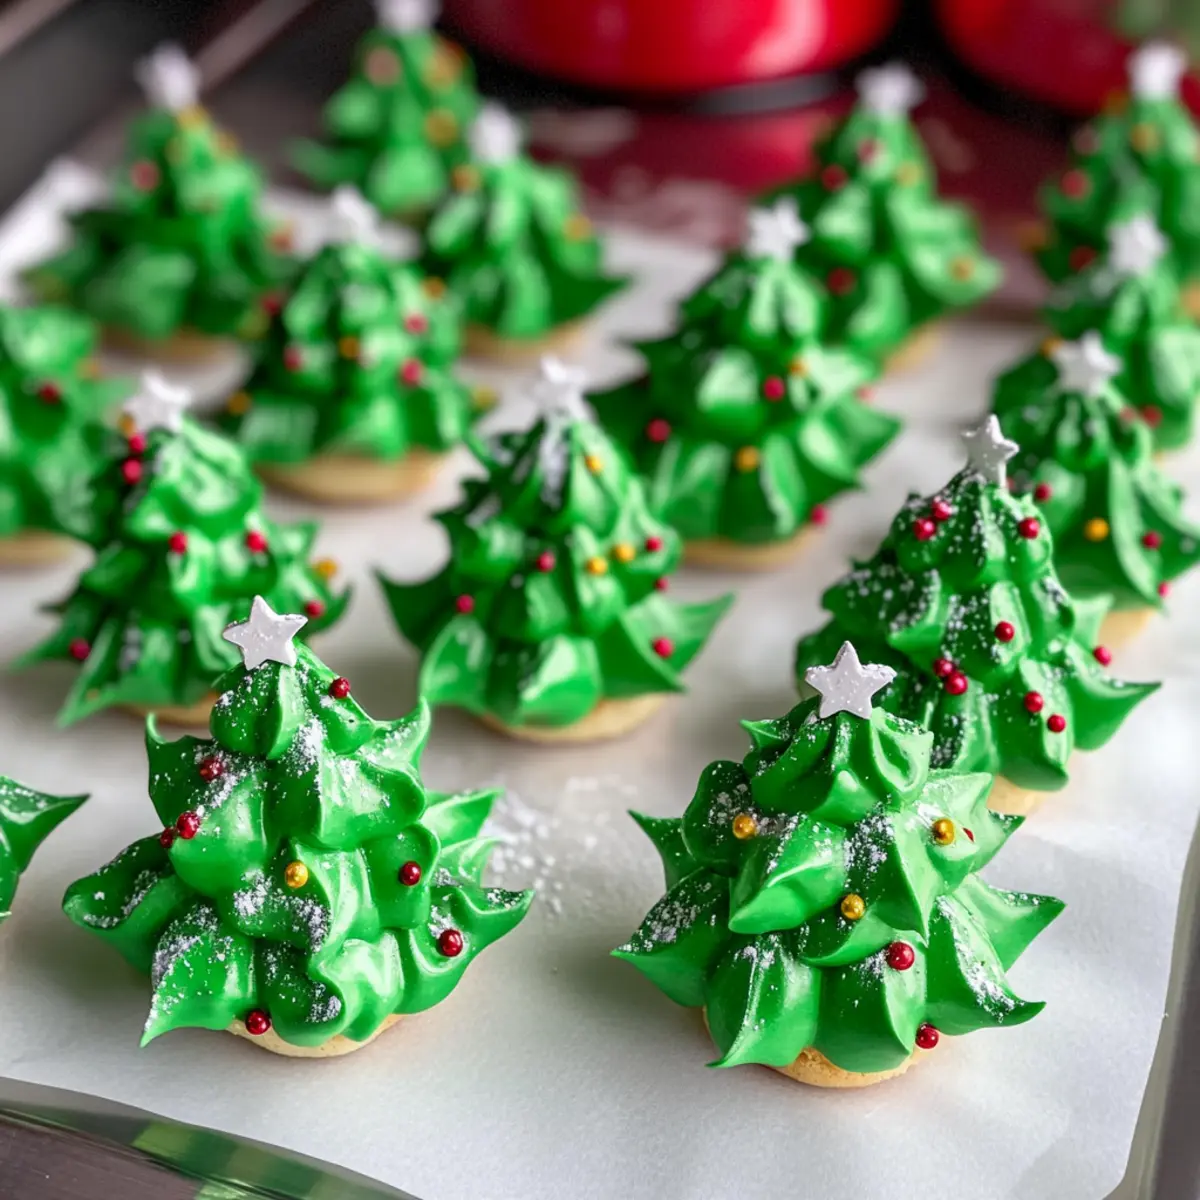
Eye-Catching Appearance: The vibrant green color and festive sprinkles make these treats not only delicious but visually stunning—sure to impress your guests!
Perfect for Sharing: Ideal for cookie exchanges, party favors, or dessert tables, they’re sure to get everyone talking.
Light and Guilt-Free: Each meringue is under 25 calories and gluten-free, allowing everyone to indulge without the worry!
Storage Made Easy: These meringue trees stay fresh for up to two weeks in an airtight container—perfect for prep ahead of time.
Dive deeper with our guide on holiday dessert tables to inspire your presentations!
Meringue Trees Ingredients
• Simple yet magical flavor journey!
For the Meringue
- Egg Whites – Provides structure and volume for meringue; room temperature yields the best results.
- Cream of Tartar – Stabilizes egg whites for achieving stiff peaks; optional but recommended for a more reliable texture.
- Granulated Sugar – Sweetens the meringue and contributes to that delightful crunch; caster sugar can be used for a smoother consistency.
- Vanilla or Almond Extract – Adds delightful depth to the flavor of your meringue trees; feel free to use your favorite!
- Green Gel Food Coloring – Gives these meringue trees a festive, vibrant appearance; avoid using liquid food coloring as it may affect your meringue’s consistency.
For Decoration
- Nonpareil Sprinkles & Star Sprinkles – Perfect for mimicking Christmas ornaments, adding an enchanting touch to your treats.
- Powdered Sugar – Dust lightly over the cooled meringues to resemble snowy accents on your beautiful trees.
Step‑by‑Step Instructions for Easy Meringue Trees
Step 1: Preheat and Prepare
Preheat your oven to 200°F (93°C). While the oven is warming, line a large baking sheet with parchment paper or a silicone mat, ensuring it’s smooth and flat. This will be the surface for your meringue trees, helping them bake evenly.
Step 2: Clean Your Equipment
Take a mixing bowl and whisk attachment, making sure they’re completely grease-free. Any residue can prevent the egg whites from whipping properly. A quick wipe down with vinegar is a handy tip to ensure everything is spotless, guaranteeing fluffy meringues.
Step 3: Whisk the Egg Whites
Place 4 large egg whites into your stand mixer bowl. Start whisking on medium speed until the mixture is bubbly and frothy. Adding 1/4 teaspoon of cream of tartar at this stage helps stabilize the egg whites, crucial for achieving the desired stiff peaks when your meringue trees are complete.
Step 4: Incorporate Sugar Gradually
While the mixer is running, gradually add 1 cup of granulated sugar, a tablespoon at a time. Keep whisking until the mixture reaches stiff peaks—this means the meringue should stand tall and glossy when lifted with a whisk, indicating it’s ready for flavoring.
Step 5: Flavor and Color
Reduce the mixer speed to low and add in 1 teaspoon of vanilla or almond extract, along with a few drops of green gel food coloring. Mix until everything is well blended and the meringue has taken on a beautiful green hue, perfect for the festive meringue trees.
Step 6: Prepare the Piping Bag
Fit a piping bag with a star piping tip for the meringue trees. If you’d like a more vibrant tree color, you can also use a little extra green gel to color the inside of the piping bag. This will help create a stunning visual effect as you pipe the meringue.
Step 7: Pipe Meringue Trees
Hold the piping bag vertically above the lined baking sheet and pipe three dollops of meringue on top of each other to form tree shapes. Space each tree about 1 inch apart to allow for expansion during baking and easy removal later.
Step 8: Decorate with Sprinkles
While the meringue is still wet, sprinkle nonpareil and star sprinkles generously over the piped trees to mimic delightful Christmas ornaments. This simple step adds charm and a festive touch to your Easy Meringue Trees.
Step 9: Bake and Cool
Transfer the baking sheet to the preheated oven and bake for 90 minutes. After the time is up, turn off the oven but leave the meringues inside for an additional hour to cool completely. This helps achieve that perfect crunchy exterior while keeping the centers delightfully chewy.
Step 10: Dust for a Snowy Effect
Once cooled, remove the meringue trees from the baking sheet carefully. Lightly dust them with powdered sugar to create a snowy effect, enhancing their holiday appeal before sharing them with friends and family.

Expert Tips for Meringue Trees
-
Grease-Free Equipment: Ensure all mixing bowls and whisk attachments are completely free from grease to achieve perfect meringue. Use vinegar if needed!
-
Egg Whites at Room Temp: Always use room-temperature egg whites for better volume and stability in your meringue trees. Cold egg whites may not whip properly.
-
Gradual Sugar Addition: Incorporate granulated sugar slowly, about 1 tablespoon at a time, to create a smooth and glossy meringue without graininess.
-
Tailored Baking Time: Keep an eye on your meringue trees while baking; baking time can vary due to size and piping technique. They should peel off smoothly from the baking sheet.
-
Decorate Early: Sprinkle your nonpareil and star decorations while the meringues are still wet to ensure they stick well, creating that beautiful festive look.
What to Serve With Easy Meringue Trees
The joyous crunch and delicate sweetness of these meringue trees create a delightful finale to any holiday meal.
- Rich Hot Chocolate: A warm cup of rich hot chocolate, topped with whipped cream, complements the lightness of the meringues beautifully.
- Spiced Apple Cider: Serve with hot spiced apple cider for a warm, festive drink that enhances the holiday spirit with every sip.
- Creamy Vanilla Pudding: The silky texture of vanilla pudding contrasts perfectly with the crispiness of meringue trees, creating delightful bites.
- Chocolate-Dipped Strawberries: Fresh and juicy strawberries dipped in chocolate provide a sweet and refreshing contrast to the meringue’s crunch.
- Gingerbread Cookies: Pair these treats with classic gingerbread cookies for a nostalgic holiday spread that celebrates traditional flavors.
- Mixed Berry Salad: A refreshing mixed berry salad adds brightness to the table, balancing the sweetness of meringue trees.
- Peppermint Ice Cream: The coolness of peppermint ice cream perfectly juxtaposes the warm holiday flavors while cooling down the sweetness of the meringue.
- Sparkling Cranberry Juice: Toast your holiday gathering with sparkling cranberry juice—a bubbly and tart beverage that elevates festive cheer.
- Fudgy Brownies: Add some decadence with fudgy brownies, providing a rich and gooey contrast to the light and airy meringue trees.
- Hazelnut Coffee: A cup of nutty hazelnut coffee or espresso rounds out your dessert experience with comforting warmth and an inviting aroma.
Storage Tips for Meringue Trees
Room Temperature: Store meringue trees in an airtight container at room temperature for up to 2 weeks. This helps maintain their delightful crunch and soft centers.
Fridge: Avoid refrigerating meringues, as the moisture can lead to a chewy texture. Room temperature storage is best for keeping meringue trees fresh.
Freezer: If you need to freeze, wrap individual meringue trees well in plastic wrap or foil, then place them in an airtight freezer bag for up to 1 month.
Reheating: For best texture, enjoy meringue trees as is; they don’t require reheating, but if they soften, a quick return to a low oven can help restore crunchiness.
Meringue Trees: Sweet Customization Ideas
Feel free to explore a world of delicious options to make these meringue trees truly your own!
-
Flavor Variations: Experiment with different extracts like lemon or peppermint to add unique flavor profiles to your meringue. The right extract can elevate the entire dessert experience!
-
Color Swaps: Instead of green gel food coloring, try red or blue for a fun twist at holiday gatherings. Imagine a vibrant array of colors that brings a playful touch to your dessert table!
-
Texture Additions: Fold in finely chopped nuts such as pistachios or almonds into the meringue before piping for a delightful crunch. The added texture will surprise and delight your guests!
-
Dairy-Free: Use aquafaba (the water from canned chickpeas) in place of egg whites for a vegan-friendly version. You’d be amazed at how versatile this simple swap can be!
-
Heat Levels: For a spicy twist, consider incorporating a pinch of cayenne or cinnamon into your meringue. It adds a warm flavor depth, providing a fun mix of sweet and spicy.
-
Decorative Toppings: Instead of sprinkles, opt for edible glitter or crushed candy canes on your trees for a dazzling finish. These alternatives will have your meringue trees shining bright!
-
Mini Meringue Bites: For a different presentation, pipe smaller dollops to create bite-sized meringue kisses. They’re easy to grab and add a charming touch to any dessert setup!
For additional inspiration, check out our guide on holiday dessert tables to make your treats shine!
Make Ahead Options
These Easy Meringue Trees are ideal for meal prep, making your holiday baking a breeze! You can prepare the meringue mixture up to 24 hours in advance; simply store it in an airtight container in the refrigerator. To maintain their quality, ensure all your equipment is grease-free before whipping the egg whites, as any residue can affect their stability. When ready to bake, transfer the meringue to a piping bag and pipe the shapes onto the baking sheet. Then, simply bake them as directed. This method not only saves you time on busy days but also ensures that your meringue trees are just as delightful when it’s time to serve!

Meringue Trees Recipe FAQs
What type of egg whites should I use for meringue trees?
Absolutely, using fresh large egg whites is key for the best results! It’s highly recommended to let them reach room temperature before whisking, as this helps achieve more volume and better stability. If you’re short on time, carton egg whites can be a fine substitute, just ensure they are high-quality.
How should I store meringue trees to keep them fresh?
Very good question! Store your meringue trees in an airtight container at room temperature for up to two weeks. Keeping them sealed prevents moisture from affecting their crunchy texture. I often use a cookie tin lined with parchment paper to keep them perfectly protected.
Can I freeze meringue trees for later enjoyment?
Yes, you can! To freeze your meringue trees, wrap each one individually in plastic wrap or foil. Then, place them in an airtight freezer bag. They can be stored for up to 1 month. When you’re ready to enjoy them, simply thaw at room temperature. A quick pop in a 200°F (93°C) oven for 5-10 minutes can help restore their lovely crunch.
What if my meringue doesn’t form stiff peaks?
If your meringue isn’t reaching stiff peaks, it might be due to grease on your equipment or the egg whites being cold. Make sure your mixing bowl and whisk attachment are completely grease-free—wiping with vinegar can help! Also, ensure your egg whites are at room temperature, which dramatically improves the whipping process.
Are meringue trees safe for people with allergies?
Great question! Meringue trees are gluten-free and primarily made from egg whites and sugar, making them a suitable option for many. However, pay attention to any decorations you plan to use, as sprinkles may contain allergens like gluten or dyes. Always check the packaging to ensure they are safe for your guests’ dietary needs.
Can I change the color of the meringue trees?
Absolutely! You can swap the green gel food coloring for any color of your choice, whether it’s red for Christmas or pastel shades for other celebrations. Just remember that liquid food colorings can alter the consistency, so stick with gel for the best results. Let your imagination run wild with colors to match your festive theme!
Meringue Trees Recipe FAQs
Meringue Trees: Delightfully Sweet Holiday Whimsies
Ingredients
Equipment
Method
- Preheat your oven to 200°F (93°C) and line a large baking sheet with parchment paper or a silicone mat.
- Ensure your mixing bowl and whisk attachment are completely grease-free.
- Whisk 4 egg whites on medium speed until frothy. Add 1/4 teaspoon of cream of tartar to stabilize.
- Gradually add 1 cup of granulated sugar, whisking until stiff peaks form.
- Add 1 teaspoon of vanilla or almond extract and a few drops of green gel food coloring, mixing until well blended.
- Fit a piping bag with a star piping tip and color the inside with green gel if desired.
- Pipe three dollops of meringue on top of each other to form tree shapes, spacing them 1 inch apart.
- Sprinkle nonpareil and star sprinkles over the wet meringue trees.
- Bake in the preheated oven for 90 minutes, then turn off the oven and leave the meringues inside for an additional hour.
- Dust cooled meringue trees with powdered sugar for a snowy effect before enjoying.