


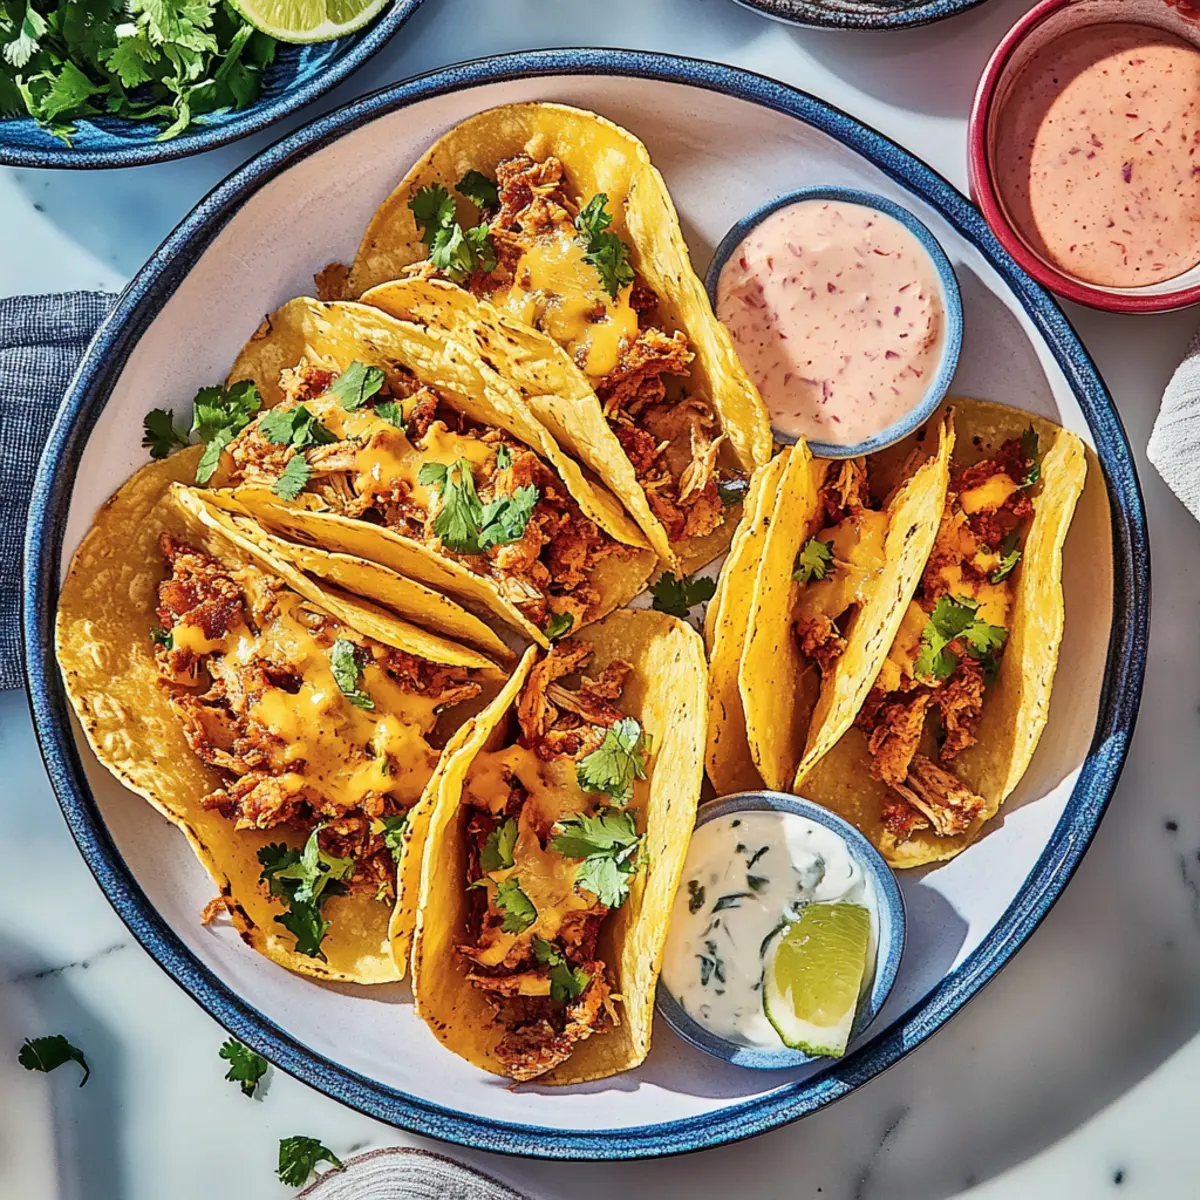
As I hustled around the kitchen, the smell of sizzling spices wafted through the air, creating a warm invitation that hinted at a flavorful family meal. Today, I’m excited to share my recipe for Healthy Oven Baked Chicken Tacos, which perfectly balances crispy textures and hearty fillings, making them a fantastic gluten-free option for those craving something delicious yet wholesome. Not only are these tacos quick to prepare—perfect for busy weeknights—but they also allow room for creativity with fillings and toppings, keeping dinner fun and fresh. Plus, they’re a guilt-free solution for anyone tired of fast food, without sacrificing taste. So, what’s your favorite way to dress up a taco? Let’s dive into this tasty adventure together!
Why are these Oven Baked Chicken Tacos a must-try?
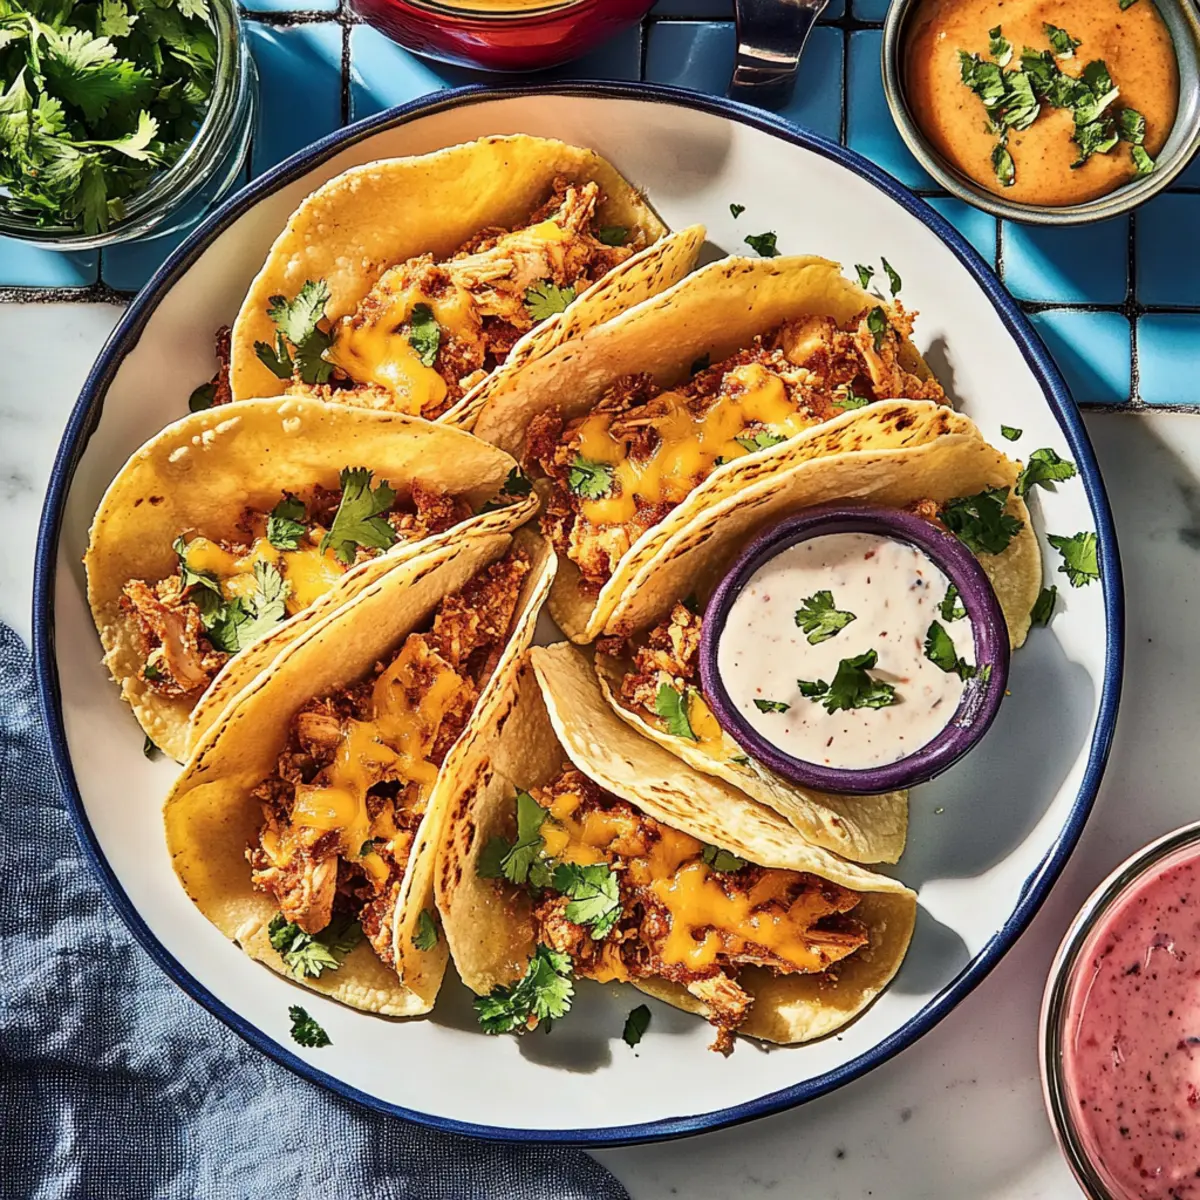
Crispy Delight: These tacos come out beautifully golden, with a satisfying crunch you’ll love.
Flavor Explosion: Seasoned ground chicken combined with smoky spices creates a savory filling that rivals any takeout option.
Customizable Joy: From choosing different toppings to varying the protein, these tacos let you get creative and cater to everyone’s taste.
Quick & Easy: Ready in under 30 minutes, they make weeknight dinners a breeze!
Guilt-Free Indulgence: With gluten-free and dairy-free options available, you can enjoy a comforting meal without the fast-food guilt. For more healthy recipes, you might also enjoy these Butter Baked Chicken or Oven Chicken Rice.
Oven Baked Chicken Tacos Ingredients
For the Filling
• Avocado Oil – Provides a healthy fat source for cooking; can be substituted with olive oil or any other oil of choice.
• Onion – Adds depth of flavor to the filling; use yellow or white onion, diced.
• Garlic – Gives aromatic flavor; fresh cloves are recommended; can be substituted with garlic powder (1/2 teaspoon per clove).
• Ground Chicken – Main protein source; leaner than beef; can be replaced with ground turkey or beef, but adjust cooking time as necessary.
• Paprika – Adds mild heat and color; consider smoked paprika for a deeper flavor.
• Cumin – Provides warmth and earthiness to the mix; keep as is for the best taste.
• Sea Salt – Enhances overall flavor; adjust to taste if on a low-sodium diet.
• Black Pepper – Adds a touch of heat; freshly ground is best.
• Chipotle Pepper – Provides smokiness and heat; can be replaced with cayenne for extra spice.
• Mild Red Enchilada Sauce – Offers moisture and flavor to the filling; substitute with red salsa if unavailable.
For the Taco Shells
• Thin Corn Tortillas – Used for the taco shells; gluten-free option; regular flour tortillas may be used if gluten is not a concern.
For the Topping
• Mexican-Blend Shredded Cheese – Adds creaminess and flavor; substitute with dairy-free cheese for a vegan option.
Discover the joy of making these Oven Baked Chicken Tacos as they’re packed with flavor and healthy goodness!
Step‑by‑Step Instructions for Oven Baked Chicken Tacos
Step 1: Preheat the Oven
Begin by preheating your oven to 400°F (200°C). This ensures that your Oven Baked Chicken Tacos will achieve the perfect golden crispiness. While the oven warms up, gather your ingredients and prepare your cooking area for the delightful taco-making process ahead.
Step 2: Heat the Oil
In a large skillet, pour in about two tablespoons of avocado oil and heat it over medium heat. Wait until the oil shimmers slightly, signaling it’s hot enough to sauté. This step is crucial for infusing the tacos with rich flavor while ensuring the ground chicken cooks evenly.
Step 3: Sauté the Aromatics
Add the diced onion to the skillet and sauté it for 3-4 minutes, stirring until it becomes translucent and fragrant. Next, add the minced garlic, allowing it to cook for an additional minute. This creates a flavorful base that will enhance the filling of your healthy Oven Baked Chicken Tacos.
Step 4: Cook the Ground Chicken
Add the ground chicken to the skillet, breaking it apart with a spatula. Cook for about 5-7 minutes, until it’s mostly cooked through, turning a lovely pale color. Make sure the meat is crumbly and no longer pink, ensuring a tender and juicy filling for your tacos.
Step 5: Season the Chicken
Sprinkle in the paprika, cumin, sea salt, black pepper, and chipotle pepper. Stir thoroughly to combine the spices with the chicken mixture. Cook for another 2-3 minutes until the chicken absorbs the vibrant flavors and is fully cooked, creating a savory filling for your Oven Baked Chicken Tacos.
Step 6: Incorporate the Enchilada Sauce
Pour in the mild red enchilada sauce, stirring well to incorporate it into the chicken and spice mixture. Allow the filling to simmer for a few minutes, just until it’s warm and well mixed. This adds moisture and a tangy kick that elevates your tacos to the next level.
Step 7: Prepare the Tortillas
Take your thin corn tortillas and wrap them in a damp paper towel. Microwave them for about 30 seconds to soften, making them easier to fold and less likely to tear during assembly. A pliable tortilla is key to crafting the perfect healthy Oven Baked Chicken Tacos.
Step 8: Assemble the Tacos
On one side of each tortilla, sprinkle a layer of cheese, then add a generous spoonful of the chicken mixture, followed by another sprinkle of cheese. Carefully fold the tortilla over the filling, ensuring it’s packed well. This layering gives the tacos delicious ooey-gooey goodness, essential for a great bite!
Step 9: Bake the Tacos
Arrange the assembled tacos on a lined baking sheet, placing them seam side down. Cover them with another baking sheet to ensure they cook evenly and don’t dry out. Bake for 18 minutes, which will yield crispy shells and melted cheese, just the way you want your Oven Baked Chicken Tacos to turn out.
Step 10: Broil for Extra Crisp
After 15 minutes, carefully remove the top baking sheet. Switch on the broiler and broil the tacos for an additional 2-3 minutes, keeping a close eye to prevent burning. This step creates that irresistible crispy texture while ensuring the cheese turns golden and bubbly.
Step 11: Serve and Enjoy
Once done, take your tacos out of the oven and let them cool for a minute. Serve immediately with your favorite salsa or dipping sauce for added flavor. If you have leftovers, store them in the fridge for up to five days, making delightful meals easy to grab any day!
Oven Baked Chicken Tacos Variations
Feel free to explore these delightful twists on my Oven Baked Chicken Tacos for a uniquely customized experience.
-
Shredded Chicken: Swap ground chicken for shredded cooked chicken. This offers a tender texture that is equally delicious.
-
Veggie Lovers: Stir in diced bell peppers or corn into the filling for extra nutrition and color! They not only enhance flavor but also bring a vibrant crunch.
-
Spicy Kick: Add more chipotle peppers or a dash of jalapeño for heat. Amping up the spice level can turn up the flavor volume for those who love a little fire!
-
Vegan Delight: Use plant-based crumbles or lentils instead of meat, and swap in dairy-free cheese. These alterations create a satisfying meal for everyone at the table!
-
Cheese Variations: Try different cheeses like pepper jack for a spicy twist or a creamy feta for a Mediterranean flare. Each brings a unique flavor that complements the savory chicken.
-
Herb Infusion: Incorporate fresh cilantro or green onions into the filling for a vibrant addition. The fresh herbs add that extra layer of flavor and a pop of freshness.
-
Tortilla Twist: Experiment with different tortillas like spinach or beetroot for a colorful spin. These options are not only visually appealing but also add a subtle twist to the flavor profile.
-
Taco Bar: Lay out an assortment of toppings such as avocado, salsa, and Greek yogurt. Allow everyone to build their perfect taco, making dining an interactive and fun experience!
These Oven Baked Chicken Tacos can truly be anything you want them to be. If you’re interested in exploring more chicken recipes, check out my Sizzling Chicken Pepper or enjoy a hearty Tuscan Chicken Soup that warms your soul!
How to Store and Freeze Oven Baked Chicken Tacos
Fridge: Store leftover Oven Baked Chicken Tacos in an airtight container for up to 5 days to keep the flavors intact and the tortillas fresh.
Freezer: For longer storage, freeze assembled, uncooked tacos in a single layer on a baking sheet. Once frozen, transfer to a freezer bag for up to 3 months.
Reheating: To reheat, simply bake from frozen at 375°F (190°C) for 25-30 minutes or until heated through. Add a few more minutes under the broiler for extra crispiness.
Wrap Well: If storing in the fridge or freezer, ensure tacos are wrapped tightly to prevent freezer burn and maintain the crispy texture when reheated.
What to Serve with Healthy Oven Baked Chicken Tacos
Indulge in a deliciously satisfying family meal that perfectly balances flavors while keeping the prep time short.
-
Creamy Avocado Dip: The rich, buttery texture of avocado enhances the freshness of the tacos and adds a delightful creaminess.
-
Spicy Black Bean Salad: This vibrant salad offers a healthy kick that pairs beautifully with the savory chicken filling and adds a refreshing crunch.
-
Zesty Corn Salsa: The bright flavors of corn, lime, and cilantro will elevate your taco night, bringing a burst of color and taste to each bite.
-
Sweet Potato Fries: Crispy, slightly sweet, and healthy, these fries bring a fantastic contrast to the savory heat of the tacos while staying on the guilt-free side.
-
Cilantro Lime Rice: Fluffy rice tossed with zesty lime and fresh cilantro delivers a fragrant complement, adding a nice touch of brightness to every taco.
-
Homemade Salsas: Serve with your choice of spicy or tangy salsa to give guests the fun of choosing their flavor adventure.
-
Refreshing Margaritas: A classic pairing, these fruity cocktails balance the spices of the tacos, making your meal feel like a festive fiesta!
-
Chocolaty Brownies: For dessert, treat your family to fudgy brownies; they create a delightful end to your flavor-packed meal while keeping the indulgence light.
Make Ahead Options
These Healthy Oven Baked Chicken Tacos are perfect for meal prep enthusiasts looking to save time during busy weeknights! You can prepare the filling (ground chicken, onion, garlic, and spices) up to 3 days in advance. Simply cook the mixture as instructed and let it cool before transferring it to an airtight container in the refrigerator. Additionally, you can soften the tortillas ahead of time and store them wrapped in a damp towel for up to 24 hours. When you’re ready to enjoy your tacos, just reheat the filling in a skillet, assemble the tacos with cheese, and follow the baking steps. This way, you’ll enjoy tasty, fresh, and crispy Oven Baked Chicken Tacos with minimal effort, just as delicious as if you made them from scratch!
Expert Tips for Oven Baked Chicken Tacos
- Tortilla Texture: Ensure tortillas are soft and pliable before assembling to prevent tearing. Wrapping them in a damp towel helps!
- Watch the Broil: Keep a close eye on the tacos while broiling to avoid burning. Aim for golden cheese without overcooking.
- Flavor Boost: Experiment with spices; adding a dash of chili powder or more cumin can enhance the filling for your Oven Baked Chicken Tacos.
- Timing is Key: Bake for the full 18 minutes and broil just until crispy for that perfect bite every time.
- Prep Ahead: Consider prepping the chicken filling a day ahead, making weeknight meals even simpler!

Oven Baked Chicken Tacos Recipe FAQs
How do I choose the best avocados for my recipe?
Absolutely! When selecting avocados, look for ones that feel slightly soft when gently squeezed but aren’t mushy. The skin should be dark green to nearly black. If you find any dark spots all over, that indicates overripeness. Avoid those and choose a firm avocado that will ripen perfectly for your delicious tacos.
How should I store leftover Oven Baked Chicken Tacos?
Store any leftover Oven Baked Chicken Tacos in an airtight container in the fridge for up to 5 days. This will keep the flavors fresh and the tortillas from becoming too soggy. To reheat, just pop them back in the oven at 375°F (190°C) for about 10-12 minutes, or until warm.
Can I freeze Oven Baked Chicken Tacos?
Yes! To freeze, assemble the uncooked tacos and place them in a single layer on a baking sheet until solid. Once frozen, transfer them into a freezer bag and they can last for up to 3 months. When you’re ready to enjoy, bake them from frozen at 375°F (190°C) for 25-30 minutes or until heated through, adding additional time under the broiler for that crunchy finish.
What if my tacos don’t come out crispy?
The key to a great crispy taco is ensuring your tortillas are soft before baking and keeping an eye during the broiling step. If you find they aren’t crispy enough, try using a higher oven setting on the broiler, but watch them closely to avoid burning. Additionally, using fresh and pliable tortillas helps maintain that crunch.
Are there any allergy considerations for these tacos?
Yes, absolutely! Since this recipe uses ground chicken and chipotle pepper, be mindful of any poultry or spice allergies. For a dairy-free option, you can substitute the Mexican-blend shredded cheese with nutritional yeast or a dairy-free cheese. Always double-check ingredient labels to ensure safety, especially if serving to guests with dietary restrictions.
Can I prepare the filling ahead of time?
Very! I highly recommend making the chicken filling a day in advance. Simply prepare the mixture, let it cool, and store it in an airtight container in the fridge. This not only saves time on busy weeknights but also allows the flavors to develop even more, making your Oven Baked Chicken Tacos taste even better!

Crispy Oven Baked Chicken Tacos for Flavor-Packed Meals
Ingredients
Equipment
Method
- Preheat the Oven to 400°F (200°C).
- Heat the avocado oil in a large skillet over medium heat until shimmering.
- Sauté the diced onion for 3-4 minutes until translucent, then add garlic and cook for another minute.
- Add ground chicken, breaking it apart and cooking for 5-7 minutes until fully cooked.
- Sprinkle in the paprika, cumin, sea salt, black pepper, and chipotle pepper, stirring well.
- Incorporate the enchilada sauce and let simmer until warm.
- Wrap tortillas in a damp paper towel and microwave for 30 seconds to soften.
- Assemble the tacos by layering cheese and chicken mixture on each tortilla before folding.
- Arrange on a baking sheet, seam side down, cover with another baking sheet, and bake for 18 minutes.
- Remove top sheet and broil for 2-3 minutes until the cheese is bubbly and golden.
- Serve immediately with salsa or dipping sauce.