


Surrounded by the laughter of my family on a sun-kissed afternoon, I suddenly craved something refreshing and indulgent. That’s when I realized the joy of Soft Chocolate Chip Ice Cream Sandwiches was calling my name. This dreamy dessert combines the delightful chewiness of freshly baked cookies with the creamy goodness of your favorite ice cream—all without the tedious waiting time for dough to chill! Perfect for casual get-togethers or a simple treat after dinner, these sandwiches are not only kid-friendly but also gluten-free adaptable, ensuring everyone can join in on the fun. So, are you ready to create your very own ice cream dream? Let’s dive into the delightful world of homemade ice cream sandwiches!

Why are ice cream sandwiches so special?
Indulgent Flavor: The combination of soft chocolate chip cookies and creamy ice cream creates a burst of deliciousness in every bite.
Quick & Easy: With no chill time for the dough, your homemade treats are ready to enjoy almost immediately—perfect for spontaneous dessert cravings!
Kid-Friendly Fun: Kids will love helping to assemble their sandwiches, making it an enjoyable activity for the whole family.
Gluten-Free Options: Flexible and accommodating, you can easily swap in a gluten-free cookie base to cater to dietary needs.
Perfect for Sharing: These sandwiches are ideal for gatherings and summer parties, enchanting guests with their delightful flavors!
So, gather your loved ones, and dive into these joyous treats that are sure to bring smiles all around!
Soft Chocolate Chip Ice Cream Sandwich Ingredients
Craft your own delightful Soft Chocolate Chip Ice Cream Sandwiches with these essential ingredients that make this treat irresistibly soft and creamy!
For the Cookies
- All-purpose flour – Provides structure to the cookies. Substitution: Use gluten-free flour blend for a gluten-free version.
- Cornstarch – Keeps cookies soft and pliable after freezing. Substitution: 1 tablespoon of cake flour for a similar effect, although not as tender.
- Baking soda – Acts as a leavening agent to help cookies rise.
- Salt – Enhances flavor balance in cookies.
- Unsalted butter – Adds richness and moisture to cookies. Make sure it’s softened to room temperature for proper creaming.
- Light or dark brown sugar – Contributes to the cookie’s moistness and chewiness.
- Granulated sugar – Adds sweetness and helps with browning.
- Egg + egg yolk – Provides structure and moisture; extra yolk adds richness.
- Pure vanilla extract – Adds depth of flavor to the cookies.
- Mini semi-sweet chocolate chips – Incorporates chocolate flavor and texture into cookies.
For the Ice Cream Filling
- Ice cream – Fills the sandwiches; use any flavor that pairs well with chocolate cookies. Avoid flavors with large mix-ins for easier assembly.
Optional Toppings
- Mini chocolate chips, sprinkles, or chopped nuts – Used for rolling the edges of the sandwiches.
Gather these ingredients, and you’ll be well on your way to treating yourself and your loved ones to the delightful bliss of homemade ice cream sandwiches!
Step‑by‑Step Instructions for Soft Chocolate Chip Ice Cream Sandwiches
Step 1: Preheat and Prepare
Begin by preheating your oven to 350°F (177°C). While the oven heats, line two baking sheets with parchment paper to prevent the cookies from sticking. This simple step sets the stage for achieving perfectly baked Soft Chocolate Chip Ice Cream Sandwiches that won’t cling to the pan, making your cleanup a breeze.
Step 2: Mix Dry Ingredients
In a medium bowl, combine 1 ½ cups of all-purpose flour, 1 tablespoon of cornstarch, 1 teaspoon of baking soda, and ½ teaspoon of salt. Whisk these dry ingredients together until they are well blended, which takes about 1-2 minutes. This mixture forms the foundation for soft and tasty cookies that perfectly complement your ice cream.
Step 3: Cream the Butter and Sugars
In a large mixing bowl, use an electric mixer to cream together ½ cup of softened unsalted butter with ½ cup of light or dark brown sugar and ¼ cup of granulated sugar until the mixture turns pale and fluffy, around 3 minutes. This texture is crucial for creating that melt-in-your-mouth quality in your Soft Chocolate Chip Ice Cream Sandwiches.
Step 4: Add Wet Ingredients
Crack in 1 large egg and 1 egg yolk, plus 1 teaspoon of pure vanilla extract, to the creamed butter mixture. Beat these ingredients together until they are fully combined and smooth, taking about 1 minute. Allow the flavors to meld together, enhancing the richness of your cookie dough that will cradle your favorite ice cream flavors.
Step 5: Combine Dry and Wet Mixtures
Gradually add the flour mixture to the wet ingredients, mixing until just incorporated. Be careful not to overmix; stir in 1 cup of mini semi-sweet chocolate chips with a spatula until evenly distributed. This final touch ensures your cookies are laden with delightful chocolate bits for your Soft Chocolate Chip Ice Cream Sandwiches.
Step 6: Scoop and Bake
Using a tablespoon or cookie scoop, drop 1.5-tablespoon balls of dough onto the prepared baking sheets, spaced about 2 inches apart. Bake the cookies in the preheated oven for 12-13 minutes, or until the edges are just set and the centers appear slightly underbaked. This technique guarantees that they stay soft and chewy once frozen.
Step 7: Cool Cookies
Remove the baking sheets from the oven and let the cookies cool on the pans for 5 minutes. Then, transfer them to a wire rack to cool completely, which should take about 15 minutes. It’s important to allow the cookies to reach room temperature to prevent any melting of the ice cream during assembly.
Step 8: Assemble the Sandwiches
To assemble your Soft Chocolate Chip Ice Cream Sandwiches, take one cookie and place a generous scoop of your favorite ice cream on the flat side. Gently press another cookie on top to form a sandwich, ensuring the ice cream remains in place. This method creates the perfect balance of cookie and ice cream.
Step 9: Roll and Freeze
If desired, roll the edges of the sandwiches in mini chocolate chips, sprinkles, or chopped nuts for an extra touch of fun. Wrap each sandwich tightly in plastic wrap and place them in the freezer for at least 3 hours to firm up the ice cream, ensuring a delightful experience with every bite.
Step 10: Serve and Enjoy
Once frozen, unwrap your Soft Chocolate Chip Ice Cream Sandwiches, and they’re ready to serve. These delightful treats are perfect for warm afternoons, family gatherings, or any time you crave something sweet. Enjoy the delicious combination of chewy cookies and creamy ice cream as they melt in your mouth!
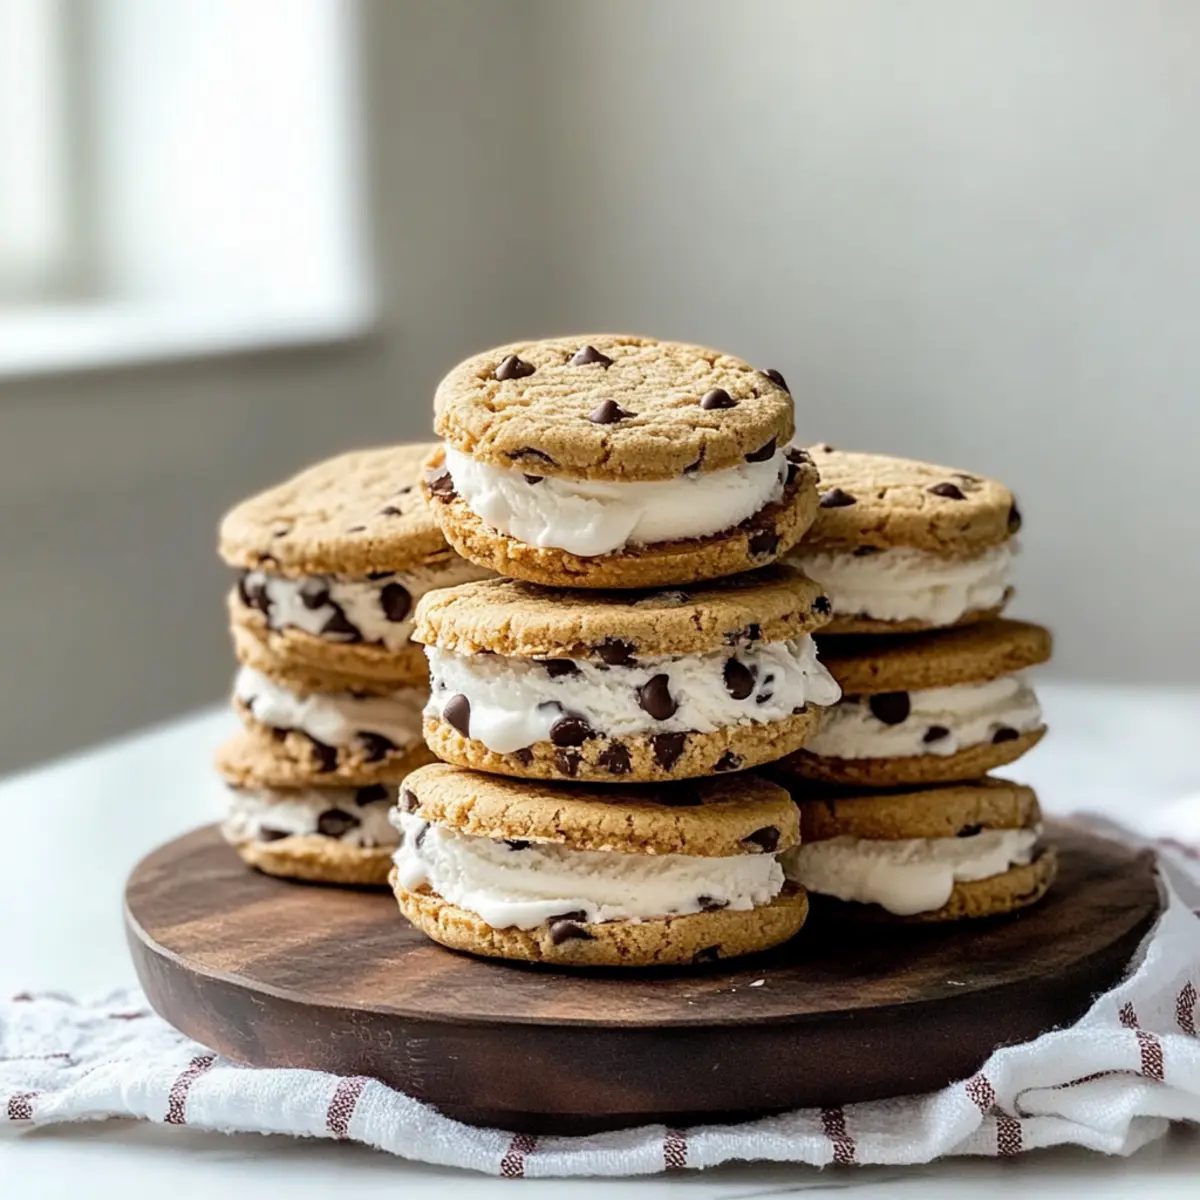
Variations & Substitutions for Soft Chocolate Chip Ice Cream Sandwiches
Feel free to get creative and customize your ice cream sandwiches to suit your taste buds and dietary needs!
-
Gluten-Free Base: Substitute traditional chocolate chip cookies with flourless almond butter or peanut butter cookies to cater to gluten-free friends.
-
Healthier Cookies: Use whole wheat flour instead of all-purpose flour for a hearty twist that still delivers on flavor and texture.
-
Dairy-Free Delight: Swap regular ice cream for your favorite coconut or almond milk-based options to whip up a refreshing dairy-free version.
-
Flavor Burst: Experiment with a splash of different extracts, like almond or mint, in your cookie dough for exciting flavor depths. A hint of mint brings a whole new dimension to standard chocolate cookies!
-
Extra Texture: Fold in crushed nuts or granola into the cookie dough for a delightful crunch that complements the softness of the ice cream. Each bite becomes a thrilling mix of textures!
-
Spicy Kick: Add a pinch of cayenne pepper or cinnamon to the cookie dough for a surprising and warm kick. It sounds daring but can provide a unique depth of flavor!
-
Choco-Lovers Treat: Use double chocolate cookies instead of regular for a double dose of chocolate goodness. The rich cookie paired with vanilla ice cream creates pure bliss!
-
Seasonal Swaps: During the fall, swap out some chocolate chips for pumpkin puree and spices, transforming your ice cream sandwiches into delightful autumn treats!
By exploring these variations, you can craft a personalized dessert experience that’s sure to delight your family and friends. If you’re looking to try a flourless option, check out my post on Flourless Chocolate Cookies. Or perhaps you’re interested in flavor ideas? Don’t miss the suggestions in Ice Cream Flavor Combinations! Each twist brings you closer to your perfect ice cream sandwich!
Storage Tips for Soft Chocolate Chip Ice Cream Sandwiches
-
Freezer: Wrap tightly in plastic wrap and freeze for up to 3 weeks. This prevents freezer burn and keeps your homemade ice cream sandwiches fresh and ready for any sweet craving.
-
Serving: Allow ice cream sandwiches to sit at room temperature for 5 minutes before serving. This makes them easier to bite into while maintaining their deliciously creamy center.
-
Wrapping: For longer storage, consider individually wrapping each sandwich in wax paper or foil, then placing them in a freezer-safe bag. This keeps them organized and ready for quick retrieval.
-
Reheating: For a warm treat, microwave the sandwich for about 10 seconds. This slightly softens the cookie while keeping the ice cream firm, creating a delightful texture experience!
Expert Tips for Soft Chocolate Chip Ice Cream Sandwiches
-
Cool Completely: Ensure cookies are completely cooled before assembly to avoid melting the ice cream during the process.
-
Underbake Slightly: Take cookies out when they’re just set on the edges and still soft in the center; they will continue baking as they cool.
-
Use Cornstarch: Don’t skip on cornstarch, as it is key to maintaining that soft texture even after freezing.
-
Gentle Press: When assembling sandwiches, press the cookies together gently to avoid cracks and ensure even ice cream distribution.
-
Skip Big Mix-ins: Choose ice cream flavors without large mix-ins to make assembly easier and keep the sandwiches neat!
-
Experiment with Variants: Try different cookie bases and ice cream flavors to customize your homemade ice cream sandwiches for unique flavor combinations!
Make Ahead Options
These Soft Chocolate Chip Ice Cream Sandwiches are perfect for busy home cooks looking to streamline dessert prep! You can make the cookie dough up to 24 hours in advance; simply cover it tightly with plastic wrap and refrigerate until ready to bake. The cookies can also be baked and cooled up to 3 days ahead of assembling your sandwiches. Store the cooled cookies in an airtight container to keep them soft and fresh. When it’s time to serve, just scoop your favorite ice cream between two cookies, roll the edges in mini chocolate chips or sprinkles if desired, and freeze the assembled sandwiches for at least 3 hours to achieve optimal firmness. Enjoy your delightful treats whenever the craving strikes!
What to Serve with Soft Chocolate Chip Ice Cream Sandwiches
Indulging in these delightful ice cream sandwiches is a joy on its own, but pairing them with the right sides can elevate your treat experience even further!
-
Fresh Berries: A mix of strawberries, raspberries, and blueberries adds a refreshing, tangy contrast to the sweetness of the sandwiches. The juicy bursts of fruit complement the creamy ice cream seamlessly.
-
Creamy Milkshakes: Pair with a thick and creamy milkshake to create an ultimate dessert duo. The flavors harmonize beautifully, and who doesn’t love a delightful shake to sip alongside their ice cream treat?
-
Chocolate Sauce Drizzle: A warm drizzle of chocolate sauce over the sandwich takes indulgence to the next level. This exciting addition adds richness as the warm chocolate melts slightly into the sandwich.
-
Vanilla Whipped Cream: Light and airy whipped cream adds a touch of elegance. Serve a dollop on the side for an extra layer of creaminess that enhances each bite of the ice cream sandwich.
-
Light Fruit Salad: A refreshing fruit salad mellowed with a squeeze of citrus creates a vibrant balance. The bright flavors and textures of the fruit will cut through the richness of the cookies.
-
Cold Brew Coffee: Pairing your sandwiches with a chilled coffee drink offers a delightful contrast. The smooth coffee flavors mingle well, adding an energizing touch to your dessert.
-
Chocolate Chip Cookie Bars: Enhance the cookie experience by presenting these alongside chewy, gooey cookie bars. It’s a double cookie delight that both kids and adults will appreciate.
-
Coconut Sorbet: Serve alongside a scoop of light coconut sorbet for a tropical twist. The creamy texture and subtle flavor will create an unforgettable flavor pairing.
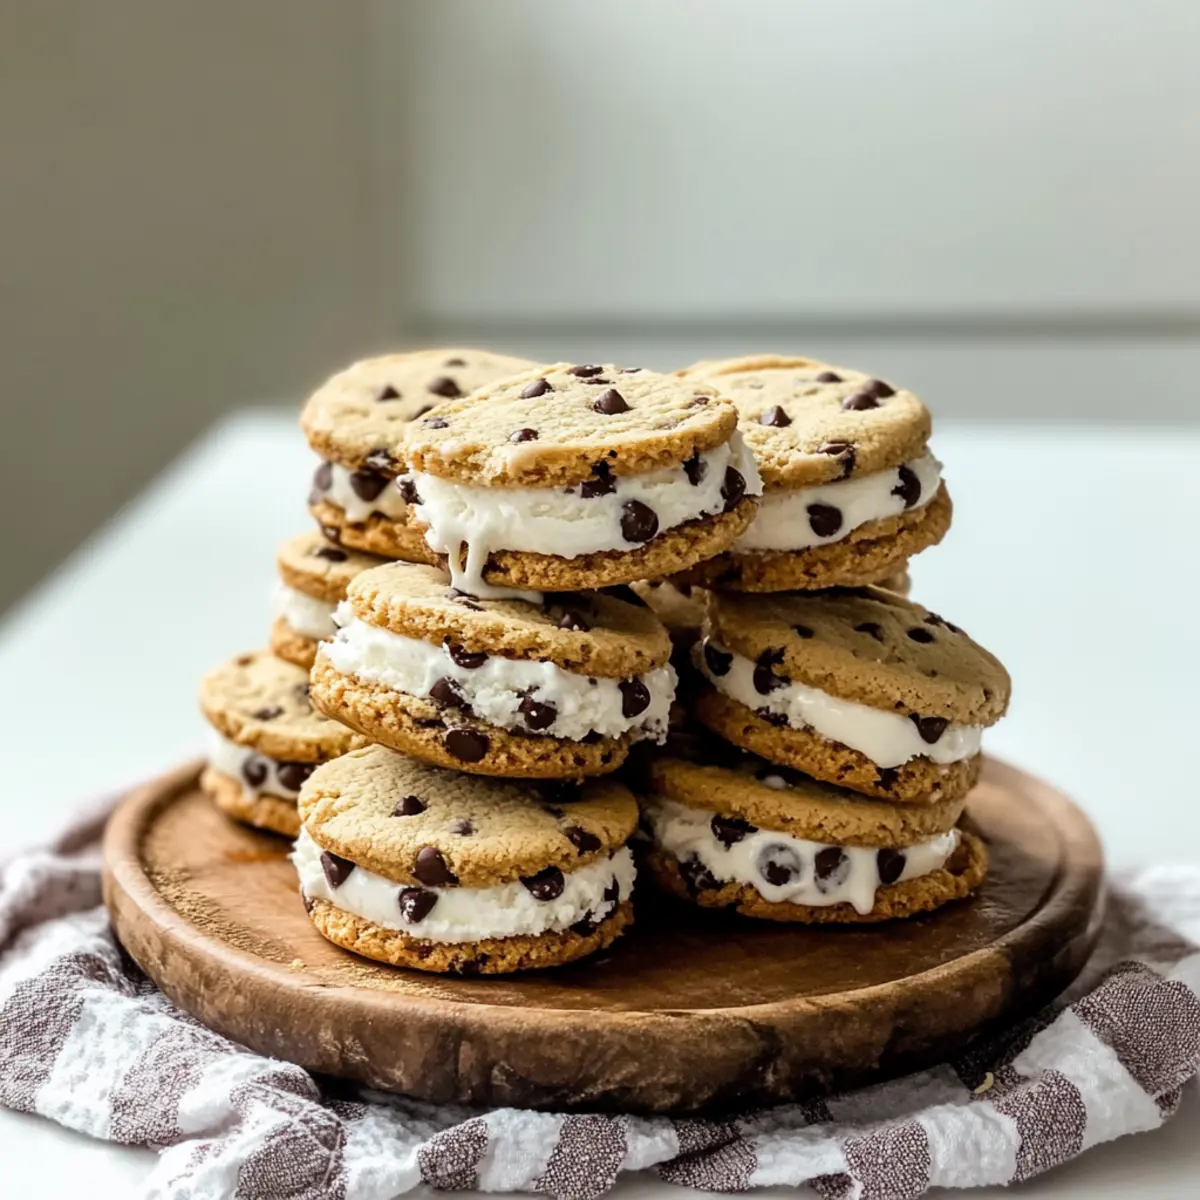
Soft Chocolate Chip Ice Cream Sandwiches Recipe FAQs
What type of flour should I use for the cookies?
You can use all-purpose flour for a classic texture, but if you want to make these sandwiches gluten-free, simply substitute it with a gluten-free flour blend. It’s crucial for both the flavor and texture of your cookies!
How long can I store homemade ice cream sandwiches in the freezer?
Absolutely! Store them wrapped tightly in plastic wrap in the freezer for up to 3 weeks. This prevents freezer burn and keeps them fresh, so you can satisfy your cravings any time!
Can I freeze the cookie dough?
Yes, you can! To freeze the unbaked cookie dough, scoop the dough balls onto a baking sheet and freeze them until solid, about 1-2 hours. Then, transfer the frozen dough balls to a resealable bag. They can be stored for up to 3 months. Just bake them straight from frozen; they may need an extra minute or two in the oven.
What should I do if my cookies come out too hard after freezing?
If your cookies turn out hard, it’s likely that the cornstarch was omitted. Cornstarch helps maintain a soft texture even after freezing. For next time, be sure to include it and check that you don’t overbake the cookies; they should look slightly underbaked when removed from the oven!
Are these ice cream sandwiches safe for pets or those with allergies?
Generally, the ice cream used is not suitable for pets, especially those sensitive to dairy. Additionally, if you’re accommodating allergies, make sure to check each ingredient to ensure no cross-contamination occurs, particularly with the ice cream, as many brands may contain allergens like nuts or gluten.
How do I make the ice cream sandwiches more visually appealing?
To enhance presentation, you can roll the edges of the ice cream sandwiches in mini chocolate chips, sprinkles, or chopped nuts. This adds a delightful touch and makes them festive for any occasion!

Soft Chocolate Chip Ice Cream Sandwiches for Instant Joy
Ingredients
Equipment
Method
- Preheat your oven to 350°F (177°C) and line two baking sheets with parchment paper.
- In a medium bowl, combine 1.5 cups of all-purpose flour, 1 tablespoon of cornstarch, 1 teaspoon of baking soda, and 0.5 teaspoon of salt. Whisk until well blended.
- In a large mixing bowl, cream together 0.5 cup of softened unsalted butter, 0.5 cup of light or dark brown sugar, and 0.25 cup of granulated sugar until pale and fluffy.
- Add 1 large egg, 1 egg yolk, and 1 teaspoon of pure vanilla extract to the creamed mixture and beat until combined.
- Gradually add the flour mixture to the wet ingredients, mixing until just incorporated, then stir in 1 cup of mini semi-sweet chocolate chips.
- Scoop 1.5-tablespoon balls of dough onto the prepared baking sheets, spaced about 2 inches apart, and bake for 12-13 minutes.
- Let the cookies cool on the pans for 5 minutes before transferring to a wire rack to cool completely.
- To assemble, place a scoop of ice cream on one cookie and gently press another cookie on top.
- Roll the edges of the sandwiches in mini chocolate chips, sprinkles, or chopped nuts, if desired, and wrap tightly in plastic wrap.
- Freeze for at least 3 hours before serving, allowing them to sit at room temperature for 5 minutes before enjoying.