


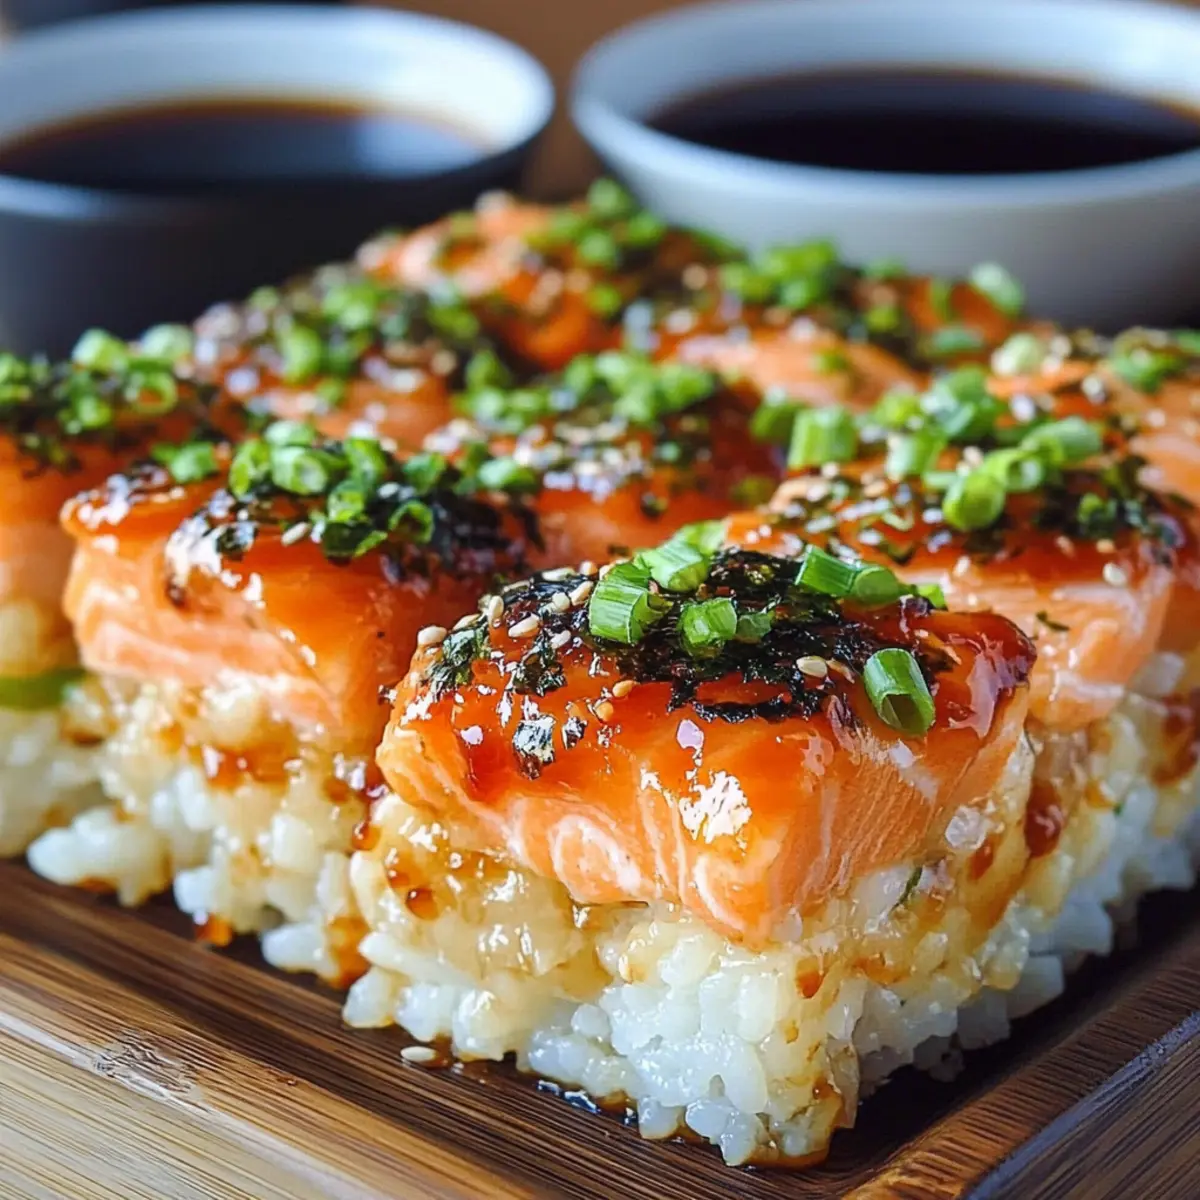
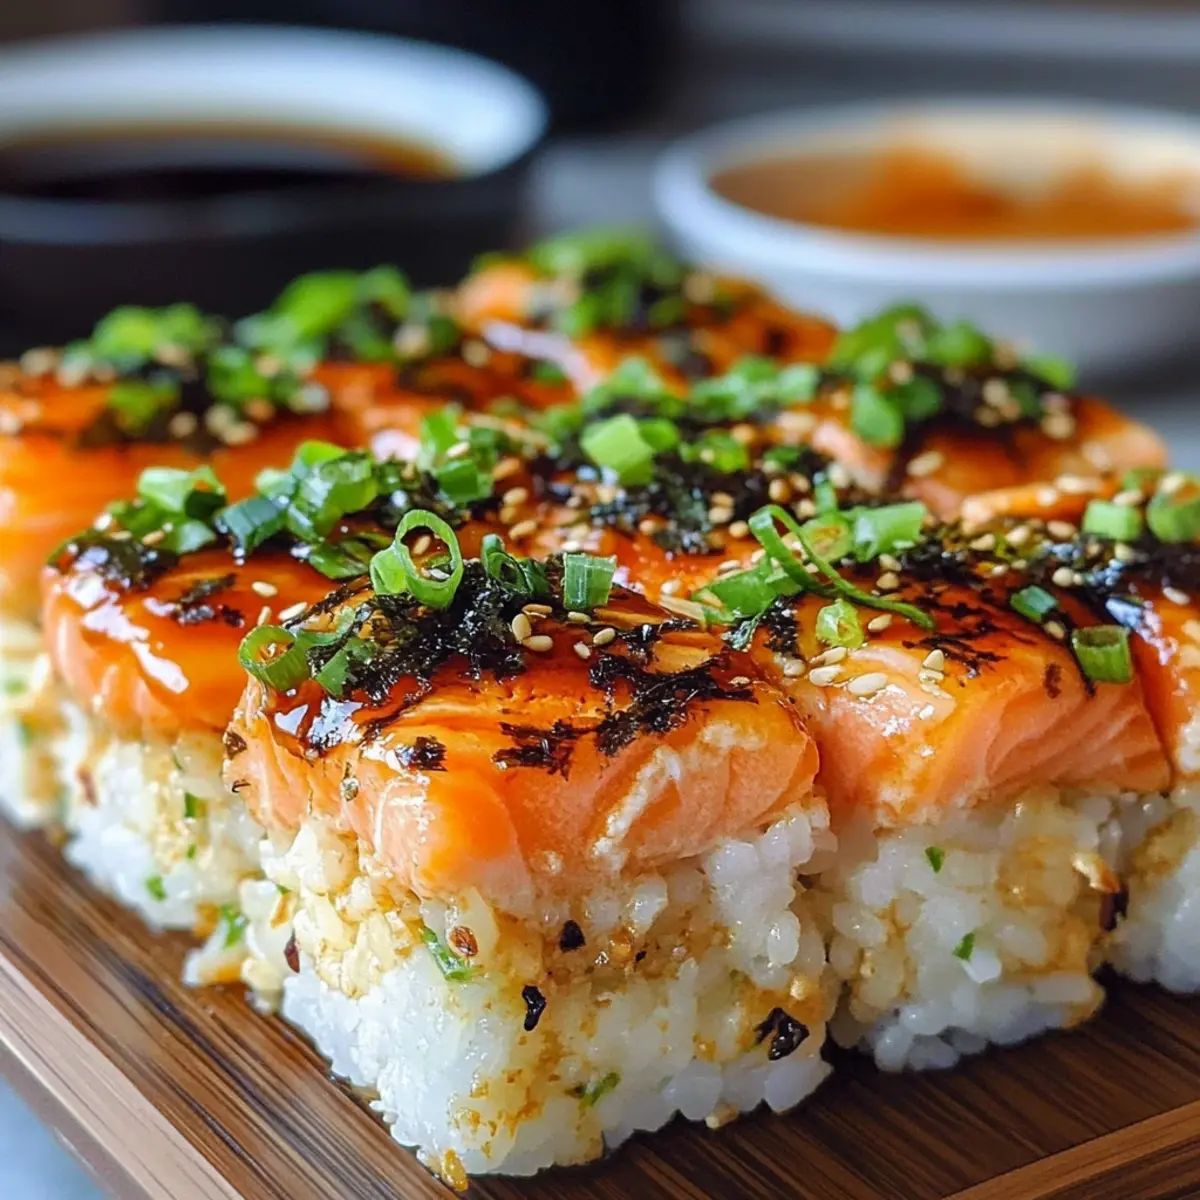
You know those weeknights when cooking feels like a marathon and takeout is calling your name? Let me share my secret weapon: a Spicy Salmon Sushi Bake that effortlessly combines comfort and flavor. This easy-to-make casserole captures the essence of sushi while offering the warmth of a baked dish, creating a delightful way to satisfy both cravings and hunger. Each serving is a harmony of fluffy sushi rice, creamy salmon, and a crispy, spicy topping that’s sure to impress your family or guests. Not only is this dish a crowd-pleaser, but it also makes for fantastic meal prep—perfect for busy lives. Are you ready to take your weeknight dinners to a whole new level? Dive into this recipe with me!
Why is this recipe a must-try?
Easy Prep: This Spicy Salmon Sushi Bake is not only simple to prepare but also perfect for busy weeknights when you crave homemade goodness.
Crowd-Pleaser: With its delicious blend of flavors and comforting texture, you’re sure to impress family and friends at any gathering.
Versatile Options: You can easily customize the recipe by swapping salmon for cooked shrimp or even trying quinoa for a gluten-free alternative.
Leftover Love: The flavors only get better with time! Enjoy tasty leftovers that reheat beautifully.
Nutritional Benefits: Packed with omega-3 fatty acids and protein, it offers nourishing comfort with every bite—making it a smart choice for a hearty meal.
Make this recipe your go-to for hassle-free weeknight cooking or explore more delightful options like our easy sushi recipes for inspiration.
Spicy Salmon Sushi Bake Ingredients
For the Rice Base
- Sushi Rice – Provides the base of the dish, offering tenderness and moisture; use short-grain rice for the best texture.
- Rice Vinegar – Adds acidity to enhance the flavor of the rice; substitute with apple cider vinegar for a different tang.
- Sugar – Balances the vinegar’s acidity, creating a well-rounded flavor profile; adjust sweetness to taste.
- Salt – Enhances the overall taste of the dish, bringing out the other flavors.
For the Salmon Mixture
- Fresh Salmon (diced) – The star ingredient that delivers creamy texture and rich flavor; ensure it’s fresh for the best taste.
- Mayonnaise – Adds creaminess to the salmon layer; swap with Greek yogurt for a lighter option.
- Sriracha – Adds heat and spice; adjust according to your spice preference or replace with a milder sauce.
- Sesame Oil – Contributes a nutty flavor, enhancing the overall dish’s profile.
- Green Onions (sliced) – Adds freshness and slight crunch; can be replaced with chives or shallots if needed.
For the Garnish
- Nori Strips – Provides crispy seaweed flavor if desired; this is optional but adds a nice touch.
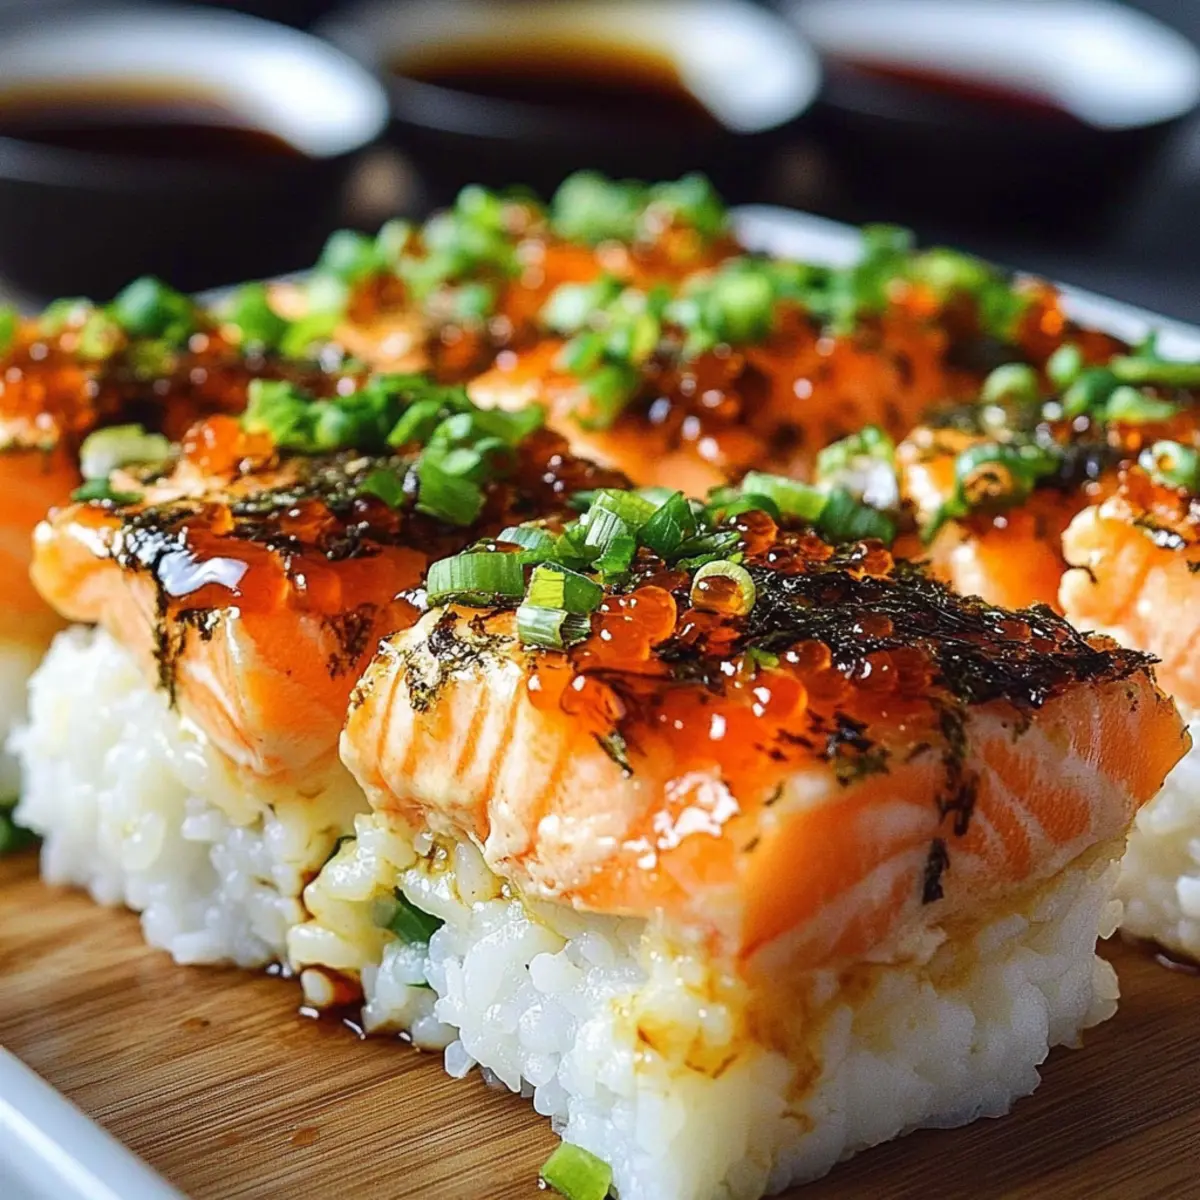
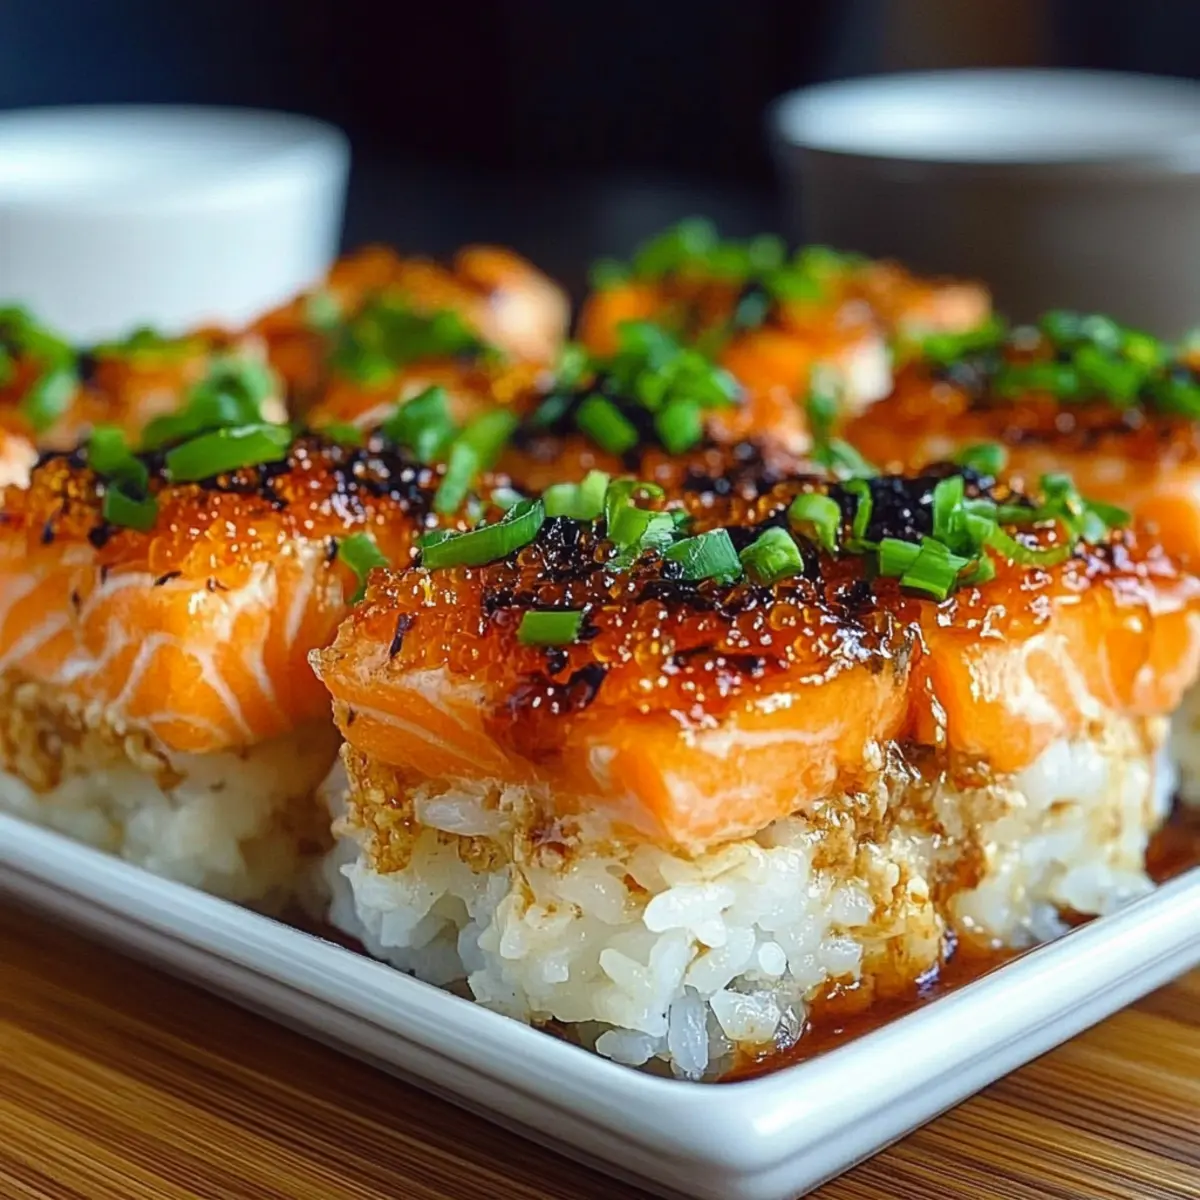
- Tobiko (optional) – Offers a pop of flavor and color for garnish, elevating the dish’s presentation.
Step‑by‑Step Instructions for Spicy Salmon Sushi Bake
Step 1: Preheat the Oven
Start by preheating your oven to 375°F (190°C). This step is crucial as it ensures your Spicy Salmon Sushi Bake cooks evenly and develops that golden, bubbly top. While the oven warms up, gather your ingredients and equipment, including a baking dish and a pot for cooking the sushi rice.
Step 2: Cook the Sushi Rice
Prepare the sushi rice according to the package instructions, typically rinsing it well and cooking for about 15 minutes. Once cooked, fluff the rice gently with a fork to prevent a mushy texture. The rice should be tender and slightly sticky, providing the perfect base for your casserole.
Step 3: Season the Rice
In a small bowl, mix rice vinegar, sugar, and salt until fully dissolved, creating a flavorful seasoning blend. Carefully fold this mixture into the warm sushi rice, making sure to combine it evenly without smashing the rice grains. This step infuses each bite with tangy goodness that balances beautifully with the salmon.
Step 4: Spread the Rice in a Baking Dish
Transfer the seasoned rice into the bottom of a baking dish, spreading it evenly to form a firm base. Let it cool slightly while you prepare the salmon mixture. This cooling step helps the flavors meld together, ensuring a deliciously cohesive Spicy Salmon Sushi Bake.
Step 5: Prepare the Salmon Mixture
In a separate bowl, combine diced salmon, mayonnaise, Sriracha, sesame oil, and sliced green onions. Stir until all the ingredients are well incorporated; you want a creamy, spicy mixture that will deliver on flavor. Taste the mixture for seasoning; adjust spiciness or creaminess according to your preference before proceeding.
Step 6: Layer the Salmon Mixture
Once your rice base has cooled, evenly spread the salmon mixture over the top of the rice layer. Use a spatula to smooth it out gently, ensuring each bite will be packed with that delicious, creamy salmon. This layer will create a delightful contrast to the rice below and adds richness to the overall dish.
Step 7: Bake the Sushi Bake
Place the baking dish in your preheated oven and bake for 25-30 minutes. Keep an eye on it; the top should become golden brown and bubbly, indicating that the salmon is cooked through and the flavors have melded beautifully.
Step 8: Cool and Garnish
Once baked, remove your Spicy Salmon Sushi Bake from the oven and let it cool slightly for about 5-10 minutes. This cooling period helps the layers set, making it easier to scoop. Garnish with additional sliced green onions and optional nori strips for added texture and flavor before serving.
Step 9: Serve Warm
Scoop out portions of the Spicy Salmon Sushi Bake and serve it warm to enjoy the comforting flavors. Pair it with a side salad or pickled vegetables to balance the richness of the dish, and watch it become a new favorite for your weeknight meals!
Spicy Salmon Sushi Bake Variations
Feel free to make this recipe your own and explore delightful twists that awaken your taste buds!
-
Seafood Swap: Substitute fresh salmon with cooked shrimp, scallops, or even imitation crab for a different flavor experience. Each option adds its own flair to the dish and keeps it interesting!
-
Spice Adjustments: For a milder version, use less Sriracha or try a creamy chili sauce instead, ensuring everyone at the table can enjoy the dish. Consider adding a sprinkle of paprika for a subtle warmth and extra color!
-
Quinoa Base: Swap out sushi rice for cooked quinoa to create a gluten-free option that still delivers on texture and taste. Quinoa’s nuttiness complements the creamy salmon beautifully, making each bite a wholesome delight.
-
Vegan Twist: For a plant-based alternative, substitute salmon with roasted eggplant or a mix of sautéed mushrooms and spinach, paired with vegan mayonnaise for that creamy element. This variation is both delicious and guilt-free!
-
Flavor Boost: Incorporate a hint of sesame seeds and fresh ginger into the salmon mixture for an extra layer of flavor. It’s a simple change that elevates the dish to new heights!
-
Creamy Enhancements: Replace mayonnaise with avocado for a rich, creamy texture that also adds healthy fats. This swap creates a delightful twist while keeping the dish light and vibrant.
-
Heat Level: If you love a kick, add diced jalapeños or a splash of chili oil to the salmon mixture before baking. This offers an exciting twist on the classic dish, perfect for spice lovers!
For more adventurous ideas, consider exploring our other easy sushi recipes for inspiration or additional meal prep-friendly dishes to make your weeknights even easier!
Storage Tips for Spicy Salmon Sushi Bake
Fridge: Store leftovers in an airtight container for up to 3-4 days to maintain freshness and flavor. Allow dish to cool before refrigerating.
Freezer: For longer storage, freeze portions in airtight containers for up to 2-3 months. Cover tightly to prevent freezer burn and odor absorption.
Reheating: Thaw frozen Spicy Salmon Sushi Bake overnight in the fridge. Reheat in the oven at 350°F (175°C) until warmed through, approximately 20-25 minutes.
Serving Leftovers: Enjoy leftovers as is or reimagine them in a new dish, like a salad or rice bowl, for a delightful twist!
Make Ahead Options
These Spicy Salmon Sushi Bake preparations are perfect for busy home cooks looking to save time during the week! You can prepare the sushi rice up to 24 hours in advance; just cook, season, and refrigerate it in an airtight container to maintain its freshness. The salmon mixture can also be made ahead, combining the diced salmon, mayonnaise, Sriracha, sesame oil, and green onions and storing it separately in the fridge for up to 3 days. When you’re ready to enjoy your meal, simply layer the chilled salmon mixture over the rice and bake as directed. This strategy not only saves you time but also ensures that your Spicy Salmon Sushi Bake remains just as delicious!
What to Serve with Spicy Salmon Sushi Bake
The warmth of this comforting casserole pairs wonderfully with refreshing sides and delightful desserts to create a full meal experience.
-
Crispy Green Salad: Crisp greens tossed with a light vinaigrette bring a refreshing contrast to the rich flavors of the sushi bake. The crunch complements the creamy texture beautifully.
-
Pickled Vegetables: Serve a side of tangy pickled cucumbers or radishes for a zesty bite that cuts through the richness. Their acidity balances the dish wonderfully, adding an exciting flavor burst.
-
Steamed Broccoli: Lightly steamed broccoli adds a vibrant green touch and a slight crunch, enriching your meal with healthy nutrients. Drizzle with sesame oil for a delightful flavor addition.
-
Miso Soup: A warm bowl of miso soup is a comforting choice that echoes Japanese flavors, making it a perfect companion to the sushi bake. Its umami richness mirrors the dish’s depth, enhancing your dining experience.
-
Sesame Rice Balls: Create mini rice balls (onigiri) seasoned with sesame seeds to echo the flavors of the sushi bake, offering another textural element. The chewiness will delight your palate along with the bake.
-
Sake or Green Tea: Complement your meal with a glass of chilled sake or a warm cup of green tea. These beverages elevate the dining experience, enhancing both flavor and ambiance.
Transform your dining table into a feast with these delicious pairings that elevate your Spicy Salmon Sushi Bake to new heights!
Expert Tips for Spicy Salmon Sushi Bake
Fluff the Rice: Ensure rice is fluffed properly after cooking to avoid a mushy texture. This creates a light and airy base for your bake.
Taste Before Baking: Always taste the salmon mixture before baking to adjust spiciness and creaminess as needed. This ensures balanced flavors in your dish.
Layering Matters: Spread the rice and salmon layers evenly for consistent cooking. Uneven layers can lead to uneven textures in the final dish.
Cooling Time: Let the dish cool slightly before serving to allow flavors to settle and make it easier to scoop out portions.
Customize Your Spice: Adjust the Sriracha according to your preferred level of heat or substitute with a milder sauce if desired. This helps to tailor the dish to your taste.
Spicy Salmon Sushi Bake Recipe FAQs
What type of sushi rice should I use?
Absolutely! For the best texture in your Spicy Salmon Sushi Bake, I recommend using short-grain sushi rice. It provides the right amount of tenderness and moisture, creating a lovely base for your baked dish. Regular long-grain rice won’t offer the same balance, so it’s worth sourcing the right kind!
How should I store leftovers?
Very good question! Store any leftover Spicy Salmon Sushi Bake in an airtight container in the fridge for up to 3-4 days. Make sure to let it cool to room temperature before sealing it up to maintain its delicious flavors. You can also reheat individual portions in the oven or microwave for a quick meal.
Can I freeze the Spicy Salmon Sushi Bake?
Absolutely! If you’d like to enjoy this dish later, you can freeze it for up to 2-3 months. Just ensure that you tightly cover the portions with plastic wrap or place them in freezer-safe, airtight containers to avoid freezer burn. For reheating, thaw in the fridge overnight and warm it in the oven until it’s heated through.
What should I do if my rice turns mushy?
Ah, the classic rice mishap! If your rice is mushy, this usually means it was overcooked or the water wasn’t measured properly. To avoid this next time, rinse the sushi rice until the water runs clear and keep to the package instructions closely. After cooking, fluff the rice gently with a fork to keep it light and airy for the best results in your bake.
Is this recipe suitable for people with seafood allergies?
Good to consider! Since the main ingredient in this Spicy Salmon Sushi Bake is fresh salmon, it’s not suitable for someone with seafood allergies. However, you can explore alternatives like cooked chicken or even a plant-based protein to retain that creamy casserole feel without the fish. Just make sure to adjust any seasonings accordingly.
Can I make this dish ahead of time?
Certainly! You can prepare the Spicy Salmon Sushi Bake up to a day in advance. Simply assemble the layers up to the baking step, cover it with plastic wrap or foil, and store it in the refrigerator. When ready to bake, take it out, let it come to room temperature for about 15 minutes, and then bake it as instructed. Preparing ahead can save you time and let the flavors meld beautifully!
Spicy Salmon Sushi Bake: Your New Comfort Food Favorite
Ingredients
Equipment
Method
- Preheat your oven to 375°F (190°C).
- Prepare the sushi rice according to the package instructions, typically rinsing it well and cooking for about 15 minutes.
- In a small bowl, mix rice vinegar, sugar, and salt until fully dissolved, carefully fold this mixture into the warm sushi rice.
- Transfer the seasoned rice into the bottom of a baking dish, spreading it evenly.
- In a separate bowl, combine diced salmon, mayonnaise, Sriracha, sesame oil, and sliced green onions, stirring until well incorporated.
- Once your rice base has cooled, evenly spread the salmon mixture over the top of the rice layer.
- Place the baking dish in your preheated oven and bake for 25-30 minutes.
- Remove the dish from the oven and let it cool slightly for about 5-10 minutes before garnishing.
- Scoop out portions and serve warm.