


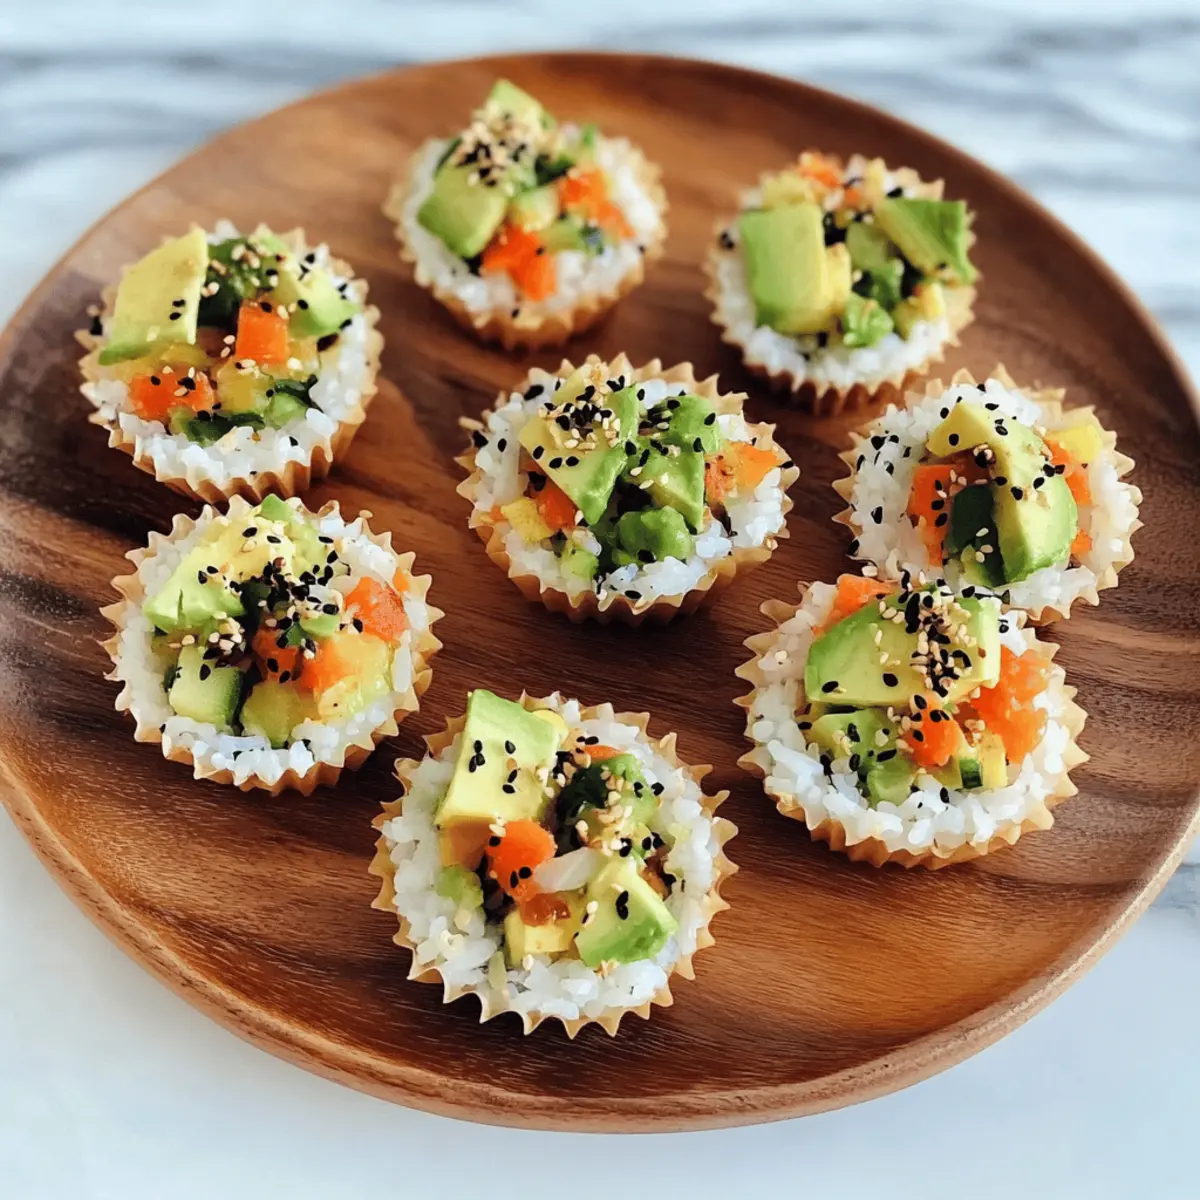
Walking through a bustling market, the vibrant colors of fresh produce caught my eye, and I couldn’t help but imagine all the delicious meals that could come from them. That’s when the idea for these Customizable No-Bake Sushi Cups hit me. With their delightful bite-sized portions, they’re perfect for turning your favorite vegetables into a quick and fun appetizer. Plus, they are vegetarian-friendly and take mere minutes to prepare, making them an effortless choice for those busy days or spontaneous gatherings. Picture creamy avocado mingling with crisp veggies, all topped with a zesty drizzle of spicy mayo—trust me, you won’t be able to resist! Are you ready to elevate your snack game and create your own sushi masterpiece? Let’s dive in!
Why are these Sushi Cups a Must-Try?
Unmatched Versatility: These sushi cups can be tailored to your taste; from zesty sauces to colorful veggies, the combinations are endless!
Quick and Easy Preparation: With no baking required, you can whip these up in no time—perfect for last-minute gatherings or a tasty afternoon snack.
Crowd-Pleasing Flavor: The delightful blend of creamy avocado, crunchy veggies, and zesty mayo means everyone will be raving about your creation!
Healthier Choice: Packed with fresh ingredients, these sushi cups are a guilt-free indulgence, making them the ideal alternative to fast food.
Meal Prep Friendly: You can prepare these up to 24 hours in advance, giving you more time for fun and festivities. For a delightful dessert to pair, consider making these Chocolate Granola Cups too!
Sushi Cups Ingredients
• Create your flavorful sushi cups masterpiece with these essential ingredients!
For the Base
- Sushi Rice – Provides the foundation for your cups; use any short-grain rice if sushi rice is unavailable.
- Water – Essential for cooking the sushi rice to perfection.
For the Filling
- Finely Chopped Veggies – Adds a fresh crunch; consider options like carrots, cucumber, bell peppers, or sprouts.
- Steamed Mukimame (Shelled Edamame) – Boosts protein and texture; available frozen or in pods (about 15 pods yield 1/4 cup).
- Diced Avocado – Offers a creamy richness; substitute with hummus or tahini for a different twist.
For the Sauce
- Sauce (Soy Sauce, Tamari, or Coconut Aminos) – Infuses flavor; pick according to dietary preferences (gluten-free or soy).
- Mayonnaise – The base for your spicy mayo; for a vegan option, use plant-based mayo.
- Sriracha Sauce – Adds the desired heat to your mayo mix; adjust to your taste preference.
- Honey – Balances out the spiciness; omit if you’re looking for a vegan version.
- Sesame Oil – Adds a nutty flavor to your mayo; a neutral oil can be a suitable substitute.
For the Garnish
- Black Sesame Seeds – Perfect for adding visual appeal and a slight crunch to finish off your sushi cups.
Now you’re all set to create these delightful sushi cups that are bound to impress and satisfy!
Step‑by‑Step Instructions for Sushi Cups
Step 1: Prepare the Sushi Rice
Begin by rinsing the sushi rice under cold water until the water runs clear to remove excess starch. In a pot, combine the rinsed rice with the appropriate amount of water, then bring it to a boil over medium-high heat. Once boiling, reduce the heat to low, cover, and simmer for about 20 minutes until the rice is tender and all the water is absorbed.
Step 2: Form the Rice Cups
Once the sushi rice is cooked, allow it to cool slightly for about 10 minutes. Next, using silicone muffin liners or a muffin tin, take handfuls of rice and firmly press it into the bottom and up the sides of each cup to create a solid base. Chill the formed rice cups in the refrigerator for 20 minutes to help them hold their shape.
Step 3: Prepare the Filling
While the rice cups are chilling, in a large mixing bowl, combine finely chopped veggies, steamed mukimame, and diced avocado. Pour in your choice of sauce, whether it’s soy sauce, tamari, or coconut aminos, and gently mix everything together until the ingredients are evenly coated and vibrant, creating a fresh filling for your sushi cups.
Step 4: Make the Spicy Mayo
In a separate bowl, whisk together mayonnaise, Sriracha sauce, honey, and sesame oil until smooth and well combined. Taste the mixture and adjust the Sriracha based on your desired level of spiciness. This zesty mayo will be the perfect complement to your sushi cups, adding creaminess and heat.
Step 5: Assemble and Garnish the Sushi Cups
Remove the sushi rice cups from the fridge and fill each cup generously with the prepared veggie and mukimame mixture. Drizzle the spicy mayo over the top of each filled cup, allowing it to cascade beautifully down the sides. Finally, sprinkle black sesame seeds on top for an appealing finish, adding a slight crunch to every bite of your delicious sushi cups.
What to Serve with Customizable No-Bake Sushi Cups
When you elevate your sushi cups with complementary sides and drinks, the dining experience becomes a delightful journey of flavors.
-
Crispy Seaweed Salad: A refreshing complement, its umami flavor and crunch perfectly balance the creamy sushi cups.
-
Miso Soup: Warm and comforting, miso soup adds a savory depth that enhances the overall meal, perfect for a sushi-inspired dinner.
-
Edamame Pods: Lightly salted and simple, these provide a pop of protein that pairs well with the sushi cups, creating a satisfying bite.
-
Cucumber Salad: Cool, crisp cucumbers soaked in rice vinegar give a bright contrast to the rich flavors of the sushi cups while adding vibrant color.
-
Fruity Green Tea: This lightly sweetened beverage helps cleanse the palate, making each bite of your sushi cups a fresh experience.
-
Chocolate Mochi: As a dessert option, these chewy delights offer a touch of sweetness, rounding out your meal with a delightful Japanese twist.
For a heartier option, consider whipping up some sweet potato tempura. Its crispy exterior and soft interior complement the textures in the sushi cups beautifully!
Sushi Cups: Delightful Customization Awaits!
Feel free to let your creativity shine as you whip up these sushi cups, transforming simple ingredients into a flavorful experience.
- Dairy-Free: Swap mayonnaise for cashew cream mixed with a touch of lemon juice for your zesty mayo.
- Spicy Kick: Add diced jalapeños or a splash of chili oil to your filling for an extra heat infusion. Your taste buds will love the extra adventure!
- Protein-Packed: Consider adding grilled chicken, tofu, or shredded crab for a heartier version that satisfies every craving.
- Crunchy Texture: Toss some crushed nori strips into your filling for a delightful crunch and beautiful seaweed flavor. It’s like having sushi without the roll!
- Colorful Greens: Replace traditional veggies with vibrant seasonal picks such as radishes, snap peas, or shredded purple cabbage for a burst of color and nutrients.
- Sweet Twist: Drizzle a hint of sweet chili sauce over the filled sushi cups before serving for a tangy-sweet contrast everyone will enjoy.
- Sesame Flavor Boost: Infuse ground sesame seeds or tahini into your filling for an additional nutty flavor that complements the overall dish. You can even use it in place of the avocado!
- Savory Sauces: Explore other sauces like ponzu or teriyaki to pour over your cups, creating exciting new flavor profiles with every batch.
With so many adaptable options, you can enjoy these sushi cups again and again! For a delightful dessert to pair with your creations, how about some Easter Dirt Cups? They’re a fun addition to any meal!
Make Ahead Options
These sushi cups are a fantastic option for meal prep enthusiasts! You can prepare the sushi rice cups up to 24 hours in advance by pressing the cooled rice into silicone muffin liners and storing them in an airtight container in the refrigerator. Additionally, you can chop the veggies and steam the mukimame ahead of time, keeping them fresh for up to 3 days in the fridge. When you’re ready to serve your sushi cups, simply fill the rice bases with the veggie and mukimame mixture, drizzle with the spicy mayo, and garnish with black sesame seeds. This way, you’ll have a delightful appetizer ready to go, making your busy days a little brighter and your meals effortless!
Expert Tips for Sushi Cups
Silicone Liners: Use silicone muffin liners for hassle-free removal; they’ll ensure your sushi cups come out intact and beautifully shaped.
Chill Time Matters: Allow the formed rice cups to chill for 20 minutes to set properly, which makes handling and filling easier.
Custom Fillings: Don’t hesitate to customize your sushi cups! Swap in proteins like imitation crab or cooked shrimp, accommodating everyone’s taste buds.
Freshness is Key: For the best quality, prepare your sushi cups no more than 24 hours in advance and store in an airtight container.
Avoid Sticking: If you’re concerned about rice sticking, lightly grease the muffin liners for easy removal; it’ll save you from frustration later.
Spicing it Up: Adjust the level of Sriracha in your spicy mayo according to your heat preference; this way, everyone can savor their unique sushi cups!
How to Store and Freeze Sushi Cups
Fridge: Store sushi cups in an airtight container and enjoy within 2 days for the best flavor and texture.
Freezer: While sushi cups are best fresh, you can freeze the rice base for up to 1 month. Fill just before serving to maintain freshness.
Reheating: If using frozen rice cups, thaw overnight in the fridge and reheat in the microwave for 15-30 seconds until warm. Avoid reheating filled cups.
Assembling Tips: To keep the filling fresh, prepare sushi cup components separately, storing veggies and sauces in airtight containers until you’re ready to assemble.

Sushi Cups Recipe FAQs
How do I choose the right ripeness of avocado for my sushi cups?
Absolutely! For your sushi cups, select avocados that are slightly soft to the touch but not overly mushy. They should be dark green in color and give a little when pressed gently. If they’re too firm, let them ripen on your countertop for a couple of days before using.
How should I store leftover sushi cups?
Very! To store sushi cups, place them in an airtight container in the refrigerator and enjoy within 2 days to maintain their freshness. If you see the rice starting to lose its moisture or dry out, it’s best to consume them sooner for optimal flavor.
Can I freeze sushi cups to enjoy later?
Of course! While the filled sushi cups are best enjoyed fresh, you can freeze just the sushi rice base for up to 1 month. To freeze, allow the rice to cool completely, then pack it into an airtight freezer bag, pressing out excess air. When you’re ready to enjoy, thaw it in the fridge overnight. Assemble the cups fresh with your desired fillings just before serving.
What can I do if the rice cups fall apart when removed from the liner?
Don’t fret! If your rice cups are crumbling, it might be due to insufficient chilling time. Always press the rice firmly into the muffin liners to create a solid base and chill them for at least 20 minutes. If using a traditional muffin tin, lightly greasing the tin can help with removal.
Are these sushi cups suitable for people with dietary restrictions?
Certainly! These sushi cups can be easily adapted for various dietary needs. For gluten-free diets, make sure to use tamari or coconut aminos instead of soy sauce. If you’re accommodating vegans, simply replace traditional mayonnaise with plant-based mayo and omit the honey. The customizable nature allows these cups to fit many dietary preferences, making them perfect for gatherings!
How can I incorporate protein into my sushi cups?
Great question! For those looking to boost the protein content, consider adding ingredients like imitation crab, cooked shrimp, or even chickpeas. If you’re using proteins, mix them with your finely chopped veggies before filling the rice cups. Just ensure they’re in bite-sized pieces for the best texture and taste!
Delicious Sushi Cups: Your Easy No-Bake Snack Delight
Ingredients
Equipment
Method
- Rinse the sushi rice under cold water until the water runs clear. Combine the rinsed rice with water in a pot, bring to a boil, then simmer for about 20 minutes until tender.
- Allow the cooked sushi rice to cool slightly for about 10 minutes. Firmly press handfuls of rice into silicone muffin liners to create a solid base. Chill in the fridge for 20 minutes.
- In a mixing bowl, combine finely chopped veggies, steamed mukimame, and diced avocado. Pour in your choice of sauce and gently mix until all ingredients are coated.
- Whisk together mayonnaise, Sriracha, honey, and sesame oil in a separate bowl until smooth. Adjust Sriracha based on desired spiciness.
- Fill each chilled rice cup with the veggie mixture, drizzle spicy mayo over the top, and sprinkle with black sesame seeds.