


As I rummaged through the fridge one busy evening, I stumbled upon a treasure — leftover turkey awaiting its next delicious adventure. It’s moments like these that spark my creativity in the kitchen, leading to the creation of my Creamy Turkey Enchiladas with Salsa Verde. This comforting dish not only transforms mundane leftovers into a satisfying meal but also dazzles the taste buds with a blend of creamy salsa verde and zesty green chiles. These enchiladas are a weeknight savior, coming together in just 30 minutes, making them a quick and delectable choice for any family. Whether you’re cooking for a crowd or just yourself, these enchiladas offer the warmth of home-cooked comfort food with a sprinkle of creativity. Ready to elevate those leftovers into something extraordinary? Let’s dive into this cheesy, satisfying recipe!
Why are Turkey Enchiladas a Must-Try?
Quick, Easy Prep: In just 30 minutes, you can whip up these creamy Turkey Enchiladas, making them perfect for busy weeknights.
Flavorful Fusion: The combination of salsa verde, green chiles, and melted cheese creates a delicious flavor explosion that’s comforting yet intriguing.
Boost Leftovers: Turn leftover turkey into a culinary delight that your whole family will love, reducing waste and inspiring creativity in your cooking.
Versatile & Adaptable: Feel free to swap the turkey with chicken, beef, or even a vegetarian option to suit your dietary needs.
Crowd-Pleasing Dish: Ideal for gatherings, these enchiladas are sure to impress, providing that warm home-cooked vibe that everyone craves.
For more delightful twists on classic meals, check out my guide on quick weeknight dinners and dive into the world of homemade comfort food!
Turkey Enchiladas Ingredients
For the Filling
- Shredded Cooked Turkey – The primary protein; using leftover turkey or rotisserie chicken speeds up prep time.
- Canned Green Chiles – Adds a hint of mild heat; fresh chiles can be swapped for bolder flavor.
- Sour Cream – Provides creaminess; Greek yogurt can be a lighter alternative if desired.
- Ground Cumin – Infuses warmth and depth; try taco seasoning for a quick flavor twist.
- Ancho Chile Powder – Delivers subtle smokiness; regular chili powder works if you’re in a pinch.
- Green Onions – Adds freshness and crunch; shallots are a good substitute if necessary.
- Chopped Fresh Cilantro – Brightens up the filling; feel free to omit if cilantro’s not your thing.
- Monterey Jack Cheese – Melts beautifully for a gooey texture; cheddar or pepper jack can also be used.
For the Tortillas & Sauce
- Flour Tortillas – Essential for holding your delicious filling; corn tortillas offer a gluten-free option.
- Heavy Cream – Richens the sauce; half-and-half or coconut cream can make a lighter sauce.
- Salsa Verde – Adds zing and acidity; don’t hesitate to use store-bought for convenience!
Transform your leftover turkey with these comforting Turkey Enchiladas that are sure to please the whole family!
Step‑by‑Step Instructions for Turkey Enchiladas
Step 1: Preheat and Prepare
Begin by preheating your oven to 350°F (175°C). Grease a 9×13-inch baking dish with a light coat of cooking spray; this will prevent the enchiladas from sticking as they bake. As the oven warms, gather your ingredients to streamline the process and set up your workspace for a smooth cooking experience.
Step 2: Make the Filling
In a large mixing bowl, combine the shredded turkey with canned green chiles, sour cream, ground cumin, ancho chile powder, chopped green onions, and cilantro. Stir in half of the Monterey Jack cheese until evenly mixed, and season with salt and pepper to taste. The filling should be creamy and fragrant, ready to add layers of flavor to your Turkey Enchiladas.
Step 3: Prepare the Sauce
In a separate bowl, whisk together the remaining sour cream, heavy cream, and salsa verde until you achieve a smooth consistency. Add a pinch of cumin, along with salt and pepper to enhance the flavor. This creamy sauce will envelop your enchiladas, providing a deliciously rich contrast to the savory filling; set it aside.
Step 4: Warm the Tortillas
To make rolling easier, microwave your flour tortillas for about 30 seconds until they’re soft and pliable. This step is essential to prevent tearing as you fill and roll your tortillas. Keep an eye on them while reheating, as you want them warm, not hot!
Step 5: Assemble the Enchiladas
Take a warmed tortilla and scoop about 1/3 cup of the turkey mixture into the center. Roll it up tightly and place it seam-side down in the prepared baking dish. Repeat this process until all the filling is used, ensuring the enchiladas fit snugly in the dish for even cooking and flavor absorption.
Step 6: Add the Sauce and Cheese
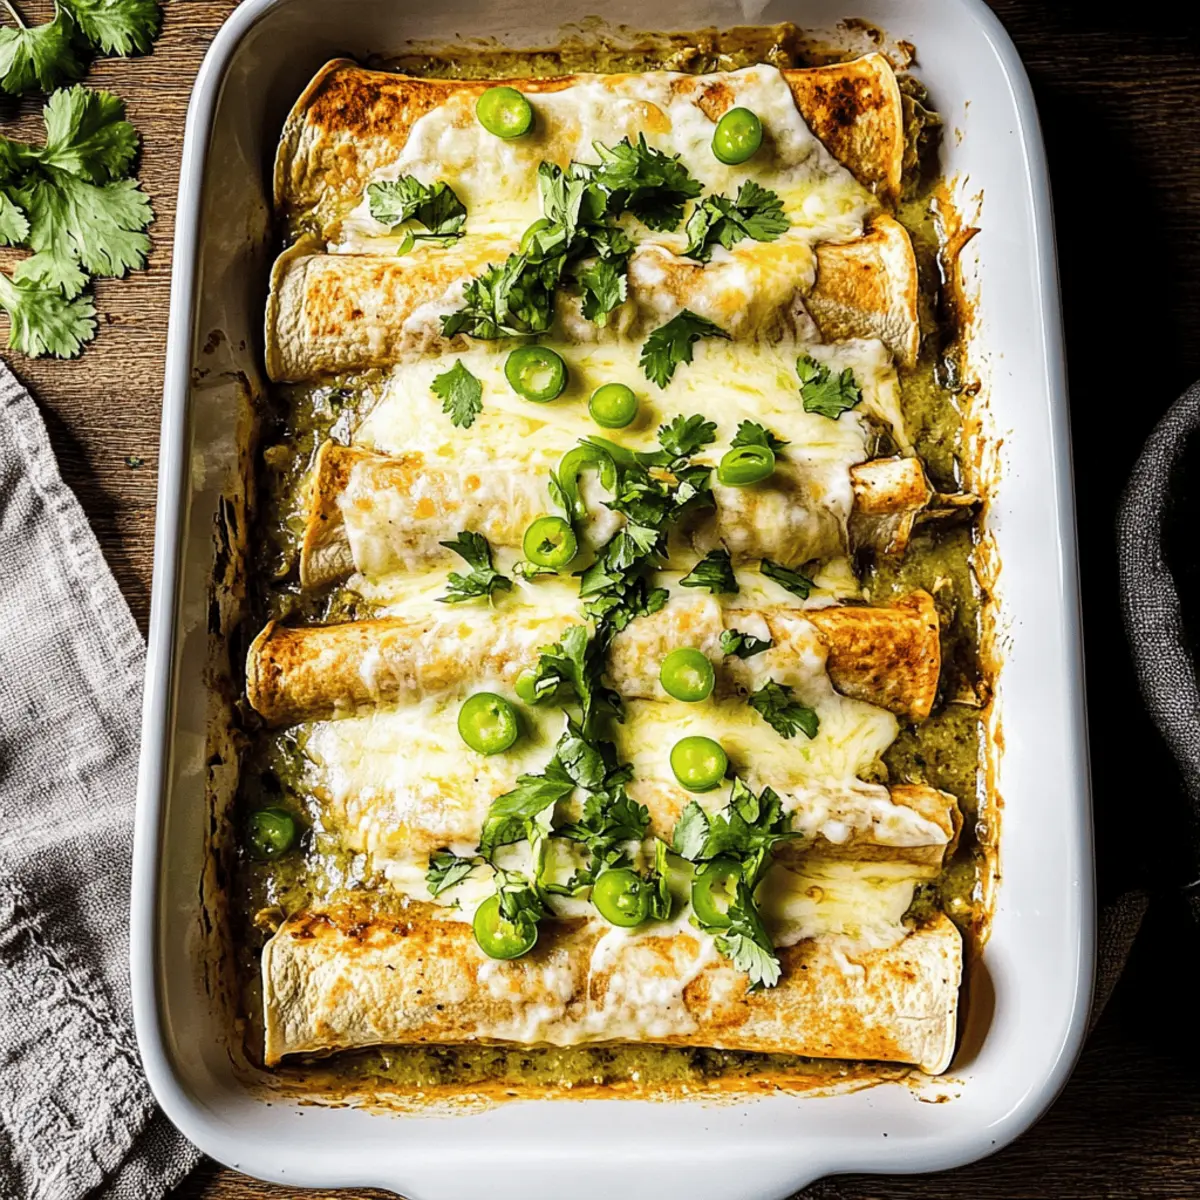
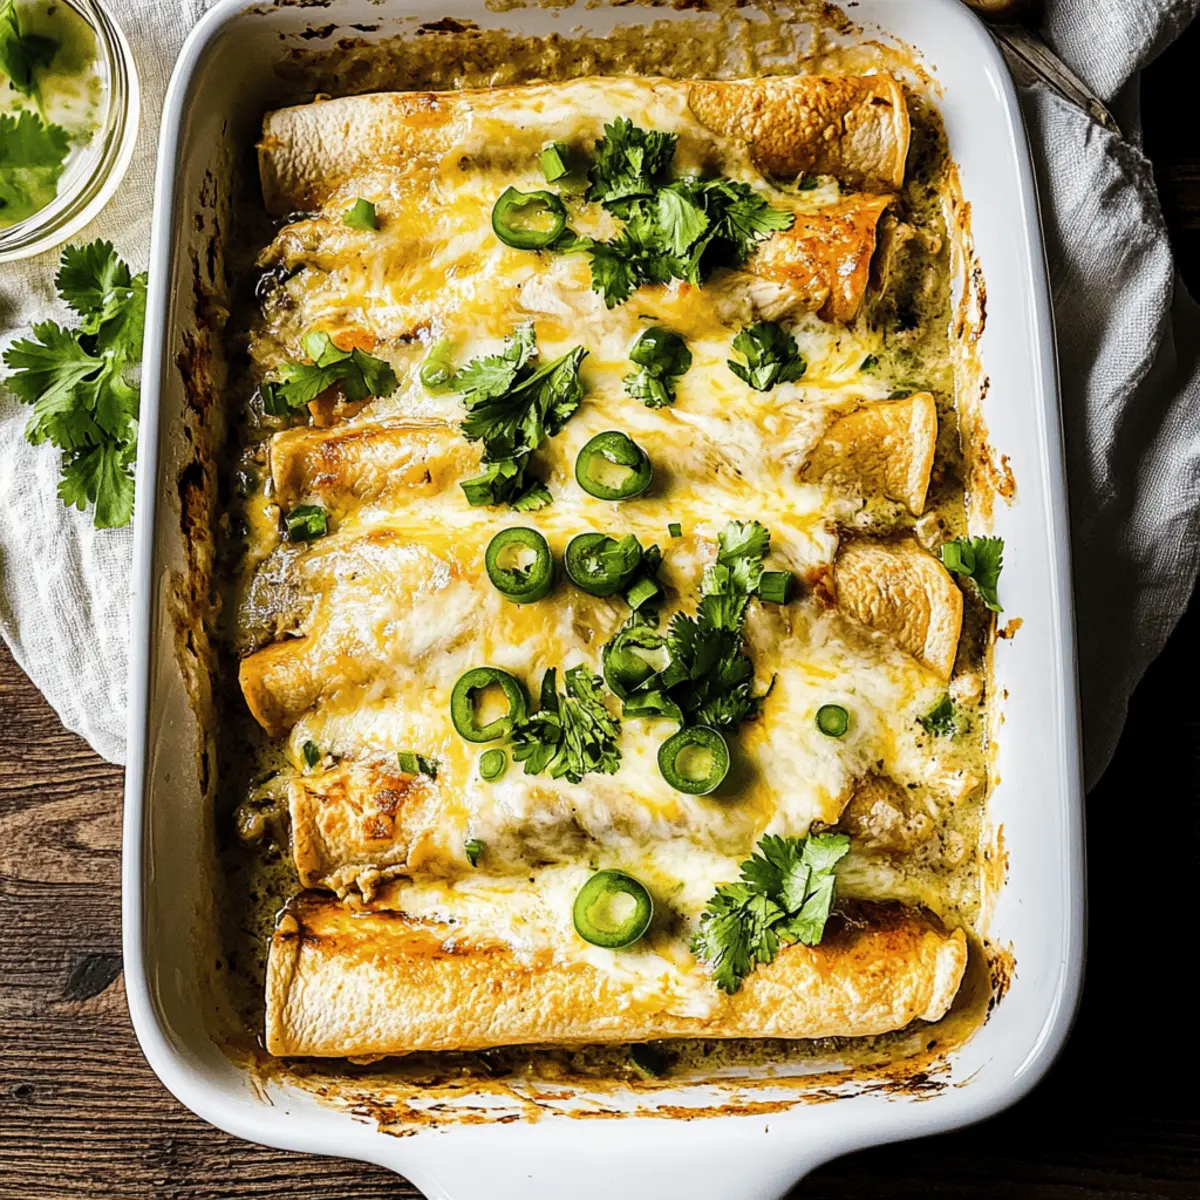
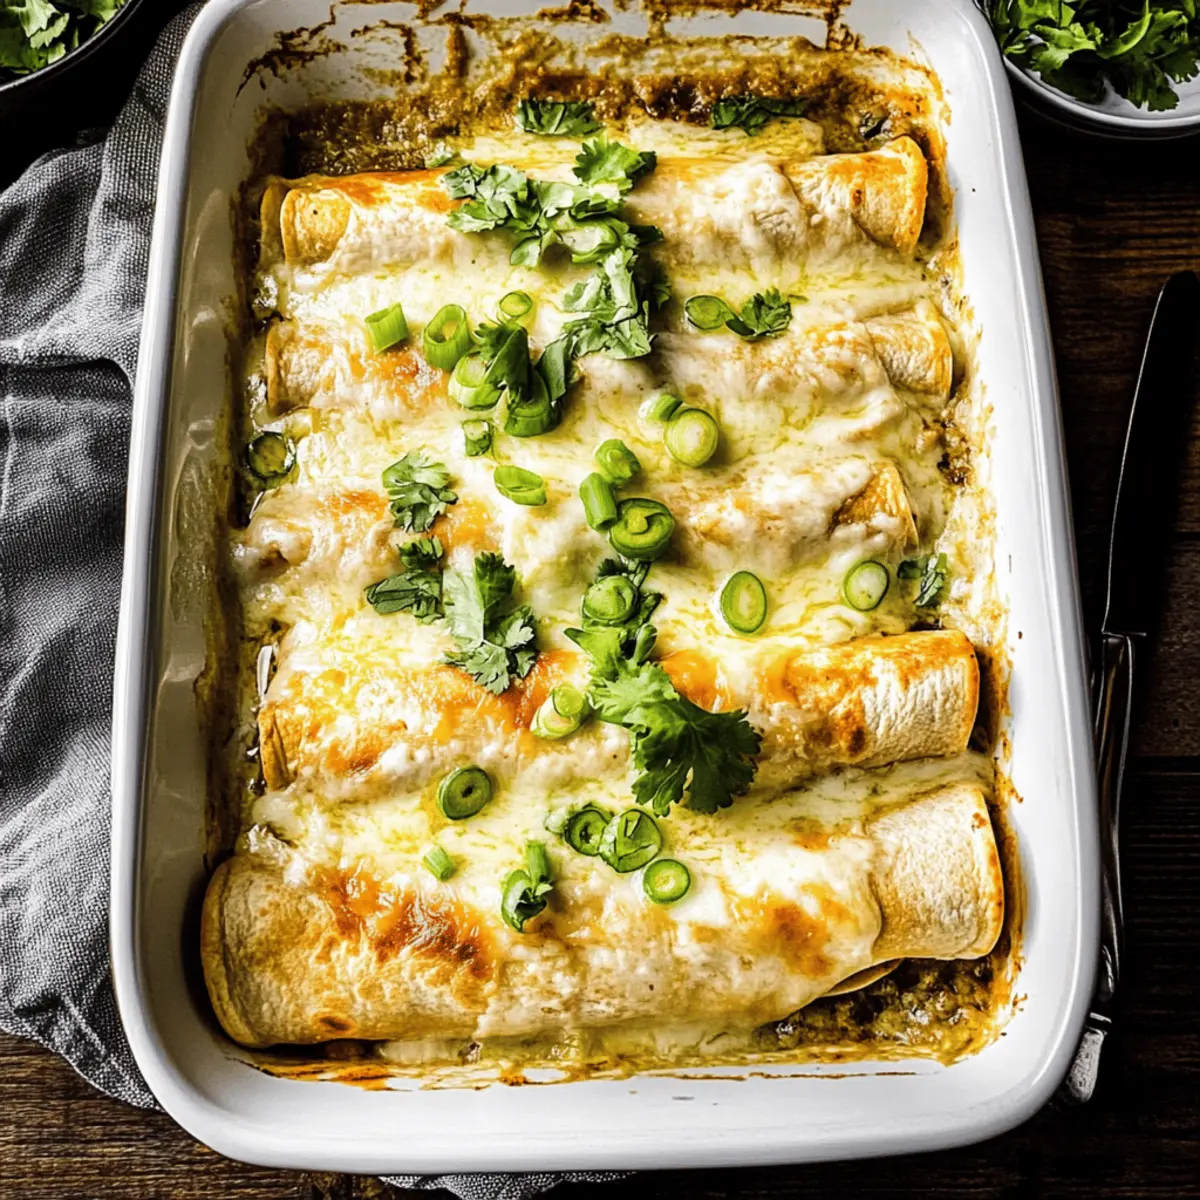
Once the enchiladas are all in the dish, pour the prepared creamy sauce evenly over the top, making sure to cover each enchilada generously. Finally, sprinkle the remaining Monterey Jack cheese on top for that melty, gooey finish. This layer will form a delightful crust as it bakes, adding to the dish’s appeal.
Step 7: Bake to Perfection
Cover the baking dish with aluminum foil to trap moisture and promote even cooking. Place it in the preheated oven and bake for 20 minutes. After that, remove the foil and bake for an additional 10 minutes, or until the cheese is bubbly and golden brown. The enchiladas should look irresistibly tempting, inviting you to dig in!
Make Ahead Options
These Turkey Enchiladas are perfect for meal prep enthusiasts! You can prepare the filling and creamy sauce up to 24 hours in advance, refrigerating them separately to maintain freshness and flavor. Simply mix the shredded turkey, green chiles, sour cream, and spices, and store it in an airtight container. When you’re ready to assemble, warm the tortillas in the microwave for easy rolling, fill them with the chilled mixture, and pour on the sauce. Bake as directed, and you’ll enjoy just as delicious, comforting enchiladas with minimal effort. This strategy not only saves time but ensures a satisfying homemade dinner is always within reach!
How to Store and Freeze Turkey Enchiladas
Fridge: Store leftover turkey enchiladas in an airtight container for up to 5 days. Make sure they are covered to maintain their creamy texture and flavors.
Freezer: For longer storage, freeze the enchiladas in a tightly sealed container or freezer bag for up to 3 months. This keeps them fresh and ready for a quick meal.
Reheating: Thaw frozen enchiladas overnight in the fridge. Reheat in the oven at 350°F (175°C) for about 20-25 minutes until heated through, ensuring that the cheesy, creamy goodness floats your taste buds!
Wrap Well: When freezing, individually wrap each enchilada in plastic wrap or foil before placing them in a container to prevent freezer burn and maintain their delicious flavor.
Turkey Enchiladas Variations & Substitutions
Now’s your chance to unleash your culinary creativity and customize these Turkey Enchiladas to fit your family’s tastes!
-
Dairy-Free: Swap sour cream and cheese with cashew cream and nutritional yeast for a creamy, savory flavor.
-
Spicy Kick: Add diced jalapeños or a splash of hot sauce to the filling for an extra layer of heat. Your taste buds will thank you!
-
Vegetarian Delight: Substitute the turkey with black beans, corn, and sautéed bell peppers for a hearty, plant-based option. This variation is just as filling and full of flavor.
-
Gluten-Free: Use corn tortillas as a delicious alternative to flour tortillas, making this dish gluten-friendly while still maintaining its comforting essence.
-
Herbed Twist: Mix in a tablespoon of fresh lime juice and some chopped cilantro into the filling to brighten up the flavors. It’s like a fresh burst of sunshine in every bite!
-
Cheese Variations: Experiment with different cheeses like feta or goat cheese for a unique twist. They each bring their own delightful complexities to the flavor profile.
-
Lazy Weeknight Option: Use store-bought rotisserie chicken for a no-fuss filling that saves you time while still delivering a scrumptious meal.
-
Personalized Toppings: Top your enchiladas with avocado slices, fresh salsa, or a sprinkle of crushed tortilla chips before serving for added texture and flavor. Feel the crunch!
Feel free to explore these options and create your own versions of these delicious Turkey Enchiladas. If you want to dive deeper into creative culinary explorations, check out my guide on quick weeknight dinners for more inspiration!
What to Serve with Creamy Turkey Enchiladas
A delightful meal awaits when you pair these creamy favorites with complementary sides that’ll elevate dinner to a new level of comfort.
-
Guacamole:
Creamy and rich, guacamole adds a vibrant tang that perfectly balances the enchiladas’ flavors, ensuring every bite is fresh and bright. -
Mexican Rice:
Fluffy, seasoned rice provides a hearty base, soaking up the rich sauce from the enchiladas and offering a delicious texture contrast. -
Refried Beans:
Smooth and savory, refried beans are the ideal protein-packed partner, adding depth and a satisfying creaminess to your plate. -
Fresh Cilantro Lime Salad:
This light salad cuts through the richness of the enchiladas, infusing a touch of zest while bringing delightful crunch to each mouthful. -
Grilled Corn on the Cob:
Sweet and smoky, grilled corn offers a delightful pop of flavor that pairs beautifully with your creamy turkey enchiladas for a summer twist. -
Sangria:
A refreshing glass of sangria complements the meal perfectly, with its fruity notes enhancing the bright flavors of the salsa verde. -
Churros:
For a sweet ending, serve churros dusted with cinnamon sugar, adding a delightful crunch that contrasts the creamy elements of your main dish.
Expert Tips for Turkey Enchiladas
- Tortilla Warmth: Ensure tortillas are warmed just enough to be pliable. This prevents tearing while rolling them up for your turkey enchiladas.
- Flavor Adjustment: Don’t hesitate to taste the filling! Adjust seasoning like salt, pepper, or spices to suit your palate before assembling.
- Avoid Overfilling: Be cautious not to overload your tortillas; overfilling can lead to sogginess. Aim for about 1/3 cup of filling per enchilada.
- Make-Ahead Convenience: Prep the enchiladas ahead of time and refrigerate them to bake later. Just add extra baking time if cooking from cold.
- Diverse Toppings: Experiment with toppings like jalapeños, avocado, or extra cheese before baking to personalize your turkey enchiladas.
Turkey Enchiladas Recipe FAQs
How can I select the perfect turkey for my enchiladas?
Absolutely! Using leftover turkey or rotisserie chicken simplifies the process. Ensure the turkey is shredded and seasoned well before mixing it into your filling. If using fresh turkey, cook it thoroughly before shredding and combine it with the filling ingredients for the best flavor.
How should I store leftover turkey enchiladas?
You can store leftover turkey enchiladas in an airtight container in the fridge for up to 5 days. Make sure to cover them well; this helps maintain their creamy texture. To enjoy them later, don’t forget to label the container with the date so you can keep track of freshness!
Can I freeze turkey enchiladas, and how do I do it properly?
Yes, absolutely! To freeze your turkey enchiladas, first ensure they’re completely cooled. Wrap each enchilada individually in plastic wrap or aluminum foil, then place them in a tightly sealed freezer bag or container. This prevents freezer burn and keeps them fresh for up to 3 months. When ready to eat, thaw them overnight in the fridge before reheating.
What should I do if my enchiladas turn out soggy?
Very good question! If you encounter sogginess, it often results from overfilling the tortillas or using too much sauce. I recommend sticking to about 1/3 cup of filling per enchilada. Also, ensure tortillas are warmed just enough to be pliable but not soggy themselves. If they seem super wet after baking, you can try serving them with a fresh side of salsa to balance.
Are there any dietary considerations for this turkey enchiladas recipe?
Of course! To accommodate dietary needs, you can easily make this recipe gluten-free by using corn tortillas instead of flour. Also, if you have any dairy allergies, consider substituting sour cream and heavy cream with dairy-free alternatives like coconut yogurt and cashew cream. Always read labels for any pre-packaged ingredients to ensure they’re suitable for your guests!
Can I make these enchiladas ahead of time?
Certainly! You can prepare the turkey enchiladas ahead of time. After assembling them, cover and refrigerate them for up to 24 hours before baking. When ready to cook, just add an extra 10 minutes to the baking time if they’re going into the oven cold. This way, you’ll have a delightful meal ready to savor without the rush!

Easy Turkey Enchiladas: Comfort Food in 30 Minutes
Ingredients
Equipment
Method
- Preheat your oven to 350°F (175°C) and grease a 9x13-inch baking dish.
- Combine the shredded turkey, green chiles, sour cream, cumin, ancho chile powder, green onions, and cilantro in a bowl. Mix in half the Monterey Jack cheese and season to taste.
- In another bowl, whisk the remaining sour cream, heavy cream, and salsa verde until smooth. Season with cumin, salt, and pepper.
- Microwave the flour tortillas for about 30 seconds until soft and pliable.
- Take a warmed tortilla, scoop about 1/3 cup of the turkey filling, and roll it tightly. Place seam-side down in the baking dish.
- Pour the sauce evenly over the assembled enchiladas and sprinkle the remaining cheese on top.
- Cover with aluminum foil and bake for 20 minutes. Remove the foil and bake for an additional 10 minutes until cheese is bubbly and golden.