


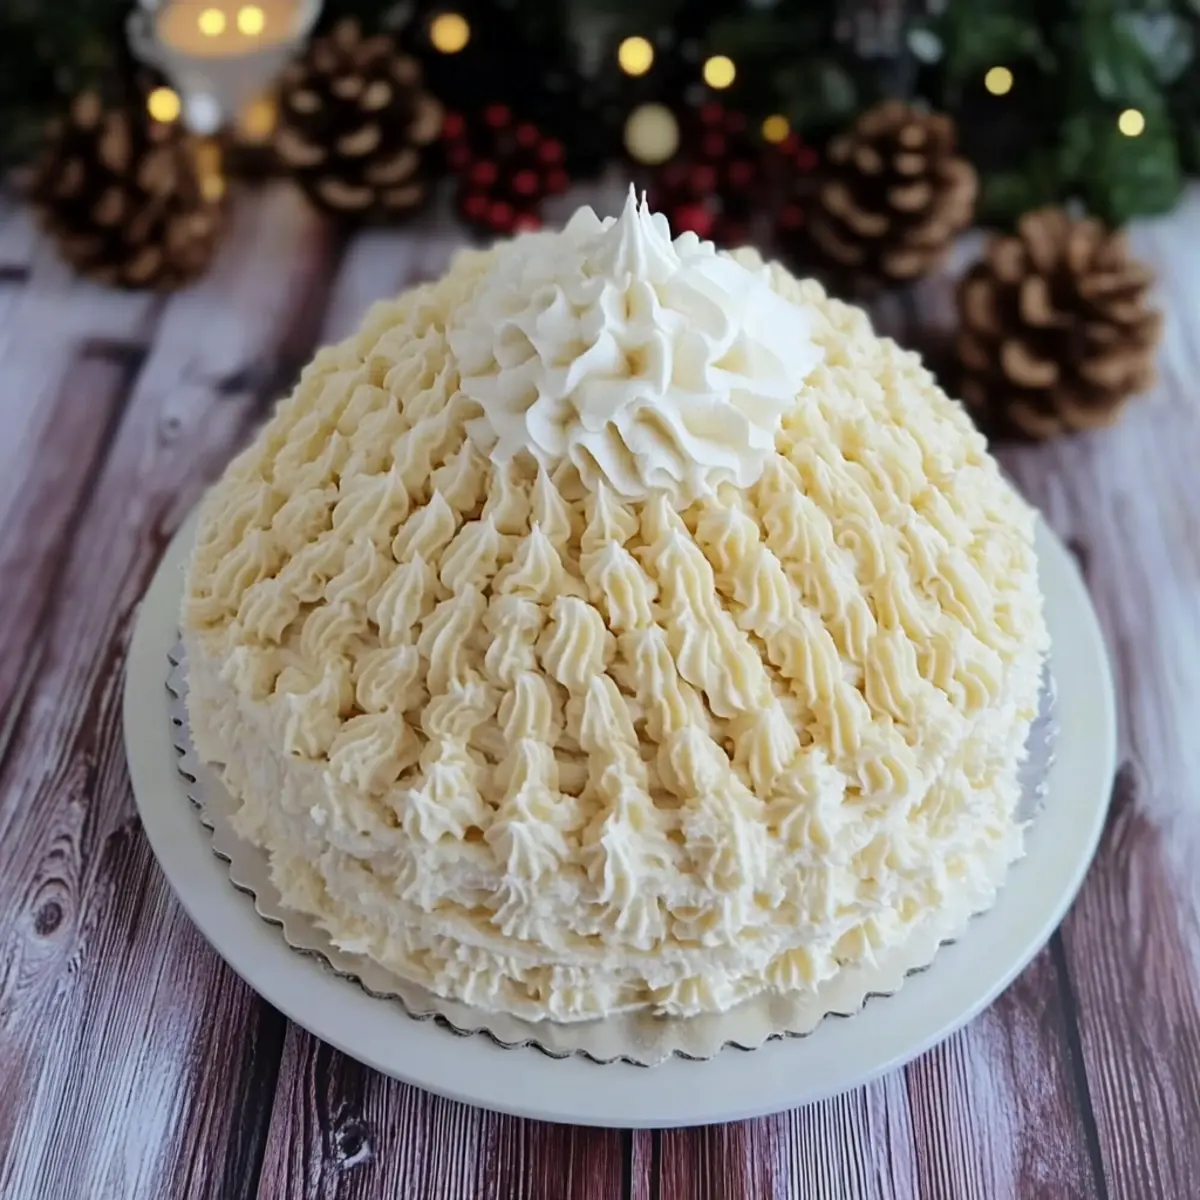
Standing in front of my oven, the sweet aroma of sponge cake fills the air, reminding me that the holiday season is just around the corner. This Creamy Winter Hat Cake is more than just dessert; it’s a showstopper that transforms any gathering into a festival of flavors and warmth. Not only does this festive baking delight boast a whimsical knit hat design, but it’s also delightfully easy to whip up, making it perfect for both seasoned bakers and enthusiastic novices alike. With a light caramel filling nestled between airy layers, you’ll be showing off a stunning centerpiece that tastes as incredible as it looks. Trust me, everyone will be reaching for seconds! So, are you ready to put on your chef hat and create this magical cake together?

Why You’ll Adore This Winter Hat Cake?
Easy Preparation: This recipe is straightforward, allowing anyone from novice bakers to seasoned chefs to create a winter masterpiece without stress.
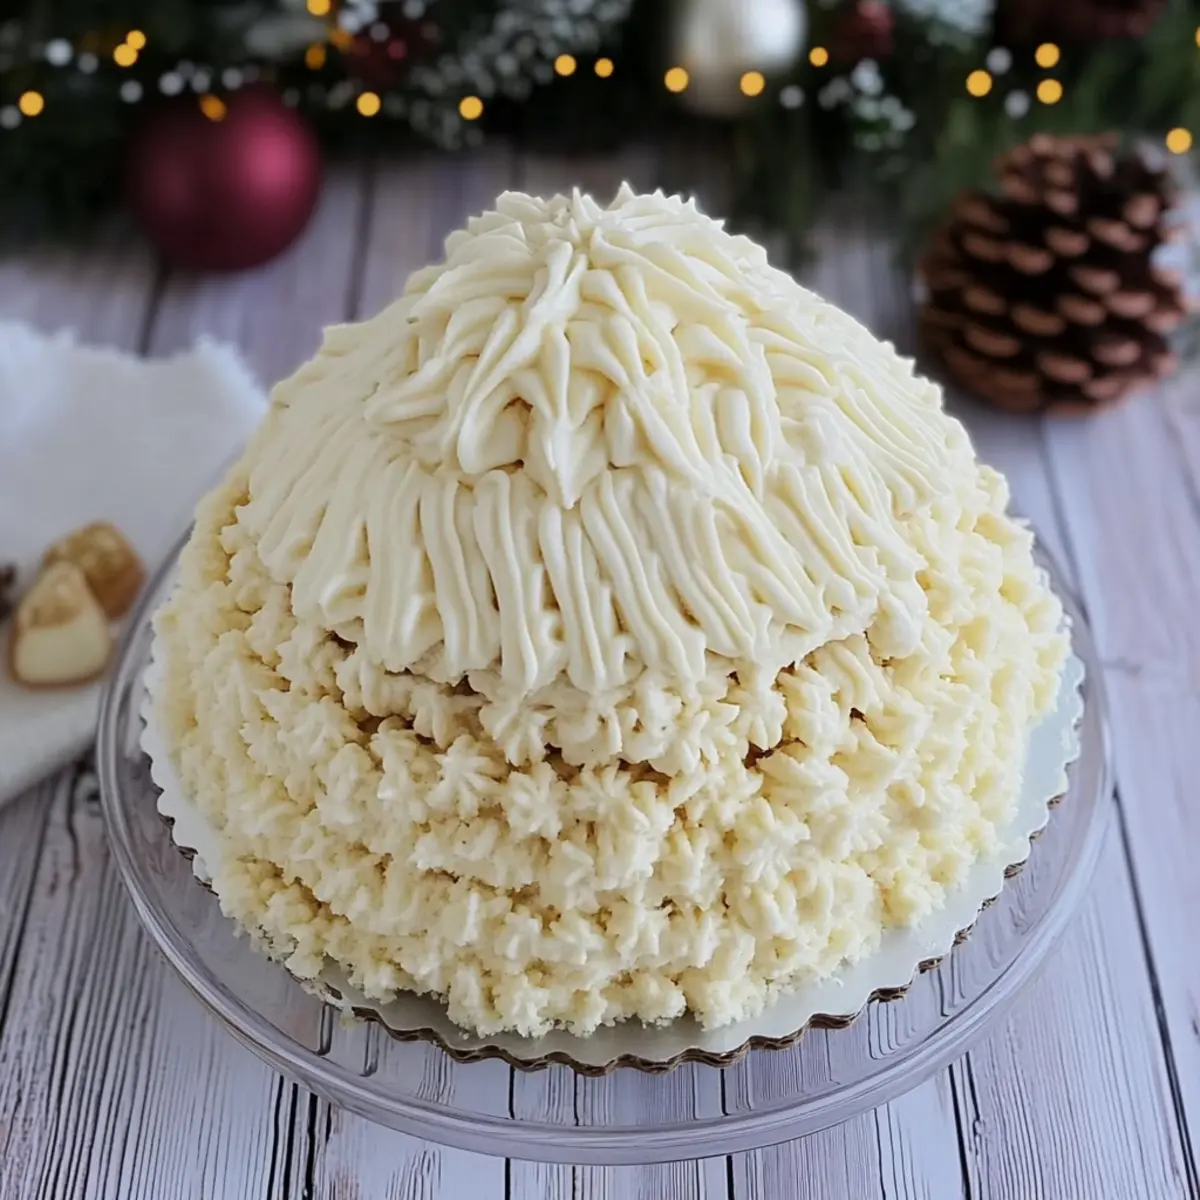
Whimsical Delight: Its unique knit hat design will have your guests marveling at your creativity, making it the perfect centerpiece for festive gatherings.
Decadent Flavor: The balance of light caramel filling and fluffy sponge will dissolve in your mouth, leaving everyone wanting more.
Versatile Creation: Feel free to experiment with toppings like toasted nuts or chocolate shavings, as well as variations like a coconut cream option for a dairy-free twist.
Perfect for Sharing: Whether it’s a family gathering or a holiday party, this cake is sure to impress, making it a fantastic conversation starter.
Not sure what to serve alongside? This cake pairs beautifully with a warm beverage, or consider serving it with fresh berries to elevate your dessert presentation even more!
Winter Hat Cake Ingredients
• You’ll love how these ingredients come together to create a whimsical favorite!
For the Sponge
- Eggs – Structure and moisture. Use large eggs for consistency.
- Sugar – Sweetness and stabilization for the cake. Adjust to taste for dietary needs.
- Flour – Structure for the sponge. Substitute with gluten-free flour for a gluten-free variant.
- Vanilla Sugar – Flavor enhancement. Can use vanilla extract as a substitute.
- Salt – Balances sweetness. Essential for flavor.
For the Cream and Filling
- Cream Cheese – Base for cake cream, contributing richness. Use low-fat cream cheese if desired.
- Heavy Cream – Adds fluffiness to cake cream. Whipping cream can be used as a lighter alternative.
- Caramelized Sweetened Condensed Milk – Adds creamy sweetness and caramel notes. Consider using homemade caramel for control over sugar levels.
For the Decorating Cream
- Mascarpone – Creaminess for decorating cream. Can substitute with additional cream cheese.
- Powdered Sugar – Sweetness and thickening for decorating cream. Adjust for sweetness preference.
Embrace the warmth and creativity of your kitchen with this delightful Winter Hat Cake—a treat that will fill your heart and home with joy!
Step‑by‑Step Instructions for Winter Hat Cake
Step 1: Prepare the Sponge
Begin by preheating your oven to 190 °C (375 °F). In a large mixing bowl, beat together the eggs, sugar, vanilla sugar, and salt until the mixture is light and fluffy, which should take about 5–7 minutes. Gently fold in the flour until just combined, being careful not to overmix. Divide the batter evenly onto two lined baking sheets and bake for approximately 10 minutes or until the sponge is lightly golden and springs back when touched. Allow the sponges to cool completely.
Step 2: Assemble the Cake
While the sponge cools, line a salad bowl with plastic wrap, ensuring it covers the bowl completely. Once cooled, cut the sponge layers into circles with diameters of Ø 18 cm, Ø 16 cm, and Ø 14 cm. Use any leftover sponge for trimming into strips. Line the interior of the bowl with these sponge strips, ensuring it is fully covered for that cohesive Winter Hat Cake look.
Step 3: Prepare the Cake Cream
In a separate bowl, whip the heavy cream until soft peaks form, then add in the vanilla sugar. Continue whipping and fold in the cream cheese and caramelized sweetened condensed milk until everything is smooth and creamy. Layer this cake cream with the prepared sponge circles in the lined bowl, starting with a layer of cream, followed by the sponge. Once done, cover with plastic wrap and refrigerate for at least 8 hours, or overnight, to set.
Step 4: Prepare the Decorating Cream
When you’re ready to decorate, beat together the cream cheese, mascarpone, heavy cream, and powdered sugar in a mixing bowl. Continue to mix until the icing reaches a firm consistency that holds its shape well. This decorating cream will give your Winter Hat Cake its finishing touch, making it look just like a cozy knitted hat.
Step 5: Decorate the Cake
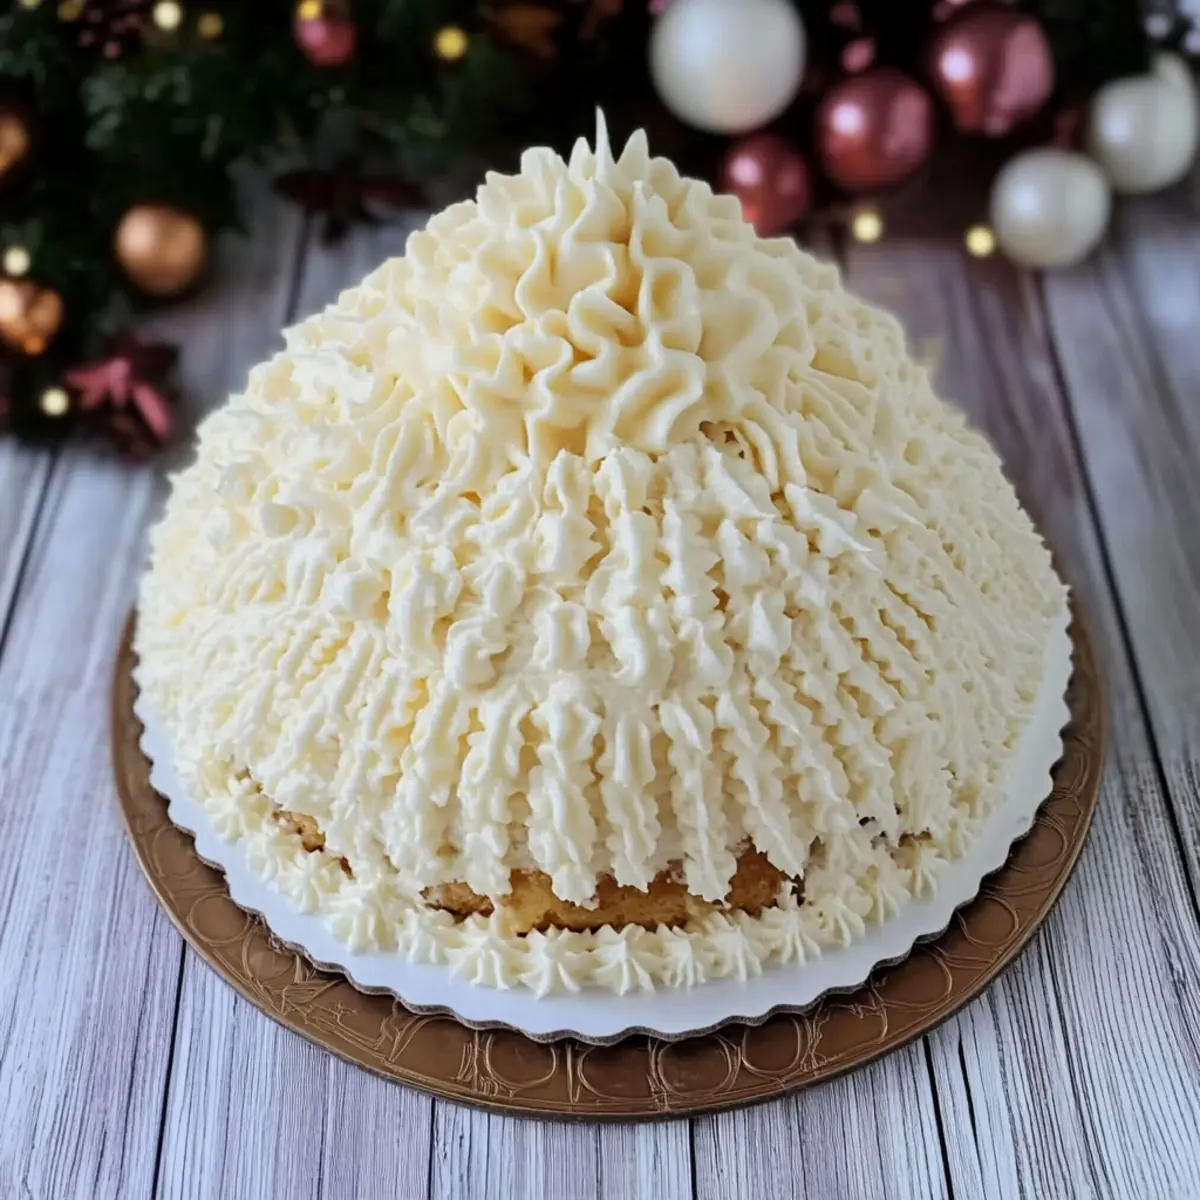
Once the cake has chilled and set in the refrigerator, carefully invert the bowl onto a serving plate to release the cake. Spread a thin layer of the decorating cream all over the cake for a smooth finish. Create a fun sponge ball from the leftover sponge scraps mixed with some of the decorating cream, placing it atop the cake to mimic a pom-pom.
Step 6: Finishing Touches
Using a star piping nozzle, pipe detailed decorations over the cake to resemble the intricate patterns of knitwear. Enhance your design with any remaining decorating cream to add festive flair. Chill the cake in the refrigerator for an additional 2 hours before the grand reveal, allowing the flavors to meld beautifully.
Variations & Substitutions for Winter Hat Cake
Feel free to get creative with this Winter Hat Cake recipe! Each twist will bring a new flavor or texture to this festive masterpiece.
-
Dairy-Free: Substitute heavy cream with coconut cream for a rich, dairy-free version that everyone can enjoy.
-
Gluten-Free: Use a 1:1 gluten-free flour blend in place of regular flour, making this dessert accessible for those with dietary restrictions.
-
Extracts Galore: Swap vanilla sugar for almond or peppermint extract to introduce a delightful twist that enhances the winter wonderland vibe.
-
Flavor Boost: Incorporate a splash of coffee or espresso powder into the cake cream for an exciting flavor dimension that pairs beautifully with caramel.
-
Nutty Crunch: Add chopped walnuts or almonds to the cream layers for a satisfying crunch. It complements the smooth textures wonderfully!
-
Chocolate Lovers: Drizzle melted chocolate over the top or mix cocoa powder into the decorating cream to indulge chocolate fans. This creates a luscious contrast that’s hard to resist.
-
Fruit Flavoured: Fold in some crushed seasonal berries, like raspberries or blueberries, into the cream for a refreshing tang that cuts through the sweetness of the cake.
If you’re in the mood for another special dessert, consider trying Honeybun Carrot Cake or the festive Easter Poke Cake to round out your holiday spread. Happy baking!
Expert Tips for the Best Winter Hat Cake
-
Don’t Overbake: Keep a close eye on the sponge; overbaking can lead to a dry cake. Use a toothpick to check doneness and ensure it’s light and fluffy.
-
Chill Time Matters: Allow your cake to refrigerate for at least 8 hours. This step is crucial for letting the flavors meld together perfectly and achieving the right texture in your Winter Hat Cake.
-
Cream Consistency: Whip your decorating cream until it’s firm but spreadable. This ensures that your intricate piping holds shape without collapsing, adding to the cake’s visual appeal.
-
Use Fresh Ingredients: Fresh cream and quality vanilla make a noticeable difference in flavor. Opt for high-quality cream cheese and other ingredients to elevate your cake.
-
Have Fun with Decorations: Feel free to get creative with your designs! Use different piping tips and incorporate toppings that represent your festive spirit while making the Winter Hat Cake truly your own.
Make Ahead Options
These Winter Hat Cakes are perfect for meal prep enthusiasts looking to save time during the busy holiday season! You can prepare the sponge layers up to 24 hours in advance; simply bake, cool, and store them in an airtight container. The cake cream can also be made ahead and refrigerated for up to 3 days; just whip it up and keep it chilled until you’re ready to assemble. When it’s time to serve, layer the cream and sponge in a salad bowl, refrigerate for a minimum of 8 hours or overnight, then decorate right before the festivities to ensure it remains just as delicious. This method not only streamlines your baking process but also guarantees a stunning centerpiece without the last-minute stress!
Storage Tips for Winter Hat Cake
-
Fridge: Store your Winter Hat Cake covered in the refrigerator to maintain its creamy texture and flavor for up to 3 days. This ensures it remains fresh and delicious throughout your holiday festivities.
-
Freezer: If you need to prepare it in advance, the cake can be frozen for up to a month. Wrap it tightly in plastic wrap, then foil, to prevent freezer burn.
-
Reheating: If desired, thaw the cake in the fridge overnight when ready to enjoy. For serving, you can let it sit at room temperature for about 30 minutes before slicing to enhance its flavors.
-
Airtight Storage: Always use an airtight container or wrap to protect the cake from absorbing odors and help maintain its signature creamy filling.
What to Serve with Winter Hat Cake?
Looking to make your Winter Hat Cake even more delightful? Pair it with these cozy accompaniments that enhance both flavor and festivity!
- Hot Chocolate: Rich, creamy hot chocolate complements the caramel notes of the cake while adding warmth to every bite.
- Fresh Berries: A medley of strawberries and blueberries offers a refreshing contrast, balancing the sweetness of the cake with a burst of tartness.
- Whipped Cream: Light and airy, a dollop of freshly whipped cream takes the cake to new heights, ensuring each slice is indulgent and creamy.
- Vanilla Ice Cream: The smooth, creamy texture of vanilla ice cream pairs perfectly with the fluffy sponge, creating a comforting dessert duo.
- Coffee or Espresso: The robust flavors of coffee enhance the cake’s richness, providing a delightful contrast and making it an irresistible treat for coffee lovers.
- Chocolate Ganache: Drizzling warm chocolate ganache over a slice adds decadence and an extra layer of flavor, turning your dessert into a lavish experience.
- Spiced Tea: A fragrant cup of spiced tea brings a cozy element to the table and complements the seasonal flavors of the cake beautifully.
- Caramel Sauce: Drizzling a homemade caramel sauce over slices of cake amplifies the caramel filling, making every bite a sweet temptation.
Winter Hat Cake Recipe FAQs
How do I choose the right eggs for the Winter Hat Cake?
Absolutely! For the best results, always use large eggs in your recipe. They provide the right amount of moisture and structure needed for the sponge. Look for eggs with clean, uncracked shells, and a vibrant yolk color, as these are indicators of freshness and quality.
What is the best way to store the Winter Hat Cake?
To keep your Winter Hat Cake fresh, store it covered in the refrigerator for up to 3 days. Make sure it’s airtight; you can use plastic wrap or an airtight container to prevent any drying out. If you plan to make it ahead of time, you can also freeze it for up to a month. Just wrap it tightly in plastic wrap, followed by foil, to fend off any freezer burn.
Can I freeze the Winter Hat Cake?
Yes, indeed! To freeze your Winter Hat Cake, wait until it has fully cooled after assembling. Wrap it snugly in plastic wrap, then cover with aluminum foil, ensuring that no air can get in. This method will protect it from freezer burn for up to 3 months. When you’re ready to indulge, let it thaw in the fridge overnight, and it will be just as delightful!
What should I do if my sponge is too dry?
If you find that your sponge is dry, it could be due to overbaking or incorrect oven temperature. Always check your sponge a minute or two before the suggested baking time by inserting a toothpick; it should come out clean but moist. Also, consider adding a simple syrup (equal parts sugar and water heated until dissolved) while assembling your cake to enhance its moisture.
Are there any dietary considerations for the Winter Hat Cake?
Very much! If you’re looking to accommodate food allergies or dietary restrictions, you can easily modify the recipe. For a gluten-free version, substitute regular flour with a gluten-free flour blend. For a dairy-free cake, replace heavy cream with whipped coconut cream, and use a dairy-free cream cheese alternative. Always check ingredient labels for allergens, especially if serving to guests.
What can I do to enhance the flavor of the Winter Hat Cake?
To elevate the flavors, try adding a tablespoon of espresso powder or almond extract to the cream mixture for a delicious twist. Alternatively, infusing your cake with citrus zest, such as lemon or orange, can provide a lovely contrast to the sweet cream. This creative touch will leave everyone begging for your recipe!
Cozy Up with Our Delectable Winter Hat Cake Recipe!
Ingredients
Equipment
Method
- Preheat the oven to 190 °C (375 °F). Beat eggs, sugar, vanilla sugar, and salt until light and fluffy for 5–7 minutes. Fold in flour gently. Divide batter onto lined baking sheets and bake for 10 minutes or until golden. Cool completely.
- Line a salad bowl with plastic wrap. Cut the cooled sponge layers into Ø 18 cm, Ø 16 cm, and Ø 14 cm circles. Line the bowl with sponge strips, covering it fully.
- Whip heavy cream until soft peaks form, then mix in vanilla sugar. Fold in cream cheese and caramelized sweetened condensed milk until smooth. Layer this cream with sponge in the bowl. Cover and refrigerate for at least 8 hours.
- Beat cream cheese, mascarpone, heavy cream, and powdered sugar until firm consistency forms. This will decorate the cake.
- Invert the bowl onto a serving plate. Spread a thin layer of decorating cream over the cake. Use leftover sponge scraps to create a sponge ball on top.
- Pipe decorations on the cake resembling knit patterns using a star piping nozzle. Chill for an additional 2 hours before serving.