


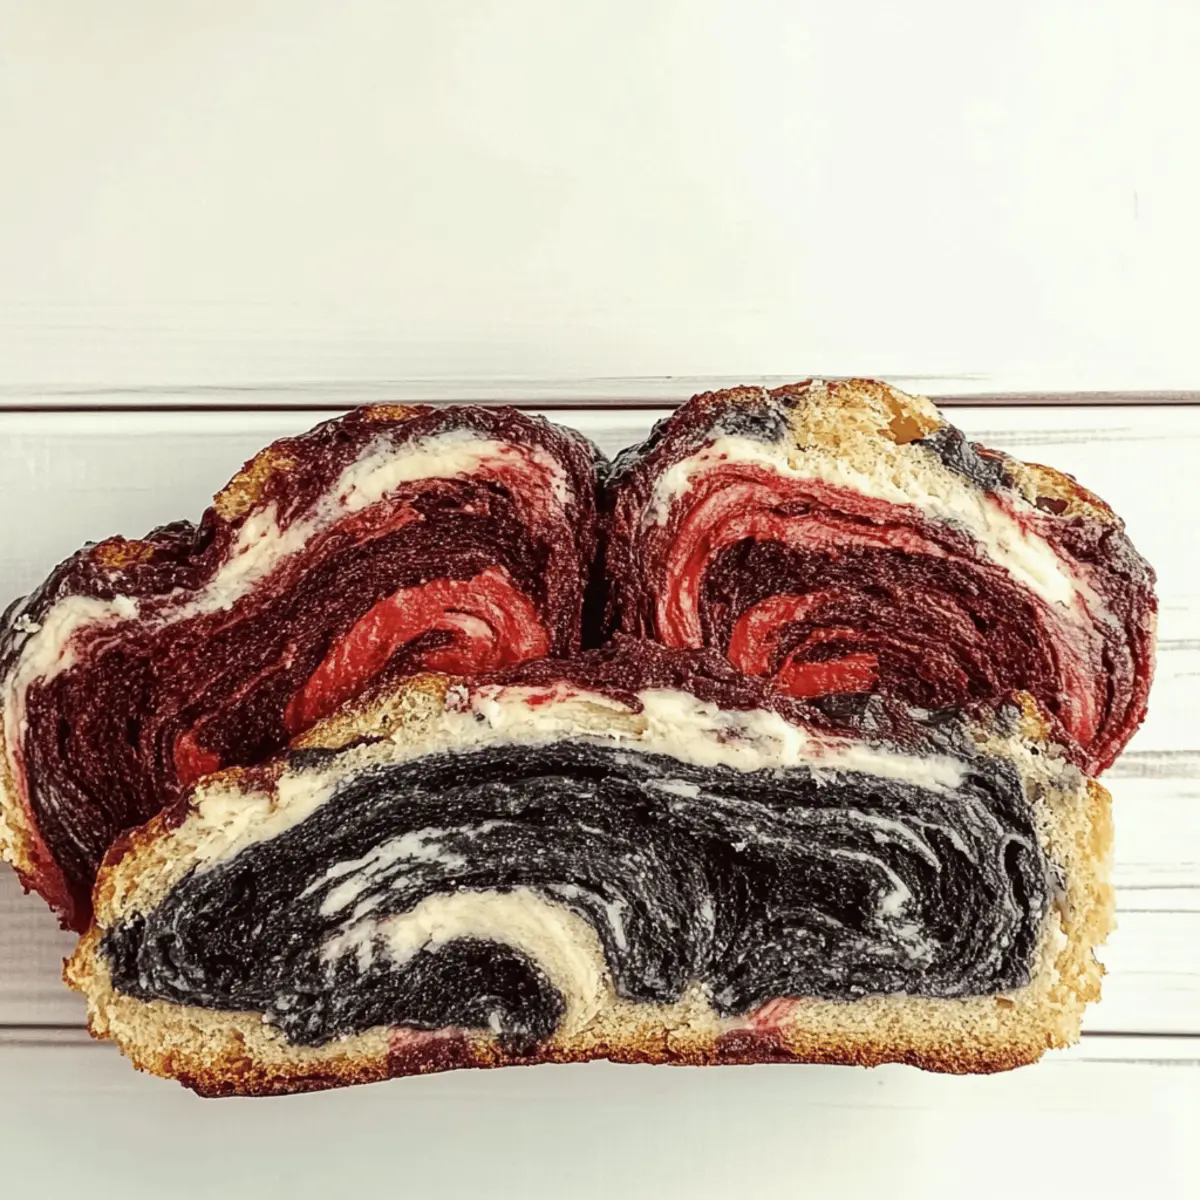
As I pulled the warm loaf from the oven, the deep color and whimsical swirls of my Vampire Bread instantly transported me to a vibrant autumn night filled with laughter and spooktacular fun. This enchanting twist on the classic loaf is not just a feast for the eyes; it’s a perfect balance of homemade goodness and a hint of natural sweetness, making it an excellent guilt-free treat. Whether you’re hosting a Halloween party or simply looking to spice up your breakfast table, this vegetarian delight promises a low-fat and kidney-friendly indulgence that everyone will adore. Just imagine the joy of sharing slices that not only taste amazing but also spark festive creativity. So, are you ready to join me in baking a loaf that’s sure to impress?
Why is Vampire Bread a Must-Try?
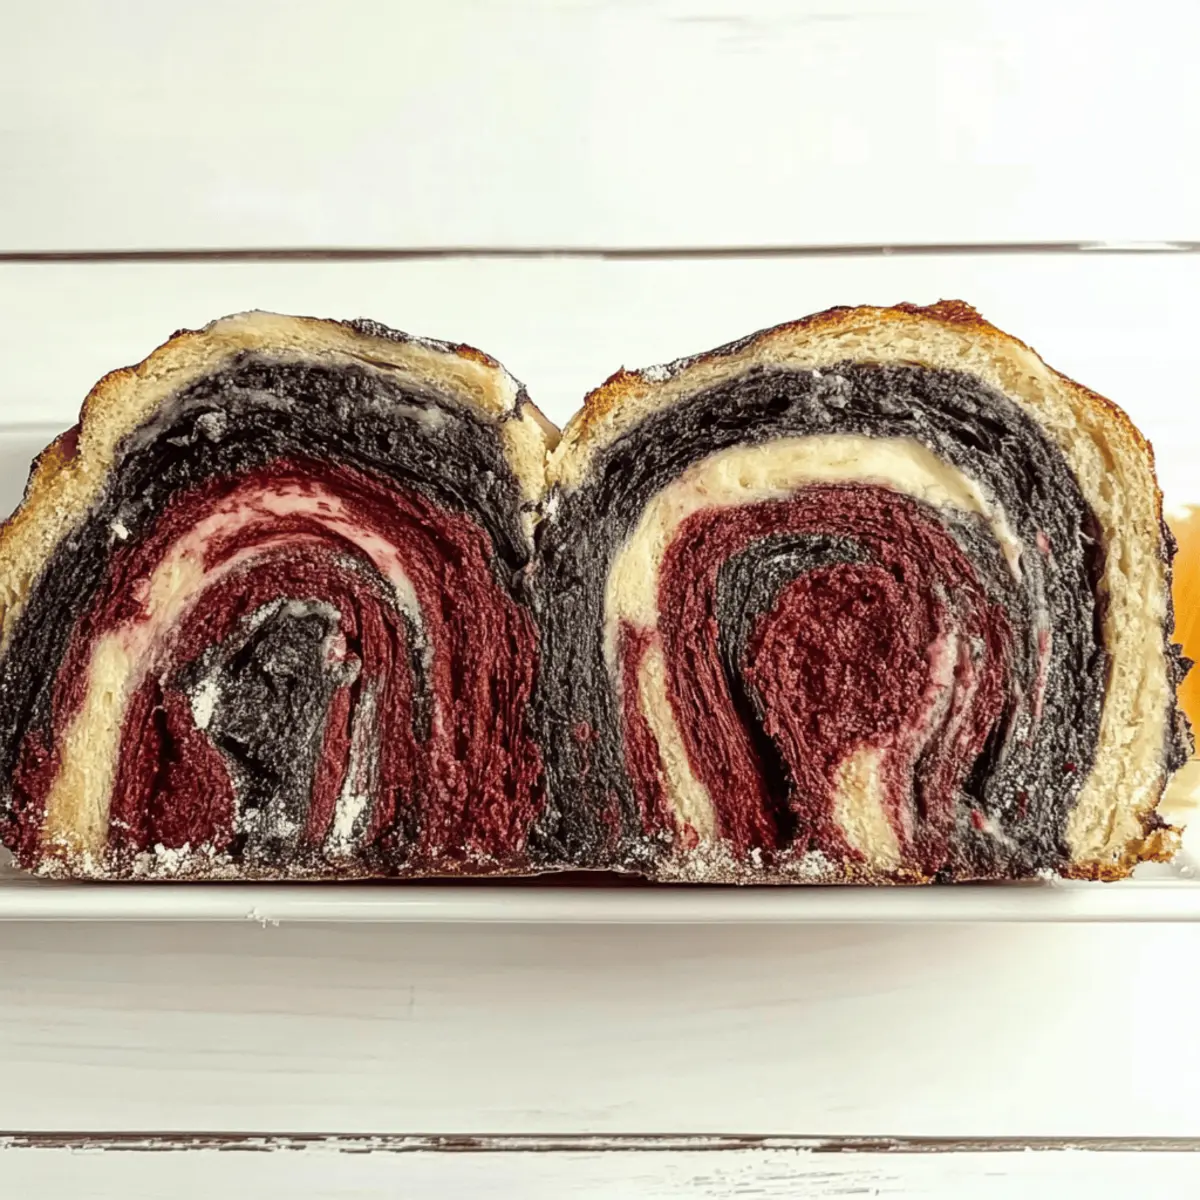
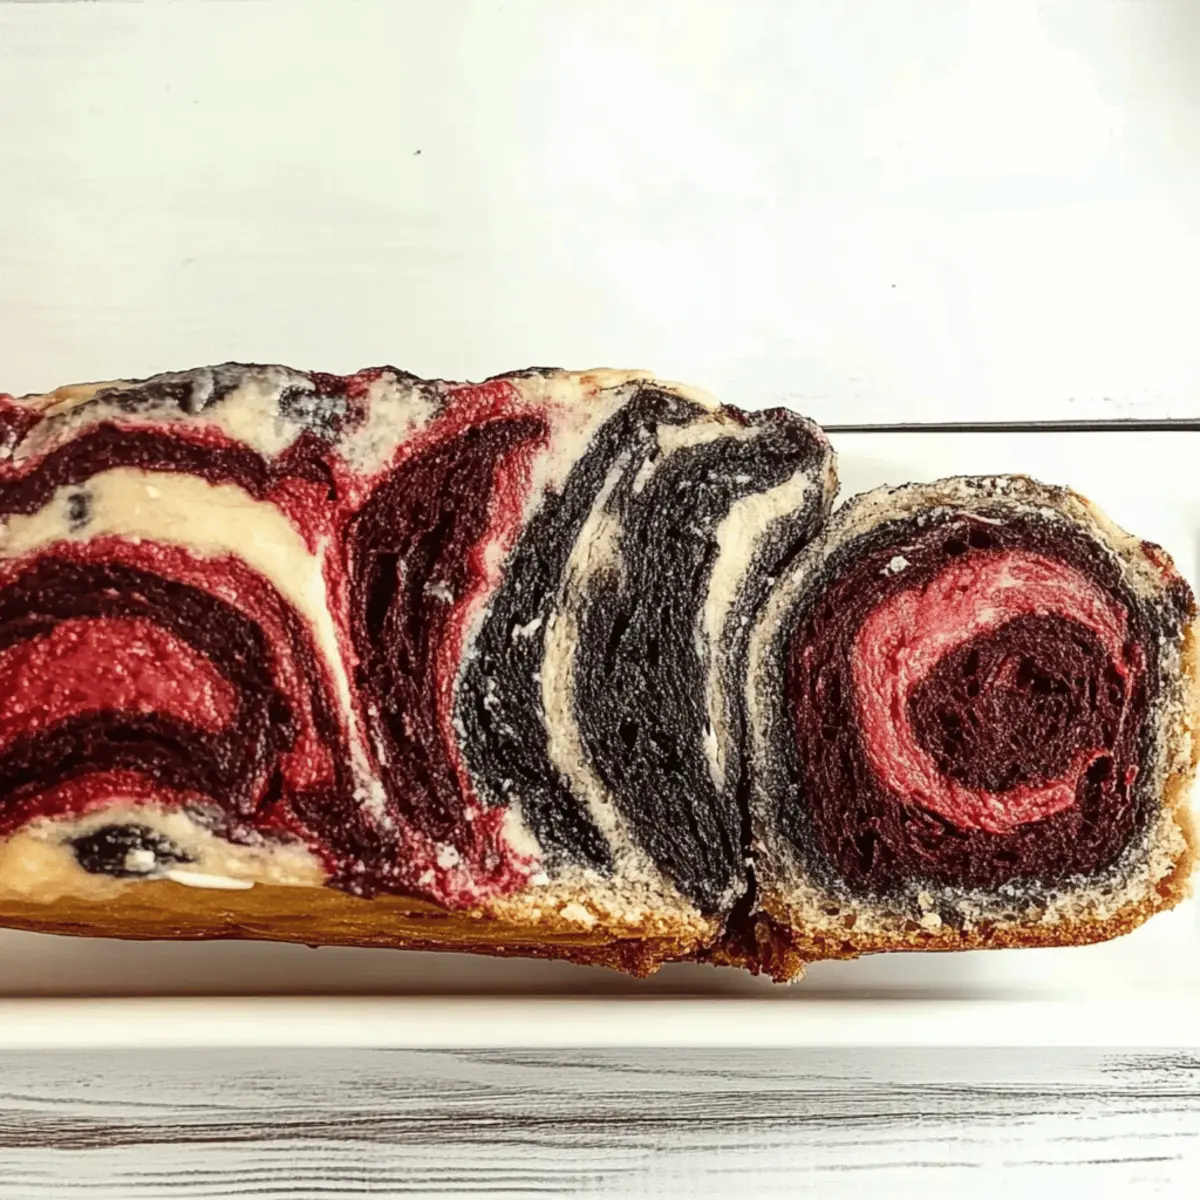
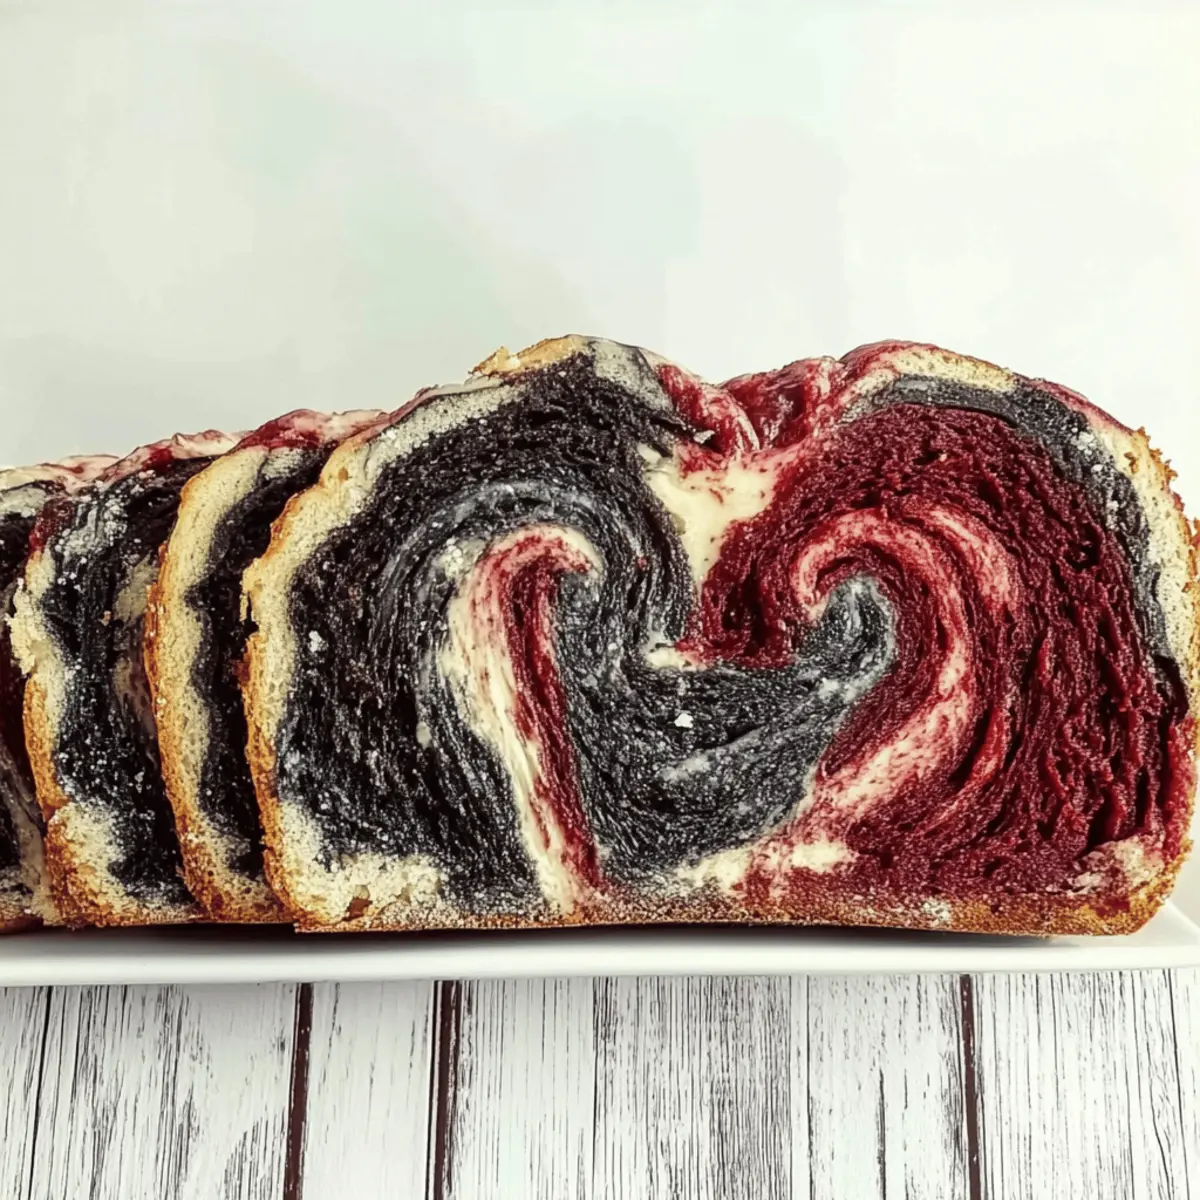
Delightfully Unique: Each slice of Vampire Bread showcases a swirling mix of colors that fascinates both kids and adults alike.
Healthy and Guilt-Free: As a low-fat, kidney-friendly option, this bread lets you indulge without any of the guilt!
Perfect for Celebrations: It’s not just a bread; it’s a centerpiece for your spooky gatherings and Halloween festivities.
Easy to Make: The straightforward process makes this recipe perfect for both novice and seasoned bakers—anyone can create this enchanting loaf.
Versatile Flavor: Serve with themed spreads or enjoy it plain; it’s a delightful addition to any meal!
For additional flavor inspiration, consider exploring other variations that can transform this classic into something even more magical!
Vampire Bread Ingredients
For the Dough
• Flour – This acts as the structural base for the bread; use all-purpose for the best texture.
• Yeast – The leavening agent for rise; instant yeast can be a speedy substitute.
• Sugar – Adds sweetness and helps with crust browning; reduce for a less sweet treat.
• Salt – Enhances flavor and strengthens gluten; opt for kosher salt for better control over seasoning.
• Water – Provides hydration for the dough; warm water (about 110°F) activates the yeast effectively.
• Oil (optional) – Adds moisture to the bread; melted butter can substitute for a richer flavor.
For the Color
• Food Coloring (Black and Red) – Essential for achieving the “vampire” theme; gel food coloring is recommended for vibrant results.
Baking this Vampire Bread not only makes for a visually stunning loaf but also ensures it’s a deliciously healthy option for your festive gatherings!
Step‑by‑Step Instructions for Vampire Bread
Step 1: Prepare the Dough
In a medium bowl, combine 2¼ teaspoons of yeast, 1 tablespoon of sugar, and 1 cup of warm water (about 110°F). Let this mixture sit for about 10 minutes until it becomes frothy and bubbly, indicating that the yeast is activated. This frothy yeast mixture is the magic behind the rise in your enchanting Vampire Bread!
Step 2: Mix Dry Ingredients
In a separate large bowl, whisk together 3 cups of all-purpose flour and 1 teaspoon of kosher salt. This step not only blends the dry ingredients but also ensures even distribution of the salt, which enhances flavor and strengthens gluten. The mixture should feel light and airy, ready to combine with your activated yeast.
Step 3: Combine Wet and Dry Ingredients
Gradually pour the frothy yeast mixture into the bowl with the flour and salt. Stir well with a wooden spoon or spatula until all the dry flour is incorporated and a dough begins to form. The dough should be slightly sticky but well combined; this texture is key for your Vampire Bread’s delightful chewiness.
Step 4: Incorporate Food Coloring
Once the dough has formed, divide it into two or more equal portions based on how many colors you wish to use. Knead in black and red gel food coloring into each portion, ensuring an even mix. Aim for a marbled effect by kneading lightly or blend thoroughly for a solid hue. This step is where your Witchy creativity shines!
Step 5: First Rise
Place the colorful dough into a greased bowl and cover it with a damp cloth. Set it in a warm, draft-free area to rise until it doubles in size—about 1 to 2 hours. You’ll know it’s ready when the dough is puffy and has expanded significantly, filling your kitchen with its inviting aroma.
Step 6: Shape the Bread
After the dough has risen, punch it down gently to release the air. Turn it out onto a lightly floured surface and shape it into a loaf. Place the shaped dough into a greased loaf pan, pressing it down gently to fit snugly. This shaping gives your Vampire Bread a beautiful, uniform appearance.
Step 7: Second Rise
Cover the shaped dough again with a cloth and allow it to rise for an additional 30 minutes. During this time, the dough will become puffy and full. This second rise is essential for creating texture in your final loaf and gives it that classic, airy feel.
Step 8: Bake
Preheat your oven to 350°F (175°C) while the dough is rising. Once ready, remove the cloth and bake the loaf for about 30 minutes. The bread should turn golden brown and sound hollow when tapped on the bottom. This is the perfect moment to unleash the scents of your incredible Vampire Bread!
Step 9: Cool
Once baked, remove the loaf from the oven and let it cool in the pan for 10 minutes. After that, transfer it to a wire rack for complete cooling. The bread will continue to set and firm up as it cools, making it even more enjoyable when it’s time for slicing!
Vampire Bread Variations & Substitutions
Ready to make your Vampire Bread even more personal? Let your creativity shine in the kitchen with these delightful twists!
- Natural Colorants: Substitute gel food coloring with beet juice for red and activated charcoal for black. This keeps things fun and healthier!
- Herbal Infusion: Enhance flavor by mixing fresh herbs like rosemary or thyme into the dough. It adds a savory twist that surprises the palate.
- Cheesy Delight: Fold in shredded cheese, like mozzarella or cheddar, before the first rise. It will melt beautifully and add a delightful gooeyness inside!
- Fruity Surprise: Mix in dried cranberries or chocolate chips to create a sweet filling. It gives your bread a fun and delicious surprise!
- Spiced Pumpkin: Add pumpkin puree and a dash of cinnamon for a seasonal twist. It creates a moist texture and a cozy flavor perfect for fall!
- Gluten-Free: Swap all-purpose flour for a gluten-free blend. Incorporate equal amounts of xanthan gum for optimal texture—everyone deserves this treat!
- Savory Swirls: Introduce a sprinkle of garlic powder and grated Parmesan into the dough for a savory version that pairs beautifully with soups and spreads.
- Heat-It-Up: For a spicy kick, incorporate finely chopped jalapeños or red pepper flakes into the dough. This adds warmth and excitement to every bite!
Feeling inspired? Each variation invites you to play with flavors and textures, making Vampire Bread a canvas for your culinary imagination. Don’t forget to check out some of my favorite filling options for a truly magical experience!
Expert Tips for Making Vampire Bread
-
Yeast Activation: Ensure your water temperature is around 110°F; too hot can kill the yeast, hindering the rise of your Vampire Bread.
-
Kneading Technique: Knead the dough just until combined; over-kneading can lead to a dense loaf instead of the light, fluffy texture you desire.
-
Creative Color Mixing: Don’t be afraid to be adventurous with your food coloring. Mix thoroughly for a solid color or knead lightly for a beautiful swirl effect!
-
Proper Rising Conditions: Find a warm, draft-free spot for your dough to rise; temperature fluctuations can negatively impact the fermentation process.
-
Storage Strategy: Keep your Vampire Bread fresh by storing it in an airtight container at room temperature for up to 3 days to maintain its delightful texture.
Make Ahead Options
These delicious Vampire Bread loaves are perfect for meal prep, making your Halloween gatherings stress-free! You can make the dough up to 24 hours in advance—simply prepare it and let it rise, then punch it down, shape it, and refrigerate (covered) until you’re ready to bake. This method maintains the bread’s freshness, ensuring it’s just as delightful when you serve it. On the day of your event, remove the dough from the fridge, allow it to come to room temperature while it rises again for about 30-45 minutes, and then bake as instructed. This way, you’ll have a stunning and scrumptious bread with minimal effort, allowing you to enjoy the festivities!
What to Serve with Vampire Bread?
Enhance your whimsical dining experience with delightful pairings that complement the enchanting flavors of this unique loaf.
-
Garlic Herb Butter: This spread brings a rich, savory twist to each slice, instantly elevating the experience and balancing the bread’s sweetness. It’s a bonus for garlic lovers!
-
Roasted Tomato Soup: The vibrant acidity and comforting warmth of this soup create a cozy pairing, perfect for dipping the soft, pillowy Vampire Bread.
-
Avocado Spread: Creamy and nutritious, this spread adds a fresh and buttery texture, making every bite of Vampire Bread a delightful affair for your taste buds.
-
Cheesy Spinach Dip: The gooey goodness of this dip matched with the striking colors of Vampire Bread creates an inviting atmosphere at any gathering, and it’s simply irresistible!
-
Cranberry Chutney: A tangy complement, this bright chutney introduces a playfully sweet contrast while enhancing the bread’s overall festive flair.
-
Sparkling Apple Cider: This refreshing, bubbly drink serves as a fun accompaniment, offering a crisp finish to the flavors of your spooky meal.
-
Pumpkin Spice Latte: Warm and comforting, this seasonal favorite brings together the joyful essence of fall with Vampire Bread during breakfast or afternoon treats.
-
Chocolate Cream Cheese Spread: For a sweet twist, this indulgent spread takes your Vampire Bread to another level, satisfying sweet cravings while adding a festive flair.
-
Fresh Salad: A mix of greens with a zesty dressing introduces a fresh, crunchy contrast, making for a well-rounded meal that celebrates the season!
-
Chocolate Pudding Cups: These creamy desserts provide a delightful finish, allowing everyone to indulge in a bit of richness after enjoying their festive meal.
How to Store and Freeze Vampire Bread
Room Temperature: Store Vampire Bread in an airtight container at room temperature for up to 3 days to keep its soft texture and delightful flavors intact.
Fridge: If you prefer a longer shelf life, you can refrigerate it for up to 5 days. Be sure to wrap it tightly to prevent it from drying out.
Freezer: For longer storage, freeze your Vampire Bread wrapped tightly in plastic wrap or aluminum foil for up to 3 months. Thaw in the fridge overnight before serving.
Reheating: To revive that freshly-baked taste, reheat slices in the toaster or oven at 350°F (175°C) for about 5-7 minutes until warm. Enjoy this enchanting loaf straight from the oven!
Vampire Bread Recipe FAQs
How do I select the right flour for Vampire Bread?
Absolutely! For the best results, use all-purpose flour as it provides the ideal structure and texture for the bread. Avoid using bread flour or cake flour, as they can create undesired results in density and chewiness.
How long can I store Vampire Bread?
You can store your Vampire Bread in an airtight container at room temperature for up to 3 days. If you need it to last longer, refrigerate it for up to 5 days, ensuring it is tightly wrapped to prevent drying out.
Can I freeze Vampire Bread?
Absolutely! To freeze your Vampire Bread, wrap it tightly in plastic wrap or aluminum foil, and store it in a freezer-safe bag for up to 3 months. When you’re ready to enjoy it, simply thaw it overnight in the fridge and then reheat for that fresh-from-the-oven taste.
What should I do if my dough isn’t rising properly?
Very important! If your dough isn’t rising as it should, first check your yeast; it may be expired or not active. Ensure your water temperature is around 110°F when activating yeast; hotter water can kill the yeast. If everything checks out, try moving the dough to a warmer place, or place it in a slightly preheated oven (turned off) to encourage rise.
Is Vampire Bread safe for people with dietary restrictions?
Yes! This recipe is vegetarian, low in fat, and lower in sodium, making it a great option for various dietary needs. However, always check ingredient labels, especially for food coloring, to ensure they don’t contain allergens or additives that may affect certain diets. If unsure, consider using natural alternatives for coloring!
Can I use different colors or flavors in the Vampire Bread?
The more, the merrier! Feel free to experiment with other gel food coloring to achieve different shades, or for a flavor twist, consider adding spices like cinnamon or nutmeg. This adds not only a festive flair but can make your baking experience even more special!
Vampire Bread: A Spooky, Whimsical Twist on Classic Loaf
Ingredients
Equipment
Method
- In a medium bowl, combine the yeast, sugar, and warm water. Let it sit for about 10 minutes until frothy.
- In a separate large bowl, whisk together flour and salt.
- Pour the frothy yeast mixture into the flour and salt mixture, stirring until a dough forms.
- Divide the dough into portions and knead in food coloring.
- Place the dough in a greased bowl, cover, and let it rise for 1 to 2 hours until doubled.
- After rising, punch down the dough, shape it into a loaf, and place it in a greased loaf pan.
- Cover and let rise again for 30 minutes.
- Preheat the oven to 350°F and bake for 30 minutes until golden brown.
- Cool in the pan for 10 minutes, then transfer to a wire rack.