


As I sat on my porch savoring the remnants of summer, the thought of a quick dessert made from a few favorite flavors danced in my mind. These Strawberry Oreo Cheesecake Cups are not just a treat; they’re an experience—combining the satisfying crunch of Oreos with a light, creamy filling, all while being completely no-bake! This easy dessert is great for warm days and perfect for anyone looking to whip up something special without a fuss. Whether you’re entertaining friends or treating yourself, these customizable cups can even cater to various dietary preferences—think dairy-free or vegan options! Curious how to create this delightful indulgence? Let’s dive into the recipe!
Why are Strawberry Oreo Cheesecake Cups perfect?
No-Bake Convenience: These cups are incredibly simple to whip up without the need for an oven, making them ideal for hot summer days.
Customizable Flavors: Switch up your Oreos or layer in different berries like raspberries for a unique twist.
Perfect Portions: Individual servings mean no sharing required—great for parties or a personal treat!
Crowd-Pleasing Delight: With the creamy filling and crunchy layers, they’re sure to impress your guests, whether at a potluck or a casual get-together.
Easy Adaptability: Want a vegan version? No problem! You can easily swap ingredients for plant-based alternatives.
Quick Chill Time: Just chill for about 30 minutes, and you’re ready to indulge in a refreshing dessert that embodies summer bliss!
Strawberry Oreo Cheesecake Cup Ingredients
• Here’s everything you need to create these delightful, no-bake treats!
For the Base:
- Oreos – Crushed for a crunchy base; consider using Golden Oreos for a twist!
For the Cheesecake Filling:
- Cream Cheese (8 oz) – Creates a smooth base for the creamy filling; can be substituted with dairy-free cream cheese for a vegan option.
- Powdered Sugar (¼ cup) – Sweetens the filling; feel free to adjust or use a sugar-free sweetener.
- Vanilla Extract (1 tsp) – Adds depth to the flavor; no substitutions needed.
- Heavy Whipping Cream (½ cup) – Provides a fluffy texture; you can swap this with Cool Whip if preferred.
For the Strawberries:
- Fresh Strawberries (1 cup) – Offer a juicy freshness; try using different berries like blueberries for variety.
For Garnish:
- Mini Oreos (2 tbsp) – Use these to enhance visual appeal; optional but highly recommended for that extra touch!
Step‑by‑Step Instructions for Strawberry Oreo Cheesecake Cup
Step 1: Prep Oreos
Begin by crushing the Oreos into fine crumbs. Use a food processor for efficiency, or place them in a zip-top bag and crush with a rolling pin until you achieve a sand-like texture. This will serve as the delightful base for your Strawberry Oreo Cheesecake Cups. Set aside about two tablespoons of crumbs for garnish later.
Step 2: Make Filling
In a large mixing bowl, beat the room-temperature cream cheese with powdered sugar and vanilla extract until smooth and creamy, about 2-3 minutes. In a separate bowl, whip the heavy cream until soft peaks form, which should take around 3-5 minutes. Gently fold the whipped cream into the cheesecake mixture until well combined, creating the light and airy filling for your Strawberry Oreo Cheesecake Cups.
Step 3: Prep Strawberries
Wash and dry one cup of fresh strawberries, then slice them evenly into thin pieces to maintain a beautiful presentation in your dessert. If desired, prepare a quick strawberry sauce by blending a few extra strawberries with a bit of sugar to drizzle on top later. This fruity layer will add vibrant color and sweetness to your cups.
Step 4: Layer Cups
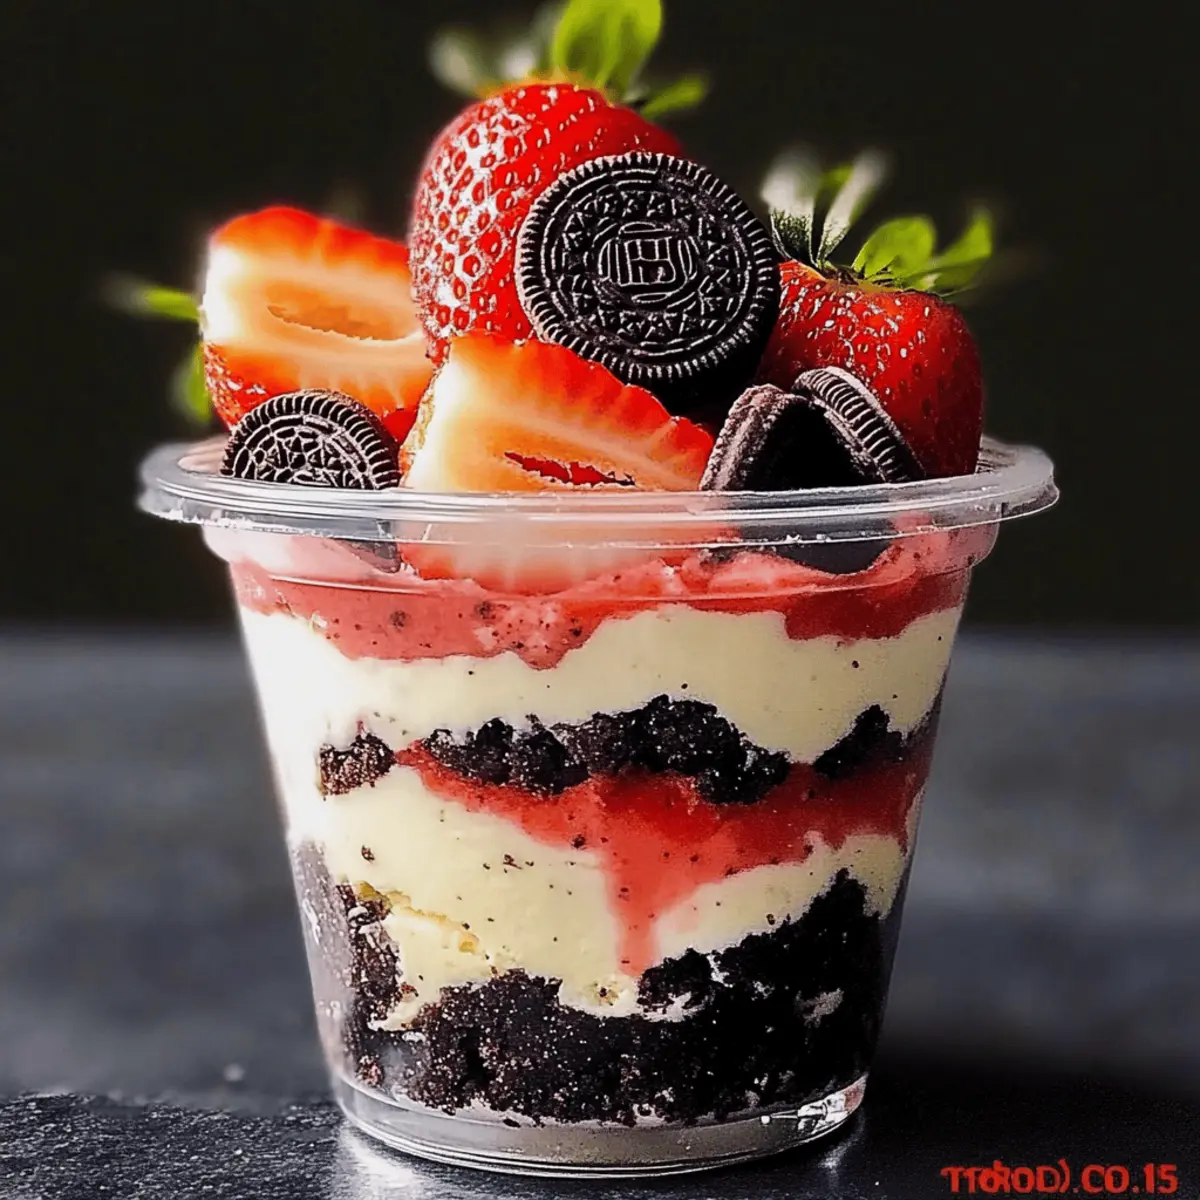
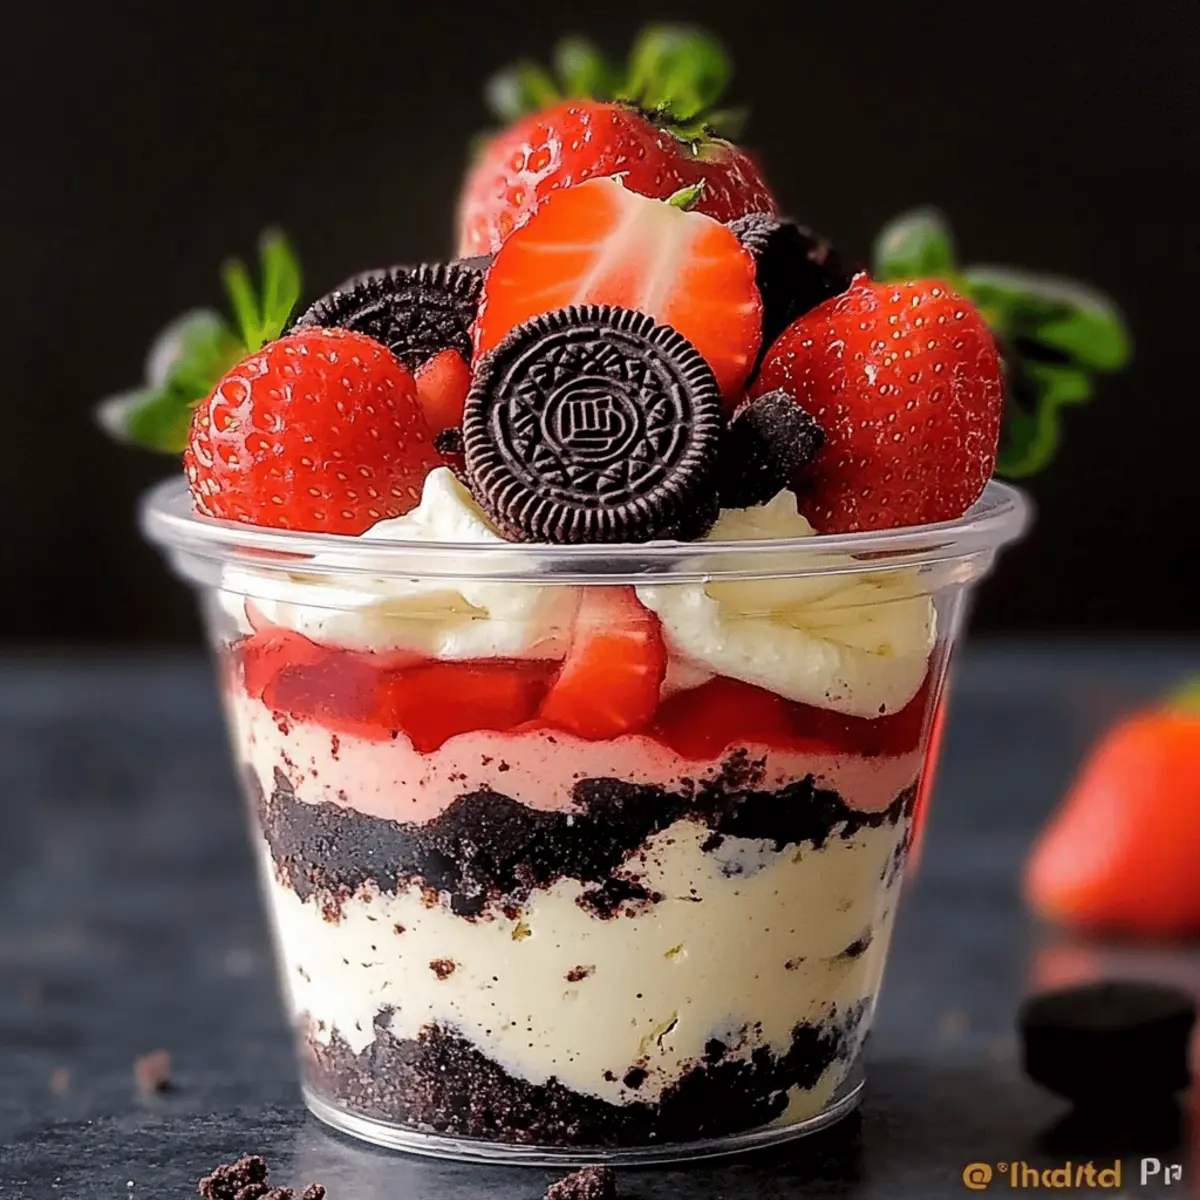
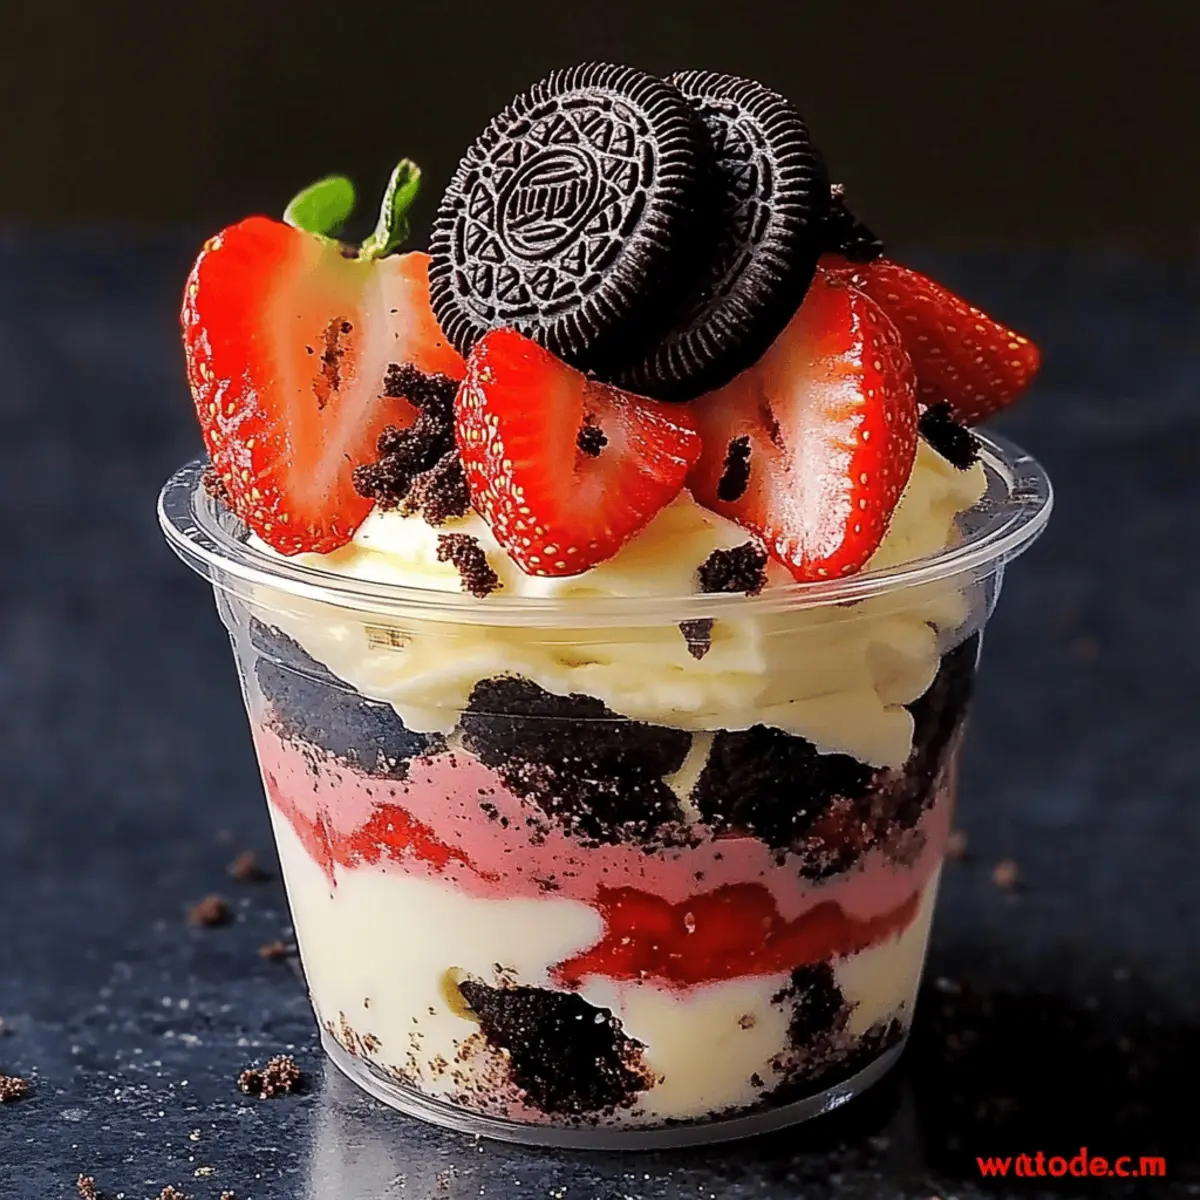
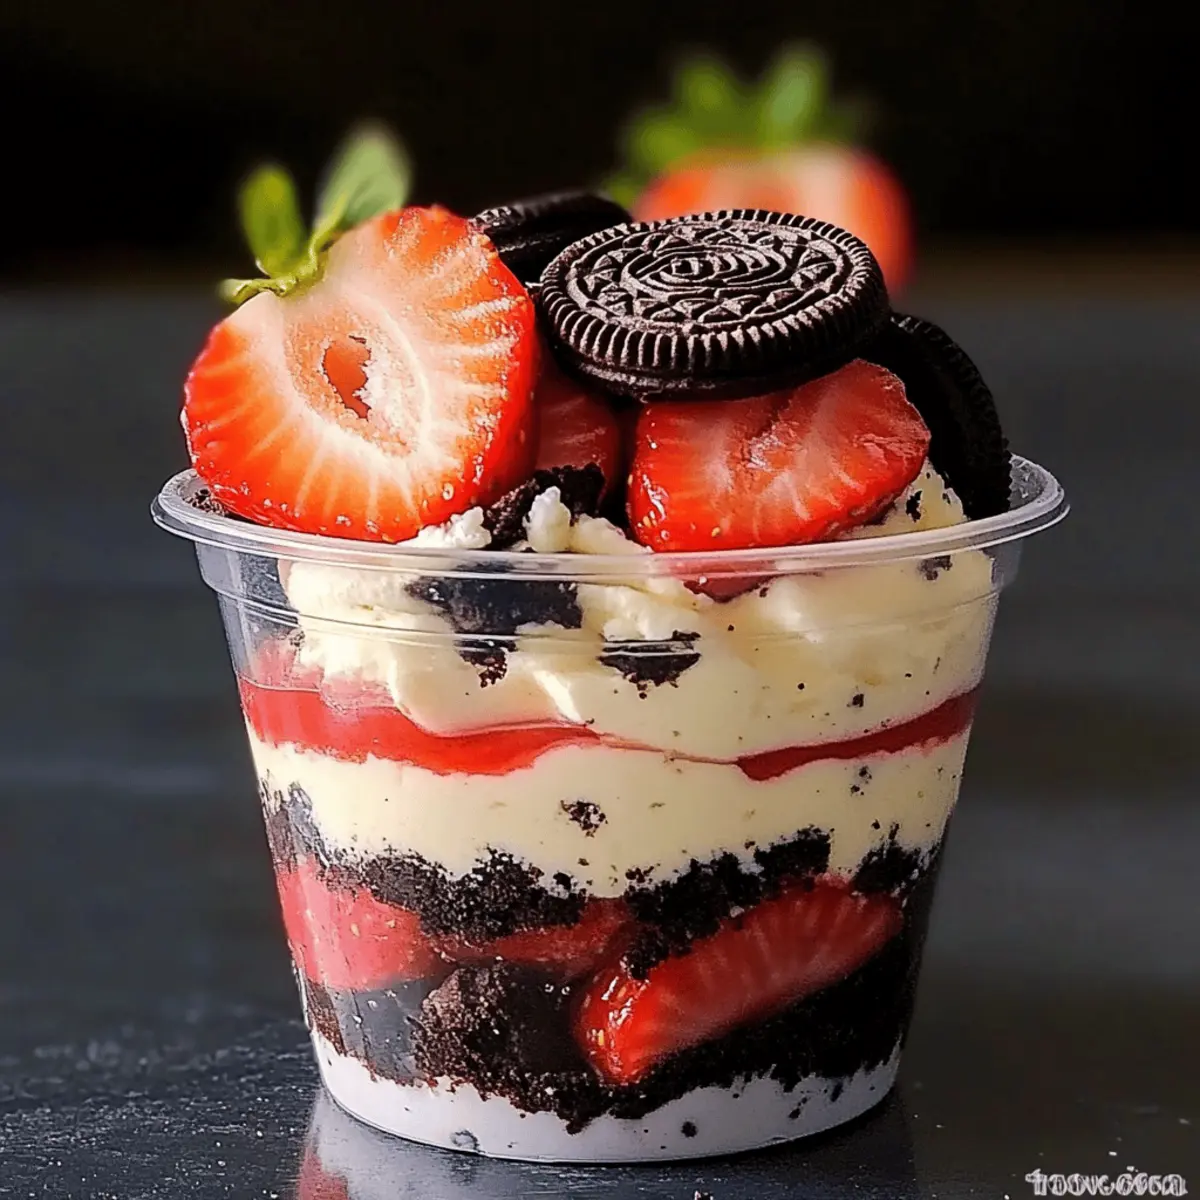
Start assembling your cups by placing a layer of the crushed Oreos at the bottom of each serving container. Follow this with a generous layer of the cream cheese filling, then add a layer of the sliced strawberries. Repeat these layers until you reach the top, finishing with a layer of cheesecake filling to create a visually appealing Strawberry Oreo Cheesecake Cup perfect for any occasion.
Step 5: Garnish
To enhance the visual appeal of your Strawberry Oreo Cheesecake Cups, top each cup with the reserved Oreo crumbs, extra sliced strawberries, and a few mini Oreos for that extra touch. If you created a strawberry sauce, drizzle a bit on top for a beautiful finishing touch. These garnishes will not only look delightful but also add a burst of flavor to each bite.
Step 6: Chill
Refrigerate the assembled Strawberry Oreo Cheesecake Cups for at least 30 minutes, or up to a few hours if time permits. This chilling step is crucial as it allows the flavors to meld and the filling to set, creating a refreshing dessert that is easy to serve. For optimal texture, serve them chilled, letting everyone enjoy the cool, decadent layers!
Strawberry Oreo Cheesecake Cup Variations
Feel free to explore these creative options to make the recipe truly your own!
-
Flavor Swap: Replace Oreos with Golden Oreos or try a mint variety for a fresh twist. Each flavor brings its own unique charm to the cups!
-
Vegan Delight: Use dairy-free cream cheese and whipped coconut cream for a completely plant-based version. You won’t miss the traditional ingredients—trust me!
-
Berry Bliss: Substitute the fresh strawberries with raspberries or blueberries for a burst of different fruit flavors. Each berry brings a new dimension to the sweet creaminess.
-
Sweetener Change: For a healthier version, swap powdered sugar with a sugar-free sweetener like Stevia. Adjust to taste, ensuring your dessert remains delightful!
-
Nutty Crunch: Add a layer of chopped nuts like almonds or walnuts between layers for an unexpected crunch. The contrast of textures will surprise you!
-
Larger Serving: Want to serve more? Create a trifle by layering the ingredients in a large dish instead of individual cups. Perfect for gatherings and easy to serve!
-
Chocolate Drizzle: Drizzle melted chocolate over the top before serving for an indulgent treat that chocolate lovers will adore.
-
Spicy Kick: Add a pinch of cinnamon or a dash of chili powder to your cheesecake filling for a surprising twist that elevates the flavor profile beautifully!
Feel inspired? Now you can make this dessert a true reflection of your taste and creativity! If you’re on the lookout for more dessert ideas, check out my delightful Strawberry Cheesecake Dump or give the fabulous Carrot Cake Cheesecake a try!
How to Store and Freeze Strawberry Oreo Cheesecake Cups
Fridge: Store your Strawberry Oreo Cheesecake Cups in an airtight container for up to 2 days. This keeps them fresh and maintains their creamy texture.
Freezer: For longer storage, freeze assembled cups for up to 1 month. Place them in an airtight container, but know that the texture may change slightly once thawed.
Thawing: To enjoy frozen cups, transfer them to the fridge for several hours or overnight to thaw gently. Avoid microwave thawing, as it can compromise the filling’s texture.
Re-garnishing: Add fresh strawberries and any additional garnishes just before serving for the best taste and presentation.
What to Serve with Strawberry Oreo Cheesecake Cups
Elevate your dessert experience and create a memorable meal by pairing these delightful cups with complementary flavors and textures.
-
Fresh Berries: A medley of raspberries and blueberries adds vibrant color and tangy contrast, enhancing the fruity notes of the cheesecake cups.
-
Whipped Cream: A dollop of freshly whipped cream on top not only boosts creaminess but also adds an airy texture that balances the richness of the dessert.
-
Chocolate Drizzle: Adding a warm chocolate drizzle brings an indulgent twist, creating an enticing visual feast while introducing a new layer of flavor to each bite.
-
Sparkling Lemonade: The citrusy zing from sparkling lemonade refreshes the palate, making it an ideal companion for the sweet and creamy cheesecake.
-
Mint Sprigs: Garnish the cups with fresh mint leaves. Their crisp flavor brings a refreshing lift and a delightful pop of color, enhancing the presentation.
-
Coffee or Espresso: A strong cup of coffee pairs beautifully, cutting through the sweetness while complementing the chocolate notes of the Oreo crust.
-
Ice Cream: A scoop of vanilla or strawberry ice cream can take your dessert to the next level. The creaminess and temperature contrast will delight your taste buds!
-
Chocolate-Covered Pretzels: The salty crunch of chocolate-covered pretzels offers a unique contrast in texture and flavor, adding a fun and unexpected twist to the dessert experience.
-
Fruit Salad: A light fruit salad with tropical fruits like pineapple and mango serves as a refreshing side, balancing the richness of the cheesecake cups nicely.
Make Ahead Options
These delightful Strawberry Oreo Cheesecake Cups are perfect for meal prep enthusiasts! You can prepare the cheesecake filling and the crushed Oreo base up to 24 hours in advance. Simply mix the cream cheese, powdered sugar, and vanilla, and fold in the whipped cream before refrigerating it in an airtight container. Store the crushed Oreos separately to maintain their crunch. When you’re ready to serve, layer the prepped components with fresh strawberries and some extra garnish for a vibrant presentation. This way, you can enjoy an indulgent, no-bake dessert that saves time and still tastes just as delicious!
Expert Tips for Strawberry Oreo Cheesecake Cups
-
Room Temperature Cream Cheese: Ensure your cream cheese is at room temperature for easy blending. This will avoid lumps and give you a smooth filling.
-
Don’t Over-Whip Cream: When whipping the heavy cream, stop once soft peaks form. Over-whipping can lead to a grainy texture in your cheesecake cups.
-
Chill Time is Key: Refrigerate the cups for at least 30 minutes to allow flavors to meld and the texture to set. This is crucial for the best Strawberry Oreo Cheesecake Cups!
-
Taste as You Go: If using sugar-free or alternative sweeteners, adjust sweetness to your preference as you mix. Everyone’s taste buds are different, so fine-tune it!
-
Use Clear Cups for Presentation: Consider using clear dessert cups to showcase the beautiful layers of your Strawberry Oreo Cheesecake Cups. Visual appeal makes the experience even more delightful!
Strawberry Oreo Cheesecake Cups Recipe FAQs
What type of Oreos should I use for the best flavor?
For these Strawberry Oreo Cheesecake Cups, classic Oreos work beautifully for that signature crunch and rich chocolate flavor. However, feel free to experiment with Golden Oreos for a different taste, or even flavored varieties like mint or strawberry for a unique twist. The more the merrier when it comes to flavor combinations!
How should I store Strawberry Oreo Cheesecake Cups?
Store your Strawberry Oreo Cheesecake Cups in an airtight container in the refrigerator for up to 2 days. This ensures they remain fresh and the creamy texture is maintained. If you’d like to prepare them in advance, simply cover them well in plastic wrap or a container to keep moisture out, enhancing their longevity.
Can I freeze Strawberry Oreo Cheesecake Cups?
Absolutely! To freeze, place your assembled cups in an airtight container and freeze for up to 1 month. Just be aware that the texture may change slightly after thawing due to the creamy nature of the filling. To thaw, simply move them to the refrigerator for several hours or overnight to gently defrost, avoiding the microwave to prevent any texture issues.
What if my cream cheese mixture is lumpy?
No worries! If your cream cheese is not at room temperature, it might not blend smoothly. To fix this, let the cream cheese sit out for about 30 minutes before mixing. If you still face lumps, continue beating until the mixture is smooth and creamy, ensuring all ingredients are nicely combined.
Are these Strawberry Oreo Cheesecake Cups safe for people with allergies?
When making these cups, consider dietary restrictions like dairy or gluten allergies. You can easily make them gluten-free by using gluten-free Oreos and can substitute with dairy-free cream cheese for a vegan option. Always check the packaging for allergens, and adjust ingredients based on individual needs for a safe and delightful dessert!
How long should I chill the cups before serving?
Chill the Strawberry Oreo Cheesecake Cups for at least 30 minutes, but for best results, aim for 2-3 hours or even overnight. This allows the flavors to blend beautifully, ensuring a refreshing dessert that is splendidly creamy and satisfying when served!
Strawberry Oreo Cheesecake Cups for Easy Summer Bliss
Ingredients
Equipment
Method
- Begin by crushing the Oreos into fine crumbs. Use a food processor or place them in a zip-top bag and crush with a rolling pin until sand-like. Set aside about two tablespoons for garnish later.
- In a large mixing bowl, beat the room-temperature cream cheese with powdered sugar and vanilla extract until smooth and creamy, about 2-3 minutes. In a separate bowl, whip the heavy cream until soft peaks form, which should take around 3-5 minutes. Gently fold the whipped cream into the cheesecake mixture until well combined.
- Wash and dry one cup of fresh strawberries, then slice them evenly into thin pieces. Prepare a quick strawberry sauce by blending a few extra strawberries with sugar if desired.
- Assemble by placing a layer of crushed Oreos at the bottom of each serving container. Follow with a layer of cream cheese filling, then add a layer of sliced strawberries. Repeat, finishing with cheesecake filling.
- Top each cup with reserved Oreo crumbs, extra sliced strawberries, and a few mini Oreos. Drizzle with strawberry sauce if made.
- Refrigerate the assembled cups for at least 30 minutes to allow flavors to meld and the filling to set.