


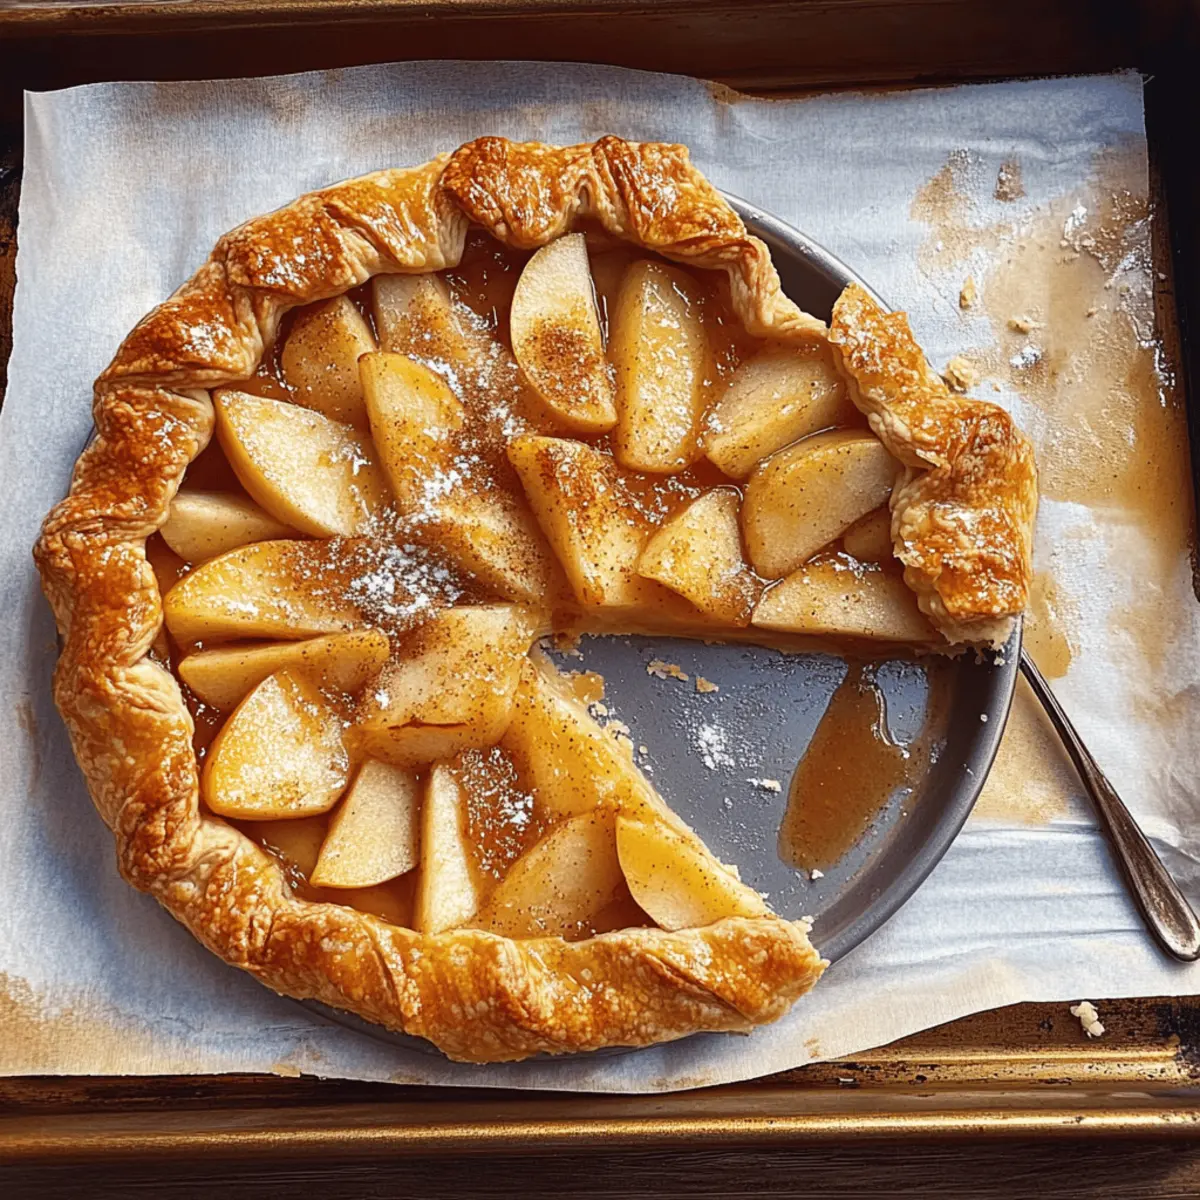
As the leaves begin to fall and the air turns crisp, my kitchen transforms into a cozy haven filled with the warm aroma of baking apples. This Easy Rustic Apple Galette Recipe is my go-to dessert, effortlessly combining a buttery, flaky crust with a perfectly spiced apple filling. What I love most is its simplicity—this rustic dessert requires minimal fuss, making it the ideal choice for Thanksgiving gatherings or any autumn occasion. Plus, it’s a showstopper that’s sure to impress your guests without keeping you locked in the kitchen for hours. Are you ready to create a dessert that captures the essence of fall and warms hearts? Let’s dive into this delightful recipe together!
Why is this Apple Galette a must-try?
Simplicity shines: This easy-to-make Apple Galette delivers all the cozy flavors of fall without a tedious pie assembly.
Wholesome goodness: Utilizing fresh apples and warm spices, you’ll savor a delightful taste that sparks nostalgia.
Versatile option: Swap apples for pears or mix in some cranberries for a new twist; your creativity knows no bounds!
Crowd-pleaser: Serve it warm with vanilla ice cream, and watch your guests rave about it, just like they do for my popular Cheesy Hamburger Potato dish.
Quick and dependable: With straightforward ingredients and minimal prep time, this galette seamlessly fits into any holiday or cozy evening bake.
Apple Galette Ingredients
For the Crust
• Pie Crust – Use store-bought for convenience or make your own for a homemade touch.
For the Filling
• Baking Apples – 1 ½ pounds, peeled and sliced; a mix of Granny Smith and Honeycrisp gives a sweet-tart balance.
• Brown Sugar – 5 tablespoons; this adds rich sweetness to complement the apples.
• Lemon Juice – 1 tablespoon; brightens the flavors and balances sweetness.
• Cornstarch – 2 teaspoons; thickens the juices from the apples to prevent a soggy crust.
• Ground Cinnamon – 1 teaspoon; infuses warmth and adds classic apple pie flavor.
• Ground Ginger – ½ teaspoon; brings depth and a zesty kick to the filling.
• Fine Sea Salt – 1/8 teaspoon; enhances the overall flavor of the apples.
• Vanilla Extract – ½ teaspoon; adds a lovely aromatic quality to the sweet filling.
For the Topping
• Egg Wash – 1 beaten egg mixed with 1 ½ teaspoons water, for that perfect golden crust.
• Coarse Sugar – A sprinkle on the crust for delightful sweetness and crunch.
• Apricot Jam – 1 tablespoon, thinned with water for a glossy finish on the baked apples.
Optional Serving
• Vanilla Ice Cream – An irresistible accompaniment to enhance the dessert experience and bring it all together.
Now that you have your ingredients ready, let’s embark on the journey to create this delightful Apple Galette Recipe that will surely become a beloved staple in your home!
Step‑by‑Step Instructions for Easy Rustic Apple Galette Recipe
Step 1: Preheat Your Oven
Begin by preheating your oven to 375°F (190°C). While the oven heats, line a baking sheet with parchment paper to prevent sticking and make cleanup easier. This simple step ensures that when you’re ready to bake your Apple Galette, the heat will be just right to achieve that perfect golden crust.
Step 2: Prepare the Apple Filling
In a large mixing bowl, toss together 1 ½ pounds of peeled and sliced baking apples with 5 tablespoons of brown sugar, 1 tablespoon of lemon juice, 2 teaspoons of cornstarch, 1 teaspoon of ground cinnamon, ½ teaspoon of ground ginger, 1/8 teaspoon of fine sea salt, and ½ teaspoon of vanilla extract. Allow the mixture to sit for about 10 minutes, which helps the flavors meld beautifully, creating a delicious filling.
Step 3: Roll Out the Pie Crust
On a lightly floured surface, roll out your pie crust into a 13-inch circle, aiming for a uniform thickness. Transfer the rolled crust carefully onto the prepared baking sheet. This rustic Apple Galette will showcase the beautiful crust, so take your time to ensure the edges are neat and the center is large enough to hold your apple filling.
Step 4: Assemble the Galette
Spoon the prepared apple filling into the center of the rolled crust, leaving a 2-inch border around. The filling should be heaped slightly, allowing room for it to bubble as it bakes. This rustic presentation is key to the charm of the Easy Rustic Apple Galette, creating a lovely centerpiece for your dessert table.
Step 5: Fold the Dough Edges
Gently fold the edges of the dough over the apples, creating pleats as you go to form a beautiful crust around the filling. This method not only looks appealing but also helps keep the juices contained, allowing the flavor to concentrate as it bakes. Ensure the pleats are secure, as this will help hold in the delicious apple filling during baking.
Step 6: Brush with Egg Wash
Prepare an egg wash by combining 1 beaten egg with 1 ½ teaspoons of water. Using a pastry brush, evenly coat the exposed crust with the egg wash, giving it a rich golden color as it bakes. Sprinkle a bit of coarse sugar over the surface for an added sweet crunch, enhancing the overall texture of your Apple Galette.
Step 7: Bake Until Golden
Carefully place the assembled galette in the preheated oven and bake for 50-60 minutes. Keep an eye on it, and look for a golden-brown crust with bubbling filling as indicators of doneness. The aroma wafting through your kitchen will surely tempt your taste buds!
Step 8: Glaze the Apples
Once baked, let your Apple Galette cool slightly on a wire rack. In a small bowl, mix 1 tablespoon of apricot jam with a splash of water. Using a pastry brush, gently brush this mixture over the warm apples for a glossy finish that makes your dessert shine with an inviting glow.
Step 9: Serve and Enjoy
Slice your warm Apple Galette into generous wedges and serve it as is, or offer a scoop of vanilla ice cream alongside for that comforting, creamy contrast. This delightful dessert is perfect for any autumn gathering, bringing warmth and joy to your table.
Storage Tips for Apple Galette
Room Temperature: Store leftover Apple Galette in a cool, dry place for up to 3 days, covering lightly with foil to maintain its texture without trapping moisture.
Fridge: For longer freshness, refrigerate the galette in an airtight container for up to 5 days. Reheat in the oven at 350°F for about 10-15 minutes to restore its crispy crust.
Freezer: To freeze, wrap slices individually in plastic wrap, then place them in a heavy-duty freezer bag. The galette can be frozen for up to 3 months; thaw overnight in the fridge before reheating.
Reheating: Warm the galette in the oven, or for a quick microwave option, heat each slice for about 30 seconds until warmed through, but expect a softer crust.
Make Ahead Options
These Easy Rustic Apple Galette Recipe components are perfect for meal prep, allowing you to save time during busy weeknights or holiday gatherings. You can prepare the apple filling up to 24 hours in advance by tossing the sliced apples with brown sugar, lemon juice, cornstarch, cinnamon, ginger, and salt before refrigerating it in an airtight container. For the crust, if you’re making a homemade one, you can roll it out and refrigerate it for up to 3 days; simply cover it tightly with plastic wrap to maintain its texture. When you’re ready to bake the Apple Galette, let the filling sit at room temperature for about 10 minutes to come back to life, then proceed to assemble and bake as directed. This prep strategy will ensure your galette is just as delicious without the last-minute rush!
What to Serve with Easy Rustic Apple Galette
Warm aromas of baked apples will fill your home, beckoning loved ones to enjoy a cozy and heartwarming meal together.
- Vanilla Ice Cream: A scoop of creamy goodness perfectly contrasts the warm, spiced apple filling, elevating each bite to dessert heaven.
- Whipped Cream: Light and airy, it adds a luscious layer of sweetness that complements the galette’s rustic flavors without overwhelming them.
- Caramel Sauce: Drizzling a bit of homemade or store-bought caramel sauce adds decadence to your dessert, enhancing the sweetness of the apples.
- Cinnamon Sugar Crusties: Serve small cinnamon-sugar dusted pastries alongside, revisiting the comforting flavors of fall and balancing the galette’s textures.
- Coffee: A steaming cup of coffee brings a cozy warmth, enhancing the experience and providing a perfect balance to the sweetness of the galette.
- Apple Cider: Warm spiced apple cider creates a delightful nod to the main ingredient and makes for a drink that warms the soul alongside dessert.
- Cheese Plate: Introducing a selection of sharp cheddar or a creamy Brie can provide a savory contrast to the sweetness of the galette, pleasing a variety of palates.
- Fresh Fruit: Pair your galette with a light fruit salad featuring citrus and berries for a refreshing contrast to the rich dessert.
- Chocolate Drizzle: Enhance the dessert experience by adding a chocolate drizzle for a delightful twist that combines flavors and textures beautifully.
Apple Galette Recipe Variations
Feel free to sprinkle your personal touch on this delightful Apple Galette, transforming it to fit your taste!
- Pear Swap: Substitute pears for apples to create a sweet and juicy twist that’s equally comforting.
- Spice Variations: Add a touch of nutmeg or allspice for a warm, cozy flavor profile that enhances the apple filling.
- Nuts and Crunch: Toss in a handful of sliced almonds or walnuts to lend a delightful crunch and nutty flavor.
- Cranberry Addition: Mix in dried cranberries for a tart burst of flavor, creating a beautiful balance with the sweetness.
- Chocolate Drizzle: Top your galette with a drizzle of chocolate sauce for a decadent touch that chocolate lovers will adore.
- Maple Sweetness: Substitute brown sugar with maple syrup in the filling for a unique twist that offers an earthy sweetness.
- Savory Spin: Incorporate a sprinkle of cheese, like sharp cheddar, for a surprising sweet-savory experience reminiscent of my comforting Cheesy Hamburger Potato.
- Different Fruits: Experiment with mixing in other fruits, such as peaches or berries, to create a vibrant medley of flavors that brighten your galette.
The beauty of this Apple Galette recipe lies in its versatility, much like enjoying a warm bowl of Broccoli Cheddar Soup or a hearty Mexican Taco Soup. Let your culinary creativity shine!
Expert Tips for Apple Galette Recipe
• Chill the Dough: Ensure your pie crust is chilled before rolling it out. This helps maintain the flaky texture, preventing it from getting too soft during preparation.
• Don’t Overfill: Be mindful of the amount of apple filling you add. Leaving a 2-inch border around the edges prevents overcrowding and allows for lovely pleats in the crust.
• Use a Baking Stone: If available, bake your Apple Galette on a baking stone. It provides even heat and helps achieve a crispier bottom crust, enhancing the dessert’s overall texture.
• Brush Generously: Apply the egg wash thoroughly to achieve that golden crust. The coarse sugar topping adds a delightful crunch and enhances the visual appeal of the galette.
• Experiment with Flavors: Don’t hesitate to mix in variations, such as apricots or pears, to suit your palate. This Apple Galette Recipe is versatile, allowing for endless creativity!
Apple Galette Recipe FAQs
What type of apples should I use for the filling?
Absolutely! For the best flavor and texture in your Apple Galette, I recommend a mix of tart and sweet apples. Granny Smith apples provide a delightful tartness, while Honeycrisp apples add sweetness and crispness. Using about 1 ½ pounds of these baking apples will create a balanced filling that’s both delicious and well-textured.
How should I store leftover Apple Galette?
You can keep any leftover Apple Galette at room temperature for up to 3 days. Just lightly cover it with foil to avoid moisture buildup. If you want it to last longer, store it in an airtight container in the refrigerator for up to 5 days. When you’re ready to enjoy it again, simply reheat it in the oven at 350°F for about 10-15 minutes to restore that lovely crispy crust!
Can I freeze my Apple Galette?
Very! Freezing is a great option if you want to preserve your Apple Galette. Wrap individual slices in plastic wrap and then place them in a heavy-duty freezer bag. This way, they can be frozen for up to 3 months. When you’re ready to indulge, just thaw overnight in the fridge and reheat in the oven for the best texture.
What if the crust becomes soggy while baking?
If your Apple Galette crust turns out soggy, it might be due to overfilling or using overly juicy apples. To avoid this, make sure to add the right amount of cornstarch—2 teaspoons will help thicken the juices. Additionally, avoid adding too much filling that could leak out. If you do find yourself with a wet crust, try baking it a little longer at a slightly lower temperature, keeping an eye on the crust to prevent burning.
Are there any dietary considerations for this recipe?
The Apple Galette is a wonderful treat, but it does contain gluten from the pie crust. If you’re making it for someone with gluten sensitivities, there are great gluten-free pie crust options available in stores! For dairy-free needs, you could substitute the butter used in homemade crusts with a plant-based butter. Always be sure to check for any allergens in the ingredients, especially if serving to others.

Irresistible Apple Galette Recipe: Quick, Homemade Fall Treat
Ingredients
Equipment
Method
- Preheat your oven to 375°F (190°C) and line a baking sheet with parchment paper.
- In a large bowl, toss together the apple filling ingredients and let sit for about 10 minutes.
- Roll out the pie crust into a 13-inch circle and transfer it to the prepared baking sheet.
- Spoon the apple filling into the center, leaving a 2-inch border.
- Fold the dough edges over the apples, creating pleats.
- Brush the exposed crust with the egg wash and sprinkle with coarse sugar.
- Bake in the preheated oven for 50-60 minutes until golden and bubbly.
- Mix apricot jam with water and brush it over the warm apples for a glossy finish.
- Slice and serve warm, optionally with vanilla ice cream.