


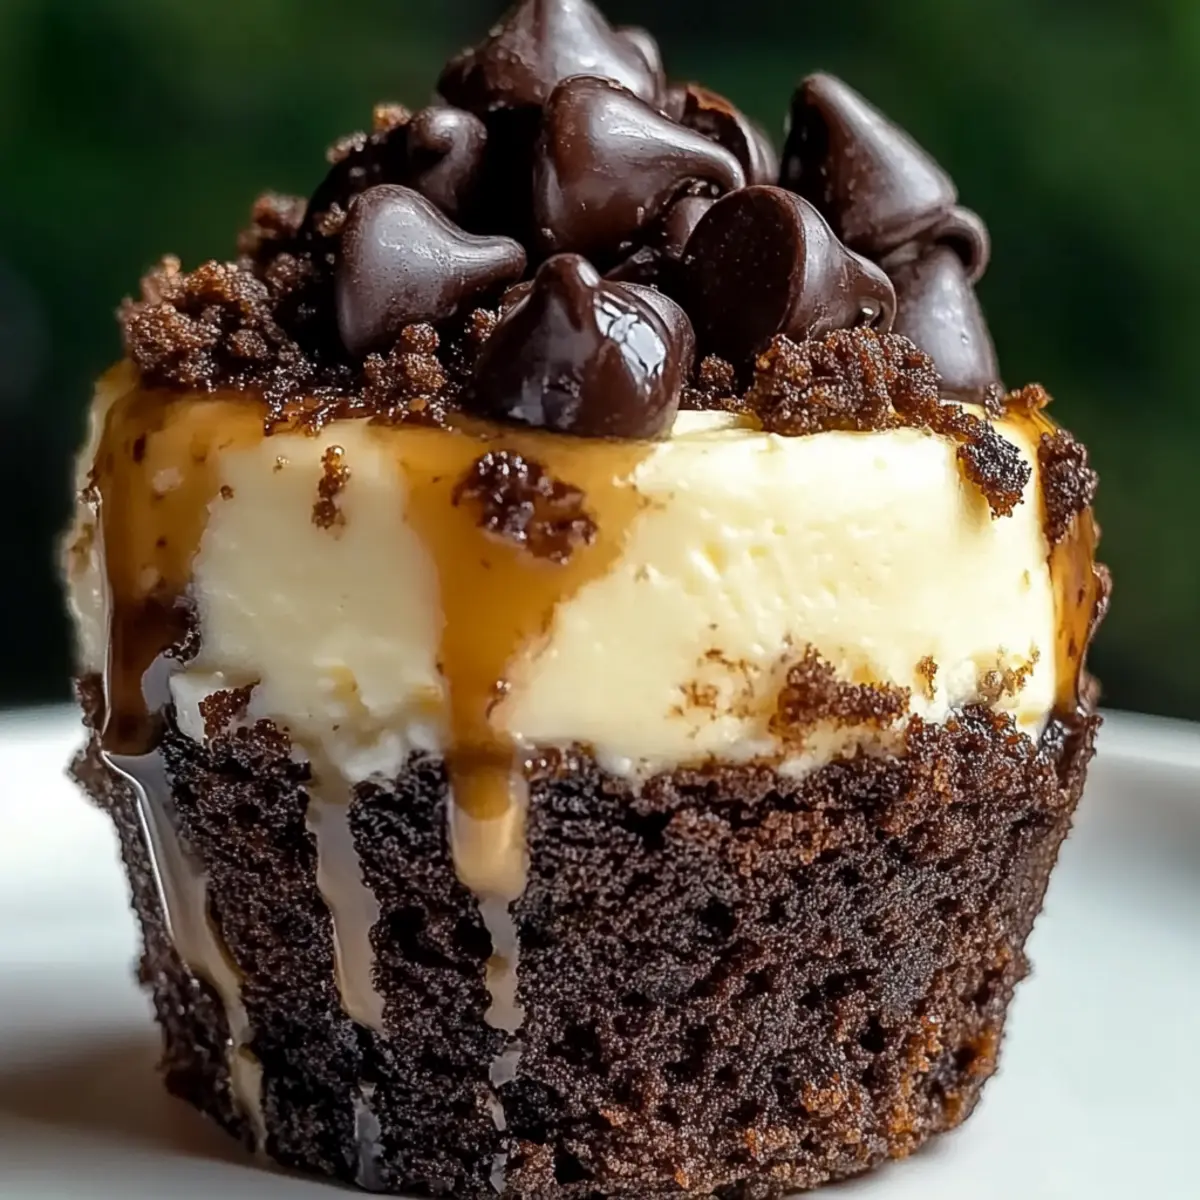
As I stood in my kitchen last week, I stumbled upon a delightful dilemma: the craving for both brownies and cheesecake was overwhelming! That’s when the idea for Loaded Brownie Cheesecake Cups was born. Imagine a fudgy brownie base, perfectly topped with a smooth, creamy cheesecake layer—a dessert that’s sure to impress both friends and family. What I love most about this recipe is how quickly it comes together, making it an ideal choice for those last-minute gatherings. Plus, these charming cups are portioned for guilt-free indulgence, allowing you to savor every bite without the stress. Intrigued? Let’s dive into this sweet adventure that’s bound to win hearts and satisfy your dessert cravings!
Why Are These Brownie Cups So Irresistible?
Decadent Layers: Each cup delivers the ultimate combo of rich brownie and creamy cheesecake that will have everyone reaching for seconds.
Quick and Easy: With just a few simple steps, you can whip these up in no time! Perfect for those spontaneous gatherings where impressing guests is a must.
Crowd Pleaser: These dessert cups are a hit across all ages, making them a fantastic addition to any party or family meal.
Versatile Options: Customize your cups by adding crushed cookies or swapping chocolate chips for caramel bits, ensuring each batch is unique.
Guilt-Free Indulgence: Portion-controlled and delicious, you can enjoy these treats without the guilt—perfect for satisfying your sweet tooth responsibly! Try pairing them with a side of fresh berries for an inviting presentation.
Loaded Brownie Cheesecake Cup Ingredients
For the Brownie Base
• Brownie Mix – Provides the fudgy base; use your favorite brand or a homemade recipe for a personal touch.
• Vegetable Oil – Adds moisture; feel free to substitute with melted butter for a richer brownie flavor.
• Egg – Binds ingredients together; make sure it’s at room temperature for better mixing.
• Water – Activates the brownie mix; follow package instructions for optimal results.
For the Cheesecake Layer
• Cream Cheese – Creates a smooth, creamy texture; you can substitute with Greek yogurt or dairy-free cream cheese for a lighter option.
• Granulated Sugar – Sweetens the cheesecake; consider using coconut sugar for a healthier alternative.
• Vanilla Extract – Enhances flavor; opt for pure vanilla extract for the best taste.
• Sour Cream – Adds richness and tang; Greek yogurt is a suitable replacement.
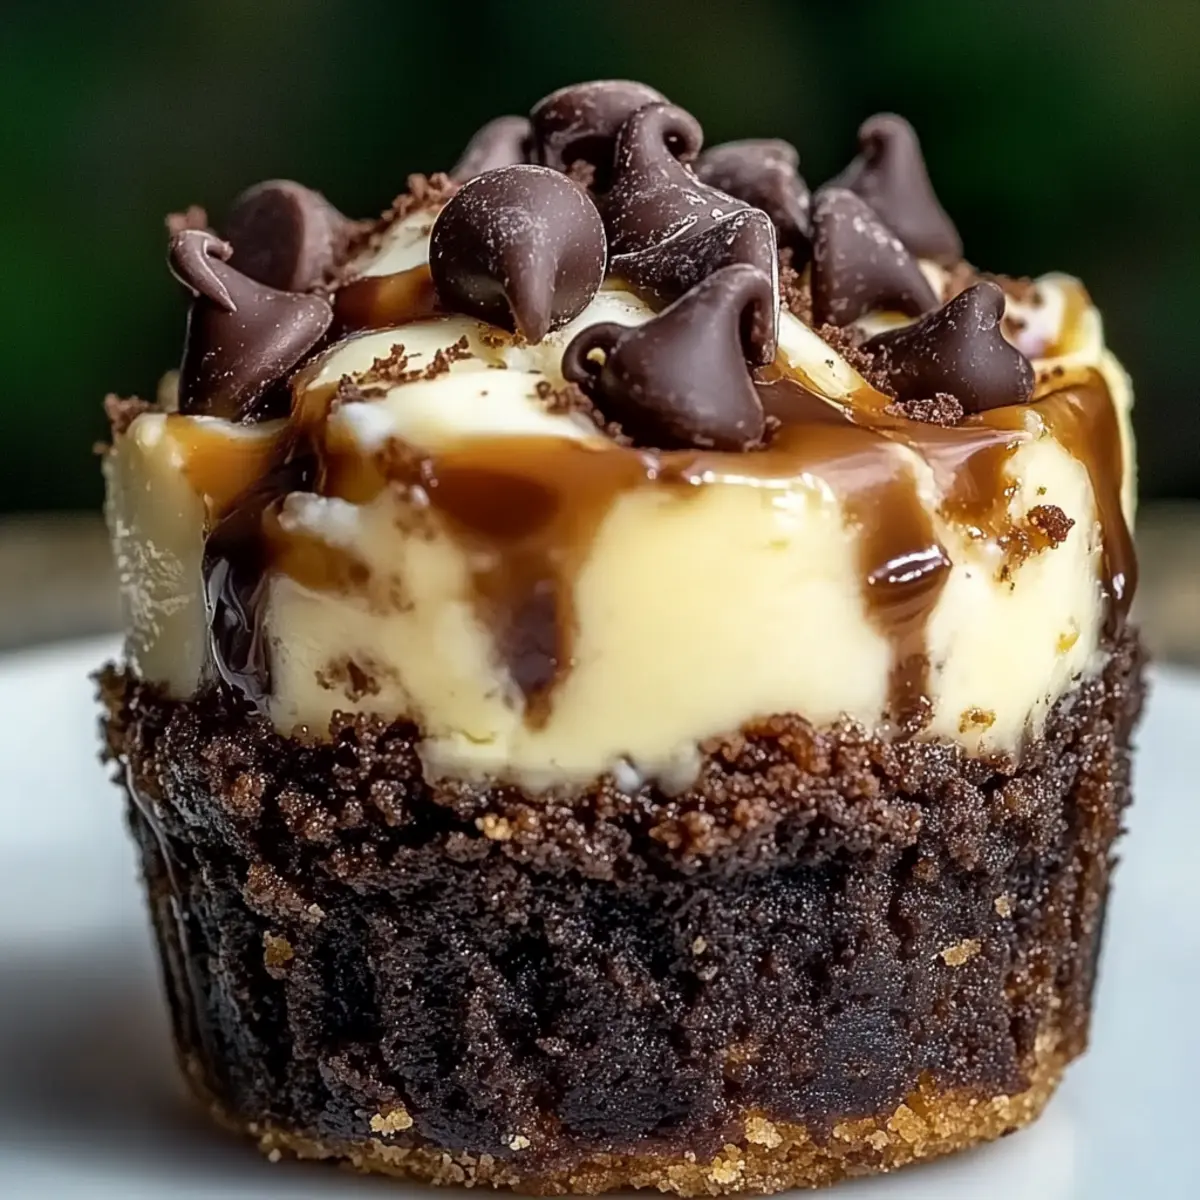
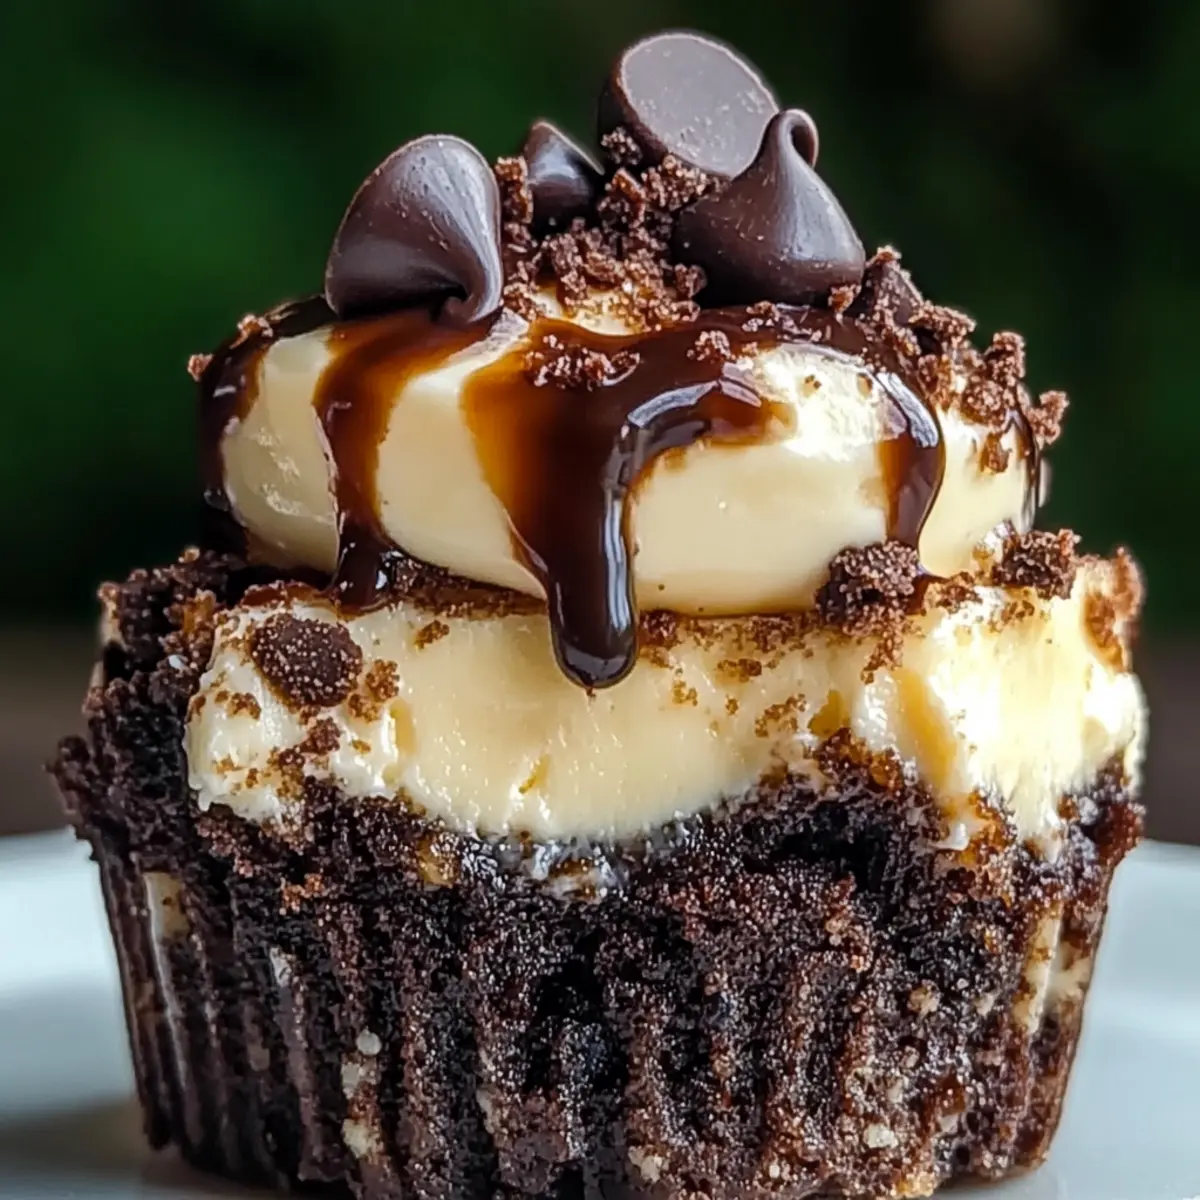
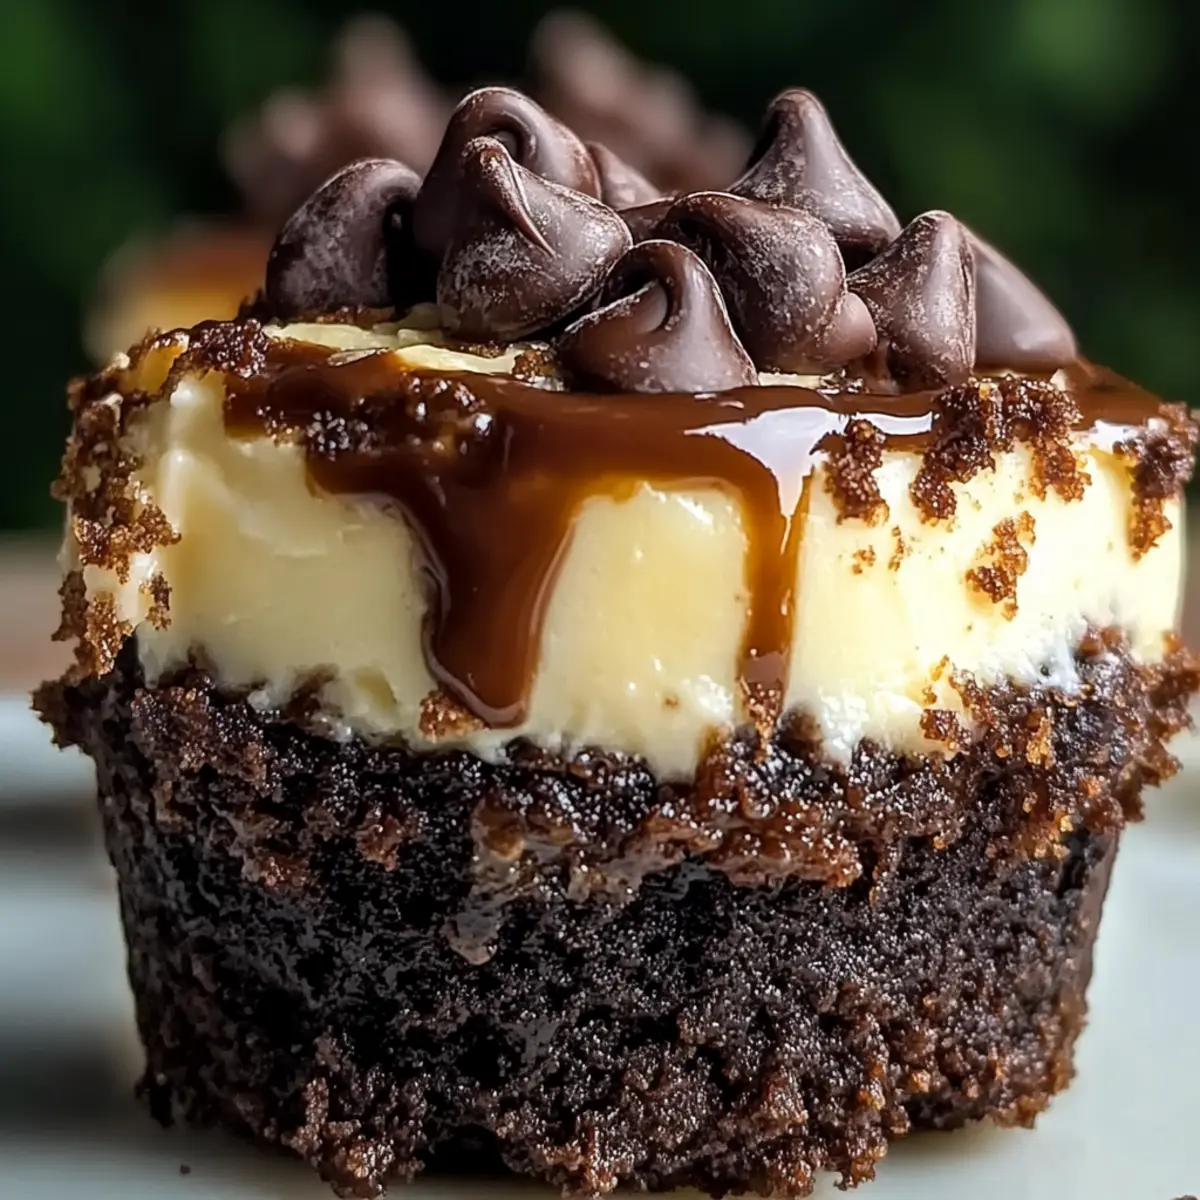
• Mini Chocolate Chips – Adds delightful chocolatey bits to the cheesecake; optional but highly recommended for added indulgence in your Loaded Brownie Cheesecake Cups.
Step‑by‑Step Instructions for Loaded Brownie Cheesecake Cups
Step 1: Preheat the Oven
Begin by preheating your oven to 350°F (175°C). While it warms up, line a muffin tin with cupcake liners to make removing your Loaded Brownie Cheesecake Cups easier after baking. This setup will ensure a smooth baking process, allowing you to focus on mixing your fudgy brownie batter.
Step 2: Prepare the Brownie Batter
In a large mixing bowl, combine your brownie mix, vegetable oil, egg, and water according to the package instructions. Mix these ingredients together until the batter is thick and glossy, which should take about 2-3 minutes. Once ready, fill each cupcake liner halfway with the brownie batter, ensuring a consistent base for each cheesecake cup.
Step 3: Bake the Brownies
Place the muffin tin in your preheated oven and bake for 10-12 minutes. To check for doneness, insert a toothpick into the center of a brownie base; it should come out with a few moist crumbs. Avoid over-baking, as you want the brownie to remain fudgy under the cheesecake layer.
Step 4: Make the Cheesecake Mixture
While the brownie bases cool slightly, prepare the cheesecake layer. In another mixing bowl, beat softened cream cheese until smooth, about 2 minutes. Then, add granulated sugar, vanilla extract, and an egg, mixing until fully incorporated. Lastly, stir in sour cream and mini chocolate chips to create a luscious cheesecake filling.
Step 5: Add the Cheesecake Layer
Once the brownie bases have cooled for about 5 minutes, spoon the creamy cheesecake mixture over each base, filling them nearly to the top. This layering of the cheesecake onto the brownie creates that gorgeous structure in your Loaded Brownie Cheesecake Cups, ensuring that every bite is a delightful combination of textures.
Step 6: Bake the Cheesecake Cups
Return the muffin tin to the oven and bake for 15-18 minutes. You’ll know they are ready when the cheesecake layer is set and slightly puffed. Keep an eye on them to prevent overbaking; the tops should not crack. This final bake allows the flavors to meld beautifully.
Step 7: Cool and Set
Once baked, remove the muffin tin from the oven and let it cool completely at room temperature. This may take about 30-45 minutes. After cooling, refrigerate the Loaded Brownie Cheesecake Cups for at least 2 hours. Chilling will help the cheesecake set properly and enhance the flavor.
Step 8: Serve and Enjoy
When you’re ready to serve, remove the cheesecake cups from the muffin tin and top them with whipped cream, a drizzle of chocolate syrup, and a sprinkle of crushed nuts if desired. This presentation not only makes your dessert even more inviting but also adds delightful textures that enhance the eating experience!
Make Ahead Options
These Loaded Brownie Cheesecake Cups are a fantastic choice for meal prep, allowing you to save time during busy weekdays or gatherings. You can prepare the brownie bases up to 24 hours in advance; simply bake them as instructed and let them cool completely before storing them in an airtight container in the refrigerator. The cheesecake filling can also be mixed ahead of time (up to 3 days) and kept covered in the fridge until you’re ready to assemble. When it’s time to serve, spoon the cheesecake mixture over the brownie bases and bake as directed. This hassle-free prep ensures that your dessert remains just as delicious and impressive, making your life a little easier when hosting!
How to Store and Freeze Loaded Brownie Cheesecake Cups
Fridge: Store your Loaded Brownie Cheesecake Cups in an airtight container in the refrigerator for up to 3 days. This helps maintain their freshness and creamy texture.
Freezer: For longer storage, these delightful cups can be frozen for up to 3 months. Place them in a single layer in a freezer-safe container, ensuring they are well-wrapped to prevent freezer burn.
Thawing: When ready to enjoy, thaw the cups in the refrigerator overnight for the best texture and flavor revival.
Reheating: If you prefer them warm, gently microwave for 10-15 seconds. Just be cautious to avoid overheating, which can affect the cheesecake texture.
What to Serve with Loaded Brownie Cheesecake Cups
Imagine a sweet celebration, where every bite of your luscious dessert is beautifully complemented by appealing sides and beverages that elevate the experience.
-
Fresh Berries: A medley of strawberries, blueberries, or raspberries adds a juicy, refreshing contrast to the rich cheesecake cups, cutting through the sweetness with every bite.
-
Vanilla Ice Cream: A scoop of creamy vanilla ice cream drizzled with warm chocolate sauce creates a classic pairing. The chill of the ice cream complements the warm brownie base, offering a delightful temperature play.
-
Minty Whipped Cream: Light and fluffy whipped cream infused with mint brings a refreshing twist, creating a perfect balance of flavors that enhances the dessert without overpowering it.
-
Coffee or Espresso: A robust cup of coffee or a shot of espresso complements the fudgy brownie notes perfectly. The bitterness of coffee works wonders alongside the sweetness, making each bite more indulgent.
-
Chocolate-Covered Strawberries: These elegant bites are not just visually stunning; their fruity sweetness and chocolatey goodness make them a fantastic pairing, mirroring the flavors of the Loaded Brownie Cheesecake Cups.
-
Nutty Trail Mix: A blend of almonds, walnuts, and dried fruits provides a crunchy texture that contrasts with the creamy layers. The nuttiness complements the chocolate richness beautifully, adding an element of surprise.
-
Caramel Sauce: Drizzling a bit of luscious caramel sauce over the cups not only enhances their look but also adds a sweet, buttery flavor that everyone will adore.
-
Chilled Sparkling Water: Refresh your palate with a glass of sparkling water, perhaps with a slice of lemon or lime. It cleanses the taste buds between bites, making the dessert experience feel lighter.
-
Chocolate Tart: Offering a small slice of a rich chocolate tart can elevate your dessert table significantly. Two desserts together? Yes, please!
Consider these delightful pairings to take your dessert night to the next level, ensuring no one leaves without a satisfied smile!
Loaded Brownie Cheesecake Cups Variations
Feel free to get creative and make these dessert cups your own with these tasty twists!
- Dairy-Free: Substitute cream cheese with dairy-free cream cheese and use coconut milk or almond milk in place of sour cream for a lighter option.
- Nutty Delight: Stir in chopped walnuts or pecans into the brownie batter for added crunch and a nutty flavor boost.
- Fruity Fusion: Top each cheesecake layer with fresh berries, like raspberries or strawberries, before serving to add a refreshing fruitiness.
- Minty Fresh: Add a few drops of peppermint extract to the cheesecake mixture for a refreshing mint chocolate flavor combination.
- Spicy Kick: Dust the brownie layer with a sprinkle of cayenne pepper or cinnamon before adding the cheesecake for a surprising depth of flavor.
- Caramel Swirl: Create a tempting caramel swirl by drizzling caramel sauce into the cheesecake mixture before baking; it adds a delightful sweetness and gooey texture.
- Gluten-Free: Opt for a gluten-free brownie mix to ensure everyone can enjoy these delicious treats without any dietary concerns.
- Extra Decadent: After baking, drizzle with hot fudge or melted chocolate to elevate the indulgence—perfect for chocoholics!
Feel free to explore these variations or even combine a couple for a unique taste experience! And if you’re up for more ideas, consider pairing these cups with some homemade whipped cream or a scoop of vanilla ice cream for even more deliciousness.
Expert Tips for Loaded Brownie Cheesecake Cups
-
Softened Cream Cheese: Always make sure the cream cheese is softened before mixing; this prevents lumps and ensures a velvety texture in your cheesecake layer.
-
Don’t Overbake: Check your Loaded Brownie Cheesecake Cups at the minimum baking time. They should be set but still slightly jiggly in the center to ensure the perfect creamy texture.
-
Room Temperature Ingredients: For the best results, use room temperature eggs and cream cheese; this helps them blend smoothly, resulting in a more cohesive cheesecake filling.
-
Cooling Period: Allow the brownie base to cool completely before adding the cheesecake layer; this prevents melting and keeps layers intact during baking.
-
Chilling Time: Refrigerate the cups for at least 2 hours post-baking. This is crucial for setting the cheesecake layer and enhancing overall flavor.
Loaded Brownie Cheesecake Cup Recipe FAQs
How can I select the best brownie mix?
Absolutely! Look for a brownie mix that emphasizes “fudgy” texture on the packaging. You want the mix to include real chocolate rather than cocoa powder for a richer flavor. If you’re feeling adventurous, trying a homemade brownie recipe can take your Loaded Brownie Cheesecake Cups to the next level!
What’s the best way to store these cheesecake cups?
For optimal freshness, store your Loaded Brownie Cheesecake Cups in an airtight container in the refrigerator for up to 3 days. This helps maintain their creamy cheesecake layer while keeping the brownie base moist. Be sure to separate layers with parchment paper if stacking to avoid sticking!
Can I freeze Loaded Brownie Cheesecake Cups?
Yes, you can freeze these delightful treats! Place them in a single layer in a freezer-safe container, tightly wrapped to avoid freezer burn. They can be frozen for up to 3 months. When you’re ready to enjoy, simply transfer them to the fridge the night before to thaw while maintaining their texture.
What if my cheesecake cups have cracked tops?
Very! Cracked tops can happen if the cups are overbaked or have been moved too much while still hot. To prevent this, make sure to check on them during the last minutes of baking. Look for a slight jiggle in the center, as this ensures a smooth top once cooled and set.
Are these Loaded Brownie Cheesecake Cups suitable for dietary restrictions?
Absolutely! This recipe is vegetarian-friendly, and you can make simple substitutions for dairy-free or gluten-free needs. Consider using dairy-free cream cheese or Greek yogurt for the filling, and check for gluten-free brownie mixes if necessary. Always be mindful of allergies and opt for ingredients that fit your dietary requirements.
How long do I need to cool my Loaded Brownie Cheesecake Cups?
For the best results, allow them to cool completely at room temperature for about 30-45 minutes after baking. This cooling period is crucial for helping the layers set properly and avoids any melting when you refrigerate them. Don’t skip this step for the perfect treat!
Loaded Brownie Cheesecake Cups: Decadent & Easy to Make
Ingredients
Equipment
Method
- Preheat your oven to 350°F (175°C) and line a muffin tin with cupcake liners.
- In a large bowl, combine brownie mix, vegetable oil, egg, and water, mixing until thick and glossy.
- Fill each cupcake liner halfway with brownie batter and bake for 10-12 minutes.
- In another bowl, beat softened cream cheese until smooth, then add sugar, vanilla, and egg, mixing well.
- Stir in sour cream and mini chocolate chips, then spoon over cooled brownie bases.
- Bake again for 15-18 minutes until the cheesecake layer is set.
- Let cool for 30-45 minutes, then refrigerate for at least 2 hours before serving.
- Serve topped with whipped cream, chocolate syrup, and crushed nuts if desired.