


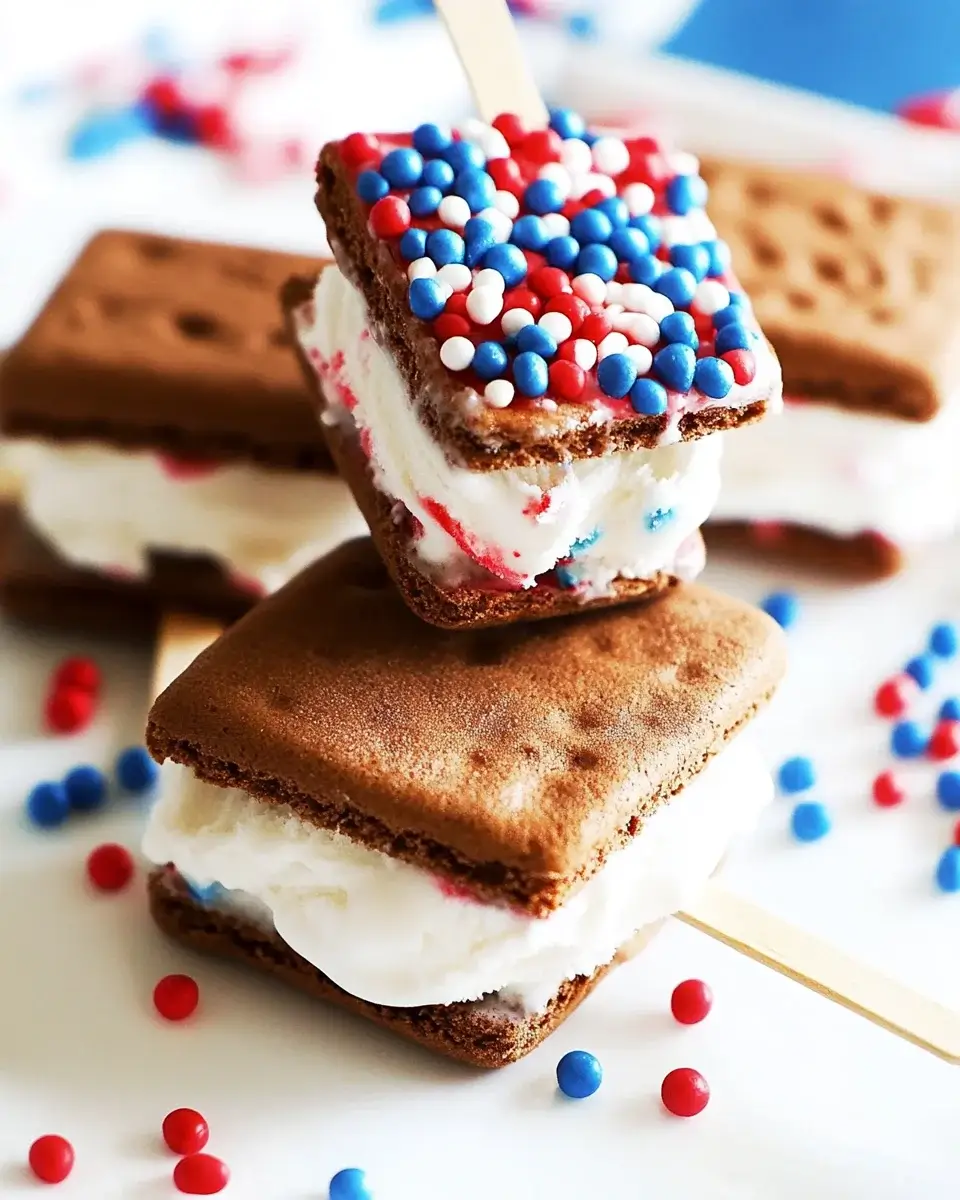
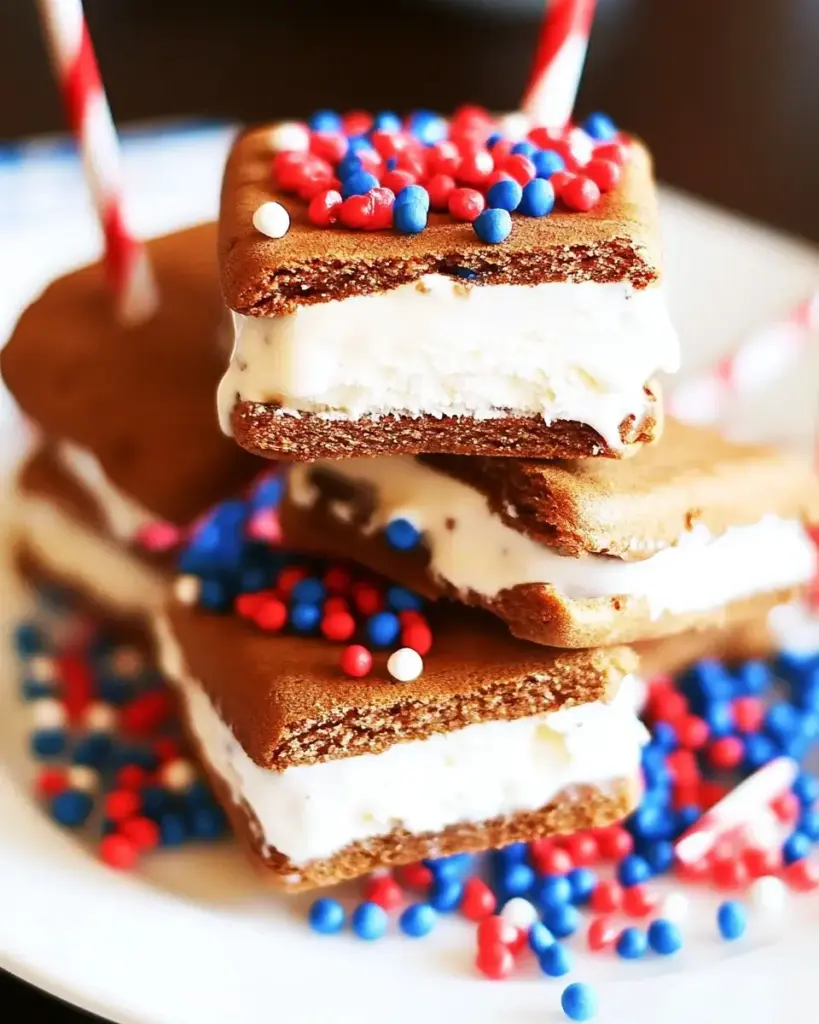
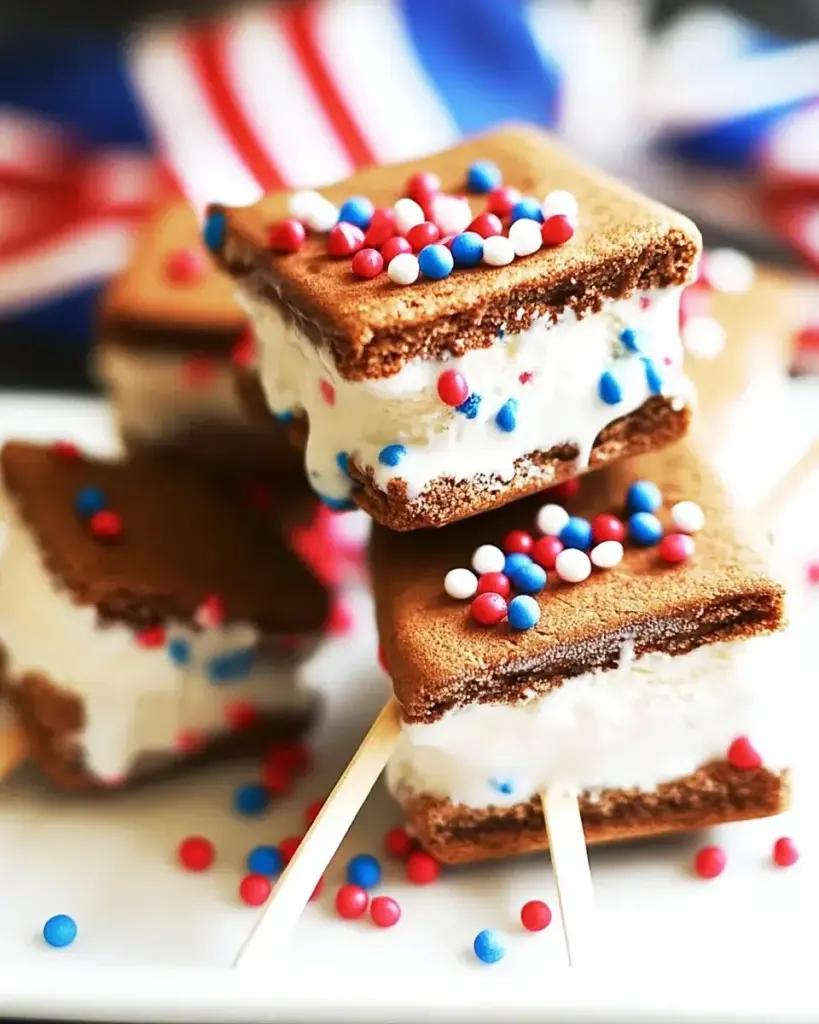
Introduction to Patriotic Mini Ice Cream Sandwiches
Summer celebrations call for something special, and what better way to bring a smile than with Patriotic Mini Ice Cream Sandwiches? These delightful treats are not just a feast for the eyes; they’re a quick solution for those busy days when you want to impress your loved ones without spending hours in the kitchen. With vibrant red and blue sprinkles, they capture the spirit of any festive gathering. Plus, they’re easy to make, ensuring you can whip them up in no time. Let’s dive into this fun recipe that’s sure to be a hit!
Why You’ll Love This Patriotic Mini Ice Cream Sandwiches
These Patriotic Mini Ice Cream Sandwiches are a game-changer for any gathering. They’re incredibly easy to whip up, making them perfect for last-minute celebrations. The taste? Absolutely delightful! The combination of soft cookies and creamy ice cream is a match made in dessert heaven. Plus, the vibrant colors add a festive touch that will impress your guests. You’ll love how quickly they disappear!
Ingredients for Patriotic Mini Ice Cream Sandwiches
Gathering the right ingredients is the first step to creating these festive treats. Here’s what you’ll need:
- All-purpose flour: The backbone of your cookies, providing structure and a soft texture.
- Baking soda: This little leavening agent helps your cookies rise and become fluffy.
- Salt: Just a pinch enhances the sweetness and balances flavors.
- Unsalted butter: Softened butter adds richness and moisture to your cookies.
- Granulated sugar: This sweetener gives your cookies a delightful crunch and sweetness.
- Brown sugar: Packed with molasses, it adds a deeper flavor and chewiness.
- Vanilla extract: A must-have for that warm, comforting flavor that ties everything together.
- Large egg: Acts as a binder, helping to hold your cookie dough together.
- Red and blue sprinkles: These festive additions not only look great but also add a fun crunch.
- Vanilla ice cream: The creamy filling that makes these sandwiches irresistible. Feel free to experiment with different flavors!
For those looking to mix things up, consider using chocolate or mint ice cream for a twist. You can find all the exact measurements at the bottom of the article, ready for printing!
How to Make Patriotic Mini Ice Cream Sandwiches
Creating these Patriotic Mini Ice Cream Sandwiches is a breeze! Follow these simple steps, and you’ll have a delicious dessert that’s perfect for any celebration. Let’s get started!
Step 1: Preheat and Prepare
First things first, preheat your oven to 350°F. This ensures your cookies bake evenly. While that’s heating up, line a baking sheet with parchment paper. This will prevent sticking and make cleanup a snap!
Step 2: Mix Dry Ingredients
In a medium bowl, whisk together the all-purpose flour, baking soda, and salt. This step is crucial as it combines the dry ingredients evenly, ensuring your cookies rise perfectly.
Step 3: Cream Butter and Sugars
Now, grab a large bowl and cream together the softened butter, granulated sugar, and brown sugar. Beat them until the mixture is light and fluffy. This process incorporates air, giving your cookies a delightful texture.
Step 4: Combine Wet Ingredients
Next, beat in the vanilla extract and the large egg until everything is well combined. The vanilla adds a warm flavor that makes these sandwiches irresistible!
Step 5: Combine Mixtures
Gradually add the dry ingredients to the wet mixture. Mix until just combined. Be careful not to overmix; you want your cookies to stay soft and chewy.
Step 6: Add Sprinkles
Now comes the fun part! Fold in the red and blue sprinkles. This not only adds color but also a delightful crunch to your cookies.
Step 7: Shape Cookies
Using a tablespoon, drop rounded balls of dough onto the prepared baking sheet. Make sure to space them about 2 inches apart. They’ll spread while baking, so give them room to breathe!
Step 8: Bake
Bake your cookies for 10-12 minutes or until the edges are lightly golden. Keep an eye on them; you want them soft in the center!
Step 9: Cool Cookies
Once baked, remove the cookies from the oven and let them cool on the baking sheet for 5 minutes. Then, transfer them to a wire rack to cool completely. This step is essential for achieving the perfect texture.
Step 10: Assemble Sandwiches
Once the cookies are cool, take one cookie and place a scoop of vanilla ice cream on the flat side. Top it with another cookie, flat side down. Gently press them together to form a sandwich. Repeat this with the remaining cookies.
Step 11: Freeze
Finally, place the assembled sandwiches in the freezer for at least 30 minutes. This helps them firm up, making them easier to eat and enjoy!
Tips for Success
- Make sure your butter is softened for easy creaming.
- Don’t skip the chilling step; it helps the sandwiches hold their shape.
- Experiment with different ice cream flavors for a unique twist.
- Use a cookie scoop for uniform cookie sizes.
- Store leftovers in an airtight container to keep them fresh.
Equipment Needed
- Baking sheet: A standard one works, but a silicone mat can be a great alternative.
- Parchment paper: If you don’t have this, greasing the baking sheet will do.
- Mixing bowls: Use any size, but a large one is ideal for creaming.
- Whisk: A fork can work in a pinch for mixing dry ingredients.
- Cookie scoop: A tablespoon works just as well for shaping dough.
Variations
- Try using chocolate chip cookies instead of the basic dough for a richer flavor.
- Substitute the vanilla ice cream with strawberry or mint chocolate chip for a refreshing twist.
- For a gluten-free option, use a gluten-free all-purpose flour blend.
- Add crushed nuts or chocolate chips to the cookie dough for extra texture.
- Make them dairy-free by using coconut or almond milk ice cream.
Serving Suggestions
- Pair these sandwiches with fresh fruit like strawberries or blueberries for a refreshing contrast.
- Serve with a scoop of whipped cream on the side for an extra indulgent treat.
- For drinks, consider lemonade or iced tea to complement the sweetness.
- Present on a festive platter, garnished with additional sprinkles for a colorful display.
FAQs about Patriotic Mini Ice Cream Sandwiches
Can I make these sandwiches ahead of time?
Absolutely! You can prepare the cookies in advance and store them in an airtight container. Just assemble the sandwiches when you’re ready to serve. This makes them a perfect treat for parties!
What other flavors of ice cream work well?
While vanilla is a classic choice, feel free to get creative! Strawberry, mint chocolate chip, or even cookies and cream can add a fun twist to your Patriotic Mini Ice Cream Sandwiches.
How do I store leftover sandwiches?
To keep your sandwiches fresh, store them in an airtight container in the freezer. They’ll stay delicious for up to a week, but I doubt they’ll last that long!
Can I use different types of sprinkles?
Of course! While red and blue sprinkles are perfect for a patriotic theme, you can use any color or type of sprinkles to match your celebration. Get creative!
Are these ice cream sandwiches suitable for kids?
Definitely! These Patriotic Mini Ice Cream Sandwiches are a hit with kids and adults alike. Just be mindful of any allergies when choosing your ingredients.
Final Thoughts
Creating Patriotic Mini Ice Cream Sandwiches is more than just baking; it’s about bringing joy to your gatherings. The vibrant colors and delightful flavors make them a perfect centerpiece for any celebration. Each bite is a reminder of summer fun, laughter, and shared moments with family and friends. Plus, the ease of preparation means you can focus on what truly matters—enjoying time with your loved ones. So, roll up your sleeves, get those sprinkles ready, and let these delicious treats add a festive touch to your next event. You won’t regret it!
Patriotic Mini Ice Cream Sandwiches: A Fun Recipe Idea!
Ingredients
Method
- Preheat your oven to 350°F and line a baking sheet with parchment paper.
- In a medium bowl, whisk together the flour, baking soda, and salt.
- In a large bowl, cream together the softened butter, granulated sugar, and brown sugar until light and fluffy.
- Beat in the vanilla extract and egg until well combined.
- Gradually add the dry ingredients to the wet mixture, mixing until just combined.
- Fold in the red and blue sprinkles.
- Using a tablespoon, drop rounded balls of dough onto the prepared baking sheet, spacing them about 2 inches apart.
- Bake for 10-12 minutes or until the edges are lightly golden.
- Remove from the oven and let cool on the baking sheet for 5 minutes before transferring to a wire rack to cool completely.
- Once the cookies are cool, take one cookie, place a scoop of vanilla ice cream on the flat side, and top with another cookie, flat side down. Gently press together to form a sandwich.
- Repeat with the remaining cookies and ice cream.
- Place the sandwiches in the freezer for at least 30 minutes to firm up before serving.
Nutrition
Notes
- For extra fun, try using different flavors of ice cream like strawberry or mint chocolate chip.
- You can also roll the edges of the ice cream sandwiches in crushed nuts or chocolate chips for added texture and flavor.