


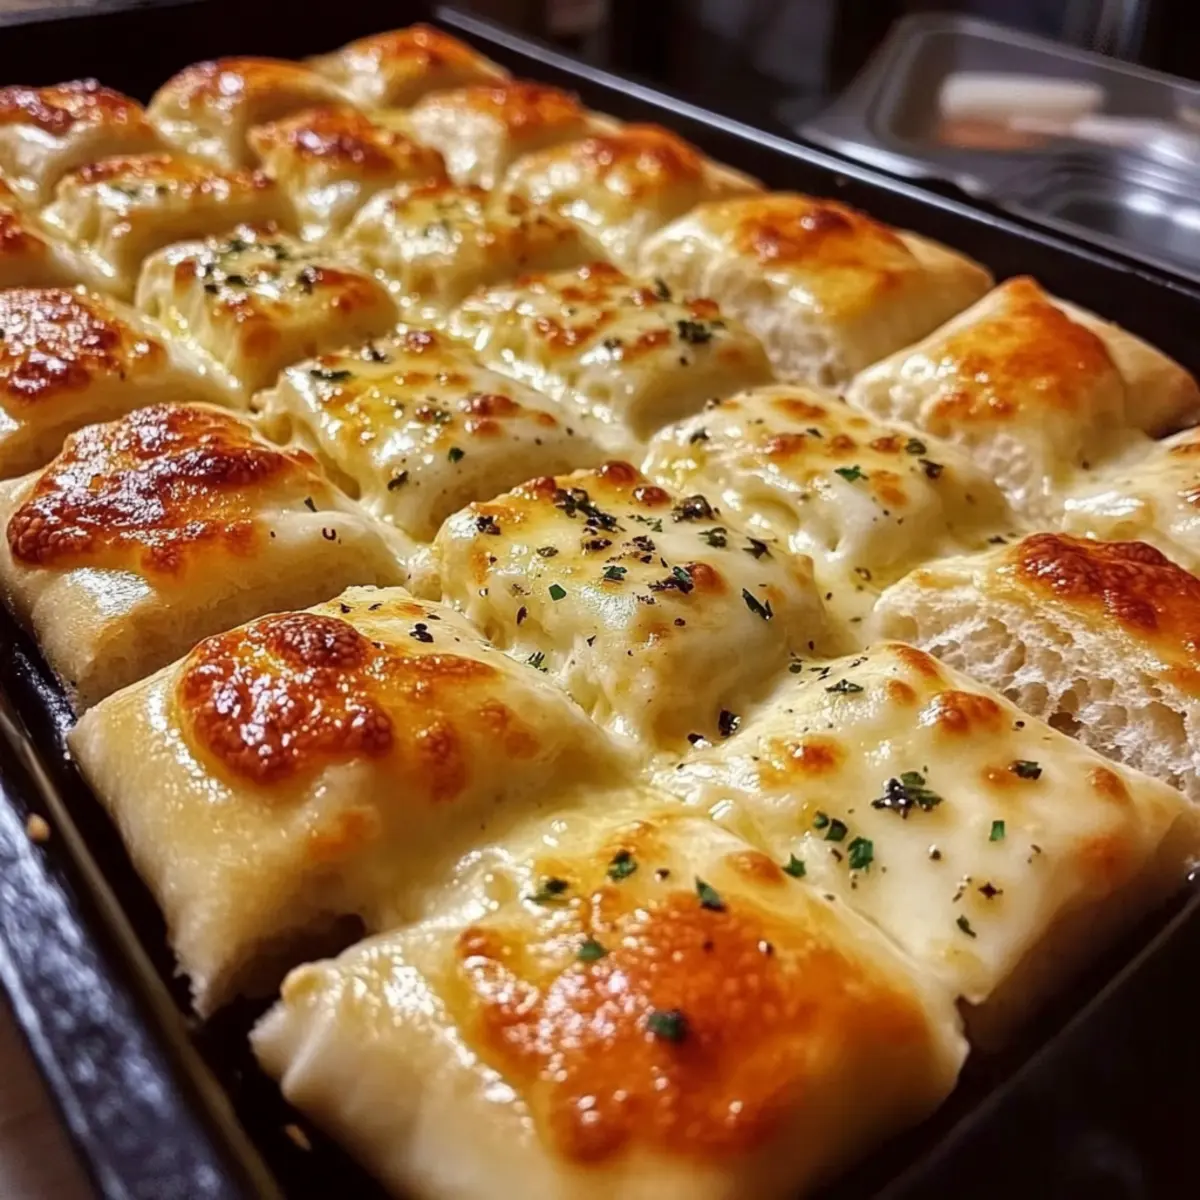
There’s something magical about the aroma of freshly baked bread wafting through the kitchen—like a warm hug from the oven. Enter my Quick & Easy Cheesy Garlic Breadsticks, a timeless recipe that brings a slice of pizzeria joy right to your home. These delightful breadsticks are not only quick to whip up in just 25 minutes, but they’re also a fantastic vegetarian snack that everyone will adore. Perfect for last-minute gatherings or quiet nights in, this recipe offers multiple variations, including gluten-free options, so you can customize every batch to suit your taste. Imagine tearing into that crispy golden crust, revealing a gooey, cheesy center that’s impossible to resist! Ready to elevate your snacking game? Let’s dive into the recipe!
Why Are These Cheesy Garlic Breadsticks Irresistible?
Quick Preparation: In just 25 minutes, you can have warm, cheesy goodness fresh out of the oven. Perfect for spontaneous snacks or parties!
Customization Options: Make them your own! Whether you prefer gluten-free options or want to swap in some veggies, the recipe supports a variety of delightful tweaks.
Flavors That Pop: The combination of garlic, mozzarella, and herbs creates an irresistibly savory aroma and taste that will have everyone reaching for more.
Crowd-Pleaser: Ideal for gatherings or cozy nights in, these breadsticks pair beautifully with sauces like marinara or garlic butter, making them a hit for kids and adults alike!
Homemade Feel: Enjoy that fresh bakery charm right at home. There’s nothing like the satisfaction of pulling apart a warm, cheesy breadstick straight from your kitchen!
Want more delicious ideas? Try these Cheesy Garlic Chicken wraps or a comforting side of Honey Garlic Salmon with your breadsticks!
Cheesy Garlic Breadsticks Ingredients
• Perfect for your next snack!
For the Dough
• Pizza Dough – Use store-bought for convenience or make your own for extra freshness.
For the Topping
• Butter – Imparts richness; substitute with olive oil for a lighter twist.
• Garlic – Fresh minced garlic brings aromatic warmth; garlic powder works in a pinch.
• Mozzarella Cheese – The star of the show, providing the gooey, stretchy texture we all crave!
• Parmesan Cheese (optional) – Adds a savory nutty flavor when grated on top.
• Dried Oregano/Italian Seasoning – Enhances the breadsticks’ flavor; fresh herbs can elevate the dish even more.
• Salt & Black Pepper – Essential for balancing flavors.
• Fresh Parsley (optional) – A bright, colorful garnish that adds freshness to the presentation.
Step‑by‑Step Instructions for Cheesy Garlic Breadsticks
Step 1: Preheat and Prepare
Begin by preheating your oven to 425°F (220°C). While the oven heats up, prepare a baking sheet by greasing it lightly with butter or lining it with parchment paper. This will help your Cheesy Garlic Breadsticks bake evenly and prevent sticking. Set the prepared baking sheet aside as you move on to the dough.
Step 2: Shape the Dough
On a lightly floured surface, roll or stretch your pizza dough into a rectangular shape about ½ inch thick. Make sure to keep the edges smooth, as this will ensure a uniform bake and beautiful presentation. If using store-bought dough, let it sit at room temperature for easier handling. Once shaped, transfer it gently to your prepared baking sheet.
Step 3: Prepare the Garlic Butter
In a small bowl, melt about 4 tablespoons of butter in the microwave or on the stove. Once melted, mix in freshly minced garlic, salt, and black pepper to create a flavorful garlic butter. This aromatic mixture will elevate your Cheesy Garlic Breadsticks and bring out the best in every bite. Brush the garlic butter generously over the dough, ensuring even coverage for that irresistible flavor.
Step 4: Add the Cheesy Toppings
Sprinkle dried oregano or Italian seasoning evenly across the brushed dough, followed by a generous layer of shredded mozzarella cheese. Make sure to leave no gaps, as this will ensure every bite is cheesy and delicious. If you’re using Parmesan cheese, sprinkle that on top as well for an extra layer of flavor. The combination of these cheeses will create a gooey, melty texture that everyone will love.
Step 5: Bake the Breadsticks
Carefully place the baking sheet in your preheated oven and bake for about 10-15 minutes. Keep an eye on them until the edges are golden brown and the cheese is bubbling and slightly browned. The heavenly aroma of garlic and cheese will fill your kitchen, signaling that your Cheesy Garlic Breadsticks are nearly ready.
Step 6: Rest and Slice
Once baked to perfection, remove the baking sheet from the oven and let the breadsticks rest for 1-2 minutes. This resting period allows the cheese to set slightly, making for cleaner slices. After resting, use a sharp knife or pizza cutter to slice the breadsticks into strips, creating perfect portions for sharing.
Step 7: Garnish and Serve
For a pop of color and freshness, sprinkle some chopped fresh parsley over the sliced breadsticks. Serve your warm Cheesy Garlic Breadsticks with your choice of dipping sauce, such as marinara or garlic butter, and enjoy the delightful mix of flavors in this comforting homemade snack!
Cheesy Garlic Breadsticks: Fun Variations!
Feel free to unleash your creativity and customize these delightful breadsticks to suit your cravings with a few simple twists!
-
Gluten-Free: Use gluten-free pizza dough for a delicious alternative that everyone can enjoy without compromising on flavor.
-
Herb-Infused: Replace dried oregano with fresh basil or rosemary for a vibrant, aromatic twist that elevates flavors to new heights. Nothing beats the freshness of garden herbs!
-
Veggie Delight: Top your breadsticks with thinly sliced bell peppers, red onions, or spinach before baking. These colorful veggies not only add nutrition but also bring a lovely crunch.
-
Spicy Kick: Add a sprinkle of red pepper flakes to the garlic butter for a bit of heat. This small tweak will ignite your taste buds and add a fun surprise!
-
Cheesy Overload: Swap mozzarella for a blend of cheeses such as cheddar or fontina for a richer flavor profile. Imagine pulling apart a cheesy breadstick wallpapered in melted goodness!
-
Pesto Drizzle: Drizzle homemade or store-bought pesto over the cooked breadsticks for an Italian flair. It adds a delightful freshness and a burst of flavor that everyone will love.
-
Balsamic Glaze: For a touch of sophistication, drizzle a little balsamic glaze over the breadsticks just before serving. It complements the cheesy goodness beautifully!
-
Caprese Style: Add sliced tomatoes and fresh mozzarella just before baking and sprinkle with balsamic vinegar after pulling them from the oven for a fresh Caprese-inspired flavor.
If you loved these and need more inspiration, why not whip up some Cheesy Spinach Artichoke dip for dipping? Or perhaps savor the irresistible flavors of Garlic Butter Steak Bites? Enjoy your culinary adventure!
How to Store and Freeze Cheesy Garlic Breadsticks
Fridge: Store leftover Cheesy Garlic Breadsticks in an airtight container for up to 2-3 days. Reheat them in the oven for the best texture.
Freezer: For longer storage, freeze baked breadsticks on a baking sheet until solid, then transfer to a resealable bag for up to 2 months.
Reheating: To revive frozen breadsticks, preheat the oven to 375°F (190°C) and bake directly from the freezer for about 10-12 minutes until heated through and crispy.
Make-Ahead Tips: Prepare the dough ahead of time and refrigerate it after shaping with toppings. Bake fresh when you’re ready for warm, cheesy goodness!
Make Ahead Options
These Cheesy Garlic Breadsticks are perfect for meal prep, allowing you to enjoy delectable snacks any day of the week! You can prepare the dough and assemble the toppings up to 24 hours in advance. Simply shape the dough, brush it with the garlic butter mixture, and sprinkle the cheese and seasonings. Cover the prepared baking sheet tightly with plastic wrap and refrigerate until you’re ready to bake. When it’s time to serve, preheat your oven and bake directly from the fridge for about 10-15 minutes until golden and bubbly. This method ensures the breadsticks are just as delicious as if made fresh, saving you hassle on busy weeknights!
What to Serve with Cheesy Garlic Breadsticks
These deliciously warm snacks pair perfectly with a variety of accompaniments, making your meal even more memorable.
-
Marinara Sauce: The classic tomato-based dip enhances the breadsticks’ flavor, adding a tangy contrast to the cheesy goodness.
-
Garlic Butter Dip: Rich and aromatic, this dip takes your cheesy experience to the next level with its creamy warmth.
-
Fresh Salad: A light, verdant salad provides a refreshing crunch that balances the richness of the breadsticks. Think mixed greens with a zesty vinaigrette!
-
Creamy Tomato Soup: The comforting creaminess of tomato soup complements the cheesy texture, creating a classic pairing that’s hard to resist.
-
Hummus: For a twist, serve with hummus—its nutty notes and smooth consistency offer a delightful contrast to the crispy, cheesy bites.
-
Roasted Vegetables: Add color and nutrients by serving alongside lightly roasted veggies; they provide a wholesome crunch with each bite.
-
Sparkling Water or Lemonade: A refreshing drink like sparkling water or homemade lemonade enhances the whole experience, cleansing the palate beautifully.
-
Ice Cream: For dessert, a scoop of vanilla ice cream rounds off the meal; the sweet contrast to the garlic will leave you craving more!
Expert Tips for Cheesy Garlic Breadsticks
-
Room-Temperature Dough: Using dough that’s at room temperature will make stretching it easier and lead to a more even bake.
-
Mind the Baking Time: Keep a close watch on the breadsticks while baking to avoid over-browning the cheese. Aim for golden edges and bubbling cheese.
-
Allow to Rest: Let the breadsticks rest for 1-2 minutes post-baking. This helps the cheese stabilize, preventing messy slices and ensuring a satisfying pull.
-
For Extra Crispiness: Position the baking sheet lower in the oven during the last couple of minutes to enhance the crunchiness of your Cheesy Garlic Breadsticks.
-
Best Reheating Method: Avoid using the microwave to reheat leftovers, as it can turn them soggy. Instead, use the oven to restore that delightful crispness.
Cheesy Garlic Breadsticks Recipe FAQs
How do I choose the best pizza dough for Cheesy Garlic Breadsticks?
Absolutely! For a perfect base, I recommend using fresh, store-bought pizza dough for convenience. However, if you have the time, homemade dough can elevate the flavor and freshness! Look for dough that is soft and pliable, avoiding any that appears overly dry or stale.
What is the best way to store leftovers?
After enjoying your Cheesy Garlic Breadsticks, store any leftovers in an airtight container in the refrigerator for up to 2-3 days. To reheat, simply place them in the oven at 375°F (190°C) for about 5-7 minutes until they’re warm and crispy again. This will help maintain their delightful texture!
Can I freeze Cheesy Garlic Breadsticks?
Absolutely! To freeze, first bake the breadsticks as per the recipe. Allow them to cool completely, then place them in a single layer on a baking sheet and freeze until solid. Once frozen, transfer them to a resealable bag and label with the date. They can be stored for up to 2 months. When you’re ready to enjoy them, bake directly from frozen at 375°F (190°C) for about 10-12 minutes.
What if my breadsticks are too soft after baking?
If your Cheesy Garlic Breadsticks turn out too soft, it might be due to overbaking or not letting them rest long enough post-baking. Make sure to keep an eye on them while they’re in the oven and allow them to rest for 1-2 minutes after baking to help the cheese set and firm up.
Are there any allergy considerations for Cheesy Garlic Breadsticks?
Yes! If you’re adapting for allergies, you can use gluten-free pizza dough for those with gluten sensitivities. Additionally, substitute dairy-free butter and cheese alternatives if you’re avoiding dairy. Always check labels to ensure no hidden allergens in your ingredients.
How can I add more flavor to my breadsticks?
Very! For added flavor, consider rubbing a little minced garlic on the dough before adding the topping. You can also experiment with additional spices like red pepper flakes for a kick, or even sprinkle some fresh herbs over the top after baking for an aromatic finish.
Cheesy Garlic Breadsticks: Your New Favorite Quick Snack
Ingredients
Equipment
Method
- Preheat your oven to 425°F (220°C) and prepare a baking sheet by greasing it or lining it with parchment paper.
- On a lightly floured surface, roll or stretch the pizza dough into a rectangular shape about ½ inch thick and transfer it to the prepared baking sheet.
- Melt about 4 tablespoons of butter, and mix in minced garlic, salt, and black pepper. Brush generously over the dough.
- Sprinkle dried oregano and mozzarella cheese evenly across the brushed dough, adding Parmesan if desired.
- Bake for about 10-15 minutes until the edges are golden brown and the cheese is bubbling.
- Remove from the oven and let the breadsticks rest for 1-2 minutes. Slice into strips.
- Garnish with chopped parsley and serve with dipping sauce.