


The sweet aroma of baking cookies wafts through the kitchen, instantly transporting me back to cherished holiday memories. These Classic Peanut Butter Blossoms are more than just cookies; they’re a comforting reminder of the warm gatherings with family and friends. Soft, chewy, and crowned with a luscious Hershey’s kiss, this classic cookie is quick and easy to prepare, making it a beloved staple for any occasion. Plus, they offer a fun twist with endless variations using different chocolate kisses, adding a personal touch that’s sure to delight. Whether you’re a seasoned home-chef or looking to elevate your dessert game, these treats are sure to bring a smile. Ready to whip up a batch and rediscover that nostalgia?

Why Are These Cookies So Irresistible?
Ultimate Comfort Food: These Classic Peanut Butter Blossoms are the epitome of nostalgia, evoking warm memories of holiday baking with loved ones.
Quick and Simple: With just a few ingredients and easy steps, you can have delicious cookies baked in no time—perfect for last-minute gatherings.
Flavorful Variations: Explore endless customization options! Experiment with different types of Hershey’s kisses like caramel or almond to surprise your guests.
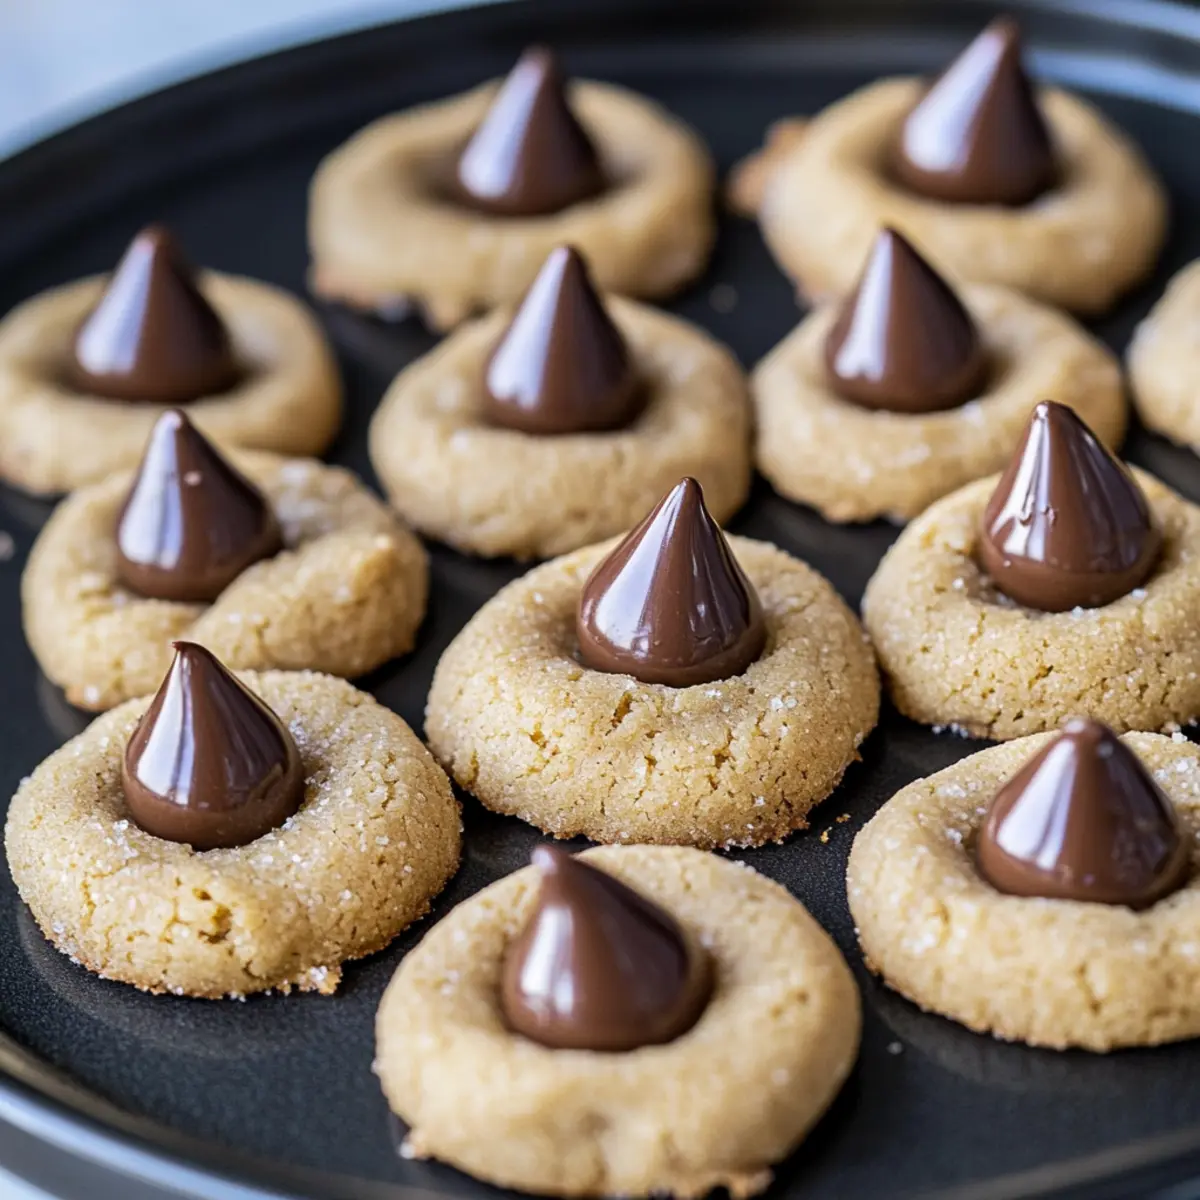
Soft and Chewy Delight: Each bite offers a delightful contrast between the soft, peanut butter cookie and the lush, melted chocolate topping.
Crowd-Pleasing Favorite: Whether for holiday celebrations or casual get-togethers, these cookies are guaranteed to be a hit. They bring joy and satisfaction, leaving everyone wanting more!
Classic Peanut Butter Blossoms Ingredients
Get ready to create these delightful cookies with the perfect blend of flavors!
For the Cookie Dough
- All-Purpose Flour – Provides structure; try using whole wheat for a heartier texture.
- Baking Soda – Acts as a leavening agent for that perfect rise.
- Salt – Enhances the overall flavor; sea salt gives a gourmet touch.
- Unsalted Butter – Adds richness and moisture; margarine is a great dairy-free substitute.
- Creamy Peanut Butter – The star of the show delivers fantastic flavor; natural peanut butter is a wholesome alternative.
- Granulated Sugar – Sweetens the cookie; coconut sugar can be a lower-glycemic option.
- Light Brown Sugar – Keeps the cookie moist and adds depth to the flavor; dark brown can intensify the molasses notes.
- Large Egg – Binds everything together and adds moisture; for vegan options, try a flax egg.
- Vanilla Extract – Elevates the cookie’s flavor; almond extract can add a nice twist.
For the Coating
- Granulated Sugar (for coating) – Offers extra sweetness and a delightful crunch on the surface.
For the Topping
- Hershey’s Kisses – The signature chocolate topping that completes each cookie; switch it up with caramel or almond kisses for unique variations.
These Classic Peanut Butter Blossoms are not just cookies; they’re little packages of joy waiting to be baked!
Step‑by‑Step Instructions for Classic Peanut Butter Blossoms
Step 1: Preheat the Oven
Begin by preheating your oven to 375°F (190°C). This ensures that your Classic Peanut Butter Blossoms bake evenly and achieve that perfect soft, chewy texture. While the oven warms, prepare your baking sheets by lining them with parchment paper for easy cookie removal later on.
Step 2: Whisk the Dry Ingredients
In a medium mixing bowl, combine all-purpose flour, baking soda, and salt. Whisk these dry ingredients together until well blended, which should take about a minute. This step helps distribute the leavening agents evenly throughout the flour, contributing to a consistent rise in your cookies.
Step 3: Cream the Butters and Sugars
In a large bowl, use a hand or stand mixer to cream together the unsalted butter, creamy peanut butter, granulated sugar, and light brown sugar until the mixture is smooth and fluffy, roughly 2–3 minutes. This key step enriches the dough, providing the beloved soft texture that makes these cookies irresistible.
Step 4: Incorporate the Wet Ingredients
Next, add the large egg and vanilla extract to the creamed mixture, mixing until fully incorporated, which should take about 1 minute. The egg acts as a binder, combining everything harmoniously while enhancing the flavor profile of your Classic Peanut Butter Blossoms.
Step 5: Combine Dry and Wet Ingredients
Gradually mix the dry ingredient blend into the wet mixture, combining just until no flour streaks remain. Be cautious not to overmix, as this can toughen your cookies. Use a spatula to scrape down the sides of the bowl as needed for an even dough consistency.
Step 6: Shape the Cookie Dough
Using a 1-inch scoop or your hands, portion out the dough and roll it into balls. Coat each ball in granulated sugar for a sweet finishing touch that adds a delightful crunch. This step is important as it creates the signature sugary exterior of your Classic Peanut Butter Blossoms.
Step 7: Bake the Cookies
Place the dough balls on the prepared baking sheets, ensuring they are spaced about 2 inches apart to allow for spreading. Bake in your preheated oven for 8–10 minutes until they are puffy and the edges are lightly golden. Keep an eye on them to avoid overbaking.
Step 8: Add Hershey’s Kisses
Once baked, remove the sheets from the oven and immediately press a Hershey’s kiss firmly into the center of each cookie, allowing the chocolate to melt slightly. The warm cookie will cradle the kiss, enhancing the overall experience of your Classic Peanut Butter Blossoms.
Step 9: Cool Before Serving
Let your cookies cool completely on the baking sheets. This cooling time allows the chocolate to set slightly while giving the cookies a chance to develop their soft, chewy texture. Once cooled, enjoy your Classic Peanut Butter Blossoms or store them in an airtight container for later!

Classic Peanut Butter Blossoms Variations
Get ready to unleash your creativity in the kitchen with delicious twists on this classic favorite!
-
Dairy-Free: Substitute unsalted butter with margarine and use dairy-free chocolate kisses for a safe alternative.
-
Chunky Twist: Swap creamy peanut butter for chunky to add delightful texture and crunch to every bite. The added nuts will delight peanut butter lovers!
-
Sugar-Free: Opt for a sugar substitute like erythritol for a low-calorie option that doesn’t compromise on sweetness. Your waistline will thank you!
-
Nut-Free: Replace peanut butter with sunbutter for a delightful nut-free version that’s just as satisfying. Perfect for school lunches or gatherings!
-
Seasonal Sprinkles: Elevate your cookies by adding festive sprinkles on top of the kiss! Holiday-themed sprinkles can turn this classic into a celebration centerpiece.
-
Spicy Kick: Mix in a pinch of cayenne pepper or cinnamon for an unexpected heat that enhances the chocolate’s richness. It’s a daring twist that will surprise your guests!
-
Flavored Kisses: Use caramel, almond, or mint Hershey’s kisses for a unique flavor adventure. Each type brings its own delightful character to the cookie.
-
Nut Butter Blend: Combine peanut butter with almond or cashew butter for a richer nut flavor. This blend will take your classic to another level of deliciousness.
So why not mix and match these variations to suit your taste and keep the family excited? These delightful flourishes deliver the familiar warmth of home while adding a new layer of joy to your baking experience. And if you’re inspired for more sweet treats, don’t forget to check out Cajun Honey Butter and Garlic Butter Baked for more delicious bites!
What to Serve with Classic Peanut Butter Blossoms
Delight in a meal with comforting sides and sweet treats that will leave your guests smiling long after the last bite.
-
Creamy Mashed Potatoes: A rich, velvety side dish that contrasts beautifully with the sweet and nutty flavors of the cookies. Perfect for holiday dinners!
-
Fresh Green Salad: Bright and crunchy, a fresh salad with vinaigrette balances the richness of the peanut butter cookies, cleansing the palate between bites.
-
Vanilla Ice Cream: Serve your cookies warm with a scoop of vanilla ice cream; the melt-in-your-mouth combination is pure bliss.
-
Hot Chocolate: A cozy cup of hot chocolate topped with whipped cream complements the chocolate kisses beautifully, perfect for a chilly evening.
-
Chocolate Chip Cookies: For a cookie platter, add chocolate chip cookies alongside your classic peanut butter blossoms for a delightful variety; the different textures are sure to please.
-
Fruit Salad: A refreshing medley of seasonal fruits brightens up the dessert table and adds a touch of freshness to balance the rich flavors.
-
Coffee or Tea: A warm beverage pairs wonderfully with these cookies, enhancing the overall experience and making for a delightful afternoon treat.
-
Brownies: Rich fudgy brownies bring an indulgent touch to your dessert lineup, satisfying any sweet tooth while appealing to the chocolate lovers.
-
Milkshakes: Creamy milkshakes are a fun, nostalgic pairing, perfect for dipping your cookies or enjoying on the side.
These pairings create sweet moments that transform any gathering into a heartwarming celebration!
Helpful Tricks for Classic Peanut Butter Blossoms
- Room Temperature Butter: Ensure that your butter is at room temperature for optimal creaming. It will help create that fluffy texture necessary for your Classic Peanut Butter Blossoms.
- Don’t Overmix: After adding the flour, mix just until everything is combined. Overmixing can lead to tough cookies, which nobody wants!
- Chill Dough for Ease: If the dough feels sticky, chill it in the refrigerator for 30 minutes. This makes it easier to handle and shape into balls.
- Check the Bake Time: Keep an eye on your cookies while they bake. For softer cookies, remove them when they’re just puffy and slightly golden; they’ll firm up as they cool.
- Experiment with Toppings: Use different flavors of Hershey’s kisses for fun twists on this classic. Caramel, almond, or even peppermint kisses can elevate your Classic Peanut Butter Blossoms!
- Freeze for Later: You can freeze raw dough balls to ensure you always have cookie dough ready! Just bake them straight from the freezer—no need to thaw.
Make Ahead Options
These Classic Peanut Butter Blossoms are perfect for meal prep enthusiasts! You can prepare the cookie dough up to 24 hours in advance by covering it tightly in plastic wrap and refrigerating it, which helps the flavors meld beautifully. Additionally, you can roll the dough into balls, coat them in granulated sugar, and freeze them for up to 3 months. When you’re ready to bake, just place the frozen dough balls on the baking sheet and add a couple of extra minutes to the baking time. For the freshest taste and soft texture, remember to let them cool completely after baking before serving. With these make ahead options, you’ll save precious time without sacrificing the delightful taste of your Classic Peanut Butter Blossoms!
How to Store and Freeze Classic Peanut Butter Blossoms
Room Temperature: Store cookies in an airtight container at room temperature for up to 1 week to maintain their soft, chewy texture.
Freezer: For longer storage, freeze Classic Peanut Butter Blossoms in an airtight container or freezer bag for up to 2 months.
Reheating: To enjoy, simply thaw at room temperature or warm in the microwave for a few seconds until the chocolate is slightly melted again.
Raw Dough: You can also freeze the raw dough balls for up to 2 months; bake them directly from the freezer whenever you crave fresh cookies!

Classic Peanut Butter Blossoms Recipe FAQs
What type of peanut butter should I use for the best flavor?
Absolutely! For the best flavor in your Classic Peanut Butter Blossoms, I recommend using creamy peanut butter. Natural peanut butter can also work beautifully, giving a wholesome and rich taste, but be sure to stir it well as it can be a bit oily.
How should I store my cookies to keep them fresh?
You can store your Classic Peanut Butter Blossoms in an airtight container at room temperature for up to 1 week. If you want to keep them longer, freezing is a fantastic option! Just make sure to place them in a freezer-safe container or bag.
Can I freeze the raw cookie dough?
Very! To freeze the raw dough, scoop the individual cookie balls onto a baking sheet lined with parchment paper and freeze them until solid. Then transfer the frozen dough balls to an airtight container or freezer bag. They can be stored in the freezer for up to 2 months. To bake from frozen, simply preheat the oven and add a couple more minutes to the baking time!
What if my cookies spread too much while baking?
If your Classic Peanut Butter Blossoms spread too much, it might be due to the butter being too warm or not enough flour in the dough. To troubleshoot, ensure your butter is at room temperature and consider chilling the dough for about 30 minutes before baking. This will help maintain their shape and create that perfect chewiness.
Are these cookies safe for pets?
No, it’s best to keep these cookies away from your pets. Chocolate, including Hershey’s kisses, is toxic to dogs and cats. So, while we enjoy these delightful treats, make sure to give your furry friends pet-friendly snacks instead!
Can I replace the egg in this recipe?
Absolutely! If you’re looking for an egg substitute for your Classic Peanut Butter Blossoms, a flax egg is a wonderful option. To make one, mix 1 tablespoon of ground flaxseed with 2.5 tablespoons of water. Let it sit for about 5 minutes until it thickens, then use it in place of the egg in the recipe. This keeps your cookies vegan-friendly while maintaining that delicious texture!
Classic Peanut Butter Blossoms That Melt in Your Mouth
Ingredients
Equipment
Method
- Preheat your oven to 375°F (190°C) and prepare baking sheets with parchment paper.
- Whisk together flour, baking soda, and salt in a medium bowl.
- In a large bowl, cream together the unsalted butter, peanut butter, granulated sugar, and light brown sugar.
- Add the egg and vanilla extract, mixing until fully incorporated.
- Gradually mix the dry ingredients into the wet mixture until just combined.
- Roll the dough into 1-inch balls and coat each ball in granulated sugar.
- Place the dough balls on baking sheets, spaced about 2 inches apart, and bake for 8-10 minutes.
- Press a Hershey's kiss into the center of each cookie immediately after baking.
- Cool on baking sheets before transferring to an airtight container.