


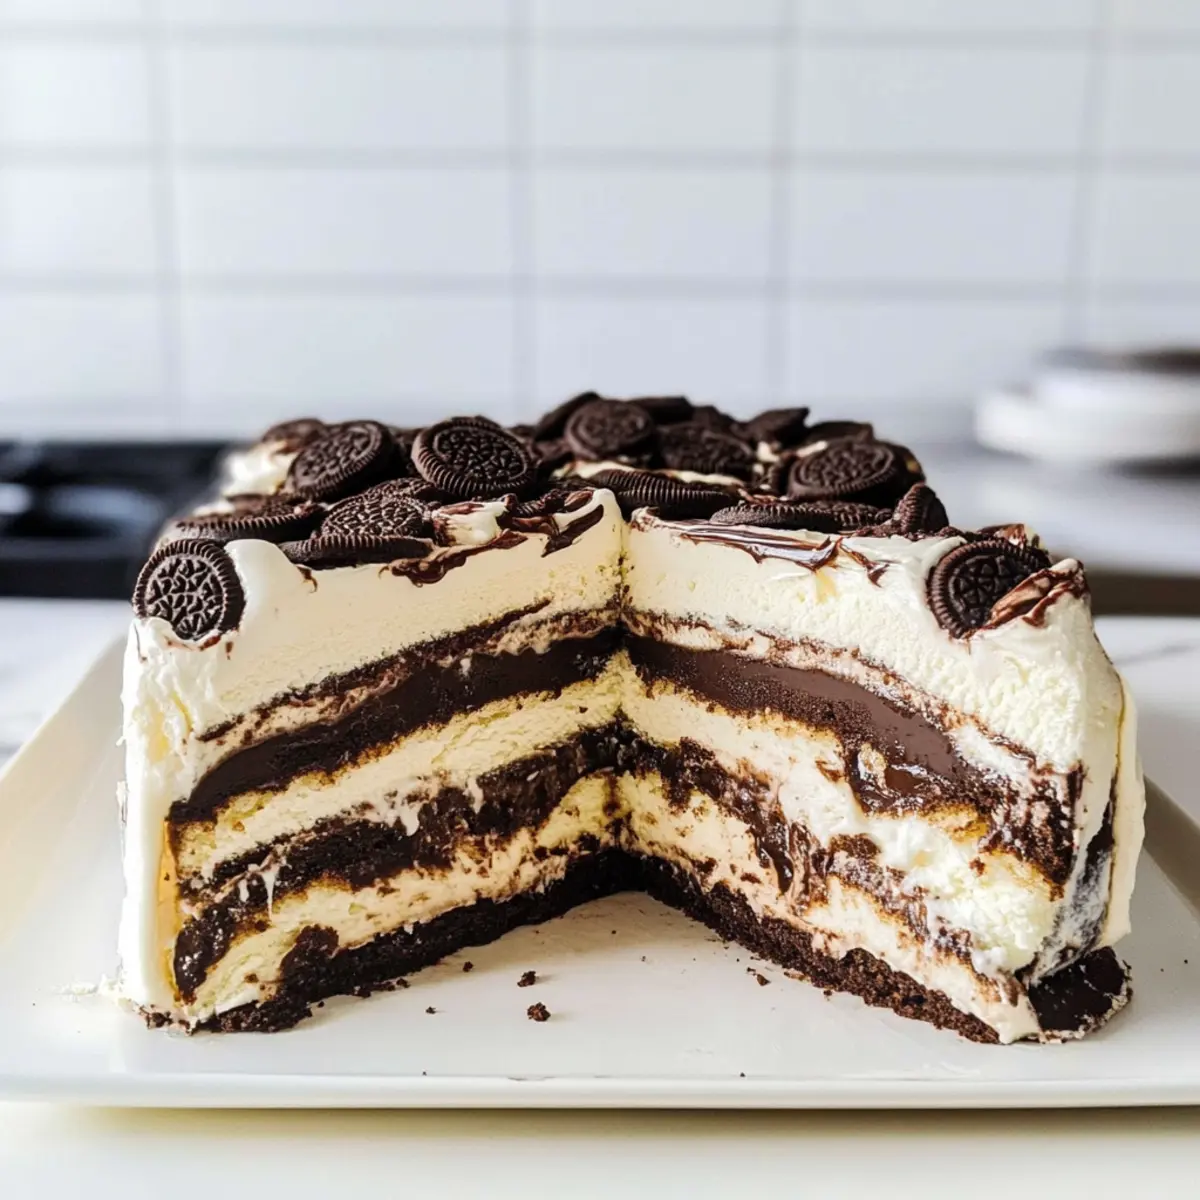
As summer days heat up, nothing compares to the sweet relief of a chilled dessert that makes everyone smile. Enter the Easy No-Bake Ice Cream Sandwich Cake! This delightful treat layers creamy vanilla ice cream with rich chocolate fudge and crunchy Oreo pieces, crafting a dessert that appeals to all ages. Not only is it quick to assemble—perfect for those lazy afternoons—but it’s also a guaranteed crowd-pleaser, ensuring you can kick back and enjoy your time with family and friends. Best of all, it requires no baking, freeing up your valuable time for more summer fun. Are you ready to whip up this effortless delight that will keep you cool all season long?
Why Is This Dessert a Must-Make?
Simplicity: This recipe is incredibly easy to make, requiring no baking skills—perfect for anyone who wants deliciousness with minimal effort.
Kid-Friendly Fun: Get the little ones involved! Layering ice cream sandwiches, fudge, and cookies is a great activity for kids.
Versatile Flavors: Customize with different cookies or ice cream flavors, offering endless variations to suit every taste.
Crowd-Pleasing Treat: Whether it’s a summer picnic or a birthday party, this cake is sure to impress guests of all ages with its delightful mix of flavors and textures.
Time-Saver: With just a few ingredients and no time in the oven, this cake fits perfectly into your summer schedule, leaving more time for fun! If you’re looking for alternatives, check out my guide on No-Bake Dessert Ideas.
Ice Cream Sandwich Ingredients
For the Cake Base
• Ice Cream Sandwiches – These provide the creamy foundation; choose your favorite brand for the best experience.
For the Fudge Layer
• Hot Fudge Sauce – Offers a rich, chocolatey sweetness; chocolate syrup can be a lighter substitute if preferred.
For the Topping
• Whipped Topping (Cool Whip) – Lightens up the dessert and adds a fluffy texture; homemade whipped cream can elevate the flavor even more.
• Oreo Sandwich Cookies – Crunchy and delicious; feel free to switch up with chocolate chip or peanut butter cookies for variety.
This Easy No-Bake Ice Cream Sandwich Cake is not just a treat for the taste buds; it’s also a fun way to gather everyone around for some summer fun!
Step-by-Step Instructions for Easy No-Bake Ice Cream Sandwich Cake
Step 1: Prepare the Dish
Start by lining an 8×8-inch freezer-safe dish with parchment paper, allowing for easy removal later. This setup will ensure that your Easy No-Bake Ice Cream Sandwich Cake keeps its shape and looks presentable when served. Press the parchment paper into the corners for a smooth finish.
Step 2: Soften the Fudge
Place the hot fudge sauce in the microwave and heat it for 20-30 seconds until softened. This will make it easier to spread over the layers of ice cream sandwiches. Stir the fudge gently to ensure an even consistency before moving on to the next step.
Step 3: Add the First Layer of Ice Cream Sandwiches
Arrange a layer of ice cream sandwiches on the bottom of your prepared dish, ensuring they fit snugly together. You may need to trim some sandwiches to fill any gaps. Aim for a flat, even layer that will serve as the tasty base of your Easy No-Bake Ice Cream Sandwich Cake.
Step 4: Spread the Hot Fudge Sauce
Using a spatula, spread half of the softened hot fudge sauce evenly over the layer of ice cream sandwiches. Ensure you cover the sandwiches thoroughly, as this delicious layer will add richness and moisture to the cake. Let it settle for a moment before moving to the next step.
Step 5: Add the Whipped Topping
Carefully dollop half of the whipped topping onto the fudge layer. Use a spatula to gently spread the topping over the fudge until it’s evenly distributed. This fluffy layer complements the denser elements, providing a lovely contrast in your Easy No-Bake Ice Cream Sandwich Cake.
Step 6: Sprinkle with Oreo Cookies
Sprinkle half of the chopped Oreo sandwich cookies over the whipped topping, ensuring they are evenly distributed. The crunchy layers add texture and flavor, making each bite of your dessert cake exciting. You can also mix in other cookie varieties if you’re feeling adventurous.
Step 7: Repeat the Layers
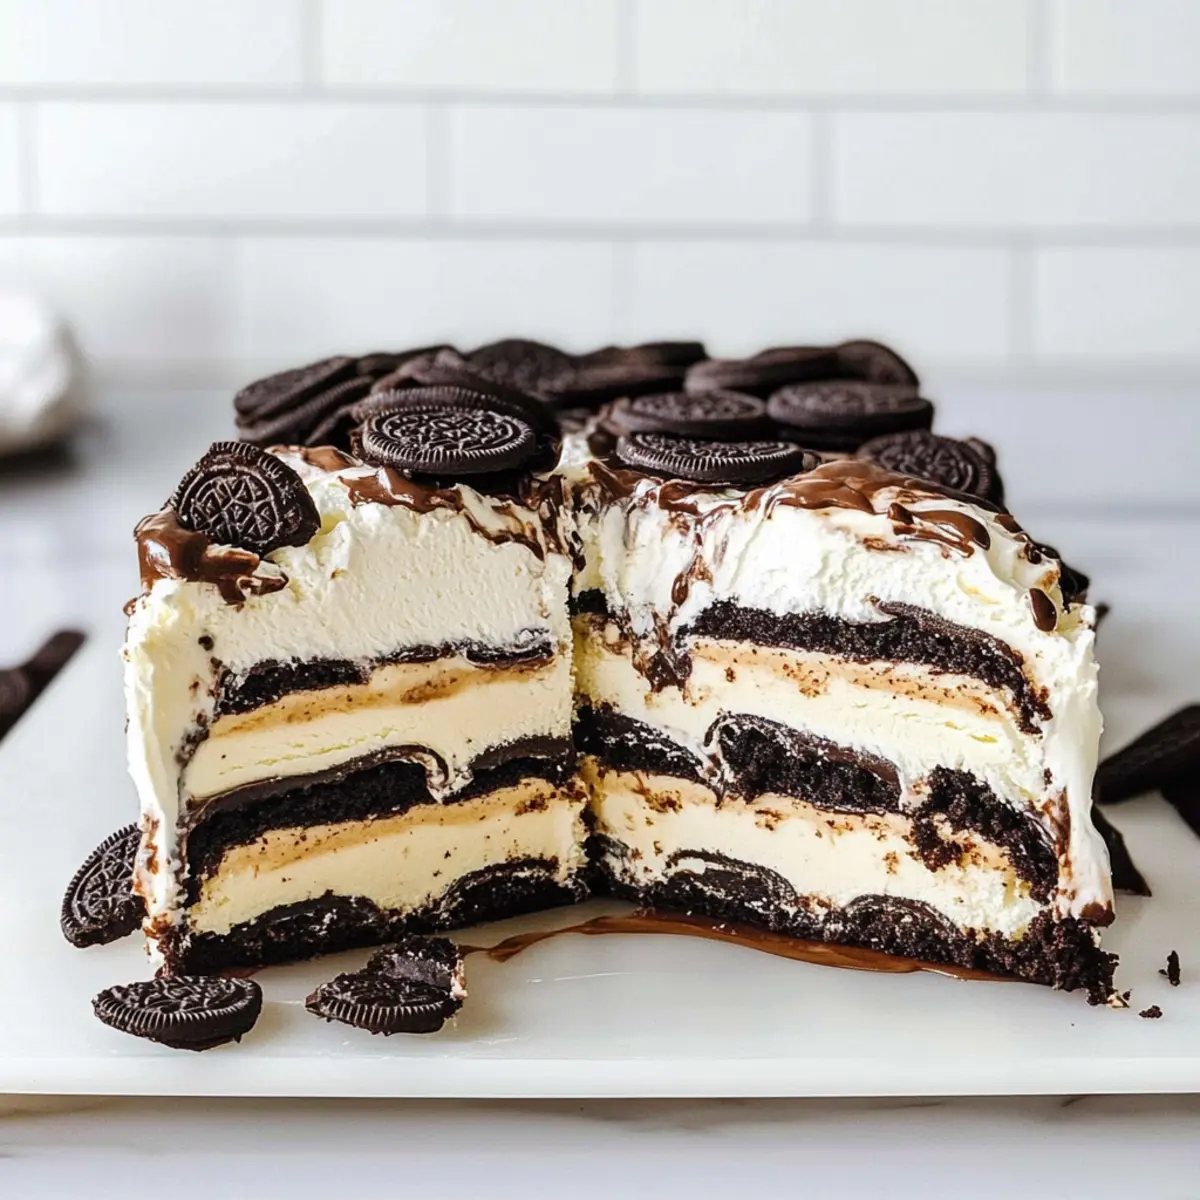
Carefully repeat the layering process, starting with another layer of ice cream sandwiches, followed by the remaining hot fudge, whipped topping, and Oreo cookies. Take your time to ensure each layer is well-composed, creating a delightful mosaic of flavors in your Easy No-Bake Ice Cream Sandwich Cake.
Step 8: Freeze the Cake
Cover the dish tightly with plastic wrap and place it in the freezer to set for a minimum of 6 hours, though overnight is ideal. This resting time will allow the layers to meld beautifully, resulting in creamy and firm slices.
Step 9: Serve the Cake
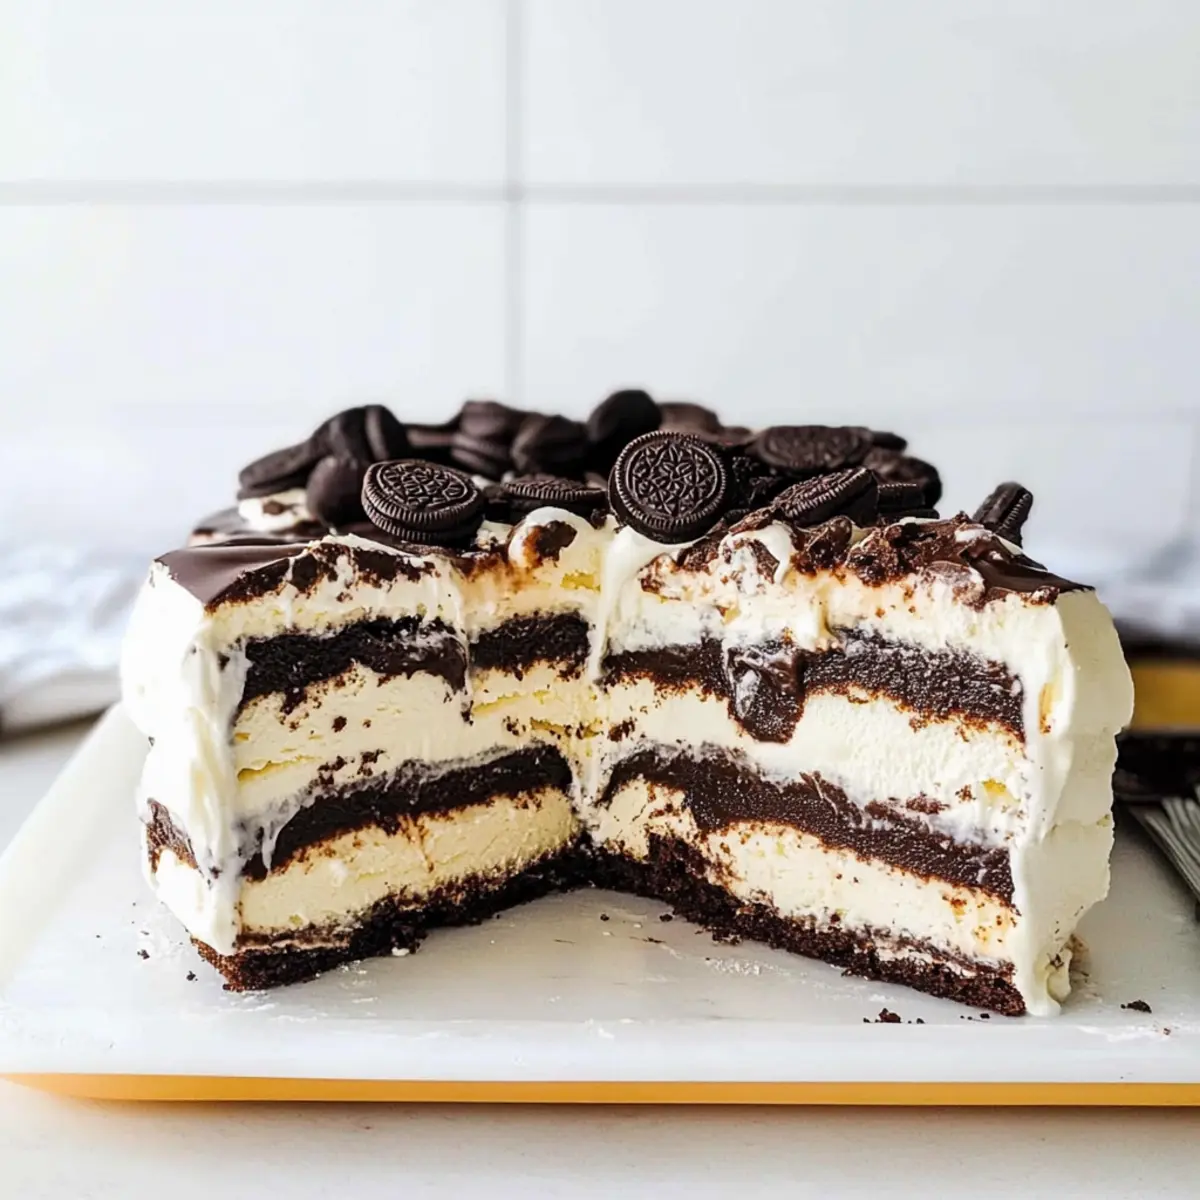
Once frozen, carefully lift the cake out of the dish using the parchment paper. Allow it to sit at room temperature for about 10 minutes before slicing. This resting time will make your Easy No-Bake Ice Cream Sandwich Cake easier to cut, helping you serve up perfect pieces for family and friends.
Expert Tips for Easy No-Bake Ice Cream Sandwich Cake
-
Soft Ice Cream Sandwiches: Make sure your ice cream sandwiches are soft enough to cut easily. If they are too hard, let them sit out for a few minutes before layering.
-
Warm Your Tools: Use a warmed spatula to spread the hot fudge sauce and whipped topping. This allows for smoother layers and avoids tearing the ice cream sandwiches.
-
Layer Wisely: To prevent messy layers, aim for even distribution of the hot fudge and whipped topping. This will ensure that each slice of your Easy No-Bake Ice Cream Sandwich Cake looks as good as it tastes.
-
Chill Time Matters: Be patient with the freezing time. Letting the cake sit overnight allows the layers to meld perfectly together, creating a luxurious texture that everyone will love.
-
Mix It Up: Don’t hesitate to experiment with different cookie varieties or add fruit layers. Personalizing your cake makes it perfect for your family’s unique tastes!
Easy No-Bake Ice Cream Sandwich Cake Variations
Feel free to get creative and make this dessert your own—let your imagination run wild with fantastic flavors and textures!
-
Dairy-Free: Use dairy-free ice cream sandwiches and a coconut whipped topping for a delicious alternative. Perfect for those with dairy sensitivities!
-
Nutty Twist: Incorporate chopped nuts like pecans or almonds between layers for added crunch and flavor. They branch out the usual cookie crust, giving each bite a delightful surprise.
-
Fruity Layers: Add slices of fresh strawberries or bananas between layers for a refreshing fruit twist. The natural sweetness from the fruit beautifully complements the chocolate fudge.
-
Chocolate Lovers: Swap in chocolate ice cream sandwiches and drizzle melted chocolate between layers for an extra-chocolatey experience. This twist caters to every chocoholic’s dreams!
-
Peanut Butter Bliss: Spread peanut butter between layers or mix it into the whipped topping for an indulgent, nutty flavor that can’t be resisted. The richness adds a layer of warmth that enhances every bite.
-
Spicy Kick: Add a pinch of cayenne or chili powder into the hot fudge for a surprising kick of heat. This unexpected twist will have your guests intrigued and amazed with the flavor combination.
-
S’mores Style: Replace Oreo cookies with graham crackers and use marshmallow fluff instead of whipped topping for a s’mores-inspired version. It creates that classic campfire taste, making you reminisce about summer nights by the fire.
-
Coconut Dreams: Use coconut ice cream sandwiches and sprinkle shredded coconut on top for a tropical vibe. Every slice will transport you to a blissful beach setting with its sweet, aromatic flavor profile.
Your Easy No-Bake Ice Cream Sandwich Cake can become a fun canvas for flavors—embrace the joy of customization! If you’re looking for more exciting ideas, visit my collection of delightful No-Bake Dessert Ideas.
What to Serve with Easy No-Bake Ice Cream Sandwich Cake
As you prepare to delight your guests with this chilled masterpiece, consider these perfect pairings to create a truly memorable meal.
-
Fresh Berries: Bright, juicy strawberries or raspberries add a refreshing contrast, balancing the sweetness of the cake. Their vibrant colors make the presentation pop!
-
Chocolate Drizzle: A rich drizzle of melted chocolate over each slice complements the fudge layer and enhances the dessert’s decadence. It adds an extra indulgent touch that chocolate lovers will adore.
-
Mint Chocolate Chip Ice Cream: A scoop alongside the sandwich cake offers a refreshing minty flavor that complements the richness, while also creating delightful texture variety.
-
Cold Brew Coffee: Serve with a chilled cup of coffee for an adult twist! The smooth bitterness of cold brew pairs beautifully with the sweetness, creating a perfect afternoon treat.
-
Lemon Sorbet: This tangy, icy treat brightens your dessert table, cleansing the palate after the rich cake and bringing a burst of summer flavor.
-
Graham Cracker Crust Pie: Add a slice of no-bake cheesecake or key lime pie for a delightful variety of textures and flavors that your guests will enjoy.
-
Whipped Cream: Always a classic, an extra dollop of whipped cream on top adds a light and fluffy touch, making each bite more decadent.
-
Chilled Raspberry Lemonade: A refreshing glass enhances the summer vibe; its tartness cuts through the sweetness, creating a balanced and enjoyable experience.
-
Fruit Skewers: Colorful fruit skewers with melon, pineapple, and grapes offer a fun, light side that adds contrast and freshness to the meal.
Make Ahead Options
This Easy No-Bake Ice Cream Sandwich Cake is perfect for meal prep, allowing you to assemble it up to 24 hours in advance! You can prepare all the layers—ice cream sandwiches, hot fudge sauce, whipped topping, and crushed Oreo cookies—before your gathering. Simply layer the ice cream sandwiches and fudge in your dish, then cover it tightly with plastic wrap and refrigerate. To maintain the cake’s delicious quality, freeze it overnight to ensure the layers meld together beautifully. When you’re ready to serve, let it sit at room temperature for 10 minutes before slicing for easy, perfect portions. Preparing ahead saves time and guarantees a delightful dessert awaits your guests!
How to Store and Freeze Ice Cream Sandwich Cake
Fridge: Keep the cake covered in the refrigerator for up to 3 days for optimal taste and texture. Ensure it’s tightly sealed to avoid freezer burn or contamination from other odors.
Freezer: Store leftovers in an airtight container or wrapped tightly in plastic wrap in the freezer for up to a week. This helps maintain the delicious layers and prevents ice crystals from forming.
Serving: Before serving, let the cake sit at room temperature for about 10 minutes to soften slightly. This makes cutting easier and enhances the delightful flavors of the ice cream sandwich cake.
Leftovers: If you have any leftover slices, it’s best to refreeze them promptly. Just remember to thaw a little for the best experience!
Easy No-Bake Ice Cream Sandwich Cake Recipe FAQs
What type of ice cream sandwiches should I use?
Absolutely! Choose soft ice cream sandwiches for the best texture in your cake. Any brand works, but make sure they are easy to cut and layer. If they are too hard, let them sit out for a few minutes to soften up.
How do I store the Ice Cream Sandwich Cake?
For optimal taste and texture, keep your Easy No-Bake Ice Cream Sandwich Cake tightly covered in the refrigerator for up to 3 days. If you prefer longer storage, wrap it in plastic wrap or place it in an airtight container and store it in the freezer for up to a week. Just remember to let it sit at room temperature for about 10 minutes before slicing and serving.
Can I freeze leftovers?
Absolutely! To freeze leftovers, wrap individual slices in plastic wrap or store them in an airtight container. This keeps the delicious layers intact while preventing ice crystals. They will remain good for up to a week. Just a quick tip: thaw slices slightly before enjoying them for the best experience.
What do I do if my layers are messy?
Very! If your layers turn out messy, don’t worry. You can smooth them out with a warmed spatula, which makes spreading easier and more neat. Just run the spatula under hot water, dry it off, and gently smooth over the edges and surfaces of the layers.
Are there any dietary considerations for this recipe?
It’s important to note that this dessert may not be suitable for individuals with dairy allergies, as it contains ice cream and whipped topping. If you’re catering to someone with dietary restrictions, consider using dairy-free ice cream sandwiches and whipped topping alternatives. The taste is still delightful, and everyone can enjoy this summer treat!
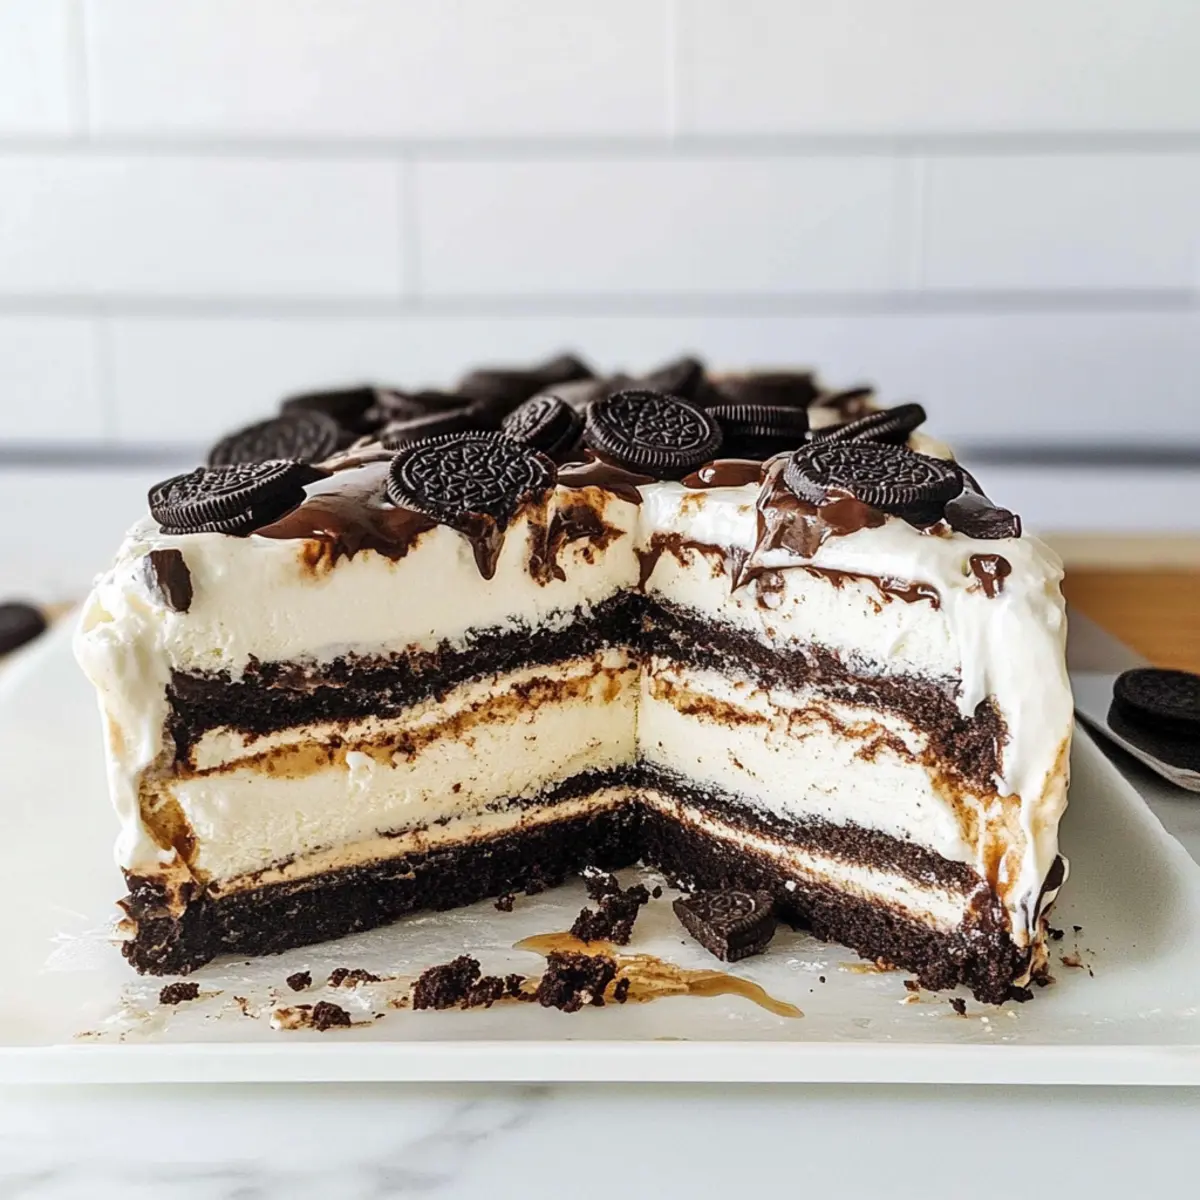
Delicious No-Bake Ice Cream Sandwich Dessert Cake for Summer Fun
Ingredients
Equipment
Method
- Line an 8x8-inch freezer-safe dish with parchment paper.
- Heat the hot fudge sauce in the microwave for 20-30 seconds until softened.
- Arrange a layer of ice cream sandwiches in the prepared dish.
- Spread half of the hot fudge sauce over the ice cream sandwiches.
- Dollop half of the whipped topping onto the fudge layer and spread evenly.
- Sprinkle half of the chopped Oreo cookies over the whipped topping.
- Repeat the layering process with the remaining ingredients.
- Cover the dish with plastic wrap and freeze for a minimum of 6 hours.
- Allow the cake to sit at room temperature for 10 minutes before slicing.