


As I stood in my kitchen, the savory aroma of sautéing garlic began to swirl around me, instantly transforming the space into a cozy haven. That’s when the idea for these Cheesy Garlic Chicken Wraps sparked— a delightful twist on a classic comfort food, perfect for any night of the week. Not only do they come together in a flash, but they also invite endless customization; whether you’re in the mood for a spicy kick with pepper jack or a creamy richness from gouda, the possibilities are deliciously endless. Plus, they cater to both gluten-free eaters and those simply craving a satisfying meal. Ready to whisk away the mundane takeout routine? Let’s dive into making these wraps that promise to bring warmth and joy to your dining table!
Why are these wraps a game-changer?
Quick and Easy: This recipe is a lifesaver for busy nights, taking just about 30 minutes from start to finish.
Customizable Goodness: Feel free to swap in your favorite cheeses, spices, and veggies. Add spinach or peppers for a wholesome twist!
Crowd-Pleasing Flavor: The combination of garlic and melty cheese makes these wraps irresistible for family dinners or casual gatherings, just like my Garlic Chicken Gnocchi.
Comfort Food Vibes: With a warm, gooey filling wrapped in a crispy tortilla, each bite feels like a hug—perfect for anyone looking to ditch bland takeout.
Health-Conscious Options: Gluten-free tortillas can easily accommodate those with dietary restrictions, making this a versatile recipe for everyone!
Garlic Chicken Wraps Ingredients
For the Filling
- Chicken – Provides hearty protein; using rotisserie chicken can speed up prep time.
- Olive Oil – Ideal for sautéing garlic and chicken, enhancing the overall flavor.
- Garlic (Minced) – Infuses bold, aromatic flavor, making it essential for the wrap.
- Cheese (e.g., cheddar, mozzarella) – Melts beautifully to create a creamy filling; gouda adds richness, while pepper jack gives a spicy kick.
For the Wraps
- Tortillas (flour/corn) – Holds all the delicious filling; swap for gluten-free tortillas to accommodate dietary needs.
- Butter – Essential for toasting the wraps, giving them a crispy exterior; garlic butter can enhance the taste even more.
For Garnish
- Parsley (optional) – Adds a fresh pop of color and flavor to your wraps before serving.
These Garlic Chicken Wraps are sure to become a staple in your home, easy to make and tailor to your own taste!
Step‑by‑Step Instructions for Garlic Chicken Wraps
Step 1: Cook Chicken
Begin by preheating your oven to 375°F (190°C) if baking the chicken. Season chicken pieces with salt and pepper, then bake for about 20-25 minutes, or until cooked through with an internal temperature of 165°F (74°C). Alternatively, you can sauté or grill the chicken for a quicker option. Once cooked, dice the chicken into small, bite-sized pieces.
Step 2: Sauté Garlic
In a large skillet, heat 2 tablespoons of olive oil over medium heat. Once hot, add 2-3 cloves of minced garlic, sautéing for 30 seconds to 1 minute until the garlic becomes fragrant and golden. Keep an eye on it to avoid burning, as you want that lovely garlicky aroma to perfume your kitchen, setting the stage for the Garlic Chicken Wraps.
Step 3: Combine Filling
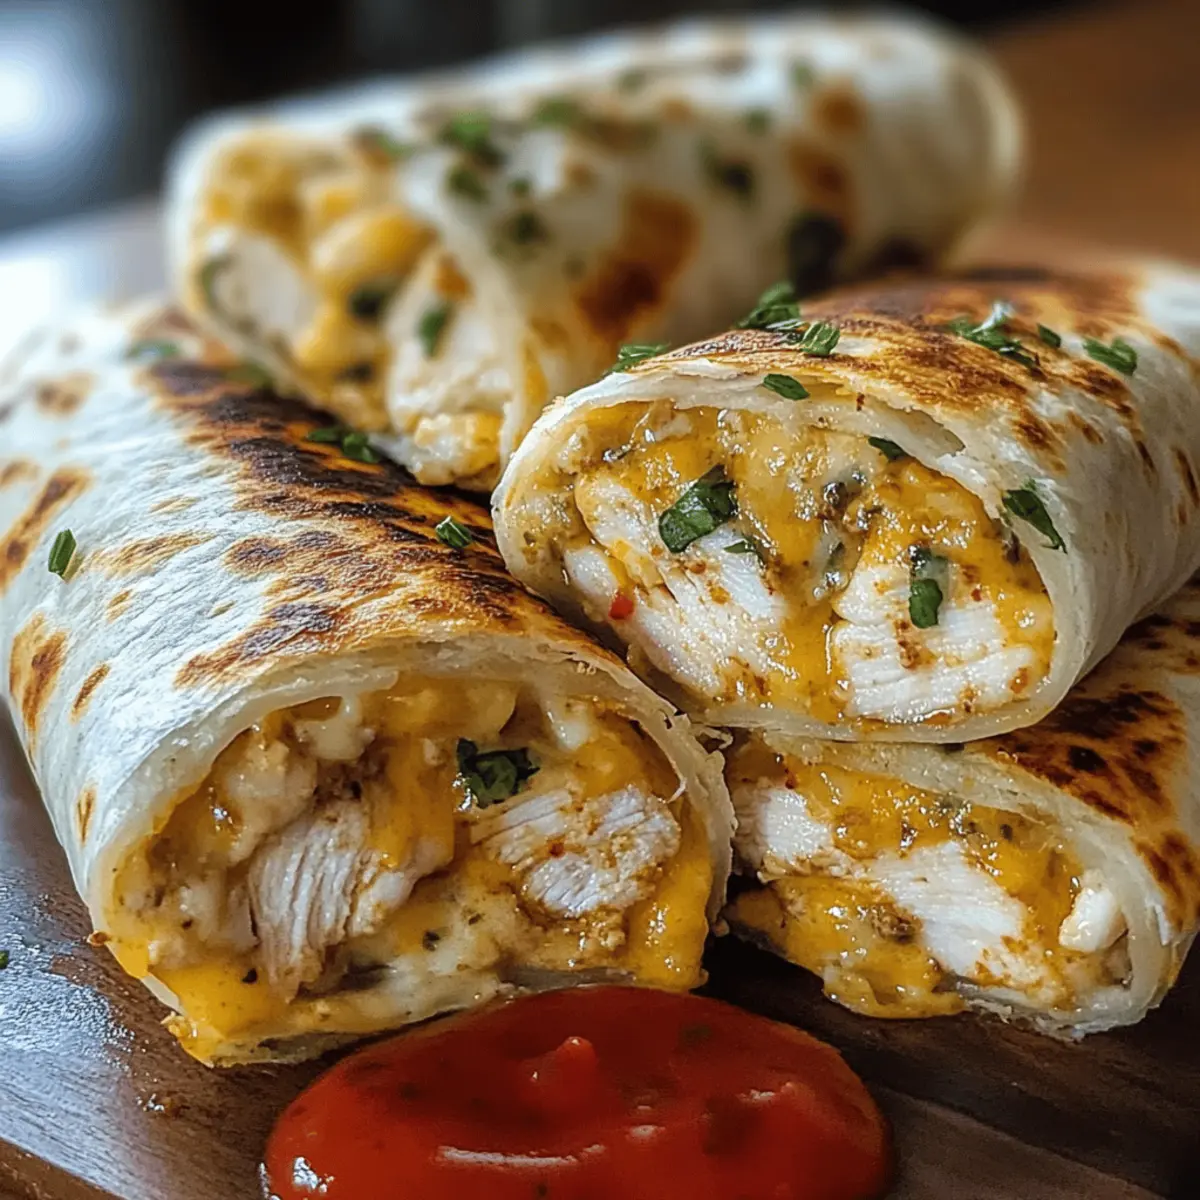
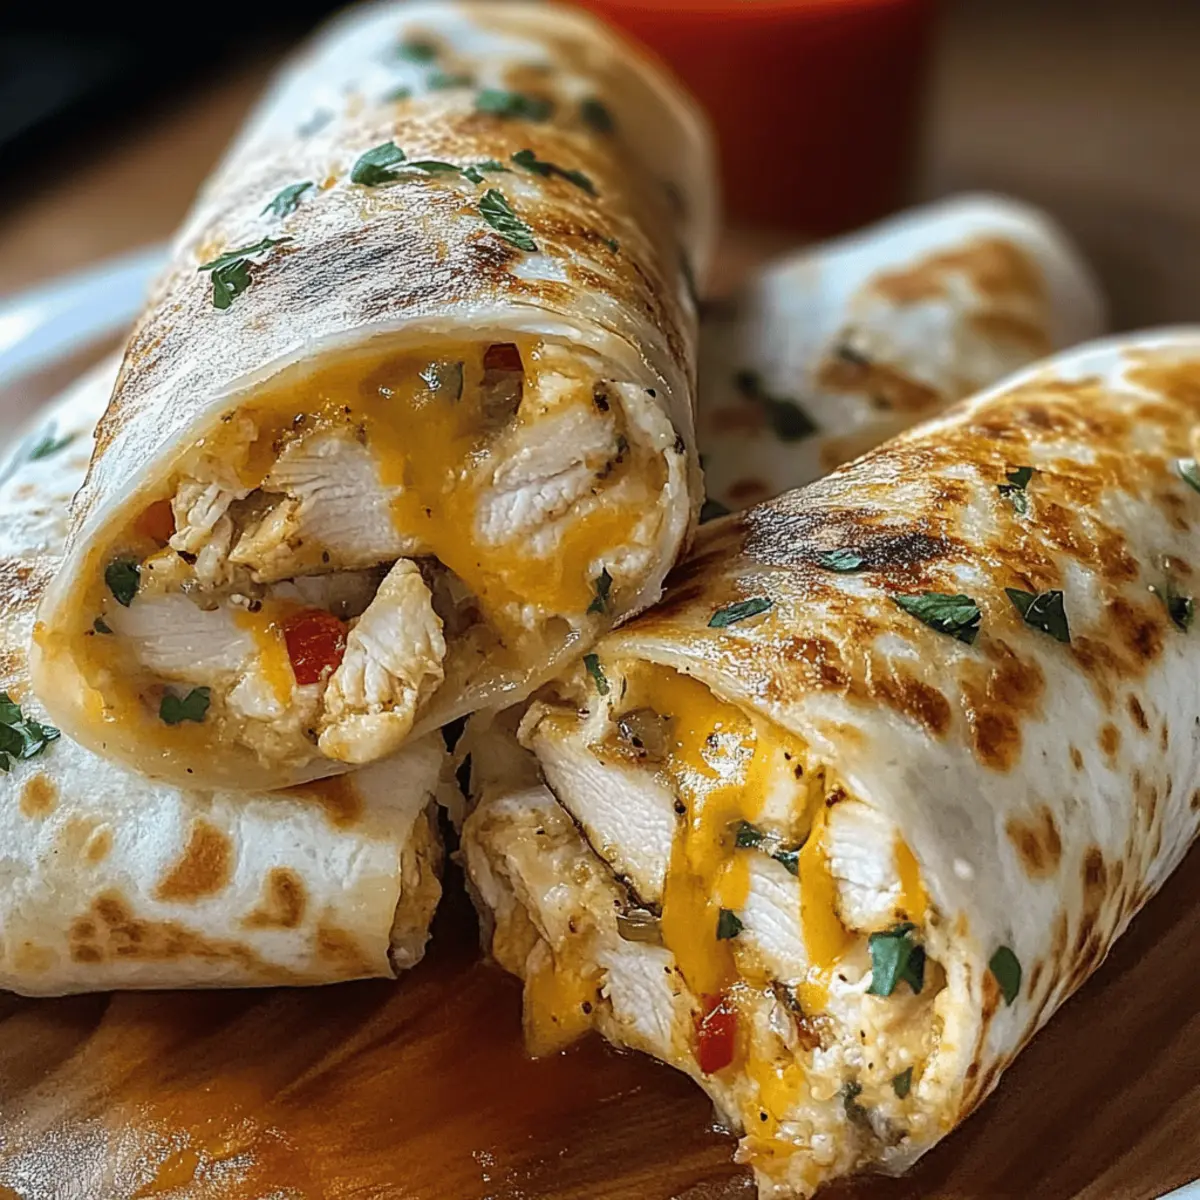
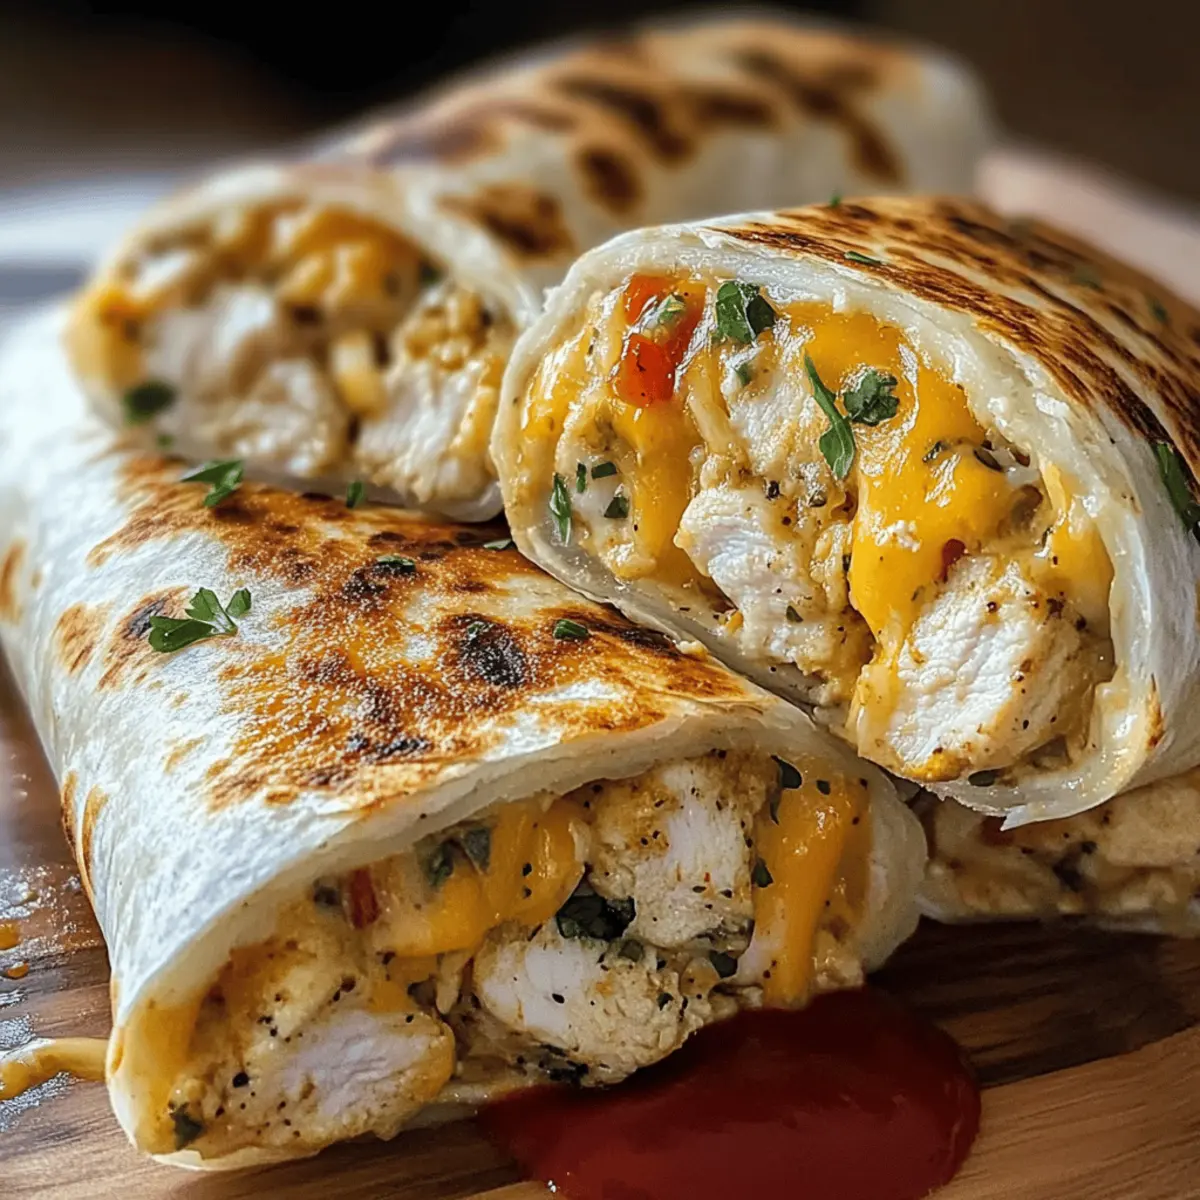
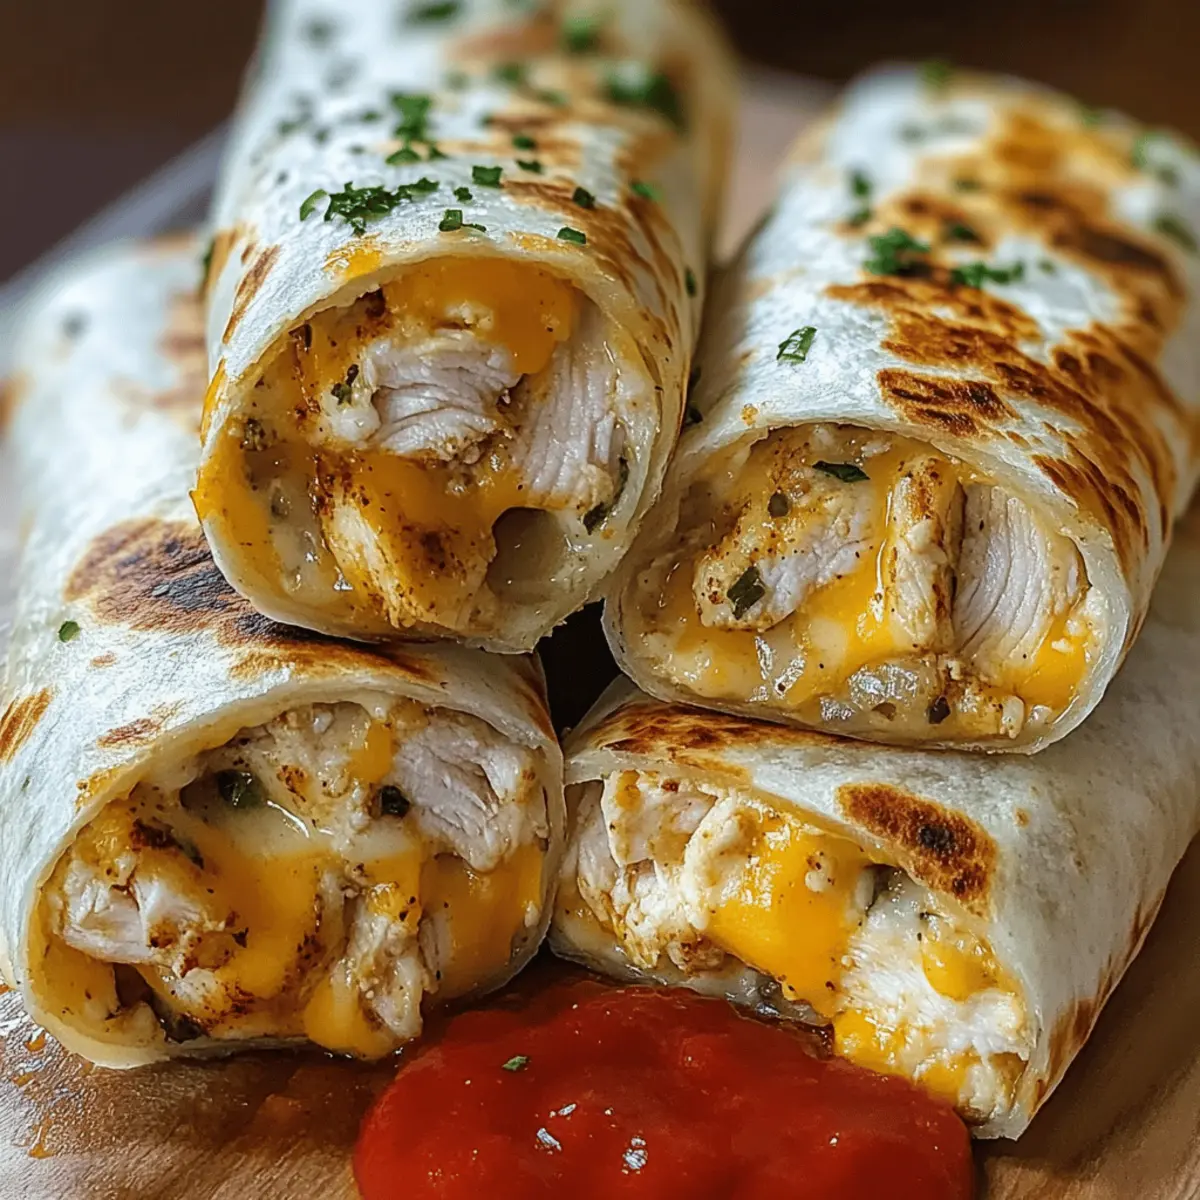
Add the diced chicken to the skillet with the sautéed garlic, tossing well to coat all the chicken with the flavorful oil. Off the heat, stir in your choice of cheese—about 1 cup of shredded cheddar or mozzarella—to allow it to melt slightly from the residual heat. The combination of warm chicken and gooey cheese is what makes these wraps so delightful.
Step 4: Assemble Wraps
Lay a tortilla (flour or corn) on a clean surface and spoon a portion of the cheesy chicken mixture onto the center. Fold the sides of the tortilla inwards and then roll it tightly from the bottom up, similar to a burrito, ensuring all the filling is securely tucked. Repeat this process until all the filling is used, creating the perfect Garlic Chicken Wraps.
Step 5: Toast Wraps
In the same skillet, melt 1-2 tablespoons of butter over medium heat. Once melted, carefully place the wraps seam-side down into the skillet, cooking for 2-3 minutes until golden brown and crispy. Flip the wraps and repeat on the other side, giving them that irresistible crunchy exterior while the cheese inside remains warm and gooey.
Step 6: Serve
Remove the wraps from the skillet and let them rest for a minute to cool slightly. This step helps prevent the filling from spilling out when you slice them. Once rested, slice each wrap in half, garnish with fresh parsley if desired, and serve alongside your favorite dipping sauce or salad for a comforting and satisfying meal.
Make Ahead Options
These Cheesy Garlic Chicken Wraps are an ideal choice for meal prep enthusiasts! You can prepare the delicious filling (chicken, garlic, and cheese mixture) up to 24 hours in advance and store it in an airtight container in the refrigerator to maintain its freshness. Simply assemble the wraps right before serving; this way, they’ll be just as gooey and flavorful! You can also wrap the assembled but un-toasted wraps tightly in plastic wrap and refrigerate them for up to 3 days. When it’s time to enjoy, toast them in a skillet or oven to achieve that crispy exterior, ensuring a comforting meal that’s quick, easy, and just as delicious as if made fresh!
What to Serve with Cheesy Garlic Chicken Wraps
Transform your weeknight dinner with side dishes that harmonize beautifully with the flavors of these cheesy delights!
-
Fresh Green Salad: A light, crisp salad with mixed greens and a tangy vinaigrette balances the warm, cheesy wraps, adding a refreshing crunch.
-
Seasoned Potato Wedges: Crispy potato wedges seasoned with herbs offer a satisfying textural contrast and enhance the wrap’s comforting vibe. Pairing these two together makes for a delightful bite.
-
Tomato Soup: A warm bowl of creamy tomato soup brings nostalgia and comfort, inviting you to dip those wraps into its savory goodness; it’s a match made in comfort food heaven.
-
Coleslaw: The creamy and crunchy elements of coleslaw complement the savory wraps while adding a pop of brightness and freshness to your plate.
-
Roasted Veggies: Colorful roasted vegetables like bell peppers and zucchini not only provide vitamins but also add roasted sweetness that pairs beautifully with the garlic and cheese.
-
Garlic Butter Knots: For the ultimate garlic experience, serve soft, buttery garlic knots on the side; they are perfect for mopping up any leftover cheese or sauce.
-
Crispy Pickles: Tangy, crunchy pickles create a satisfying contrast to the wraps, enhancing each bite with their zesty flavor profile.
-
A Light Beer or Lemonade: A chilled bottle of light beer or refreshing lemonade can be the perfect beverage pairing, elevating the entire meal’s experience and aiding in its comforting nature.
Let your meal assembly shine by mixing and matching these sides with your Cheesy Garlic Chicken Wraps for a dinner that warms the heart!
Garlic Chicken Wraps: Customize Your Way
Feel free to make these wraps your own by mixing and matching ingredients for an exciting twist on a classic!
- Cheese Swap: Use gouda for a creamier experience or pepper jack for a spicy bite. The cheese you choose can completely change the flavor profile!
- Veggie Power: Add fresh spinach, sautéed mushrooms, or bell peppers to incorporate some vibrant colors and healthy nutrients. Each veggie brings its own unique flavor and texture!
- Protein Alternatives: Swap ground turkey or chicken for the diced chicken if you’d like a different texture; you could even try tofu for a vegetarian option. There’s so much versatility in protein!
- Spice It Up: Incorporate jalapeños or crushed red pepper for an extra kick, perfect if you love heat. Just a little can make a big difference in flavor.
- Herb Infusion: Experiment with different herbs such as cilantro or taco seasoning for a distinct taste. Fresh herbs can elevate the dish and surprise your taste buds!
- Low-Carb Option: Try using lettuce wraps instead of tortillas for a lighter, low-carb variant; they are still delicious and refreshing. Keep your meals light and fresh during warm weather!
- Garlic Butter Finish: Brush your tortillas with garlic butter before toasting for extra aromatic layers of flavor; it’s a simple way to enhance every bite.
- Zesty Dipping Sauces: Pair these wraps with zesty sauces like salsa verde or a creamy chipotle sauce for an exciting flavor contrast. Dipping can make meal times even more enjoyable!
For even more delicious ideas, check out my Garlic Parmesan Chicken or try something a little more adventurous with Chilli Chicken Takeout.
Expert Tips for Garlic Chicken Wraps
- Use Rotisserie Chicken: For an even quicker dinner, opt for rotisserie chicken instead of cooking from scratch—saving time without sacrificing flavor.
- Avoid Burnt Garlic: Watch the garlic closely while sautéing; it can burn quickly. Aim for golden, not brown, to maintain the lovely aroma inherent in these Garlic Chicken Wraps.
- Perfectly Crispy Wraps: Ensure your skillet is adequately heated before adding the wraps to achieve that golden, crispy exterior. A non-stick skillet can help prevent sticking.
- Resting Time Matters: Allowing the wraps to rest for a minute after cooking before slicing helps prevent the warm filling from spilling out, ensuring neat servings.
- Customize Generously: Don’t hesitate to adjust spices and fillings based on your family’s preferences. More veggies or different cheeses can elevate your Garlic Chicken Wraps to the next level!
How to Store and Freeze Garlic Chicken Wraps
Fridge: Store leftover wraps in an airtight container for up to 3 days. Reheat in a skillet over medium heat to maintain crispiness.
Freezer: Wrap individual portions tightly in plastic wrap or foil, then place in a freezer bag. They can last up to 2 months. Thaw overnight in the fridge before reheating.
Reheating: For best results, reheat frozen wraps in a skillet or toaster oven for 10-15 minutes at 350°F (175°C) until heated through and crispy.
Make-Ahead: Prepare the filling in advance and store it in the fridge for up to 2 days. Assemble and toast the wraps when ready to enjoy your Garlic Chicken Wraps.
Cheesy Garlic Chicken Wraps Recipe FAQs
What type of chicken is best for the wraps?
Absolutely! You can use any cooked chicken, but rotisserie chicken is a fantastic choice for convenience. It cuts down prep time significantly while still being juicy and flavorful.
How should I store leftover wraps?
After enjoying these cheesy delights, store any leftovers in an airtight container in the fridge for up to 3 days. To reheat, pop them in a skillet over medium-low heat for about 5-7 minutes to maintain their crispy texture.
Can I freeze the Cheesy Garlic Chicken Wraps?
Very! To freeze, wrap each prepared wrap tightly in plastic wrap or foil. Then, place them in a freezer bag. They can be stored in the freezer for up to 2 months. When ready to eat, simply thaw them overnight in the fridge and reheat in a skillet for the best results!
What if my cheese doesn’t melt properly?
If you find that your cheese isn’t melting well, try using a lower moisture cheese, such as cheddar or gouda. Also, ensure your skillet is appropriately heated before adding the wraps. Consider covering the pan for a minute or two to trap heat and help the cheese melt perfectly.
Are these wraps suitable for those with gluten allergies?
Absolutely! You can easily make these Cheesy Garlic Chicken Wraps gluten-free by opting for gluten-free tortillas, which have become widely available. Just double-check the packaging for any allergens to suit your needs.
How do I customize the fillings in my wraps?
The more the merrier! Feel free to get creative: add sautéed spinach, diced bell peppers, or even beans for added texture and nutrition. Adjust your spices by adding crushed red pepper or jalapeños for a spicy twist—your wraps, your rules!
Garlic Chicken Wraps: Quick, Cheesy Comfort in Every Bite
Ingredients
Equipment
Method
- Preheat your oven to 375°F (190°C). Season chicken with salt and pepper, bake for 20-25 minutes or until cooked through. Dice into small pieces.
- Heat olive oil in a skillet over medium heat. Sauté minced garlic until fragrant, about 30 seconds to 1 minute, without burning.
- Add diced chicken to the skillet and toss to coat. Off heat, stir in shredded cheese, allowing it to melt slightly.
- Lay a tortilla on a surface, spoon filling into the center, fold the sides, and roll tightly.
- Melt butter in the skillet. Place wraps seam-side down and cook 2-3 minutes on each side until golden and crispy.
- Let wraps rest for a minute, slice in half, garnish with parsley, and serve with dipping sauce or salad.