


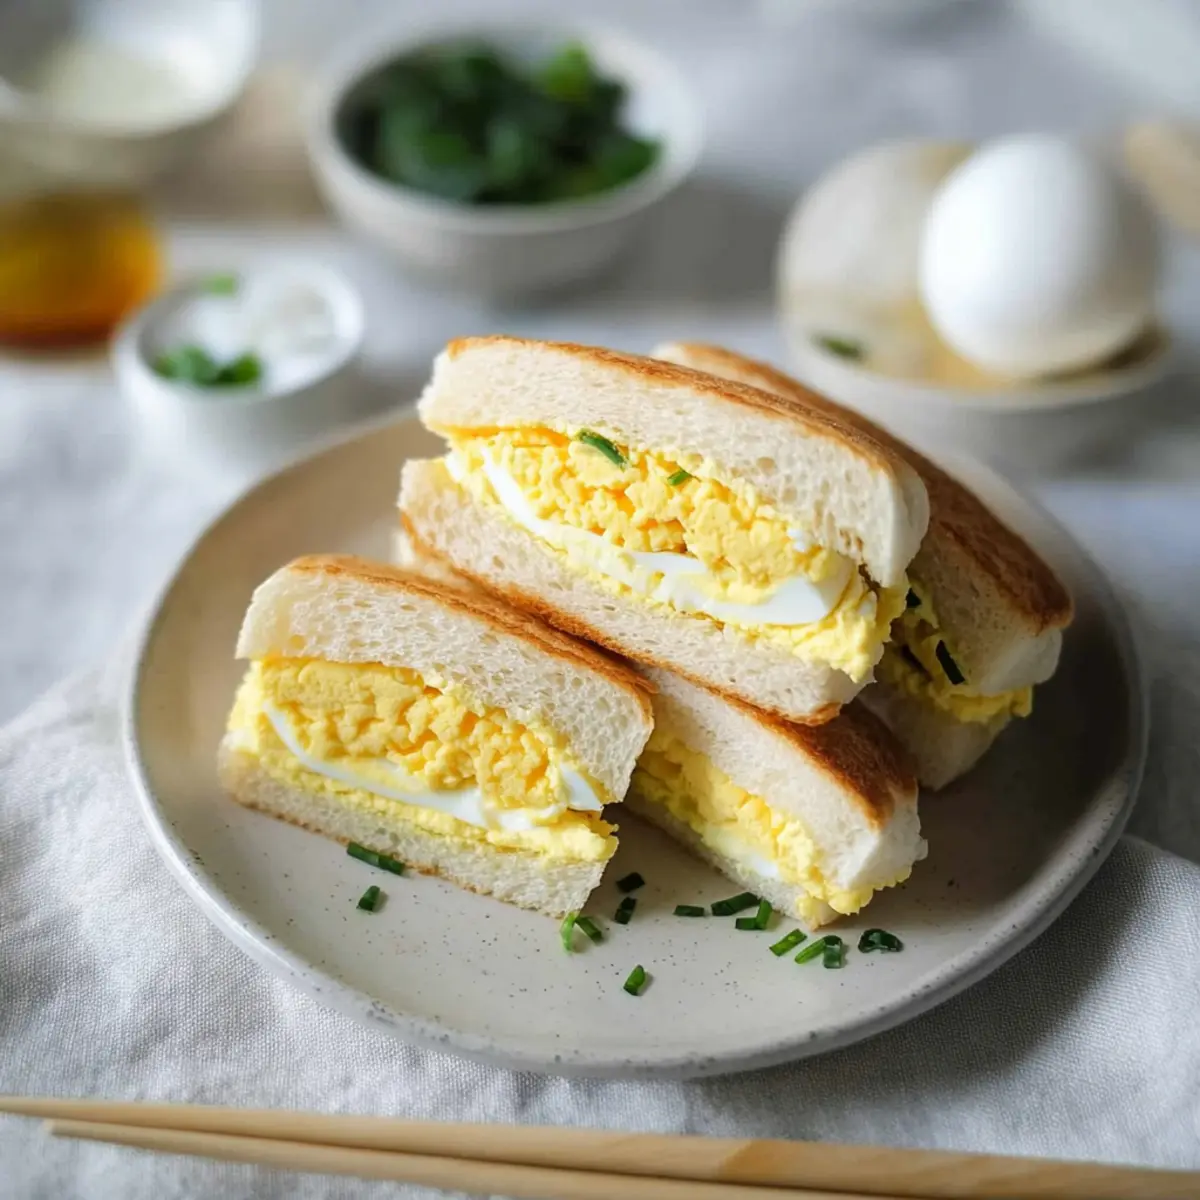
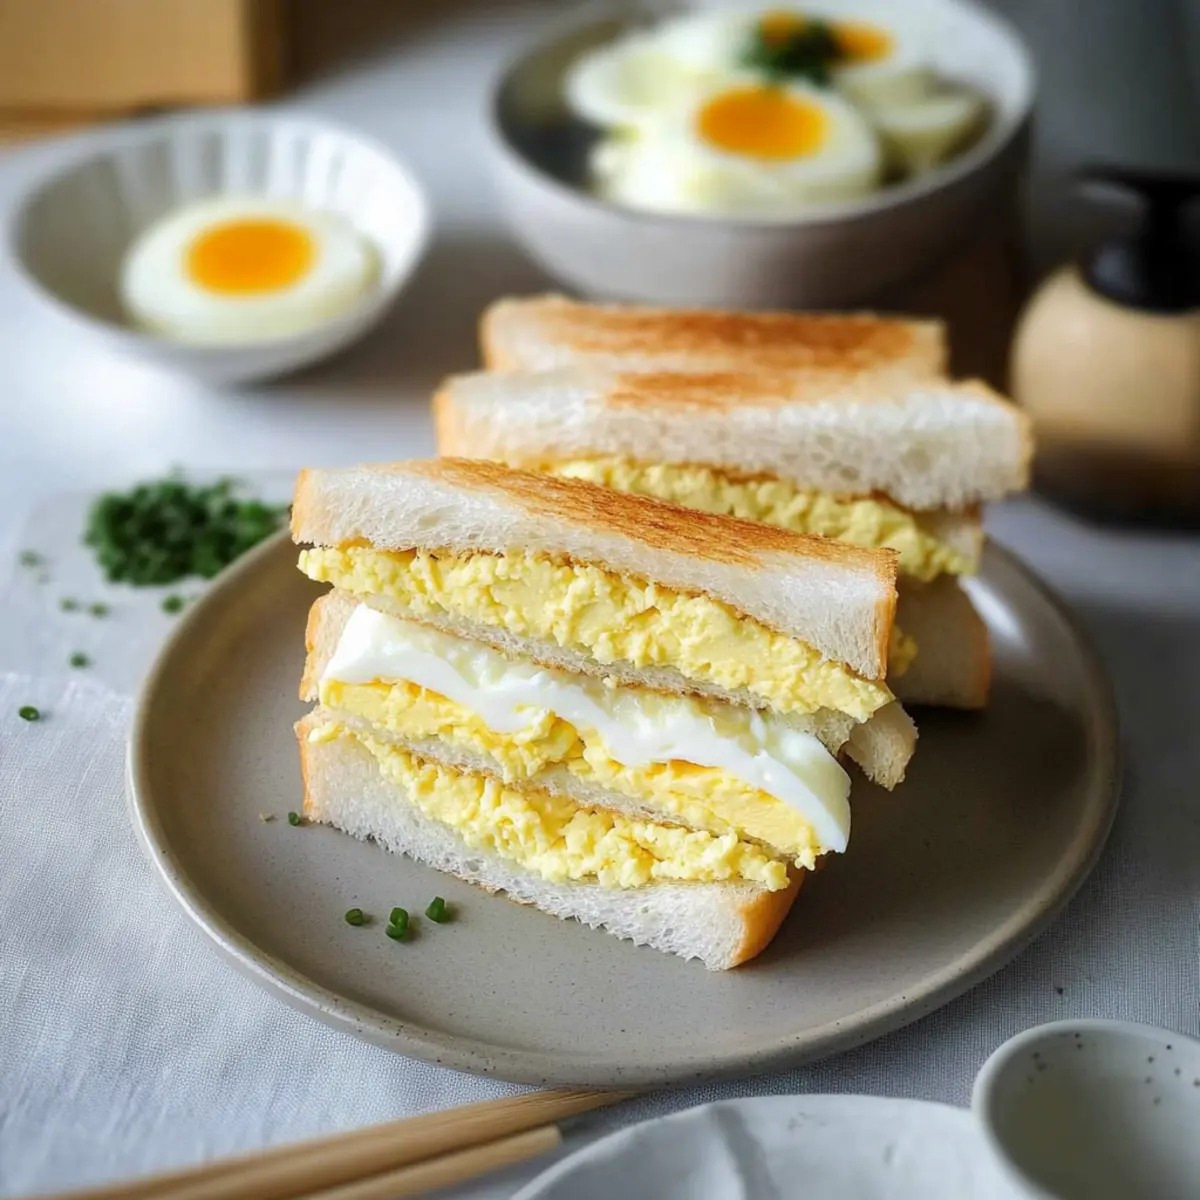
There’s something magical about the way a perfectly cooked egg transforms into a comforting dish, and that’s exactly the allure of the Japanese Egg Sandwich, also known as Tamago Sando. With its rich, buttery egg mayonnaise tucked between soft, fluffy shokupan, each bite is an inviting embrace of creamy goodness and airy bread. This delightful sandwich not only serves as a quick snack but also stands out as a light lunch option that showcases the beauty of Japanese convenience store cuisine, now made effortlessly in your own kitchen. What’s more, it’s a vegetarian treat that fits seamlessly into any meal plan, appealing to all food lovers. Are you ready to bring a taste of Japan to your table? Let’s dive into this simple yet soul-satisfying recipe!

Why is Tamago Sando So Irresistible?
Simplicity: This Japanese Egg Sandwich is a breeze to make. With minimal ingredients, it’s perfect for those who crave a homemade meal without fussing over complicated techniques.
Creamy Goodness: The silky egg mayonnaise, enhanced by Kewpie mayo, creates an indulgent flavor that’s impossible to resist. Each bite offers a delightful balance of richness and lightness.
Versatile Fillings: Feel free to personalize your Tamago Sando by adding fresh herbs or vegetables for an exciting twist. It’s adaptable to suit your taste preferences!
Crowd-Pleaser: Whether for a family meal or a gathering with friends, this sandwich satisfies cravings and sparks conversations, making it a fantastic addition to your menu.
Quick Snack: Ready in under 30 minutes, it’s the ideal solution for busy days when you need something delicious and fulfilling. If you’re looking for more easy recipes, you might also enjoy the Honey Banana Sandwich or the Avocado Melt Sandwich!
Japanese Egg Sandwich Ingredients
• Here’s what you need for the perfect homemade Tamago Sando.
For the Egg Filling
- Large-sized eggs (6) – Essential for a creamy filling; use room temperature eggs for even cooking.
- Large-sized egg (1, optional) – Medium-boiled for a rich and runny yolk; enhances visual appeal.
- Whole milk (2 tsp) – Adds extra creaminess; can be substituted with any milk or omitted for a dairy-free version.
- Kewpie Japanese Mayonnaise (4 tbsp) – Provides a unique flavor that’s essential for an authentic taste.
- White granulated sugar (½ tsp) – Balances savory and sweet notes in the filling.
- Salt (¾ tsp, preferably Diamond Crystal) – Brings out the flavors; adjust if using table salt.
- Black pepper (¼ tsp) – Adds a subtle kick; can be adjusted or omitted to suit preferences.
For the Sandwich Assembly
- Shokupan (4 slices, crusts removed) – Soft, fluffy bread that forms the base of your sandwich; substitute with fresh white bread if needed.
- Unsalted butter – For spreading on the bread; enriches the flavor, though it can be omitted for a lighter option.
- Chives (1 tbsp, finely chopped, optional) – Adds color and a mild onion flavor to elevate the sandwich aesthetic.
For Cooking
- Water – Essential for boiling the eggs; ensure there’s enough to fully cover them.
- Ice – Creates an ice bath to halt cooking after boiling, ensuring the perfect texture.
Step‑by‑Step Instructions for Japanese Egg Sandwich
Step 1: Prepare Eggs
To begin making your Japanese Egg Sandwich, bring a pot of water to a boil over medium heat. Gently add six large eggs and let them boil for 9 minutes for hard-boiling. After the time is up, promptly transfer the eggs to an ice bath for at least 5 minutes to stop the cooking process, resulting in perfect, creamy yolks. If using one medium-boiled egg, boil it for 7 minutes and 30 seconds before placing it in the ice bath.
Step 2: Make Filling
Once the hard-boiled eggs have cooled, peel them and slice in half. In a mixing bowl, mash the yolks and whites together until you achieve a creamy consistency. Stir in 2 teaspoons of whole milk, 4 tablespoons of Kewpie mayonnaise, ½ teaspoon of sugar, ¾ teaspoon of salt, and ¼ teaspoon of black pepper. Mix until everything is well combined, then refrigerate the filling for 10 minutes to allow the flavors to meld beautifully.
Step 3: Assemble Sandwich
Prepare your shokupan by cutting off the crusts from the four slices, creating a neat edge. Butter one side of each slice generously for added richness. On the buttered side of two slices, place the medium-boiled egg, then spread the chilled egg filling evenly over the eggs. This creamy mixture is the star of your Japanese Egg Sandwich, making sure to add enough for a hearty bite.
Step 4: Finish
Top your assembled fillings with the remaining two buttered slices, ensuring the buttered side is facing down. Press gently to help the sandwich hold together, then slice the sandwiches in half diagonally for a beautiful presentation. Serve immediately for the best texture, allowing that rich, creamy filling to shine in each delightful bite of your homemade Tamago Sando.
Japanese Egg Sandwich Variations
Embrace creativity with these delightful twists and substitutions for your Tamago Sando, each bite a chance to explore new flavors!
- Dairy-Free: Swap whole milk with almond or oat milk and omit butter for a lighter, vegan-friendly sandwich.
- Herb-Infused: Stir in fresh dill or parsley into your egg filling for a fragrant twist that elevates each delightful bite.
- Spicy Kick: Add a dash of sriracha or a pinch of chili flakes to the filling for a little heat that brings excitement to your palate.
- Avocado Creaminess: Mash in ripe avocado alongside the eggs for a luscious richness that pairs beautifully with the creamy filling.
- Crunchy Veggies: Include finely chopped cucumbers or radishes in the mix for added crunch and refreshing flavors, reminiscent of a crisp garden.
- Savory Umami: Mix in a bit of finely chopped nori (seaweed) to give your sandwich the subtle oceanic flavor found in Japanese cuisine.
- Texture Play: Try using a crusty baguette instead of shokupan for a delightful contrast of soft filling and crunchy exterior.
- Sweet Surprise: Incorporate a spoonful of sweet pickles or relish into the mixture for a tangy-sweet contrast that brightens the flavors.
Let your imagination run wild! And if you’re looking for something equally scrumptious, you might also enjoy a delightful Croissant Breakfast Sandwich or an indulgent Bbq Chicken Sandwich.
How to Store and Freeze Japanese Egg Sandwich
Fridge: Keep any leftover Tamago Sando in an airtight container for up to 3 days. Ensure the filling is well-covered to prevent it from drying out.
Freezer: While not ideal, you can freeze the sandwich for up to 1 month. Wrap tightly in plastic wrap and then in foil to avoid freezer burn.
Reheating: Thaw overnight in the fridge before reheating. Use the microwave for 15-30 seconds on medium power, but enjoy freshly made sandwiches for the best flavor and texture.
Serving Suggestion: For the best taste experience, eat your Japanese Egg Sandwich fresh; the creaminess of the filling and fluffiness of the bread are unbeatable!
Make Ahead Options
These Japanese Egg Sandwiches are perfect for meal prep enthusiasts! You can prepare the egg filling up to 24 hours in advance by boiling and mashing the eggs as described in the recipe. After mixing in the Kewpie mayonnaise, milk, sugar, salt, and pepper, refrigerate the filling in an airtight container to keep it fresh and flavorful. You can also slice the shokupan and butter the bread ahead of time, storing it in the refrigerator for a few hours. When you’re ready to serve, simply assemble the sandwiches by layering the medium-boiled egg and chilled filling between the bread. This way, you’ll enjoy delicious, homemade Tamago Sando with minimal effort, perfect for busy weeknights!
What to Serve with Japanese Egg Sandwich
Imagine a delightful spread that brings out the comforting flavors and textures of your Tamago Sando, enhancing your meal experience.
-
Green Tea: This warm, earthy beverage complements the creamy egg filling beautifully, offering a soothing balance to the meal’s richness.
-
Japanese Pickles (Tsukemono): Their crunchy and tangy profile brightens each bite of the sandwich, providing a refreshing contrast to the creamy texture.
-
Cucumber Salad: Light and crisp, a simple cucumber salad tossed in rice vinegar adds brightness and cuts through the richness of the egg sandwich.
-
Fruits like Strawberries or Melon: Juicy, sweet fruits serve as a perfect palate cleanser, enhancing the overall dining experience with freshness.
Enjoying your Tamago Sando with these accompaniments not only creates a well-rounded meal but also adds layers of flavor and texture that elevate simple comfort food into a delightful feast!
Expert Tips for Japanese Egg Sandwich
-
Egg Boiling Time: Adjust boiling times based on egg size; larger eggs may need an extra 30 seconds to achieve perfect hard-boiled texture.
-
Kewpie Mayo Importance: Don’t substitute regular mayonnaise! Kewpie’s unique creaminess and slight sweetness elevate the flavors of the Japanese Egg Sandwich significantly.
-
Cooling Technique: Always use an ice bath after boiling to stop the cooking. This step ensures your yolks remain creamy and prevent overcooking.
-
Bread Choices: While shokupan is ideal, a soft white bread can suffice. Just make sure it’s fresh and fluffy for the best sandwich experience.
-
Mashing Eggs: Mash the boiled eggs well for a creamier filling. If you leave larger chunks, it can disrupt the delightful texture.

Japanese Egg Sandwich Recipe FAQs
What type of eggs should I use for the Japanese Egg Sandwich?
Absolutely! Using large-sized eggs is essential for creating a creamy filling. Opt for room temperature eggs to ensure even cooking throughout.
How should I store leftover Tamago Sando?
Store any leftover sandwiches in an airtight container in the refrigerator for up to 3 days. Make sure the filling is covered to prevent it from drying out and losing its delightful creaminess.
Can I freeze Japanese Egg Sandwiches?
You can! While not ideal, wrap the sandwiches tightly in plastic wrap and then in foil to prevent freezer burn. They can be frozen for up to 1 month. Thaw overnight in the fridge and reheat gently in the microwave before serving for the best results.
What if my eggs are difficult to peel?
Very! If you find that your hard-boiled eggs are challenging to peel, try using slightly older eggs. They tend to peel more easily than fresh ones. Additionally, remember to place the boiled eggs in an ice bath immediately after cooking—this halts the cooking process and can also help with peeling.
Can I customize the filling for the Tamago Sando?
Of course! Feel free to add finely chopped chives, herbs, or even veggies like cucumber for a fresh twist. Personalizing your sandwich not only enhances flavor but also adds a delightful touch to your homemade Tamago Sando.
Is Kewpie mayonnaise necessary for this recipe?
Yes, it’s a must! Kewpie mayonnaise contributes a rich, unique flavor that is different from regular mayonnaise, making your Japanese Egg Sandwich truly authentic. If unavailable, a regular mayonnaise can be used, but the taste will vary.
Japanese Egg Sandwich: A Creamy Twist on Comfort Food
Ingredients
Equipment
Method
- Bring a pot of water to a boil over medium heat. Add six large eggs and boil for 9 minutes. Transfer to an ice bath for 5 minutes to stop cooking.
- If using a medium-boiled egg, boil it for 7 minutes and 30 seconds.
- Peel the cooled hard-boiled eggs and slice in half. Mash yolks and whites in a bowl until creamy.
- Stir in milk, Kewpie mayonnaise, sugar, salt, and pepper. Mix until combined and refrigerate for 10 minutes.
- Cut the crusts off the shokupan. Butter one side of each slice. On two slices, place the medium-boiled egg.
- Spread the chilled egg filling over the eggs. Top with remaining buttered slices, buttered side down, and press gently.
- Slice sandwiches in half diagonally for presentation and serve immediately.