


A delightful aroma wafts through the kitchen as I whip up a batch of Loaded Brownie Cheesecake Cups, a dessert that feels like a warm hug after a long day. These charming little cups offer the best of both worlds—rich brownie bases mingled with a silky cheesecake layer—perfect for any occasion, from busy weeknights to unexpected guest visits. With their quick prep time and individual servings, they not only satisfy those sweet cravings but also make for a stunning centerpiece at any gathering. Imagine indulging in a treat that combines decadent flavors while allowing you to feel good about portion control. Are you ready to make these irresistible bites? Let’s dive into the recipe!
Why Are These Cheesecake Cups Irresistible?
Indulgent, Flavorful Layers: Each cup features a rich brownie base topped with silky cheesecake, creating a symphony of tastes that dance on your palate.
Easy to Make: The straightforward steps ensure that even novice bakers can whip these up with confidence.
Perfectly Portioned Delight: Individual servings make it easy to satisfy your sweet tooth without overindulging.
Customizable Creations: Feel free to experiment with toppings and mix-ins like fresh berries or flavored extracts for a unique twist.
Crowd-Pleaser Appeal: These charming cups are sure to impress guests at any gathering, whether it’s a casual dinner or a fancy celebration.
Get ready to enjoy these Loaded Brownie Cheesecake Cups that are perfect for any occasion!
Loaded Brownie Cheesecake Cups Ingredients
For the Brownie Base
• Brownie Mix – Provides the structure and sweetness; opt for a gluten-free mix for a gluten-free option.
• Vegetable Oil – Adds moisture and richness; melted coconut oil is a tasty substitute for a hint of coconut flavor.
• Egg – Acts as a binding agent; consider using a flax egg for a vegan-friendly version.
• Water – Essential to hydrate the dry brownie mix.
For the Cheesecake Layer
• Cream Cheese – This creamy layer is crucial; Greek yogurt or dairy-free cream cheese can lighten it up or make it vegan.
• Granulated Sugar – Brings sweetness to the cheesecake layer.
• Vanilla Extract – Enhances flavor; always choose pure vanilla for a richer taste.
• Sour Cream – Adds creaminess and a tangy flavor; Greek yogurt can work as a substitute.
• Mini Chocolate Chips – Contributes extra chocolate flavor and delightful texture; optional but highly recommended for added richness.
These Loaded Brownie Cheesecake Cups ingredients come together to create an indulgent dessert experience you won’t want to miss!
Step-by-Step Instructions for Loaded Brownie Cheesecake Cups
Step 1: Preheat and Prepare
Begin by preheating your oven to 350°F (175°C). While the oven is heating, line a muffin tin with cupcake liners to ensure easy removal later. This preparation step sets the stage for your Loaded Brownie Cheesecake Cups, helping them bake evenly and thoroughly.
Step 2: Mix Brownie Batter
In a medium mixing bowl, combine the brownie mix, vegetable oil, egg, and water. Stir until the mixture is glossy and smooth, ensuring there are no dry spots. Once ready, fill each cupcake liner halfway with the brownie batter, making sure to spread it evenly for consistent baking throughout.
Step 3: Bake Brownie Bases
Place the muffin tin in the preheated oven and bake for 10-12 minutes. To check for doneness, insert a toothpick into the center; it should come out with a few moist crumbs attached. Once baked, remove the tin from the oven and allow the brownie bases to cool for about 5-10 minutes in the pan.
Step 4: Prepare Cheesecake Mixture
In a separate bowl, beat the softened cream cheese with an electric mixer until it’s smooth and creamy. Gradually add in the granulated sugar and vanilla extract, mixing until fully combined. Follow up by incorporating the egg and sour cream until the mixture becomes velvety, then fold in the mini chocolate chips for that extra chocolatey goodness.
Step 5: Assemble the Cups
Once the brownie bases have cooled slightly, spoon the cheesecake mixture over them, filling almost to the top. This layering creates the signature textures of the Loaded Brownie Cheesecake Cups. Ensure the mixture is evenly distributed among all the liners for uniform baking.
Step 6: Bake Cheesecake Layers
Return the muffin tin to the oven and bake the layers for 15-18 minutes. The cheesecake should be set and slightly puffed; avoid overbaking to keep that delightful creamy texture. After baking, remove the tin from the oven and allow the cups to cool completely in the pan, about 30 minutes.
Step 7: Chill and Set
Once cooled, carefully transfer the Loaded Brownie Cheesecake Cups to the refrigerator. Allow them to chill for at least 2 hours to enhance their flavors and set the cheesecake layer. Chilling is crucial for achieving that perfect slice and serving texture.
Step 8: Serve and Enjoy
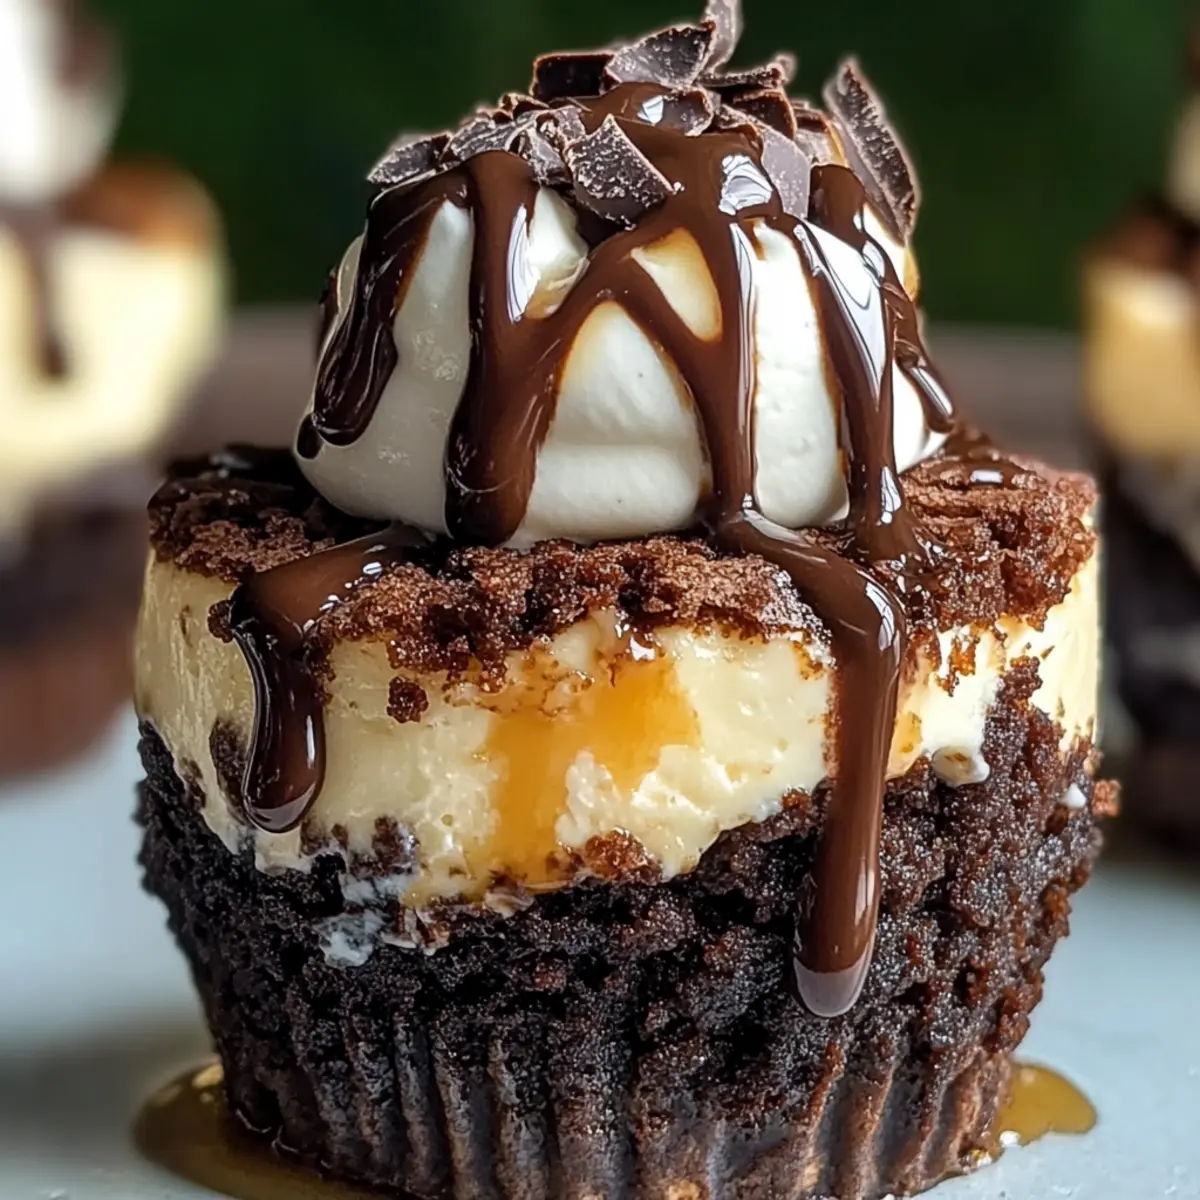
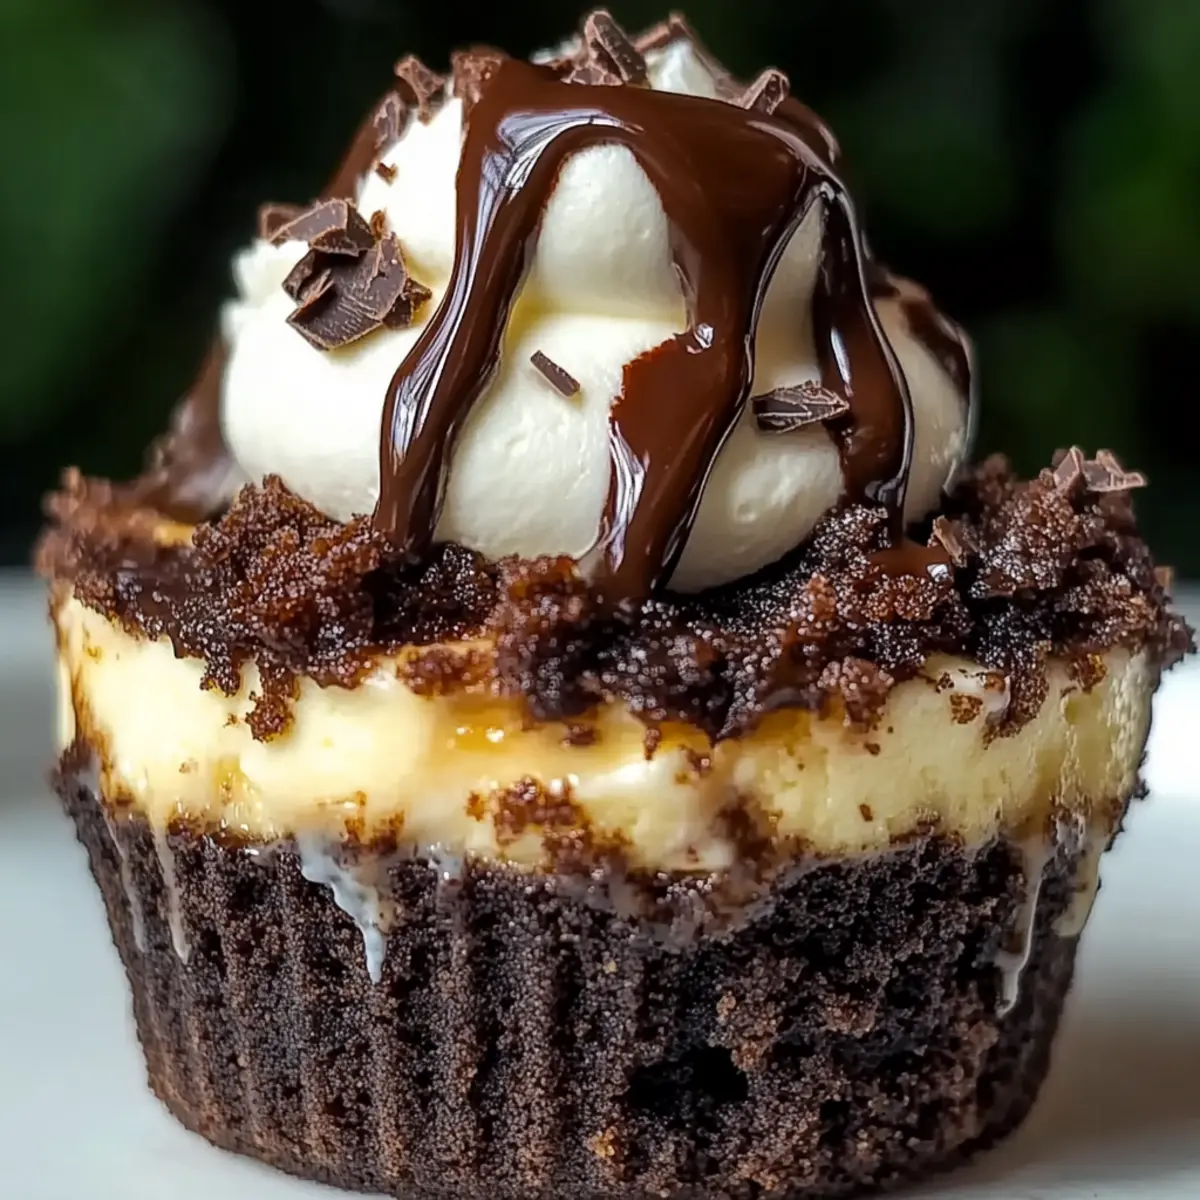
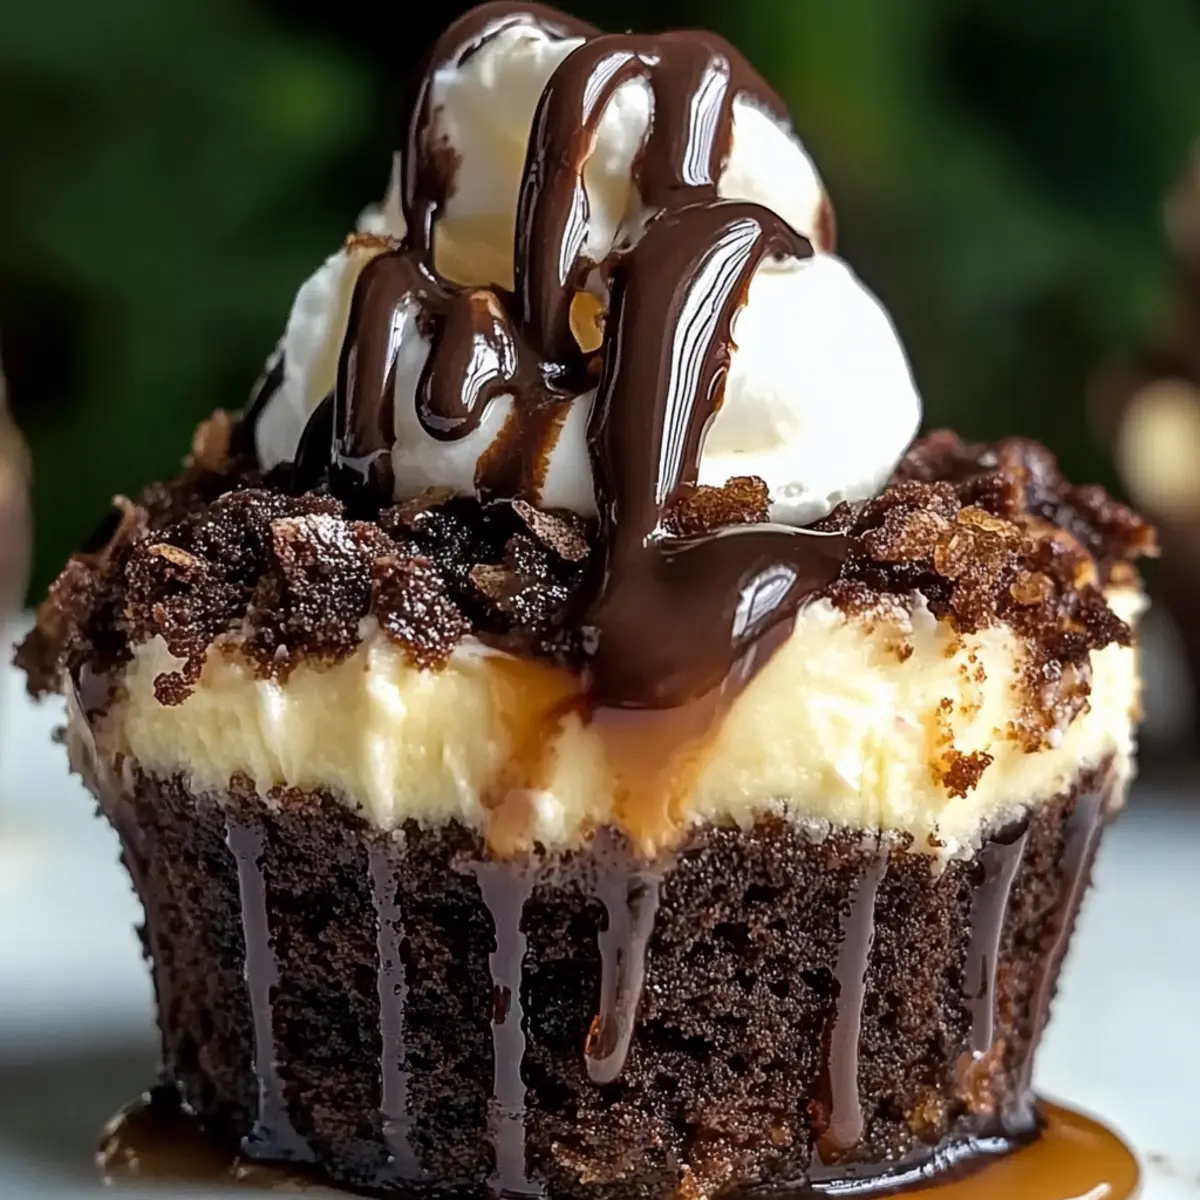
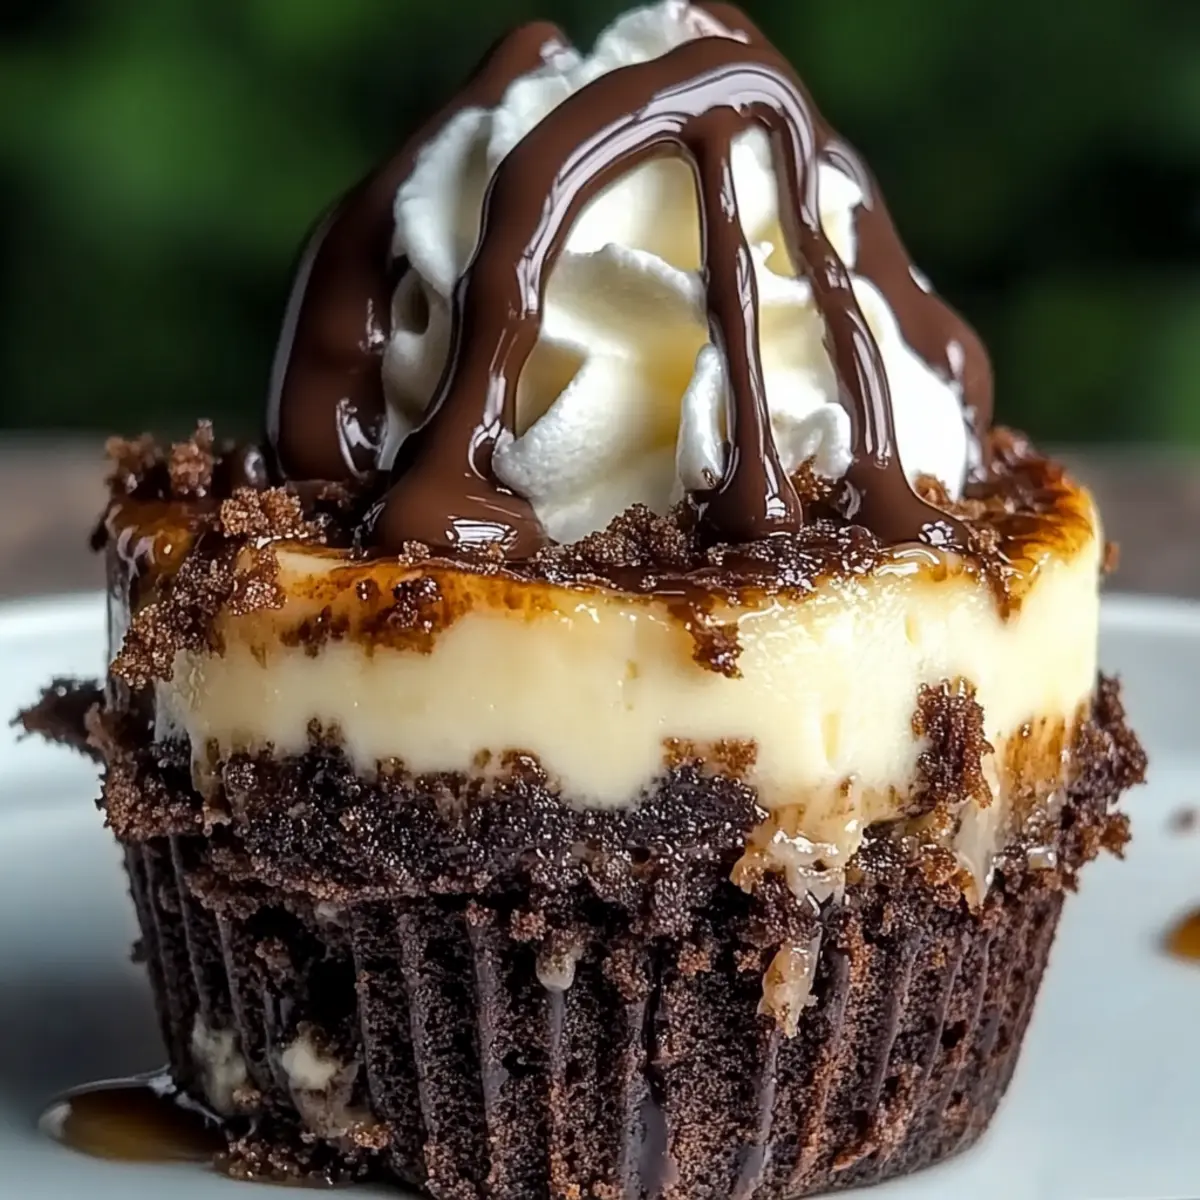
After chilling, your Loaded Brownie Cheesecake Cups are ready to serve! Top each cup with whipped cream, a drizzle of chocolate syrup, and optional crushed nuts for added flair. Delight in these indulgent treats that are sure to impress friends and family alike!
Make Ahead Options
These Loaded Brownie Cheesecake Cups are perfect for meal prep enthusiasts! You can prepare the brownie bases up to 24 hours in advance; simply bake them, let them cool, and then store them in an airtight container in the refrigerator. The cheesecake mixture can also be prepped ahead—mix it and store it in the fridge for up to 3 days before assembly. When you’re ready to serve, spoon the cheesecake topping over the cooled brownie bases, bake, and chill them for a couple of hours. This way, you’ll have an impressive dessert ready with minimal effort, making your busy weeknights a little sweeter!
What to Serve with Loaded Brownie Cheesecake Cups
Looking to elevate your dessert experience? Pairing these individual treasures with complementary delights can create a truly memorable treat.
-
Fresh Berries: The tartness of strawberries or raspberries cuts through the richness, providing a refreshing contrast that brightens each bite.
-
Whipped Cream: A dollop of light, fluffy whipped cream adds an airy texture, perfectly balancing the dense brownie and cheesecake layers.
-
Chocolate Sauce: Drizzling warm chocolate sauce over the cups intensifies the chocolaty flavors and offers a gooey indulgence that chocolate lovers adore.
-
Coffee: A cup of freshly brewed coffee enhances the dessert’s flavors and adds a comforting warmth, making for a delightful post-dinner pairing.
-
Nutty Crunch: Sprinkling crushed nuts like pecans or hazelnuts on top adds a lovely crunch and additional flavor, enhancing the overall dessert experience.
-
Ice Cream: Serving your brownie cheesecake cups with a scoop of vanilla or salted caramel ice cream creates a divine hot-and-cold experience that’s hard to resist.
Let your imagination run wild with these suggestions, and you’ll have an extraordinary dessert table that will impress everyone at your next gathering!
Loaded Brownie Cheesecake Cups Variations
Feel free to explore and personalize these delightful Loaded Brownie Cheesecake Cups with your own creative twists!
- Dairy-Free: Substitute regular cream cheese with a dairy-free version to cater to lactose-intolerant guests.
- Gluten-Free: Use a gluten-free brownie mix for a delicious treat that everyone can enjoy, no matter their dietary restrictions.
- Vegan: Replace the egg with a flax egg and use coconut cream in place of cream cheese for a creamy, plant-based alternative.
- Nutty Addition: Mix in chopped walnuts or pecans into the brownie batter for an added crunch that complements the silky cheesecake layer beautifully.
- Flavor Boost: Try infusing the cheesecake mixture with a splash of orange extract or almond extract for a surprising flavor dimension that will excite your taste buds.
- Peak Chocolate: Swap mini chocolate chips for crushed chocolate-covered pretzels or toffee bits to introduce unexpected textures and flavors.
- Fruity Fun: Top your brownie cups with fresh raspberries or strawberries to brighten the flavors and add a tart contrast to the sweetness.
- Ultimate Sweets: Drizzle with salted caramel or chocolate ganache before serving for an indulgent finish that elevates the whole dessert experience.
Let these variations inspire you! You might even spark new family favorites, just like my beloved family-loved recipes that are always a hit!
How to Store and Freeze Loaded Brownie Cheesecake Cups
Fridge: Store any leftover Loaded Brownie Cheesecake Cups in an airtight container in the refrigerator for up to 3 days. This keeps them fresh and ready for a quick treat!
Freezer: For longer storage, wrap the cheesecake cups individually in plastic wrap, then place them in a freezer-safe bag. They can be frozen for up to 3 months.
Thawing: When you’re ready to enjoy them, transfer the cups to the fridge to thaw overnight. This gradual thaw preserves the texture and flavor beautifully.
Reheating: If you prefer them warm, microwave the cups for about 15-20 seconds, checking frequently to ensure they don’t get too hot. Enjoy the delightful flavors again!
Expert Tips for Loaded Brownie Cheesecake Cups
Cream Cheese Care: Ensure cream cheese is at room temperature for easy mixing; cold cream cheese can lead to lumps in your cheesecake layer.
Watch the Bake: Avoid overbaking the cheesecake layers; they should be set but slightly puffed. Use a toothpick to test doneness.
Cool Completely: Allow brownie bases to cool fully before adding cheesecake mixture, preventing any melting or mixing of layers.
Refrigerate Thoroughly: Chill the cups for at least 2 hours after baking; this not only enhances flavor but also ensures a clean cut when serving.
Portion Control: These Loaded Brownie Cheesecake Cups are great for satisfying your sweet tooth without going overboard—perfect for guilt-free indulgence!
Loaded Brownie Cheesecake Cups Recipe FAQs
What kind of brownie mix should I use?
Absolutely! Use a standard brownie mix for a classic taste, but feel free to opt for a gluten-free mix if dietary needs call for it. Look for packs with terms like “fudgy” or “cake-like” depending on your texture preference!
How should I store Loaded Brownie Cheesecake Cups?
After indulging, store any leftovers in an airtight container in the refrigerator for up to 3 days. This will help keep them fresh and delicious for your next sweet craving. You can also keep them at room temperature for a couple of hours before serving if you’re entertaining!
Can I freeze Loaded Brownie Cheesecake Cups?
Very much! To freeze, wrap each cheesecake cup tightly in plastic wrap, then place them in a freezer-safe bag. They can stay good in the freezer for up to 3 months. When you’re ready to enjoy, transfer them to the fridge for overnight thawing. This method helps maintain their creamy texture!
What can I do if my cheesecake mixture is lumpy?
Oh no! Lumpy cheesecake mixture can happen if cream cheese isn’t softened or fully blended. To prevent this, make sure the cream cheese is at room temperature before mixing. Use a robust mixer to whip it smooth before adding the sugar and other ingredients, ensuring a velvety texture. If lumps still appear, mix longer until achieved!
Are these Loaded Brownie Cheesecake Cups suitable for vegetarians?
Yes, absolutely! These Loaded Brownie Cheesecake Cups are vegetarian-friendly. If you need them to cater to vegan diets, simply swap the egg for a flax egg and use dairy-free cream cheese or Greek yogurt in the cheesecake layer. It’s still a delightful treat!
Can I customize the toppings on these cheesecake cups?
The more the merrier! You can definitely customize your Loaded Brownie Cheesecake Cups. Consider adding fresh berries, crushed nuts, or even a drizzle of caramel or chocolate sauce for that extra flair. Get creative to make it truly your own!
Loaded Brownie Cheesecake Cups to Delight Your Sweet Tooth
Ingredients
Equipment
Method
- Preheat your oven to 350°F (175°C) and line a muffin tin with cupcake liners.
- In a medium mixing bowl, combine the brownie mix, vegetable oil, egg, and water. Mix until smooth, then fill each cupcake liner halfway with the batter.
- Bake for 10-12 minutes, checking doneness with a toothpick. Once baked, cool for 5-10 minutes.
- In a separate bowl, beat the cream cheese until creamy. Gradually mix in sugar and vanilla, then add egg and sour cream, mixing until velvety. Fold in mini chocolate chips.
- Spoon the cheesecake mixture over the cooled brownie bases, filling almost to the top.
- Bake for 15-18 minutes until set and puffed. Cool completely in the pan for about 30 minutes.
- Transfer to the refrigerator and chill for at least 2 hours to set the cheesecake layer.
- Serve topped with whipped cream, chocolate syrup, and optional crushed nuts.