


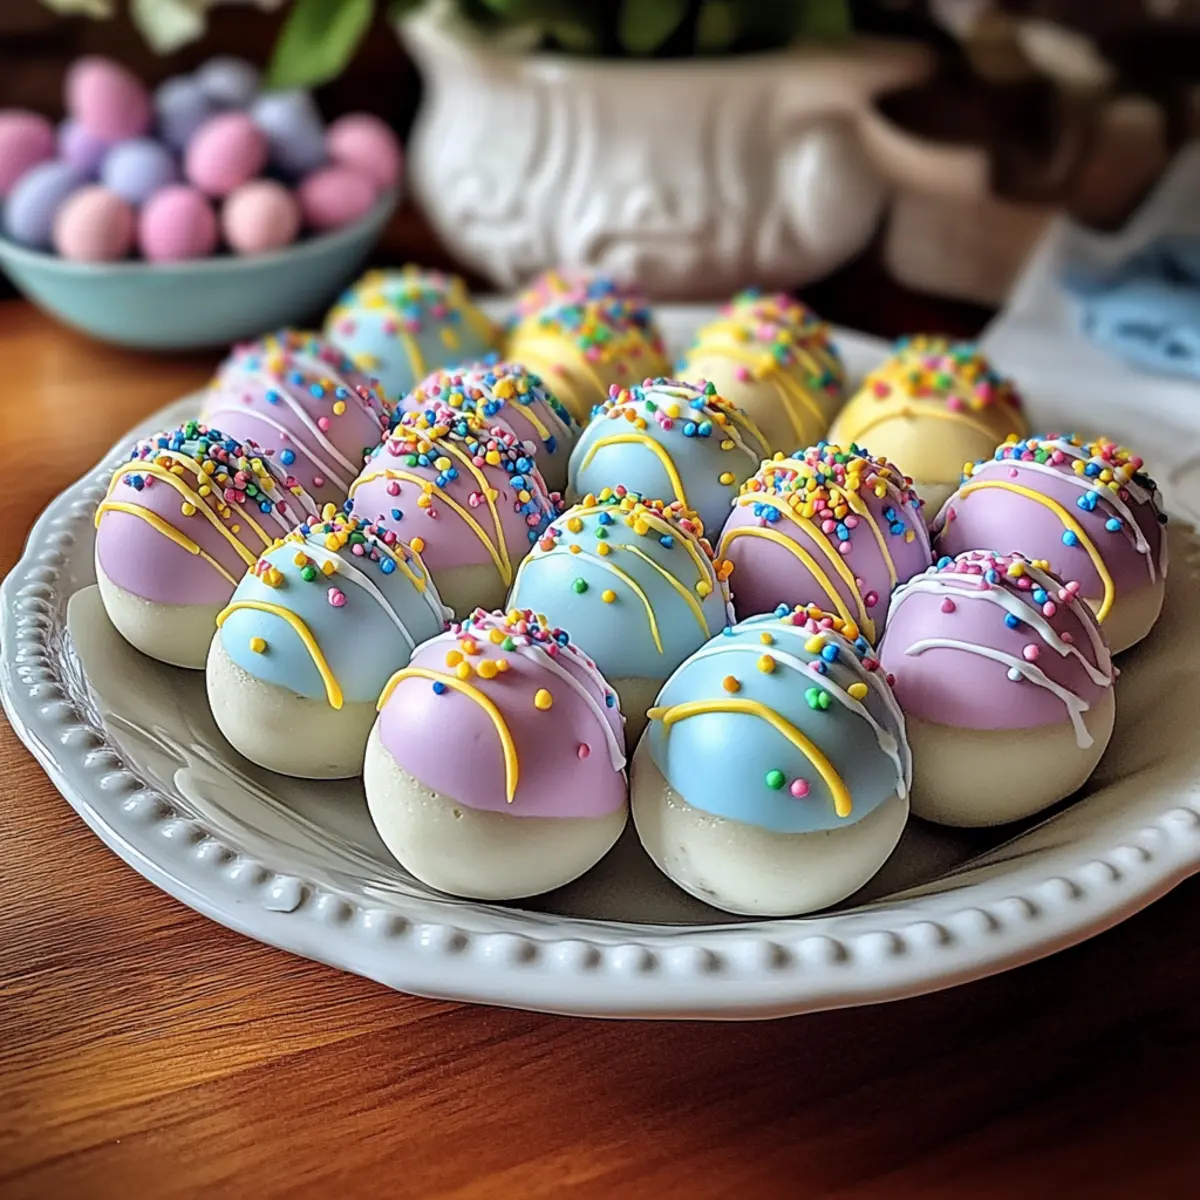
As I stood in the kitchen, the familiar sound of crushed cookies filled the air, whisking me back to joyful springs filled with laughter and celebration. Today, I’m excited to share my recipe for No-Bake Easter Egg Oreo Balls, a fun and festive treat that perfectly captures the essence of the season. These mouthwatering bites blend crunchy Oreo cookies with a creamy center and a colorful candy shell, making them not only easy to whip up but also a hit at any gathering. They’re fully customizable, allowing you to add your favorite decorations or flavors, ensuring they are as unique as the Easter celebrations themselves. Plus, with no baking required, you can spend more time making memories and less time in the kitchen. Ready to create some delightful holiday magic? Let’s dive into this sweet adventure!
Why Are These Oreo Balls So Irresistible?
Ease of Preparation: With only a few simple steps, you’ll have a stunning treat ready in no time. No-Bake Delight: Forget the oven! These Egg Oreo Balls come together quickly, letting you focus on family fun. Customizable: Dress them up with sprinkles or your favorite candy colors for a personal touch. Crowd-Pleasing Flavor: The rich Oreo cookie and creamy filling are a guaranteed hit among all ages. Plus, they make a fantastic addition to your festive dessert table or Easter baskets!
Easter Egg Oreo Balls Ingredients
• To create these delightful no-bake treats, gather these essential ingredients for a sweet spring celebration.
For the Filling
- Oreo Cookies – The base for that signature chocolate flavor; feel free to substitute with Golden Oreos for a lighter twist.
- Cream Cheese – This rich ingredient creates a creamy center; opt for reduced-fat or dairy-free versions if preferred.
- Vanilla Extract (optional) – Adds depth of flavor to your mixture; you can skip it if you prefer a simpler taste.
For the Coating
- White Candy Melts (or White Chocolate Chips) – These form the colorful outer shell; candy melts are user-friendly, but white chocolate chips with added coconut oil work too.
- Pastel Food Coloring – Used to brighten your candy coating; gel food coloring is ideal to maintain consistency without thinning the mix.
For Decoration
- Sprinkles/Sanding Sugar (optional) – Perfect for adding a festive look to your treats; choose a variety of colors to make them pop on the dessert table.
Now that you have your ingredients ready, it’s time to create these fun and festive Easter Egg Oreo Balls!
Step‑by‑Step Instructions for No-Bake Easter Egg Oreo Balls
Step 1: Crush Oreos
Begin by finely crushing 24 Oreo cookies in a food processor or by placing them in a zip-top bag and using a rolling pin. Aim for a crumbly texture with no large chunks, ensuring the creamy filling mixes in well. This should take about 1-2 minutes. Set aside your crushed Oreos for the next step.
Step 2: Mix Filling
In a large mixing bowl, combine the crushed Oreos with 8 ounces of softened cream cheese. If desired, add 1 teaspoon of vanilla extract for extra flavor. Use a spatula or your hands to mix until the ingredients form a thick, cohesive dough. This process should take about 3-4 minutes, and you’ll know it’s ready when it holds its shape well.
Step 3: Shape Mixture
Scoop out approximately 1 tablespoon of the cookie mixture and roll it into an egg shape between your palms. Place each egg on a parchment-lined tray to keep them from sticking. Aim for an even size to ensure uniformity in your No-Bake Easter Egg Oreo Balls. This shaping should take around 10-15 minutes, depending on how many you make.
Step 4: Chill
Refrigerate the shaped eggs for at least 30 minutes to firm up the mixture. Alternatively, you can freeze them for about 15 minutes to speed up the process. The chilling time is crucial, as it helps the balls maintain their shape during the dipping process, so don’t skip this step!
Step 5: Melt Coating
While your egg shapes chill, melt 12 ounces of white candy melts in a microwave-safe bowl. Heat in 30-second intervals, stirring in between, until completely smooth. If you are using white chocolate chips, add 1 teaspoon of coconut oil to help prevent burning and achieve a silky consistency. This should take about 2-3 minutes.
Step 6: Color Coatings
Once melted, divide the candy coating into small bowls if you’d like to create different pastel colors. Add pastel food coloring until you achieve your desired shades—gel food coloring is recommended for brightness. Stir well to ensure even coloring without thinning the mixture, which can be achieved in just a few moments.
Step 7: Dip Eggs
Using two forks or a candy-dipping tool, dip each chilled egg into the colored coating. Gently tap off any excess coating before transferring the dipped egg back to the parchment-lined tray. Aim for a smooth, even layer of candy covering each No-Bake Easter Egg Oreo Ball. Repeat until all eggs are coated, which may take around 10 minutes.
Step 8: Decorate
Before the candy coating sets, bring on the festive spirit by adding sprinkles or drizzling with a contrasting color of melted chocolate. Get creative with your decorations, as this is your chance to personalize your No-Bake Easter Egg Oreo Balls for the occasion. This should take around 5 minutes.
Step 9: Set
Allow your decorated Oreo Balls to sit at room temperature or refrigerate them for about 15-20 minutes until the coating hardens. Once set, your delightful No-Bake Easter Egg Oreo Balls are ready to serve!
What to Serve with No-Bake Easter Egg Oreo Balls
Create a delightful spread to complement these sweet treats and make your Easter celebration even more unforgettable.
-
Fresh Fruit Salad: A vibrant mix of seasonal fruits adds a refreshing contrast to the rich Oreo flavor, balancing the sweetness perfectly.
-
Creamy Vanilla Ice Cream: The cool creaminess of vanilla ice cream enhances the dessert experience, making each bite even more indulgent. Pairing it with warm sauces can add cozy elements.
-
Grasshopper Pie: This minty, no-bake dessert complements the chocolate in the Oreo Balls, adding a festive twist that resonates with Easter themes.
-
Chocolate-Covered Strawberries: Juicy strawberries dipped in rich chocolate echo the indulgent flavors of your Oreo balls while adding a fresh, fruity bite.
-
Lemonade or Iced Tea: Refreshing, zesty drinks, like classic lemonade or sweet iced tea, cleanse the palate, making them perfect companions for your sweet treats.
-
Carrot Cake Cupcakes: These fluffy, spiced cupcakes not only celebrate the season but also offer a delightful texture contrast against the Oreo balls.
By serving these delightful options alongside your No-Bake Easter Egg Oreo Balls, you’re sure to create a memorable feast that keeps everyone coming back for more!
Expert Tips for Easter Egg Oreo Balls
- Perfect Crumbs: Ensure Oreos are crushed evenly to avoid any unblended chunks, which can make the balls crumbly instead of smooth.
- Chill Well: Don’t rush the chilling step! Proper refrigerating lets the mixture firm up, helping your No-Bake Easter Egg Oreo Balls hold their shape during coating.
- Melt Carefully: Melt your candy melts or chocolate in short bursts. Overheating can lead to a grainy texture, ruining the smooth coating you’re aiming for.
- Fork Dipping: Use a fork or candy-dipping tool for a cleaner look while coating. This prevents messy fingers and ensures an even dip!
- Quick Decorating: Work fast when adding sprinkles or further decorations; the coating sets quickly, leaving no time for creativity if you wait too long!
Make Ahead Options
These No-Bake Easter Egg Oreo Balls are a fantastic choice for meal prep, making your festive celebrations easier and more enjoyable! You can prepare the filling, roll the egg shapes, and refrigerate them up to 24 hours in advance. Just ensure to store them in an airtight container to keep them fresh and maintain their firmness. When you’re ready to finish them, simply melt the candy coating and dip the chilled egg shapes before adding your fun decorations. This way, you can save time on busy days and ensure your treats are just as delicious and vibrant when it’s time to serve!
Storage Tips for Easter Egg Oreo Balls
Fridge: Store your No-Bake Easter Egg Oreo Balls in an airtight container in the refrigerator for up to 5 days to maintain their freshness and flavor.
Freezer: These delightful treats can be frozen for up to 2 months! Place them in a single layer on a baking sheet to freeze before transferring to a freezer-safe container.
Reheating: There’s no need to reheat these Oreo balls; simply let them thaw in the fridge for a few hours before serving for the best texture.
Wrapping: If gifting or sharing, wrap the Easter Egg Oreo Balls in festive cellophane or place them in pretty boxes for a lovely presentation that adds to their charm!
Easter Egg Oreo Balls Variations
Feel free to take these delightful treats to the next level and customize them to your heart’s content!
-
Gluten-Free: Substitute regular Oreos with gluten-free versions for a safe and scrumptious treat everyone can enjoy. These still pack a sweet punch and will keep the festivities lively!
-
Nutty Delight: Fold in finely chopped nuts like walnuts or almonds into the filling for a crunchy surprise. This adds an extra layer of texture that’s a hit at Easter gatherings.
-
Dairy-Free: Swap out cream cheese for a vegan cream cheese alternative to make this treat dairy-free while still maintaining that creamy, indulgent feel. Enjoy guilt-free sweetness!
-
Flavor Burst: Experiment with flavored candy melts, like strawberry or mint, to give your balls a unique spin and tantalizing taste. Different flavors will revive the classic treat into a new experience!
-
Chocolate Lover: For an extra chocolatey kick, dip your eggs in melted dark chocolate instead of white candy melts. This rich twist is sure to satisfy even the most passionate chocolate enthusiast.
-
Colorful Fun: Mix in sprinkles or edible glitter into the coating for a sparkly finish that captures the festive spirit of Easter! Everything looks better with a little sparkle, right?
-
Spicy Chocolate: Add a dash of cayenne pepper or chili powder to the chocolate coating for a spicy flavor that surprises the palate. It’s an adventurous twist that brings warmth to the treat!
-
Cookie Crumble Topping: Once dipped, roll the balls in crushed Oreos or graham cracker crumbs for an added crunch and a delightful presentation. Transform these balls into delightful bites that look as good as they taste!
The beauty of making Easter Egg Oreo Balls is that they can be tailored to fit any occasion. Whether you are hosting, gifting, or simply indulging, the options are endless. And if you’re looking for more exciting creations, don’t hesitate to explore additional delicious ideas from our recipe collection!
Easter Egg Oreo Balls Recipe FAQs
What type of Oreo cookies should I use?
Absolutely! You can use classic Oreo cookies for that irresistible chocolate flavor, or you can swap them for Golden Oreos if you prefer a lighter taste. There’s even the option of using sugar-free Oreos for those mindful of sugar intake—whatever tickles your tastebuds!
How should I store leftover Oreo balls?
To keep your No-Bake Easter Egg Oreo Balls fresh, store them in an airtight container in the refrigerator for up to 5 days. If you want to enjoy them later, they freeze beautifully for up to 2 months. Just make sure to layer them between parchment paper in a freezer-safe container to prevent sticking.
Can I freeze the Oreo balls, and how?
Definitely! Freezing your Easter Egg Oreo Balls is easy. First, lay them out in a single layer on a baking sheet and freeze them for about 1-2 hours until they are firm. Then, transfer them to a freezer-safe container, separating layers with parchment paper, and you can enjoy them for up to 2 months. Just allow them to thaw in the fridge for a few hours before serving.
Why are my Oreo balls falling apart?
If your No-Bake Easter Egg Oreo Balls are crumbling, it might be because the Oreo mixture isn’t adequately combined or too dry. Make sure the cream cheese is softened and mixed well with the crushed Oreos until it forms a cohesive dough. If the mixture feels too dry, consider adding a bit more cream cheese to bind it all together!
Are there any allergen considerations with these ingredients?
Yes, absolutely! If you’re making these Oreo balls for others, it’s vital to check for allergies. Cream cheese contains dairy, and Oreos, while often nut-free, can have cross-contamination risks. You can easily switch to dairy-free cream cheese and ensure your cookie choices and coatings are allergy-friendly to accommodate different dietary needs!
How long does it take for the coating to set?
Generally, you’ll want to let your decorated Oreo balls sit at room temperature for about 15-20 minutes for the candy coating to harden. If you’re in a hurry, popping them in the refrigerator for that timeframe can help speed up the process!

No-Bake Easter Egg Oreo Balls for a Festive Spring Treat
Ingredients
Equipment
Method
- Crush Oreos in a food processor or zip-top bag to a crumbly texture.
- Mix crushed Oreos with softened cream cheese and vanilla extract until cohesive.
- Scoop and roll about 1 tablespoon of mixture into egg shapes.
- Chill in the refrigerator for at least 30 minutes to firm up.
- Melt white candy melts in intervals; stir until smooth.
- Divide coating to color it with pastel food coloring.
- Dip each egg into the coating, tapping off excess before placing back on parchment.
- Decorate with sprinkles before the coating sets.
- Allow decorated balls to sit until the coating hardens.