


As the sun sets and a warm breeze drifts through my kitchen, I find myself whisking up a delightful batch of No-Bake Key Lime Pie Mini Desserts. These treats embody the bright, tangy essence of traditional key lime pie, but in a charming, portable format that makes them a hit at any gathering. One of the best parts? They’re super quick to prepare and customizable—perfect if you’re craving something lighter or experimenting with gluten-free options! Just imagine diving into a creamy, luscious filling nestled in a crunchy graham cracker crust, all without the fuss of baking. Are you ready to whip up these little pieces of sunshine for your next occasion?
Why Will You Love These Mini Desserts?
Simplicity, these No-Bake Key Lime Pie Mini Desserts require minimal effort, making them accessible to everyone!
Refreshing Flavor, the combination of tart key lime juice and creamy yogurt creates a mouthwatering taste that delights.
Customization, easily adjust ingredients for gluten-free diets or low-fat preferences to suit your needs.
Portable Treats, perfect for parties or picnics, these mini desserts are ideal for on-the-go enjoyment.
Crowd-Pleaser, their colorful presentation guarantees they will be the star of your dessert table! Don’t forget to check out my tips for making the best no-bake treats, and consider pairing these with iced tea for a refreshing meal experience.
No-Bake Key Lime Pie Mini Desserts Ingredients
For the Crust
• Graham Cracker Crumbs – These provide the structure for the crust; swap with gluten-free cookies for a delightful variation.
• Melted Butter – This binds the crust together; coconut oil is a great dairy-free alternative.
• White Sugar – Adds sweetness; you can reduce the amount or omit it if you prefer a less sweet base.
For the Filling
• Reduced-Fat Cream Cheese – This gives the filling a creamy texture; feel free to use full-fat for a richer experience.
• Low-Fat Vanilla Greek Yogurt – It adds a tangy creaminess; dairy-free yogurt works well if needed.
• Fat-Free Sweetened Condensed Milk – This sweetens the filling beautifully; look for dairy-free options for a vegan twist.
• Key Lime Juice – The main flavor component; strive for fresh juice for the best taste.
• Green Food Coloring (optional) – Adds a fun visual element; can be left out for a more natural appearance.
These No-Bake Key Lime Pie Mini Desserts are not just easy to make but are also fully customizable to fit your dietary preferences. Enjoy the simplicity and delightful flavors!
Step‑by‑Step Instructions for No-Bake Key Lime Pie Mini Desserts
Step 1: Prepare the Crust
In a mixing bowl, combine 1 cup of graham cracker crumbs with 4 tablespoons of melted butter and 2 tablespoons of white sugar until the mixture resembles wet sand. Use your fingers or the back of a spoon to press this mixture firmly into the bottom of mini dessert glasses. Aim for an even layer, and set aside as you prepare the filling.
Step 2: Mix the Filling
In a large mixing bowl, beat together 8 ounces of softened reduced-fat cream cheese and 1 cup of low-fat vanilla Greek yogurt until the mixture is smooth and creamy, which should take about 2 minutes with an electric mixer. In a separate bowl, whisk 1 cup of fat-free sweetened condensed milk with 1/2 cup of freshly squeezed key lime juice until well combined, then gently fold this mixture into the cream cheese blend until fully integrated.
Step 3: Assemble the Desserts
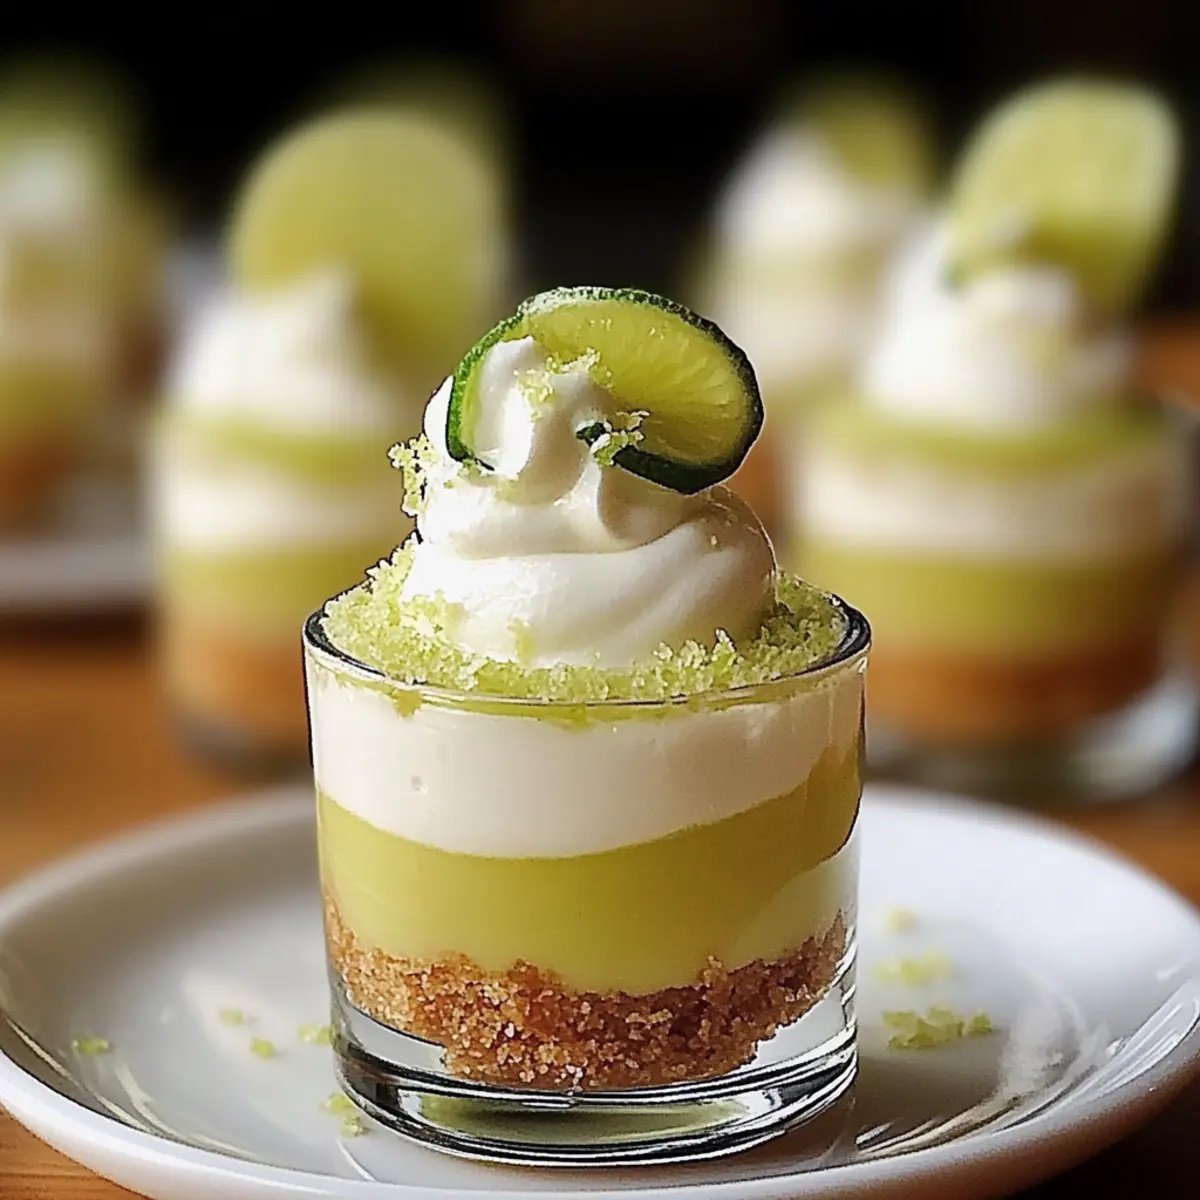
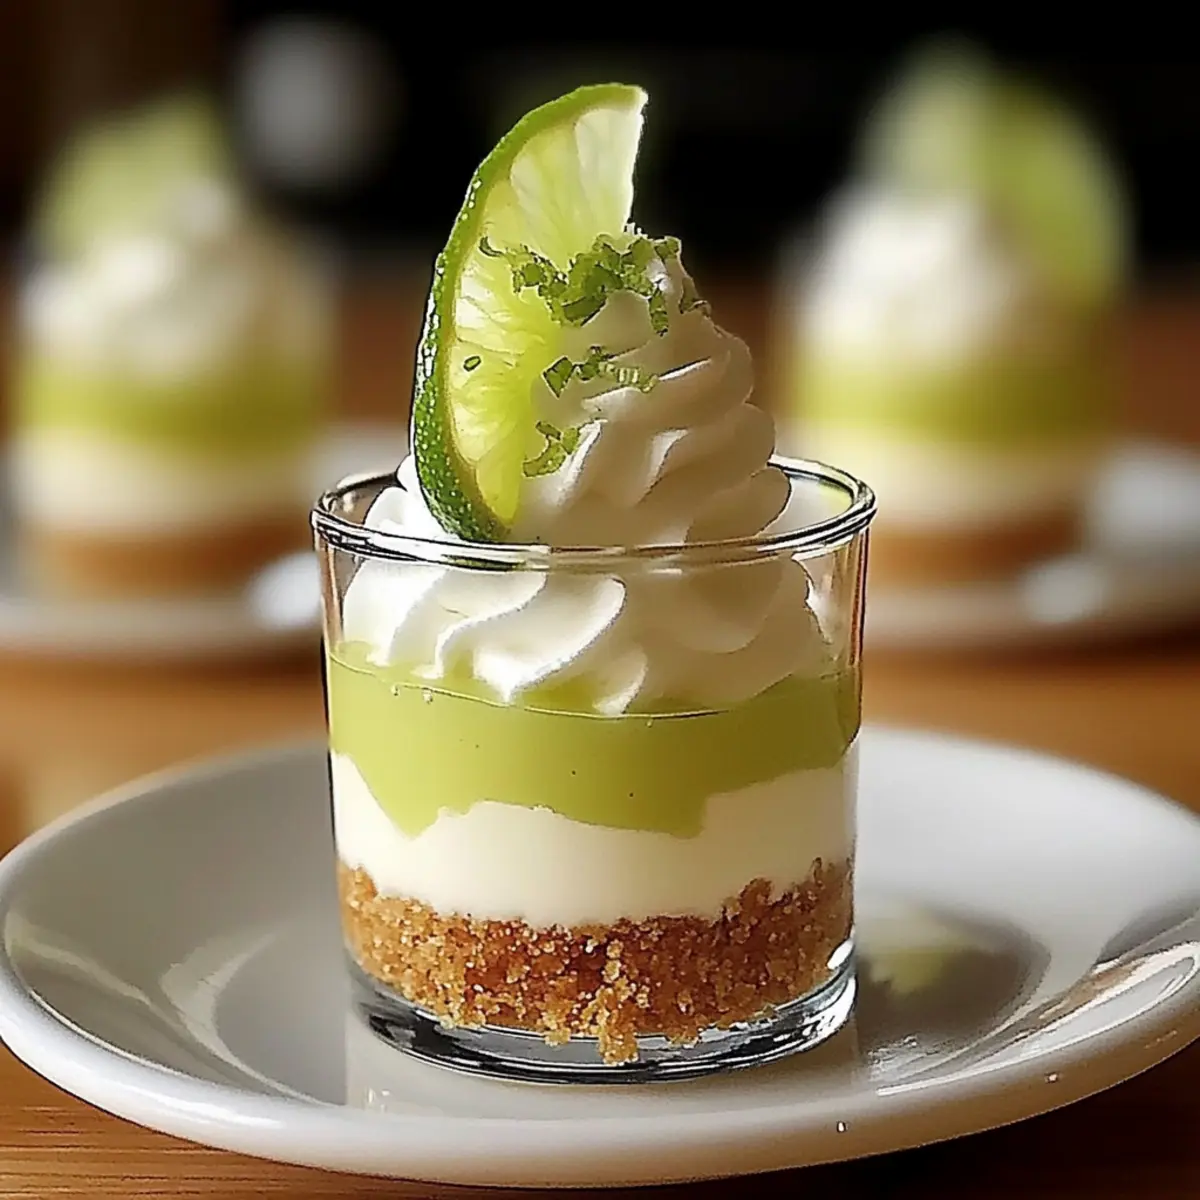
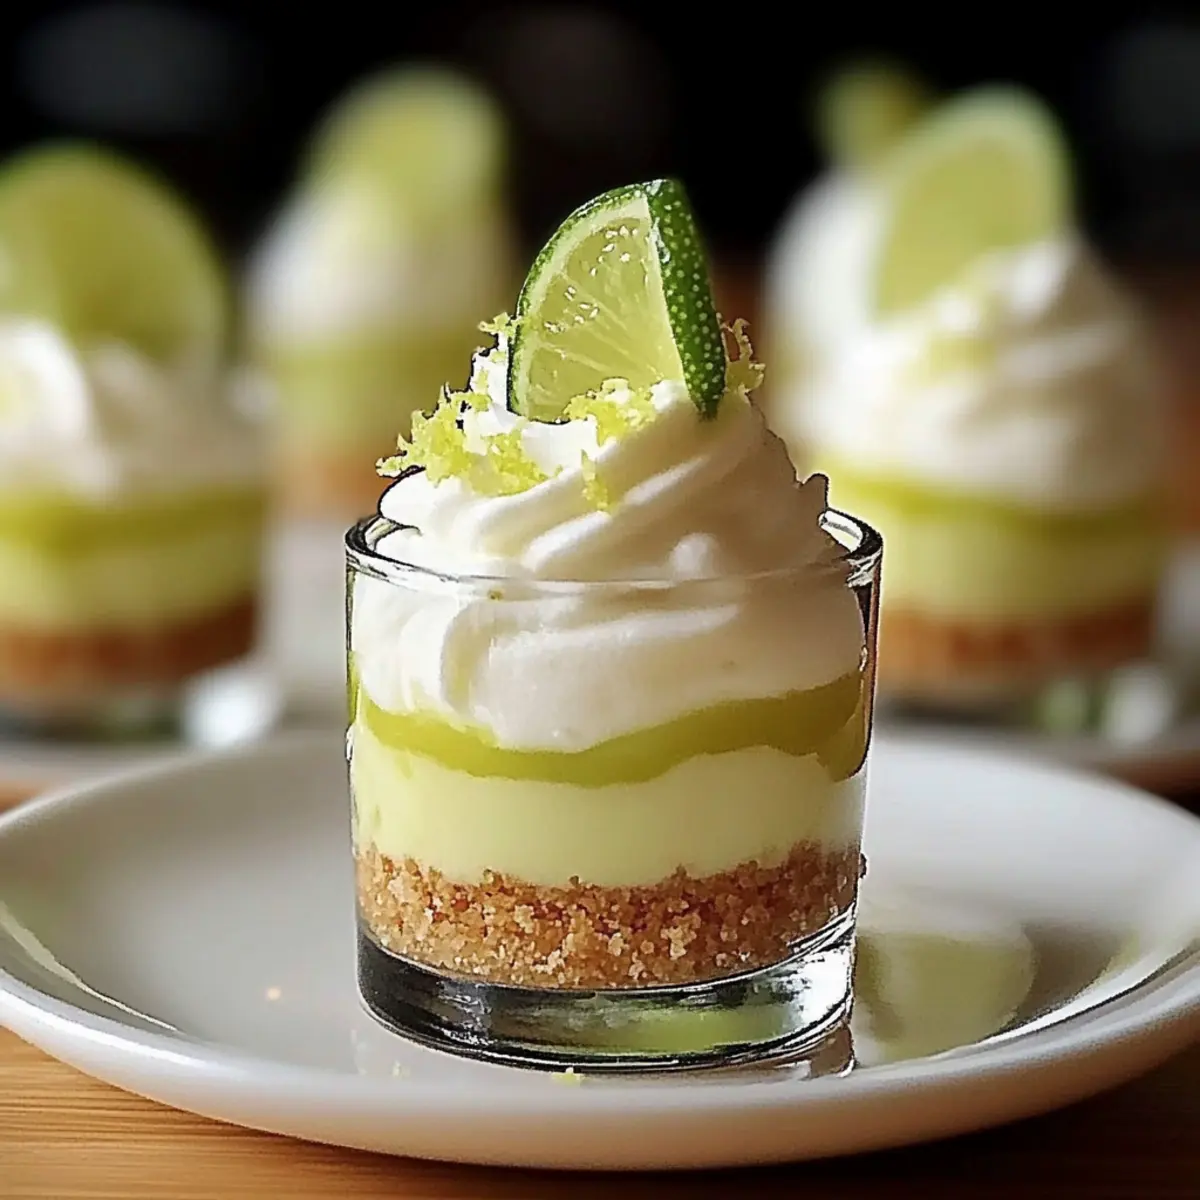
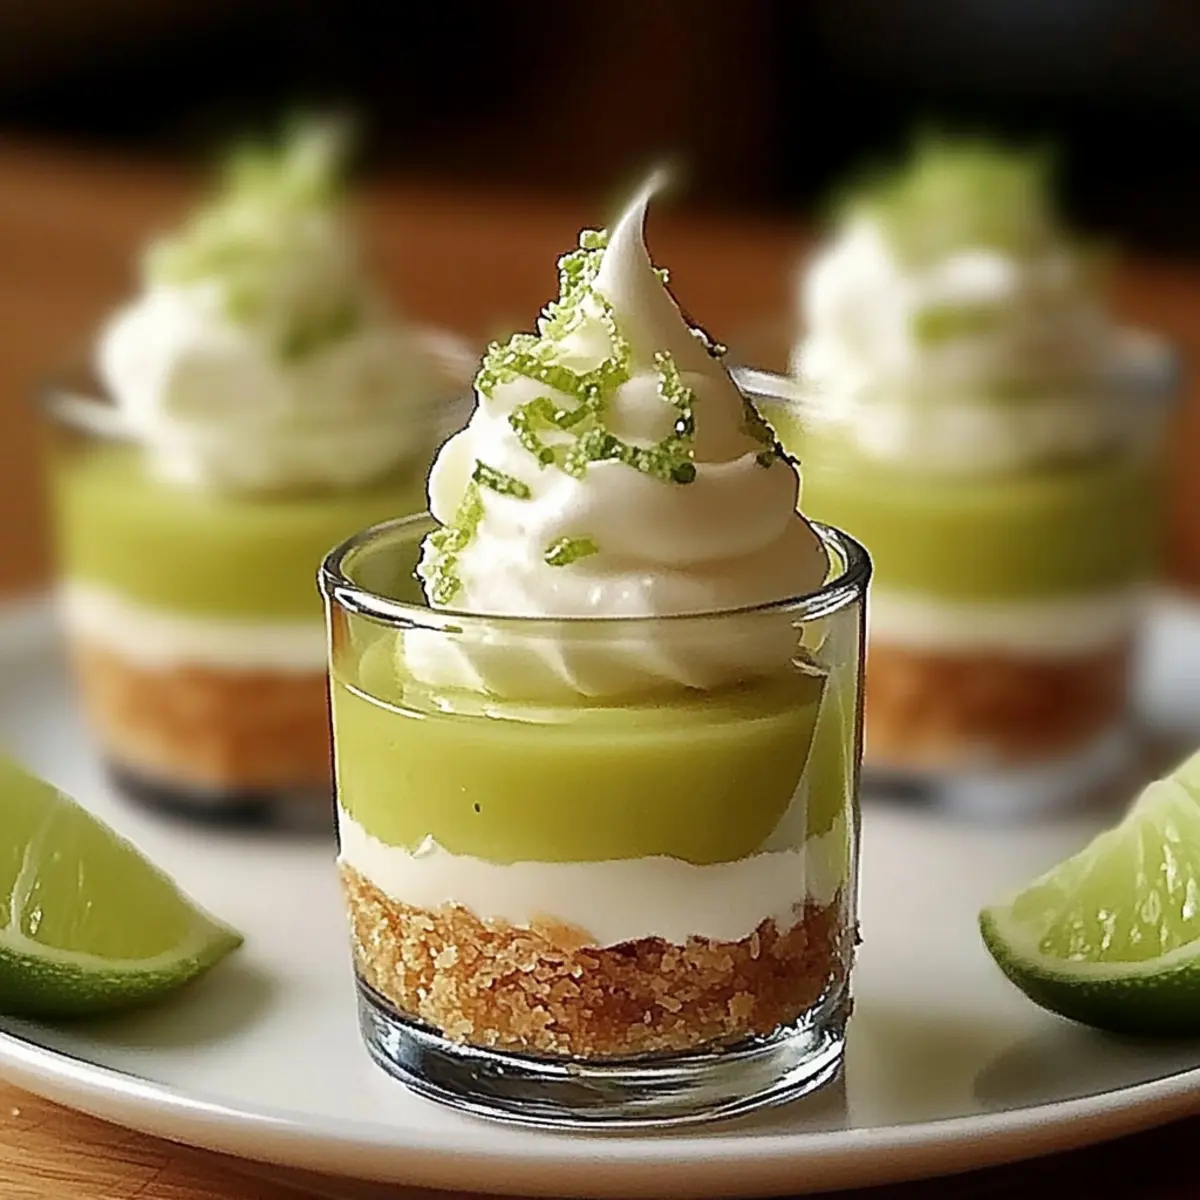
Divide the creamy filling into two bowls; tint one half with a few drops of green food coloring for a vibrant two-tone effect. Using a piping bag, pipe the filling into each mini dessert glass, layering the two colors for a beautiful presentation. Fill each glass to the top, leaving a little space for garnishing later.
Step 4: Chill
Cover each mini dessert glass with plastic wrap and refrigerate them for at least 2 hours. This chilling time allows the filling to set and flavors to meld beautifully. You’ll know they’re ready when the filling is firm to the touch and can hold its shape.
Step 5: Garnish & Serve
Before serving your No-Bake Key Lime Pie Mini Desserts, consider topping them with a swirl of whipped cream, a sprinkle of lime zest, or fresh fruit slices for an extra flourish. These delightful little treats are now ready to impress your guests, offering a refreshing burst of flavor that’s sure to be a crowd-pleaser!
How to Store and Freeze Key Lime Pie Mini Desserts
Fridge: Store these mini desserts in an airtight container for up to 3 days. This ensures they maintain their creamy texture and zesty flavor.
Freezer: Freeze the Key Lime Pie Mini Desserts for up to 1 month. Make sure to wrap them individually in plastic wrap to prevent freezer burn.
Thawing: When ready to enjoy, thaw in the refrigerator for several hours. This allows them to regain their soft and velvety texture before serving.
Reheating: There’s no need to reheat these no-bake desserts; serve them cold for the best experience!
What to Serve with No-Bake Key Lime Pie Mini Desserts
As you prepare these delightful mini treats, consider pairing them with complementing dishes and beverages that elevate the entire dining experience.
- Iced Tea: The light, refreshing taste of iced tea balances the tangy sweetness of the desserts, making for an invigorating sip.
- Lemonade: A classic citrus drink, lemonade accentuates the zesty flavors of the key lime filling, leaving you wanting more.
- Fresh Fruit Salad: Crisp, colorful fruit adds a burst of freshness and texture alongside the creamy mini desserts, creating a vibrant plate.
- Coconut Macaroons: Chewy and sweet, these coconut cookies harmonize beautifully with the tropical notes in the key lime pie.
- Sparkling Water: The fizz offers a lightness that refreshes the palate between bites, enhancing the overall enjoyment of each mini dessert.
- Mango Sorbet: Creamy and sweet, this sorbet provides a luscious contrast to the tartness of the desserts, creating a delightful harmony.
- Citrus-infused Cocktails: A light cocktail with citrus notes can elevate the meal experience while playing off the key lime flavors beautifully.
- Whipped Cream: Topping each mini dessert with dollops of freshly whipped cream adds creaminess, inviting delightful flavor contrasts in every bite.
- Chocolate-Dipped Strawberries: The sweet contrast of chocolate with fresh strawberries provides an elegant side that keeps things exciting on the dessert table.
Make Ahead Options
These No-Bake Key Lime Pie Mini Desserts are perfect for meal prep, allowing you to save time before your next gathering! You can prepare the crust up to 24 hours in advance by pressing the graham cracker mixture into the dessert glasses and storing them covered in the refrigerator. Additionally, the creamy filling can be made up to 3 days ahead and kept in an airtight container; just remember to whisk it again before piping for optimal texture. When you’re ready to serve, simply pipe the filling into the prepped crusts, chill for at least 2 hours, and garnish as desired. This method ensures your desserts will be just as delicious and fresh, making entertaining a breeze!
Expert Tips for No-Bake Key Lime Pie Mini Desserts
-
Soften Cream Cheese: Ensure your cream cheese is fully softened to avoid lumps in the filling, making it silky smooth and easy to mix.
-
Use a Piping Bag: For cleaner layers and more precise filling, use a piping bag to alternate colors. Snip just a small corner for more control.
-
Chill Thoroughly: Don’t rush the chilling step; these mini desserts need at least 2 hours in the fridge to set properly and develop their flavors.
-
Adjust Sweetness: Taste the filling before piping it into the crust; you can easily adjust sweetness by adding more condensed milk or omitting sugar.
-
Fresh Is Best: Opt for fresh key lime juice rather than bottled for a vibrant, zesty flavor that truly shines through in your mini desserts.
Key Lime Pie Mini Desserts Variations
Feel free to get creative and customize these delights to perfectly suit your taste and dietary needs!
-
Gluten-Free: Swap graham cracker crumbs with crushed gluten-free cookies or almond flour for a delightful spin.
-
Dairy-Free: Replace cream cheese and yogurt with dairy-free alternatives like coconut cream and vegan yogurt for a creamy texture without dairy.
-
Fruit Layers: Layer fresh berries, like strawberries or raspberries, between the filling for a burst of natural sweetness and beautiful color.
-
Flavor Infusions: Add a splash of coconut or vanilla extract to the filling for an extra flavor dimension that enhances the overall taste.
-
Reduced Sugar: Cut back on sweetness by using ripe banana puree or substituting a sugar alternative, making it even lighter.
-
Spicy Kick: For a zesty twist, add a pinch of cayenne pepper or diced jalapeños to the filling to balance the tartness of the key lime.
-
Garnish Variations: Top your mini desserts with toasted coconut flakes or lime zest for a crunchy texture and eye-catching finish.
-
Mini Cups: Serve in edible cookie cups instead of dessert glasses for a fun and crunchy alternative that reduces clean-up time.
These variations make it easy to tailor your No-Bake Key Lime Pie Mini Desserts to your preferences. Ready to impress your guests? Don’t forget to check out my tips for making the best no-bake treats or consider pairing these with iced tea for a refreshing meal experience!
No-Bake Key Lime Pie Mini Desserts Recipe FAQs
How do I select ripe key limes for the best flavor?
Absolutely! When choosing key limes, look for ones that are slightly yellow and give a little when squeezed, indicating they’re juicy and ripe. Avoid any limes with dark spots or that feel hard, as these are typically not as flavorful.
What is the best way to store these mini desserts?
You can keep your No-Bake Key Lime Pie Mini Desserts in the refrigerator for up to 3 days in an airtight container. This will help maintain their creamy consistency and freshness. I often place a layer of plastic wrap directly on top of the filling before sealing the container to prevent any crusty texture while stored.
Can I freeze the mini desserts for later enjoyment?
Yes, you can freeze these delightful treats! Wrap each mini dessert tightly in plastic wrap and store them in a freezer-safe container. They will keep well for up to 1 month. When it’s time to enjoy, simply thaw them in the refrigerator for a few hours before serving for that perfect creamy texture.
What should I do if the filling is too runny?
Very! If your filling seems too runny, this could be due to not properly mixing the cream cheese or using juice that wasn’t fully extracted. To remedy this, I recommend adding a small amount of Greek yogurt or an extra tablespoon of condensed milk to help thicken it up. Always mix well until you achieve a smooth consistency before piping them into your crusts.
Are these mini desserts safe for those with dietary restrictions?
Absolutely! You can make these No-Bake Key Lime Pie Mini Desserts gluten-free by using gluten-free cookies for the crust. Plus, they can easily be made dairy-free by substituting the cream cheese and yogurt with coconut alternatives. Always check the labels of your ingredient choices to ensure they align with any dietary needs or allergies.
Can I substitute other flavors for key lime?
Definitely! While key lime provides that distinctive taste, you can experiment and use other citrus juices like lemon or even orange for a refreshing twist. Just keep in mind that the sweetness or tartness may vary, and you may want to adjust the sugar accordingly to achieve the desired balance.
No-Bake Key Lime Pie Mini Desserts
Ingredients
Equipment
Method
- In a mixing bowl, combine graham cracker crumbs, melted butter, and white sugar until it resembles wet sand. Press firmly into the bottom of mini dessert glasses.
- In another bowl, beat together cream cheese and yogurt until smooth. In a separate bowl, whisk sweetened condensed milk and key lime juice, then fold into cream cheese mixture.
- Divide filling; tint one half with green food coloring. Pipe the filling into dessert glasses, layering the two colors for presentation.
- Cover and refrigerate for at least 2 hours until firm.
- Garnish with whipped cream, lime zest, or fruit before serving.