Get my cookbooks

Balsamic Strawberry Caprese Salad is a must-try dish!

Introduction to Balsamic Strawberry Caprese Salad Recipe

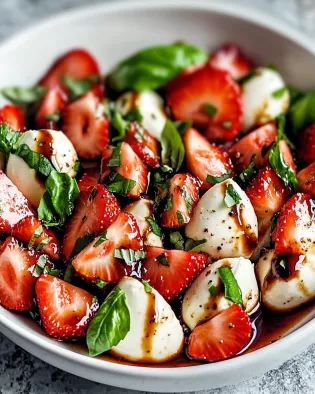
The Balsamic Strawberry Caprese Salad is a delightful twist on the classic Italian Caprese salad. This vibrant dish combines the sweetness of fresh strawberries with the creaminess of mozzarella cheese, all enhanced by the rich flavor of balsamic glaze. It’s not just a feast for the eyes; it’s a treat for your taste buds too! Perfect for summer gatherings or a light lunch, this salad is both refreshing and satisfying.

What Makes Balsamic Strawberry Caprese Salad Unique?

What sets the Balsamic Strawberry Caprese Salad apart is its unique blend of flavors. The juicy strawberries add a sweet and tangy note, while the mozzarella provides a creamy texture. The fresh basil leaves contribute an aromatic touch, making each bite a burst of flavor. The balsamic glaze ties everything together, adding a hint of acidity that balances the sweetness of the strawberries. This salad is not only delicious but also visually appealing, making it a standout dish at any table.

The Health Benefits of Balsamic Strawberry Caprese Salad

This salad is not just tasty; it’s also packed with health benefits. Strawberries are rich in vitamins, particularly vitamin C, which supports your immune system. They are also high in antioxidants, which help fight free radicals in the body. Mozzarella cheese provides a good source of protein and calcium, essential for strong bones. Additionally, the olive oil in the dressing is a healthy fat that can improve heart health. Overall, the Balsamic Strawberry Caprese Salad is a nutritious choice that can fit into a balanced diet.

Ingredients for Balsamic Strawberry Caprese Salad Recipe

To create the delicious Balsamic Strawberry Caprese Salad, you’ll need a few fresh and simple ingredients. Each component plays a vital role in achieving the perfect balance of flavors. Here’s what you’ll need:

  • 2 cups fresh strawberries, hulled and sliced
  • 8 ounces fresh mozzarella cheese, sliced
  • 1 cup fresh basil leaves
  • 3 tablespoons balsamic glaze
  • 2 tablespoons extra virgin olive oil
  • Salt and pepper to taste

These ingredients come together to create a salad that is not only tasty but also visually stunning. The bright red strawberries contrast beautifully with the creamy white mozzarella and vibrant green basil. This colorful combination makes the salad appealing to both the eyes and the palate.

When selecting your ingredients, opt for the freshest strawberries and mozzarella you can find. Fresh basil leaves should be bright green and fragrant. Using high-quality balsamic glaze and extra virgin olive oil will enhance the overall flavor of the dish. Remember, the quality of your ingredients can make a significant difference in the final result!

Step-by-Step Preparation of Balsamic Strawberry Caprese Salad Recipe

Now that you have all your ingredients ready, it’s time to dive into the preparation of your Balsamic Strawberry Caprese Salad. This step-by-step guide will help you create a beautiful and delicious salad that everyone will love. Let’s get started!

Step 1: Gather Your Ingredients

Before you begin, make sure you have all your ingredients on hand. Gather:

  • Fresh strawberries
  • Fresh mozzarella cheese
  • Fresh basil leaves
  • Balsamic glaze
  • Extra virgin olive oil
  • Salt and pepper

Having everything ready will make the process smoother and more enjoyable. Plus, it’s always nice to see all those vibrant colors together!

Step 2: Prepare the Strawberries

Start by washing your strawberries thoroughly under cool water. After rinsing, hull them to remove the green tops. Then, slice the strawberries into even pieces. Aim for about ¼ inch thick slices. This size will help them blend well with the mozzarella and basil.

Once sliced, place the strawberries in a bowl and set them aside. Their sweet aroma will fill your kitchen, making it hard to resist snacking on them!

Step 3: Slice the Mozzarella

Next, take your fresh mozzarella cheese and slice it into rounds. Similar to the strawberries, aim for about ¼ inch thick slices. This will ensure that each bite of the salad has a perfect balance of cheese and fruit.

Place the mozzarella slices on a plate or cutting board, ready for assembly. The creamy texture of the mozzarella will complement the strawberries beautifully.

Step 4: Assemble the Salad

Now comes the fun part—assembling your salad! In a large serving dish, start by arranging the sliced strawberries and mozzarella cheese in an alternating pattern. For example, place a slice of mozzarella, followed by a slice of strawberry, and repeat.

As you layer, tuck fresh basil leaves between the strawberries and mozzarella slices. This not only adds flavor but also makes the salad look stunning. The vibrant green basil will pop against the red and white, creating a beautiful presentation.

Step 5: Drizzle with Balsamic Reduction

Finally, it’s time to add the finishing touches! Drizzle the balsamic glaze and extra virgin olive oil evenly over the assembled salad. This will enhance the flavors and add a lovely shine to your dish.

Season with salt and pepper to taste. A little sprinkle of salt can elevate the sweetness of the strawberries, while pepper adds a nice kick. Serve immediately or chill in the refrigerator for 15-30 minutes to let the flavors meld together.

And there you have it! Your Balsamic Strawberry Caprese Salad is ready to be enjoyed. It’s a simple yet elegant dish that’s sure to impress your family and friends.

Variations of Balsamic Strawberry Caprese Salad Recipe

The Balsamic Strawberry Caprese Salad is delicious on its own, but there are many ways to customize it. By adding different ingredients, you can create unique flavors and textures. Here are some fun variations to try!

Adding Nuts for Crunch

For an extra crunch, consider adding nuts to your salad. Toasted pine nuts or walnuts work wonderfully. Simply sprinkle a handful over the top just before serving. The nuts add a delightful texture and a nutty flavor that complements the sweetness of the strawberries. Plus, they provide healthy fats and protein, making your salad even more nutritious!

Incorporating Other Fruits

Don’t be afraid to mix things up with different fruits! While strawberries are the star of this salad, you can substitute or add other fruits for a twist. Peaches or nectarines are excellent choices, bringing a juicy sweetness that pairs well with mozzarella. You could also try blueberries or raspberries for a burst of color and flavor. Each fruit will give your salad a unique taste, so feel free to experiment!

Using Different Cheeses

While fresh mozzarella is traditional, you can switch it out for other cheeses to change the flavor profile. Burrata cheese, with its creamy center, adds a luxurious touch. Feta cheese can provide a tangy contrast to the sweetness of the strawberries. Goat cheese is another great option, offering a rich and earthy flavor. Each cheese brings its own character to the salad, so choose one that suits your taste!

These variations not only enhance the flavor but also make your Balsamic Strawberry Caprese Salad more exciting. Whether you stick to the classic recipe or try something new, this salad is sure to be a hit!

Cooking Note for Balsamic Strawberry Caprese Salad Recipe

When preparing the Balsamic Strawberry Caprese Salad, a few cooking notes can help you achieve the best results. First, always use the freshest ingredients available. Fresh strawberries should be bright red and firm, while mozzarella should be soft and creamy. This ensures that your salad is not only delicious but also visually appealing.

Another important tip is to slice your ingredients evenly. This helps with presentation and ensures that each bite has a balanced mix of flavors. Aim for uniform thickness in your strawberry and mozzarella slices, about ¼ inch thick. This way, they will layer beautifully and create a stunning display.

When it comes to the balsamic glaze, you can either buy a pre-made version or make your own. If you choose to make it, simply simmer balsamic vinegar over low heat until it thickens. This homemade glaze can add a richer flavor to your salad.

Lastly, consider the timing of your salad assembly. If you plan to serve the salad later, it’s best to assemble it just before serving. This prevents the strawberries from becoming soggy and keeps the basil fresh. If you need to prepare it in advance, layer the ingredients in a way that keeps the moisture away from the strawberries until you’re ready to serve.

By following these cooking notes, you’ll create a Balsamic Strawberry Caprese Salad that is not only delicious but also a feast for the eyes. Enjoy the process and the delightful flavors that come together in this refreshing dish!

Serving Suggestions for Balsamic Strawberry Caprese Salad Recipe

Once your Balsamic Strawberry Caprese Salad is ready, it’s time to think about how to serve it. This salad is not only delicious but also visually stunning, making it a perfect centerpiece for any meal. Here are some ideal pairings and presentation tips to elevate your dining experience.

Ideal Pairings with Balsamic Strawberry Caprese Salad

The Balsamic Strawberry Caprese Salad pairs wonderfully with a variety of dishes. Here are some great options to consider:

  • Grilled Chicken: The light and juicy flavors of grilled chicken complement the sweetness of the salad. Serve the chicken alongside or on top of the salad for a complete meal.
  • Crusty Bread: A slice of fresh, crusty bread is perfect for soaking up the balsamic glaze. It adds a satisfying crunch and makes for a delightful side.
  • Pasta Dishes: Pair the salad with a light pasta dish, such as lemon garlic spaghetti or pesto pasta. The fresh flavors of the salad will balance the richness of the pasta.
  • Wine: A crisp white wine, like Sauvignon Blanc or Pinot Grigio, enhances the flavors of the salad. The acidity in the wine complements the balsamic glaze beautifully.

These pairings not only enhance the meal but also create a harmonious dining experience. Feel free to mix and match based on your preferences!

Presentation Tips for Serving

Presentation is key when serving your Balsamic Strawberry Caprese Salad. Here are some tips to make it look as good as it tastes:

  • Use a Large Platter: Arrange the salad on a large, colorful platter to make it the star of the table. A white platter can make the colors pop even more.
  • Layering: When assembling, layer the strawberries, mozzarella, and basil in a circular pattern. This creates a beautiful visual effect that draws the eye.
  • Garnish: Add a few whole basil leaves on top for a fresh touch. A light drizzle of extra balsamic glaze can also enhance the look.
  • Serve Chilled: If you’ve chilled the salad, serve it cold. This adds to the refreshing experience, especially on a warm day.

By following these serving suggestions and presentation tips, your Balsamic Strawberry Caprese Salad will not only taste amazing but also look stunning on your dining table. Enjoy sharing this delightful dish with family and friends!

Tips for Perfecting Your Balsamic Strawberry Caprese Salad Recipe

Choosing the Best Ingredients

To create the best Balsamic Strawberry Caprese Salad, selecting high-quality ingredients is essential. Start with strawberries; look for ones that are bright red, firm, and fragrant. Fresh strawberries should be free from blemishes or soft spots. The flavor of your salad will greatly depend on the quality of the strawberries you choose.

Next, opt for fresh mozzarella cheese. The best mozzarella is soft and creamy, often sold in water or brine. This type of mozzarella will provide a delightful texture and flavor. If possible, choose buffalo mozzarella for a richer taste.

Fresh basil leaves are another key ingredient. Look for vibrant green leaves that are not wilted. The aroma of fresh basil adds a wonderful fragrance to the salad. If you can, pick basil just before using it to ensure maximum freshness.

Lastly, use high-quality balsamic glaze and extra virgin olive oil. A good balsamic glaze should be thick and sweet, while extra virgin olive oil should have a fruity flavor. These ingredients will enhance the overall taste of your salad, making it truly exceptional.

Storing Leftovers

If you have any leftovers from your Balsamic Strawberry Caprese Salad, proper storage is key to maintaining freshness. First, it’s best to store the salad in an airtight container. This helps prevent the ingredients from becoming soggy.

However, keep in mind that the salad is best enjoyed fresh. If you know you’ll have leftovers, consider storing the components separately. Place the strawberries, mozzarella, and basil in separate containers. This way, you can assemble the salad again when you’re ready to eat.

When stored properly in the refrigerator, the salad components can last for about one to two days. However, the strawberries may lose their texture over time. For the best taste and quality, try to enjoy your Balsamic Strawberry Caprese Salad within a day of making it.

By following these tips for choosing the best ingredients and storing leftovers, you’ll ensure that your Balsamic Strawberry Caprese Salad remains delicious and fresh. Enjoy every bite of this delightful dish!

Breakdown of Time for Balsamic Strawberry Caprese Salad Recipe

Understanding the time needed to prepare your Balsamic Strawberry Caprese Salad can help you plan better. This salad is quick and easy to make, making it perfect for any occasion. Here’s a breakdown of the time involved in each step:

Prep Time

The prep time for this salad is quite short. You’ll need about 15 minutes to gather and prepare your ingredients. This includes washing and slicing the strawberries, slicing the mozzarella, and gathering the basil leaves. If you have everything ready, you can whip up this salad in no time!

Cooking Time

Interestingly, there is no actual cooking time involved in this recipe. The only time you might want to consider is if you choose to chill the salad before serving. If you decide to do this, allow it to chill in the refrigerator for about 15-30 minutes. This step is optional but can enhance the flavors.

Total Time

In total, you can expect to spend around 15-45 minutes on your Balsamic Strawberry Caprese Salad. This includes the prep time and optional chilling time. With such a quick turnaround, this salad is perfect for last-minute gatherings or a refreshing side dish during the week!

Nutritional Information for Balsamic Strawberry Caprese Salad Recipe

Understanding the nutritional content of your Balsamic Strawberry Caprese Salad is essential for maintaining a balanced diet. This salad not only delights your taste buds but also provides valuable nutrients. Here’s a closer look at the nutritional information per serving:

Calories

Each serving of the Balsamic Strawberry Caprese Salad contains approximately 180 calories. This makes it a light and healthy option for lunch or as a side dish. The combination of fresh ingredients ensures that you’re getting a satisfying meal without excessive calories. Enjoying this salad can help you stay within your daily caloric goals while still indulging in delicious flavors!

Protein

In terms of protein, this salad offers about 8 grams per serving. The mozzarella cheese is the primary source of protein in this dish. Protein is essential for building and repairing tissues in the body, making it an important nutrient to include in your meals. Pairing this salad with a protein-rich dish, like grilled chicken, can further enhance your protein intake.

Sodium

The sodium content in the Balsamic Strawberry Caprese Salad is relatively low, making it a heart-healthy choice. Each serving contains around 200 mg of sodium, depending on how much salt you add during preparation. Keeping sodium levels in check is important for maintaining healthy blood pressure. This salad allows you to enjoy a flavorful dish without worrying about excessive sodium intake.

Overall, the Balsamic Strawberry Caprese Salad is a nutritious option that fits well into a healthy lifestyle. With its low calorie count, decent protein content, and low sodium levels, it’s a great choice for anyone looking to enjoy a delicious and healthful meal!

FAQs about Balsamic Strawberry Caprese Salad Recipe

Can I make Balsamic Strawberry Caprese Salad ahead of time?

Yes, you can prepare the Balsamic Strawberry Caprese Salad ahead of time, but with a few considerations. It’s best to assemble the salad just before serving to keep the ingredients fresh. However, you can wash and slice the strawberries and mozzarella in advance. Store them separately in airtight containers in the refrigerator. This way, you can quickly put the salad together when you’re ready to serve. If you do assemble it early, consider adding the balsamic glaze and olive oil just before serving to prevent the strawberries from becoming soggy.

What can I substitute for balsamic vinegar?

If you don’t have balsamic vinegar on hand, there are several substitutes you can use. One option is red wine vinegar mixed with a bit of honey or maple syrup to mimic the sweetness of balsamic. Another alternative is apple cider vinegar, which has a fruity flavor. You can also use a store-bought balsamic vinaigrette if you prefer a ready-made option. Just keep in mind that the flavor profile may change slightly, but your salad will still be delicious!

Is Balsamic Strawberry Caprese Salad suitable for a vegan diet?

Unfortunately, the traditional Balsamic Strawberry Caprese Salad is not suitable for a vegan diet due to the inclusion of mozzarella cheese. However, you can easily make a vegan version by substituting the mozzarella with a plant-based cheese alternative. There are many delicious vegan cheeses available that can provide a similar creamy texture. Additionally, ensure that the balsamic glaze you use is free from any animal products. With these adjustments, you can enjoy a delightful vegan version of this refreshing salad!

Conclusion on Balsamic Strawberry Caprese Salad Recipe

The Balsamic Strawberry Caprese Salad is a delightful dish that brings together fresh ingredients in a beautiful and tasty way. With its vibrant colors and unique flavor combination, this salad is perfect for any occasion, whether it’s a summer picnic, a family gathering, or a light lunch. The sweetness of strawberries, the creaminess of mozzarella, and the aromatic basil create a symphony of flavors that is hard to resist.

Not only is this salad delicious, but it also offers numerous health benefits. Packed with vitamins, antioxidants, and healthy fats, it supports a balanced diet while satisfying your cravings. Plus, the ease of preparation makes it an ideal choice for both novice cooks and seasoned chefs alike. You can whip it up in no time, making it a go-to recipe for busy days.

As you explore the variations and tips provided, feel free to get creative! Whether you add nuts for crunch, incorporate other fruits, or experiment with different cheeses, the possibilities are endless. Each twist you make can lead to a new favorite version of this classic dish.

In conclusion, the Balsamic Strawberry Caprese Salad is more than just a salad; it’s a celebration of fresh, wholesome ingredients. So, gather your ingredients, follow the steps, and enjoy this refreshing dish with family and friends. You’ll not only impress your guests but also treat yourself to a delightful culinary experience. Happy cooking!

Chocolate Chip Brownie Fruit Pizza Recipe is a must-try!

Introduction to Chocolate Chip Brownie Fruit Pizza Recipe

What is a Chocolate Chip Brownie Fruit Pizza?

The Chocolate Chip Brownie Fruit Pizza is a delightful twist on traditional pizza. Instead of a savory base, this dessert features a rich brownie crust topped with a layer of fluffy whipped cream and an array of colorful fresh fruits. Imagine biting into a slice of soft, chocolatey goodness, complemented by the sweetness of strawberries, blueberries, and kiwi. This dessert is not only visually appealing but also a delicious way to enjoy your favorite fruits. It’s perfect for parties, family gatherings, or simply as a treat for yourself!

Why You Should Try This Recipe

There are many reasons to whip up this Chocolate Chip Brownie Fruit Pizza Recipe. First, it’s incredibly easy to make, requiring just a few simple ingredients. The combination of chocolate and fresh fruit creates a delightful balance of flavors that everyone will love. Plus, it’s a fun way to get kids involved in the kitchen! They can help arrange the fruit on top, making it a creative activity.

Moreover, this dessert is versatile. You can customize it with your favorite fruits or even add a hint of espresso for a richer flavor. It’s a great way to impress guests without spending hours in the kitchen. So, whether you’re celebrating a special occasion or just want to indulge in something sweet, this recipe is sure to satisfy your cravings!

Ingredients for Chocolate Chip Brownie Fruit Pizza Recipe

Essential Ingredients

To create the perfect Chocolate Chip Brownie Fruit Pizza, you’ll need a few essential ingredients. These components come together to form a delicious brownie base that serves as the foundation for your fruity masterpiece. Here’s what you’ll need:

  • 1 cup unsalted butter, melted: This adds richness and moisture to the brownie.
  • 2 cups granulated sugar: Sweetness is key, and sugar helps create that chewy texture.
  • 4 large eggs: Eggs provide structure and help bind the ingredients together.
  • 1 teaspoon vanilla extract: This enhances the flavor of the brownies.
  • 1 cup all-purpose flour: Flour gives the brownies their body and texture.
  • 1/2 cup unsweetened cocoa powder: Cocoa powder is what makes these brownies chocolatey and delicious.
  • 1/2 teaspoon salt: A pinch of salt balances the sweetness.
  • 1 cup semi-sweet chocolate chips: These add extra chocolatey goodness and texture.
  • 2 cups assorted fresh fruit: Choose your favorites like strawberries, blueberries, and kiwi for a colorful topping.
  • 1 cup whipped cream or Cool Whip: This creamy layer adds a light and fluffy finish.

Optional Ingredients for Customization

While the essential ingredients will give you a fantastic Chocolate Chip Brownie Fruit Pizza, you can also customize it to suit your taste. Here are some optional ingredients to consider:

  • Espresso powder: Adding a teaspoon can enhance the chocolate flavor.
  • Yogurt: Substitute whipped cream with yogurt for a lighter option.
  • Different types of chocolate: Try using white chocolate chips or dark chocolate for a unique twist.
  • Nut toppings: Chopped nuts like walnuts or pecans can add a nice crunch.
  • Drizzle of chocolate sauce: A drizzle on top can make it even more decadent.

Feel free to mix and match these optional ingredients to create your own signature version of this delightful dessert!

Step-by-Step Preparation of Chocolate Chip Brownie Fruit Pizza Recipe

Step 1: Preheat the Oven

First things first, you need to preheat your oven to 350°F. This step is crucial because it ensures that your brownies bake evenly. While the oven heats up, you can prepare your baking pan. Grease a 12-inch pizza pan or a large baking sheet with butter or cooking spray. This will help prevent the brownies from sticking, making it easier to remove them later.

Step 2: Prepare the Brownie Batter

In a large mixing bowl, combine the melted butter and granulated sugar. Stir them together until they are well blended. Next, add the eggs one at a time, mixing well after each addition. This helps to incorporate air into the batter, making your brownies light and fluffy. After that, stir in the vanilla extract for added flavor.

In a separate bowl, whisk together the all-purpose flour, cocoa powder, and salt. Gradually add this dry mixture to the wet ingredients. Stir until just combined; be careful not to overmix. Finally, fold in the semi-sweet chocolate chips. This will give your brownies that extra chocolatey goodness!

Step 3: Bake the Brownie Base

Now it’s time to spread the brownie batter evenly onto your prepared pan. Use a spatula to smooth it out. Place the pan in the preheated oven and bake for 20-25 minutes. To check if they are done, insert a toothpick into the center. If it comes out with a few moist crumbs, your brownies are ready!

Step 4: Cool the Brownie

Once baked, remove the brownie from the oven and let it cool completely in the pan. This step is important because it allows the brownie to set properly. If you try to add toppings while it’s still warm, the whipped cream may melt, and the fruit won’t stay in place. Patience is key here!

Step 5: Prepare the Toppings

While the brownie cools, you can prepare your toppings. Wash and slice your assorted fresh fruit. Strawberries, blueberries, and kiwi are great choices, but feel free to use whatever fruits you love. If you’re using yogurt instead of whipped cream, have it ready as well. This will make the assembly process quick and easy!

Step 6: Assemble the Chocolate Chip Brownie Fruit Pizza

Once the brownie is completely cool, it’s time to assemble your masterpiece! Spread a generous layer of whipped cream or yogurt over the top of the brownie. Then, arrange your fresh fruit on top in a decorative pattern. You can be creative here! Slice the brownie into wedges, just like a pizza, and serve immediately. Enjoy your delicious Chocolate Chip Brownie Fruit Pizza!

Variations of Chocolate Chip Brownie Fruit Pizza Recipe

Different Fruit Combinations

One of the best things about the Chocolate Chip Brownie Fruit Pizza is its versatility. You can mix and match fruits to create your perfect topping. For a tropical twist, consider using pineapple, mango, and coconut. These fruits add a refreshing flavor that pairs beautifully with the chocolate base.

If you prefer a berry medley, try combining raspberries, blackberries, and strawberries. This combination not only looks stunning but also offers a burst of tartness that balances the sweetness of the brownie. You can even add slices of banana for a creamy texture. The options are endless, so feel free to get creative!

Alternative Brownie Bases

While the classic brownie base is delicious, you can experiment with different types of bases for your fruit pizza. For a gluten-free option, use almond flour or a gluten-free brownie mix. This way, everyone can enjoy this delightful dessert!

If you want a healthier twist, consider making a black bean brownie base. It’s rich in protein and fiber, making it a guilt-free treat. Simply replace the flour with pureed black beans, and you’ll have a fudgy brownie that’s packed with nutrients. No one will even notice the difference!

Unique Toppings Ideas

To elevate your Chocolate Chip Brownie Fruit Pizza, think beyond just fruit and whipped cream. You can add a drizzle of caramel or chocolate sauce for an extra layer of sweetness. A sprinkle of shredded coconut can also add a delightful texture.

For a nutty crunch, consider topping your pizza with chopped nuts like almonds or pecans. They not only add flavor but also a satisfying crunch. If you’re feeling adventurous, try adding a dollop of peanut butter or Nutella on top of the whipped cream. This will create a rich and indulgent treat that chocolate lovers will adore!

With these variations, you can make your Chocolate Chip Brownie Fruit Pizza unique every time you prepare it. Enjoy experimenting with flavors and toppings to find your favorite combination!

Cooking Note for Chocolate Chip Brownie Fruit Pizza Recipe

Tips for Perfectly Baked Brownies

To achieve the best Chocolate Chip Brownie Fruit Pizza, follow these helpful tips for perfectly baked brownies. First, always measure your ingredients accurately. Too much flour can lead to dry brownies, while too little can make them too gooey. Use a kitchen scale for precision if possible.

Next, avoid overmixing the batter. Once you combine the wet and dry ingredients, mix just until you see no flour. Overmixing can lead to tough brownies. Also, keep an eye on the baking time. Ovens can vary, so check your brownies a few minutes before the suggested time. Remember, they will continue to cook slightly after you take them out of the oven.

Lastly, let the brownies cool completely in the pan. This helps them set and makes it easier to slice. If you want to ensure even baking, rotate the pan halfway through the baking time. This simple step can help prevent uneven cooking, especially if your oven has hot spots.

Storing Leftovers

If you have any leftovers from your Chocolate Chip Brownie Fruit Pizza, storing them properly is essential to maintain freshness. First, cover the pizza with plastic wrap or aluminum foil. This will help keep the moisture in and prevent the brownies from drying out.

For best results, store the pizza in the refrigerator. It can last for up to three days. If you want to keep it longer, consider freezing individual slices. Wrap each slice in plastic wrap and then place them in an airtight container. When you’re ready to enjoy, simply thaw in the refrigerator or at room temperature. This way, you can savor your delicious dessert even days later!

Serving Suggestions for Chocolate Chip Brownie Fruit Pizza Recipe

Ideal Occasions for Serving

The Chocolate Chip Brownie Fruit Pizza is a delightful dessert that fits perfectly into various occasions. Whether you’re hosting a birthday party, a family gathering, or a casual get-together with friends, this dessert will surely impress your guests. Its vibrant colors and delicious flavors make it a showstopper on any dessert table.

For birthday celebrations, consider personalizing the fruit toppings to match the birthday person’s favorite flavors. You can even add candles on top for a fun twist! This dessert is also great for summer barbecues or picnics, as it’s easy to transport and can be served cold. Just slice it up and let everyone enjoy a piece of this sweet treat.

Additionally, it’s a fantastic option for holiday gatherings. Whether it’s a festive Christmas party or a cheerful Fourth of July celebration, the Chocolate Chip Brownie Fruit Pizza can be adapted to fit the theme. Use seasonal fruits and decorations to make it even more special. No matter the occasion, this dessert is sure to bring smiles and satisfaction!

Pairing with Beverages

To enhance your experience with the Chocolate Chip Brownie Fruit Pizza, consider pairing it with the right beverages. A glass of cold milk is a classic choice that complements the rich chocolate flavor beautifully. The creaminess of the milk balances the sweetness of the brownie and fruit, making each bite even more enjoyable.

If you prefer something a bit more sophisticated, try serving it with a cup of coffee or espresso. The bitterness of the coffee contrasts nicely with the sweetness of the dessert, creating a delightful flavor combination. For a refreshing option, consider iced tea or lemonade. These beverages add a light and zesty touch that pairs well with the fruity toppings.

For those who enjoy a little sparkle, a glass of sparkling water or a fruity soda can also be a fun choice. The fizz adds a festive feel to your dessert experience. No matter what you choose, the right beverage can elevate your Chocolate Chip Brownie Fruit Pizza to a whole new level of deliciousness!

Tips for Making the Best Chocolate Chip Brownie Fruit Pizza Recipe

Common Mistakes to Avoid

When making your Chocolate Chip Brownie Fruit Pizza, avoiding common mistakes can make a big difference in the final result. First, be careful not to overmix your batter. Mixing too much can lead to tough brownies. Stir just until the ingredients are combined for a soft, chewy texture.

Another mistake is not measuring ingredients accurately. Too much flour can make your brownies dry, while too little can make them too gooey. Use measuring cups and spoons for precision. Also, remember to check your oven temperature. An oven that’s too hot can burn the edges while leaving the center undercooked. An oven thermometer can help ensure accuracy.

Lastly, don’t skip the cooling step! Allowing the brownie to cool completely before adding toppings is crucial. If you rush this step, the whipped cream may melt, and the fruit won’t stay in place. Patience is key to achieving the perfect dessert!

Enhancing Flavor and Texture

To take your Chocolate Chip Brownie Fruit Pizza to the next level, consider enhancing the flavor and texture. One simple way is to add a teaspoon of espresso powder to the brownie batter. This will deepen the chocolate flavor and make it even more delicious.

For a unique twist, try using different types of chocolate chips. Dark chocolate or white chocolate can add a new dimension to your brownies. You can also mix in some chopped nuts for added crunch. Walnuts or pecans work wonderfully and complement the chocolate beautifully.

Don’t forget about the toppings! Experiment with different fruits to find your favorite combination. Adding a drizzle of chocolate or caramel sauce on top can elevate the dessert even further. A sprinkle of sea salt can also enhance the sweetness and create a delightful contrast. With these tips, your Chocolate Chip Brownie Fruit Pizza will be a hit every time!

Breakdown of Time for Chocolate Chip Brownie Fruit Pizza Recipe

Prep Time

Getting started on your Chocolate Chip Brownie Fruit Pizza is quick and easy! The prep time for this delightful dessert is approximately 15-20 minutes. During this time, you’ll gather all your ingredients, preheat the oven, and mix the brownie batter. It’s a simple process that allows you to dive right into the fun of baking!

Cooking Time

Once your brownie batter is ready, it’s time to bake! The cooking time for the brownie base is about 20-25 minutes. Keep an eye on the oven, and remember to check for doneness with a toothpick. If it comes out with a few moist crumbs, your brownies are perfectly baked and ready to cool!

Total Time

In total, you can expect to spend around 40-50 minutes from start to finish. This includes both the prep and cooking time. After baking, don’t forget to allow the brownie to cool completely before adding your whipped cream and fruit toppings. This cooling period is essential for achieving the best results. Once assembled, your Chocolate Chip Brownie Fruit Pizza is ready to be sliced and served!

Nutritional Information for Chocolate Chip Brownie Fruit Pizza Recipe

Calories

When indulging in the Chocolate Chip Brownie Fruit Pizza, it’s good to be aware of the calories you’re consuming. Each serving contains approximately 220 calories. This makes it a delightful treat that won’t completely derail your daily calorie intake. Enjoying this dessert in moderation allows you to satisfy your sweet tooth without feeling guilty!

Protein

In addition to being a tasty dessert, the Chocolate Chip Brownie Fruit Pizza also provides some protein. Each serving contains about 3 grams of protein. While this isn’t a high amount, it does contribute to your daily protein needs. The eggs and chocolate chips in the brownie base help provide this essential nutrient, making it a more balanced treat.

Sodium

For those watching their sodium intake, it’s important to note that each serving of this dessert contains around 150 milligrams of sodium. This is a moderate amount, especially considering that it’s a dessert. If you’re mindful of your sodium levels, you can enjoy this Chocolate Chip Brownie Fruit Pizza without worry. Just remember to balance it with lower-sodium meals throughout the day!

FAQs about Chocolate Chip Brownie Fruit Pizza Recipe

Can I use a store-bought brownie mix for this recipe?

Absolutely! Using a store-bought brownie mix can save you time and effort. Just follow the instructions on the package for baking. Once your brownies are baked and cooled, you can proceed with the toppings as outlined in the recipe. This is a great option if you’re short on time or want to simplify the process. Just remember to choose a mix that you enjoy, as it will be the base of your delicious dessert!

What fruits work best for topping the pizza?

The beauty of the Chocolate Chip Brownie Fruit Pizza is its versatility when it comes to fruit toppings. You can use a variety of fresh fruits to create a colorful and tasty topping. Some popular choices include strawberries, blueberries, kiwi, and bananas. These fruits not only add vibrant colors but also provide a nice balance to the rich chocolate flavor. Feel free to mix and match your favorites or even try seasonal fruits for a unique twist!

How do I store leftover Chocolate Chip Brownie Fruit Pizza?

To keep your Chocolate Chip Brownie Fruit Pizza fresh, it’s important to store it properly. Cover the pizza with plastic wrap or aluminum foil to prevent it from drying out. For the best results, store it in the refrigerator, where it can last for up to three days. If you have individual slices left, consider wrapping each slice in plastic wrap and placing them in an airtight container. This way, you can enjoy your delicious dessert even days later!

Can I make this recipe gluten-free?

Yes, you can easily make this Chocolate Chip Brownie Fruit Pizza gluten-free! Simply substitute the all-purpose flour with a gluten-free flour blend or almond flour. There are also gluten-free brownie mixes available that you can use. Just be sure to check the labels to ensure they are certified gluten-free. With these adjustments, everyone can enjoy this delightful dessert without worry!

Conclusion on Chocolate Chip Brownie Fruit Pizza Recipe

Recap of the Recipe Benefits

The Chocolate Chip Brownie Fruit Pizza Recipe is a delightful dessert that combines the rich flavors of chocolate brownies with the freshness of assorted fruits. This recipe is not only easy to make but also allows for endless customization. You can choose your favorite fruits, add unique toppings, and even experiment with different brownie bases. Each slice is a perfect balance of sweetness and texture, making it a hit for any occasion.

Moreover, this dessert is visually stunning, making it a showstopper at parties and gatherings. With its vibrant colors and delicious flavors, it’s sure to impress your guests. Plus, it’s a fun way to get kids involved in the kitchen, allowing them to help with the fruit arrangement. Overall, this recipe is a fantastic way to enjoy a sweet treat while incorporating fresh fruits into your diet.

Encouragement to Try the Recipe

If you haven’t yet tried making the Chocolate Chip Brownie Fruit Pizza, now is the perfect time! Gather your ingredients, invite your family or friends, and enjoy the process of creating this delicious dessert together. Whether you’re celebrating a special occasion or simply want to indulge in something sweet, this recipe is sure to bring joy to your table.

Don’t be afraid to get creative with your toppings and flavors. Each time you make it, you can try something new, making it a unique experience every time. So, roll up your sleeves, and let the baking adventure begin! You won’t regret it, and your taste buds will thank you!

Cucumber Feta Salad with Lemon Dressing Recipe is easy!

Introduction to Cucumber Feta Salad with Lemon Dressing Recipe

Cucumber Feta Salad with Lemon Dressing Recipe is a delightful choice. This salad is not only easy to prepare but also packed with vibrant flavors. It’s perfect for warm days or as a side dish for any meal. With its crisp cucumbers, juicy tomatoes, and creamy feta, this salad is sure to please everyone at the table.

Why Cucumber Feta Salad with Lemon Dressing is a Must-Try

First and foremost, this salad is incredibly versatile. You can enjoy it as a light lunch or serve it alongside grilled meats for a complete meal. The combination of fresh ingredients makes it a nutritious option. Cucumbers are hydrating and low in calories, while feta cheese adds a rich, tangy flavor. Plus, the lemon dressing brings everything together with a zesty kick.

Another reason to try this salad is its simplicity. With just a few ingredients, you can whip up a dish that looks and tastes gourmet. It’s perfect for gatherings, picnics, or even a quick weeknight dinner. The best part? You can customize it to your liking! Add your favorite herbs or vegetables to make it your own.

Cucumber Feta Salad with Lemon Dressing Recipe is a must-try for anyone who loves fresh, flavorful food. It’s easy to make, healthy, and absolutely delicious. So, let’s dive into the ingredients and get started on this delightful salad!

Ingredients for Cucumber Feta Salad with Lemon Dressing Recipe

Cucumber Feta Salad with Lemon Dressing Recipe, you’ll need a handful of fresh ingredients. Each component plays a vital role in delivering flavor and texture. Here’s what you’ll need:

  • 2 large cucumbers, diced
  • 1 cup cherry tomatoes, halved
  • 1/2 red onion, thinly sliced
  • 1 cup feta cheese, crumbled
  • 1/4 cup fresh parsley, chopped
  • 1/4 cup olive oil
  • 2 tablespoons lemon juice
  • 1 teaspoon dried oregano
  • Salt and pepper to taste

These ingredients come together to create a salad that is not only colorful but also bursting with flavor. The cucumbers provide a refreshing crunch, while the cherry tomatoes add a touch of sweetness. The red onion gives a slight bite, and the feta cheese brings a creamy, salty element. Fresh parsley adds a pop of color and a hint of earthiness.

When it comes to the dressing, the combination of olive oil and lemon juice creates a light and zesty flavor that perfectly complements the salad. Dried oregano adds an aromatic touch, enhancing the overall taste. Don’t forget to season with salt and pepper to bring all the flavors together!

Now that you have all the ingredients ready, you’re one step closer to enjoying this delightful salad. Let’s move on to the preparation steps!

Step-by-Step Preparation of Cucumber Feta Salad with Lemon Dressing Recipe

Cucumber Feta Salad with Lemon Dressing Recipe. Follow these simple steps to create a delicious and refreshing salad that everyone will love!

Step 1: Preparing the Cucumbers

Start by washing the cucumbers thoroughly under cold water. This step is important to remove any dirt or pesticides. Once clean, slice the cucumbers in half lengthwise. Then, dice them into bite-sized pieces. The smaller the pieces, the easier they are to eat. Place the diced cucumbers in a large mixing bowl. Their crisp texture will be the foundation of your salad.

Step 2: Crumbling the Feta Cheese

Next, take your feta cheese and crumble it into small pieces. You can use your hands or a fork for this task. Crumbling the cheese allows it to mix well with the other ingredients. Add the crumbled feta to the bowl with the cucumbers. The creamy feta will add a delightful contrast to the crunchy cucumbers.

Step 3: Mixing the Dressing

In a separate small bowl, combine the olive oil, lemon juice, dried oregano, salt, and pepper. Use a whisk to mix everything together until it’s well blended. This dressing is what brings all the flavors together. The zesty lemon juice will brighten the salad, while the olive oil adds richness.

Step 4: Combining Ingredients

Now it’s time to bring everything together! Pour the dressing over the cucumber and feta mixture. Gently toss all the ingredients together using a spatula or large spoon. Be careful not to mash the feta too much. You want to keep those lovely chunks intact. This step ensures that every bite is full of flavor!

Step 5: Chilling the Salad

After combining all the ingredients, let the salad sit for about 10 minutes. This resting time allows the flavors to meld beautifully. If you have time, you can also refrigerate the salad for a bit longer. Chilling enhances the refreshing taste, making it even more enjoyable. Once ready, serve it up and watch everyone dig in!

Cucumber Feta Salad with Lemon Dressing Recipe. It’s a simple yet impressive dish that’s perfect for any occasion. Now, let’s explore some variations to make this salad even more exciting!

Variations of Cucumber Feta Salad with Lemon Dressing Recipe

Cucumber Feta Salad with Lemon Dressing Recipe is delicious as is, there are many ways to customize it. Adding your favorite ingredients can enhance the flavors and make it even more enjoyable. Here are some fun variations to consider!

Adding Fresh Herbs

Fresh herbs can elevate your salad to a whole new level. Consider adding basil, mint, or dill for a burst of flavor. These herbs not only add freshness but also bring unique tastes that complement the salad beautifully. For example, mint pairs wonderfully with cucumbers, giving a refreshing twist. Simply chop a handful of your chosen herbs and mix them in with the other ingredients. This small addition can make a big difference!

Incorporating Other Vegetables

Don’t hesitate to get creative with your vegetable choices! You can add diced bell peppers, radishes, or even avocados for extra texture and flavor. Bell peppers add a sweet crunch, while radishes provide a peppery bite. Avocados bring creaminess that pairs well with feta. Just chop them up and toss them in with the cucumbers and tomatoes. These additions not only enhance the taste but also make the salad more colorful and appealing.

Cucumber Feta Salad with Lemon Dressing Recipe that suits your taste. Enjoy the process of making it your own!

Cooking Note for Cucumber Feta Salad with Lemon Dressing Recipe

Cucumber Feta Salad with Lemon Dressing Recipe, there are a few cooking notes to keep in mind. These tips will help you achieve the best flavor and texture for your salad.

First, choose fresh, firm cucumbers. Look for cucumbers that are bright green and free from blemishes. Fresh cucumbers will provide the best crunch and flavor. If you prefer, you can peel the cucumbers for a different texture, but leaving the skin on adds extra nutrients and a lovely color.

Next, consider the ripeness of your cherry tomatoes. They should be vibrant and slightly soft to the touch. This ensures they are sweet and juicy, enhancing the overall taste of the salad. If you can, opt for organic tomatoes for the best flavor.

When it comes to feta cheese, crumbled feta is ideal for this recipe. However, if you have a block of feta, you can crumble it yourself for a fresher taste. Just remember to use a fork or your fingers to break it into small pieces, allowing it to blend well with the other ingredients.

Lastly, don’t rush the chilling process. Allowing the salad to sit for at least 10 minutes helps the flavors meld together. If you have time, refrigerate it for up to an hour. This extra time will make the salad even more refreshing and delicious.

Cucumber Feta Salad with Lemon Dressing Recipe turns out perfectly every time. Enjoy the process and the delightful flavors that come together in this simple yet satisfying dish!

Serving Suggestions for Cucumber Feta Salad with Lemon Dressing Recipe

Cucumber Feta Salad with Lemon Dressing Recipe, it’s time to think about how to serve it. This salad is not only delicious on its own but also pairs wonderfully with various dishes. Here are some serving suggestions to enhance your meal experience!

Pairing with Grilled Meats

Cucumber Feta Salad with Lemon Dressing Recipe is an excellent side dish for grilled meats. The refreshing flavors of the salad complement the smoky, savory taste of grilled chicken, steak, or fish. Imagine enjoying a juicy grilled chicken breast alongside this vibrant salad. The coolness of the cucumbers and the tanginess of the feta create a perfect balance with the rich flavors of the meat.

For a complete meal, consider serving the salad with grilled kebabs or marinated pork chops. The zesty lemon dressing will cut through the richness of the meat, making each bite delightful. You can even add a side of warm pita bread to soak up the delicious dressing. This combination is sure to impress your family and friends at your next barbecue!

Serving as a Light Lunch

Cucumber Feta Salad with Lemon Dressing Recipe is perfect. It’s light yet filling, making it an ideal choice for a midday meal. You can enjoy it on its own or pair it with a slice of whole-grain bread for added sustenance.

For an even heartier lunch, consider adding some protein. Grilled shrimp or chickpeas can be tossed into the salad for an extra boost. This way, you’ll have a balanced meal that’s both nutritious and satisfying. Plus, it’s easy to prepare in advance, making it a great option for meal prep. Just store it in the fridge, and you’ll have a delicious lunch ready to go!

Cucumber Feta Salad with Lemon Dressing Recipe is versatile and delicious. It’s a fantastic addition to any meal, bringing freshness and flavor to your table!

Tips for Perfecting Cucumber Feta Salad with Lemon Dressing Recipe

Cucumber Feta Salad with Lemon Dressing Recipe truly shine, consider these helpful tips. They will ensure that your salad is not only delicious but also visually appealing and full of flavor.

First, always use fresh ingredients. Fresh cucumbers and ripe tomatoes will enhance the taste of your salad. Look for cucumbers that are firm and free from blemishes. For tomatoes, choose ones that are vibrant and slightly soft to the touch. This will guarantee a burst of flavor in every bite.

Next, don’t skip the chilling step! Allowing the salad to sit for at least 10 minutes before serving helps the flavors meld together. If you have time, refrigerate it for up to an hour. This extra chilling time makes the salad even more refreshing, especially on a hot day.

When mixing the dressing, whisk it well to ensure all ingredients are combined. This will help distribute the flavors evenly throughout the salad. If you prefer a creamier dressing, consider adding a dollop of Greek yogurt. It adds a nice tang and richness.

For added texture, consider toasting some nuts or seeds. Almonds or sunflower seeds can provide a delightful crunch. Just sprinkle them on top before serving for an extra layer of flavor.

Lastly, taste as you go! Adjust the seasoning to your liking. If you prefer a bit more acidity, add a splash more lemon juice. If you like it saltier, sprinkle in a little more salt. Personalizing the flavors will make the salad truly yours.

Cucumber Feta Salad with Lemon Dressing Recipe that’s not only delicious but also a feast for the eyes. Enjoy the process and the delightful flavors that come together in this simple yet satisfying dish!

Breakdown of Time for Cucumber Feta Salad with Lemon Dressing Recipe

Cucumber Feta Salad with Lemon Dressing Recipe can help you plan your meals better. This salad is quick to make, making it a great option for busy days. Here’s a breakdown of the time involved in each step:

Prep Time

The prep time for this salad is approximately 15 minutes. This includes washing and dicing the cucumbers, halving the cherry tomatoes, slicing the red onion, and crumbling the feta cheese. If you choose to add extra vegetables or herbs, you might need a few more minutes. However, with a little practice, you can easily streamline this process!

Cooking Time

There is no actual cooking time involved in this recipe. The only time you need to consider is the resting period after mixing the salad. Allowing the salad to sit for about 10 minutes helps the flavors meld together beautifully. If you prefer, you can chill it in the refrigerator for up to an hour for an even more refreshing taste.

Total Time

Cucumber Feta Salad with Lemon Dressing Recipe a quick and easy dish to prepare, perfect for any occasion!

Nutritional Information for Cucumber Feta Salad with Lemon Dressing Recipe

Cucumber Feta Salad with Lemon Dressing Recipe is essential for those who are health-conscious or following specific dietary plans. This salad is not only delicious but also offers a variety of nutrients that can benefit your overall health. Here’s a breakdown of the key nutritional components per serving:

Calories

Cucumber Feta Salad with Lemon Dressing Recipe contains approximately 180 calories. This makes it a light and satisfying option for those looking to maintain or lose weight. The low-calorie count allows you to enjoy this salad without feeling guilty, making it a great addition to any meal.

Protein

In terms of protein, this salad provides about 6 grams per serving. The feta cheese contributes a good amount of protein, which is essential for muscle repair and growth. Including protein in your meals can help keep you feeling full longer, making this salad a smart choice for a balanced diet.

Sodium

Cucumber Feta Salad with Lemon Dressing Recipe is approximately 400 milligrams per serving. While feta cheese does contain some sodium, you can control the overall saltiness by adjusting the amount of added salt in the dressing. For those watching their sodium intake, consider using low-sodium feta cheese or reducing the salt in the recipe.

Cucumber Feta Salad with Lemon Dressing Recipe!

FAQs about Cucumber Feta Salad with Lemon Dressing Recipe

Can I make Cucumber Feta Salad with Lemon Dressing in advance?

Cucumber Feta Salad with Lemon Dressing Recipe in advance! Preparing it a few hours ahead of time allows the flavors to meld beautifully. However, it’s best to add the dressing just before serving. This keeps the cucumbers crisp and prevents them from becoming soggy. If you do prepare it in advance, store the salad in an airtight container in the refrigerator. Just remember to give it a gentle toss before serving to redistribute the dressing!

What can I substitute for feta cheese in this recipe?

If you’re looking for a substitute for feta cheese, there are several options! Crumbled goat cheese is a popular alternative, offering a creamy texture and tangy flavor. You can also use ricotta cheese for a milder taste. For a dairy-free option, try using crumbled tofu mixed with a bit of lemon juice and salt. This will give you a similar texture without the dairy. Each substitute will bring its unique flavor, so feel free to experiment and find what you like best!

How long does Cucumber Feta Salad with Lemon Dressing last in the fridge?

Cucumber Feta Salad with Lemon Dressing Recipe can last in the fridge for about 2 to 3 days. However, the quality may decline over time. The cucumbers may become softer, and the flavors might change. To keep it fresh, store the salad in an airtight container. If you notice any excess liquid forming, you can drain it before serving. For the best taste and texture, try to enjoy the salad within the first couple of days!

Conclusion on Cucumber Feta Salad with Lemon Dressing Recipe

Cucumber Feta Salad with Lemon Dressing Recipe is a delightful dish that brings together fresh ingredients and vibrant flavors. It’s not just a salad; it’s a celebration of taste and health. With its crisp cucumbers, juicy tomatoes, and creamy feta, this salad is sure to be a hit at any gathering or meal.

Whether you’re enjoying it as a light lunch or serving it alongside grilled meats, this salad offers versatility and satisfaction. The zesty lemon dressing ties everything together, making each bite refreshing and enjoyable. Plus, with the option to customize it with fresh herbs or additional vegetables, you can easily make it your own.

Cucumber Feta Salad with Lemon Dressing Recipe.

We hope you enjoy making and sharing this salad as much as we do. Happy cooking!

Blueberry Rhubarb Crisp is a must-try dessert recipe!

Introduction to Blueberry Rhubarb Crisp Recipe

Blueberry Rhubarb Crisp Recipe is not just a dessert; it’s a celebration of seasonal fruits. This dish is perfect for family gatherings, potlucks, or simply enjoying a cozy evening at home.

What Makes Blueberry Rhubarb Crisp Special?

What sets this crisp apart? First, it’s the unique blend of blueberries and rhubarb. Blueberries bring a natural sweetness, while rhubarb adds a tangy kick. Together, they create a flavor explosion that dances on your taste buds. Plus, the crisp topping made from oats and brown sugar adds a delightful crunch.

Another reason this recipe shines is its versatility. You can easily customize it to suit your taste. Whether you prefer a nutty topping or want to swap out the fruits, the options are endless. This dish is also simple to prepare, making it a great choice for both novice and experienced bakers.

Blueberry Rhubarb Crisp Recipe is a fantastic way to enjoy the health benefits of these fruits. Blueberries are packed with antioxidants, while rhubarb is low in calories and high in fiber. So, you can indulge in this dessert without the guilt!

In the following sections, we will guide you through the ingredients, preparation steps, and tips to make your Blueberry Rhubarb Crisp a hit. Get ready to impress your friends and family with this scrumptious dessert!

Ingredients for Blueberry Rhubarb Crisp Recipe

Blueberry Rhubarb Crisp Recipe, you’ll need a handful of fresh ingredients. Each component plays a vital role in achieving that delightful balance of flavors and textures. Here’s what you’ll need:

  • 2 cups fresh blueberries: These juicy berries add sweetness and a burst of flavor.
  • 2 cups rhubarb, chopped into 1-inch pieces: Rhubarb brings a tangy taste that complements the blueberries beautifully.
  • 1 cup granulated sugar: This sweetener helps balance the tartness of the rhubarb.
  • 2 tablespoons cornstarch: This thickening agent helps create a luscious filling.
  • 1 teaspoon vanilla extract: A splash of vanilla enhances the overall flavor.
  • 1 tablespoon lemon juice: This adds brightness and acidity to the fruit mixture.
  • 1 cup rolled oats: Oats provide a hearty texture to the crisp topping.
  • 1 cup all-purpose flour: This forms the base of the topping, giving it structure.
  • 1/2 cup brown sugar, packed: Brown sugar adds a rich, caramel-like flavor.
  • 1/2 teaspoon cinnamon: A hint of cinnamon warms up the dish with its aromatic spice.
  • 1/2 cup unsalted butter, melted: Butter binds the topping ingredients together and adds richness.

Gathering these ingredients is the first step toward creating a delicious dessert that everyone will love. Make sure to use fresh blueberries and rhubarb for the best flavor. Now that you have everything ready, let’s move on to the preparation steps!

Step-by-Step Preparation of Blueberry Rhubarb Crisp Recipe

Blueberry Rhubarb Crisp Recipe. Follow these simple steps to create a delicious dessert that will impress everyone!

Step 1: Preparing the Rhubarb and Blueberries

First, let’s get our fruits ready. Start by washing the fresh blueberries under cool water. Gently pat them dry with a clean towel. Next, take the rhubarb and chop it into 1-inch pieces. Make sure to remove any leaves, as they are toxic. In a large mixing bowl, combine the blueberries and chopped rhubarb. Add the granulated sugar, cornstarch, vanilla extract, and lemon juice. Toss everything together until the fruits are well coated. This mixture will create a sweet and tangy filling that’s simply irresistible!

Step 2: Making the Crisp Topping

Now, let’s move on to the topping. In another bowl, mix together the rolled oats, all-purpose flour, brown sugar, and cinnamon. Stir these dry ingredients until they are evenly combined. Next, pour in the melted butter. Use a fork or your fingers to mix everything together until it resembles a crumbly texture. This topping will add a delightful crunch to your crisp, making it even more enjoyable!

Step 3: Assembling the Blueberry Rhubarb Crisp

With both the fruit filling and topping ready, it’s time to assemble your crisp. Take a greased 9×13-inch baking dish and pour the fruit mixture into it. Spread it out evenly. Then, sprinkle the oat topping generously over the fruit. Make sure to cover the filling completely. This will ensure that every bite is packed with flavor and texture!

Step 4: Baking the Blueberry Rhubarb Crisp

Finally, it’s time to bake! Preheat your oven to 350°F (175°C) if you haven’t already. Place the assembled crisp in the oven and bake for 35-40 minutes. You’ll know it’s ready when the topping turns golden brown and the fruit filling starts bubbling. Once it’s done, remove it from the oven and let it cool for at least 10 minutes before serving. This cooling time allows the filling to set, making it easier to serve.

Blueberry Rhubarb Crisp Recipe is ready to be enjoyed. The combination of sweet blueberries and tart rhubarb, topped with a crunchy oat mixture, is sure to be a hit!

Variations of Blueberry Rhubarb Crisp Recipe

Blueberry Rhubarb Crisp Recipe is a fantastic base that allows for many delicious variations. Whether you have dietary restrictions or simply want to try something new, these variations will keep your dessert exciting and flavorful. Let’s explore some options!

Gluten-Free Options

If you or your guests are gluten-sensitive, you can easily make a gluten-free version of this crisp. Start by substituting the all-purpose flour with a gluten-free flour blend. Many brands offer great alternatives that work well in baking. Additionally, ensure that your rolled oats are certified gluten-free. This way, you can enjoy the same delightful taste and texture without worrying about gluten!

Blueberry Rhubarb Crisp Recipe will be safe for everyone to enjoy!

Adding Nuts or Oats

For those who love a bit of crunch, consider adding nuts to your crisp topping. Chopped walnuts, pecans, or almonds can enhance the flavor and texture. Simply mix in about 1/2 cup of your favorite nuts with the dry ingredients in the topping. This addition not only provides a delightful crunch but also boosts the nutritional value of your dessert.

Blueberry Rhubarb Crisp Recipe even more delicious!

With these variations, you can customize your crisp to suit your taste and dietary needs. Enjoy experimenting and finding your perfect version of this classic dessert!

Cooking Note for Blueberry Rhubarb Crisp Recipe

Blueberry Rhubarb Crisp Recipe, there are a few important cooking notes to keep in mind. These tips will help ensure that your dessert turns out perfectly every time!

First, always use fresh ingredients. Fresh blueberries and rhubarb will provide the best flavor and texture. If you can, buy them from a local farmer’s market. This way, you support local growers and get the freshest produce available.

Next, pay attention to the ripeness of your rhubarb. It should be firm and crisp, with a vibrant color. Avoid any stalks that are limp or have brown spots. These can affect the overall taste of your crisp.

When mixing the fruit filling, make sure to coat the blueberries and rhubarb evenly with sugar and cornstarch. This step is crucial as it helps to thicken the juices released during baking. If the mixture is not well-coated, your filling may turn out too runny.

For the topping, ensure that the melted butter is not too hot when you mix it with the dry ingredients. If it is too hot, it can cook the oats and flour, resulting in a less desirable texture. Let the butter cool slightly before combining it with the other ingredients.

Lastly, keep an eye on the baking time. Ovens can vary, so check your crisp a few minutes before the suggested time. You want the topping to be golden brown and the fruit bubbling. If the topping browns too quickly, you can cover it loosely with aluminum foil to prevent burning.

Blueberry Rhubarb Crisp Recipe that everyone will love. Happy baking!

Serving Suggestions for Blueberry Rhubarb Crisp Recipe

Blueberry Rhubarb Crisp Recipe is baked to perfection, it’s time to think about how to serve it. This delightful dessert can be enjoyed in many ways, making it a versatile choice for any occasion. Here are some serving suggestions to elevate your crisp experience!

Best Pairings with Blueberry Rhubarb Crisp

One of the best ways to enjoy your Blueberry Rhubarb Crisp is by serving it warm. The comforting warmth enhances the flavors and makes it even more inviting. Here are some delicious pairings to consider:

  • Vanilla Ice Cream: A scoop of creamy vanilla ice cream on top of warm crisp is a classic combination. The cold ice cream melts slightly, creating a delightful contrast with the warm fruit filling.
  • Whipped Cream: Light and fluffy whipped cream adds a touch of sweetness. You can either make it from scratch or use store-bought for convenience.
  • Greek Yogurt: For a healthier option, serve your crisp with a dollop of Greek yogurt. It adds creaminess and a slight tang that complements the sweetness of the dessert.
  • Custard Sauce: Drizzling warm custard sauce over your crisp can take it to the next level. The rich, creamy sauce pairs beautifully with the fruity filling.
  • Fresh Mint: Garnishing with fresh mint leaves not only adds a pop of color but also a refreshing flavor that brightens the dish.

Blueberry Rhubarb Crisp Recipe, making it a delightful treat for everyone. Whether you’re serving it at a family gathering or enjoying it on a quiet evening, these suggestions will surely impress!

Tips for Perfecting Your Blueberry Rhubarb Crisp Recipe

Blueberry Rhubarb Crisp Recipe truly shine, consider these helpful tips. They will guide you in achieving the best flavor and texture, ensuring that your dessert is a hit every time!

Use Fresh Ingredients

Always opt for fresh blueberries and rhubarb. Fresh produce not only enhances the flavor but also contributes to the overall texture of your crisp. If possible, buy them from local farmers’ markets. This way, you support local agriculture while enjoying the freshest fruits available.

Adjust Sweetness to Taste

Everyone has different preferences when it comes to sweetness. Feel free to adjust the amount of granulated sugar based on your taste. If you prefer a less sweet dessert, reduce the sugar slightly. Conversely, if you love a sweeter crisp, add a bit more sugar. Just remember, the natural sweetness of the blueberries will also play a role!

Experiment with Spices

Blueberry Rhubarb Crisp Recipe and make it even more delightful.

Let It Cool

After baking, allow your crisp to cool for at least 10 minutes before serving. This cooling time helps the filling set, making it easier to serve. Plus, it allows the flavors to meld together beautifully. While it may be tempting to dig in right away, patience will reward you with a better texture!

Store Properly

Blueberry Rhubarb Crisp Recipe can last for up to three days. When ready to enjoy, simply reheat it in the oven or microwave. This way, you can savor the deliciousness even after the initial serving!

Blueberry Rhubarb Crisp Recipe that everyone will love. Happy baking!

Breakdown of Time for Blueberry Rhubarb Crisp Recipe

Blueberry Rhubarb Crisp Recipe can help you plan your baking session better. Here’s a simple breakdown of the time required for preparation and cooking.

Prep Time

The prep time for this delicious dessert is approximately 15-20 minutes. During this time, you will wash and chop the rhubarb, rinse the blueberries, and mix the ingredients for both the fruit filling and the crisp topping. It’s a quick and easy process that sets the stage for your delightful crisp!

Cooking Time

Once your crisp is assembled, it will need to bake in the oven for about 35-40 minutes. This cooking time allows the topping to become golden brown and the fruit filling to bubble up, creating that irresistible aroma. Keep an eye on it as it bakes to ensure it doesn’t overcook.

Total Time

Blueberry Rhubarb Crisp Recipe for any occasion!

Nutritional Information for Blueberry Rhubarb Crisp Recipe

Blueberry Rhubarb Crisp Recipe can help you enjoy this dessert while keeping your health in mind. Here’s a breakdown of the key nutritional components per serving, so you can indulge without worry!

Calories

Each serving of this delightful crisp contains approximately 220 calories. This makes it a relatively light dessert option, especially when compared to many other sweet treats. The combination of fresh fruits and wholesome ingredients ensures that you’re not just consuming empty calories, but rather a dessert that offers flavor and nutrition.

Protein

In terms of protein, each serving provides about 2 grams. While this may not seem like a lot, the protein content comes from the oats and any nuts you might add. If you’re looking to boost the protein level, consider serving your crisp with a dollop of Greek yogurt or a scoop of ice cream, which can enhance both the flavor and nutritional value.

Sodium

Blueberry Rhubarb Crisp Recipe is quite low, typically around 100 mg. This makes it a heart-healthy dessert choice. Keeping sodium levels in check is important for maintaining overall health, and this recipe fits the bill nicely.

Blueberry Rhubarb Crisp Recipe guilt-free. It’s a delicious way to satisfy your sweet tooth while still being mindful of your dietary needs!

FAQs about Blueberry Rhubarb Crisp Recipe

Can I use frozen blueberries for the Blueberry Rhubarb Crisp Recipe?

Blueberry Rhubarb Crisp Recipe. Frozen blueberries are a great alternative, especially when fresh ones are out of season. Just remember to thaw them first and drain any excess liquid. This will help prevent your crisp from becoming too watery. Using frozen blueberries can still yield a delicious dessert that everyone will enjoy!

How do I store leftover Blueberry Rhubarb Crisp?

Blueberry Rhubarb Crisp Recipe is easy! Allow the crisp to cool completely, then transfer it to an airtight container. You can keep it in the refrigerator for up to three days. When you’re ready to enjoy it again, simply reheat it in the oven or microwave. Reheating will bring back that warm, comforting texture that makes this dessert so delightful!

Can I substitute rhubarb with another fruit in the Blueberry Rhubarb Crisp Recipe?

Blueberry Rhubarb Crisp Recipe. Just keep in mind that different fruits may have varying sweetness levels, so you might need to adjust the sugar accordingly. This flexibility allows you to create a crisp that suits your taste perfectly!

Conclusion on Blueberry Rhubarb Crisp Recipe

Blueberry Rhubarb Crisp Recipe is a delightful dessert that brings together the best of both worlds: the sweetness of blueberries and the tartness of rhubarb. This recipe is not only easy to prepare but also offers endless possibilities for customization. Whether you stick to the classic version or try out the variations, you’re sure to create a dish that will impress your family and friends.

As you bake this crisp, remember the joy of cooking and sharing delicious food. The aroma of the crisp baking in the oven is enough to make anyone’s mouth water. Plus, serving it warm with a scoop of ice cream or a dollop of whipped cream can elevate the experience even further.

Don’t forget the health benefits! With fresh fruits and wholesome ingredients, you can indulge in this dessert without feeling guilty. It’s a wonderful way to enjoy seasonal produce while treating yourself to something sweet.

Blueberry Rhubarb Crisp Recipe. Whether it’s for a special occasion or just a cozy night in, this dessert is sure to bring smiles all around. Happy baking!

Honey BBQ Chicken Rice Bowl Recipe is a must-try!

Introduction to Honey BBQ Chicken Rice Bowl Recipe

Are you looking for a delicious and easy meal that the whole family will love? Look no further than the Honey BBQ Chicken Rice Bowl Recipe! This dish combines tender chicken thighs, sweet honey, and tangy BBQ sauce, all served over a bed of fluffy rice. It’s not just tasty; it’s also colorful and packed with nutrients. Plus, it’s quick to prepare, making it perfect for busy weeknights.

What Makes the Honey BBQ Chicken Rice Bowl Special?

The Honey BBQ Chicken Rice Bowl stands out for several reasons. First, the combination of honey and BBQ sauce creates a delightful balance of sweetness and smokiness. This flavor profile makes every bite exciting! Second, the dish is versatile. You can easily customize it with your favorite ingredients, such as different vegetables or grains. Lastly, it’s a complete meal in one bowl, which means less cleanup and more time to enjoy with your loved ones.

Whether you’re a seasoned cook or just starting, this recipe is simple to follow. With just a few ingredients and steps, you can create a satisfying meal that will impress everyone at the table. So, let’s dive into the ingredients and get cooking!

Ingredients for Honey BBQ Chicken Rice Bowl Recipe

To create the delicious Honey BBQ Chicken Rice Bowl, you’ll need a few simple ingredients. Each component plays a vital role in building flavor and texture. Here’s what you’ll need:

  • 2 cups cooked white rice
  • 1 lb boneless, skinless chicken thighs
  • 1 cup BBQ sauce (your favorite brand)
  • 1/4 cup honey
  • 1 tablespoon olive oil
  • 1 teaspoon garlic powder
  • 1 teaspoon onion powder
  • 1/2 teaspoon salt
  • 1/4 teaspoon black pepper
  • 1 cup corn (canned or frozen)
  • 1 cup black beans (canned, rinsed and drained)
  • 1/2 cup diced red bell pepper
  • 1/4 cup chopped fresh cilantro (optional)
  • Lime wedges for serving

These ingredients come together to create a delightful meal that is both satisfying and nutritious. The chicken thighs provide a juicy protein base, while the honey and BBQ sauce add a sweet and tangy flavor. The corn and black beans contribute fiber and color, making the dish visually appealing. Finally, the fresh cilantro and lime wedges add a burst of freshness that elevates the entire bowl.

Feel free to adjust the ingredients based on your preferences. For instance, you can swap out the chicken for another protein or add more vegetables to suit your taste. Now that you have your ingredients ready, let’s move on to the step-by-step preparation!

Step-by-Step Preparation of Honey BBQ Chicken Rice Bowl Recipe

Now that you have all your ingredients ready, it’s time to dive into the step-by-step preparation of the Honey BBQ Chicken Rice Bowl Recipe. Each step is simple and straightforward, ensuring that you can create this delicious meal with ease. Let’s get started!

Step 1: Marinating the Chicken

First, we need to marinate the chicken to infuse it with flavor. In a large bowl, mix together the BBQ sauce and honey until they are well combined. This sweet and tangy mixture is what makes the chicken so tasty! Reserve half of this sauce for later use. Next, add the boneless, skinless chicken thighs to the bowl, ensuring they are evenly coated with the marinade. Cover the bowl and let the chicken marinate for at least 30 minutes. If you have more time, letting it sit for up to 2 hours in the refrigerator will enhance the flavor even more.

Step 2: Cooking the Chicken

Once the chicken has marinated, it’s time to cook it. Heat a tablespoon of olive oil in a large skillet over medium heat. Carefully remove the chicken from the marinade and place it in the skillet. Cook the chicken for about 5-7 minutes on each side. You want it to be golden brown and cooked through. To ensure it’s safe to eat, use a meat thermometer to check that the internal temperature reaches 165°F. Once cooked, remove the chicken from the skillet and let it rest for a few minutes before slicing it into strips.

Step 3: Preparing the Rice

While the chicken is cooking, you can prepare the rice and other ingredients. In a separate pot, heat the corn and black beans over medium heat until they are warmed through. This step adds a nice texture and flavor to the bowl. Season the mixture with garlic powder, onion powder, salt, and black pepper. Stir well to combine all the flavors. This will create a delicious base for your rice bowl!

Step 4: Assembling the Bowl

Now comes the fun part—assembling your Honey BBQ Chicken Rice Bowl! Start by dividing the cooked white rice among four bowls. Next, top each bowl with the warm corn and black bean mixture. Then, add the sliced chicken on top. For a pop of color and crunch, sprinkle diced red bell pepper over each bowl. Finally, drizzle the reserved BBQ sauce over everything and garnish with chopped fresh cilantro, if desired. Serve with lime wedges on the side for an extra burst of flavor!

And there you have it! A delicious and colorful Honey BBQ Chicken Rice Bowl that is sure to please everyone at the table. Enjoy your meal!

Variations of Honey BBQ Chicken Rice Bowl Recipe

The Honey BBQ Chicken Rice Bowl is a fantastic dish that can be easily adapted to suit different tastes and dietary preferences. Whether you want to switch up the protein or explore vegetarian options, there are plenty of ways to make this recipe your own. Let’s take a look at some delicious variations!

Alternative Proteins

If you’re not in the mood for chicken, there are several alternative proteins you can use. Here are a few ideas:

  • Turkey: Ground turkey is a lean option that works well with the BBQ sauce. Cook it in the same way as the chicken for a lighter meal.
  • Pork: Boneless pork chops or tenderloin can be marinated and cooked similarly. They add a different flavor profile that pairs nicely with the honey BBQ sauce.
  • Tofu: For a plant-based option, use firm tofu. Press it to remove excess moisture, then marinate and cook until golden brown.
  • Fish: Salmon or tilapia can be grilled or pan-seared with the BBQ sauce for a unique twist. The fish will absorb the flavors beautifully!

These alternative proteins not only change the flavor but also provide different nutritional benefits. Feel free to experiment and find your favorite!

Vegetarian Options

If you’re looking for a vegetarian version of the Honey BBQ Chicken Rice Bowl, you can easily create a satisfying meal without meat. Here are some tasty ideas:

  • Grilled Vegetables: Use a mix of your favorite vegetables, such as zucchini, bell peppers, and mushrooms. Grill or sauté them with the BBQ sauce for a smoky flavor.
  • Chickpeas: Canned chickpeas are a great source of protein. Toss them in the BBQ sauce and heat them up for a hearty addition to your bowl.
  • Quinoa: Instead of rice, use quinoa as a base. It’s packed with protein and adds a nutty flavor to the dish.
  • Cauliflower: Roasted cauliflower can be a fantastic substitute. Toss it in BBQ sauce and roast until crispy for a delicious crunch.

These vegetarian options are not only healthy but also full of flavor. They make the Honey BBQ Chicken Rice Bowl a versatile dish that everyone can enjoy!

Cooking Note for Honey BBQ Chicken Rice Bowl Recipe

When preparing the Honey BBQ Chicken Rice Bowl, there are a few cooking notes to keep in mind to ensure your dish turns out perfectly every time. These tips will help you achieve the best flavor and texture, making your meal even more enjoyable.

First, marinating the chicken is crucial. The longer you let it sit in the BBQ sauce and honey mixture, the more flavorful it will be. If you can, aim for at least an hour. This allows the chicken to absorb all those delicious flavors, making each bite a treat!

Next, when cooking the chicken, make sure your skillet is hot enough before adding the meat. This helps to sear the chicken, creating a nice glaze on the outside. If the skillet is too cool, the chicken may steam instead of brown, which can affect the overall taste.

Also, remember to let the chicken rest after cooking. This step is often overlooked but is essential. Allowing the chicken to rest for a few minutes helps the juices redistribute, keeping the meat tender and juicy when you slice it.

As you prepare the corn and black bean mixture, feel free to adjust the seasonings to your liking. If you enjoy a bit of heat, consider adding a pinch of cayenne pepper or some diced jalapeños. This can elevate the flavor profile and add a spicy kick to your bowl.

Lastly, presentation matters! When assembling your bowls, take a moment to arrange the ingredients neatly. A colorful and well-presented dish is more appetizing and makes for a delightful dining experience. Don’t forget to serve with lime wedges on the side; a squeeze of fresh lime juice can brighten up the flavors even more!

By keeping these cooking notes in mind, you’ll create a Honey BBQ Chicken Rice Bowl that is not only delicious but also visually appealing. Enjoy your cooking adventure!

Serving Suggestions for Honey BBQ Chicken Rice Bowl Recipe

When it comes to serving your Honey BBQ Chicken Rice Bowl, presentation and accompaniments can elevate the dining experience. Here are some delightful serving suggestions to make your meal even more enjoyable:

  • Garnish with Fresh Herbs: A sprinkle of fresh cilantro or parsley adds a pop of color and freshness. It enhances the flavor and makes the dish visually appealing.
  • Pair with a Side Salad: A light side salad with mixed greens, cherry tomatoes, and a simple vinaigrette complements the richness of the rice bowl. It adds a refreshing crunch and balances the meal.
  • Offer Extra BBQ Sauce: Serve additional BBQ sauce on the side for those who love extra flavor. This allows everyone to customize their bowl to their liking.
  • Include Avocado Slices: Creamy avocado slices can be a delicious addition. They provide healthy fats and a smooth texture that pairs well with the other ingredients.
  • Serve with Tortilla Chips: For a fun twist, add a side of tortilla chips. They can be used to scoop up the rice bowl or enjoyed on their own with the BBQ sauce.
  • Use Lime Wedges: Don’t forget the lime wedges! A squeeze of fresh lime juice over the bowl brightens the flavors and adds a zesty kick.

These serving suggestions not only enhance the flavor but also create a more enjoyable dining experience. Whether you’re hosting a family dinner or a casual get-together with friends, these ideas will impress your guests and make the Honey BBQ Chicken Rice Bowl a memorable meal!

Tips for Perfecting Your Honey BBQ Chicken Rice Bowl Recipe

Creating the perfect Honey BBQ Chicken Rice Bowl is all about attention to detail. With a few simple tips, you can elevate this dish to new heights. Here are some helpful suggestions to ensure your meal is not only delicious but also visually appealing and satisfying.

First, always use high-quality ingredients. Fresh chicken thighs, a good brand of BBQ sauce, and organic honey can make a significant difference in flavor. When you start with quality ingredients, the end result will be much tastier.

Next, don’t rush the marinating process. Allowing the chicken to marinate for at least 30 minutes is essential. If you can, let it sit for a couple of hours. This extra time allows the flavors to penetrate the meat, making it more flavorful and juicy.

When cooking the chicken, ensure your skillet is preheated. A hot skillet helps to sear the chicken, creating a beautiful glaze. If the skillet is too cool, the chicken may not brown properly, which can affect the overall taste.

Another tip is to slice the chicken against the grain. This technique helps to keep the meat tender and easy to chew. After resting the chicken, take a moment to observe the grain direction and cut accordingly.

For added texture, consider toasting the rice before adding the water. This step enhances the nutty flavor and gives the rice a delightful crunch. Simply heat the rice in the pot for a few minutes before cooking it as usual.

Don’t forget to taste as you go! Adjust the seasonings in the corn and black bean mixture to suit your preferences. If you like it spicy, add some diced jalapeños or a sprinkle of cayenne pepper. This customization allows you to create a dish that perfectly matches your taste.

Lastly, presentation is key! Take the time to arrange the ingredients neatly in the bowls. A colorful and well-organized dish is more appetizing. Use vibrant vegetables and fresh herbs to make your Honey BBQ Chicken Rice Bowl visually stunning.

By following these tips, you’ll create a Honey BBQ Chicken Rice Bowl that is not only delicious but also a feast for the eyes. Enjoy the process and savor every bite!

Breakdown of Time for Honey BBQ Chicken Rice Bowl Recipe

Understanding the time required for each step of the Honey BBQ Chicken Rice Bowl Recipe can help you plan your cooking efficiently. Here’s a breakdown of the time you’ll need for preparation and cooking:

Prep Time

The prep time for this recipe is approximately 10-15 minutes. This includes gathering your ingredients, mixing the BBQ sauce and honey, and marinating the chicken. If you choose to let the chicken marinate for longer, you can adjust this time accordingly. Remember, the longer the chicken marinates, the more flavorful it will be!

Cooking Time

The cooking time for the Honey BBQ Chicken Rice Bowl is about 20-25 minutes. This includes cooking the chicken in the skillet and heating the corn and black beans. Make sure to keep an eye on the chicken to ensure it cooks evenly and reaches the safe internal temperature of 165°F.

Total Time

In total, you can expect the entire process to take around 30-40 minutes, depending on how long you marinate the chicken. This makes it a quick and easy meal option for busy weeknights. With just a little bit of planning, you can have a delicious and satisfying Honey BBQ Chicken Rice Bowl ready in no time!

Nutritional Information for Honey BBQ Chicken Rice Bowl Recipe

Understanding the nutritional content of your meals is essential for maintaining a balanced diet. The Honey BBQ Chicken Rice Bowl is not only delicious but also provides a good mix of nutrients. Here’s a breakdown of the nutritional information per serving:

Calories

Each serving of the Honey BBQ Chicken Rice Bowl contains approximately 480 calories. This makes it a satisfying meal that can fit into a variety of dietary plans. The combination of protein, carbohydrates, and healthy fats ensures that you feel full and energized after enjoying this dish.

Protein

With about 30 grams of protein per serving, this recipe is an excellent source of this essential nutrient. Protein is vital for muscle repair, immune function, and overall health. The chicken thighs provide a hearty protein base, while the black beans contribute additional protein and fiber, making this bowl a well-rounded meal.

Sodium

The sodium content in each serving is approximately 800 mg. While this is a reasonable amount for a meal, it’s important to be mindful of your overall sodium intake throughout the day. If you’re watching your sodium levels, consider using low-sodium BBQ sauce or rinsing the canned beans to reduce the sodium content.

Overall, the Honey BBQ Chicken Rice Bowl is a nutritious option that offers a balance of calories, protein, and flavor. By being aware of the nutritional information, you can enjoy this meal while keeping your dietary goals in mind!

FAQs about Honey BBQ Chicken Rice Bowl Recipe

Can I use a different type of meat for the Honey BBQ Chicken Rice Bowl Recipe?

Absolutely! The Honey BBQ Chicken Rice Bowl Recipe is versatile. You can easily swap out the chicken for other proteins. Turkey, pork, or even fish like salmon work wonderfully. If you prefer a plant-based option, tofu or tempeh can be great substitutes. Just remember to adjust the cooking times based on the protein you choose to ensure everything is cooked perfectly!

How can I make the Honey BBQ Chicken Rice Bowl Recipe spicier?

If you love a bit of heat, there are several ways to spice up your Honey BBQ Chicken Rice Bowl. One simple method is to add a teaspoon of cayenne pepper to the BBQ sauce mixture. You can also include diced jalapeños or hot sauce when preparing the corn and black bean mixture. These additions will give your dish a delightful kick without overpowering the sweet and tangy flavors!

What can I substitute for rice in the Honey BBQ Chicken Rice Bowl Recipe?

There are plenty of delicious alternatives to rice if you want to switch things up! Quinoa is a fantastic option, as it’s packed with protein and has a nutty flavor. Brown rice is another healthy choice, offering more fiber than white rice. For a low-carb option, consider using cauliflower rice. It’s light and absorbs flavors well, making it a great base for your bowl!

How long can I store leftovers of the Honey BBQ Chicken Rice Bowl Recipe?

Leftovers from the Honey BBQ Chicken Rice Bowl can be stored in an airtight container in the refrigerator for up to 3-4 days. To reheat, simply warm it in the microwave or on the stovetop until heated through. If you want to keep the ingredients fresh, consider storing the components separately. This way, you can enjoy the flavors just as they were when first made!

Conclusion on Honey BBQ Chicken Rice Bowl Recipe

In conclusion, the Honey BBQ Chicken Rice Bowl Recipe is a delightful dish that brings together a wonderful mix of flavors and textures. With its sweet and tangy BBQ sauce, tender chicken, and colorful vegetables, this meal is not only satisfying but also visually appealing. It’s perfect for busy weeknights or casual gatherings with family and friends.

By following the simple steps outlined in this recipe, you can create a wholesome meal that everyone will love. The versatility of this dish allows you to customize it to your liking, whether you choose to switch up the protein or add more veggies. Plus, with the tips and variations provided, you can easily make this recipe your own.

As you enjoy your Honey BBQ Chicken Rice Bowl, remember that cooking is all about creativity and fun. Don’t hesitate to experiment with different ingredients and flavors. Whether you’re a seasoned chef or a beginner in the kitchen, this recipe is designed to be approachable and enjoyable.

So gather your ingredients, roll up your sleeves, and get ready to savor a delicious meal that’s sure to become a favorite in your household. Happy cooking!

Chipotle Pineapple Chicken Tacos are a must-try dish!

Introduction to Chipotle Pineapple Chicken Tacos Recipe

Chipotle Pineapple Chicken Tacos Recipe is a delightful twist on traditional tacos. This dish combines the smoky heat of chipotle with the sweet juiciness of fresh pineapple. The result? A flavor explosion that will leave your taste buds dancing!

These tacos are not just delicious; they are also easy to prepare. With just a few simple ingredients, you can create a meal that feels special. Whether you’re hosting a gathering or enjoying a cozy dinner at home, these tacos are sure to impress. Plus, they are packed with protein and nutrients, making them a healthy choice for any meal.

What Makes Chipotle Pineapple Chicken Tacos Unique?

What sets these tacos apart from the rest? First, the combination of flavors is truly unique. The smoky chipotle sauce adds a kick, while the pineapple brings a refreshing sweetness. This balance makes every bite exciting!

Additionally, the use of shredded chicken makes the tacos hearty and satisfying. The texture of the chicken pairs perfectly with the crunchy red cabbage and creamy avocado. Together, they create a delightful contrast that enhances the overall experience.

Moreover, these tacos are versatile. You can easily customize them to suit your taste. Want more heat? Add extra chipotle sauce! Prefer a milder flavor? Just reduce the amount. The possibilities are endless, making this recipe a favorite for many.

Chipotle Pineapple Chicken Tacos Recipe is a fun and flavorful dish that stands out. With its unique blend of ingredients and easy preparation, it’s a must-try for taco lovers everywhere!

Ingredients for Chipotle Pineapple Chicken Tacos Recipe

Chipotle Pineapple Chicken Tacos Recipe, you’ll need a selection of fresh and flavorful ingredients. Each component plays a vital role in achieving that perfect balance of taste and texture. Here’s what you’ll need:

  • 2 cups cooked chicken, shredded: This is the main protein source. You can use rotisserie chicken for convenience or cook your own.
  • 1 cup fresh pineapple, diced: Fresh pineapple adds a sweet and juicy element that complements the smoky chipotle.
  • 1 tablespoon olive oil: This helps to sauté the chicken and pineapple, enhancing their flavors.
  • 1 tablespoon chipotle sauce: Adjust this to your taste for the desired level of spiciness.
  • 1 teaspoon garlic powder: Garlic powder adds depth and richness to the dish.
  • 1 teaspoon onion powder: This ingredient brings a subtle sweetness and enhances the overall flavor.
  • 1 teaspoon cumin: Cumin adds a warm, earthy flavor that pairs well with the other spices.
  • Salt and pepper to taste: Essential for seasoning and bringing out the flavors of the ingredients.
  • 8 small corn tortillas: These are the perfect vessel for your delicious filling.
  • 1 cup shredded red cabbage: Adds crunch and a pop of color to your tacos.
  • 1 avocado, sliced: Creamy avocado provides a rich texture that balances the dish.
  • Fresh cilantro, for garnish: Cilantro adds a fresh, herbal note that brightens the flavors.
  • Lime wedges, for serving: A squeeze of lime juice enhances the flavors and adds a zesty kick.

With these ingredients on hand, you’re ready to embark on a culinary adventure. The combination of sweet, spicy, and savory elements will make your tacos unforgettable!

Step-by-Step Preparation of Chipotle Pineapple Chicken Tacos Recipe

Chipotle Pineapple Chicken Tacos Recipe. This step-by-step guide will help you create these delicious tacos with ease. Let’s get started!

Step 1: Marinating the Chicken

To kick things off, marinating the chicken is essential. This step infuses the chicken with flavor. In a bowl, combine the shredded chicken with chipotle sauce, garlic powder, onion powder, cumin, salt, and pepper. Mix well to ensure the chicken is evenly coated. Let it sit for about 15 minutes. This allows the spices to penetrate the chicken, enhancing its taste.

Step 2: Preparing the Pineapple Salsa

While the chicken marinates, it’s time to prepare the pineapple salsa. Dice the fresh pineapple into small pieces. If you like, you can add a squeeze of lime juice for extra zing. This will brighten the flavors and keep the pineapple fresh. Set the salsa aside until you’re ready to assemble the tacos. The sweet and tangy salsa will perfectly complement the smoky chicken.

Step 3: Cooking the Chicken

Once the chicken has marinated, heat the olive oil in a large skillet over medium heat. Add the marinated chicken mixture to the skillet. Cook for about 5-7 minutes, stirring occasionally. You want the chicken to be heated through and the pineapple to caramelize slightly. This caramelization adds a wonderful depth of flavor. The aroma will fill your kitchen, making it hard to resist!

Step 4: Assembling the Tacos

Now comes the fun part—assembling your tacos! Warm the corn tortillas in a separate skillet or over a gas flame until they are pliable. Then, take a tortilla and place a generous portion of the chicken and pineapple mixture in the center. Top it off with shredded red cabbage and slices of creamy avocado. Finally, garnish with fresh cilantro for a burst of flavor. Serve with lime wedges on the side for that extra zesty kick!

Chipotle Pineapple Chicken Tacos Recipe is ready to be enjoyed. Each bite is a delightful mix of flavors and textures that will surely impress your family and friends.

Variations of Chipotle Pineapple Chicken Tacos Recipe

Chipotle Pineapple Chicken Tacos Recipe is already a crowd-pleaser, there are many ways to switch things up! Whether you want to try different proteins or explore vegetarian options, these variations will keep your taco nights exciting. Let’s dive into some delicious alternatives!

Alternative Proteins to Use

If you’re looking to change the protein in your tacos, there are several tasty options. Here are a few ideas:

  • Grilled Shrimp: For a seafood twist, use grilled shrimp. Marinate them in chipotle sauce and grill until cooked through. The shrimp will add a delightful flavor and texture.
  • Beef: Shredded beef or ground beef can be a hearty alternative. Season it with the same spices for a rich, savory taste.
  • Pork: Pulled pork is another great choice. It pairs wonderfully with the sweetness of pineapple and adds a smoky flavor.
  • Tofu: For a lighter option, try marinated tofu. It absorbs flavors well and provides a satisfying texture.

These alternative proteins can easily be swapped into the recipe, allowing you to enjoy different flavors while keeping the essence of the dish intact!

Vegetarian Options for Chipotle Pineapple Chicken Tacos

If you prefer a vegetarian meal, you can still enjoy the deliciousness of these tacos. Here are some fantastic vegetarian options:

  • Black Beans: Replace the chicken with black beans. They are packed with protein and fiber, making them a filling choice.
  • Grilled Vegetables: Use a mix of grilled bell peppers, zucchini, and onions. The smoky flavor from grilling complements the chipotle sauce beautifully.
  • Chickpeas: Roasted chickpeas can add a crunchy texture. Season them with spices for extra flavor.
  • Quinoa: For a nutritious twist, use cooked quinoa. It’s a great source of protein and adds a nice texture to the tacos.

Chipotle Pineapple Chicken Tacos Recipe accessible to everyone but also bring a variety of flavors to your table. Enjoy experimenting with these delicious alternatives!

Cooking Note for Chipotle Pineapple Chicken Tacos Recipe

Chipotle Pineapple Chicken Tacos Recipe, there are a few cooking notes to keep in mind. These tips will help you achieve the best results and ensure your tacos are bursting with flavor!

First, always use fresh ingredients. Fresh pineapple, for instance, enhances the sweetness and juiciness of the tacos. Canned pineapple can work in a pinch, but fresh will elevate the dish significantly. Additionally, using high-quality chicken will make a noticeable difference in taste. If possible, opt for organic or free-range chicken for a richer flavor.

Next, don’t rush the cooking process. Allow the chicken and pineapple to cook together for the full 5-7 minutes. This time is crucial for the flavors to meld and for the pineapple to caramelize slightly. The caramelization adds a depth of flavor that is simply irresistible!

Also, consider the heat level. The chipotle sauce can vary in spiciness. If you’re unsure, start with a smaller amount and taste as you go. You can always add more if you like it spicier. This way, you can customize the heat to suit your preferences.

Lastly, when warming the tortillas, be careful not to overheat them. You want them pliable but not crispy. A few seconds on each side is usually enough. If they become too crispy, they may crack when you fill them, making it harder to enjoy your tacos.

Chipotle Pineapple Chicken Tacos Recipe turns out delicious every time. Happy cooking!

Serving Suggestions for Chipotle Pineapple Chicken Tacos Recipe

Chipotle Pineapple Chicken Tacos Recipe, it’s time to think about how to serve them! The right sides and beverages can elevate your meal, making it even more enjoyable. Here are some fantastic serving suggestions to complement your tacos.

Pairing Sides with Your Tacos

When it comes to sides, you want to choose dishes that balance the flavors of your tacos. Here are some great options:

  • Mexican Street Corn (Elote): This dish features grilled corn on the cob slathered with mayonnaise, cheese, and spices. The creamy and tangy flavors pair perfectly with the smoky tacos.
  • Black Bean Salad: A refreshing black bean salad with corn, tomatoes, and cilantro adds a nutritious touch. The flavors are vibrant and complement the tacos well.
  • Guacamole and Tortilla Chips: Creamy guacamole served with crispy tortilla chips is always a hit. The richness of the guacamole balances the spiciness of the tacos.
  • Rice and Beans: A side of cilantro lime rice or seasoned black beans can round out the meal. They provide a hearty base that pairs nicely with the tacos.

These sides not only enhance the meal but also add variety to your dining experience. Feel free to mix and match based on your preferences!

Beverage Recommendations

Chipotle Pineapple Chicken Tacos, consider these refreshing beverage options:

  • Margaritas: A classic margarita, whether frozen or on the rocks, is a perfect match. The citrusy flavors complement the tacos beautifully.
  • Horchata: This sweet rice drink is creamy and refreshing. It balances the heat of the chipotle sauce and adds a unique flavor.
  • Mexican Beer: A light Mexican lager or a pale ale can enhance the flavors of your meal. The crispness of the beer pairs well with the spices in the tacos.
  • Fresh Limeade: For a non-alcoholic option, serve fresh limeade. The tartness of the lime will brighten the flavors of the tacos.

Chipotle Pineapple Chicken Tacos Recipe with these delightful pairings for a truly memorable meal!

Tips for Perfecting Chipotle Pineapple Chicken Tacos Recipe

Chipotle Pineapple Chicken Tacos Recipe truly shine, consider these helpful tips. They will ensure that every bite is bursting with flavor and that your tacos are a hit with everyone!

First, always taste as you go. When cooking, it’s essential to sample the chicken mixture before serving. This way, you can adjust the seasoning to your liking. If you find it needs more spice, add a bit more chipotle sauce. If it’s too spicy, a touch of honey or sugar can balance the heat.

Next, don’t skip the garnishes! Fresh cilantro and lime wedges are not just for decoration; they enhance the overall flavor. A squeeze of lime juice over the tacos brightens the dish and adds a refreshing zing. The cilantro adds a burst of freshness that complements the smoky and sweet flavors.

Additionally, consider the texture. The crunch of the red cabbage is essential for a satisfying bite. If you want extra crunch, try adding some sliced radishes or jicama. These ingredients will add a delightful crunch and a pop of color to your tacos.

Another tip is to let the chicken mixture rest for a few minutes after cooking. This allows the flavors to meld together even more. It also makes it easier to assemble the tacos without burning your fingers!

Lastly, experiment with different toppings. While avocado and cabbage are fantastic, you can also try adding pickled onions, diced tomatoes, or even a drizzle of creamy chipotle sauce. These toppings can add layers of flavor and texture, making your tacos even more enjoyable.

Chipotle Pineapple Chicken Tacos Recipe to new heights. Enjoy the process and have fun creating a meal that everyone will love!

Breakdown of Time for Chipotle Pineapple Chicken Tacos Recipe

Chipotle Pineapple Chicken Tacos Recipe can help you plan your meal better. Here’s a simple breakdown of the time required for preparation and cooking. This way, you can enjoy your tacos without any rush!

Prep Time

The prep time for this recipe is approximately 20 minutes. This includes gathering all your ingredients, marinating the chicken, and preparing the pineapple salsa. Taking your time during this step ensures that everything is ready for cooking. Plus, it allows the flavors to meld beautifully!

Cooking Time

Once you’re prepped, the cooking time is about 10 minutes. This includes heating the olive oil, cooking the marinated chicken and pineapple mixture, and warming the tortillas. It’s a quick process, making this recipe perfect for busy weeknights or last-minute gatherings.

Total Time

Chipotle Pineapple Chicken Tacos Recipe. This makes it a fantastic option for a delicious meal that doesn’t take all evening to make. With just half an hour, you can serve up a plate of flavorful tacos that everyone will love!

Nutritional Information for Chipotle Pineapple Chicken Tacos Recipe

Chipotle Pineapple Chicken Tacos Recipe not only offers delicious flavors but also provides valuable nutrients. Here’s a breakdown of the nutritional information per serving, so you can enjoy your tacos guilt-free!

Calories

Chipotle Pineapple Chicken Tacos Recipe contains approximately 320 calories. This makes it a satisfying meal option without being overly heavy. The combination of chicken, pineapple, and fresh toppings ensures you get a fulfilling meal that won’t weigh you down.

Protein Content

Protein is a vital nutrient for your body, and this recipe delivers! Each serving provides about 24 grams of protein. The shredded chicken is the primary source of protein, helping to keep you full and energized. This makes the tacos a great choice for anyone looking to increase their protein intake while enjoying a tasty meal.

Sodium Levels

When it comes to sodium, each serving contains around 600 milligrams. While this is a reasonable amount for a flavorful dish, it’s always good to be mindful of your sodium intake. If you’re watching your sodium levels, consider using low-sodium chipotle sauce or adjusting the seasoning to suit your dietary needs.

Chipotle Pineapple Chicken Tacos Recipe is not only delicious but also provides a good balance of calories, protein, and sodium. Enjoy these tacos as part of a healthy diet, and feel good about what you’re eating!

FAQs about Chipotle Pineapple Chicken Tacos Recipe

Can I make Chipotle Pineapple Chicken Tacos ahead of time?

Chipotle Pineapple Chicken Tacos Recipe ahead of time. The chicken and pineapple mixture can be cooked and stored in the refrigerator for up to three days. Just make sure to keep it in an airtight container. When you’re ready to serve, simply reheat the mixture in a skillet over medium heat until warmed through. This makes it a great option for meal prep or for hosting gatherings!

What can I substitute for pineapple in the recipe?

Chipotle Pineapple Chicken Tacos Recipe.

How spicy are Chipotle Pineapple Chicken Tacos?

Chipotle Pineapple Chicken Tacos largely depends on the amount of chipotle sauce you use. Chipotle sauce can vary in heat, so if you’re sensitive to spice, start with a smaller amount and taste as you go. You can always add more if you like it spicier! The sweetness of the pineapple helps to balance the heat, making it enjoyable for most palates.

Can I use store-bought salsa for this recipe?

Chipotle Pineapple Chicken Tacos Recipe. Look for a salsa that complements the smoky and sweet elements of the dish. Just remember to adjust the seasoning of the chicken mixture accordingly, as store-bought salsas can vary in flavor and saltiness.

Conclusion on Chipotle Pineapple Chicken Tacos Recipe

Chipotle Pineapple Chicken Tacos Recipe is a delightful fusion of flavors that brings excitement to any meal. With its perfect balance of smoky chipotle and sweet pineapple, this dish is sure to become a favorite in your household. The ease of preparation makes it an ideal choice for both busy weeknights and special gatherings.

Not only are these tacos delicious, but they also offer versatility. Whether you choose to stick with the classic chicken or explore alternative proteins and vegetarian options, the possibilities are endless. Each variation allows you to customize the dish to suit your taste preferences, ensuring that everyone at the table can enjoy a satisfying meal.

Moreover, the nutritional benefits of this recipe cannot be overlooked. With a good amount of protein and fresh ingredients, you can feel good about serving these tacos to your family and friends. The addition of vibrant toppings like avocado and cilantro not only enhances the flavor but also adds a burst of color to your plate.

Chipotle Pineapple Chicken Tacos. Whether you’re sharing them with loved ones or savoring them solo, these tacos are bound to bring joy to your dining experience. Happy cooking!

Grilled Shrimp Bowl with Avocado Salsa is delicious!

Introduction to Grilled Shrimp Bowl with Avocado Salsa

Grilled Shrimp Bowl with Avocado Salsa is a fantastic choice. This dish combines the succulent flavors of grilled shrimp with the freshness of avocado and corn salsa. It’s not just tasty; it’s also packed with nutrients!

Imagine biting into perfectly grilled shrimp, seasoned to perfection, paired with a vibrant salsa that bursts with flavor. This bowl is not only visually appealing but also offers a delightful mix of textures. The creamy avocado, crunchy corn, and juicy tomatoes create a symphony of taste in every bite.

Whether you’re hosting a summer barbecue or simply enjoying a weeknight dinner, this recipe is sure to impress. Plus, it’s versatile! You can easily customize it to suit your preferences. Want to add some spice? Toss in jalapeños! Prefer a different grain? Quinoa works beautifully too.

Grilled Shrimp Bowl with Avocado Salsa a hit. So, let’s dive in and discover how to create this delightful dish that’s perfect for any occasion!

Ingredients for Grilled Shrimp Bowl with Avocado Salsa

Grilled Shrimp Bowl with Avocado Salsa, you’ll need a variety of fresh and flavorful ingredients. Each component plays a vital role in bringing this dish to life. Here’s what you’ll need:

  • 1 pound large shrimp: Make sure they are peeled and deveined for easy cooking.
  • 1 tablespoon olive oil: This helps to keep the shrimp moist and adds a rich flavor.
  • 1 teaspoon garlic powder: A must-have for that aromatic touch.
  • 1 teaspoon paprika: This adds a lovely color and a hint of smokiness.
  • 1 teaspoon salt: Essential for enhancing all the flavors.
  • 1/2 teaspoon black pepper: For a little kick!
  • 1 cup cooked brown rice: A healthy base that’s full of fiber.
  • 1 cup corn: You can use fresh, frozen, or canned corn for convenience.
  • 1 avocado: Diced, it adds creaminess and healthy fats.
  • 1/2 cup cherry tomatoes: Halved for a burst of sweetness.
  • 1/4 cup red onion: Finely chopped for a bit of crunch and flavor.
  • 1/4 cup fresh cilantro: Chopped, it brings a fresh, herbal note.
  • Juice of 1 lime: This brightens up the entire dish.
  • 1/2 cup Greek yogurt: For a creamy, tangy sauce.
  • 1 tablespoon lime juice: To mix into the yogurt for added zest.
  • 1 teaspoon honey: A touch of sweetness to balance the flavors.

Grilled Shrimp Bowl with Avocado Salsa. Each item contributes to the overall taste and texture, making this dish a wholesome and satisfying meal. Now that you have everything you need, let’s move on to the preparation steps!

Preparation of Grilled Shrimp Bowl with Avocado Salsa

Grilled Shrimp Bowl with Avocado Salsa. This process is simple and quick, allowing you to enjoy a delicious meal in no time. Let’s break it down into easy steps!

Step 1: Marinating the Shrimp

First, we need to marinate the shrimp. In a large bowl, combine the peeled and deveined shrimp with olive oil, garlic powder, paprika, salt, and black pepper. Make sure every shrimp is coated evenly with the seasoning. This step is crucial as it infuses the shrimp with flavor.

For best results, let the shrimp marinate for about 30 minutes. This allows the flavors to penetrate the shrimp, making them even tastier. If you’re short on time, you can skip this step, but marinating really enhances the dish!

Step 2: Preparing the Avocado Salsa

While the shrimp is marinating, it’s the perfect time to prepare the avocado salsa. In a separate bowl, mix together the corn, diced avocado, halved cherry tomatoes, finely chopped red onion, and fresh cilantro. This colorful mix not only looks great but also adds a variety of textures to your bowl.

Next, squeeze the juice of one lime over the salsa. This brightens the flavors and keeps the avocado from browning. Gently toss everything together, being careful not to mash the avocado. Set the salsa aside while you grill the shrimp.

Step 3: Grilling the Shrimp

Now, it’s time to grill the shrimp! Preheat your grill to medium-high heat. If you’re using wooden skewers, remember to soak them in water for about 30 minutes to prevent burning. Thread the marinated shrimp onto the skewers, leaving a little space between each shrimp for even cooking.

Place the skewers on the grill and cook for about 2-3 minutes on each side. You’ll know the shrimp are done when they turn pink and opaque. Once cooked, remove them from the grill and set them aside. The aroma will be irresistible!

Step 4: Assembling the Grilled Shrimp Bowl

Grilled Shrimp Bowl with Avocado Salsa. Start by dividing the cooked brown rice among four bowls. Top each bowl with a generous portion of grilled shrimp and a scoop of the fresh avocado salsa.

For an extra touch, drizzle the creamy sauce made from Greek yogurt, lime juice, and honey over the top. This adds a delightful creaminess that complements the shrimp and salsa perfectly. Serve immediately and enjoy your delicious creation!

Variation of Grilled Shrimp Bowl with Avocado Salsa

Grilled Shrimp Bowl with Avocado Salsa is a versatile dish that can be easily customized to suit your taste. Whether you want to switch up the ingredients or try a different cooking method, there are plenty of options to explore. Let’s take a look at some alternative ingredients and cooking methods that can elevate your bowl!

Alternative Ingredients for the Bowl

One of the best things about this recipe is its flexibility. You can swap out ingredients based on what you have on hand or your personal preferences. Here are some ideas:

  • Quinoa: Instead of brown rice, try using quinoa for a protein-packed base. It adds a nutty flavor and is gluten-free.
  • Other Proteins: If shrimp isn’t your favorite, consider using grilled chicken, tofu, or even fish. Each option brings its own unique taste.
  • Different Vegetables: Feel free to add or substitute vegetables in the salsa. Bell peppers, cucumbers, or even black beans can enhance the flavor and texture.
  • Spices: Experiment with different spices in the marinade. Cumin, chili powder, or even a dash of cayenne can add a new twist to the shrimp.
  • Fruits: For a sweet touch, add diced mango or pineapple to the salsa. This will give your bowl a tropical flair!

These alternatives not only keep the dish exciting but also allow you to cater to dietary needs or preferences. The possibilities are endless!

Different Cooking Methods for Shrimp

Grilled Shrimp Bowl with Avocado Salsa even more delightful:

  • Sautéing: Heat a skillet over medium heat and add a little olive oil. Sauté the marinated shrimp for about 3-4 minutes until they are cooked through. This method is quick and easy!
  • Baking: Preheat your oven to 400°F (200°C). Spread the shrimp on a baking sheet and bake for about 8-10 minutes. This method is great for cooking larger batches.
  • Broiling: Place the shrimp on a broiler pan and broil for 2-3 minutes on each side. This gives the shrimp a nice char without needing a grill.
  • Stovetop Grilling: If you don’t have an outdoor grill, use a stovetop grill pan. It mimics the grilling process and gives you those lovely grill marks!

By trying out these different cooking methods, you can find the one that best suits your taste and kitchen setup. Each method brings out the shrimp’s natural sweetness and pairs beautifully with the avocado salsa.

Cooking Note for Grilled Shrimp Bowl with Avocado Salsa

Grilled Shrimp Bowl with Avocado Salsa, there are a few cooking notes to keep in mind to ensure your dish turns out perfectly every time. These tips will help you achieve the best flavor and texture, making your meal even more enjoyable.

First, always choose fresh shrimp when possible. Fresh shrimp not only tastes better but also has a firmer texture. If you opt for frozen shrimp, make sure to thaw them completely before marinating. This will help the shrimp absorb the flavors of the marinade more effectively.

Next, pay attention to the grilling time. Shrimp cooks quickly, so keep a close eye on them. Overcooking can lead to rubbery shrimp, which is not what you want. As a general rule, shrimp should be cooked until they are pink and opaque, which usually takes about 2-3 minutes per side on medium-high heat.

Additionally, consider using a meat thermometer to check the internal temperature of the shrimp. They should reach an internal temperature of 120°F (49°C) for optimal safety and taste. This ensures that your shrimp are cooked through without being overdone.

Lastly, let the grilled shrimp rest for a minute or two after removing them from the grill. This allows the juices to redistribute, keeping the shrimp moist and flavorful. Once rested, they are ready to be served atop your brown rice and avocado salsa.

Grilled Shrimp Bowl with Avocado Salsa to a whole new level. Enjoy the process and savor the delicious results!

Serving Suggestions for Grilled Shrimp Bowl with Avocado Salsa

Grilled Shrimp Bowl with Avocado Salsa, presentation is key! A well-served dish not only looks appealing but also enhances the dining experience. Here are some creative serving suggestions to make your meal even more enjoyable:

  • Garnish with Fresh Herbs: Sprinkle some extra chopped cilantro or parsley on top of your bowl. This adds a pop of color and freshness that brightens the dish.
  • Serve with Lime Wedges: Place lime wedges on the side. A squeeze of fresh lime juice right before eating can elevate the flavors and add a zesty kick.
  • Pair with a Side Salad: Consider serving a light side salad with mixed greens, cucumber, and a simple vinaigrette. This adds crunch and balances the richness of the avocado.
  • Offer Tortilla Chips: For a fun twist, serve your bowl with a side of tortilla chips. They can be used to scoop up the salsa, adding a delightful crunch.
  • Include a Spicy Sauce: If you enjoy heat, offer a spicy sauce or salsa on the side. This allows guests to customize their bowls to their liking.
  • Use Colorful Bowls: Serve the dish in vibrant bowls to make it visually appealing. Bright colors can make the meal feel more festive and inviting.

Grilled Shrimp Bowl with Avocado Salsa but also provide options for your guests to personalize their meal. Enjoy the delightful flavors and the beautiful presentation!

Tips for Perfecting Your Grilled Shrimp Bowl with Avocado Salsa

Grilled Shrimp Bowl with Avocado Salsa is all about attention to detail. With a few simple tips, you can elevate your dish and impress your family and friends. Here are some helpful suggestions to ensure your bowl turns out delicious every time:

  • Choose Quality Shrimp: Always opt for the freshest shrimp available. Look for shrimp that are firm and have a mild ocean scent. If using frozen shrimp, ensure they are properly thawed before cooking.
  • Marinate Wisely: While marinating the shrimp, don’t go overboard with the time. A quick 30-minute soak is ideal. If you marinate too long, the shrimp can become mushy due to the acidity in the marinade.
  • Preheat the Grill: Make sure your grill is preheated to medium-high heat before adding the shrimp. This helps achieve a nice sear and prevents sticking. A hot grill also locks in the juices, keeping the shrimp tender.
  • Don’t Overcrowd the Grill: When grilling, give each shrimp enough space. Overcrowding can lead to uneven cooking. If necessary, grill in batches to ensure each shrimp gets that perfect char.
  • Use a Timer: Keep track of cooking time. Shrimp cook quickly, usually in just 2-3 minutes per side. Using a timer helps prevent overcooking, which can make shrimp rubbery.
  • Let the Shrimp Rest: After grilling, allow the shrimp to rest for a minute. This helps the juices redistribute, making them more flavorful and juicy when you bite into them.
  • Customize the Salsa: Feel free to get creative with your avocado salsa. Add diced jalapeños for heat, or mix in some black beans for extra protein. The more you experiment, the more unique your bowl will be!
  • Serve Fresh: For the best taste, serve the bowl immediately after assembling. The freshness of the ingredients shines when enjoyed right away.

Grilled Shrimp Bowl with Avocado Salsa. Each step contributes to a delightful dining experience, making your meal not just tasty but also memorable. Enjoy the process and the delicious results!

Breakdown of Time for Grilled Shrimp Bowl with Avocado Salsa

Grilled Shrimp Bowl with Avocado Salsa can help you plan your meal better. Here’s a simple breakdown of the time required for each step, so you can enjoy this delicious dish without any rush!

Prep Time

The prep time for this dish is approximately 15-20 minutes. This includes gathering your ingredients, marinating the shrimp, and preparing the avocado salsa. If you choose to let the shrimp marinate for 30 minutes, you can use that time to prepare the salsa and get everything ready for grilling.

Cooking Time

Cooking the shrimp takes about 6-8 minutes. You’ll grill the shrimp for 2-3 minutes on each side until they are pink and opaque. If you’re using a different cooking method, like sautéing or baking, the time may vary slightly, but it generally stays within this range.

Total Time

Grilled Shrimp Bowl with Avocado Salsa ready to serve in no time!

Nutritional Information for Grilled Shrimp Bowl with Avocado Salsa

Grilled Shrimp Bowl with Avocado Salsa not only tastes great but also offers a variety of nutrients that can benefit your health. Let’s break down the key nutritional components of this delicious dish.

Calories

Grilled Shrimp Bowl with Avocado Salsa contains approximately 400 calories. This makes it a satisfying meal option without being overly heavy. The combination of shrimp, brown rice, and fresh vegetables provides a well-rounded meal that can keep you energized throughout the day.

Protein

One of the standout features of this dish is its protein content. Each serving provides about 30 grams of protein. Shrimp is an excellent source of lean protein, which is essential for muscle repair and growth. Coupled with the brown rice, this bowl offers a great balance of protein and carbohydrates, making it a perfect post-workout meal.

Sodium

Grilled Shrimp Bowl with Avocado Salsa is around 600 milligrams per serving. While this is a moderate amount, it’s important to be mindful of your overall sodium intake, especially if you are watching your salt consumption. Using fresh ingredients and controlling the amount of added salt can help keep the sodium levels in check.

Grilled Shrimp Bowl with Avocado Salsa is not only a flavorful dish but also a nutritious one. With a good balance of calories, protein, and sodium, it can fit well into a healthy eating plan. Enjoy this delightful meal knowing that you’re nourishing your body with wholesome ingredients!

FAQs about Grilled Shrimp Bowl with Avocado Salsa

Can I use frozen shrimp for the Grilled Shrimp Bowl with Avocado Salsa?

Grilled Shrimp Bowl with Avocado Salsa. Just make sure to thaw them completely before marinating. To thaw, place the shrimp in the refrigerator overnight or run them under cold water for a quick thaw. Using frozen shrimp is a convenient option, and they can still taste delicious when cooked properly!

What can I substitute for avocado in the salsa?

If you’re not a fan of avocado or simply don’t have any on hand, there are several tasty substitutes you can use in the salsa. Consider using diced mango for a sweet twist, or try adding diced cucumber for a refreshing crunch. You could also use a combination of both for added flavor and texture. Each option will give your salsa a unique taste while still keeping it vibrant and fresh!

How spicy is the Grilled Shrimp Bowl with Avocado Salsa?

Grilled Shrimp Bowl with Avocado Salsa is not inherently spicy, but you can easily adjust the heat level to your liking. The recipe as written is mild, making it suitable for everyone. If you enjoy a bit of heat, consider adding diced jalapeños to the salsa or sprinkling some red pepper flakes over the shrimp before grilling. This way, you can customize the spice level to suit your taste!

Can I make the Grilled Shrimp Bowl with Avocado Salsa ahead of time?

Grilled Shrimp Bowl with Avocado Salsa ahead of time! The shrimp can be marinated a few hours in advance, and the avocado salsa can be made and stored in the refrigerator for up to a day. However, it’s best to assemble the bowls just before serving to keep the ingredients fresh and vibrant. If you make the salsa ahead of time, add a little extra lime juice to help prevent the avocado from browning.

Conclusion on Grilled Shrimp Bowl with Avocado Salsa

Grilled Shrimp Bowl with Avocado Salsa is a delightful dish that brings together fresh ingredients and bold flavors. It’s not only easy to prepare but also offers a nutritious meal option that can be enjoyed any day of the week. With its vibrant colors and delicious taste, this bowl is sure to impress your family and friends.

Whether you’re grilling shrimp for a summer barbecue or preparing a quick weeknight dinner, this recipe is versatile enough to suit any occasion. The combination of grilled shrimp, creamy avocado, and zesty salsa creates a satisfying meal that is both filling and refreshing. Plus, with the option to customize ingredients and cooking methods, you can make this dish your own!

Grilled Shrimp Bowl with Avocado Salsa to fit your taste preferences and dietary needs.

So, gather your ingredients, fire up the grill, and enjoy the process of creating this delicious bowl. With each bite, you’ll savor the flavors and appreciate the wholesome ingredients that make this dish a true winner. Happy cooking!

Honey Garlic Chicken: A Delicious Dinner Delight!

Honey Garlic Chicken

Introduction to Honey Garlic Chicken

Sweet, savory, and irresistibly sticky—Honey Garlic Chicken is the kind of dinner that turns an ordinary evening into something special. With juicy, tender chicken coated in a rich glaze of honey, garlic, and soy sauce, every bite is packed with bold, mouthwatering flavor. Quick to make and always a crowd-pleaser, this dish is a perfect go-to for busy nights or when you just want something truly satisfying.

Why You’ll Love This Honey Garlic Chicken

This Honey Garlic Chicken is a game-changer for busy weeknights. It’s incredibly easy to whip up, taking just 45 minutes from start to finish. The combination of sweet honey and savory garlic creates a flavor explosion that will have your family asking for seconds. Plus, it’s versatile enough to pair with rice, quinoa, or your favorite veggies, making it a perfect fit for any meal plan!

Ingredients for Honey Garlic Chicken

Gathering the right ingredients is the first step to creating a mouthwatering Honey Garlic Chicken. Here’s what you’ll need:

  • Boneless, skinless chicken thighs: Tender and juicy, these are perfect for absorbing the marinade’s flavors.
  • Honey: This natural sweetener adds a delightful glaze and balances the savory elements.
  • Gluten-free Soy sauce: A staple in Asian cuisine, it brings depth and umami to the dish. (such as tamari or coconut aminos).
  • Garlic: Minced garlic infuses the chicken with a robust flavor that’s hard to resist.
  • Fresh ginger: Grated ginger adds a warm, spicy note that complements the sweetness of the honey.
  • Rice vinegar: This tangy ingredient brightens the marinade and enhances the overall taste.
  • Cornstarch: Used to thicken the sauce, giving it a luscious texture.
  • Water: Helps create the cornstarch slurry for thickening the sauce.
  • Vegetable oil: Ideal for cooking, it has a high smoke point and won’t overpower the dish.
  • Salt and pepper: Essential for seasoning, enhancing the flavors of the chicken.
  • Chopped green onions: Optional, but they add a fresh crunch and a pop of color for garnish.

For those looking to spice things up, consider adding red pepper flakes to the marinade for a kick. You can find all the exact measurements at the bottom of the article, ready for printing!

How to Make Honey Garlic Chicken

Creating this Honey Garlic Chicken is a breeze! Follow these simple steps, and you’ll have a delicious dinner on the table in no time. Let’s get started!

Step 1: Prepare the Marinade

In a large bowl, whisk together the honey, soy sauce, minced garlic, grated ginger, and rice vinegar. This mixture is the heart of your dish, so make sure it’s well combined. The sweet and savory notes will dance together, creating a marinade that’s simply irresistible.

Step 2: Marinate the Chicken

Add the boneless, skinless chicken thighs to the marinade, ensuring they are fully coated. Cover the bowl with plastic wrap and refrigerate for at least 30 minutes. If you have time, let it marinate for up to 2 hours. This step allows the flavors to penetrate the chicken, making it tender and flavorful.

Step 3: Cook the Chicken

Heat vegetable oil in a large skillet over medium-high heat. Remove the chicken from the marinade, letting the excess drip off. Season with salt and pepper. Place the chicken in the skillet and cook for about 5-7 minutes on each side. You want it golden brown and cooked through. The sizzling sound is music to my ears!

Step 4: Thicken the Sauce

While the chicken is cooking, pour the remaining marinade into a small saucepan. In a separate bowl, mix cornstarch and water to create a slurry. Add this to the saucepan and bring the marinade to a boil over medium heat. Stir constantly until it thickens. This will give your sauce that luscious texture that clings beautifully to the chicken.

Step 5: Combine and Serve

Once the chicken is cooked, pour the thickened sauce over it in the skillet. Toss to coat the chicken evenly. Serve hot, garnished with chopped green onions if desired. The vibrant colors and enticing aroma will have everyone gathering around the table, eager to dig in!

Tips for Success

  • Always marinate the chicken for at least 30 minutes to enhance flavor.
  • Use a meat thermometer to ensure the chicken reaches 165°F for perfect doneness.
  • For extra flavor, consider adding a splash of sesame oil to the marinade.
  • Don’t skip the cornstarch slurry; it’s key for a thick, glossy sauce.
  • Serve immediately for the best texture and taste!

Equipment Needed

  • Large bowl: For mixing the marinade. A mixing jug works too!
  • Skillet: A non-stick skillet is ideal, but any frying pan will do.
  • Small saucepan: For thickening the sauce. A regular pot can substitute.
  • Whisk: Essential for blending the marinade. A fork can work in a pinch.
  • Meat thermometer: To check chicken doneness. A simple knife can help cut and check, too.

Variations

  • Spicy Honey Garlic Chicken: Add a teaspoon of red pepper flakes or sriracha to the marinade for a fiery kick.
  • Honey Garlic Tofu: Substitute chicken with firm tofu for a delicious vegetarian option. Just press the tofu to remove excess moisture before marinating.
  • Honey Garlic Shrimp: Swap chicken for shrimp, adjusting the cooking time to just 3-4 minutes per side for a quick seafood twist.
  • Low-Carb Option: Serve the chicken over cauliflower rice instead of traditional rice for a healthier, low-carb meal.
  • Herb-Infused: Add fresh herbs like cilantro or basil to the marinade for an aromatic touch that elevates the dish.

Serving Suggestions

  • Steamed Rice: Serve the Honey Garlic Chicken over fluffy white or brown rice to soak up the delicious sauce.
  • Stir-Fried Vegetables: Pair with colorful stir-fried veggies for a nutritious and vibrant plate.
  • Refreshing Salad: A crisp cucumber or Asian slaw salad complements the dish beautifully.
  • Drink Pairing: Enjoy with a chilled glass of white wine or iced green tea for a refreshing touch.

FAQs about Honey Garlic Chicken

Can I use chicken breasts instead of thighs? Absolutely! Chicken breasts can be used, but they may require a shorter cooking time. Just ensure they reach an internal temperature of 165°F for safety.

How can I make this dish gluten-free? To make Honey Garlic Chicken gluten-free, simply use tamari or a gluten-free soy sauce alternative. This way, you can enjoy the same delicious flavors without the gluten.

Can I prepare the marinade in advance? Yes! You can prepare the marinade a day ahead and store it in the refrigerator. Just add the chicken when you’re ready to cook for a quick meal.

What can I serve with Honey Garlic Chicken? This dish pairs wonderfully with steamed rice, quinoa, or stir-fried vegetables. You can also serve it with a fresh salad for a balanced meal.

How do I store leftovers? Store any leftovers in an airtight container in the refrigerator for up to three days. Reheat gently in a skillet or microwave, adding a splash of water to keep it moist.

Final Thoughts

Cooking Honey Garlic Chicken is more than just preparing a meal; it’s about creating memories and sharing joy with those you love. The sweet and savory flavors meld together, making each bite a delightful experience. Whether it’s a cozy family dinner or a gathering with friends, this dish brings everyone to the table, sparking laughter and conversation. I hope this recipe becomes a staple in your kitchen, just as it has in mine. Embrace the simplicity and deliciousness of Honey Garlic Chicken, and let it inspire your culinary adventures!

Honey Garlic Chicken
jhessica

Honey Garlic Chicken: A Delicious Dinner Delight!

A delicious and easy-to-make Honey Garlic Chicken recipe that is perfect for dinner.
Prep Time 30 minutes
Cook Time 15 minutes
Total Time 45 minutes
Servings: 4 servings
Course: Dinner
Cuisine: Asian
Calories: 350

Ingredients
  

  • 2 pounds boneless skinless chicken thighs
  • 1/2 cup honey
  • 1/4 cup soy sauce
  • 4 cloves garlic minced
  • 1 tablespoon fresh ginger grated
  • 1 tablespoon rice vinegar
  • 1 tablespoon cornstarch
  • 1 tablespoon water
  • 1 tablespoon vegetable oil
  • Salt and pepper to taste
  • Chopped green onions for garnish optional

Method
 

  1. In a large bowl, whisk together honey, soy sauce, minced garlic, grated ginger, and rice vinegar until well combined.
  2. Add the chicken thighs to the marinade, ensuring they are fully coated. Cover and refrigerate for at least 30 minutes, or up to 2 hours for more flavor.
  3. Heat vegetable oil in a large skillet over medium-high heat. Remove chicken from the marinade, allowing excess marinade to drip off, and season with salt and pepper.
  4. Place the chicken in the skillet and cook for about 5-7 minutes on each side, or until the chicken is golden brown and cooked through.
  5. While the chicken is cooking, pour the remaining marinade into a small saucepan. In a separate bowl, mix cornstarch and water to create a slurry, then add it to the saucepan.
  6. Bring the marinade to a boil over medium heat, stirring constantly until it thickens. Remove from heat.
  7. Once the chicken is cooked, pour the thickened sauce over the chicken in the skillet, tossing to coat evenly.
  8. Serve hot, garnished with chopped green onions if desired.

Nutrition

Serving: 1servingCalories: 350kcalCarbohydrates: 20gProtein: 30gFat: 15gSaturated Fat: 3gPolyunsaturated Fat: 12gCholesterol: 100mgSodium: 600mgSugar: 20g

Notes

  • For a spicier kick, add a teaspoon of red pepper flakes to the marinade.
  • Serve over steamed rice or quinoa for a complete meal, or pair with stir-fried vegetables for added nutrition.

Tried this recipe?

Let us know how it was!

Bakery-Style Blueberry Muffins Recipe for Everyone!

Introduction to Bakery-Style Blueberry Muffins Recipe

There’s something truly special about biting into a warm, fluffy blueberry muffin. The sweet, juicy bursts of blueberries combined with a soft, buttery texture make for a delightful treat. Whether you enjoy them for breakfast, as a snack, or even as a dessert, bakery-style blueberry muffins are a favorite for many. This recipe brings the bakery experience right into your kitchen, allowing you to create delicious muffins that rival those from your local café.

Why Choose Bakery-Style Blueberry Muffins?

Choosing bakery-style blueberry muffins means opting for a treat that is not only tasty but also comforting. These muffins are packed with fresh blueberries, which are rich in antioxidants and vitamins. They provide a burst of flavor that elevates the simple muffin to something extraordinary. Plus, making them at home allows you to control the ingredients, ensuring they are fresh and free from preservatives.

Another reason to love this recipe is its simplicity. With just a few basic ingredients, you can whip up a batch in no time. The process is straightforward, making it perfect for both novice bakers and seasoned pros. You can even involve your kids in the fun, creating lasting memories in the kitchen.

Lastly, the aroma of freshly baked blueberry muffins wafting through your home is simply irresistible. It creates a warm and inviting atmosphere, perfect for family gatherings or cozy mornings. So, roll up your sleeves and get ready to enjoy the delightful experience of baking your very own bakery-style blueberry muffins!

Ingredients for Bakery-Style Blueberry Muffins Recipe

To create the perfect bakery-style blueberry muffins, you’ll need a few simple ingredients. Each component plays a vital role in achieving that fluffy texture and delicious flavor. Here’s what you’ll need:

  • 2 cups all-purpose flour: This is the base of your muffins, providing structure and a light texture.
  • 1 cup granulated sugar: This adds sweetness and helps create a lovely golden crust.
  • 1 tablespoon baking powder: This leavening agent helps the muffins rise, making them light and fluffy.
  • 1/2 teaspoon baking soda: This works with the baking powder to give the muffins an extra lift.
  • 1/2 teaspoon salt: A pinch of salt enhances the flavors and balances the sweetness.
  • 1/2 cup unsalted butter, melted and slightly cooled: Butter adds richness and moisture to the muffins.
  • 1 large egg: The egg binds the ingredients together and adds structure.
  • 1 teaspoon vanilla extract: This adds a warm, sweet flavor that complements the blueberries.
  • 1 cup buttermilk: Buttermilk keeps the muffins moist and tender, giving them a delightful crumb.
  • 2 cups fresh blueberries: These juicy berries are the star of the show, providing bursts of flavor in every bite.
  • 1 tablespoon coarse sugar (for topping): This adds a crunchy finish to the muffins, making them even more appealing.

Gathering these ingredients is the first step toward baking your delicious muffins. Make sure to use fresh blueberries for the best flavor. If you can’t find fresh ones, frozen blueberries work just as well. Now that you have everything ready, let’s move on to the next step in our baking adventure!

Step-by-Step Preparation of Bakery-Style Blueberry Muffins Recipe

Now that you have all your ingredients ready, it’s time to dive into the fun part: baking! Follow these simple steps to create your delicious bakery-style blueberry muffins. Each step is designed to ensure your muffins turn out perfectly fluffy and bursting with flavor.

Step 1: Preheat the Oven

First things first, preheat your oven to 375°F (190°C). This step is crucial as it ensures your muffins bake evenly. While the oven heats up, you can prepare your muffin tin. Line it with paper liners or lightly grease it with butter or cooking spray. This will help your muffins come out easily after baking.

Step 2: Prepare the Muffin Batter

In a large mixing bowl, whisk together the dry ingredients. Combine 2 cups of all-purpose flour, 1 cup of granulated sugar, 1 tablespoon of baking powder, 1/2 teaspoon of baking soda, and 1/2 teaspoon of salt. Mix them well until they are fully blended. In a separate bowl, mix the wet ingredients. Combine 1/2 cup of melted butter, 1 large egg, 1 teaspoon of vanilla extract, and 1 cup of buttermilk. Stir until the mixture is smooth and creamy.

Step 3: Fold in the Blueberries

Now, it’s time to combine the wet and dry ingredients. Pour the wet mixture into the bowl with the dry ingredients. Gently stir them together until just combined. Remember, it’s okay if there are a few lumps! Overmixing can lead to tough muffins. Once combined, carefully fold in 2 cups of fresh blueberries. This step ensures that the blueberries are evenly distributed throughout the batter, giving you a burst of flavor in every bite.

Step 4: Fill the Muffin Tins

Next, it’s time to fill your muffin tins. Use a spoon or an ice cream scoop to divide the batter evenly among the muffin cups. Fill each cup about 3/4 full to allow room for the muffins to rise. For an extra touch, sprinkle 1 tablespoon of coarse sugar on top of each muffin. This will create a delightful crunchy topping once baked.

Step 5: Bake the Muffins

Place the muffin tin in the preheated oven and bake for 18-22 minutes. Keep an eye on them! You’ll know they’re done when a toothpick inserted into the center comes out clean. The muffins should be golden brown and spring back when lightly touched. The aroma of baking muffins will fill your kitchen, making it hard to wait!

Step 6: Cool and Serve

Once baked, remove the muffins from the oven and let them cool in the pan for about 5 minutes. This allows them to set and makes them easier to remove. After that, transfer the muffins to a wire rack to cool completely. Enjoy them warm or at room temperature. They are perfect for breakfast, snacks, or even dessert!

Now that you’ve mastered the steps to bake bakery-style blueberry muffins, you’re ready to impress your family and friends with your baking skills!

Variations of Bakery-Style Blueberry Muffins Recipe

While the classic bakery-style blueberry muffins are delicious on their own, there are many fun variations you can try. These twists can add new flavors and textures, making your baking experience even more exciting. Let’s explore some creative options!

Adding Different Fruits

One of the easiest ways to change up your blueberry muffins is by adding different fruits. You can mix and match to create your own unique flavor combinations. Here are some ideas:

  • Raspberries: These tart berries pair wonderfully with blueberries. Just replace half of the blueberries with raspberries for a delightful twist.
  • Bananas: Mashed bananas can add moisture and sweetness. Try adding 1 ripe banana to the batter for a banana-blueberry muffin.
  • Peaches: Fresh or canned peaches can bring a juicy sweetness. Dice them up and fold them in with the blueberries.
  • Apples: Diced apples can add a nice crunch. Use a tart variety like Granny Smith for a balanced flavor.

Feel free to experiment with your favorite fruits! Just remember to adjust the amount of sugar if you’re using sweeter fruits.

Gluten-Free Options

If you or someone you know has a gluten intolerance, you can still enjoy these muffins! Making gluten-free blueberry muffins is simple. Here’s how:

  • Gluten-Free Flour Blend: Substitute the all-purpose flour with a gluten-free flour blend. Make sure it’s a 1:1 ratio for best results.
  • Almond Flour: For a nutty flavor, you can use almond flour. Combine it with a bit of coconut flour to help with texture.
  • Oat Flour: Ground oats can also work well. Just blend rolled oats in a food processor until they reach a fine flour consistency.

When using gluten-free flours, be sure to check the packaging for any specific instructions. This way, you can ensure your muffins turn out perfectly fluffy and delicious!

With these variations, you can enjoy bakery-style blueberry muffins in many delightful ways. So, gather your ingredients and let your creativity shine in the kitchen!

Cooking Note for Bakery-Style Blueberry Muffins Recipe

When it comes to baking, a few key tips can make all the difference in achieving the perfect bakery-style blueberry muffins. Here are some important cooking notes to keep in mind:

  • Room Temperature Ingredients: For the best results, ensure that your ingredients are at room temperature. This includes the egg and buttermilk. Room temperature ingredients mix more easily, leading to a smoother batter and fluffier muffins.
  • Don’t Overmix: As mentioned earlier, overmixing can lead to tough muffins. Mix the batter just until the ingredients are combined. A few lumps are perfectly fine!
  • Fresh Blueberries: If using fresh blueberries, rinse them gently and pat them dry before adding them to the batter. Excess moisture can affect the texture of your muffins.
  • Frozen Blueberries: If you opt for frozen blueberries, do not thaw them before mixing. Adding them straight from the freezer helps prevent the batter from turning blue and keeps the muffins looking beautiful.
  • Check for Doneness: Ovens can vary in temperature. To ensure your muffins are baked perfectly, check them a few minutes before the suggested baking time. Insert a toothpick into the center; if it comes out clean, they’re ready!
  • Cooling Time: Allow the muffins to cool in the pan for a few minutes before transferring them to a wire rack. This helps them set and makes them easier to remove without breaking.

By following these cooking notes, you’ll be well on your way to baking delicious, fluffy blueberry muffins that everyone will love. Happy baking!

Serving Suggestions for Bakery-Style Blueberry Muffins Recipe

Once your bakery-style blueberry muffins are baked to perfection, it’s time to think about how to serve them. These muffins are versatile and can be enjoyed in many delightful ways. Here are some serving suggestions to enhance your muffin experience:

  • With Butter: Spread a little butter on a warm muffin for a rich, creamy flavor. The butter melts into the muffin, making each bite even more delicious.
  • With Jam or Jelly: Pair your muffins with your favorite fruit jam or jelly. Blueberry jam complements the muffins beautifully, adding an extra layer of sweetness.
  • With Whipped Cream: For a special treat, top your muffins with a dollop of whipped cream. This adds a light and airy texture that pairs well with the moist muffin.
  • As a Breakfast Sandwich: Slice a muffin in half and fill it with scrambled eggs and cheese for a hearty breakfast sandwich. This is a great way to start your day!
  • With Fresh Fruit: Serve your muffins alongside a bowl of fresh fruit. Slices of strawberries, bananas, or even more blueberries make for a colorful and healthy addition.
  • With Coffee or Tea: Enjoy your muffins with a warm cup of coffee or tea. The flavors of the muffins pair wonderfully with a hot beverage, making for a cozy snack or breakfast.

These serving suggestions can elevate your bakery-style blueberry muffins from a simple treat to a delightful experience. Whether you’re hosting a brunch or enjoying a quiet morning at home, these muffins are sure to impress!

Tips for Perfect Bakery-Style Blueberry Muffins Recipe

To achieve the ultimate bakery-style blueberry muffins, a few helpful tips can make all the difference. These simple suggestions will ensure your muffins are fluffy, flavorful, and simply irresistible. Let’s dive into some expert tips for perfecting your baking skills!

  • Measure Ingredients Accurately: Use the spoon-and-level method for measuring flour. Spoon the flour into your measuring cup and level it off with a knife. This prevents packing, which can lead to dense muffins.
  • Use Fresh Ingredients: Fresh ingredients yield the best results. Check the expiration dates on your baking powder and baking soda. Fresh leavening agents help your muffins rise beautifully.
  • Don’t Skip the Buttermilk: Buttermilk adds moisture and a slight tang to your muffins. If you don’t have buttermilk, you can make a quick substitute by mixing 1 cup of milk with 1 tablespoon of vinegar or lemon juice. Let it sit for 5 minutes before using.
  • Chill the Blueberries: If using fresh blueberries, chill them in the refrigerator before adding them to the batter. This helps them hold their shape and prevents them from sinking to the bottom.
  • Let the Batter Rest: Allowing the batter to rest for about 10 minutes before baking can enhance the texture. This gives the flour time to absorb the liquid, resulting in a tender muffin.
  • Rotate the Muffin Tin: Halfway through baking, rotate the muffin tin in the oven. This helps ensure even baking, especially if your oven has hot spots.
  • Cool Completely: Allow your muffins to cool completely on a wire rack. This prevents them from becoming soggy and helps maintain their fluffy texture.

By following these tips, you’ll be well on your way to baking perfect bakery-style blueberry muffins every time. Enjoy the process and savor the delicious results!

Breakdown of Time for Bakery-Style Blueberry Muffins Recipe

Understanding the time needed for each step in the baking process can help you plan your baking session better. Here’s a simple breakdown of the time required for making your delicious bakery-style blueberry muffins.

Prep Time

The prep time for this bakery-style blueberry muffins recipe is approximately 15-20 minutes. This includes gathering your ingredients, measuring them out, and mixing the batter. Make sure to have everything ready before you start, as this will make the process smoother and more enjoyable.

Cooking Time

The cooking time for these muffins is about 18-22 minutes. Keep an eye on them as they bake, and check for doneness with a toothpick. If it comes out clean, your muffins are ready to be enjoyed!

Total Time

In total, you can expect to spend around 35-45 minutes from start to finish. This includes both prep and cooking time. With such a quick turnaround, you can easily whip up a batch of these delightful muffins for breakfast or a snack any day of the week!

Nutritional Information for Bakery-Style Blueberry Muffins Recipe

Understanding the nutritional content of your bakery-style blueberry muffins can help you enjoy them as part of a balanced diet. Here’s a breakdown of the key nutritional information per serving, which is one muffin. This will give you a clearer picture of what you’re indulging in!

Calories

Each bakery-style blueberry muffin contains approximately 210 calories. This makes them a satisfying treat without being overly indulgent. Enjoying one muffin can be a delightful way to start your day or to enjoy as a snack.

Protein

In terms of protein, each muffin provides about 3 grams. While this isn’t a high protein snack, it does contribute to your daily intake. Pairing your muffin with a source of protein, like yogurt or a glass of milk, can make for a more balanced meal.

Sodium

The sodium content in each muffin is around 200 milligrams. This is a moderate amount, making these muffins a reasonable choice for most diets. However, if you are watching your sodium intake, consider enjoying them in moderation.

Overall, these bakery-style blueberry muffins are a delicious treat that can fit into a healthy lifestyle. They provide a good balance of carbohydrates, a bit of protein, and essential nutrients from the blueberries. Enjoy them guilt-free as part of your breakfast or snack time!

FAQs about Bakery-Style Blueberry Muffins Recipe

Can I use frozen blueberries in the Bakery-Style Blueberry Muffins Recipe?

Absolutely! You can use frozen blueberries in your bakery-style blueberry muffins. In fact, frozen blueberries are a great option, especially when fresh ones are out of season. Just remember not to thaw them before adding them to the batter. This helps keep the muffins from turning blue and ensures that the blueberries maintain their shape. Plus, they’ll still provide that delicious burst of flavor in every bite!

How do I store leftover Bakery-Style Blueberry Muffins?

Storing your leftover bakery-style blueberry muffins is easy! To keep them fresh, place them in an airtight container at room temperature. They can last for about 2-3 days this way. If you want to keep them for a longer period, consider freezing them. Wrap each muffin tightly in plastic wrap and then place them in a freezer-safe bag. They can be stored in the freezer for up to 3 months. When you’re ready to enjoy one, simply thaw it at room temperature or warm it in the microwave for a few seconds!

Can I make Bakery-Style Blueberry Muffins Recipe ahead of time?

Yes, you can definitely make bakery-style blueberry muffins ahead of time! They are perfect for meal prep. You can bake them a day or two in advance and store them as mentioned above. If you prefer, you can also prepare the batter ahead of time and refrigerate it for up to 24 hours. Just remember to give it a gentle stir before filling the muffin tins. This way, you can enjoy fresh muffins with minimal effort on busy mornings!

Conclusion on Bakery-Style Blueberry Muffins Recipe

In conclusion, baking your own bakery-style blueberry muffins is a rewarding experience that brings joy to both the baker and those who get to enjoy the delicious results. With simple ingredients and straightforward steps, you can create muffins that are fluffy, flavorful, and bursting with juicy blueberries. Whether you’re making them for a special occasion or just a cozy breakfast at home, these muffins are sure to impress.

Remember, the beauty of this recipe lies in its versatility. You can easily customize it with different fruits or dietary options, making it suitable for everyone. Plus, the tips and variations provided will help you perfect your baking skills, ensuring that each batch is better than the last.

So, gather your ingredients, preheat that oven, and let the delightful aroma of freshly baked blueberry muffins fill your home. Enjoy them warm, share them with loved ones, or savor them all to yourself. No matter how you choose to enjoy them, these bakery-style blueberry muffins are a treat that will surely brighten your day!

Slow Cooker Beef and Noodles Recipe for Comforting Meals

Introduction to Slow Cooker Beef and Noodles Recipe

Slow Cooker Beef and Noodles Recipe. This dish is not just a meal; it’s an experience that brings family and friends together. With its rich flavors and tender beef, it’s perfect for any occasion, whether it’s a busy weeknight or a cozy weekend gathering.

What Makes the Slow Cooker Beef and Noodles Recipe Special?

What sets this recipe apart is its simplicity and the depth of flavor achieved through slow cooking. The beef chuck roast becomes incredibly tender as it simmers in a savory broth, absorbing all the delicious seasonings. The addition of egg noodles and peas creates a delightful texture that complements the beef perfectly.

Moreover, the slow cooker does all the hard work for you. Just toss in the ingredients, set the timer, and let it work its magic. This means you can spend more time with your loved ones while the meal cooks itself. Plus, the aroma that fills your home while it cooks is simply irresistible!

Slow Cooker Beef and Noodles Recipe a fantastic choice for families with varying preferences.

So, roll up your sleeves and get ready to create a dish that will surely become a family favorite. Let’s dive into the ingredients and preparation steps that will lead you to a delicious meal!

Ingredients for Slow Cooker Beef and Noodles Recipe

Slow Cooker Beef and Noodles Recipe, you’ll need a selection of fresh and flavorful ingredients. Each component plays a vital role in building the rich taste and hearty texture of this dish. Here’s what you’ll need:

  • 2 pounds beef chuck roast: Cut into 1-inch pieces for even cooking.
  • 1 teaspoon salt: Enhances the flavor of the beef.
  • 1/2 teaspoon black pepper: Adds a touch of spice.
  • 1 tablespoon olive oil: For browning the beef and adding richness.
  • 1 medium onion: Chopped to provide sweetness and depth.
  • 3 cloves garlic: Minced for a fragrant kick.
  • 4 cups beef broth: The base of the sauce, adding moisture and flavor.
  • 1 tablespoon Worcestershire sauce: A secret ingredient that boosts umami.
  • 1 teaspoon dried thyme: For an earthy aroma.
  • 1 teaspoon dried rosemary: Adds a pine-like flavor.
  • 1/2 teaspoon paprika: For a hint of smokiness.
  • 8 ounces egg noodles: The perfect vehicle for soaking up the sauce.
  • 1 cup frozen peas: For a pop of color and sweetness.
  • 1/4 cup fresh parsley: Chopped, for garnish and freshness.

These ingredients come together to create a dish that is not only delicious but also comforting. The combination of tender beef, savory broth, and hearty noodles makes this recipe a go-to for any meal. Now that you have your ingredients ready, let’s move on to the step-by-step preparation!

Step-by-Step Preparation of Slow Cooker Beef and Noodles Recipe

Slow Cooker Beef and Noodles Recipe. This process is straightforward and allows you to create a hearty meal with minimal effort. Let’s break it down into easy steps!

Step 1: Preparing the Beef

First, you need to prepare the beef. Start by cutting the beef chuck roast into 1-inch pieces. This size ensures even cooking and tenderness. Next, season the beef pieces with salt and black pepper. This simple seasoning enhances the natural flavors of the meat.

In a large skillet, heat 1 tablespoon of olive oil over medium-high heat. Once the oil is hot, add the beef in batches. Browning the beef on all sides takes about 5-7 minutes per batch. This step is crucial as it locks in the juices and adds a rich flavor. After browning, transfer the beef to the slow cooker.

Step 2: Adding Vegetables and Seasonings

Now, it’s time to add some aromatic vegetables. In the same skillet, add the chopped onion and minced garlic. Sauté them for 2-3 minutes until the onion becomes translucent. This step releases their flavors and adds depth to the dish.

Once the onion and garlic are ready, transfer them to the slow cooker with the browned beef. Next, pour in 4 cups of beef broth. This broth serves as the base of your sauce, providing moisture and flavor. Stir in 1 tablespoon of Worcestershire sauce, 1 teaspoon of dried thyme, 1 teaspoon of dried rosemary, and 1/2 teaspoon of paprika. These seasonings will create a deliciously aromatic blend that enhances the beef.

Step 3: Cooking in the Slow Cooker

With everything in the slow cooker, it’s time to let it work its magic. Cover the slow cooker and set it to cook on low for 6-8 hours or on high for 4-5 hours. The longer cooking time allows the beef to become incredibly tender, soaking up all the flavors from the broth and seasonings. You can go about your day while the slow cooker does all the hard work!

Step 4: Adding Noodles at the Right Time

About 30 minutes before you plan to serve the meal, it’s time to add the egg noodles and frozen peas. Stir them into the slow cooker, ensuring they are well combined with the beef and broth. Cover the slow cooker again and cook on high for an additional 30 minutes. This allows the noodles to become tender and soak up the delicious sauce.

Slow Cooker Beef and Noodles Recipe is now ready to be enjoyed!

Variations of Slow Cooker Beef and Noodles Recipe

Slow Cooker Beef and Noodles Recipe is a fantastic base that allows for plenty of creativity. Whether you want to switch up the flavors or cater to dietary preferences, there are many variations to explore. Let’s take a look at some alternative ingredients and different cooking methods you can try!

Alternative Ingredients to Consider

One of the best things about this recipe is its flexibility. Here are some alternative ingredients you might consider:

  • Meat Options: Instead of beef chuck roast, you can use beef stew meat or even chicken for a lighter version. Pork can also be a delicious alternative.
  • Vegetable Additions: Feel free to add more vegetables like carrots, bell peppers, or mushrooms. These not only enhance the flavor but also add nutrition.
  • Broth Variations: If you want a different flavor profile, try using chicken broth or vegetable broth instead of beef broth.
  • Herbs and Spices: Experiment with different herbs like oregano or basil. You can also add a pinch of red pepper flakes for a spicy kick.
  • Noodle Choices: While egg noodles are traditional, you can substitute them with whole wheat noodles or gluten-free options to suit dietary needs.

These alternatives can help you create a unique dish that still captures the essence of the original recipe. Don’t hesitate to mix and match ingredients based on what you have on hand or your personal preferences!

Different Cooking Methods for Beef and Noodles

While the slow cooker is a convenient method, there are other ways to prepare this delicious meal. Here are a couple of different cooking methods:

  • Instant Pot: If you’re short on time, the Instant Pot can be a great alternative. Sauté the beef and vegetables using the sauté function, then add the broth and seasonings. Seal the lid and cook on high pressure for about 35 minutes. Add the noodles and peas afterward, and cook for an additional 5 minutes.
  • Stovetop: For a quicker version, you can make this dish on the stovetop. Brown the beef in a large pot, then add the broth and seasonings. Simmer for about 1-1.5 hours until the beef is tender. Add the noodles and peas in the last 10-15 minutes of cooking.

Slow Cooker Beef and Noodles Recipe is sure to be a hit!

Cooking Note for Slow Cooker Beef and Noodles Recipe

Slow Cooker Beef and Noodles Recipe, there are a few important cooking notes to keep in mind. These tips will help ensure that your dish turns out perfectly every time, making your cooking experience enjoyable and stress-free.

First, always choose a good quality beef chuck roast. The better the meat, the more flavorful and tender your dish will be. Look for marbling in the meat, as this fat will melt during cooking, adding richness to the broth.

Next, don’t skip the browning step! Searing the beef before adding it to the slow cooker locks in the juices and enhances the overall flavor. It may take a little extra time, but the results are well worth it.

Also, be mindful of the cooking time. If you’re cooking on low, aim for the full 6-8 hours to achieve that melt-in-your-mouth tenderness. If you’re short on time, the high setting is a great alternative, but keep an eye on the beef to ensure it doesn’t overcook.

When adding the egg noodles, make sure to stir them well into the broth. This helps them absorb the flavors and prevents them from clumping together. If you find that the sauce is too thick, feel free to add a splash of beef broth or water to reach your desired consistency.

Lastly, always taste your dish before serving. Adjust the seasoning as needed, adding more salt, pepper, or herbs to suit your taste. A little extra seasoning can elevate the dish and make it even more delicious!

Slow Cooker Beef and Noodles Recipe that your family will love. Happy cooking!

Serving Suggestions for Slow Cooker Beef and Noodles Recipe

Slow Cooker Beef and Noodles Recipe is ready, it’s time to think about how to serve it. A well-presented meal can enhance the dining experience, making it even more enjoyable. Here are some ideal side dishes to pair with your hearty beef and noodles, along with some garnishing tips for a beautiful presentation.

Ideal Side Dishes to Pair

When serving your delicious beef and noodles, consider these side dishes that complement the flavors of the main dish:

  • Garlic Bread: A warm, crusty garlic bread is perfect for soaking up the savory broth. It adds a delightful crunch to your meal.
  • Steamed Vegetables: Lightly steamed broccoli, green beans, or carrots provide a fresh contrast to the rich flavors of the beef. They also add a pop of color to your plate.
  • Side Salad: A simple green salad with mixed greens, cherry tomatoes, and a light vinaigrette can balance the richness of the beef and noodles.
  • Mashed Potatoes: For an extra comforting touch, serve creamy mashed potatoes alongside. They pair wonderfully with the beef and absorb the delicious sauce.
  • Coleslaw: A tangy coleslaw can add a refreshing crunch and a bit of acidity, which helps cut through the richness of the dish.

These side dishes not only enhance the meal but also provide a variety of textures and flavors that everyone will enjoy. Feel free to mix and match based on your family’s preferences!

Garnishing Tips for Presentation

Slow Cooker Beef and Noodles Recipe. Here are some simple garnishing tips to make your dish look as good as it tastes:

  • Fresh Parsley: As mentioned in the recipe, a sprinkle of chopped fresh parsley adds a vibrant green color and a fresh flavor. It’s an easy way to elevate the dish.
  • Grated Parmesan Cheese: A light dusting of grated Parmesan cheese can add a savory touch and a bit of creaminess to the dish.
  • Cracked Black Pepper: A few cracks of fresh black pepper on top can enhance the visual appeal and add a hint of spice.
  • Lemon Zest: For a unique twist, consider adding a touch of lemon zest. It brightens the flavors and adds a refreshing aroma.
  • Edible Flowers: If you want to impress your guests, consider using edible flowers as a garnish. They add a beautiful pop of color and a touch of elegance.

Slow Cooker Beef and Noodles Recipe in style!

Tips for Perfecting Your Slow Cooker Beef and Noodles Recipe

Slow Cooker Beef and Noodles Recipe turns out perfectly every time, it’s essential to be aware of some common pitfalls and how to store leftovers properly. Here are some helpful tips to guide you through the process!

Common Mistakes to Avoid

Even the best cooks can make mistakes. Here are a few common ones to watch out for:

  • Skipping the Browning Step: Don’t skip browning the beef! This step adds a rich flavor that enhances the entire dish. It’s worth the extra time.
  • Overcrowding the Slow Cooker: Avoid adding too much beef or other ingredients at once. Overcrowding can lead to uneven cooking. Stick to the recommended amounts for the best results.
  • Not Adjusting Liquid Levels: If you find your sauce too thick, add a little beef broth or water. Conversely, if it’s too thin, let it cook uncovered for a while to thicken.
  • Ignoring Cooking Times: Cooking times can vary based on your slow cooker model. Always check the beef for tenderness and adjust the time as needed.
  • Adding Noodles Too Early: Make sure to add the egg noodles at the right time. Adding them too early can lead to mushy noodles. Follow the recipe for the best texture.

By avoiding these common mistakes, you’ll be on your way to creating a delicious and satisfying meal that everyone will love!

Storage Tips for Leftovers

Slow Cooker Beef and Noodles Recipe can be just as delightful as the first serving. Here are some tips for storing them properly:

  • Cool Before Storing: Allow the dish to cool to room temperature before transferring it to an airtight container. This helps prevent condensation, which can make the food soggy.
  • Refrigerate Promptly: Store leftovers in the refrigerator within two hours of cooking. They can last for up to 3-4 days when stored properly.
  • Freezing for Later: If you want to keep leftovers longer, consider freezing them. Place the beef and noodles in a freezer-safe container, and they can last for up to 3 months.
  • Reheating Tips: When reheating, add a splash of beef broth or water to keep the dish moist. Heat it on the stovetop or in the microwave until warmed through.

Slow Cooker Beef and Noodles Recipe even after the initial meal. Leftovers can be a quick and satisfying option for busy days!

Breakdown of Time for Slow Cooker Beef and Noodles Recipe

Slow Cooker Beef and Noodles Recipe is essential for planning your meal. Here’s a detailed breakdown of the time involved in preparing and cooking this delicious dish.

Prep Time

The prep time for this recipe is relatively short, making it perfect for busy days. You can expect to spend about 20-30 minutes getting everything ready. This includes:

  • Cutting the beef chuck roast into 1-inch pieces.
  • Chopping the onion and mincing the garlic.
  • Measuring out the broth and seasonings.
  • Browning the beef in batches.

With a little organization, you can have everything prepped and ready to go in no time!

Cooking Time

The cooking time is where the magic happens. Depending on your schedule, you can choose between two cooking settings:

  • Low Setting: If you have the time, cooking on low for 6-8 hours allows the beef to become incredibly tender and flavorful.
  • High Setting: For a quicker option, cooking on high for 4-5 hours will still yield delicious results, though the beef may not be quite as tender.

Regardless of the setting you choose, the slow cooker does all the work for you, allowing you to focus on other tasks or enjoy some downtime.

Total Time

Slow Cooker Beef and Noodles Recipe will range from about 6.5 to 8.5 hours, depending on your cooking method. Here’s a quick summary:

  • Total Time on Low: Approximately 6.5 to 8.5 hours (20-30 minutes prep + 6-8 hours cooking).
  • Total Time on High: Approximately 4.5 to 5.5 hours (20-30 minutes prep + 4-5 hours cooking).

This makes it easy to plan your day around this comforting meal. Whether you’re at home or out running errands, you can return to a warm, hearty dish ready to serve!

Nutritional Information for Slow Cooker Beef and Noodles Recipe

Slow Cooker Beef and Noodles Recipe not only satisfies your taste buds but also provides a hearty serving of nutrients. Let’s break down the key nutritional components of this delicious dish.

Calories

Slow Cooker Beef and Noodles Recipe contains approximately 410 calories. This makes it a filling option for lunch or dinner without being overly heavy. The combination of beef, noodles, and vegetables provides a satisfying meal that can keep you energized throughout the day.

Protein Content

Protein is a vital nutrient for building and repairing tissues, and this recipe delivers a generous amount. Each serving contains about 30 grams of protein. The beef chuck roast is the primary source of protein, making this dish an excellent choice for those looking to increase their protein intake. Pairing it with egg noodles and peas adds additional nutrients, making it a well-rounded meal.

Sodium Levels

Slow Cooker Beef and Noodles Recipe has approximately 800 milligrams. While this is a reasonable amount for a hearty dish, it’s essential to be mindful of your overall sodium intake, especially if you are watching your salt consumption. You can reduce the sodium levels by using low-sodium beef broth or adjusting the amount of Worcestershire sauce used in the recipe.

Slow Cooker Beef and Noodles Recipe offers a balanced mix of calories, protein, and sodium, making it a nutritious option for your family meals. Enjoy this comforting dish while being aware of its nutritional benefits!

FAQs about Slow Cooker Beef and Noodles Recipe

Can I use frozen beef for the Slow Cooker Beef and Noodles Recipe?

Slow Cooker Beef and Noodles Recipe is not recommended. While slow cookers are great for tenderizing meat, starting with frozen beef can lead to uneven cooking. The meat may not reach a safe temperature quickly enough, which can pose a food safety risk. It’s best to thaw the beef in the refrigerator overnight before using it in the recipe. This ensures that the beef cooks evenly and safely, resulting in a delicious meal.

How can I make the Slow Cooker Beef and Noodles Recipe gluten-free?

Slow Cooker Beef and Noodles Recipe gluten-free is quite simple! First, ensure that you use gluten-free beef broth. Many brands offer gluten-free options, so check the labels. Next, substitute the egg noodles with gluten-free noodles. There are various types available, such as rice noodles or gluten-free pasta, which work well in this recipe. By making these adjustments, you can enjoy a hearty and satisfying meal without gluten!

What type of noodles work best in the Slow Cooker Beef and Noodles Recipe?

The traditional choice for this recipe is egg noodles, as they absorb the flavors of the broth beautifully and cook to a tender texture. However, you can also use other types of noodles if you prefer. Whole wheat noodles are a healthier option, while gluten-free noodles cater to dietary needs. Just be sure to adjust the cooking time according to the type of noodles you choose, as some may require different cooking durations. Regardless of your choice, the noodles will complement the beef and broth perfectly!

How long can I store leftovers from the Slow Cooker Beef and Noodles Recipe?

Slow Cooker Beef and Noodles Recipe can be stored in the refrigerator for up to 3-4 days. Make sure to place them in an airtight container to maintain freshness. If you want to keep them longer, consider freezing the leftovers. They can last in the freezer for up to 3 months. When you’re ready to enjoy them again, simply thaw in the refrigerator overnight and reheat on the stovetop or in the microwave, adding a splash of broth or water to keep them moist. This way, you can savor the delicious flavors of your meal even after the initial serving!

Conclusion on Slow Cooker Beef and Noodles Recipe

Slow Cooker Beef and Noodles Recipe is a delightful dish that combines convenience with comfort. It’s perfect for busy families or anyone looking to enjoy a hearty meal without spending hours in the kitchen. The slow cooking process allows the flavors to meld beautifully, resulting in tender beef and savory noodles that everyone will love.

This recipe not only satisfies your hunger but also brings a sense of warmth and togetherness to the dining table. Whether you’re serving it on a chilly evening or during a family gathering, it’s sure to be a hit. Plus, with the various tips and variations provided, you can easily customize the dish to suit your taste preferences or dietary needs.

As you embark on your cooking journey, remember to enjoy the process. Cooking is not just about the end result; it’s about creating memories and sharing delicious food with those you care about. So, gather your ingredients, follow the steps, and let your slow cooker do the magic!

Slow Cooker Beef and Noodles Recipe becomes a staple in your home, bringing joy and satisfaction to your meals. Happy cooking!

Stay Connected

Get recipes via email: