Get my cookbooks

Korean Beef Sloppy Joes Recipe is a must-try dish!

Introduction to Korean Beef Sloppy Joes Recipe

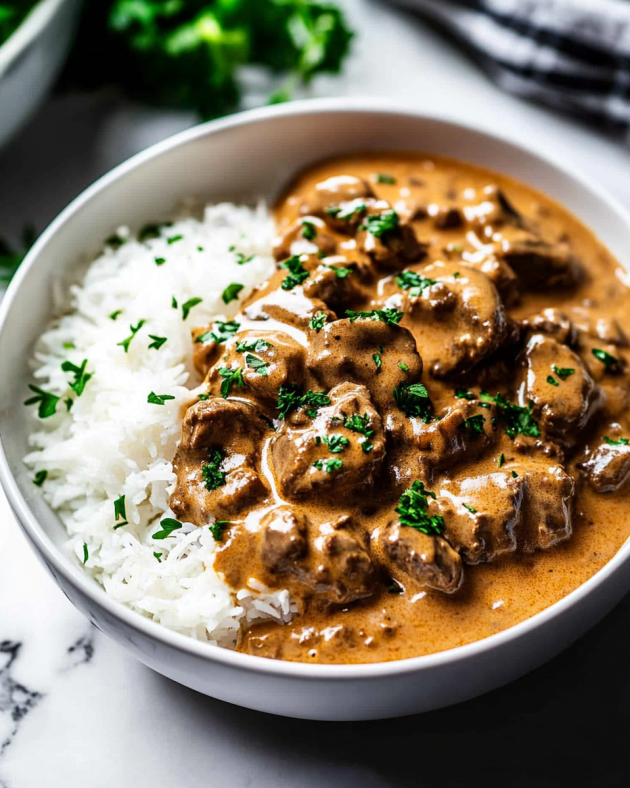
If you’re looking for a fun twist on a classic dish, the Korean Beef Sloppy Joes recipe is just what you need! This delightful meal combines the comforting elements of traditional sloppy joes with the bold and exciting flavors of Korean cuisine. It’s a perfect dish for family dinners, casual gatherings, or even a quick weeknight meal. Let’s dive into what makes this recipe so special!

What Makes Korean Beef Sloppy Joes Unique?

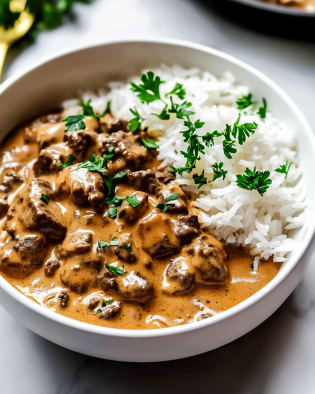
Korean Beef Sloppy Joes stand out because they blend familiar American flavors with the rich, savory notes of Korean cooking. The use of soy sauce, sesame oil, and ginger creates a unique taste that is both sweet and savory. Unlike traditional sloppy joes, which often rely on ketchup, this recipe uses a homemade sauce that elevates the dish to a whole new level. The addition of fresh vegetables like shredded carrots and green onions adds a delightful crunch, making each bite a burst of flavor.

The Fusion of Flavors in Korean Beef Sloppy Joes

The fusion of flavors in Korean Beef Sloppy Joes is truly remarkable. The sweetness from brown sugar balances the saltiness of soy sauce, while the sesame oil adds a nutty aroma. The ginger and garlic provide a fragrant kick, and if you choose to add red pepper flakes, you’ll get a hint of heat that makes the dish even more exciting. This combination of ingredients not only makes the sloppy joes delicious but also introduces your taste buds to a delightful culinary adventure. Whether you’re a fan of Korean food or just looking for something new, this recipe is sure to impress!

Ingredients for Korean Beef Sloppy Joes Recipe

To create the mouthwatering Korean Beef Sloppy Joes, you’ll need a few key ingredients. Each component plays a vital role in building the dish’s unique flavor profile. Here’s what you’ll need:

  • 1 pound ground beef: This is the main protein source, providing a hearty base for the sloppy joes.
  • 1 tablespoon vegetable oil: Used for sautéing the onions and garlic, adding a bit of richness.
  • 1 small onion, finely chopped: This adds sweetness and depth to the dish.
  • 2 cloves garlic, minced: Garlic brings a wonderful aroma and flavor that enhances the overall taste.
  • 1/4 cup soy sauce: A key ingredient that adds saltiness and umami flavor.
  • 1/4 cup brown sugar: This balances the saltiness of the soy sauce with a touch of sweetness.
  • 1 tablespoon sesame oil: Adds a nutty flavor that is characteristic of Korean cuisine.
  • 1 tablespoon rice vinegar: This provides acidity, brightening the flavors of the dish.
  • 1 teaspoon grated ginger: Ginger adds warmth and a slight spiciness.
  • 1/2 teaspoon red pepper flakes (optional): For those who enjoy a bit of heat, this is a great addition.
  • 4 hamburger buns: These will hold all the delicious filling together.
  • 1/2 cup shredded carrots: Adds crunch and a pop of color to the dish.
  • 1/4 cup chopped green onions: These provide freshness and a mild onion flavor.
  • Sesame seeds for garnish (optional): A lovely finishing touch that adds visual appeal.

Gathering these ingredients will set you on the right path to making a delicious Korean Beef Sloppy Joes recipe. Each item contributes to the overall taste, making this dish a delightful experience for your palate!

Step-by-Step Preparation of Korean Beef Sloppy Joes Recipe

Now that you have all your ingredients ready, it’s time to dive into the cooking process! This step-by-step guide will help you create the perfect Korean Beef Sloppy Joes. Follow along, and soon you’ll have a delicious meal to enjoy!

Step 1: Preparing the Ingredients

Before you start cooking, it’s essential to prepare your ingredients. Begin by finely chopping the onion and mincing the garlic. Grate the ginger and measure out the soy sauce, brown sugar, sesame oil, and rice vinegar. If you’re using red pepper flakes, have those ready too. Finally, shred the carrots and chop the green onions. Having everything prepped will make the cooking process smooth and enjoyable!

Step 2: Cooking the Beef

In a large skillet, heat the vegetable oil over medium heat. Once the oil is hot, add the chopped onion. Sauté the onion for about 3-4 minutes until it becomes soft and translucent. Next, add the minced garlic and cook for another minute until it’s fragrant. This step is crucial as it builds the base flavor for your sloppy joes.

Now, increase the heat to medium-high and add the ground beef. Cook the beef for about 5-7 minutes, breaking it apart with a spatula as it browns. Make sure to drain any excess fat if necessary. This will keep your sloppy joes from being too greasy!

Step 3: Making the Sauce

While the beef is cooking, it’s time to make the sauce. In a small bowl, whisk together the soy sauce, brown sugar, sesame oil, rice vinegar, grated ginger, and red pepper flakes. This mixture is what gives your Korean Beef Sloppy Joes their unique flavor. Once the beef is browned, pour this sauce over the cooked meat and stir well to combine. Let it simmer on low heat for about 5 minutes. This allows all the flavors to meld beautifully!

Step 4: Combining Ingredients

After the sauce has simmered, it’s time to combine everything. Make sure the beef is well-coated with the sauce. The mixture should be thick and flavorful. If you find it too runny, let it simmer a bit longer. This step ensures that every bite of your sloppy joes is packed with flavor!

Step 5: Assembling the Sloppy Joes

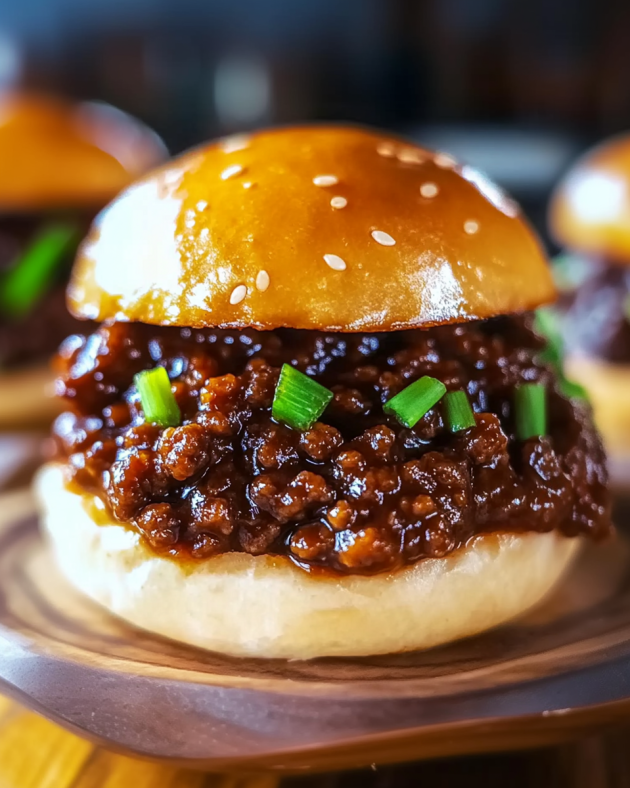
Now comes the fun part—assembling your Korean Beef Sloppy Joes! If you like, toast the hamburger buns lightly for added texture. Spoon the Korean beef mixture onto the bottom half of each bun. Top it off with shredded carrots and chopped green onions for a fresh crunch. If you want, sprinkle sesame seeds on top for a lovely garnish. Finally, place the top half of the bun on each sandwich and serve immediately. Enjoy your delicious creation!

Variations of Korean Beef Sloppy Joes Recipe

While the traditional Korean Beef Sloppy Joes recipe is already a hit, there are many ways to customize it to suit different tastes and dietary needs. Here are some exciting variations you can try!

Vegetarian Options

If you’re looking for a meatless version, you can easily make vegetarian Korean Sloppy Joes. Instead of ground beef, use plant-based alternatives like lentils, black beans, or crumbled tofu. These ingredients provide a hearty texture and soak up the delicious sauce just like beef. You can follow the same cooking steps, just be sure to adjust the cooking time for lentils or beans, as they may require longer to soften. This variation is not only tasty but also packed with nutrients!

Spicy Korean Beef Sloppy Joes

For those who love a kick of heat, try making Spicy Korean Beef Sloppy Joes! Simply increase the amount of red pepper flakes in the sauce or add a splash of sriracha or gochujang (Korean chili paste) for an extra punch. You can also include sliced jalapeños or other hot peppers when cooking the beef. This variation will surely satisfy your spicy cravings while keeping the original flavors intact!

Gluten-Free Korean Beef Sloppy Joes

If you need a gluten-free option, it’s easy to adapt this recipe. Start by using gluten-free soy sauce, which is widely available in stores. You can also use gluten-free hamburger buns or lettuce wraps for a low-carb alternative. The rest of the ingredients remain the same, ensuring you still enjoy the delicious flavors of Korean Beef Sloppy Joes without any gluten. This way, everyone can enjoy this delightful dish!

These variations allow you to explore different flavors and cater to various dietary preferences. Whether you’re cooking for vegetarians, spice lovers, or those needing gluten-free options, there’s a Korean Beef Sloppy Joes recipe for everyone!

Cooking Note for Korean Beef Sloppy Joes Recipe

When preparing your Korean Beef Sloppy Joes, a few cooking notes can help ensure your dish turns out perfectly every time. First, always choose high-quality ground beef for the best flavor. Look for beef with a good balance of fat, around 80/20, which keeps the meat juicy and flavorful.

Next, don’t rush the cooking process. Sautéing the onions and garlic until they are soft and fragrant is crucial. This step builds a solid flavor base for your sloppy joes. If you skip this, you might miss out on the rich taste that makes this dish special.

When making the sauce, feel free to adjust the sweetness or saltiness to your liking. If you prefer a sweeter sauce, add a bit more brown sugar. Conversely, if you want it saltier, increase the soy sauce. Taste as you go to find the perfect balance for your palate.

Additionally, if you’re using ground turkey or chicken as a substitute, keep in mind that these meats can dry out more quickly than beef. To prevent this, consider adding a splash of broth or a bit more sesame oil to keep the mixture moist.

Lastly, don’t forget to let the mixture simmer long enough. This allows the flavors to meld beautifully, creating a deliciously cohesive dish. Enjoy the process, and remember that cooking is all about experimenting and finding what works best for you!

Serving Suggestions for Korean Beef Sloppy Joes Recipe

Once you’ve prepared your delicious Korean Beef Sloppy Joes, it’s time to think about how to serve them! The right side dishes and creative serving ideas can elevate your meal and make it even more enjoyable. Here are some suggestions to consider.

Ideal Side Dishes

Pairing your Korean Beef Sloppy Joes with the right side dishes can enhance the overall dining experience. Here are some tasty options:

  • Sweet Potato Fries: These crispy fries add a sweet and savory contrast to the rich flavors of the sloppy joes.
  • Coleslaw: A refreshing coleslaw made with cabbage and carrots can provide a crunchy texture and balance the meal.
  • Steamed Broccoli: Lightly steamed broccoli adds a healthy touch and a pop of color to your plate.
  • Kimchi: For an authentic Korean twist, serve a side of kimchi. Its tangy and spicy flavor complements the sloppy joes perfectly.
  • Rice: A bowl of steamed rice can soak up the delicious sauce and make the meal more filling.

These side dishes not only taste great but also add variety to your meal, making it more satisfying for everyone at the table!

Creative Serving Ideas

Serving your Korean Beef Sloppy Joes can be fun and creative! Here are some ideas to make your presentation stand out:

  • Sloppy Joe Bar: Set up a DIY sloppy joe bar where guests can assemble their sandwiches. Provide various toppings like pickled vegetables, sliced jalapeños, and different types of buns.
  • Lettuce Wraps: For a low-carb option, serve the beef mixture in large lettuce leaves instead of buns. This adds a fresh crunch and is perfect for those watching their carbs.
  • Mini Sliders: Make smaller versions of the sloppy joes for a fun appetizer. Use slider buns and serve them at parties or gatherings.
  • Garnish with Fresh Herbs: Add a sprinkle of fresh cilantro or mint on top of the sloppy joes for a burst of color and flavor.
  • Serve with a Side of Soup: Pair your sloppy joes with a light soup, like miso or a simple vegetable broth, for a comforting meal.

These creative serving ideas can make your Korean Beef Sloppy Joes not just a meal, but an experience. Enjoy experimenting with different presentations and sides to find what you love best!

Tips for Perfecting Your Korean Beef Sloppy Joes Recipe

To ensure your Korean Beef Sloppy Joes turn out perfectly every time, consider these helpful tips. Each suggestion will enhance the flavor and texture of your dish, making it a hit with family and friends!

  • Use Fresh Ingredients: Fresh ingredients make a big difference in flavor. Opt for fresh garlic, ginger, and vegetables. They will elevate the taste of your sloppy joes.
  • Don’t Overcook the Beef: When cooking the ground beef, avoid overcooking it. This can lead to a dry texture. Cook just until browned and no longer pink.
  • Adjust the Sauce to Your Taste: Feel free to tweak the sauce ingredients. If you like it sweeter, add more brown sugar. For a saltier flavor, increase the soy sauce. Taste as you go!
  • Let It Simmer: Allow the beef mixture to simmer for a few extra minutes. This helps the flavors meld together, creating a more delicious dish.
  • Experiment with Toppings: Don’t be afraid to get creative with toppings! Try adding sliced jalapeños, avocado, or even a drizzle of spicy mayo for an extra kick.
  • Choose the Right Buns: Select sturdy hamburger buns that can hold the filling without falling apart. Brioche or whole wheat buns are great options.
  • Make It Ahead: If you’re short on time, prepare the beef mixture ahead of time. Store it in the fridge and reheat when you’re ready to serve.
  • Garnish for Presentation: A sprinkle of sesame seeds or fresh herbs can make your sloppy joes look more appealing. Presentation matters, especially when serving guests!

By following these tips, you’ll be well on your way to creating the best Korean Beef Sloppy Joes. Enjoy the process and have fun experimenting with flavors!

Breakdown of Time for Korean Beef Sloppy Joes Recipe

Understanding the time needed for each step in the Korean Beef Sloppy Joes recipe can help you plan your cooking efficiently. Here’s a breakdown of the time required for preparation and cooking, so you can enjoy this delicious meal without any rush!

Prep Time

The prep time for this Korean Beef Sloppy Joes recipe is approximately 15 minutes. During this time, you will gather all your ingredients, chop the onion, mince the garlic, grate the ginger, and prepare the vegetables. Having everything ready before you start cooking will make the process smoother and more enjoyable!

Cooking Time

The cooking time for the Korean Beef Sloppy Joes is about 20 minutes. This includes sautéing the onions and garlic, browning the ground beef, and simmering the sauce. Each step is essential for building flavor, so take your time to ensure everything is cooked perfectly.

Total Time

In total, you can expect to spend around 35 minutes from start to finish. This includes both prep and cooking time. With just a little bit of effort, you’ll have a delicious meal ready to serve in no time!

Nutritional Information for Korean Beef Sloppy Joes Recipe

Understanding the nutritional content of your meals is essential for maintaining a balanced diet. The Korean Beef Sloppy Joes recipe not only offers a burst of flavor but also provides valuable nutrients. Here’s a breakdown of the nutritional information per serving, so you can enjoy this dish while keeping track of your dietary needs.

Calories

Each serving of Korean Beef Sloppy Joes contains approximately 360 calories. This makes it a satisfying meal option without being overly heavy. The combination of ground beef, vegetables, and flavorful sauce contributes to the calorie count, ensuring you get a hearty dish that keeps you full.

Protein

With about 24 grams of protein per serving, this recipe is a great source of this essential nutrient. Protein is vital for muscle repair and growth, making it an important part of your diet. The ground beef provides a significant amount of protein, helping you feel energized and satisfied after your meal.

Sodium

The sodium content in each serving is approximately 800 milligrams. While sodium is necessary for bodily functions, it’s important to monitor your intake. The soy sauce in the recipe contributes to the sodium level, so if you’re watching your salt intake, consider using low-sodium soy sauce as a substitute. This small adjustment can help you enjoy the flavors without compromising your health goals.

By keeping these nutritional facts in mind, you can enjoy your Korean Beef Sloppy Joes while being mindful of your dietary needs. This dish is not only delicious but also provides a good balance of calories, protein, and essential nutrients!

FAQs about Korean Beef Sloppy Joes Recipe

Can I make Korean Beef Sloppy Joes ahead of time?

Absolutely! You can prepare the Korean Beef mixture ahead of time. Simply cook the beef and sauce as directed, then let it cool. Store it in an airtight container in the refrigerator for up to three days. When you’re ready to serve, just reheat it on the stove or in the microwave. This makes it a great option for meal prep or busy weeknights!

What can I substitute for ground beef in this recipe?

If you’re looking for alternatives to ground beef, there are several options! Ground turkey or chicken works well and provides a lighter option. For a vegetarian choice, consider using lentils, black beans, or crumbled tofu. Each of these substitutes will absorb the delicious sauce and create a satisfying meal. Just remember to adjust the cooking time as needed for different ingredients!

How can I store leftovers of Korean Beef Sloppy Joes?

Storing leftovers is easy! Place any remaining Korean Beef mixture in an airtight container and refrigerate it. It will stay fresh for about three days. When you’re ready to enjoy it again, simply reheat it on the stove or in the microwave. If you have leftover buns, store them separately to keep them from getting soggy.

Can I freeze Korean Beef Sloppy Joes?

Yes, you can freeze Korean Beef Sloppy Joes! To do this, let the beef mixture cool completely, then transfer it to a freezer-safe container or bag. It can be frozen for up to three months. When you’re ready to eat, thaw it in the refrigerator overnight and reheat it on the stove. This makes for a quick and easy meal option on busy days!

Conclusion on Korean Beef Sloppy Joes Recipe

In conclusion, the Korean Beef Sloppy Joes recipe is a delightful fusion of flavors that brings a unique twist to a classic dish. With its savory beef, sweet and tangy sauce, and fresh toppings, this meal is sure to please everyone at the table. Whether you’re hosting a casual gathering or simply looking for a quick weeknight dinner, this recipe is both easy to prepare and incredibly satisfying.

By following the step-by-step instructions, you can create a delicious meal that showcases the best of Korean cuisine while still being familiar and comforting. Plus, the variations allow you to customize the dish to suit your dietary preferences, making it versatile for any occasion.

So, gather your ingredients, roll up your sleeves, and get ready to enjoy a plate of Korean Beef Sloppy Joes. With each bite, you’ll experience a burst of flavor that will leave you wanting more. Happy cooking!

Beef Stroganoff with Rice Recipe is a must-try dish!

Introduction to Beef Stroganoff with Rice Recipe

What is Beef Stroganoff?

Beef Stroganoff is a classic dish that features tender strips of beef cooked in a creamy sauce. This delightful recipe is often served over rice or noodles, making it a hearty meal. The combination of beef, mushrooms, and a rich sauce creates a comforting dish that warms the heart. The addition of sour cream gives it a smooth texture and a tangy flavor, making it a favorite for many families. Whether you’re cooking for a special occasion or a cozy weeknight dinner, Beef Stroganoff with rice is sure to impress.

The Origins of Beef Stroganoff

The origins of Beef Stroganoff can be traced back to Russia in the 19th century. It is named after the Stroganov family, who were wealthy merchants and landowners. The dish was originally created as a way to showcase tender beef and flavorful sauces. Over the years, it has evolved and gained popularity worldwide. Today, you can find many variations of Beef Stroganoff, each with its unique twist. Despite its many adaptations, the essence of this dish remains the same: a delicious, creamy beef dish that brings people together around the dinner table.

Ingredients for Beef Stroganoff with Rice Recipe

To create a mouthwatering Beef Stroganoff with Rice, you’ll need a selection of fresh ingredients. Each component plays a vital role in building the rich flavors of this dish. Here’s what you’ll need:

  • 1 pound beef sirloin: Thinly sliced for tenderness.
  • 1 tablespoon olive oil: For sautéing the beef and vegetables.
  • 1 medium onion: Diced to add sweetness and depth.
  • 2 cloves garlic: Minced for a fragrant kick.
  • 8 ounces mushrooms: Sliced, they add an earthy flavor.
  • 1 cup beef broth: Provides a savory base for the sauce.
  • 1 tablespoon Worcestershire sauce: For a tangy, umami boost.
  • 1 teaspoon Dijon mustard: Adds a subtle sharpness.
  • 1 cup sour cream: Gives the dish its creamy texture.
  • Salt and pepper: To taste, enhancing all the flavors.
  • 3 cups cooked white rice: The perfect base for serving.
  • Fresh parsley: Chopped, for garnish and a pop of color.

These ingredients come together to create a delightful Beef Stroganoff with Rice recipe that serves four people. Each bite is a blend of savory beef, creamy sauce, and fluffy rice, making it a satisfying meal for any occasion. Gather these ingredients, and you’re ready to start cooking!

Step-by-Step Preparation of Beef Stroganoff with Rice Recipe

Step 1: Preparing the Ingredients

Before you start cooking, it’s essential to prepare all your ingredients. Begin by gathering everything you need. Slice the beef sirloin into thin strips. This helps the meat cook quickly and evenly. Next, dice the onion and mince the garlic. Slice the mushrooms as well. Having everything ready will make the cooking process smoother and more enjoyable. Remember, a well-prepared kitchen is a happy kitchen!

Step 2: Cooking the Beef

Now, let’s get cooking! In a large skillet, heat the olive oil over medium-high heat. Once the oil is hot, add the sliced beef. Cook it for about 3-4 minutes until it’s nicely browned. This step is crucial as it locks in the flavors. After browning, remove the beef from the skillet and set it aside. This allows the beef to rest while you prepare the next steps.

Step 3: Making the Sauce

In the same skillet, add the diced onion. Cook it for about 3 minutes until it becomes translucent. This adds a sweet flavor to your dish. Next, toss in the minced garlic and sliced mushrooms. Cook them together for about 5 minutes until the mushrooms are tender. Now, return the beef to the skillet. Pour in the beef broth, Worcestershire sauce, and Dijon mustard. Stir everything together and bring it to a gentle simmer. Let it cook for 5-7 minutes. This allows the sauce to thicken slightly, creating a rich and flavorful base.

Step 4: Combining with Rice

Once your sauce has thickened, it’s time to add the star ingredient: sour cream! Reduce the heat to low and stir in the sour cream until it’s well combined. This will give your Beef Stroganoff its creamy texture. Season with salt and pepper to taste. Now, take your cooked white rice and serve it on plates. Spoon the delicious beef mixture over the rice, ensuring each serving is generous and satisfying.

Step 5: Final Touches

To finish off your Beef Stroganoff with Rice, sprinkle some freshly chopped parsley on top. This adds a lovely pop of color and freshness to the dish. Now, it’s time to enjoy your meal! Each bite will be a delightful mix of tender beef, creamy sauce, and fluffy rice. Your family and friends will surely be impressed with this comforting dish!

Variations of Beef Stroganoff with Rice Recipe

Vegetarian Options

If you’re looking for a vegetarian twist on the classic Beef Stroganoff with Rice recipe, you’re in luck! You can easily substitute the beef with hearty vegetables or plant-based proteins. For instance, use mushrooms as the main ingredient, as they provide a rich, umami flavor. You can also add ingredients like zucchini, bell peppers, or eggplant for added texture and taste. Another great option is to use lentils or chickpeas, which are packed with protein and will keep the dish filling. Just follow the same cooking steps, and you’ll have a delicious vegetarian meal that everyone will love!

Alternative Proteins

For those who prefer different types of meat, there are plenty of alternative proteins you can use in your Beef Stroganoff with Rice recipe. Chicken breast or thighs can be a great substitute, offering a lighter option. Simply slice the chicken and cook it in the same way as the beef. Pork tenderloin is another tasty alternative that pairs well with the creamy sauce. If you’re feeling adventurous, try using shrimp or even tofu for a unique twist. Each protein will bring its own flavor, making your dish exciting and new!

Different Rice Choices

While white rice is a classic choice for serving Beef Stroganoff, you can switch things up with different rice varieties. Brown rice adds a nutty flavor and is a healthier option, providing more fiber. Jasmine or basmati rice can also be used for a fragrant touch. If you’re looking for a gluten-free option, consider serving the stroganoff over quinoa or cauliflower rice. These alternatives not only change the flavor profile but also add nutritional benefits to your meal. Experimenting with different rice choices can elevate your Beef Stroganoff with Rice recipe to new heights!

Cooking Note for Beef Stroganoff with Rice Recipe

When preparing your Beef Stroganoff with Rice, there are a few cooking notes to keep in mind. First, the quality of your beef is essential. Choose a good cut, like sirloin, for the best flavor and tenderness. If you can, look for grass-fed beef, as it often has a richer taste.

Next, be mindful of the cooking temperature. Cooking the beef over medium-high heat helps to sear it quickly, locking in the juices. However, once you add the sour cream, reduce the heat to low. This prevents the sour cream from curdling, ensuring a smooth and creamy sauce.

Another tip is to taste as you go. Adjust the seasoning with salt and pepper according to your preference. If you like a bit of tang, consider adding a splash of lemon juice or a bit more Worcestershire sauce. These small adjustments can make a big difference in flavor.

Lastly, don’t rush the simmering process. Allowing the sauce to simmer for a few minutes helps the flavors meld together beautifully. This step is crucial for achieving that rich, comforting taste that Beef Stroganoff is known for. Enjoy the cooking process, and soon you’ll have a delicious meal ready to serve!

Serving Suggestions for Beef Stroganoff with Rice Recipe

When it comes to serving your Beef Stroganoff with Rice, presentation and pairing can elevate the dining experience. Here are some delightful serving suggestions to consider:

  • Garnish with Fresh Herbs: A sprinkle of freshly chopped parsley or chives adds a burst of color and freshness. It also enhances the dish’s flavor, making it more appealing.
  • Serve with a Side Salad: A light green salad with a tangy vinaigrette complements the richness of the stroganoff. Consider using mixed greens, cherry tomatoes, and cucumbers for a refreshing contrast.
  • Pair with Steamed Vegetables: Steamed broccoli, green beans, or carrots can add a nutritious touch to your meal. The vibrant colors and textures will make your plate more inviting.
  • Offer Crusty Bread: A slice of warm, crusty bread or a soft dinner roll is perfect for soaking up the creamy sauce. It adds a comforting element to the meal.
  • Include a Glass of Wine: For an adult dinner, consider serving a glass of red wine, like Merlot or Cabernet Sauvignon. The wine’s rich flavors pair beautifully with the beef and sauce.
  • Top with Cheese: For cheese lovers, a sprinkle of grated Parmesan or a dollop of cream cheese can add an extra layer of creaminess and flavor to the dish.

These serving suggestions not only enhance the visual appeal of your Beef Stroganoff with Rice but also create a well-rounded meal. Whether it’s a family dinner or a gathering with friends, these ideas will surely impress your guests and make the meal memorable!

Tips for Perfecting Beef Stroganoff with Rice Recipe

To make your Beef Stroganoff with Rice truly exceptional, consider these helpful tips. Each suggestion can enhance the flavors and textures, ensuring a delightful dining experience for you and your loved ones.

  • Choose the Right Cut of Beef: Opt for tender cuts like sirloin or tenderloin. These cuts cook quickly and remain juicy, making your stroganoff more enjoyable.
  • Don’t Overcook the Beef: When cooking the beef, aim for a nice brown color without overcooking. This keeps the meat tender and flavorful. Remember, it will continue to cook in the sauce.
  • Use Fresh Ingredients: Fresh garlic, onions, and mushrooms can significantly enhance the dish’s flavor. Fresh herbs, like parsley, also add a vibrant touch.
  • Adjust the Creaminess: If you prefer a creamier sauce, feel free to add more sour cream. For a lighter option, Greek yogurt can be a great substitute.
  • Experiment with Seasonings: Don’t hesitate to add your favorite spices. A pinch of paprika or a dash of cayenne pepper can add a delightful kick to the dish.
  • Let It Simmer: Allow the sauce to simmer for a few extra minutes. This helps the flavors meld together beautifully, creating a richer taste.
  • Serve Immediately: Beef Stroganoff is best enjoyed fresh. If you need to prepare it in advance, keep the sauce and rice separate until serving to maintain the texture.
  • Pair with the Right Rice: While white rice is traditional, consider using jasmine or basmati rice for a fragrant twist. Brown rice adds a nutty flavor and is a healthier option.

By following these tips, you can elevate your Beef Stroganoff with Rice recipe to new heights. Each bite will be a delightful experience, filled with rich flavors and comforting textures. Enjoy the process of cooking, and savor the delicious results!

Breakdown of Time for Beef Stroganoff with Rice Recipe

Prep Time

Preparing your ingredients is a crucial step in making Beef Stroganoff with Rice. The prep time for this recipe is approximately 15 minutes. During this time, you will slice the beef, dice the onion, mince the garlic, and slice the mushrooms. Having everything ready before you start cooking will make the process smoother and more enjoyable. Remember, a little preparation goes a long way in the kitchen!

Cooking Time

The cooking time for Beef Stroganoff with Rice is about 20 minutes. This includes browning the beef, sautéing the vegetables, and simmering the sauce. Each step is essential for building flavor and ensuring that the beef is tender. The key is to keep an eye on the skillet and stir occasionally to prevent sticking. With a bit of attention, you’ll have a delicious meal ready in no time!

Total Time

In total, you can expect to spend around 35 minutes from start to finish. This includes both the prep and cooking times. It’s a quick and satisfying meal that’s perfect for busy weeknights or when you want to impress guests without spending hours in the kitchen. With just 35 minutes, you can serve a delightful Beef Stroganoff with Rice that everyone will love!

Nutritional Information for Beef Stroganoff with Rice Recipe

Calories

When it comes to enjoying a hearty meal like Beef Stroganoff with Rice, understanding the calorie content is essential. Each serving of this delicious dish contains approximately 450 calories. This makes it a satisfying option for dinner without going overboard on calories. It’s a great balance of flavors and nutrition, perfect for a fulfilling meal.

Protein

Protein is a vital nutrient, and Beef Stroganoff with Rice delivers on this front. Each serving provides about 30 grams of protein. The beef sirloin is an excellent source of high-quality protein, which is essential for muscle repair and overall health. Pairing it with rice adds a complete amino acid profile, making this dish not only tasty but also nutritious.

Sodium

Monitoring sodium intake is important for maintaining a healthy diet. In each serving of Beef Stroganoff with Rice, there is approximately 800 milligrams of sodium. This amount can vary based on the beef broth and Worcestershire sauce used. If you’re watching your sodium levels, consider using low-sodium broth and adjusting the seasoning to keep the flavor while reducing sodium content.

FAQs about Beef Stroganoff with Rice Recipe

Can I use a different type of meat for Beef Stroganoff?

Absolutely! While beef is the traditional choice for Beef Stroganoff, you can easily substitute it with other meats. Chicken is a popular alternative, offering a lighter flavor. Pork tenderloin also works well, providing a slightly different taste. If you’re feeling adventurous, try using shrimp or even turkey. Each protein will bring its unique flavor to the dish, making it versatile and enjoyable for everyone!

How can I make Beef Stroganoff with Rice Recipe gluten-free?

Making Beef Stroganoff gluten-free is simple! Start by using gluten-free beef broth and Worcestershire sauce. Many brands offer gluten-free options, so check the labels. Additionally, you can serve the stroganoff over gluten-free rice or quinoa. This way, you can enjoy the same delicious flavors without worrying about gluten. It’s a great way to accommodate dietary needs while still enjoying a comforting meal!

What side dishes pair well with Beef Stroganoff with Rice Recipe?

Beef Stroganoff with Rice is a hearty dish that pairs well with various side dishes. A light green salad with a tangy vinaigrette complements the richness of the stroganoff beautifully. Steamed vegetables, like broccoli or green beans, add a nutritious touch and vibrant color to your plate. For a comforting addition, consider serving crusty bread or dinner rolls to soak up the creamy sauce. These sides will enhance your meal and create a well-rounded dining experience!

Can I prepare Beef Stroganoff with Rice Recipe in advance?

Yes, you can prepare Beef Stroganoff in advance! To do this, cook the beef and sauce as directed, but keep the rice separate until you’re ready to serve. Store the stroganoff in an airtight container in the refrigerator for up to three days. When you’re ready to enjoy it, simply reheat the sauce on the stove and serve it over freshly cooked rice. This makes it a convenient option for busy weeknights or meal prep!

Conclusion on Beef Stroganoff with Rice Recipe

In conclusion, Beef Stroganoff with Rice is a delightful dish that combines rich flavors and comforting textures. This recipe is not only easy to prepare but also versatile, allowing for various adaptations to suit different tastes and dietary needs. Whether you stick to the classic beef version or explore vegetarian options, each bite promises satisfaction.

As you gather your ingredients and follow the steps, remember that cooking is an art. Feel free to experiment with flavors and make the dish your own. The joy of cooking comes from creativity and the love you put into your meals. With just a few simple ingredients and some time, you can create a dish that brings family and friends together around the table.

So, the next time you’re looking for a comforting meal, consider making Beef Stroganoff with Rice. It’s a recipe that not only fills the stomach but also warms the heart. Enjoy the process, savor the flavors, and share the joy of this classic dish with those you love. Happy cooking!

Thai Red Curry Chicken is a must-try recipe today!

Introduction to Thai Red Curry Chicken Recipe

Thai Red Curry Chicken is a delightful dish that brings the vibrant flavors of Thailand right to your kitchen. This recipe is not just about cooking; it’s about creating a warm, inviting meal that can be enjoyed by family and friends. With its rich coconut milk base and aromatic spices, this dish is sure to impress anyone who tries it.

What Makes Thai Red Curry Chicken Unique?

What sets Thai Red Curry Chicken apart from other chicken dishes is its unique blend of flavors. The combination of creamy coconut milk, spicy red curry paste, and fresh vegetables creates a harmony that is both comforting and exciting. The use of fresh herbs, like basil, adds a fragrant touch that elevates the dish. Each bite offers a balance of sweetness, spice, and savory goodness, making it a favorite among many.

The Origins of Thai Red Curry Chicken

Thai Red Curry Chicken has its roots in Thailand, where curries are a staple in the cuisine. The use of red curry paste, made from dried red chilies, garlic, and spices, gives this dish its signature color and flavor. Traditionally, curries are served with rice, making them a complete meal. Over the years, this dish has gained popularity worldwide, thanks to its delicious taste and the ease of preparation. Whether you’re a seasoned cook or a beginner, this recipe is accessible and rewarding.

Ingredients for Thai Red Curry Chicken Recipe

To create a mouthwatering Thai Red Curry Chicken, you’ll need a selection of fresh ingredients that come together to form a delightful dish. Here’s what you’ll need:

  • 2 tablespoons vegetable oil
  • 1 pound boneless, skinless chicken thighs, cut into bite-sized pieces
  • 1 medium onion, sliced
  • 3 cloves garlic, minced
  • 1 tablespoon fresh ginger, minced
  • 2 tablespoons Thai red curry paste
  • 1 can (13.5 ounces) coconut milk
  • 1 cup chicken broth
  • 1 tablespoon fish sauce
  • 1 tablespoon brown sugar
  • 1 red bell pepper, sliced
  • 1 cup snap peas
  • 1 cup broccoli florets
  • Fresh basil leaves, for garnish
  • Cooked jasmine rice, for serving

These ingredients are not only easy to find but also work together to create a rich and flavorful dish. The chicken thighs provide a tender texture, while the vegetables add color and nutrition. The coconut milk and red curry paste are the stars of the show, giving the dish its creamy consistency and spicy kick. Don’t forget the fresh basil leaves; they add a lovely aroma and freshness to the final presentation!

Step-by-Step Preparation of Thai Red Curry Chicken Recipe

Now that you have all your ingredients ready, it’s time to dive into the cooking process. This step-by-step guide will help you create a delicious Thai Red Curry Chicken that’s sure to impress. Let’s get started!

Step 1: Preparing the Ingredients

Before you start cooking, it’s essential to prepare all your ingredients. Begin by cutting the chicken thighs into bite-sized pieces. This helps them cook evenly. Next, slice the onion and red bell pepper, and chop the broccoli into florets. Mince the garlic and ginger as well. Having everything ready will make the cooking process smoother and more enjoyable.

Step 2: Cooking the Chicken

Heat the vegetable oil in a large skillet or wok over medium heat. Once the oil is hot, add the chicken pieces. Cook them for about 5-7 minutes, stirring occasionally, until they are browned on all sides. This step is crucial as it locks in the flavors. Once browned, remove the chicken from the skillet and set it aside. This allows the chicken to rest while you prepare the sauce.

Step 3: Making the Curry Sauce

In the same skillet, add the sliced onion, minced garlic, and ginger. Sauté these ingredients for 2-3 minutes until the onion becomes translucent. This step enhances the flavors and aroma of your dish. Next, stir in the Thai red curry paste and cook for another minute. You’ll notice a delightful fragrance filling your kitchen!

Step 4: Combining Ingredients

Now it’s time to bring everything together. Pour in the coconut milk and chicken broth, stirring to combine. Add the fish sauce and brown sugar, then bring the mixture to a gentle simmer. This is where the magic happens! Once simmering, return the cooked chicken to the skillet. Add the sliced red bell pepper, snap peas, and broccoli florets. Cook for an additional 5-7 minutes, or until the vegetables are tender and the chicken is fully cooked.

Step 5: Final Cooking Steps

After the vegetables are tender, taste the curry and adjust the seasoning if needed. You can add a pinch of salt or more fish sauce for extra flavor. Once satisfied, serve the Thai Red Curry Chicken hot over a bed of cooked jasmine rice. Don’t forget to garnish with fresh basil leaves for that extra touch of flavor and color. Enjoy your delicious creation!

Variations of Thai Red Curry Chicken Recipe

While the traditional Thai Red Curry Chicken is a delightful dish on its own, there are many ways to customize it to suit your taste preferences. Whether you’re looking for vegetarian options, want to spice things up, or simply wish to experiment with different ingredients, these variations will help you create a unique version of this beloved recipe.

Vegetarian Alternatives

If you’re looking for a vegetarian option, you can easily substitute the chicken with tofu. Firm tofu works best as it holds its shape during cooking. Simply cut the tofu into bite-sized cubes and follow the same cooking steps. Additionally, use vegetable broth instead of chicken broth to keep the dish vegetarian-friendly. You can also add more vegetables like carrots, zucchini, or mushrooms for added texture and flavor. This way, you can enjoy a delicious Thai Red Curry that everyone can savor!

Spicy Adjustments

For those who love a little heat, you can amp up the spice level of your Thai Red Curry Chicken. Start by adding extra Thai red curry paste to the sauce. If you want even more heat, consider including fresh sliced chilies or a dash of chili flakes. Another option is to use a spicier variety of curry paste, such as green curry paste. Just remember to taste as you go, so you can find the perfect balance of flavors that suits your palate!

Ingredient Swaps for Different Flavors

Feel free to get creative with your ingredients! You can swap out the vegetables based on what you have on hand or what’s in season. For instance, try using eggplant, bell peppers, or even spinach for a different twist. You can also experiment with different proteins, such as shrimp or beef, to create a new version of the dish. Each ingredient brings its own unique flavor, making your Thai Red Curry Chicken a versatile and exciting meal!

Cooking Note for Thai Red Curry Chicken Recipe

When preparing your Thai Red Curry Chicken, there are a few important cooking notes to keep in mind. These tips will help ensure that your dish turns out perfectly every time, enhancing both flavor and texture.

First, always use fresh ingredients whenever possible. Fresh vegetables and herbs not only taste better but also add vibrant colors to your dish. For instance, fresh basil leaves can elevate the aroma and flavor of your curry significantly.

Next, pay attention to the heat level while cooking. Medium heat is ideal for sautéing and simmering. If the heat is too high, you risk burning the garlic and ginger, which can lead to a bitter taste. On the other hand, if the heat is too low, the flavors may not develop fully.

Additionally, when adding the coconut milk, stir gently to combine it with the other ingredients. This helps to create a creamy texture without curdling the milk. If you notice the sauce is too thick, you can add a little more chicken broth or water to reach your desired consistency.

Lastly, let your curry simmer for a few minutes after adding the vegetables. This allows the flavors to meld together beautifully. Remember, the longer you let it simmer, the more intense the flavors will become. Just be careful not to overcook the vegetables; they should remain vibrant and slightly crisp.

By following these cooking notes, you’ll be well on your way to creating a delicious and satisfying Thai Red Curry Chicken that everyone will love!

Serving Suggestions for Thai Red Curry Chicken Recipe

Once you’ve prepared your delicious Thai Red Curry Chicken, it’s time to think about how to serve it. The right side dishes and accompaniments can elevate your meal, making it even more enjoyable. Here are some fantastic serving suggestions to complement your curry.

Best Side Dishes

When it comes to side dishes, you have plenty of options that pair beautifully with Thai Red Curry Chicken. Here are a few ideas:

  • Thai Cucumber Salad: This refreshing salad adds a crunchy contrast to the creamy curry. Toss sliced cucumbers with a bit of vinegar, sugar, and chili flakes for a zesty kick.
  • Spring Rolls: Fresh or fried spring rolls filled with vegetables and herbs make a delightful appetizer. They add a light and crispy texture to your meal.
  • Steamed Vegetables: Simple steamed vegetables, like bok choy or green beans, can provide a healthy and colorful addition to your plate.
  • Thai Fried Rice: For a heartier option, serve your curry with Thai fried rice. The flavors of the rice will complement the curry perfectly.

These side dishes not only enhance the meal but also add variety to your dining experience. Feel free to mix and match based on your preferences!

Pairing with Rice or Noodles

Thai Red Curry Chicken is traditionally served over jasmine rice, which absorbs the rich flavors of the curry. The fluffy texture of jasmine rice complements the creamy sauce beautifully. However, you can also explore other options:

  • Jasmine Rice: This fragrant rice is the classic choice. Its subtle sweetness pairs well with the spicy curry.
  • Brown Rice: For a healthier option, consider using brown rice. It adds a nutty flavor and extra fiber to your meal.
  • Rice Noodles: If you prefer noodles, rice noodles are a great alternative. They soak up the curry sauce and provide a different texture.
  • Quinoa: For a protein-packed option, serve your curry over quinoa. It’s a nutritious choice that adds a unique flavor.

Whether you choose rice or noodles, the key is to ensure they soak up the delicious curry sauce. This will make every bite a flavorful experience!

Tips for Perfecting Your Thai Red Curry Chicken Recipe

To make your Thai Red Curry Chicken truly exceptional, consider these helpful tips. They will guide you in selecting the best ingredients and techniques, ensuring a delicious outcome every time you cook this dish.

Choosing the Right Coconut Milk

The coconut milk you choose can significantly impact the flavor and texture of your curry. Look for full-fat coconut milk for a rich and creamy consistency. This type of coconut milk provides a luxurious mouthfeel that enhances the overall dish. If you prefer a lighter option, you can use light coconut milk, but be aware that it may not be as creamy. Always shake the can well before opening, as the cream can separate. For the best results, opt for brands that contain minimal additives and preservatives.

Balancing Flavors

Balancing flavors is key to a successful Thai Red Curry Chicken. The dish should have a harmonious blend of sweet, salty, and spicy notes. Start by tasting the curry as you cook. If it’s too spicy, add a bit more brown sugar to mellow the heat. If it’s too sweet, a splash of fish sauce can enhance the savory aspect. Remember, the goal is to create a well-rounded flavor profile that excites your taste buds. Fresh herbs, like basil, can also brighten the dish, so don’t skip the garnish!

Storing Leftovers

If you have leftovers, storing them properly is essential to maintain freshness. Allow the curry to cool completely before transferring it to an airtight container. It can be stored in the refrigerator for up to 3 days. When reheating, do so gently on the stove or in the microwave, adding a splash of water or broth if the sauce has thickened. For longer storage, consider freezing the curry. It can last up to 3 months in the freezer. Just remember to thaw it overnight in the fridge before reheating. This way, you can enjoy your delicious Thai Red Curry Chicken even after the initial meal!

Breakdown of Time for Thai Red Curry Chicken Recipe

Understanding the time required for each step in the cooking process can help you plan your meal better. Here’s a breakdown of the time needed for preparing and cooking your Thai Red Curry Chicken.

Prep Time

The prep time for this Thai Red Curry Chicken recipe is approximately 15-20 minutes. During this time, you will gather all your ingredients, wash and chop the vegetables, and cut the chicken into bite-sized pieces. Having everything ready before you start cooking will make the process smoother and more enjoyable.

Cooking Time

The cooking time for the Thai Red Curry Chicken is about 20-25 minutes. This includes browning the chicken, sautéing the vegetables, and simmering the curry sauce until everything is cooked through. It’s important to keep an eye on the cooking process to ensure that the chicken is tender and the vegetables remain vibrant.

Total Time

In total, you can expect to spend around 35-45 minutes from start to finish. This includes both prep and cooking time. With this quick and easy recipe, you can have a delicious Thai Red Curry Chicken ready to serve in no time!

Nutritional Information for Thai Red Curry Chicken Recipe

Understanding the nutritional content of your meals is essential for maintaining a balanced diet. The Thai Red Curry Chicken is not only delicious but also provides a good mix of nutrients. Here’s a breakdown of the nutritional information per serving:

Calories

Each serving of Thai Red Curry Chicken contains approximately 420 calories. This makes it a satisfying meal that can fit into various dietary plans. The combination of chicken, vegetables, and coconut milk contributes to the calorie count, providing energy and nourishment.

Protein

With about 30 grams of protein per serving, this dish is an excellent source of protein. The chicken thighs are particularly rich in protein, which is essential for muscle repair and growth. Including protein in your meals can help keep you feeling full and satisfied for longer periods.

Sodium

The sodium content in Thai Red Curry Chicken is around 800 milligrams per serving. This amount can vary based on the specific brands of ingredients used, especially the fish sauce and chicken broth. If you’re watching your sodium intake, consider using low-sodium broth and adjusting the amount of fish sauce to suit your dietary needs.

Overall, this Thai Red Curry Chicken recipe offers a balanced mix of calories, protein, and sodium, making it a nutritious choice for a hearty meal. Enjoying this dish as part of a varied diet can contribute to your overall health and well-being!

FAQs about Thai Red Curry Chicken Recipe

Can I make Thai Red Curry Chicken in advance?

Absolutely! Making Thai Red Curry Chicken in advance is a great idea. You can prepare the dish a day ahead and store it in the refrigerator. Just make sure to let it cool completely before transferring it to an airtight container. When you’re ready to serve, simply reheat it on the stove or in the microwave. The flavors will meld beautifully overnight, making it even tastier!

What can I substitute for chicken in this recipe?

If you want to substitute chicken, there are several delicious options. Tofu is a popular choice for a vegetarian version. Firm tofu holds its shape well and absorbs the flavors of the curry. You can also use shrimp, beef, or even tempeh for a different protein source. Just adjust the cooking times accordingly to ensure everything is cooked perfectly!

How spicy is Thai Red Curry Chicken?

The spice level of Thai Red Curry Chicken can vary based on the amount of red curry paste you use. Typically, it has a mild to medium heat. If you prefer a spicier dish, feel free to add more curry paste or include fresh chilies. On the other hand, if you’re sensitive to spice, you can reduce the amount of curry paste for a milder flavor. Always taste as you go to find the right balance for your palate!

Can I freeze Thai Red Curry Chicken?

Yes, you can freeze Thai Red Curry Chicken! To do this, let the curry cool completely and then transfer it to a freezer-safe container. It can be stored in the freezer for up to 3 months. When you’re ready to enjoy it again, thaw it overnight in the refrigerator and reheat on the stove. Just add a splash of water or broth if the sauce has thickened during freezing. This way, you can savor your delicious curry even after some time!

Conclusion on Thai Red Curry Chicken Recipe

In conclusion, Thai Red Curry Chicken is a delightful dish that brings the vibrant flavors of Thailand to your table. With its creamy coconut milk, aromatic spices, and colorful vegetables, this recipe is not only easy to prepare but also incredibly satisfying. Whether you’re cooking for family, friends, or just for yourself, this dish is sure to impress.

By following the step-by-step instructions, you can create a meal that is both delicious and nutritious. The versatility of this recipe allows for various adaptations, making it suitable for different dietary preferences. From vegetarian options to spicy adjustments, you can customize it to suit your taste.

Moreover, the nutritional benefits of Thai Red Curry Chicken make it a great choice for a balanced meal. With a good amount of protein and healthy fats, it provides the energy you need to power through your day. Plus, the vibrant colors and fresh ingredients make it visually appealing, adding to the overall dining experience.

So, gather your ingredients, roll up your sleeves, and get ready to enjoy a bowl of comforting Thai Red Curry Chicken. Whether served over jasmine rice or paired with your favorite side dishes, this recipe is bound to become a favorite in your household. Happy cooking!

Crockpot Chicken Piccata Recipe is a must-try dish!

Introduction to Crockpot Chicken Piccata Recipe

What is Chicken Piccata?

Chicken Piccata is a classic Italian dish that features tender chicken breasts cooked in a zesty lemon and caper sauce. Traditionally, the chicken is sautéed, but this crockpot version makes it easier and more convenient. The combination of fresh lemon juice, savory garlic, and briny capers creates a delightful flavor that pairs perfectly with pasta or rice. This dish is not only delicious but also a great way to impress family and friends with minimal effort.

Why Choose a Crockpot for This Recipe?

Using a crockpot for Chicken Piccata offers several advantages. First, it allows for hands-free cooking, which is perfect for busy days. You can simply set it and forget it! The slow cooking process ensures that the chicken becomes incredibly tender and absorbs all the flavors from the sauce. Additionally, a crockpot is energy-efficient, making it a great choice for those who want to save on electricity while preparing a hearty meal. Plus, the cleanup is a breeze since everything cooks in one pot!

Ingredients for Crockpot Chicken Piccata Recipe

To create a mouthwatering Crockpot Chicken Piccata, you’ll need a few simple ingredients. Each component plays a vital role in building the dish’s rich flavor. Here’s what you’ll need:

  • 2 pounds boneless, skinless chicken breasts: This is the main protein in the dish, providing a tender and juicy base.
  • 1 cup chicken broth: This adds moisture and depth to the sauce, enhancing the overall taste.
  • 1/2 cup fresh lemon juice: About 2-3 lemons will do. The acidity brightens the dish and balances the flavors.
  • 1/4 cup capers: Drained capers bring a salty, briny flavor that complements the lemon.
  • 4 cloves garlic: Minced garlic adds a wonderful aroma and savory taste.
  • 1 teaspoon dried oregano: This herb adds a hint of earthiness to the dish.
  • 1 teaspoon salt: Essential for seasoning the chicken and enhancing the flavors.
  • 1/2 teaspoon black pepper: A touch of spice to round out the flavor profile.
  • 1/4 cup fresh parsley: Chopped parsley is used for garnish, adding a pop of color and freshness.
  • Cooked pasta or rice: This serves as a base for the chicken piccata, making it a complete meal.

Gathering these ingredients will set you on the right path to creating a delicious Crockpot Chicken Piccata. Each item contributes to the dish’s unique taste, making it a favorite for family dinners or gatherings.

Step-by-Step Preparation of Crockpot Chicken Piccata Recipe

Step 1: Preparing the Chicken

Start by taking your boneless, skinless chicken breasts. Rinse them under cold water and pat them dry with paper towels. This step is important as it helps remove any excess moisture. Next, place the chicken breasts in the bottom of your crockpot. Make sure they are arranged in a single layer for even cooking. This simple preparation sets the stage for a delicious meal.

Step 2: Mixing the Sauce

In a separate bowl, it’s time to create the flavorful sauce. Combine the chicken broth, fresh lemon juice, drained capers, minced garlic, dried oregano, salt, and black pepper. Whisk these ingredients together until they are well blended. The mixture should smell fresh and zesty, which is a good sign! This sauce will infuse the chicken with amazing flavors as it cooks.

Step 3: Combining Ingredients in the Crockpot

Now, pour the sauce mixture over the chicken in the crockpot. Make sure the chicken is well coated with the sauce. This ensures that every bite will be packed with flavor. If you want, you can give the chicken a gentle stir to help distribute the sauce evenly. Cover the crockpot with its lid, sealing in all the delicious aromas.

Step 4: Cooking the Chicken Piccata

Set your crockpot to cook on low for 6-7 hours or on high for 3-4 hours. The low and slow method allows the chicken to become tender and soak up all the flavors. If you’re in a hurry, the high setting works just as well. Either way, you’ll end up with juicy chicken that falls apart easily. It’s a great way to prepare a meal without much fuss!

Step 5: Finishing Touches

Once the cooking time is up, carefully remove the chicken from the crockpot. Use two forks to shred the chicken into bite-sized pieces. This step makes it easier to serve and enjoy. After shredding, return the chicken to the crockpot and stir it into the sauce. This will help the chicken absorb even more flavor. Finally, serve your Crockpot Chicken Piccata over cooked pasta or rice, and don’t forget to garnish with fresh parsley for that extra touch of color and freshness!

Variations of the Crockpot Chicken Piccata Recipe

Gluten-Free Options

If you’re looking for a gluten-free version of the Crockpot Chicken Piccata Recipe, you’re in luck! This dish is naturally gluten-free, as it doesn’t require any flour or breading. However, if you want to serve it with a side, consider using gluten-free pasta or rice. Many brands offer delicious gluten-free options that pair perfectly with the zesty chicken piccata. Just be sure to check the labels to ensure they meet your dietary needs. This way, everyone can enjoy a tasty meal without worrying about gluten!

Adding Vegetables for Extra Flavor

Enhancing your Crockpot Chicken Piccata with vegetables is a fantastic way to boost nutrition and flavor. You can add sliced mushrooms, spinach, or even bell peppers to the crockpot. These veggies not only add color but also provide additional vitamins and minerals. Simply toss them in with the chicken and sauce during the cooking process. They will cook down and blend beautifully with the flavors of the dish. This variation makes your meal even more wholesome and satisfying!

Cooking Note for Crockpot Chicken Piccata Recipe

When preparing your Crockpot Chicken Piccata, there are a few important cooking notes to keep in mind. These tips will help ensure that your dish turns out perfectly every time.

First, always check the size of your chicken breasts. If they are particularly large, consider cutting them in half. This will help them cook more evenly and quickly. Remember, the goal is to have tender chicken that easily shreds.

Next, avoid lifting the lid of the crockpot during cooking. Each time you open it, heat escapes, which can extend the cooking time. Trust the process! The slow cooker does its magic best when left undisturbed.

Additionally, if you prefer a thicker sauce, you can remove the lid during the last 30 minutes of cooking. This allows some of the liquid to evaporate, concentrating the flavors. Just be sure to keep an eye on it to prevent it from drying out.

Lastly, feel free to adjust the seasoning to your taste. If you love a bit more zing, add extra lemon juice or capers. For a milder flavor, reduce the amount of garlic or salt. Cooking is all about personal preference, so make this recipe your own!

By following these cooking notes, you’ll create a delicious and satisfying Crockpot Chicken Piccata that everyone will love. Enjoy the process and the delightful aromas that fill your kitchen!

Serving Suggestions for Crockpot Chicken Piccata Recipe

Best Side Dishes to Pair

When it comes to serving your Crockpot Chicken Piccata, choosing the right side dishes can elevate your meal. Here are some fantastic options that complement the zesty flavors of the chicken:

  • Garlic Bread: A warm, crusty garlic bread is perfect for soaking up the delicious sauce. It adds a comforting touch to your meal.
  • Steamed Vegetables: Lightly steamed broccoli, asparagus, or green beans provide a fresh and healthy contrast to the rich flavors of the chicken piccata.
  • Caesar Salad: A crisp Caesar salad with romaine lettuce, croutons, and a tangy dressing pairs wonderfully with the dish, adding a crunchy texture.
  • Quinoa or Couscous: For a nutritious alternative, serve the chicken over fluffy quinoa or couscous. These grains absorb the sauce beautifully.
  • Roasted Potatoes: Crispy roasted potatoes seasoned with herbs make for a hearty side that balances the lightness of the chicken.

These side dishes not only enhance the meal but also provide a variety of textures and flavors that everyone will enjoy. Feel free to mix and match based on your preferences and dietary needs!

Wine Pairing Recommendations

Pairing the right wine with your Crockpot Chicken Piccata can enhance the dining experience. Here are some excellent wine options to consider:

  • Sauvignon Blanc: This white wine is known for its crisp acidity and citrus notes, making it a perfect match for the lemony flavors of the dish.
  • Pinot Grigio: Another great white option, Pinot Grigio offers a light and refreshing taste that complements the chicken without overpowering it.
  • Chardonnay: A lightly oaked Chardonnay can add a creamy texture that pairs well with the richness of the sauce, especially if you choose to add cream.
  • Prosecco: If you prefer sparkling wine, Prosecco is a delightful choice. Its bubbles and fruity notes can brighten up the meal.
  • Rosé: A dry rosé offers a nice balance of fruitiness and acidity, making it versatile enough to pair with various side dishes.

Choosing the right wine can elevate your meal, making it feel even more special. Enjoy experimenting with these pairings to find your perfect match!

Tips for Perfecting Your Crockpot Chicken Piccata Recipe

To ensure your Crockpot Chicken Piccata turns out perfectly every time, consider these helpful tips. They will enhance the flavor and texture of your dish, making it a family favorite!

First, always use fresh ingredients. Fresh lemon juice and garlic will provide a vibrant flavor that dried or bottled versions simply can’t match. The zest from the lemons can also be added for an extra burst of citrus aroma.

Next, don’t skip the marinating step. If you have time, marinate the chicken in the lemon juice, garlic, and spices for a few hours before cooking. This allows the flavors to penetrate the chicken, making it even more delicious.

Another tip is to adjust the cooking time based on your crockpot model. Some cook faster than others. If you notice your chicken is cooking too quickly, reduce the cooking time slightly. Conversely, if it’s not tender enough, you can extend the cooking time by an hour.

For a richer sauce, consider adding a splash of white wine to the sauce mixture. This will deepen the flavor profile and add a lovely complexity to the dish. Just remember to let the alcohol cook off during the slow cooking process.

Lastly, don’t forget to taste and adjust the seasoning before serving. Everyone’s palate is different, so feel free to add more salt, pepper, or lemon juice to suit your taste. This final touch can make a big difference in the overall enjoyment of your meal.

By following these tips, you’ll create a Crockpot Chicken Piccata that is bursting with flavor and sure to impress your family and friends. Happy cooking!

Breakdown of Time for Crockpot Chicken Piccata Recipe

Prep Time

The prep time for your Crockpot Chicken Piccata is quite minimal. You can expect to spend about 15-20 minutes gathering and preparing your ingredients. This includes rinsing and drying the chicken, mixing the sauce, and combining everything in the crockpot. With such a quick prep time, you can easily fit this recipe into your busy schedule!

Cooking Time

Once everything is in the crockpot, the cooking time will vary based on your settings. If you choose to cook on low, it will take about 6-7 hours. On the other hand, if you opt for the high setting, it will take around 3-4 hours. Regardless of the method, the slow cooking process ensures that the chicken becomes tender and flavorful, making it well worth the wait!

Total Time

In total, you can expect the entire process of making Crockpot Chicken Piccata to take approximately 6 hours and 15 minutes to 7 hours and 20 minutes, depending on your cooking method. This includes both the prep and cooking times. The beauty of this recipe is that while it takes a bit of time to cook, you can spend that time doing other things, making it a perfect meal for busy days!

Nutritional Information for Crockpot Chicken Piccata Recipe

Calories

When it comes to enjoying a delicious meal, knowing the calorie content can help you make informed choices. Each serving of Crockpot Chicken Piccata contains approximately 290 calories. This makes it a satisfying option for dinner without being overly heavy. The balance of protein and healthy fats ensures that you feel full and satisfied after your meal.

Protein

Protein is an essential nutrient that helps build and repair tissues in our bodies. In this recipe, each serving provides about 38 grams of protein. The boneless, skinless chicken breasts are a fantastic source of lean protein, making this dish a great choice for those looking to maintain or build muscle. Plus, protein helps keep you feeling full longer, which can be beneficial for weight management.

Sodium

Monitoring sodium intake is important for maintaining heart health. Each serving of Crockpot Chicken Piccata contains around 800 milligrams of sodium. This amount is primarily from the chicken broth and added salt. If you’re watching your sodium levels, consider using low-sodium chicken broth and adjusting the salt to taste. This way, you can enjoy the flavors of the dish while keeping your sodium intake in check.

FAQs about Crockpot Chicken Piccata Recipe

Can I use frozen chicken for this recipe?

Yes, you can use frozen chicken for your Crockpot Chicken Piccata Recipe! However, it’s important to note that cooking times may vary. If you start with frozen chicken, you should cook it on high for about 4-5 hours instead of the usual 3-4 hours. Always ensure that the chicken reaches an internal temperature of 165°F (75°C) for safe consumption. Using frozen chicken is a great way to save time and still enjoy a delicious meal!

How can I make this recipe dairy-free?

Making your Crockpot Chicken Piccata dairy-free is simple! The original recipe does not include any dairy, so you’re already on the right track. If you want to add creaminess, consider using coconut milk or a dairy-free yogurt alternative. These options will provide a rich texture without any dairy. Just stir in your choice of dairy-free product at the end of cooking, and you’ll have a creamy sauce that everyone can enjoy!

What can I substitute for capers in this recipe?

If you don’t have capers on hand or prefer not to use them, there are several substitutes you can try. Green olives or pickles can provide a similar briny flavor. Simply chop them up and add them to the sauce in place of capers. Another option is to use a splash of vinegar, such as white wine vinegar or lemon juice, to add acidity. While the flavor will be slightly different, these alternatives can still create a delicious dish!

How long can I store leftovers of Crockpot Chicken Piccata?

Leftovers of your Crockpot Chicken Piccata can be stored in an airtight container in the refrigerator for up to 3-4 days. If you want to keep it longer, consider freezing the leftovers. They can be frozen for up to 3 months. When you’re ready to enjoy them again, simply thaw in the refrigerator overnight and reheat on the stove or in the microwave. This makes for a quick and easy meal on busy days!

Conclusion on Crockpot Chicken Piccata Recipe

In conclusion, the Crockpot Chicken Piccata Recipe is a delightful and easy way to enjoy a classic Italian dish at home. With its tender chicken, zesty lemon sauce, and briny capers, this meal is sure to impress your family and friends. The slow cooking method not only enhances the flavors but also allows you to spend your time on other activities while dinner cooks itself.

Whether you choose to serve it over pasta, rice, or with a side of fresh vegetables, this recipe offers versatility and satisfaction. Plus, with the option to customize it to your dietary needs, everyone can enjoy a plate of this delicious chicken piccata. Remember to experiment with different ingredients and side dishes to make it your own!

So, gather your ingredients, set your crockpot, and get ready to savor a meal that is both comforting and flavorful. With minimal effort and maximum taste, the Crockpot Chicken Piccata Recipe is bound to become a staple in your dinner rotation. Happy cooking!

Crockpot Pineapple Chicken Recipe is a must-try dish!

Introduction to Crockpot Pineapple Chicken Recipe

Crockpot Pineapple Chicken Recipe. This dish combines the sweetness of pineapple with savory barbecue flavors, creating a delightful taste that everyone will love. Plus, it’s made in a crockpot, which means you can set it and forget it!

What Makes the Crockpot Pineapple Chicken Recipe Special?

What sets this recipe apart is its unique blend of flavors. The juicy chicken thighs soak up the tangy pineapple juice and rich barbecue sauce, resulting in a tender and flavorful dish. The addition of garlic and ginger adds a hint of warmth, making it perfect for any occasion.

Another great aspect of this recipe is its versatility. You can easily customize it to suit your taste. Want it sweeter? Just add a bit of honey! Prefer a spicy kick? Toss in some jalapeños or hot sauce. The possibilities are endless!

Crockpot Pineapple Chicken Recipe is not only tasty but also nutritious. With a good balance of protein and healthy carbs, it makes for a satisfying meal. Serve it over rice or quinoa, and you have a complete dish that’s sure to please.

So, whether you’re hosting a dinner party or just need a quick weeknight meal, this recipe is a fantastic choice. Let’s dive into the ingredients and get cooking!

Ingredients for Crockpot Pineapple Chicken Recipe

Crockpot Pineapple Chicken Recipe, you’ll need a few simple ingredients. These items are easy to find and will help you whip up this delightful dish in no time. Here’s what you’ll need:

  • 2 pounds boneless, skinless chicken thighs
  • 1 can (20 ounces) pineapple chunks in juice, undrained
  • 1 cup barbecue sauce
  • 1/4 cup soy sauce
  • 1 tablespoon minced garlic
  • 1 tablespoon minced ginger
  • 1/2 teaspoon black pepper
  • 1/4 teaspoon red pepper flakes (optional)
  • 2 green onions, sliced (for garnish)
  • Cooked rice or quinoa (for serving)

These ingredients come together to create a sweet and savory flavor profile that is simply irresistible. The chicken thighs are the star of the show, providing a tender and juicy base. The pineapple adds a refreshing sweetness, while the barbecue and soy sauces bring depth and richness to the dish.

Don’t forget the garlic and ginger! They add a wonderful aromatic quality that enhances the overall taste. If you like a little heat, the red pepper flakes are a great optional addition. Finally, the green onions not only add a pop of color but also a fresh crunch when sprinkled on top before serving.

Now that you have your ingredients ready, let’s move on to the next step: preparing the chicken!

Step-by-Step Preparation of Crockpot Pineapple Chicken Recipe

Crockpot Pineapple Chicken Recipe. This process is simple and straightforward, making it perfect for cooks of all skill levels. Let’s get started!

Step 1: Gather Your Ingredients

Before you begin cooking, it’s essential to gather all your ingredients. This will make the process smoother and more enjoyable. Make sure you have:

  • 2 pounds of boneless, skinless chicken thighs
  • 1 can of pineapple chunks in juice
  • 1 cup of barbecue sauce
  • 1/4 cup of soy sauce
  • 1 tablespoon of minced garlic
  • 1 tablespoon of minced ginger
  • 1/2 teaspoon of black pepper
  • 1/4 teaspoon of red pepper flakes (optional)
  • 2 green onions for garnish
  • Cooked rice or quinoa for serving

Having everything in one place will help you stay organized and focused. Plus, it’s always nice to see all the colorful ingredients ready to go!

Step 2: Prepare the Chicken

Next, it’s time to prepare the chicken. Start by rinsing the chicken thighs under cold water. This helps to remove any excess moisture. After rinsing, pat them dry with paper towels. This step is important because it helps the chicken brown better if you choose to sear it before adding it to the crockpot.

Once the chicken is dry, place it in the bottom of the crockpot. Make sure to spread the pieces out evenly. This ensures that every piece gets coated with the delicious sauce later on.

Step 3: Mix the Sauce

Now, let’s create the flavorful sauce that will bring this dish to life. In a separate bowl, combine the pineapple chunks (with juice), barbecue sauce, soy sauce, minced garlic, minced ginger, black pepper, and red pepper flakes (if you’re using them).

Stir the mixture well until all the ingredients are fully combined. The sweet and savory aroma will start to fill your kitchen, making your mouth water in anticipation!

Step 4: Combine Ingredients in the Crockpot

Once your sauce is ready, pour it over the chicken in the crockpot. Make sure to cover all the chicken pieces with the sauce. This will help them absorb all the wonderful flavors as they cook.

Give the chicken a gentle stir to ensure it’s well coated. This step is crucial for achieving that perfect blend of sweet and savory in every bite.

Step 5: Set the Crockpot and Cook

Now it’s time to set your crockpot! Cover it with the lid and choose your cooking time. You can cook on low for 6-8 hours or on high for 3-4 hours. The longer you cook, the more tender the chicken will become.

As the chicken cooks, the flavors will meld together beautifully. You can go about your day, knowing that a delicious meal is waiting for you at the end!

Crockpot Pineapple Chicken Recipe.

Variations of Crockpot Pineapple Chicken Recipe

Crockpot Pineapple Chicken Recipe is not only delicious but also highly adaptable. You can easily make variations to suit your taste or dietary needs. Let’s explore some fun ways to switch things up!

Adding Vegetables to the Crockpot Pineapple Chicken Recipe

Crockpot Pineapple Chicken Recipe is by adding vegetables. This not only boosts the nutritional value but also adds color and texture to the dish. Here are some vegetables you can consider:

  • Bell Peppers: Slice up some bell peppers and toss them in. They add a sweet crunch.
  • Carrots: Chopped carrots bring a nice sweetness and vibrant color.
  • Broccoli: Add broccoli florets in the last hour of cooking for a fresh, green touch.
  • Snap Peas: These can be added during the last 30 minutes for a crisp bite.

Simply chop your chosen vegetables and add them to the crockpot along with the chicken and sauce. They will cook down and absorb the delicious flavors, making your meal even more satisfying!

Alternative Protein Options for the Recipe

Crockpot Pineapple Chicken Recipe, there are plenty of options! Here are some alternatives:

  • Chicken Breasts: You can use boneless, skinless chicken breasts instead of thighs for a leaner option.
  • Pork: Pork tenderloin or pork chops can be a tasty substitute, offering a different flavor profile.
  • Tofu: For a vegetarian option, use firm tofu. Just make sure to press it to remove excess moisture.
  • Turkey: Ground turkey or turkey thighs can also work well, providing a lighter alternative.

Whichever protein you choose, the cooking times may vary slightly. Always ensure that your protein is cooked through before serving. Enjoy experimenting with these variations to find your favorite version of this delightful dish!

Cooking Note for Crockpot Pineapple Chicken Recipe

Crockpot Pineapple Chicken Recipe, there are a few important cooking notes to keep in mind. These tips will help ensure that your dish turns out perfectly every time.

First, always use a reliable crockpot. Different models can vary in cooking times and temperatures. If you’re unsure, it’s a good idea to check the chicken for doneness a little earlier than the suggested cooking time. The chicken should be tender and easily shred with a fork.

Next, avoid overfilling your crockpot. While it may be tempting to add extra ingredients, too much can lead to uneven cooking. A good rule of thumb is to fill your crockpot no more than two-thirds full. This allows for proper heat circulation and ensures that everything cooks evenly.

Additionally, if you prefer a thicker sauce, consider removing the lid during the last 30 minutes of cooking. This will allow some of the liquid to evaporate, resulting in a richer sauce. You can also mix in a cornstarch slurry (1 tablespoon of cornstarch mixed with 2 tablespoons of water) to thicken the sauce if desired.

Lastly, let the chicken rest for a few minutes after cooking. This allows the juices to redistribute, making the chicken even more flavorful and moist. Once rested, shred the chicken and mix it back into the sauce for a delicious finish.

Crockpot Pineapple Chicken Recipe that your family will love!

Serving Suggestions for Crockpot Pineapple Chicken Recipe

Crockpot Pineapple Chicken Recipe is ready, it’s time to think about how to serve it. This dish is not only flavorful but also versatile, making it easy to pair with a variety of side dishes. Here are some fantastic options to complement your meal:

Best Side Dishes to Pair with Crockpot Pineapple Chicken

  • Steamed Rice: A classic choice! White or brown rice absorbs the delicious sauce, making every bite delightful.
  • Quinoa: For a healthier option, serve the chicken over quinoa. It adds a nutty flavor and extra protein.
  • Coleslaw: A crunchy coleslaw adds a refreshing contrast to the sweet and savory chicken. The crispness balances the dish perfectly.
  • Roasted Vegetables: Roasted broccoli, carrots, or bell peppers make a colorful and nutritious side. Their natural sweetness pairs well with the chicken.
  • Cauliflower Rice: For a low-carb option, try cauliflower rice. It’s light and fluffy, making it a great base for the chicken.
  • Garlic Bread: If you’re in the mood for something different, garlic bread can be a fun addition. It’s perfect for soaking up the sauce!

Crockpot Pineapple Chicken Recipe to new heights!

Tips for Perfecting Your Crockpot Pineapple Chicken Recipe

Crockpot Pineapple Chicken Recipe truly shine, consider these helpful tips. They will ensure that your dish is not only delicious but also perfectly cooked every time. Let’s dive into some expert advice!

First, always choose high-quality chicken. Fresh, boneless, skinless chicken thighs are ideal for this recipe. They remain juicy and tender during the long cooking process. If you can, opt for organic or free-range chicken for the best flavor.

Next, don’t skip the marinating step! If you have time, marinate the chicken in the sauce for a few hours or overnight. This allows the flavors to penetrate the meat, resulting in a more flavorful dish. Just remember to adjust the cooking time slightly if the chicken is cold from the fridge.

Another tip is to layer your ingredients wisely. Place the chicken at the bottom of the crockpot, as it needs the most heat. Then, pour the sauce over the top. This way, the chicken absorbs all the flavors while cooking.

For added depth of flavor, consider adding a splash of pineapple juice or a bit of apple cider vinegar to the sauce. This will enhance the sweetness and tanginess, making your dish even more delightful.

Crockpot Pineapple Chicken Recipe truly your own.

By following these tips, you’ll be well on your way to creating a mouthwatering dish that your family and friends will rave about!

Breakdown of Time for Crockpot Pineapple Chicken Recipe

Crockpot Pineapple Chicken Recipe is essential for planning your meal. This dish is not only easy to prepare but also allows you to manage your time effectively. Here’s a breakdown of the time involved in making this delicious meal.

Prep Time

The prep time for this recipe is quite minimal. You’ll need about 15-20 minutes to gather your ingredients, prepare the chicken, and mix the sauce. This quick preparation makes it perfect for busy weeknights or when you want to impress guests without spending hours in the kitchen.

Cooking Time

Crockpot Pineapple Chicken Recipe on low for 6-8 hours or on high for 3-4 hours. The longer cooking time on low allows the flavors to meld beautifully, resulting in tender, juicy chicken. If you’re short on time, the high setting is a great option, too!

Total Time

In total, you can expect the entire process to take anywhere from 6 hours and 15 minutes to 8 hours and 20 minutes, depending on your cooking choice. This includes both prep and cooking time. The best part? While the chicken cooks, you can go about your day, knowing a delicious meal is waiting for you!

Crockpot Pineapple Chicken Recipe. It’s a hassle-free way to enjoy a delightful meal with minimal effort!

Nutritional Information for Crockpot Pineapple Chicken Recipe

Crockpot Pineapple Chicken Recipe not only offers a delightful taste but also provides a good nutritional profile. Here’s a closer look at the key nutritional components per serving:

Calories

Crockpot Pineapple Chicken Recipe contains approximately 320 calories. This makes it a satisfying option for lunch or dinner without overwhelming your daily caloric intake. The combination of chicken and pineapple ensures that you’re getting a meal that is both filling and flavorful.

Protein

Crockpot Pineapple Chicken Recipe an excellent choice for those looking to increase their protein intake while enjoying a delicious meal.

Sodium

When it comes to sodium, each serving contains around 800 milligrams. While this is a reasonable amount for a savory dish, it’s important to be mindful of your overall sodium intake throughout the day. If you’re watching your sodium levels, consider using low-sodium soy sauce or barbecue sauce to reduce the overall sodium content without sacrificing flavor.

Crockpot Pineapple Chicken Recipe is not only a tasty meal but also a nutritious one. With a good balance of calories, protein, and sodium, it can fit well into a healthy eating plan. Enjoy this delightful dish knowing that you’re nourishing your body while satisfying your taste buds!

FAQs about Crockpot Pineapple Chicken Recipe

Can I use frozen chicken for the Crockpot Pineapple Chicken Recipe?

Crockpot Pineapple Chicken Recipe. However, it’s important to note that cooking times may vary. If you start with frozen chicken, you should cook it on high for about 4-5 hours instead of the usual 3-4 hours. Always ensure the chicken reaches an internal temperature of 165°F (75°C) for safety. Using frozen chicken can be a great time-saver, especially on busy days!

How long can I store leftovers of Crockpot Pineapple Chicken?

Crockpot Pineapple Chicken Recipe can be stored in an airtight container in the refrigerator for up to 3-4 days. If you want to keep it longer, consider freezing it. When properly stored in a freezer-safe container, it can last for up to 3 months. Just remember to thaw it in the refrigerator overnight before reheating. This way, you can enjoy the delicious flavors again!

Can I make the Crockpot Pineapple Chicken Recipe ahead of time?

Crockpot Pineapple Chicken Recipe is perfect for meal prep. You can prepare the chicken and sauce the night before and store them in the refrigerator. In the morning, simply pour everything into the crockpot and set it to cook. This makes it a convenient option for busy weekdays or when you have guests over. Just set it and forget it!

What can I substitute for pineapple in the Crockpot Pineapple Chicken Recipe?

Crockpot Pineapple Chicken Recipe, there are a few options. You can use canned peaches or mangoes for a similar sweetness. Alternatively, try using apple juice or a mix of orange juice and a bit of vinegar for a tangy flavor. Each substitute will give a unique twist to the dish, so feel free to experiment and find your favorite!

Conclusion on Crockpot Pineapple Chicken Recipe

Crockpot Pineapple Chicken Recipe is a fantastic choice for anyone seeking a delicious and hassle-free meal. With its perfect blend of sweet and savory flavors, this dish is sure to become a family favorite. The ease of preparation and the ability to customize it to your taste make it a versatile option for any occasion.

Whether you’re cooking for a busy weeknight dinner or hosting a gathering, this recipe delivers on both flavor and convenience. The slow cooking process allows the chicken to become tender and juicy, while the sauce infuses every bite with delightful taste. Plus, the nutritional benefits make it a guilt-free indulgence!

Crockpot Pineapple Chicken Recipe can easily adapt to your preferences. So, don’t hesitate to get creative!

We hope you enjoy making and sharing this recipe with your loved ones. With just a few simple ingredients and a little time, you can create a meal that brings joy to your table. Happy cooking!

Southern Chicken Salad: A Refreshing Recipe You’ll Love!

Introduction to Southern Chicken Salad

This Southern Chicken Salad reminds me of summer picnics and family gatherings, where laughter mingles with the aroma of delicious food. This recipe is a quick solution for those busy days when you crave something refreshing yet satisfying. With tender chicken, crunchy veggies, and a creamy dressing, it’s a dish that impresses without the fuss. Whether you’re hosting friends or just need a delightful lunch, this Southern Chicken Salad is sure to become a favorite in your kitchen. Let’s dive into this delightful recipe!

Why You’ll Love This Southern Chicken Salad

This Southern Chicken Salad is a game-changer for busy weeknights. It’s quick to whip up, taking just 15 minutes of prep time. The combination of tender chicken and sweet grapes creates a delightful balance of flavors that will have your taste buds dancing. Plus, it’s versatile! Serve it on a bed of greens, in a sandwich, or with crackers. You’ll find it’s a dish everyone will love, making mealtime a breeze.

Ingredients for Southern Chicken Salad

Gathering the right ingredients is key to making a delicious Southern Chicken Salad. Here’s what you’ll need:

  • Cooked chicken: Shredded or diced, this is the star of the show. Use leftover rotisserie chicken for a quick option.
  • Celery: Finely chopped, it adds a satisfying crunch and freshness to the salad.
  • Red grapes: Halved, these bring a sweet burst of flavor that perfectly complements the savory chicken.
  • Mayonnaise: This creamy base binds everything together. For a lighter version, consider using Greek yogurt instead.
  • Plain Greek yogurt: Adds creaminess and a tangy flavor, plus a boost of protein.
  • Dijon mustard: Just a tablespoon adds a subtle kick that elevates the dressing.
  • Lemon juice: A splash of acidity brightens the flavors and keeps the salad fresh.
  • Garlic powder: A pinch enhances the overall taste without overpowering it.
  • Onion powder: This adds depth and a hint of sweetness to the dressing.
  • Salt and pepper: Essential for seasoning, adjust to your taste.
  • Pecans (optional): Chopped pecans add a delightful crunch and nutty flavor, but feel free to skip them if you prefer.
  • Green onions (optional): Sliced green onions provide a fresh, mild onion flavor that brightens the dish.

For exact measurements, check the bottom of the article where you can find everything available for printing. Enjoy the process of gathering these ingredients, as each one plays a role in creating a refreshing Southern Chicken Salad that you’ll love!

How to Make Southern Chicken Salad

Creating a delicious Southern Chicken Salad is a breeze! Follow these simple steps, and you’ll have a refreshing dish ready in no time. Let’s get started!

Step 1: Combine the Chicken and Vegetables

In a large mixing bowl, add your cooked chicken, finely chopped celery, and halved red grapes. The chicken should be tender and juicy, while the celery adds that satisfying crunch. Gently toss these ingredients together until they’re evenly mixed. This is where the magic begins, as the flavors start to blend beautifully!

Step 2: Prepare the Dressing

In a separate bowl, whisk together the mayonnaise, plain Greek yogurt, Dijon mustard, lemon juice, garlic powder, onion powder, salt, and pepper. Keep whisking until the mixture is smooth and creamy. This dressing is the heart of your Southern Chicken Salad, bringing everything together with its rich and tangy flavor.

Step 3: Mix Everything Together

Now, pour the dressing over the chicken mixture. Use a spatula or wooden spoon to gently stir everything together until the chicken and veggies are well coated. This step is crucial! You want every bite to be bursting with flavor, so take your time to ensure everything is evenly mixed.

Step 4: Add Optional Ingredients

If you’re feeling adventurous, fold in the chopped pecans and sliced green onions at this stage. The pecans add a delightful crunch, while the green onions bring a fresh, mild flavor. These optional ingredients can elevate your Southern Chicken Salad, making it even more delicious!

Step 5: Chill the Salad

Cover the bowl with plastic wrap or a lid and refrigerate the salad for at least one hour. This chilling time allows the flavors to meld together, creating a more harmonious taste. Trust me, the wait is worth it!

Step 6: Serve and Enjoy

When you’re ready to serve, you have plenty of options! Enjoy your Southern Chicken Salad on a bed of crisp lettuce, in a sandwich, or with crunchy crackers. Each serving is a delightful experience, perfect for lunch or a light dinner. Dig in and savor every bite!

Tips for Success

  • Use leftover rotisserie chicken for a quick and flavorful base.
  • Chill the salad longer for even better flavor melding.
  • Adjust the seasoning to your taste; don’t be shy with salt and pepper!
  • Experiment with different nuts or fruits for a unique twist.
  • For a creamier texture, add more Greek yogurt or mayonnaise.

Equipment Needed

  • Mixing bowls: A large bowl for combining ingredients and a smaller one for the dressing.
  • Whisk: Essential for blending the dressing smoothly; a fork works too!
  • Spatula or wooden spoon: Perfect for mixing everything together.
  • Plastic wrap or lid: To cover the salad while it chills in the fridge.

Variations of Southern Chicken Salad

  • Fruit Medley: Add diced apples or dried cranberries for a sweet twist that complements the savory chicken.
  • Spicy Kick: Mix in some diced jalapeños or a dash of hot sauce for those who enjoy a little heat.
  • Herb Infusion: Incorporate fresh herbs like dill or parsley for an aromatic touch that brightens the salad.
  • Avocado Delight: Substitute some of the mayonnaise with mashed avocado for a creamy, nutrient-packed version.
  • Low-Carb Option: Use cauliflower rice instead of chicken for a refreshing, low-carb salad that’s still full of flavor.

Serving Suggestions for Southern Chicken Salad

  • Pair with a light, crisp white wine like Sauvignon Blanc for a refreshing complement.
  • Serve alongside a simple green salad dressed with vinaigrette for added freshness.
  • Present on a platter with colorful edible flowers for a beautiful touch.
  • Offer whole grain crackers or toasted baguette slices for a delightful crunch.

FAQs about Southern Chicken Salad

Can I make Southern Chicken Salad ahead of time?

Absolutely! In fact, making it ahead of time allows the flavors to meld beautifully. Just store it in the fridge for up to three days. The longer it sits, the tastier it becomes!

What can I substitute for mayonnaise in this recipe?

If you’re looking for a lighter option, you can use additional Greek yogurt instead of mayonnaise. It keeps the salad creamy while adding a tangy flavor. You can also try avocado for a unique twist!

Is Southern Chicken Salad gluten-free?

Yes, this Southern Chicken Salad is naturally gluten-free! Just ensure that any additional ingredients, like crackers, are also gluten-free if you plan to serve them alongside.

Can I add other vegetables to the salad?

Definitely! Feel free to get creative. Chopped bell peppers, cucumbers, or even shredded carrots can add extra crunch and flavor to your Southern Chicken Salad.

How can I make this salad more filling?

If you want to make your Southern Chicken Salad more filling, consider serving it on a bed of quinoa or brown rice. You can also add hard-boiled eggs for an extra protein boost!

Final Thoughts

Every bite of this Southern Chicken Salad is like a warm hug on a plate. It’s not just a meal; it’s a celebration of flavors and memories. Whether you’re enjoying it at a picnic or savoring it on a quiet afternoon, this dish brings joy and comfort. The blend of tender chicken, crunchy veggies, and creamy dressing creates a delightful experience that’s hard to resist. I hope this recipe becomes a staple in your kitchen, just as it has in mine. Here’s to creating delicious moments and sharing them with loved ones—one bowl of Southern Chicken Salad at a time!

Southern Chicken Salad
jhessica

Southern Chicken Salad: A Refreshing Recipe You’ll Love!

A refreshing Southern Chicken Salad recipe that combines tender chicken with crunchy vegetables and a creamy dressing.
Prep Time 15 minutes
Total Time 1 hour 15 minutes
Servings: 6 servings
Course: Salad
Cuisine: Southern
Calories: 250

Ingredients
  

  • 3 cups cooked chicken shredded or diced
  • 1 cup celery finely chopped
  • 1 cup red grapes halved
  • 1/2 cup mayonnaise
  • 1/4 cup plain Greek yogurt
  • 1 tablespoon Dijon mustard
  • 1 tablespoon lemon juice
  • 1/2 teaspoon garlic powder
  • 1/2 teaspoon onion powder
  • Salt and pepper to taste
  • 1/4 cup chopped pecans optional
  • 1/4 cup green onions sliced (optional)

Method
 

  1. In a large mixing bowl, combine the cooked chicken, celery, and red grapes.
  2. In a separate bowl, whisk together the mayonnaise, Greek yogurt, Dijon mustard, lemon juice, garlic powder, onion powder, salt, and pepper until smooth.
  3. Pour the dressing over the chicken mixture and stir until everything is well coated.
  4. If using, fold in the chopped pecans and green onions for added crunch and flavor.
  5. Cover the bowl and refrigerate the chicken salad for at least 1 hour to allow the flavors to meld.
  6. Serve chilled on a bed of lettuce, in a sandwich, or with crackers.

Nutrition

Serving: 1servingCalories: 250kcalCarbohydrates: 5gProtein: 23gFat: 15gSugar: 5g

Notes

  • For a lighter version, substitute the mayonnaise with additional Greek yogurt.
  • Add diced apples or dried cranberries for a sweet twist to the salad.

Tried this recipe?

Let us know how it was!

Chocolate Vanilla Swirl Muffins Recipe is a must-try!

Introduction to Chocolate Vanilla Swirl Muffins Recipe

Chocolate Vanilla Swirl Muffins Recipe is not just a feast for the taste buds but also a visual delight. Imagine biting into a soft, fluffy muffin that has a beautiful swirl of rich chocolate and creamy vanilla. It’s a perfect snack for breakfast, an afternoon pick-me-up, or even a sweet addition to a party spread.

These muffins are incredibly easy to make, making them a great choice for both novice bakers and seasoned pros. With simple ingredients that you likely already have in your pantry, you can whip up a batch in no time. Plus, the aroma of freshly baked muffins wafting through your kitchen is simply irresistible!

Chocolate Vanilla Swirl Muffins. Let’s get started!

Ingredients for Chocolate Vanilla Swirl Muffins Recipe

Chocolate Vanilla Swirl Muffins Recipe. Having everything ready will make your baking experience smooth and enjoyable. Here’s what you’ll need:

  • 2 cups all-purpose flour
  • 1 cup granulated sugar
  • 1 tablespoon baking powder
  • 1/2 teaspoon salt
  • 1/2 cup unsweetened cocoa powder
  • 1/2 cup milk
  • 1/2 cup vegetable oil
  • 2 large eggs
  • 2 teaspoons vanilla extract
  • 1 cup chocolate chips (optional)

These ingredients come together to create a delightful blend of flavors. The all-purpose flour provides the structure, while the sugar adds sweetness. Baking powder helps the muffins rise, and a pinch of salt enhances the overall taste. The cocoa powder is what gives our muffins that rich chocolate flavor, while the milk and vegetable oil keep them moist and tender.

Don’t forget the eggs! They act as a binding agent, ensuring that all the ingredients mix well. Lastly, the vanilla extract adds a lovely aroma and flavor that complements the chocolate perfectly. If you’re a chocolate lover, feel free to toss in some chocolate chips for an extra treat!

Now that we have our ingredients ready, let’s move on to the next step of preparing these delicious muffins!

Step-by-Step Preparation of Chocolate Vanilla Swirl Muffins Recipe

Chocolate Vanilla Swirl Muffins Recipe. Each step is designed to ensure your muffins turn out perfectly delicious.

Step 1: Preheat the Oven

First things first, preheat your oven to 350°F (175°C). This step is crucial as it ensures that your muffins bake evenly. While the oven heats up, you can prepare your muffin tin. Line it with paper liners or lightly grease it with cooking spray. This will help prevent the muffins from sticking.

Step 2: Prepare the Muffin Batter

In a large mixing bowl, whisk together the all-purpose flour, granulated sugar, baking powder, and salt. This dry mixture is the foundation of your muffins. In a separate bowl, mix the cocoa powder with half a cup of the dry mixture. This will help distribute the cocoa evenly when you combine everything later.

Step 3: Create the Chocolate Swirl

Next, in another bowl, combine the milk, vegetable oil, eggs, and vanilla extract. Stir these wet ingredients until they are well blended. Once mixed, pour the wet ingredients into the bowl with the remaining dry ingredients. Mix gently until just combined. Remember, do not overmix! This will keep your muffins light and fluffy.

Step 4: Combine the Batters

Now, divide the batter evenly into two bowls. To one bowl, add the cocoa mixture you prepared earlier. Stir until the cocoa is fully incorporated. You should now have one bowl of vanilla batter and one bowl of chocolate batter, ready to create that beautiful swirl!

Step 5: Fill the Muffin Tins

Using a spoon, alternate between the vanilla and chocolate batters in each muffin cup. This is where the fun begins! You can create a lovely swirl effect by gently swirling the batters together with a toothpick or a knife. Just a few swirls will do; you want to see both colors in each muffin.

Step 6: Bake the Muffins

Finally, it’s time to bake! Place your muffin tin in the preheated oven and bake for 18-20 minutes. To check if they are done, insert a toothpick into the center of a muffin. If it comes out clean, your muffins are ready! Once baked, allow them to cool in the tin for about 5 minutes before transferring them to a wire rack to cool completely.

Chocolate Vanilla Swirl Muffins are now ready to be enjoyed. The delightful aroma filling your kitchen is just a hint of the deliciousness to come!

Variation of Chocolate Vanilla Swirl Muffins Recipe

Chocolate Vanilla Swirl Muffins Recipe is a delightful treat on its own, there are many ways to customize and enhance these muffins. Whether you want to experiment with different flavors or make dietary modifications, the possibilities are endless. Let’s explore some alternative flavors and dietary options that can elevate your baking experience!

Alternative Flavors to Try

If you’re feeling adventurous, why not try some alternative flavors? Here are a few ideas to get you started:

  • Peanut Butter Swirl: Add 1/2 cup of creamy peanut butter to the wet ingredients. This will give your muffins a rich, nutty flavor that pairs beautifully with chocolate.
  • Banana Chocolate Swirl: Mash 1 ripe banana and mix it into the wet ingredients. This adds natural sweetness and moisture, creating a delicious banana-chocolate combo.
  • Mint Chocolate: Add 1 teaspoon of peppermint extract to the wet ingredients for a refreshing minty twist. You can also sprinkle crushed mint candies on top before baking.
  • Coconut Chocolate: Mix in 1/2 cup of shredded coconut into the vanilla batter. This adds a tropical flair that complements the chocolate perfectly.

These variations not only change the flavor profile but also add unique textures to your muffins. Feel free to mix and match these ideas to create your own signature muffin!

Dietary Modifications

Chocolate Vanilla Swirl Muffins Recipe without sacrificing taste. Here are some suggestions:

  • Gluten-Free: Substitute the all-purpose flour with a gluten-free flour blend. Make sure it contains xanthan gum for the best texture.
  • Dairy-Free: Use almond milk or coconut milk instead of regular milk. You can also replace vegetable oil with melted coconut oil for a dairy-free option.
  • Vegan: Replace the eggs with flax eggs (1 tablespoon of ground flaxseed mixed with 2.5 tablespoons of water per egg). This will keep your muffins vegan-friendly.
  • Reduced Sugar: Cut down the granulated sugar by half and use mashed bananas or unsweetened applesauce as a natural sweetener.

Chocolate Vanilla Swirl Muffins. With a little creativity, you can cater to various dietary needs while still delivering a tasty treat!

Cooking Note for Chocolate Vanilla Swirl Muffins Recipe

Chocolate Vanilla Swirl Muffins Recipe. Here are some important cooking notes to keep in mind as you embark on your baking adventure:

First, always measure your ingredients accurately. Baking is a science, and even a small variation can affect the outcome. Use measuring cups and spoons for dry ingredients and a liquid measuring cup for wet ingredients. This ensures that your muffins rise properly and have the right texture.

Next, consider the freshness of your ingredients. Check the expiration dates on your baking powder and cocoa powder. Fresh ingredients yield better results, so if they’re old, it might be time to replace them.

Another important note is to avoid overmixing the batter. When you combine the wet and dry ingredients, mix just until everything is incorporated. Overmixing can lead to dense muffins instead of light and fluffy ones. A few lumps are perfectly fine!

Additionally, if you’re using chocolate chips, consider tossing them in a bit of flour before adding them to the batter. This helps prevent them from sinking to the bottom of the muffins during baking, ensuring a delightful chocolate surprise in every bite.

Lastly, keep an eye on your muffins as they bake. Ovens can vary in temperature, so start checking for doneness a couple of minutes before the recommended baking time. Remember, a toothpick should come out clean or with a few moist crumbs, but not wet batter.

Chocolate Vanilla Swirl Muffins that are sure to impress everyone. Happy baking!

Serving Suggestions for Chocolate Vanilla Swirl Muffins Recipe

Chocolate Vanilla Swirl Muffins are baked to perfection, it’s time to think about how to serve them! These muffins are versatile and can be enjoyed in various ways. Here are some delightful serving suggestions to enhance your muffin experience:

  • With a Spread: Serve your muffins warm with a spread of butter, cream cheese, or even nut butter. The creamy texture complements the fluffy muffins beautifully.
  • Pair with Fresh Fruit: Enjoy your muffins alongside fresh fruit like strawberries, bananas, or blueberries. The fruity flavors add a refreshing contrast to the rich chocolate and vanilla.
  • Drizzle with Chocolate Sauce: For an extra indulgent treat, drizzle some warm chocolate sauce over the muffins. This will satisfy any chocolate cravings and make them even more decadent.
  • Accompany with Coffee or Tea: These muffins make a perfect snack with a cup of coffee or tea. The warm beverage enhances the flavors and makes for a cozy afternoon treat.
  • Serve at Parties: Cut the muffins in half and arrange them on a platter for parties or gatherings. They make a delightful addition to any dessert table and are sure to impress your guests.

Chocolate Vanilla Swirl Muffins Recipe is not only delicious on its own but can also be paired with various accompaniments to elevate your snack time. Enjoy these muffins fresh out of the oven or at room temperature, and watch them disappear in no time!

Tips for Perfecting Your Chocolate Vanilla Swirl Muffins Recipe

Chocolate Vanilla Swirl Muffins Recipe turns out perfectly every time, here are some handy tips to keep in mind. These simple suggestions can help you achieve that ideal texture and flavor, making your muffins a hit with everyone!

  • Use Room Temperature Ingredients: For the best results, make sure your eggs and milk are at room temperature. This helps the ingredients blend more smoothly, resulting in a lighter muffin.
  • Don’t Overfill the Muffin Cups: When filling your muffin tins, aim to fill each cup about two-thirds full. This allows room for the muffins to rise without overflowing.
  • Experiment with Mix-Ins: Feel free to add your favorite mix-ins! Nuts, dried fruits, or even a sprinkle of sea salt on top can add a delightful twist to your muffins.
  • Cool Completely: Allow your muffins to cool completely on a wire rack. This helps them set properly and enhances their flavor. Plus, they’re easier to store when cooled.
  • Store Properly: To keep your muffins fresh, store them in an airtight container at room temperature. They can last for up to three days. For longer storage, consider freezing them!
  • Test for Doneness: Remember to check your muffins a few minutes before the baking time is up. Ovens can vary, and you want to avoid overbaking, which can lead to dry muffins.

Chocolate Vanilla Swirl Muffins Recipe. Each batch will be delicious, fluffy, and sure to impress anyone who takes a bite. Happy baking!

Breakdown of Time for Chocolate Vanilla Swirl Muffins Recipe

Chocolate Vanilla Swirl Muffins Recipe can help you plan your baking session better. Here’s a simple breakdown of the time you’ll need to create these delightful muffins.

Prep Time

The prep time for this recipe is approximately 15-20 minutes. This includes gathering your ingredients, measuring them out, and mixing the batter. Make sure to have everything ready before you start baking. This will make the process smoother and more enjoyable!

Cooking Time

Once your muffins are in the oven, the cooking time is about 18-20 minutes. Keep an eye on them as they bake. Ovens can vary, so it’s a good idea to check for doneness a couple of minutes before the timer goes off. A toothpick inserted into the center should come out clean or with a few moist crumbs.

Total Time

Chocolate Vanilla Swirl Muffins ready to enjoy in no time!

Nutritional Information for Chocolate Vanilla Swirl Muffins Recipe

Chocolate Vanilla Swirl Muffins Recipe is essential, especially if you’re mindful of your diet. Here’s a breakdown of the key nutritional components per serving, which is one muffin. This information can help you enjoy your treats while keeping track of your daily intake.

Calories

Each muffin contains approximately 210 calories. This makes them a satisfying snack or breakfast option without being overly indulgent. The balance of flavors and textures in these muffins ensures that you get a delightful treat without consuming too many calories.

Protein

In terms of protein, each muffin provides about 3 grams. While this isn’t a high protein snack, it does contribute to your daily intake. Pairing these muffins with a protein-rich food, like yogurt or a glass of milk, can help create a more balanced meal.

Sodium

The sodium content in each muffin is around 150 milligrams. This is a moderate amount, making these muffins a reasonable choice for most diets. However, if you’re watching your sodium intake, consider adjusting the salt in the recipe or enjoying them in moderation.

Chocolate Vanilla Swirl Muffins Recipe offers a tasty treat that can fit into a balanced diet. Enjoy them as part of a wholesome breakfast or a delightful snack, and feel good about the nutritional choices you’re making!

FAQs about Chocolate Vanilla Swirl Muffins Recipe

Can I use whole wheat flour in the Chocolate Vanilla Swirl Muffins Recipe?

Chocolate Vanilla Swirl Muffins Recipe. This will add a nutty flavor and increase the fiber content. Just keep in mind that whole wheat flour may make the muffins slightly denser. To maintain a light texture, you might want to add a little extra liquid, like milk, to the batter.

How do I store leftover Chocolate Vanilla Swirl Muffins?

Chocolate Vanilla Swirl Muffins fresh, store them in an airtight container at room temperature. They can last for up to three days. If you want to keep them longer, consider refrigerating them. Just remember to let them come to room temperature before enjoying them again. For the best taste, you can also warm them in the microwave for a few seconds!

Can I freeze Chocolate Vanilla Swirl Muffins?

Chocolate Vanilla Swirl Muffins! To do this, allow the muffins to cool completely. Then, wrap each muffin tightly in plastic wrap or aluminum foil. Place them in a freezer-safe bag or container. They can be frozen for up to three months. When you’re ready to enjoy them, simply thaw them at room temperature or warm them in the microwave.

What can I substitute for eggs in the Chocolate Vanilla Swirl Muffins Recipe?

Chocolate Vanilla Swirl Muffins Recipe, you have several options! You can use a flax egg by mixing 1 tablespoon of ground flaxseed with 2.5 tablespoons of water. Let it sit for a few minutes until it thickens. Alternatively, you can use 1/4 cup of unsweetened applesauce or mashed banana for each egg. These substitutes will help bind the ingredients while adding a touch of sweetness!

Conclusion on Chocolate Vanilla Swirl Muffins Recipe

Chocolate Vanilla Swirl Muffins Recipe is a delightful way to enjoy the classic combination of chocolate and vanilla. These muffins are not only easy to make but also incredibly versatile. Whether you’re baking for a special occasion or just treating yourself, these muffins are sure to please everyone.

With their soft texture and beautiful swirl, they make for an eye-catching addition to any table. Plus, the ability to customize the recipe with different flavors and dietary modifications means that everyone can enjoy them, regardless of their preferences or restrictions.

As you embark on your baking journey, remember to have fun and experiment with the ingredients. The joy of baking lies in the creativity it allows. So, don’t hesitate to try new flavors or mix-ins that excite your taste buds!

Chocolate Vanilla Swirl Muffins. They are perfect for breakfast, snacks, or even dessert. So, gather your ingredients, preheat your oven, and get ready to indulge in a delicious treat that will surely become a favorite in your home. Happy baking!

Cinnamon Air Fryer Apples are a quick, tasty treat!

Introduction to Cinnamon Air Fryer Apples Recipe

Cinnamon Air Fryer Apples Recipe. This dish combines the natural sweetness of apples with the warm, comforting taste of cinnamon. It’s a perfect treat for any occasion, whether you’re hosting a gathering or simply enjoying a cozy night at home.

What Makes Cinnamon Air Fryer Apples Special?

Cinnamon Air Fryer Apples are special for several reasons. First, they are incredibly simple to prepare. With just a handful of ingredients, you can create a dish that feels indulgent yet is healthy. The combination of apples and cinnamon is a classic that evokes feelings of warmth and nostalgia. Plus, the air fryer gives the apples a tender texture while enhancing their natural sweetness. This method also allows for a quick cooking time, making it a go-to recipe for busy days.

Benefits of Using an Air Fryer for This Recipe

Using an air fryer for this recipe offers numerous benefits. For starters, air frying requires less oil than traditional frying methods, making it a healthier option. The hot air circulation in the air fryer cooks the apples evenly, ensuring they are perfectly tender without becoming mushy. Additionally, the air fryer can caramelize the sugars in the apples, creating a deliciously rich flavor. This method also saves time, allowing you to enjoy your dessert in just a matter of minutes. Overall, the air fryer is a fantastic tool for making Cinnamon Air Fryer Apples that are both delicious and nutritious.

Ingredients for Cinnamon Air Fryer Apples Recipe

Cinnamon Air Fryer Apples Recipe, you’ll need a few simple ingredients. Each component plays a vital role in enhancing the flavor and texture of the dish. Here’s what you’ll need:

  • 3 medium apples, cored and sliced
  • 2 tablespoons brown sugar
  • 1 teaspoon ground cinnamon
  • 1 tablespoon lemon juice
  • 1 tablespoon melted butter (or coconut oil for a vegan option)
  • 1/4 teaspoon salt
  • 1/4 cup chopped walnuts or pecans (optional)

When selecting apples, consider using varieties like Granny Smith, Honeycrisp, or Fuji. These apples provide a perfect balance of sweetness and tartness. The brown sugar and cinnamon will enhance their natural flavors, while the lemon juice adds a refreshing zing. If you’re looking for a vegan option, simply swap the butter for coconut oil. The nuts, while optional, add a delightful crunch that complements the soft apples beautifully.

Gather these ingredients, and you’re ready to embark on a delicious culinary adventure with your air fryer!

Step-by-Step Preparation of Cinnamon Air Fryer Apples Recipe

Cinnamon Air Fryer Apples Recipe. This process is straightforward and fun, making it perfect for cooks of all skill levels. Let’s get started!

Step 1: Preparing the Apples

First, you need to prepare the apples. Start by washing them thoroughly under running water. This step is important to remove any dirt or wax. Next, core the apples using an apple corer or a knife. After coring, slice the apples into thin wedges. Aim for uniform thickness to ensure even cooking. You can leave the skin on for added texture and nutrients, or peel them if you prefer a softer bite.

Step 2: Mixing the Cinnamon and Sugar

In a large mixing bowl, combine the brown sugar and ground cinnamon. Stir them together until they are well mixed. This blend will create a sweet and aromatic coating for your apples. The cinnamon will add warmth, while the brown sugar will enhance the natural sweetness of the apples. Feel free to adjust the amount of sugar based on your taste preferences!

Step 3: Coating the Apples

Now it’s time to coat the apples! Add the sliced apples to the bowl with the cinnamon-sugar mixture. Pour in the lemon juice and melted butter (or coconut oil). Toss everything together gently until the apple slices are evenly coated. Make sure each piece gets a good amount of the sweet mixture. This step is crucial for ensuring that every bite is bursting with flavor!

Step 4: Preheating the Air Fryer

Before you start cooking, preheat your air fryer to 350°F (175°C). Preheating is essential as it helps the apples cook evenly and achieve that perfect caramelized texture. Most air fryers take just a few minutes to reach the desired temperature, so this step is quick and easy.

Step 5: Air Frying the Apples

Once your air fryer is preheated, it’s time to cook the apples! Place the coated apple slices in the air fryer basket in a single layer. If you have a smaller air fryer, you may need to cook them in batches. Set the timer for 10-12 minutes. Remember to shake the basket halfway through to ensure even cooking. The apples should become tender and slightly caramelized, creating a delicious aroma in your kitchen!

Step 6: Serving the Cinnamon Air Fryer Apples

After the cooking time is up, carefully remove the basket from the air fryer. Let the apples cool for a few minutes before serving. This waiting time allows the flavors to settle. You can enjoy the Cinnamon Air Fryer Apples warm, as is, or with your favorite toppings. They make a fantastic dessert or a sweet snack!

Variations of Cinnamon Air Fryer Apples Recipe

Cinnamon Air Fryer Apples Recipe is delicious as is, there are many fun variations you can try! These tweaks can enhance the flavor and texture, making your dessert even more exciting. Let’s explore some tasty options!

Adding Nuts for Extra Crunch

One simple way to elevate your Cinnamon Air Fryer Apples is by adding nuts. Chopped walnuts or pecans bring a delightful crunch to the soft apples. Not only do they add texture, but they also provide healthy fats and protein. To incorporate nuts, simply mix them in with the apples during the coating step. This addition will create a satisfying contrast with the tender fruit, making each bite even more enjoyable!

Using Different Types of Apples

Another fun variation is to experiment with different types of apples. Each variety has its unique flavor and texture. For instance, Granny Smith apples offer a tartness that balances the sweetness of the brown sugar. Honeycrisp apples are known for their crispness and sweetness, while Fuji apples are juicy and sweet. Mixing different apple types can create a more complex flavor profile. Feel free to combine two or three varieties for a delicious twist!

Incorporating Other Spices

Don’t hesitate to get creative with spices! While cinnamon is the star of this recipe, adding other spices can enhance the flavor even more. Consider including nutmeg, allspice, or ginger for a warm, spiced aroma. A pinch of vanilla extract can also add a lovely depth to the dish. Just remember to start with small amounts and adjust to your taste. These spices can transform your Cinnamon Air Fryer Apples into a unique dessert that surprises your taste buds!

Cooking Note for Cinnamon Air Fryer Apples Recipe

Cinnamon Air Fryer Apples Recipe, there are a few cooking notes to keep in mind to ensure the best results. These tips will help you achieve perfectly cooked apples that are both delicious and visually appealing.

First, always choose apples that are firm and fresh. Soft or overripe apples may turn mushy during cooking, which can affect the overall texture of your dish. A good rule of thumb is to select apples that are slightly crisp to the touch.

Next, consider the size of your apple slices. Aim for uniform thickness, about 1/4 inch thick. This consistency helps the apples cook evenly. If some slices are thicker than others, they may not cook at the same rate, leading to a mix of tender and crunchy pieces.

Additionally, don’t overcrowd the air fryer basket. If you place too many apple slices at once, they may steam instead of fry. This can prevent that lovely caramelization from happening. If necessary, cook the apples in batches to ensure they get the best texture and flavor.

Lastly, keep an eye on the cooking time. Air fryers can vary in performance, so it’s wise to check the apples a minute or two before the timer goes off. You want them to be tender and slightly caramelized, but not overly soft. Adjust the cooking time as needed based on your air fryer model.

By following these cooking notes, you’ll create a delightful batch of Cinnamon Air Fryer Apples that are sure to impress your family and friends!

Serving Suggestions for Cinnamon Air Fryer Apples Recipe

Cinnamon Air Fryer Apples, it’s time to think about how to serve them. This dish is versatile and can be enjoyed in various ways. Here are some delightful serving suggestions that will elevate your dessert experience!

Pairing with Ice Cream

One of the most popular ways to enjoy Cinnamon Air Fryer Apples is by pairing them with a scoop of vanilla ice cream. The warm, spiced apples contrast beautifully with the cold, creamy ice cream. As the ice cream melts, it creates a delicious sauce that enhances the flavors of the dish. You can also try other flavors like caramel or cinnamon ice cream for an extra twist. This combination makes for a comforting dessert that’s perfect for any occasion!

Serving with Pancakes or Waffles

Another fantastic way to enjoy your Cinnamon Air Fryer Apples is by serving them on top of pancakes or waffles. The sweet and spiced apples add a delightful touch to your breakfast or brunch. Simply spoon the warm apples over your favorite pancakes or waffles, and drizzle with maple syrup for an indulgent treat. This combination is sure to impress your family and friends, making breakfast feel like a special occasion!

Cinnamon Air Fryer Apples in a variety of delicious ways. Whether you choose to indulge with ice cream or elevate your breakfast with pancakes, this recipe is sure to be a hit!

Tips for Perfecting Your Cinnamon Air Fryer Apples Recipe

Cinnamon Air Fryer Apples Recipe even more delightful, consider these helpful tips. These suggestions will ensure that your apples turn out perfectly every time, enhancing both flavor and texture.

Choosing the Right Apples

The type of apples you choose can significantly impact the final dish. For the best results, opt for firm apples that hold their shape during cooking. Varieties like Granny Smith, Honeycrisp, and Fuji are excellent choices. Granny Smith apples provide a nice tartness that balances the sweetness of the brown sugar. Honeycrisp apples are juicy and sweet, while Fuji apples offer a delightful crunch. Mixing different types can also create a more complex flavor profile, making your dessert even more enjoyable!

Adjusting Sweetness to Taste

Cinnamon Air Fryer Apples to your liking!

By following these tips, you’ll be well on your way to creating the perfect batch of Cinnamon Air Fryer Apples that everyone will love!

Tips for Perfecting Your Cinnamon Air Fryer Apples Recipe

Cinnamon Air Fryer Apples Recipe even more delightful, consider these helpful tips. These suggestions will ensure that your apples turn out perfectly every time, enhancing both flavor and texture.

Choosing the Right Apples

The type of apples you choose can significantly impact the final dish. For the best results, opt for firm apples that hold their shape during cooking. Varieties like Granny Smith, Honeycrisp, and Fuji are excellent choices. Granny Smith apples provide a nice tartness that balances the sweetness of the brown sugar. Honeycrisp apples are juicy and sweet, while Fuji apples offer a delightful crunch. Mixing different types can also create a more complex flavor profile, making your dessert even more enjoyable!

Adjusting Sweetness to Taste

Cinnamon Air Fryer Apples to your liking!

Breakdown of Time for Cinnamon Air Fryer Apples Recipe

Cinnamon Air Fryer Apples Recipe can help you plan your cooking better. Here’s a simple breakdown of the time required for each step, ensuring you can enjoy this delicious dessert without any rush!

Prep Time

The prep time for this recipe is quite short. You’ll need about 10-15 minutes to wash, core, and slice the apples. Mixing the ingredients together will take an additional 5 minutes. In total, you can expect to spend around 15-20 minutes on preparation. This quick prep time makes it easy to whip up this delightful dish even on busy days!

Cooking Time

Once your apples are prepped and ready, the cooking time in the air fryer is approximately 10-12 minutes. During this time, the hot air circulates around the apples, cooking them evenly and creating that lovely caramelized texture. Remember to shake the basket halfway through to ensure even cooking. This short cooking time is one of the many reasons why air frying is such a popular method!

Total Time

Cinnamon Air Fryer Apples is about 25-32 minutes. This means you can have a warm, delicious dessert ready in under half an hour! It’s perfect for a quick treat after dinner or a sweet snack during the day.

Cinnamon Air Fryer Apples Recipe into your schedule, making it a fantastic choice for any occasion!

Nutritional Information for Cinnamon Air Fryer Apples Recipe

Cinnamon Air Fryer Apples Recipe is essential for making informed choices about your diet. This delicious dessert not only satisfies your sweet tooth but also provides some nutritional benefits. Here’s a breakdown of the key nutritional components per serving:

Calories

Each serving of Cinnamon Air Fryer Apples contains approximately 150 calories. This makes it a relatively low-calorie dessert option, especially when compared to traditional baked goods. The natural sugars from the apples, combined with the brown sugar, contribute to the calorie count, but they also provide a satisfying sweetness that can curb cravings without overindulging.

Protein

In terms of protein, this recipe offers about 1 gram per serving. While this may seem low, the protein content is primarily derived from the apples and any optional nuts you choose to add. If you want to boost the protein content, consider serving your Cinnamon Air Fryer Apples with a dollop of Greek yogurt or a scoop of ice cream, which can enhance both flavor and nutrition.

Sodium

The sodium content in each serving is approximately 100 milligrams. This is a modest amount, especially for a dessert. The salt added in the recipe helps to enhance the flavors of the apples and spices. If you’re watching your sodium intake, you can easily omit the salt without compromising the overall taste of the dish.

Cinnamon Air Fryer Apples Recipe is a delightful treat that can fit into a balanced diet. With its low calorie count and minimal sodium, it’s a guilt-free dessert option that you can enjoy any time!

FAQs about Cinnamon Air Fryer Apples Recipe

Can I use frozen apples for this recipe?

Cinnamon Air Fryer Apples Recipe is possible, but there are a few things to keep in mind. First, frozen apples tend to be softer than fresh ones. This means they may cook faster and could become mushy. To use frozen apples, let them thaw completely and drain any excess moisture before coating them with the cinnamon-sugar mixture. You might need to adjust the cooking time, checking for tenderness after about 8-10 minutes. While fresh apples are ideal for this recipe, frozen apples can still create a tasty dessert in a pinch!

How do I store leftover Cinnamon Air Fryer Apples?

Cinnamon Air Fryer Apples, storing them is easy! Allow the apples to cool completely before transferring them to an airtight container. You can keep them in the refrigerator for up to 3-4 days. When you’re ready to enjoy them again, simply reheat in the air fryer for a few minutes at 350°F (175°C) until warmed through. Alternatively, you can microwave them for about 30 seconds to 1 minute. This way, you can savor the delicious flavors of your apples even after the initial serving!

Can I make this recipe without sugar?

Cinnamon Air Fryer Apples without sugar! If you prefer a sugar-free option, consider using natural sweeteners like stevia or monk fruit. You can also skip the sweetener altogether and let the natural sweetness of the apples shine through. Just keep in mind that the flavor will be less sweet, but the cinnamon and lemon juice will still provide a delightful taste. This makes the recipe a great choice for those looking to reduce their sugar intake while still enjoying a delicious dessert!

Conclusion on Cinnamon Air Fryer Apples Recipe

Cinnamon Air Fryer Apples Recipe is a delightful and simple dessert that brings together the natural sweetness of apples and the warm, comforting flavor of cinnamon. This recipe is not only quick to prepare but also offers a healthier alternative to traditional desserts. With just a few ingredients and minimal cooking time, you can create a dish that is sure to impress family and friends.

Whether you enjoy them warm on their own, paired with ice cream, or as a topping for pancakes, these air-fried apples are versatile and delicious. The variations you can explore, such as adding nuts or experimenting with different apple types, make this recipe even more exciting. Plus, the nutritional benefits, including low calories and minimal sodium, make it a guilt-free treat.

Cinnamon Air Fryer Apples Recipe is bound to become a favorite in your household. Enjoy the warm, spiced aroma filling your kitchen as you create this delicious dessert. Happy cooking!

Red Velvet Pancakes with Cream Cheese Frosting delightfully impress!

Introduction to Red Velvet Pancakes with Cream Cheese Frosting

Are you ready to elevate your breakfast game? Red Velvet Pancakes with Cream Cheese Frosting are not just a treat; they are a delightful experience! These pancakes are fluffy, vibrant, and bursting with flavor. The rich red color makes them perfect for special occasions, like Valentine’s Day or birthdays. But honestly, who needs a reason to enjoy these delicious pancakes?

Imagine waking up to the sweet aroma of freshly cooked pancakes, topped with a creamy glaze that melts in your mouth. The combination of cocoa and buttermilk creates a unique taste that is both indulgent and comforting. Plus, the cream cheese frosting adds a tangy sweetness that perfectly complements the pancakes.

Whether you’re cooking for family or friends, these pancakes are sure to impress. They are easy to make and can be whipped up in no time. So, grab your apron and let’s dive into the world of Red Velvet Pancakes with Cream Cheese Frosting. You’ll be amazed at how simple it is to create a breakfast that feels like a special occasion!

Ingredients for Red Velvet Pancakes with Cream Cheese Frosting

To create the perfect batch of Red Velvet Pancakes with Cream Cheese Frosting, you’ll need a few key ingredients. Each component plays a vital role in achieving that rich flavor and beautiful color. Here’s what you’ll need:

  • 2 cups all-purpose flour
  • 2 tablespoons granulated sugar
  • 1 tablespoon baking powder
  • 1/2 teaspoon baking soda
  • 1/2 teaspoon salt
  • 1 tablespoon unsweetened cocoa powder
  • 1 1/2 cups buttermilk
  • 2 large eggs
  • 1/4 cup vegetable oil
  • 2 tablespoons red food coloring
  • 1 teaspoon vanilla extract

For the cream cheese frosting, gather the following:

  • 4 ounces cream cheese, softened
  • 1/4 cup unsalted butter, softened
  • 1 cup powdered sugar
  • 1 teaspoon vanilla extract
  • 2 tablespoons milk (adjust for desired consistency)

These ingredients come together to create a delightful breakfast that’s not only visually stunning but also incredibly tasty. The combination of buttermilk and cocoa powder gives the pancakes their signature flavor, while the cream cheese frosting adds a luscious finish. So, gather your ingredients and get ready to whip up something special!

Step-by-Step Preparation of Red Velvet Pancakes with Cream Cheese Frosting

Now that you have all your ingredients ready, it’s time to dive into the fun part: making your Red Velvet Pancakes with Cream Cheese Frosting! Follow these simple steps to create a breakfast that will wow everyone at the table.

Step 1: Preparing the Pancake Batter

Start by grabbing a large mixing bowl. In this bowl, whisk together the dry ingredients: all-purpose flour, granulated sugar, baking powder, baking soda, salt, and cocoa powder. Make sure everything is well combined. This step is crucial for even flavor and texture.

Next, in a separate bowl, mix the wet ingredients. Combine the buttermilk, eggs, vegetable oil, red food coloring, and vanilla extract. Whisk these together until the mixture is smooth and uniform. The vibrant red color will make your pancakes pop!

Now, pour the wet ingredients into the bowl with the dry ingredients. Gently stir the mixture until just combined. Be careful not to overmix; a few lumps are perfectly fine. Overmixing can lead to tough pancakes, and we want them to be fluffy and light!

Step 2: Cooking the Pancakes

Once your batter is ready, it’s time to cook! Preheat a non-stick skillet or griddle over medium heat. Lightly grease the surface with cooking spray or a little vegetable oil to prevent sticking.

Using a measuring cup, pour about 1/4 cup of batter onto the skillet for each pancake. Cook until bubbles form on the surface, which should take about 2-3 minutes. This is a good sign that they are ready to flip!

Carefully flip the pancakes and cook for another 1-2 minutes until they are golden brown. Repeat this process with the remaining batter. You should end up with a stack of beautiful red pancakes, ready for frosting!

Step 3: Making the Cream Cheese Frosting

While the pancakes are cooking, let’s whip up the cream cheese frosting. In a medium bowl, beat the softened cream cheese and unsalted butter together until smooth and creamy. This will create a rich base for your frosting.

Gradually add the powdered sugar and vanilla extract, mixing until everything is well combined. If the frosting is too thick, add milk a little at a time until you reach your desired consistency. You want it to be pourable but still thick enough to hold its shape on the pancakes.

Step 4: Assembling the Pancakes

Now comes the best part—assembling your pancakes! Start with a warm pancake on a plate. Drizzle a generous amount of cream cheese frosting over the top. You can stack multiple pancakes if you like, adding frosting between each layer for extra indulgence.

For a finishing touch, consider garnishing with fresh berries or a sprinkle of powdered sugar. This not only adds flavor but also makes your dish look even more appealing. Serve your Red Velvet Pancakes with Cream Cheese Frosting warm, and watch everyone enjoy this delightful breakfast treat!

Variation of Red Velvet Pancakes with Cream Cheese Frosting

While the classic Red Velvet Pancakes with Cream Cheese Frosting are already a hit, there are plenty of fun variations to explore! These tweaks can add new flavors and textures, making your breakfast even more exciting. Here are some delightful ideas to consider:

  • Chocolate Chip Delight: For a sweet twist, fold in some chocolate chips into the pancake batter before cooking. The melted chocolate will create pockets of gooey goodness that pair perfectly with the cream cheese frosting.
  • Nutty Flavor: Add chopped nuts, like pecans or walnuts, to the batter. This will give your pancakes a crunchy texture and a nutty flavor that complements the sweetness of the frosting.
  • Berry Bliss: Mix in fresh or frozen berries, such as blueberries or raspberries, into the batter. The tartness of the berries will balance the sweetness of the pancakes and frosting beautifully.
  • Spiced Up: Add a pinch of cinnamon or nutmeg to the dry ingredients for a warm, spiced flavor. This can enhance the overall taste and make your pancakes feel even cozier.
  • Gluten-Free Option: Substitute all-purpose flour with a gluten-free flour blend. This way, everyone can enjoy these delicious pancakes, regardless of dietary restrictions.
  • Healthier Glaze: For a lighter version of the cream cheese frosting, consider using Greek yogurt instead of half the cream cheese. This will reduce the calories while still providing a creamy texture.

These variations allow you to customize your Red Velvet Pancakes with Cream Cheese Frosting to suit your taste preferences. Feel free to mix and match these ideas to create your perfect pancake experience. The possibilities are endless, and each variation brings its own unique charm to the table!

Cooking Note for Red Velvet Pancakes with Cream Cheese Frosting

Cooking Red Velvet Pancakes with Cream Cheese Frosting is a delightful experience, but there are a few important notes to keep in mind to ensure your pancakes turn out perfectly every time. Here are some tips to help you achieve the best results:

First, make sure your ingredients are at room temperature. This includes the buttermilk, eggs, and butter. Room temperature ingredients mix together more easily, resulting in a smoother batter. It also helps the pancakes cook evenly, giving you that fluffy texture we all love.

Next, don’t skip the resting time for your batter. After mixing the wet and dry ingredients, let the batter sit for about 5-10 minutes. This allows the flour to hydrate fully and the baking powder to activate, leading to lighter and fluffier pancakes.

When cooking, keep an eye on the heat. Medium heat is ideal, but every stove is different. If your pancakes are browning too quickly, lower the heat slightly. You want them to cook through without burning. A good tip is to test the first pancake; if it cooks too fast, adjust the heat before continuing with the rest.

Also, avoid pressing down on the pancakes with your spatula while they cook. This can cause them to lose their fluffiness. Instead, let them rise naturally as they cook. You’ll know they’re ready to flip when bubbles form on the surface and the edges look set.

Lastly, serve your pancakes immediately after cooking. They taste best when warm and fresh. If you need to keep them warm, place them on a baking sheet in a low oven (around 200°F) while you finish cooking the rest. This way, everyone can enjoy a warm stack of Red Velvet Pancakes with Cream Cheese Frosting!

By following these cooking notes, you’ll be well on your way to creating a delicious breakfast that will impress your family and friends. Enjoy the process and the delightful results!

Serving Suggestions for Red Velvet Pancakes with Cream Cheese Frosting

Now that you’ve mastered the art of making Red Velvet Pancakes with Cream Cheese Frosting, it’s time to think about how to serve them! Presentation can elevate your breakfast experience, making it even more enjoyable. Here are some delightful serving suggestions to consider:

  • Layered Stacks: Create a stunning presentation by stacking multiple pancakes on top of each other. Drizzle cream cheese frosting between each layer for a decadent treat. This not only looks impressive but also adds extra flavor with each bite!
  • Fresh Fruit Garnish: Top your pancakes with a variety of fresh fruits. Sliced strawberries, blueberries, or raspberries add a pop of color and a refreshing taste. The tartness of the berries beautifully balances the sweetness of the pancakes and frosting.
  • Chocolate Drizzle: For chocolate lovers, consider drizzling melted chocolate or chocolate syrup over the pancakes. This adds an extra layer of indulgence and makes the dish even more appealing.
  • Whipped Cream: A dollop of whipped cream on top can make your pancakes feel extra special. You can even flavor the whipped cream with a hint of vanilla or cocoa powder for a delightful twist.
  • Sprinkle of Nuts: Add a crunchy texture by sprinkling chopped nuts, such as pecans or walnuts, on top of your pancakes. This not only enhances the flavor but also adds a nice contrast to the soft pancakes.
  • Maple Syrup: Serve with a side of warm maple syrup for those who enjoy a classic touch. The rich, sweet syrup pairs perfectly with the cream cheese frosting and adds a comforting flavor.
  • Festive Touch: For special occasions, consider adding edible glitter or sprinkles on top. This can make your pancakes look festive and fun, perfect for birthdays or celebrations!

These serving suggestions will not only enhance the visual appeal of your Red Velvet Pancakes with Cream Cheese Frosting but also add exciting flavors and textures. Feel free to mix and match these ideas to create a breakfast that’s uniquely yours. Enjoy every delicious bite!

Tips for Perfect Red Velvet Pancakes with Cream Cheese Frosting

Creating the perfect Red Velvet Pancakes with Cream Cheese Frosting is all about attention to detail. With a few simple tips, you can ensure that your pancakes turn out fluffy, flavorful, and visually stunning. Here are some essential tips to help you achieve pancake perfection:

  • Use Fresh Ingredients: Always check the expiration dates on your baking powder and baking soda. Fresh leavening agents are crucial for fluffy pancakes. If they’re old, your pancakes may not rise properly.
  • Don’t Overmix: When combining the wet and dry ingredients, mix until just combined. Overmixing can lead to tough pancakes. A few lumps are okay; they will cook out during the cooking process.
  • Let the Batter Rest: Allow your batter to rest for about 5-10 minutes before cooking. This helps the flour absorb the liquid and allows the baking powder to activate, resulting in lighter pancakes.
  • Control the Heat: Cooking pancakes at medium heat is key. If the heat is too high, the outside will burn while the inside remains raw. If it’s too low, they may turn out dry. Adjust the heat as needed for even cooking.
  • Test the First Pancake: Use the first pancake as a test. If it cooks too quickly or slowly, adjust the heat before continuing with the rest of the batter. This ensures all pancakes cook evenly.
  • Use a Measuring Cup: For uniform pancakes, use a measuring cup to pour the batter onto the skillet. This helps ensure that each pancake is the same size, making for a beautiful stack.
  • Keep Them Warm: If you’re making a large batch, keep the cooked pancakes warm in a low oven (around 200°F) while you finish cooking the rest. This way, everyone can enjoy warm pancakes together.
  • Experiment with Toppings: Don’t be afraid to get creative with your toppings! Fresh fruits, nuts, or even a sprinkle of cinnamon can elevate your pancakes to the next level.
  • Practice Patience: Allow the pancakes to cook undisturbed until bubbles form on the surface. This is a sign they are ready to flip. Patience will reward you with perfectly cooked pancakes.

By following these tips, you’ll be well on your way to making the best Red Velvet Pancakes with Cream Cheese Frosting. Each pancake will be fluffy, flavorful, and a delight to eat. Enjoy the process and the delicious results!

Breakdown of Time for Red Velvet Pancakes with Cream Cheese Frosting

When it comes to making Red Velvet Pancakes with Cream Cheese Frosting, knowing how much time to set aside can help you plan your breakfast perfectly. Here’s a simple breakdown of the time you’ll need for each step of the process.

Prep Time

The prep time for these delightful pancakes is about 15 minutes. This includes gathering all your ingredients, measuring them out, and mixing the batter. Make sure to have everything ready before you start cooking. It makes the process smoother and more enjoyable!

Cooking Time

Once your batter is ready, the cooking time will take around 15-20 minutes. This includes cooking each pancake for about 2-3 minutes on one side and 1-2 minutes on the other. If you’re making a large batch, you might need a bit more time, but it’s worth the wait for those fluffy pancakes!

Total Time

In total, you should expect to spend about 30-35 minutes from start to finish. This includes both prep and cooking time. With this quick and easy timeline, you can have a delicious breakfast ready in no time. So, gather your ingredients and get ready to enjoy a delightful stack of Red Velvet Pancakes with Cream Cheese Frosting!

Nutritional Information for Red Velvet Pancakes with Cream Cheese Frosting

Understanding the nutritional content of your meals is essential, especially when indulging in delicious treats like Red Velvet Pancakes with Cream Cheese Frosting. Here’s a breakdown of the key nutritional information per serving, so you can enjoy these pancakes while being mindful of your dietary choices.

Calories

350 calories. This calorie count includes the pancakes and the cream cheese frosting, making it a satisfying breakfast option. While it’s a bit indulgent, it’s perfect for special occasions or a weekend treat!

Protein

6 grams per serving. While this isn’t a high-protein meal, it does contribute to your daily intake. Pairing these pancakes with a side of eggs or yogurt can help boost the protein content, making for a more balanced breakfast.

Sodium

400 milligrams. This amount is relatively moderate, but if you’re watching your sodium intake, consider using less salt in the pancake batter or opting for a lower-sodium cream cheese for the frosting. Adjusting these ingredients can help you enjoy your pancakes while keeping your sodium levels in check.

Overall, Red Velvet Pancakes with Cream Cheese Frosting can be a delightful addition to your breakfast menu. By being aware of the nutritional information, you can enjoy these pancakes guilt-free, knowing you’re treating yourself to something special!

FAQs about Red Velvet Pancakes with Cream Cheese Frosting

Can I make Red Velvet Pancakes with Cream Cheese Frosting ahead of time?

Absolutely! You can prepare the pancake batter ahead of time. Just mix the dry and wet ingredients separately, then combine them when you’re ready to cook. If you want to make the pancakes in advance, cook them and store them in an airtight container. They can be kept in the refrigerator for up to 2 days. When you’re ready to enjoy them, simply reheat in a toaster or microwave. The cream cheese frosting can also be made ahead and stored in the fridge. Just give it a good stir before using!

What can I substitute for buttermilk in Red Velvet Pancakes with Cream Cheese Frosting?

If you don’t have buttermilk on hand, don’t worry! You can easily make a substitute. For every cup of buttermilk needed, mix 1 cup of milk with 1 tablespoon of white vinegar or lemon juice. Let it sit for about 5-10 minutes until it thickens slightly. This will give you a similar tangy flavor and consistency as buttermilk, perfect for your Red Velvet Pancakes with Cream Cheese Frosting!

How do I store leftover Red Velvet Pancakes with Cream Cheese Frosting?

To store leftover pancakes, let them cool completely first. Then, place them in an airtight container. You can keep them in the refrigerator for up to 2 days. If you want to store them for a longer period, consider freezing them. Place parchment paper between each pancake to prevent sticking, then wrap them tightly in plastic wrap and place them in a freezer-safe bag. They can be frozen for up to 2 months. Just reheat them in the toaster or microwave when you’re ready to enjoy!

Can I use a different frosting for Red Velvet Pancakes?

Of course! While cream cheese frosting is a classic choice, you can get creative with other frostings. For a lighter option, consider using whipped cream or a yogurt-based frosting. Chocolate ganache or a simple vanilla glaze can also be delicious alternatives. Feel free to experiment with flavors that you love, and make your Red Velvet Pancakes with Cream Cheese Frosting uniquely yours!

Conclusion on Red Velvet Pancakes with Cream Cheese Frosting

In conclusion, Red Velvet Pancakes with Cream Cheese Frosting are a delightful way to start your day. Their vibrant color and rich flavor make them a standout dish for any breakfast table. Whether you’re celebrating a special occasion or simply treating yourself, these pancakes are sure to impress.

With their fluffy texture and the creamy sweetness of the frosting, each bite is a delicious experience. Plus, the versatility of this recipe allows you to customize it to your liking. From adding chocolate chips to experimenting with different frostings, the possibilities are endless!

Remember, cooking is all about having fun and enjoying the process. So, gather your loved ones, whip up a batch of these delightful pancakes, and create lasting memories around the breakfast table. With just a little effort, you can turn an ordinary morning into something extraordinary.

So, what are you waiting for? Grab your ingredients and start cooking! Your taste buds will thank you for this delicious adventure into the world of Red Velvet Pancakes with Cream Cheese Frosting!

Honey Garlic Chicken Breasts Recipe for Easy Dinner Delight

Introduction to Honey Garlic Chicken Breasts Recipe

Honey Garlic Chicken Breasts Recipe is a perfect choice for busy weeknights or special occasions. This dish combines the sweetness of honey with the savory flavor of garlic, creating a mouthwatering experience that everyone will love.

Not only is this recipe simple to prepare, but it also requires minimal ingredients. With just a few pantry staples, you can whip up a meal that tastes like it came from a fancy restaurant. Plus, the chicken breasts turn out tender and juicy, making them a hit with both kids and adults.

In this article, we will guide you through the ingredients, preparation steps, and even some variations to try. Whether you’re a seasoned cook or a beginner, you’ll find this recipe easy to follow. So, let’s dive into the world of honey garlic goodness and discover how to make this delightful dish!

Ingredients for Honey Garlic Chicken Breasts Recipe

Honey Garlic Chicken Breasts Recipe, you will need a few simple ingredients. These items are easy to find and often already in your kitchen. Here’s what you’ll need:

  • 2 large boneless, skinless chicken breasts (about 1 pound total)
  • 1/4 cup honey
  • 1/4 cup soy sauce
  • 2 cloves garlic, minced
  • 1 tablespoon olive oil
  • 1 teaspoon ground ginger
  • 1/2 teaspoon black pepper
  • 1/4 teaspoon red pepper flakes (optional)
  • 1 tablespoon chopped green onions (for garnish)

These ingredients come together to create a delightful balance of sweet and savory flavors. The honey adds a natural sweetness, while the soy sauce provides a rich umami taste. Garlic and ginger bring in aromatic notes that elevate the dish. If you enjoy a bit of heat, the red pepper flakes are a great addition!

Gather these ingredients, and you’re ready to start cooking. The simplicity of this recipe makes it perfect for any night of the week. Now, let’s move on to the preparation steps to bring this delicious dish to life!

Step-by-Step Preparation of Honey Garlic Chicken Breasts Recipe

Honey Garlic Chicken Breasts Recipe. This process is straightforward and will guide you to create a delicious meal that everyone will enjoy. Let’s get started!

Step 1: Marinating the Chicken

First, we need to marinate the chicken. This step is crucial as it allows the flavors to soak into the meat. Begin by placing the chicken breasts in a large bowl or a resealable plastic bag. Then, pour the honey garlic mixture over the chicken. Make sure each piece is well coated. If you have time, let the chicken marinate for at least 30 minutes. This will enhance the flavor even more. If you’re in a hurry, you can skip this step, but marinating is always a good idea!

Step 2: Preparing the Honey Garlic Sauce

While the chicken is marinating, let’s prepare the honey garlic sauce. In a medium bowl, combine the honey, soy sauce, minced garlic, olive oil, ground ginger, black pepper, and red pepper flakes. Whisk these ingredients together until they are well blended. This sauce is what makes the dish so special! The sweet and savory combination will create a delightful glaze for your chicken.

Step 3: Cooking the Chicken Breasts

Once the chicken has marinated, it’s time to cook! Preheat your oven to 375°F (190°C). Place the marinated chicken breasts in a baking dish. Pour any remaining honey garlic sauce over the chicken, ensuring they are fully coated. Bake the chicken in the preheated oven for 25-30 minutes. You’ll know it’s done when the chicken reaches an internal temperature of 165°F (75°C). This ensures that the chicken is safe to eat and perfectly cooked!

Step 4: Glazing the Chicken with Sauce

For an extra burst of flavor, you can glaze the chicken with sauce. After baking, switch your oven to broil. Broil the chicken on high for an additional 2-3 minutes. This step caramelizes the sauce, giving it a beautiful golden color and enhancing the taste. Just keep an eye on it to prevent burning! Once done, remove the chicken from the oven and let it rest for about 5 minutes before slicing. This resting period allows the juices to redistribute, making the chicken even juicier.

Now that you’ve prepared your honey garlic chicken breasts, you’re ready to serve! The next section will explore some delicious variations to try with this recipe.

Variations of Honey Garlic Chicken Breasts Recipe

Honey Garlic Chicken Breasts Recipe is versatile and can be adapted to suit different tastes and preferences. Whether you want to add some veggies or spice things up, there are plenty of variations to explore. Let’s take a look at two delicious options that will elevate your meal even further!

Honey Garlic Chicken Breasts Recipe with Vegetables

Adding vegetables to your honey garlic chicken is a fantastic way to create a complete meal. Not only do they add color and nutrition, but they also soak up the delicious sauce! Here’s how to do it:

  • Choose your favorite vegetables. Bell peppers, broccoli, and snap peas work great.
  • Chop the vegetables into bite-sized pieces.
  • After marinating the chicken, place the chopped vegetables in the baking dish alongside the chicken.
  • Pour the honey garlic sauce over both the chicken and vegetables.
  • Bake as directed, ensuring the vegetables are tender and the chicken is cooked through.

This variation not only enhances the flavor but also makes your dish more colorful and appealing. Plus, it’s a great way to sneak in some extra nutrients!

Spicy Honey Garlic Chicken Breasts Recipe

Honey Garlic Chicken Breasts Recipe is perfect for you! The addition of spices will give your dish a delightful kick. Here’s how to spice things up:

  • Increase the amount of red pepper flakes to 1/2 teaspoon or more, depending on your spice tolerance.
  • For an extra layer of flavor, add a teaspoon of sriracha or your favorite hot sauce to the marinade.
  • Mix the spicy ingredients into the honey garlic sauce as you prepare it.

This spicy variation will tantalize your taste buds and add an exciting twist to the classic recipe. It’s perfect for those who enjoy bold flavors!

With these variations, you can easily customize your honey garlic chicken to suit your mood or the season. Now, let’s move on to some cooking notes to ensure your dish turns out perfectly every time!

Cooking Note for Honey Garlic Chicken Breasts Recipe

Honey Garlic Chicken Breasts Recipe, there are a few important cooking notes to keep in mind. These tips will help you achieve the best results and ensure your chicken turns out tender and flavorful every time.

First, always check the freshness of your chicken. Fresh chicken breasts will yield the best flavor and texture. If you’re using frozen chicken, make sure to thaw it completely in the refrigerator before marinating. This ensures even cooking and helps the marinade penetrate the meat.

Next, marinating is key! If you have the time, let the chicken marinate for at least 30 minutes, or even up to 2 hours. This allows the flavors to infuse deeply into the chicken. If you’re short on time, even a quick 15-minute soak can enhance the taste.

When baking, use a meat thermometer to check the internal temperature of the chicken. This is the most reliable way to ensure it’s cooked through. Remember, the chicken should reach an internal temperature of 165°F (75°C) for safe consumption. Overcooking can lead to dry chicken, so keep an eye on the time!

Lastly, don’t skip the resting period after baking. Allowing the chicken to rest for about 5 minutes before slicing helps retain its juices. This simple step makes a big difference in the overall juiciness and flavor of your dish.

Honey Garlic Chicken Breasts Recipe. Now, let’s explore some serving suggestions to complement this delicious dish!

Serving Suggestions for Honey Garlic Chicken Breasts Recipe

Honey Garlic Chicken Breasts Recipe, it’s time to think about how to serve it! The right sides can elevate your meal and create a well-rounded dining experience. Here are some tasty serving suggestions that pair perfectly with your honey garlic chicken:

  • Steamed Rice: A classic choice! Serve the chicken over a bed of fluffy steamed rice. The rice will soak up the sweet and savory sauce, making every bite delightful.
  • Quinoa: For a healthier option, try serving the chicken with quinoa. This protein-packed grain adds a nutty flavor and complements the dish beautifully.
  • Roasted Vegetables: Add some color and nutrition by serving your chicken with a side of roasted vegetables. Carrots, zucchini, and bell peppers work wonderfully!
  • Salad: A fresh green salad can balance the richness of the chicken. Toss together mixed greens, cherry tomatoes, and a light vinaigrette for a refreshing side.
  • Garlic Bread: For a comforting touch, serve garlic bread on the side. The buttery, garlicky flavor pairs well with the honey garlic chicken.

Don’t forget to drizzle any extra honey garlic sauce over your sides for added flavor! You can also garnish the chicken with chopped green onions or sesame seeds for a pop of color and texture.

These serving suggestions will not only enhance your meal but also impress your family and friends. Enjoy your delicious honey garlic chicken and the delightful sides that accompany it!

Tips for Perfecting Your Honey Garlic Chicken Breasts Recipe

Honey Garlic Chicken Breasts Recipe, a few tips can make all the difference. These simple yet effective suggestions will help you achieve the best flavor and texture every time you cook this dish. Let’s explore some key tips to elevate your cooking experience!

First, always use fresh ingredients. Fresh garlic and high-quality honey can significantly enhance the flavor of your dish. If possible, opt for local honey, as it often has a richer taste. Fresh garlic will provide a more robust aroma and flavor compared to pre-minced options.

Next, consider the thickness of your chicken breasts. If they are particularly thick, they may require a longer cooking time. To ensure even cooking, you can pound the chicken to an even thickness before marinating. This not only helps with cooking time but also makes the chicken more tender.

Another important tip is to let the chicken marinate longer if you can. While 30 minutes is great, marinating for a few hours or even overnight will allow the flavors to penetrate deeper into the meat. Just remember to keep it in the refrigerator during this time to maintain freshness.

When it comes to baking, using a baking dish that’s not too crowded is essential. If the chicken breasts are too close together, they may steam instead of bake, resulting in less flavor. Make sure there’s enough space for the heat to circulate around each piece.

Lastly, don’t forget to taste your sauce! Before pouring it over the chicken, give it a quick taste test. If you prefer a sweeter sauce, add a bit more honey. If you like it saltier, a dash more soy sauce can do the trick. Adjusting the sauce to your liking will ensure that every bite is packed with flavor.

Honey Garlic Chicken Breasts Recipe. Each time you make it, you’ll discover new ways to enhance the dish, making it a favorite in your household!

Breakdown of Time for Honey Garlic Chicken Breasts Recipe

Honey Garlic Chicken Breasts Recipe is essential for planning your meal. Knowing how long each step takes will help you manage your kitchen time effectively. Here’s a breakdown of the time involved in preparing this delicious dish:

Prep Time

The prep time for this recipe is quite minimal. You’ll need about 10-15 minutes to gather your ingredients and prepare the honey garlic sauce. If you choose to marinate the chicken, add an additional 30 minutes to 2 hours, depending on your schedule. However, if you’re short on time, you can skip the marinating step and proceed directly to cooking!

Cooking Time

Once you’re ready to cook, the actual cooking time is approximately 25-30 minutes. This includes baking the chicken in the oven at 375°F (190°C). If you decide to broil the chicken for an extra caramelized finish, add another 2-3 minutes. Always ensure the chicken reaches an internal temperature of 165°F (75°C) for safe consumption.

Total Time

Honey Garlic Chicken Breasts Recipe can take anywhere from 40 minutes to 2 hours and 45 minutes, depending on how long you choose to marinate. If you skip marinating, the total time will be around 35-45 minutes. This makes it a quick and easy option for a weeknight dinner or a last-minute meal!

With this time breakdown, you can easily plan your cooking schedule and enjoy a delicious honey garlic chicken dinner without any stress. Now that you know how to manage your time, let’s move on to the nutritional information for this delightful recipe!

Nutritional Information for Honey Garlic Chicken Breasts Recipe

Honey Garlic Chicken Breasts Recipe is essential for those who are health-conscious or following specific dietary plans. This dish not only satisfies your taste buds but also provides a balanced meal. Let’s break down the key nutritional components per serving.

Calories

Honey Garlic Chicken Breasts Recipe contains approximately 320 calories. This makes it a relatively low-calorie option for a main dish, especially when paired with healthy sides like steamed vegetables or quinoa. The balance of protein and carbohydrates in this recipe helps keep you full and satisfied without overindulging.

Protein

One of the standout features of this recipe is its protein content. Each serving provides about 30 grams of protein. This high protein content is beneficial for muscle repair and growth, making it an excellent choice for those who are active or looking to maintain a healthy diet. Chicken breasts are a lean source of protein, which means you can enjoy this dish without worrying about excess fat.

Sodium

Honey Garlic Chicken Breasts Recipe is approximately 800 milligrams per serving. While this is a moderate amount, it’s important to consider if you are watching your sodium intake. You can reduce the sodium level by using low-sodium soy sauce or adjusting the amount of soy sauce in the marinade. This way, you can enjoy the flavors without compromising your dietary needs.

Honey Garlic Chicken Breasts Recipe is a nutritious and delicious option that fits well into a balanced diet. With its combination of protein, moderate calories, and the ability to adjust sodium levels, it’s a meal that can cater to various dietary preferences. Now that you have a clear understanding of the nutritional information, let’s move on to some frequently asked questions about this delightful recipe!

FAQs about Honey Garlic Chicken Breasts Recipe

Can I use chicken thighs instead of breasts in the Honey Garlic Chicken Breasts Recipe?

Honey Garlic Chicken Breasts Recipe. Chicken thighs are juicier and have a richer flavor, making them a great alternative. Just keep in mind that thighs may require a slightly longer cooking time. Ensure they reach an internal temperature of 165°F (75°C) for safe consumption. This substitution can add a delightful twist to the dish!

How can I make the Honey Garlic Chicken Breasts Recipe healthier?

Honey Garlic Chicken Breasts Recipe healthier while still keeping it delicious. Here are a few tips:

  • Use skinless chicken breasts or thighs to reduce fat content.
  • Opt for low-sodium soy sauce to cut down on sodium levels.
  • Replace honey with a natural sweetener like agave syrup or maple syrup for a different flavor profile.
  • Serve the chicken with a side of steamed vegetables or a fresh salad instead of rice for a lighter meal.

These adjustments will help you enjoy a healthier version of this tasty dish without sacrificing flavor!

What sides pair well with Honey Garlic Chicken Breasts Recipe?

Honey Garlic Chicken Breasts Recipe with the right sides can enhance your meal experience. Here are some delicious options:

  • Steamed Broccoli: This adds a nutritious and colorful touch to your plate.
  • Brown Rice: A whole grain option that complements the sweet and savory flavors of the chicken.
  • Cauliflower Rice: A low-carb alternative that works well with the dish.
  • Garlic Mashed Potatoes: Creamy and comforting, these potatoes pair beautifully with the honey garlic sauce.
  • Asian Slaw: A crunchy and refreshing side that adds a nice contrast to the tender chicken.

These sides will not only balance the flavors but also create a well-rounded meal that everyone will enjoy!

Conclusion on Honey Garlic Chicken Breasts Recipe

Honey Garlic Chicken Breasts Recipe is a delightful dish that brings together the perfect balance of sweet and savory flavors. With its simple ingredients and easy preparation, it’s an ideal choice for both busy weeknights and special occasions. The tender chicken, coated in a luscious honey garlic sauce, is sure to impress your family and friends.

Throughout this article, we’ve explored various aspects of the recipe, from the essential ingredients to step-by-step preparation. We also discussed exciting variations, cooking notes, and serving suggestions that can elevate your dining experience. Whether you choose to add vegetables or spice things up, this recipe is versatile enough to cater to different tastes.

Moreover, the nutritional information highlights the health benefits of this dish, making it a great option for those looking to maintain a balanced diet. With its high protein content and moderate calorie count, you can enjoy a satisfying meal without any guilt.

Honey Garlic Chicken Breasts Recipe, remember to have fun and experiment with flavors. Cooking is an art, and each dish you create is a reflection of your personal taste. So, gather your ingredients, follow the steps, and savor the delicious results!

We hope this recipe inspires you to bring a touch of sweetness and flavor to your dinner table. Happy cooking!

Stay Connected

Get recipes via email: