Get my cookbooks

Creamy Garlic Salmon is a must-try recipe today!

Introduction to Creamy Garlic Salmon Recipe

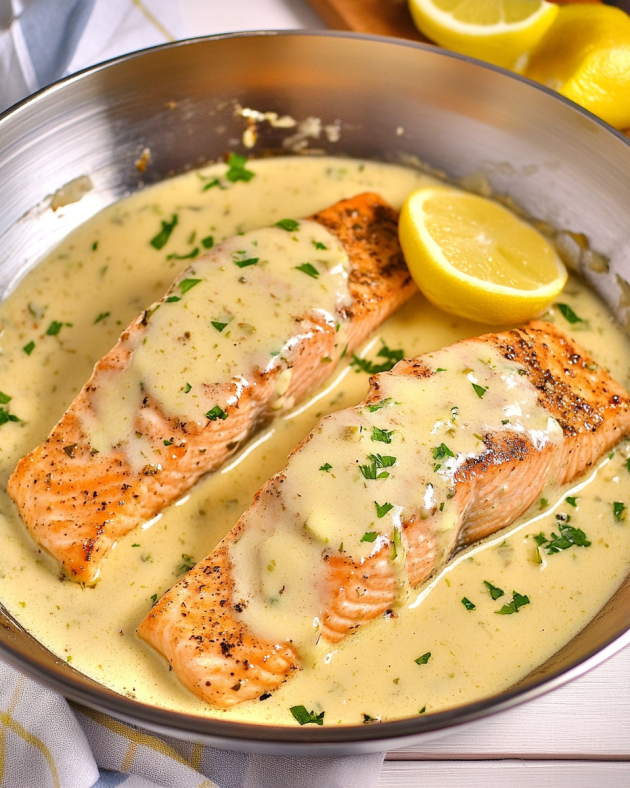
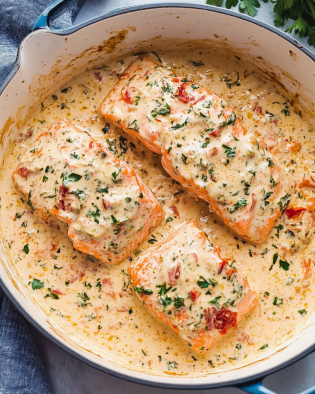
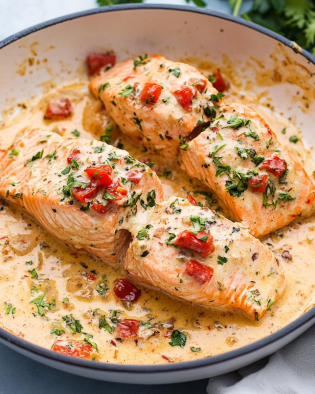
Creamy Garlic Salmon Recipe is a perfect choice. This dish combines the rich flavors of salmon with a creamy garlic sauce that is simply irresistible. Whether you are a seasoned cook or a beginner, this recipe is straightforward and quick to prepare.

What Makes the Creamy Garlic Salmon Recipe Special?

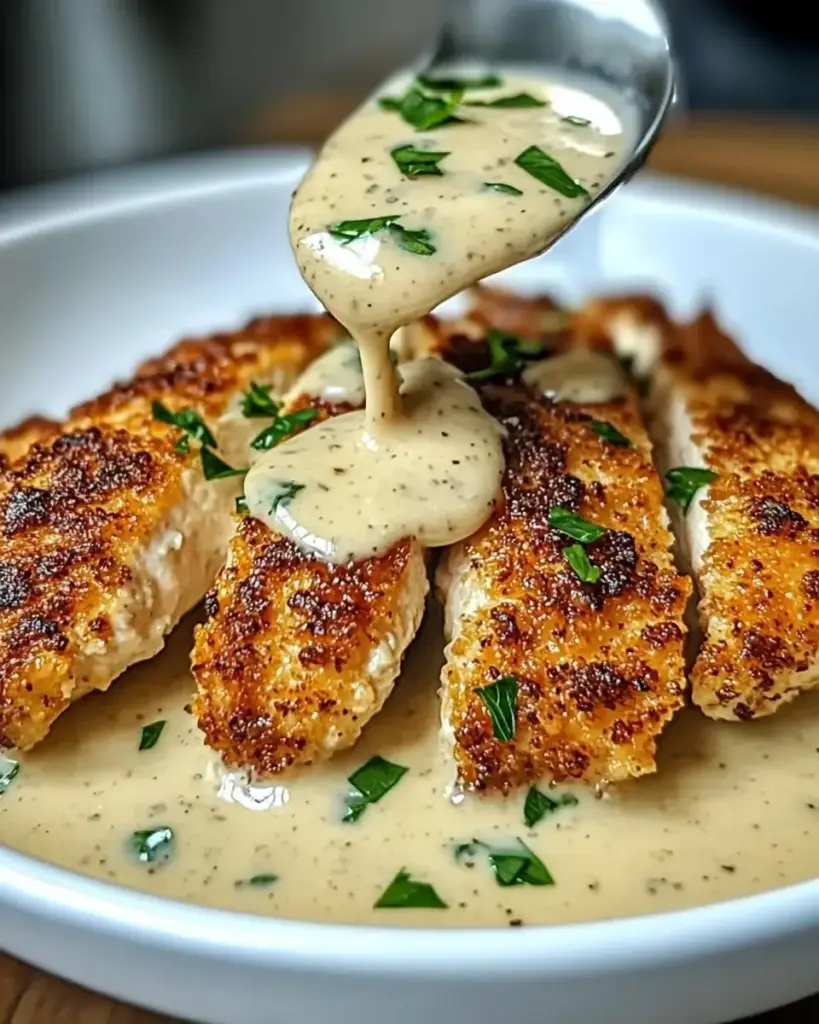
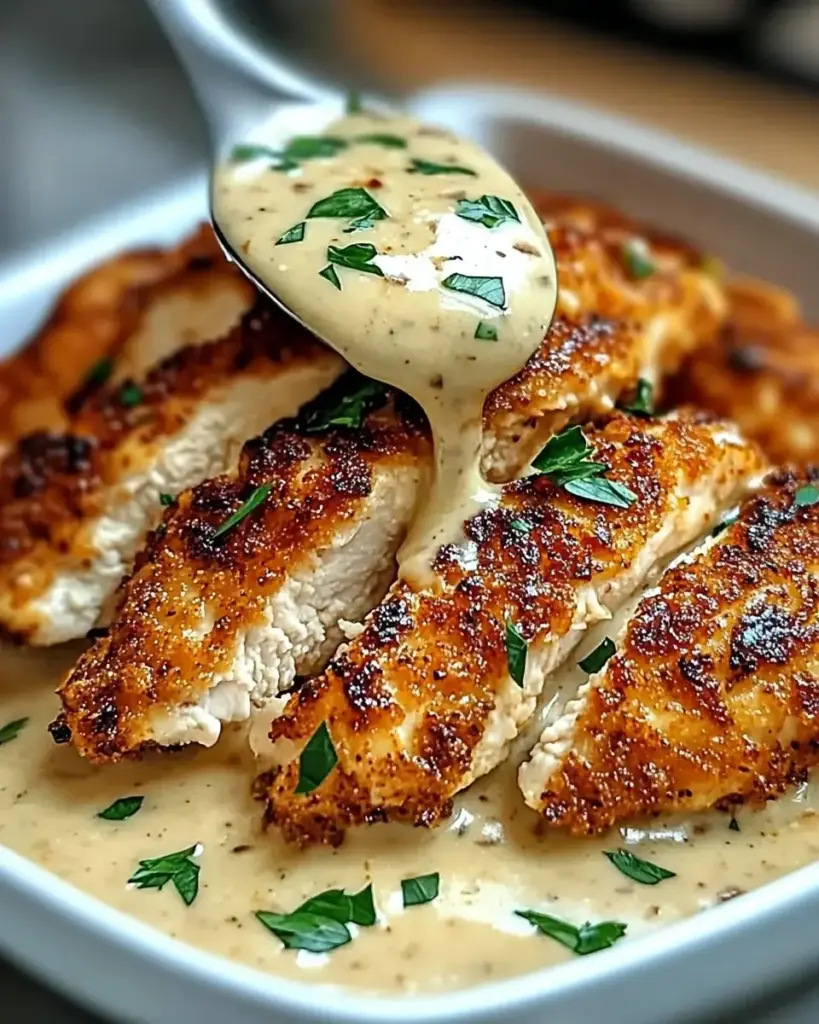
What sets this recipe apart is its delightful balance of flavors and textures. The salmon fillets are cooked to perfection, with a crispy skin that adds a satisfying crunch. The creamy garlic sauce is rich and velvety, enhancing the natural taste of the fish. Plus, the addition of fresh parsley and a hint of lemon juice brightens the dish, making it feel light and refreshing.

Another reason this recipe shines is its versatility. You can easily customize it to suit your taste. Want to add a bit of zing? Toss in some capers or sun-dried tomatoes for an extra burst of flavor. Looking for a lighter option? Substitute heavy cream with half-and-half or coconut cream. The possibilities are endless!

Creamy Garlic Salmon Recipe!

Ingredients for Creamy Garlic Salmon Recipe

Creamy Garlic Salmon Recipe, you’ll need a few simple ingredients. Each component plays a vital role in bringing out the flavors of this dish. Here’s what you’ll need:

  • 2 (6-ounce) salmon fillets
  • 1 tablespoon olive oil
  • Salt and pepper, to taste
  • 1 tablespoon butter
  • 4 cloves garlic, minced
  • 1 cup heavy cream
  • 1 teaspoon Dijon mustard
  • 1 teaspoon lemon juice
  • 2 tablespoons fresh parsley, chopped

These ingredients are not only easy to find but also work together to create a rich and creamy sauce that perfectly complements the salmon. The olive oil and butter provide a wonderful base for cooking, while the garlic adds a fragrant aroma. The heavy cream, Dijon mustard, and lemon juice combine to form a luscious sauce that elevates the dish to new heights.

Creamy Garlic Salmon Recipe lies in its flexibility, allowing you to make it your own!

Step-by-Step Preparation of Creamy Garlic Salmon Recipe

Creamy Garlic Salmon Recipe. Following these simple steps will ensure that your dish turns out perfectly every time. Let’s get started!

Step 1: Preparing the Salmon

First, take your salmon fillets and pat them dry with a paper towel. This step is crucial as it helps achieve that crispy skin we all love. Next, season both sides of the salmon with salt and pepper. Don’t be shy with the seasoning; it enhances the flavor of the fish. Once seasoned, set the salmon aside while you prepare the skillet.

Step 2: Making the Creamy Garlic Sauce

In a large skillet, heat the olive oil over medium-high heat. Once the oil is hot, carefully place the salmon fillets in the skillet, skin-side down. Cook for about 4-5 minutes until the skin is golden brown and crispy. While the salmon cooks, you can start making the creamy garlic sauce.

Creamy Garlic Salmon Recipe truly special!

Step 3: Cooking the Salmon

Now it’s time to cook the salmon! Carefully return the salmon fillets to the skillet, placing them in the creamy garlic sauce. Spoon the sauce over the top of the salmon to ensure it’s well-coated. Let it cook for an additional minute to heat through. This step allows the salmon to absorb the delicious flavors of the sauce.

Step 4: Combining Salmon with the Sauce

Creamy Garlic Salmon Recipe is now ready to be enjoyed!

Variation of Creamy Garlic Salmon Recipe

Creamy Garlic Salmon Recipe is already a delightful dish, there are many ways to add your personal touch. By experimenting with alternative ingredients and cooking methods, you can create a unique version that suits your taste. Let’s explore some exciting variations!

Alternative Ingredients for a Unique Twist

Creamy Garlic Salmon Recipe a fresh twist:

  • Herbs: Instead of parsley, try using dill or basil for a different flavor profile. These herbs pair wonderfully with salmon.
  • Cheese: Adding a sprinkle of grated Parmesan or feta cheese to the sauce can enhance its creaminess and add a salty kick.
  • Vegetables: Incorporate spinach or cherry tomatoes into the sauce for added nutrition and color. They will also bring a lovely sweetness to the dish.
  • Spices: For a bit of heat, consider adding red pepper flakes or a dash of cayenne pepper to the sauce. This will give your dish a spicy kick!

Creamy Garlic Salmon Recipe is its flexibility, allowing you to create a dish that’s uniquely yours!

Cooking Methods: Baking vs. Pan-Seering

While pan-searing is a popular method for cooking salmon, baking is another excellent option. Each method has its benefits, and choosing one depends on your preference and available time.

Pan-Seering: This method gives you that crispy skin and a beautiful golden color. It’s quick and allows you to keep an eye on the cooking process. Plus, you can make the creamy garlic sauce in the same skillet, which saves on cleanup!

Baking: If you prefer a hands-off approach, baking is the way to go. Preheat your oven to 375°F (190°C). Place the seasoned salmon fillets on a baking sheet lined with parchment paper. Bake for about 12-15 minutes, or until the salmon flakes easily with a fork. You can prepare the creamy garlic sauce on the stovetop while the salmon bakes. This method is great for cooking multiple fillets at once.

Creamy Garlic Salmon Recipe will surely impress!

Cooking Note for Creamy Garlic Salmon Recipe

Creamy Garlic Salmon Recipe, there are a few important cooking notes to keep in mind. These tips will help you achieve the best results and ensure your dish is both delicious and visually appealing.

First, always choose fresh salmon fillets for the best flavor. Fresh fish has a bright color and a mild scent. If you can, buy wild-caught salmon, as it tends to have a richer taste compared to farmed varieties.

Next, be mindful of the cooking temperature. Cooking salmon at medium-high heat allows the skin to crisp up nicely while keeping the fish moist. If the heat is too high, the salmon may cook too quickly on the outside while remaining raw inside. Conversely, cooking at too low a temperature can lead to a dry texture.

Another key point is to let the salmon rest for a minute after cooking. This allows the juices to redistribute, making the fish more tender and flavorful. When you cut into the salmon, it should flake easily with a fork, indicating it’s perfectly cooked.

Lastly, don’t rush the creamy garlic sauce. Allow it to simmer gently until it thickens slightly. This step is crucial for developing the rich flavors that make this dish so special. Stirring occasionally will help prevent the sauce from sticking to the bottom of the skillet.

Creamy Garlic Salmon Recipe to new heights, impressing everyone at the dinner table!

Serving Suggestions for Creamy Garlic Salmon Recipe

Creamy Garlic Salmon Recipe, it’s time to think about what to serve alongside it. The right side dishes can enhance the meal and create a well-rounded dining experience. Here are some fantastic options to consider:

Best Side Dishes to Pair with Creamy Garlic Salmon

  • Steamed Vegetables: Fresh, steamed vegetables like broccoli, asparagus, or green beans are a perfect match. Their bright colors and crisp textures complement the creamy salmon beautifully.
  • Garlic Mashed Potatoes: For a comforting side, serve creamy garlic mashed potatoes. The flavors will harmonize with the salmon, making each bite delightful.
  • Quinoa Salad: A light quinoa salad with cherry tomatoes, cucumber, and a lemon vinaigrette adds a refreshing touch. It’s healthy and adds a nice crunch to your meal.
  • Rice Pilaf: Fluffy rice pilaf with herbs and spices is another excellent choice. It absorbs the creamy sauce well, ensuring you don’t miss a drop of flavor.
  • Side Salad: A simple side salad with mixed greens, avocado, and a light dressing can balance the richness of the salmon. The freshness of the salad will brighten up the plate.

Creamy Garlic Salmon Recipe will shine on the dinner table!

Tips for Perfecting Your Creamy Garlic Salmon Recipe

Creamy Garlic Salmon Recipe, a few tips can make all the difference. These simple yet effective suggestions will help you achieve a dish that is not only delicious but also visually stunning. Let’s dive into some expert tips!

Choose Quality Salmon: Always opt for fresh, high-quality salmon. Look for fillets that are bright in color and have a mild scent. Wild-caught salmon is often more flavorful than farmed varieties, making it a great choice for this recipe.

Don’t Overcook the Salmon: Salmon can dry out quickly if overcooked. Aim for a cooking time of about 4-5 minutes on the skin side and 3-4 minutes after flipping. The salmon should be opaque and flake easily with a fork when done.

Adjust the Sauce Consistency: If you prefer a thicker sauce, let it simmer a bit longer. Conversely, if you like it thinner, add a splash of chicken broth or more cream. This flexibility allows you to customize the sauce to your liking.

Experiment with Flavors: Don’t hesitate to add your favorite herbs and spices. Fresh dill, thyme, or even a hint of smoked paprika can elevate the dish. Just remember to balance the flavors so they complement the creamy garlic sauce.

Garnish for Presentation: A sprinkle of fresh parsley or a few lemon wedges can enhance the visual appeal of your dish. A beautiful presentation makes the meal feel special and inviting.

Pair with the Right Sides: As mentioned earlier, the right side dishes can elevate your meal. Consider serving with a light salad or roasted vegetables to balance the richness of the salmon and sauce.

Creamy Garlic Salmon Recipe. Each bite will be a delightful experience, impressing your family and friends alike!

Breakdown of Time for Creamy Garlic Salmon Recipe

Creamy Garlic Salmon Recipe can help you plan your meal better. Here’s a quick breakdown of the time required for preparation and cooking:

Prep Time

The prep time for this delicious dish is quite short. You’ll need about 10 minutes to gather your ingredients and prepare the salmon. This includes patting the salmon dry, seasoning it, and chopping the garlic and parsley. With everything ready, you’ll be set to start cooking!

Cooking Time

Creamy Garlic Salmon Recipe takes approximately 15 minutes. This includes:

  • 4-5 minutes for cooking the salmon skin-side down until crispy.
  • 3-4 minutes for cooking the salmon on the other side.
  • 1 minute to heat the salmon in the creamy garlic sauce.
  • 3-4 minutes for simmering the sauce until it thickens.

In total, the cooking time is around 15 minutes, making this recipe perfect for a quick weeknight dinner!

Total Time

Creamy Garlic Salmon Recipe is about 25 minutes. This means you can have a delicious, restaurant-quality meal on your table in no time. Perfect for busy evenings or when you want to impress guests without spending hours in the kitchen!

Nutritional Information for Creamy Garlic Salmon Recipe

Creamy Garlic Salmon Recipe not only delights your taste buds but also provides valuable nutrients. Here’s a breakdown of the nutritional information per serving:

Calories

Creamy Garlic Salmon Recipe contains approximately 520 calories. This calorie count includes the rich flavors from the salmon and the creamy garlic sauce. While it may seem high, the meal is packed with healthy fats and protein, making it a satisfying option.

Protein

One of the standout features of this dish is its protein content. Each serving provides about 34 grams of protein. Salmon is an excellent source of high-quality protein, which is essential for muscle repair and overall health. Including protein in your meals can help keep you feeling full and energized throughout the day.

Sodium

Creamy Garlic Salmon Recipe is approximately 600 milligrams per serving. This amount can vary based on the seasoning and any additional ingredients you choose to add. While sodium is necessary for bodily functions, it’s important to monitor your intake, especially if you are watching your salt consumption.

Creamy Garlic Salmon Recipe is a nutritious choice that offers a balance of calories, protein, and healthy fats. Enjoying this dish as part of a well-rounded diet can contribute to your overall health and well-being!

FAQs about Creamy Garlic Salmon Recipe

Can I use frozen salmon for the Creamy Garlic Salmon Recipe?

Creamy Garlic Salmon Recipe. However, it’s important to thaw the salmon properly before cooking. The best way to do this is to place the frozen fillets in the refrigerator overnight. If you’re short on time, you can also thaw them under cold running water for about 30 minutes. Once thawed, pat the salmon dry and season it as you would with fresh salmon. This ensures that you still achieve that crispy skin and delicious flavor!

What can I substitute for heavy cream in the Creamy Garlic Salmon Recipe?

Creamy Garlic Salmon Recipe. You can use half-and-half or whole milk for a lower-fat version. For a dairy-free alternative, coconut cream works wonderfully and adds a subtle sweetness. Additionally, you can blend silken tofu with a bit of broth to create a creamy texture without the fat. Each substitute will slightly change the flavor, but they will still yield a delicious sauce!

How can I make the Creamy Garlic Salmon Recipe spicier?

Creamy Garlic Salmon Recipe, consider incorporating red pepper flakes or a dash of cayenne pepper into the creamy garlic sauce. Start with a small amount and adjust to your taste. You can also add sliced jalapeños or a splash of hot sauce for an extra kick. Just remember to balance the spice with the creaminess of the sauce to keep the flavors harmonious!

Can I prepare the Creamy Garlic Salmon Recipe in advance?

Creamy Garlic Salmon Recipe is best enjoyed fresh, you can prepare some components in advance. For instance, you can season the salmon fillets and make the creamy garlic sauce ahead of time. Store the sauce in an airtight container in the refrigerator for up to two days. When you’re ready to serve, simply reheat the sauce gently and cook the salmon fresh. This way, you can enjoy a quick and delicious meal without much hassle!

Conclusion on Creamy Garlic Salmon Recipe

Creamy Garlic Salmon Recipe is a delightful dish that combines rich flavors with simple preparation. Whether you’re cooking for a special occasion or just a cozy weeknight dinner, this recipe is sure to impress. The crispy salmon paired with the velvety garlic sauce creates a perfect harmony of taste and texture.

Not only is this dish delicious, but it also offers versatility. You can easily customize it with different herbs, spices, or even vegetables to suit your preferences. Plus, with the option to bake or pan-sear, you can choose the cooking method that works best for you.

As you explore this recipe, remember to pay attention to the quality of your ingredients. Fresh salmon and high-quality cream will elevate your dish to new heights. And don’t forget to experiment with side dishes that complement the creamy sauce, making your meal even more enjoyable.

Creamy Garlic Salmon Recipe is a wonderful addition to your culinary repertoire, and we hope it brings joy to your dining table. Happy cooking!

Creamy Garlic Butter Salmon Recipe is a must-try dish!

Introduction to Creamy Garlic Butter Salmon Recipe

Creamy Garlic Butter Salmon Recipe is a must-try! This recipe combines the rich flavors of garlic and butter with tender salmon fillets, creating a meal that is both satisfying and elegant. Whether you’re cooking for a special occasion or just a weeknight dinner, this dish is sure to impress.

Why You Should Try This Recipe

First and foremost, this recipe is incredibly simple. With just a few ingredients, you can whip up a gourmet meal in no time. The creamy garlic sauce adds a luxurious touch, making it perfect for impressing guests or treating yourself. Plus, salmon is packed with nutrients, including omega-3 fatty acids, which are great for heart health.

Another reason to try this recipe is its versatility. You can easily customize it to suit your taste. Want a little kick? Add some red pepper flakes! Prefer a tangy twist? A splash of lemon juice does the trick. The options are endless, allowing you to make this dish your own.

Creamy Garlic Butter Salmon Recipe is a great way to introduce more seafood into your diet. Salmon is not only delicious but also a fantastic source of protein. With its rich flavor and creamy sauce, even those who are hesitant about fish will find it hard to resist.

So, gather your ingredients and get ready to enjoy a delightful meal that is sure to become a favorite in your household!

Ingredients for Creamy Garlic Butter Salmon Recipe

Creamy Garlic Butter Salmon Recipe, you’ll need a few simple ingredients. Each one plays a vital role in bringing out the rich flavors of this dish. Here’s what you’ll need:

  • 2 (6-ounce) salmon fillets
  • 2 tablespoons unsalted butter
  • 4 cloves garlic, minced
  • 1 cup heavy cream
  • 1 teaspoon Dijon mustard
  • 1 teaspoon lemon juice
  • Salt and pepper to taste
  • 2 tablespoons fresh parsley, chopped (for garnish)

These ingredients are not only easy to find but also work together to create a creamy, flavorful sauce that perfectly complements the salmon. The unsalted butter and heavy cream provide a rich base, while the garlic adds a delightful aroma and taste. The Dijon mustard and lemon juice bring a hint of tanginess, balancing the richness of the dish.

Creamy Garlic Butter Salmon Recipe lies in its flexibility, allowing you to tailor it to your liking!

Step-by-Step Preparation of Creamy Garlic Butter Salmon Recipe

Creamy Garlic Butter Salmon Recipe. Following these simple steps will ensure that your dish turns out perfectly every time!

Step 1: Preparing the Salmon

Start by taking your salmon fillets out of the refrigerator. Let them sit at room temperature for about 15 minutes. This helps them cook evenly. While waiting, you can season the fillets with salt and pepper on both sides. This simple seasoning enhances the natural flavor of the salmon.

Once seasoned, pat the salmon dry with a paper towel. This step is crucial as it helps achieve a crispy skin when cooking. A dry surface allows the skin to sear nicely in the skillet.

Step 2: Making the Garlic Butter Sauce

Next, it’s time to make the delicious garlic butter sauce. In a large skillet, melt the unsalted butter over medium heat. As the butter melts, add the minced garlic. Sauté the garlic for about one minute, stirring constantly. Be careful not to let it burn, as burnt garlic can taste bitter.

Once the garlic is fragrant, it’s time to add the heavy cream, Dijon mustard, and lemon juice. Stir everything together until well combined. Bring the mixture to a gentle simmer. Allow it to cook for 2-3 minutes until the sauce thickens slightly. This creamy sauce will be the star of your dish!

Step 3: Cooking the Salmon

Now, it’s time to cook the salmon! Carefully place the seasoned salmon fillets in the skillet, skin-side down. Cook for about 4-5 minutes without moving them. This allows the skin to become crispy and golden brown.

After 4-5 minutes, gently flip the fillets using a spatula. Cook for another 3-4 minutes until the salmon is cooked through. The fish should be opaque and flake easily with a fork. Once done, remove the salmon from the skillet and set it aside on a plate.

Step 4: Combining Salmon with the Sauce

Finally, it’s time to bring everything together! Return the cooked salmon to the skillet with the garlic butter sauce. Spoon the creamy sauce over the top of the salmon fillets. Let them cook together for an additional 1-2 minutes to heat through.

Creamy Garlic Butter Salmon Recipe is now ready to be served!

Variations of Creamy Garlic Butter Salmon Recipe

Creamy Garlic Butter Salmon Recipe is not only delicious on its own, but it also offers plenty of room for creativity. You can easily customize this dish to suit your taste preferences or to incorporate seasonal ingredients. Here are some exciting variations to consider!

Adding Vegetables to the Dish

Creamy Garlic Butter Salmon Recipe is by adding vegetables. Not only do they add color and nutrition, but they also complement the rich flavors of the salmon and sauce. Here are a few ideas:

  • Spinach: Sauté fresh spinach in the skillet before adding the garlic. It wilts down quickly and adds a lovely green touch.
  • Zucchini Noodles: For a low-carb option, spiralize zucchini and sauté it in the skillet. This creates a light and healthy base for your salmon.
  • Asparagus: Add asparagus spears to the skillet while cooking the salmon. They will cook perfectly alongside the fish, adding a nice crunch.
  • Cherry Tomatoes: Toss in halved cherry tomatoes during the last few minutes of cooking. They burst with flavor and add a sweet contrast to the dish.

Feel free to mix and match your favorite vegetables. The addition of veggies not only boosts the nutritional value but also makes the meal more colorful and appealing!

Alternative Seasonings and Herbs

Creamy Garlic Butter Salmon Recipe is by experimenting with different seasonings and herbs. Here are some suggestions:

  • Capers: For a briny kick, add a teaspoon of capers to the sauce. They pair beautifully with salmon.
  • Red Pepper Flakes: If you enjoy a bit of heat, sprinkle in some red pepper flakes while cooking the garlic. This adds a spicy twist!
  • Fresh Herbs: Instead of parsley, try using dill or basil for a fresh flavor. These herbs complement the salmon wonderfully.
  • Lemon Zest: For an extra citrusy punch, add some lemon zest to the sauce. It brightens up the dish and enhances the lemon juice flavor.

Creamy Garlic Butter Salmon Recipe to your liking. Whether you prefer it with veggies or a different flavor profile, the possibilities are endless!

Cooking Note for Creamy Garlic Butter Salmon Recipe

Creamy Garlic Butter Salmon Recipe, there are a few important cooking notes to keep in mind. These tips will help ensure that your dish turns out perfectly every time, making your cooking experience enjoyable and stress-free.

First, always choose fresh salmon fillets. Fresh fish not only tastes better but also has a firmer texture. If you can, buy wild-caught salmon for the best flavor and nutritional benefits. If you must use frozen salmon, make sure to thaw it completely in the refrigerator before cooking. This helps maintain the quality and texture of the fish.

Next, pay attention to the cooking temperature. Cooking the salmon over medium heat is key to achieving that crispy skin while keeping the inside moist and tender. If the heat is too high, the outside may burn before the inside is fully cooked. Conversely, cooking on too low of a heat can lead to a rubbery texture.

Additionally, use a non-stick skillet or a well-seasoned cast-iron pan. This prevents the salmon from sticking and makes flipping the fillets easier. If you notice the skin sticking, give it a little more time to cook before attempting to flip it. The skin will naturally release from the pan when it’s ready.

Lastly, let the salmon rest for a minute after cooking. This allows the juices to redistribute, resulting in a more flavorful and moist fillet. When serving, don’t forget to drizzle extra sauce over the salmon for an added burst of flavor!

Creamy Garlic Butter Salmon Recipe. Enjoy the process and savor the delicious results!

Serving Suggestions for Creamy Garlic Butter Salmon Recipe

Creamy Garlic Butter Salmon Recipe, it’s time to think about how to serve it. The right side dishes and beverages can elevate your meal, making it even more enjoyable. Here are some fantastic serving suggestions to consider!

Pairing with Side Dishes

Choosing the right side dishes can enhance the flavors of your salmon. Here are some delicious options:

  • Sautéed Spinach: This simple side is quick to prepare. Just sauté fresh spinach in olive oil with a pinch of salt. The mild flavor complements the rich salmon.
  • Garlic Mashed Potatoes: Creamy mashed potatoes infused with garlic make a comforting pairing. They soak up the delicious garlic butter sauce beautifully.
  • Roasted Asparagus: Toss asparagus with olive oil, salt, and pepper, then roast until tender. The slight crunch adds a nice contrast to the soft salmon.
  • Quinoa Salad: A light quinoa salad with cherry tomatoes, cucumber, and a lemon vinaigrette offers a refreshing balance to the richness of the dish.
  • Zucchini Noodles: For a low-carb option, serve the salmon over zucchini noodles. They add a fresh touch and soak up the creamy sauce.

Creamy Garlic Butter Salmon Recipe but also add color and nutrition to your plate. Feel free to mix and match based on your preferences!

Ideal Wine Pairings

To elevate your dining experience, consider pairing your salmon with the right wine. Here are some excellent choices:

  • Sauvignon Blanc: This white wine is crisp and refreshing, making it a perfect match for the creamy sauce. Its acidity balances the richness of the dish.
  • Chardonnay: A lightly oaked Chardonnay complements the buttery flavors of the salmon. Look for one with a hint of citrus for added brightness.
  • Pinot Noir: If you prefer red wine, a light-bodied Pinot Noir works well. Its fruity notes won’t overpower the salmon, making it a delightful pairing.
  • Rosé: A dry rosé is versatile and pairs beautifully with seafood. Its refreshing taste enhances the overall meal experience.

Creamy Garlic Butter Salmon Recipe and create a memorable dining experience. Cheers to a delicious meal!

Tips for Perfecting Your Creamy Garlic Butter Salmon Recipe

Creamy Garlic Butter Salmon Recipe, a few tips can make all the difference. These simple yet effective suggestions will help you achieve the best flavor and texture, ensuring your dish is a hit every time!

First, always start with high-quality salmon. Fresh, wild-caught salmon is ideal for this recipe. It has a better flavor and texture compared to farmed salmon. If you can, visit a local fish market or grocery store that offers fresh seafood. This small change can elevate your dish significantly.

Next, don’t rush the cooking process. Cooking the salmon over medium heat allows the skin to crisp up nicely while keeping the inside moist. If the heat is too high, the outside may burn before the inside is fully cooked. Patience is key to achieving that perfect sear!

Another important tip is to let the salmon rest after cooking. Allowing it to sit for a minute helps the juices redistribute throughout the fillet. This results in a more flavorful and tender piece of fish. When serving, drizzle extra sauce over the salmon for added richness.

For an extra layer of flavor, consider marinating the salmon before cooking. A simple marinade of olive oil, lemon juice, and herbs can enhance the taste. Just be sure not to marinate for too long, as the acid can start to cook the fish.

Creamy Garlic Butter Salmon Recipe is versatile, so feel free to make it your own!

Creamy Garlic Butter Salmon Recipe. Enjoy the cooking process and savor the delicious results!

Breakdown of Time for Creamy Garlic Butter Salmon Recipe

Creamy Garlic Butter Salmon Recipe can help you plan your meal better. Here’s a quick breakdown of the time required for preparation and cooking, ensuring you can enjoy this delicious dish without any rush!

Prep Time

The prep time for this recipe is quite short, making it perfect for a weeknight dinner. You’ll need about 10-15 minutes to gather your ingredients and prepare the salmon. This includes seasoning the fillets and chopping the garlic and parsley. If you decide to add vegetables, factor in a few extra minutes for washing and cutting them.

Cooking Time

Creamy Garlic Butter Salmon Recipe is approximately 15-20 minutes. This includes:

  • Cooking the salmon for about 8-10 minutes (4-5 minutes on each side).
  • Making the garlic butter sauce, which takes around 5-7 minutes.
  • Combining the salmon with the sauce for an additional 1-2 minutes.

Total Time

Creamy Garlic Butter Salmon Recipe an excellent choice for busy evenings when you want a delicious meal without spending hours in the kitchen. With just a little time and effort, you’ll have a gourmet dish ready to impress!

Nutritional Information for Creamy Garlic Butter Salmon Recipe

Creamy Garlic Butter Salmon Recipe not only delights your taste buds but also provides valuable nutrients. Here’s a breakdown of the nutritional information per serving:

Calories

Creamy Garlic Butter Salmon Recipe contains approximately 550 calories. This calorie count includes the rich flavors from the butter and cream, making it a satisfying meal. While it may seem high, the calories come from healthy fats and protein, which are essential for energy and overall health.

Protein Content

One of the standout features of this dish is its protein content. Each serving provides about 38 grams of protein. Salmon is an excellent source of high-quality protein, which is vital for muscle repair and growth. Including protein-rich foods like salmon in your diet can help you feel fuller for longer, making it easier to manage your weight.

Sodium Levels

Creamy Garlic Butter Salmon Recipe contains approximately 600 milligrams per serving. This level is reasonable for a flavorful dish, especially considering the use of salt in seasoning. However, if you’re watching your sodium intake, you can adjust the amount of salt used or opt for low-sodium butter and broth to keep the flavors intact without the extra sodium.

Creamy Garlic Butter Salmon Recipe is a nutritious choice that combines delicious flavors with essential nutrients. Enjoy this dish knowing that you’re treating yourself to a meal that’s not only tasty but also beneficial for your health!

FAQs about Creamy Garlic Butter Salmon Recipe

Can I use frozen salmon for this recipe?

Creamy Garlic Butter Salmon Recipe. However, it’s essential to thaw the salmon completely before cooking. The best way to do this is to place it in the refrigerator overnight. If you’re short on time, you can also thaw it under cold running water for about 30 minutes. Just remember that cooking times may vary slightly, so keep an eye on the salmon to ensure it cooks through properly.

What can I substitute for heavy cream?

If you’re looking for a substitute for heavy cream, there are several options you can consider. One popular choice is to use half-and-half, which will give you a similar creamy texture but with fewer calories. Another option is to use coconut cream for a dairy-free alternative. You can also blend silken tofu with a bit of milk for a healthier, lower-fat option. Just keep in mind that these substitutes may slightly alter the flavor and consistency of the sauce.

How do I know when the salmon is cooked?

To determine if the salmon is cooked, look for a few key signs. First, the salmon should be opaque and easily flake with a fork. The internal temperature should reach 145°F (63°C) for safe consumption. If you have a meat thermometer, this is the most accurate way to check. If you don’t have one, simply cut into the thickest part of the fillet; it should be a light pink color and not translucent. Remember, overcooking can lead to dry salmon, so keep a close watch!

Can I make this recipe ahead of time?

Creamy Garlic Butter Salmon Recipe is best enjoyed fresh, you can prepare some components ahead of time. For instance, you can season the salmon fillets and make the garlic butter sauce in advance. Store the sauce in an airtight container in the refrigerator for up to two days. When you’re ready to serve, simply reheat the sauce and cook the salmon. However, it’s best to cook the salmon just before serving to maintain its texture and flavor.

Conclusion on Creamy Garlic Butter Salmon Recipe

Creamy Garlic Butter Salmon Recipe is a delightful dish that combines simplicity with gourmet flair. With its rich flavors and creamy sauce, this recipe is perfect for any occasion, whether it’s a cozy family dinner or an elegant gathering with friends. The ease of preparation makes it accessible for cooks of all skill levels, allowing anyone to impress their guests with a restaurant-quality meal.

Not only is this dish delicious, but it also offers numerous health benefits. Salmon is a fantastic source of protein and omega-3 fatty acids, which are essential for heart health. By incorporating this recipe into your meal rotation, you can enjoy a tasty way to boost your nutrient intake.

Creamy Garlic Butter Salmon Recipe allows you to customize it to your liking. Whether you choose to add vegetables, experiment with different herbs, or adjust the seasoning, the possibilities are endless. This adaptability ensures that you can make the dish your own, catering to your taste preferences and dietary needs.

Creamy Garlic Butter Salmon Recipe, you’re not just cooking; you’re creating a memorable dining experience that you and your loved ones will cherish. Enjoy every bite!

Blackened Salmon with Lemon Garlic Butter Recipe delights!

Introduction to Blackened Salmon with Lemon Garlic Butter Recipe

Blackened Salmon with Lemon Garlic Butter Recipe is a delightful dish that combines rich flavors with a healthy twist. This recipe is not only easy to prepare but also brings a burst of taste that will impress your family and friends. With its crispy exterior and tender, flaky interior, blackened salmon is a true culinary gem.

What Makes Blackened Salmon Unique?

Blackened salmon stands out due to its unique cooking method. The term “blackened” refers to a technique where fish is coated with a blend of spices and then seared in a hot skillet. This process creates a delicious crust that locks in moisture and flavor. The spices used in this recipe, such as paprika and cayenne pepper, give the salmon a smoky, spicy kick that is simply irresistible. Plus, the addition of lemon garlic butter adds a zesty finish that complements the fish perfectly.

The Benefits of Cooking with Salmon

Salmon is not just tasty; it’s also packed with health benefits. This fish is rich in omega-3 fatty acids, which are essential for heart health. Omega-3s can help reduce inflammation and lower the risk of chronic diseases. Additionally, salmon is a great source of high-quality protein, making it an excellent choice for those looking to maintain a balanced diet. With its vibrant flavor and numerous health benefits, cooking with salmon is a win-win!

Ingredients for Blackened Salmon with Lemon Garlic Butter Recipe

Blackened Salmon with Lemon Garlic Butter Recipe, you’ll need a few simple yet flavorful ingredients. Here’s what you’ll need:

  • 2 (6-ounce) salmon fillets
  • 2 tablespoons paprika
  • 1 teaspoon garlic powder
  • 1 teaspoon onion powder
  • 1 teaspoon dried thyme
  • 1 teaspoon cayenne pepper
  • 1 teaspoon salt
  • 1/2 teaspoon black pepper
  • 2 tablespoons olive oil
  • 4 tablespoons unsalted butter
  • 3 cloves garlic, minced
  • 1 tablespoon fresh lemon juice
  • 1 tablespoon fresh parsley, chopped
  • Lemon wedges for serving

These ingredients come together to create a dish that is not only delicious but also visually appealing. The vibrant colors of the spices and the fresh parsley make the salmon look as good as it tastes. Plus, the combination of lemon and garlic in the butter sauce adds a refreshing touch that enhances the overall flavor profile.

When selecting your salmon, opt for fresh, high-quality fillets. This will ensure that your dish is both tasty and nutritious. Now that you have your ingredients ready, let’s move on to the next step in preparing this delightful meal!

Step-by-Step Preparation of Blackened Salmon with Lemon Garlic Butter Recipe

Blackened Salmon with Lemon Garlic Butter Recipe. This step-by-step guide will help you create a delicious meal that is sure to impress. Let’s get started!

Step 1: Preparing the Salmon

First, take your salmon fillets and pat them dry with paper towels. This step is crucial as it helps the seasoning stick better and ensures a crispy skin. Once dried, place the fillets on a clean cutting board. Make sure to check for any pin bones and remove them with tweezers if necessary. This will make your eating experience much more enjoyable!

Step 2: Making the Blackening Spice

Next, it’s time to create the flavorful blackening spice. In a small bowl, combine the paprika, garlic powder, onion powder, dried thyme, cayenne pepper, salt, and black pepper. Mix these ingredients well until they are evenly blended. This spice mix is what gives the salmon its signature flavor and beautiful color. Feel free to adjust the cayenne pepper to your taste if you prefer a milder dish.

Step 3: Cooking the Salmon

Now, let’s cook the salmon! Heat the olive oil in a large skillet over medium-high heat. Once the oil is hot, carefully add the salmon fillets, skin-side down. Cook for about 4-5 minutes, allowing the skin to become crispy. After that, gently flip the fillets using a spatula. Cook for an additional 3-4 minutes, or until the salmon is cooked through and flakes easily with a fork. The cooking time may vary slightly depending on the thickness of your fillets.

Step 4: Preparing the Lemon Garlic Butter

In the last minute of cooking, it’s time to add the finishing touch! Add the unsalted butter, minced garlic, and fresh lemon juice to the skillet. As the butter melts, spoon the delicious garlic butter over the salmon fillets. This step not only enhances the flavor but also adds a beautiful shine to the fish. Once everything is cooked to perfection, remove the skillet from heat and sprinkle fresh parsley on top for a pop of color.

Blackened Salmon with Lemon Garlic Butter Recipe is now ready to be served. The combination of spices, garlic, and lemon creates a dish that is bursting with flavor. Let’s explore some variations and serving suggestions next!

Variation of Blackened Salmon with Lemon Garlic Butter Recipe

Blackened Salmon with Lemon Garlic Butter Recipe is already a crowd-pleaser, there are many ways to switch things up! Whether you want to experiment with different flavors or try out new cooking methods, these variations will keep your meals exciting and delicious.

Alternative Seasonings

If you’re looking to change the flavor profile of your blackened salmon, consider using alternative seasonings. For a sweeter twist, try adding brown sugar to the spice mix. This will create a caramelized crust that pairs beautifully with the fish. You can also experiment with herbs like dill or basil for a fresh taste. If you enjoy a bit of heat, consider adding more cayenne pepper or even a dash of hot sauce to the seasoning blend. Remember, the key is to find a balance that suits your palate!

Another option is to use a pre-made blackening seasoning. Many grocery stores offer blends that can save you time while still delivering great flavor. Just be sure to check the ingredients for any added sugars or preservatives. With these alternative seasonings, you can easily customize your blackened salmon to match your mood or the occasion.

Different Cooking Methods

While pan-searing is a popular method for cooking blackened salmon, there are other techniques you can try. Grilling the salmon adds a smoky flavor that complements the spices beautifully. Simply preheat your grill and cook the seasoned fillets for about 4-5 minutes on each side. This method is perfect for summer barbecues!

Another option is baking the salmon in the oven. Preheat your oven to 400°F (200°C) and place the seasoned fillets on a baking sheet lined with parchment paper. Bake for about 12-15 minutes, or until the salmon is cooked through. This method is great for a hands-off approach, allowing you to prepare side dishes while the salmon cooks.

Blackened Salmon with Lemon Garlic Butter Recipe.

Cooking Note for Blackened Salmon with Lemon Garlic Butter Recipe

Blackened Salmon with Lemon Garlic Butter Recipe, there are a few important cooking notes to keep in mind. These tips will help ensure that your salmon turns out perfectly every time, making your meal not only delicious but also visually appealing.

First, the key to achieving that signature blackened crust lies in the heat of your skillet. Make sure your skillet is hot enough before adding the salmon. A well-heated skillet allows the spices to sear quickly, creating a flavorful crust while keeping the inside moist. If the skillet isn’t hot enough, the salmon may steam instead of sear, resulting in a less desirable texture.

Next, avoid overcrowding the skillet. If you’re cooking more than two fillets, consider cooking them in batches. Overcrowding can lower the temperature of the skillet, preventing that beautiful sear from forming. It’s better to cook in smaller portions to achieve the best results.

Additionally, keep an eye on the cooking time. Salmon cooks quickly, and overcooking can lead to a dry texture. The fish is done when it flakes easily with a fork and has an internal temperature of 145°F (63°C). Using a meat thermometer can help you check for doneness without cutting into the fillet.

Blackened Salmon with Lemon Garlic Butter Recipe!

Serving Suggestions for Blackened Salmon with Lemon Garlic Butter Recipe

Blackened Salmon with Lemon Garlic Butter Recipe, it’s time to think about how to serve it. The right side dishes and drink pairings can elevate your meal, making it even more enjoyable. Here are some fantastic suggestions to complement your salmon dish!

Ideal Side Dishes

When it comes to side dishes, you want to choose options that balance the rich flavors of the blackened salmon. Here are a few ideas:

  • Sautéed Spinach: Lightly sautéed spinach with garlic and olive oil makes a nutritious and vibrant side. The greens add freshness and a pop of color to your plate.
  • Roasted Vegetables: A mix of seasonal vegetables like bell peppers, zucchini, and carrots roasted until tender can provide a sweet contrast to the spicy salmon.
  • Quinoa Salad: A refreshing quinoa salad with cherry tomatoes, cucumber, and a lemon vinaigrette can add a light and zesty touch to your meal.
  • Garlic Mashed Potatoes: Creamy mashed potatoes with a hint of garlic can be a comforting side that pairs well with the bold flavors of the salmon.

These side dishes not only enhance the meal but also provide a variety of textures and flavors that complement the blackened salmon beautifully.

Pairing with Wine

Blackened Salmon with Lemon Garlic Butter Recipe, consider these wine pairings:

  • Sauvignon Blanc: This white wine is crisp and refreshing, with citrus notes that match the lemon in the dish. It’s a perfect complement to the richness of the salmon.
  • Chardonnay: A lightly oaked Chardonnay can add a creamy texture that pairs well with the buttery sauce. Look for one with bright acidity to balance the flavors.
  • Pinot Noir: If you prefer red wine, a light-bodied Pinot Noir can work nicely. Its fruity notes and low tannins won’t overpower the salmon.

These wine options will enhance the flavors of your meal, making your dining experience even more delightful. Enjoy your blackened salmon with these delicious sides and the perfect glass of wine!

Tips for Perfecting Blackened Salmon with Lemon Garlic Butter Recipe

Blackened Salmon with Lemon Garlic Butter Recipe, there are a few essential tips to keep in mind. These tips will help you choose the best ingredients and avoid common pitfalls, ensuring that your dish turns out perfectly every time. Let’s dive into these helpful suggestions!

Choosing the Right Salmon

When it comes to selecting salmon, quality matters. Here are some tips to help you choose the best salmon for your recipe:

  • Freshness: Always look for fresh salmon fillets with a bright, vibrant color. The flesh should be firm to the touch and have a mild, ocean-like smell. Avoid any fillets that appear dull or have a strong fishy odor.
  • Wild-Caught vs. Farmed: Wild-caught salmon is often considered superior in flavor and texture. It tends to have a richer taste and is usually more nutritious. However, farmed salmon can also be a good option if it’s sustainably sourced.
  • Skin-On vs. Skinless: For this recipe, skin-on fillets are recommended. The skin helps protect the fish during cooking and adds a delightful crispiness. If you prefer skinless, just be cautious while cooking to prevent the fillets from drying out.

Blackened Salmon with Lemon Garlic Butter Recipe that your family and friends will love!

Avoiding Common Mistakes

Even the best recipes can go awry if certain mistakes are made. Here are some common pitfalls to avoid when preparing your blackened salmon:

  • Not Patting Dry: Failing to pat the salmon dry can lead to steaming instead of searing. Always use paper towels to remove excess moisture before seasoning.
  • Overcrowding the Skillet: Cooking too many fillets at once can lower the skillet’s temperature, preventing that beautiful blackened crust from forming. Cook in batches if necessary.
  • Ignoring Cooking Time: Salmon cooks quickly, so keep an eye on the time. Overcooking can result in dry fish. Aim for an internal temperature of 145°F (63°C) for perfectly cooked salmon.
  • Skipping the Resting Period: Allowing the salmon to rest for a few minutes after cooking helps the juices redistribute. This step is crucial for a moist and flavorful bite.

Blackened Salmon with Lemon Garlic Butter Recipe that will impress everyone at the table!

Breakdown of Time for Blackened Salmon with Lemon Garlic Butter Recipe

Blackened Salmon with Lemon Garlic Butter Recipe can help you plan your meal better. Here’s a simple breakdown of the time needed for preparation and cooking, ensuring you can serve this delicious dish without any rush.

Prep Time

The prep time for this recipe is quite short, making it perfect for a weeknight dinner. You’ll need about 10-15 minutes to gather your ingredients and prepare the salmon. This includes:

  • Patting the salmon fillets dry
  • Mixing the blackening spice
  • Chopping the parsley and mincing the garlic

With everything ready, you’ll be set to start cooking in no time!

Cooking Time

Blackened Salmon with Lemon Garlic Butter Recipe is approximately 8-10 minutes. Here’s how it breaks down:

  • Cooking the salmon skin-side down: 4-5 minutes
  • Flipping the salmon and cooking the other side: 3-4 minutes
  • Adding the lemon garlic butter in the last minute

This quick cooking time ensures that your salmon remains tender and flaky while developing a beautiful blackened crust.

Total Time

Blackened Salmon with Lemon Garlic Butter Recipe an excellent choice for a delicious meal that doesn’t take all evening to prepare. With just a little bit of time, you can enjoy a flavorful dish that’s sure to impress!

Nutritional Information for Blackened Salmon with Lemon Garlic Butter Recipe

Blackened Salmon with Lemon Garlic Butter Recipe is essential for those who are health-conscious or following specific dietary plans. This dish not only delights the taste buds but also provides a wealth of nutrients. Here’s a closer look at the nutritional information per serving:

Calories

Each serving of this delicious blackened salmon contains approximately 400 calories. This makes it a satisfying option for dinner without being overly heavy. The calorie count comes from the healthy fats in the salmon and the butter, which contribute to the overall richness of the dish. Enjoying this meal can fit well into a balanced diet, especially when paired with nutritious side dishes.

Protein

One of the standout features of salmon is its high protein content. Each serving provides about 40 grams of protein. This makes it an excellent choice for those looking to increase their protein intake, whether for muscle building or simply to feel fuller longer. Protein is essential for various bodily functions, including repairing tissues and supporting immune health.

Sodium

The sodium content in this recipe is approximately 800 milligrams per serving. This includes the salt used in the seasoning mix. While sodium is necessary for maintaining fluid balance in the body, it’s important to monitor intake, especially for those with high blood pressure. You can easily adjust the salt in the recipe to suit your dietary needs without sacrificing flavor.

Blackened Salmon with Lemon Garlic Butter Recipe is a nutritious option that offers a great balance of calories, protein, and flavor. It’s a fantastic choice for anyone looking to enjoy a healthy meal that doesn’t compromise on taste!

FAQs about Blackened Salmon with Lemon Garlic Butter Recipe

Can I use frozen salmon for this recipe?

Blackened Salmon with Lemon Garlic Butter Recipe. However, it’s important to thaw the salmon properly before cooking. The best way to do this is to place the frozen fillets in the refrigerator overnight. If you’re short on time, you can also thaw them under cold running water for about 30 minutes. Once thawed, pat the salmon dry and follow the recipe as usual. Just keep in mind that cooking times may vary slightly, so check for doneness to ensure your salmon is perfectly cooked!

What can I substitute for lemon in the recipe?

Blackened Salmon with Lemon Garlic Butter Recipe. Lime juice is a great alternative, providing a similar citrusy zing. You can also use vinegar, such as white wine vinegar or apple cider vinegar, for a tangy kick. If you want a sweeter option, consider using orange juice. Just remember to adjust the amount to your taste, as some substitutes may be sweeter than lemon juice. Each of these options will still enhance the flavor of the garlic butter sauce!

How do I store leftovers of blackened salmon?

Blackened Salmon with Lemon Garlic Butter Recipe is easy! First, allow the salmon to cool to room temperature. Then, place the leftover fillets in an airtight container. You can store them in the refrigerator for up to 3 days. If you want to keep them longer, consider freezing the salmon. Wrap each fillet tightly in plastic wrap and then place them in a freezer-safe bag. Frozen salmon can last for up to 3 months. When you’re ready to enjoy the leftovers, simply thaw them in the refrigerator overnight and reheat gently in a skillet or microwave. This way, you can savor the delicious flavors of your blackened salmon even after the initial meal!

Conclusion on Blackened Salmon with Lemon Garlic Butter Recipe

Blackened Salmon with Lemon Garlic Butter Recipe is a fantastic dish that combines bold flavors with health benefits. This recipe is not only easy to prepare but also offers a delightful dining experience that can impress anyone at your table. The crispy, seasoned exterior of the salmon, paired with the rich lemon garlic butter, creates a perfect harmony of taste that is hard to resist.

Whether you’re cooking for a special occasion or just a weeknight dinner, this recipe is versatile enough to suit any setting. With its quick preparation and cooking time, you can enjoy a gourmet meal without spending hours in the kitchen. Plus, the nutritional benefits of salmon make it a smart choice for those looking to maintain a healthy lifestyle.

As you explore the variations and serving suggestions, feel free to get creative! Experimenting with different seasonings or side dishes can make each meal unique. Remember, the key to a successful dish lies in the quality of your ingredients and the love you put into cooking.

So, gather your ingredients, follow the steps, and savor the deliciousness of your homemade blackened salmon. With this recipe in your culinary repertoire, you’ll be well on your way to impressing family and friends with your cooking skills. Enjoy every bite of this flavorful dish, and happy cooking!

Crispy Shrimp Po’ Boy: A Delicious Sandwich Recipe

Introduction to Crispy Shrimp Po’ Boy

What is a Crispy Shrimp Po’ Boy?

The Crispy Shrimp Po’ Boy is a delightful sandwich that brings together the flavors of the sea and the crunch of perfectly fried shrimp. This dish features large, succulent shrimp that are soaked in buttermilk, coated in a seasoned breading, and fried until golden brown. Served on a soft hoagie roll, it’s topped with fresh lettuce, juicy tomatoes, and a creamy, spicy mayonnaise. Each bite is a burst of flavor and texture, making it a favorite among seafood lovers.

The Origin of the Po’ Boy Sandwich

The Po’ Boy sandwich has a rich history that dates back to New Orleans in the late 19th century. It was created during a streetcar strike in 1929 by a couple named Benny and Clovis Martin. They wanted to feed the striking workers, often referred to as “poor boys,” hence the name “Po’ Boy.” Traditionally, this sandwich is filled with various ingredients, but the shrimp version has become a classic. Today, the Crispy Shrimp Po’ Boy is celebrated for its deliciousness and is a staple in many seafood restaurants across the United States.

Ingredients for Crispy Shrimp Po’ Boy

To create a mouthwatering Crispy Shrimp Po’ Boy, you’ll need a selection of fresh ingredients. Each component plays a vital role in delivering that perfect balance of flavors and textures. Here’s what you’ll need:

  • 1 pound large shrimp: Make sure they are peeled and deveined for easy preparation.
  • 1 cup buttermilk: This will tenderize the shrimp and add a rich flavor.
  • 1 cup all-purpose flour: Essential for creating a crispy coating.
  • 1 cup cornmeal: Adds a delightful crunch to the breading.
  • 1 teaspoon paprika: For a hint of smokiness and color.
  • 1 teaspoon garlic powder: Enhances the overall flavor profile.
  • 1 teaspoon onion powder: Complements the garlic and adds depth.
  • 1/2 teaspoon cayenne pepper: Gives a spicy kick; adjust to your taste.
  • Salt and pepper: To season the shrimp and breading.
  • Vegetable oil: For frying; it should be heated to the right temperature for the best results.
  • 4 hoagie rolls: Choose soft rolls to hold all the delicious fillings.
  • 1 cup shredded lettuce: Adds freshness and crunch.
  • 1 large tomato: Sliced for juicy, vibrant flavor.
  • 1/2 cup mayonnaise: A creamy base for the spread.
  • 1 tablespoon hot sauce: Optional, for those who enjoy a spicy touch.
  • Lemon wedges: For serving, adding a zesty finish to your sandwich.

Gathering these ingredients will set you on the right path to making a delicious Crispy Shrimp Po’ Boy. Each item contributes to the overall taste, ensuring that every bite is satisfying and full of flavor.

Step-by-Step Preparation of Crispy Shrimp Po’ Boy

Step 1: Preparing the Shrimp

To start, you need to prepare the shrimp. First, take your pound of large shrimp and ensure they are peeled and deveined. This step is crucial for a clean and enjoyable eating experience. Next, place the shrimp in a medium bowl and pour in the buttermilk. Make sure all the shrimp are submerged. Soak them for at least 30 minutes. This soaking process not only tenderizes the shrimp but also infuses them with flavor. While you wait, you can gather the other ingredients and get ready for the next steps!

Step 2: Breading the Shrimp

Once the shrimp have soaked, it’s time to bread them. In a separate bowl, mix together the all-purpose flour, cornmeal, paprika, garlic powder, onion powder, cayenne pepper, salt, and pepper. This mixture will create a flavorful coating for your shrimp. After mixing, take the shrimp out of the buttermilk, allowing any excess to drip off. Then, dredge each shrimp in the flour mixture, ensuring they are evenly coated. This step is key to achieving that crispy texture you desire in your Crispy Shrimp Po’ Boy.

Step 3: Frying the Shrimp

Now, let’s move on to frying the shrimp. In a large skillet, heat about 2 inches of vegetable oil over medium-high heat. You want the oil to reach a temperature of 350°F for the best frying results. To check if the oil is ready, you can drop a small piece of bread into the oil; if it sizzles, you’re good to go! Carefully add the breaded shrimp in batches, making sure not to overcrowd the pan. Fry them for about 2-3 minutes or until they turn golden brown and are cooked through. Once done, remove the shrimp and place them on paper towels to drain any excess oil.

Step 4: Assembling the Po’ Boy

Finally, it’s time to assemble your Crispy Shrimp Po’ Boy! Start by mixing the mayonnaise with hot sauce in a small bowl, if you’re using it. This spicy spread will add a delightful kick to your sandwich. Take your hoagie rolls and spread a generous amount of the spicy mayonnaise on each one. Next, layer on the shredded lettuce and sliced tomatoes. Finally, add the crispy shrimp on top. For an extra touch, you can squeeze some lemon juice over the shrimp. Serve your delicious Po’ Boy with lemon wedges on the side for a zesty finish!

Variations of Crispy Shrimp Po’ Boy

Spicy Crispy Shrimp Po’ Boy

If you love a little heat, the Spicy Crispy Shrimp Po’ Boy is the perfect twist on the classic recipe. To amp up the spice, you can increase the amount of cayenne pepper in the breading mixture. Additionally, consider adding sliced jalapeños or a spicy slaw made with cabbage, carrots, and a zesty dressing. This will not only enhance the flavor but also add a crunchy texture. For the mayonnaise, you can mix in more hot sauce or even a dash of sriracha for an extra kick. This variation is sure to satisfy those who crave bold flavors!

Vegetarian Alternatives to Crispy Shrimp Po’ Boy

For those who prefer a meat-free option, creating a vegetarian Crispy Po’ Boy is easy and delicious! Instead of shrimp, you can use crispy fried eggplant or zucchini slices. Simply slice the vegetables, dip them in buttermilk, and coat them with the same seasoned flour and cornmeal mixture. Fry them until golden brown, just like you would with shrimp. You can also use tofu, marinated and breaded, for a protein-packed alternative. Assemble the sandwich with the same fresh toppings, and you’ll have a delightful vegetarian Po’ Boy that everyone will enjoy!

Cooking Note for Crispy Shrimp Po’ Boy

When preparing your Crispy Shrimp Po’ Boy, there are a few important cooking notes to keep in mind. First, the temperature of the oil is crucial for achieving that perfect crispy texture. If the oil is too hot, the shrimp may burn on the outside while remaining raw inside. Conversely, if the oil is not hot enough, the shrimp will absorb too much oil and become greasy. A reliable kitchen thermometer can help you monitor the oil temperature accurately.

Additionally, frying in small batches is essential. Overcrowding the pan can lower the oil temperature, leading to soggy shrimp. Instead, fry a few shrimp at a time, allowing them to cook evenly and develop a golden crust. Once fried, place the shrimp on paper towels to absorb any excess oil, ensuring they stay crispy.

Lastly, consider the freshness of your ingredients. Fresh shrimp will always yield the best flavor and texture. If possible, buy shrimp that is wild-caught and in season. This not only enhances the taste of your Crispy Shrimp Po’ Boy but also supports sustainable fishing practices.

By following these cooking notes, you’ll be well on your way to creating a delicious and satisfying Crispy Shrimp Po’ Boy that everyone will love!

Serving Suggestions for Crispy Shrimp Po’ Boy

When it comes to serving your Crispy Shrimp Po’ Boy, the right accompaniments can elevate the meal to new heights. Here are some delightful serving suggestions that will complement your sandwich perfectly:

  • Classic Side Dishes: Pair your Po’ Boy with traditional sides like crispy French fries or sweet potato fries. The crunchiness of the fries balances the softness of the sandwich.
  • Coleslaw: A refreshing coleslaw made with cabbage, carrots, and a tangy dressing adds a crunchy texture and a burst of flavor. It’s a great way to cut through the richness of the fried shrimp.
  • Pickles: Serve dill pickles or bread-and-butter pickles on the side. Their tangy flavor complements the shrimp and adds a nice crunch.
  • Potato Chips: For a quick and easy option, serve your Po’ Boy with a side of potato chips. Choose a flavor that you love, whether it’s classic salted or something more adventurous.
  • Fresh Fruit: A fruit salad or slices of watermelon can provide a sweet contrast to the savory sandwich. The natural sweetness of the fruit refreshes the palate.
  • Beer or Iced Tea: To drink, consider serving a cold beer or a refreshing iced tea. Both beverages pair well with the flavors of the Po’ Boy and enhance the overall dining experience.

These serving suggestions not only enhance the meal but also create a well-rounded dining experience. Whether you’re hosting a casual gathering or enjoying a family dinner, these sides will make your Crispy Shrimp Po’ Boy even more enjoyable!

Tips for Making the Perfect Crispy Shrimp Po’ Boy

Creating the perfect Crispy Shrimp Po’ Boy is all about attention to detail. Here are some helpful tips to ensure your sandwich turns out delicious every time:

  • Choose Quality Shrimp: Always opt for fresh, large shrimp. Wild-caught shrimp often have better flavor than farmed varieties. Look for shrimp that are firm and have a mild scent of the sea.
  • Soak for Flavor: Don’t skip the buttermilk soak! This step not only tenderizes the shrimp but also infuses them with flavor. If you have time, soaking for longer than 30 minutes can enhance the taste even more.
  • Season Generously: When mixing your breading, be generous with the spices. The seasoning is what gives the shrimp their delicious flavor. Adjust the spices to suit your taste, especially if you enjoy a bit more heat.
  • Maintain Oil Temperature: Use a thermometer to keep the oil at a steady 350°F. This ensures the shrimp fry evenly and become crispy without absorbing too much oil.
  • Fry in Batches: Frying too many shrimp at once can lower the oil temperature. This can lead to soggy shrimp. Fry in small batches to achieve that perfect crunch.
  • Let Them Drain: After frying, place the shrimp on paper towels to drain excess oil. This step is crucial for keeping them crispy and not greasy.
  • Customize Your Toppings: Feel free to get creative with your toppings! Add sliced avocados, crispy bacon, or even a tangy slaw for extra flavor and texture.
  • Serve Immediately: For the best experience, serve your Po’ Boy right after assembling. The longer it sits, the softer the bread will become. Enjoy it fresh for that delightful crunch!

By following these tips, you’ll be well on your way to mastering the art of the Crispy Shrimp Po’ Boy. Each sandwich will be a delicious treat that you and your guests will love!

Breakdown of Time for Crispy Shrimp Po’ Boy

Prep Time

Preparing your Crispy Shrimp Po’ Boy is a straightforward process. The prep time mainly involves soaking the shrimp and getting your ingredients ready. Here’s a quick breakdown:

  • Soaking the Shrimp: 30 minutes
  • Mixing the Breading: 5 minutes
  • Preparing the Toppings: 5 minutes

40 minutes. This includes the soaking time, which is essential for flavor and tenderness.

Cooking Time

Once your shrimp are ready, the cooking process is quick and efficient. Here’s how the cooking time breaks down:

  • Frying the Shrimp: 10-15 minutes (depending on the size of your batches)
  • Assembling the Sandwich: 5 minutes

15-20 minutes. This allows you to fry the shrimp to a perfect golden brown and assemble your delicious sandwich.

Total Time

55-60 minutes. This includes soaking, frying, and assembling. It’s a manageable time frame for a delightful meal that’s sure to impress your family and friends!

Nutritional Information for Crispy Shrimp Po’ Boy

Calories in Crispy Shrimp Po’ Boy

550 calories. This number can vary slightly based on the specific ingredients used and portion sizes. While it’s a satisfying meal, it’s good to keep in mind if you’re watching your calorie intake.

Protein Content

25 grams of protein. This protein comes primarily from the shrimp, making it a fantastic option for those looking to boost their protein intake. Protein is essential for muscle repair and growth, making this sandwich not only tasty but also nutritious!

Sodium Levels

800 milligrams of sodium. This amount can vary based on the mayonnaise and any additional toppings you choose. If you’re watching your sodium intake, consider using low-sodium mayonnaise or adjusting the seasoning in the breading. Balancing flavors while keeping sodium in check can help you enjoy this delightful sandwich without worry.

FAQs about Crispy Shrimp Po’ Boy

What type of shrimp is best for a Crispy Shrimp Po’ Boy?

When it comes to choosing shrimp for your Crispy Shrimp Po’ Boy, larger shrimp are ideal. Look for large or extra-large shrimp, as they provide a satisfying bite and hold up well during frying. Wild-caught shrimp often have a better flavor compared to farmed varieties. Always check for freshness; shrimp should be firm and have a mild ocean scent. If possible, opt for shrimp that are peeled and deveined to save time in preparation.

Can I make a Crispy Shrimp Po’ Boy ahead of time?

While the Crispy Shrimp Po’ Boy is best enjoyed fresh, you can prepare some components ahead of time. For instance, you can soak the shrimp in buttermilk and mix the breading a few hours in advance. However, it’s best to fry the shrimp just before serving to maintain their crispy texture. If you need to store leftovers, keep the fried shrimp separate from the bread and toppings to prevent sogginess. Reheat the shrimp in an oven to restore some crispiness before assembling the sandwich.

What sauces pair well with Crispy Shrimp Po’ Boy?

The classic spicy mayonnaise is a fantastic choice for your Crispy Shrimp Po’ Boy, but there are many other sauces you can try! Tartar sauce adds a creamy, tangy flavor that complements the shrimp beautifully. Alternatively, a zesty remoulade sauce can bring a unique twist. For those who enjoy heat, a drizzle of sriracha or a spicy aioli can elevate the sandwich. Feel free to experiment with different sauces to find your perfect pairing!

How can I make my Crispy Shrimp Po’ Boy healthier?

If you’re looking to lighten up your Crispy Shrimp Po’ Boy, there are several easy adjustments you can make. First, consider baking the shrimp instead of frying them. Toss the breaded shrimp with a little olive oil and bake at 425°F for about 12-15 minutes until crispy. You can also use whole grain hoagie rolls for added fiber. Additionally, load up on fresh veggies like lettuce, tomatoes, and even avocado to boost the nutritional value. Finally, opt for a lighter mayonnaise or yogurt-based spread to cut down on calories while still enjoying great flavor!

Conclusion on Crispy Shrimp Po’ Boy

The Crispy Shrimp Po’ Boy is more than just a sandwich; it’s a celebration of flavors and textures that brings a taste of New Orleans to your table. With its perfectly fried shrimp, fresh toppings, and zesty mayonnaise, this dish is sure to impress family and friends alike. Whether you’re enjoying it on a sunny day or serving it at a gathering, the Crispy Shrimp Po’ Boy is a crowd-pleaser that never goes out of style.

As you explore the variations and tips shared in this article, you’ll find that making this sandwich can be both fun and rewarding. From the classic version to spicy twists and vegetarian alternatives, there’s a Crispy Shrimp Po’ Boy for everyone. Remember, the key to a great sandwich lies in the quality of your ingredients and the love you put into preparing it.

So, gather your ingredients, follow the steps, and dive into the delicious world of Crispy Shrimp Po’ Boy sandwiches. Enjoy the crunch, savor the flavors, and share this delightful dish with those you love. Happy cooking!

Buffalo Chicken Cheesesteak Recipe for a Tasty Meal

Introduction to Buffalo Chicken Cheesesteak Recipe

If you’re looking for a delicious twist on a classic favorite, the Buffalo Chicken Cheesesteak is the perfect dish for you! This recipe combines the bold flavors of buffalo sauce with tender chicken, sautéed vegetables, and gooey cheese, all nestled in a soft hoagie roll. It’s a delightful meal that’s sure to please everyone at the table.

Imagine biting into a warm sandwich filled with spicy, savory chicken and melted cheese. The combination of flavors is simply irresistible! Whether you’re hosting a game day party, a casual family dinner, or just craving something tasty, this Buffalo Chicken Cheesesteak recipe is a fantastic choice.

Not only is this dish easy to prepare, but it also allows for plenty of customization. You can adjust the spice level to suit your taste or even swap out ingredients for a unique twist. Plus, it’s a great way to enjoy a hearty meal without spending hours in the kitchen.

In this article, we’ll guide you through the ingredients, preparation steps, and even some variations to try. So, roll up your sleeves and get ready to create a mouthwatering Buffalo Chicken Cheesesteak that will have everyone asking for seconds!

Ingredients for Buffalo Chicken Cheesesteak Recipe

To create a mouthwatering Buffalo Chicken Cheesesteak, you’ll need a few simple ingredients. Each component plays a vital role in delivering that delicious flavor and satisfying texture. Here’s what you’ll need:

  • 2 tablespoons olive oil: This will help cook the chicken and vegetables, adding a rich flavor.
  • 1 pound boneless, skinless chicken breasts, diced: The star of the dish! Chicken provides protein and absorbs the buffalo sauce beautifully.
  • 1 teaspoon garlic powder: For that aromatic kick that enhances the overall taste.
  • 1 teaspoon onion powder: Adds depth and sweetness to the chicken mixture.
  • 1 teaspoon paprika: This spice gives a subtle smokiness and vibrant color.
  • Salt and pepper to taste: Essential for seasoning and bringing out the flavors.
  • 1 cup buffalo sauce: The key ingredient that gives this cheesesteak its signature spicy flavor. You can use store-bought or homemade.
  • 1 green bell pepper, sliced: Adds crunch and freshness to the sandwich.
  • 1 small onion, sliced: Sweet and savory, onions complement the chicken perfectly.
  • 4 hoagie rolls: The perfect vessel for all the delicious fillings.
  • 8 ounces provolone cheese, sliced: Melts beautifully and adds creaminess to the dish.
  • Fresh parsley, chopped (for garnish): A sprinkle of parsley adds a pop of color and freshness.

With these ingredients on hand, you’re well on your way to making a delightful Buffalo Chicken Cheesesteak. Each item contributes to the overall flavor and texture, ensuring a satisfying meal that everyone will love!

Step-by-Step Preparation of Buffalo Chicken Cheesesteak Recipe

Now that you have all your ingredients ready, it’s time to dive into the step-by-step preparation of your Buffalo Chicken Cheesesteak. This process is straightforward and fun, making it easy for anyone to follow along. Let’s get started!

Step 1: Preparing the Chicken

First, heat the olive oil in a large skillet over medium heat. Once the oil is hot, add the diced chicken. Sprinkle in the garlic powder, onion powder, paprika, salt, and pepper. Stir everything together to ensure the chicken is well-coated with the spices. Cook the chicken for about 5-7 minutes. You want it to be cooked through and no longer pink in the center. This step is crucial as it sets the flavor base for your cheesesteak.

Step 2: Cooking the Vegetables

After the chicken is cooked, remove it from the skillet and set it aside. In the same skillet, add the sliced green bell pepper and onion. Sauté these vegetables for about 5 minutes. You want them to become tender and slightly caramelized. This adds a wonderful sweetness and texture to your Buffalo Chicken Cheesesteak.

Step 3: Combining Ingredients

Once the vegetables are ready, it’s time to bring everything together. Return the cooked chicken to the skillet and pour in the buffalo sauce. Stir well to combine all the ingredients. Let this mixture cook for an additional 2-3 minutes. This allows the chicken to absorb the spicy flavors of the buffalo sauce, making every bite delicious!

Step 4: Assembling the Cheesesteak

Now comes the fun part! Preheat your oven to 350°F. While it’s heating, slice the hoagie rolls lengthwise, but don’t cut all the way through. Place the rolls on a baking sheet. Divide the buffalo chicken mixture evenly among the hoagie rolls. Then, top each sandwich with the sautéed vegetables. This layering creates a perfect balance of flavors and textures.

Step 5: Melting the Cheese

Finally, it’s time to add the cheese! Layer the provolone cheese slices on top of each sandwich. This cheese melts beautifully and adds a creamy richness to the dish. Place the baking sheet in the preheated oven and bake for 10-12 minutes. You’ll know they’re ready when the cheese is melted and bubbly. Once done, remove them from the oven and garnish with fresh parsley before serving.

And there you have it! A step-by-step guide to preparing a mouthwatering Buffalo Chicken Cheesesteak. Each step is simple, ensuring that you can create this delicious meal with ease. Enjoy your cooking adventure!

Variations of Buffalo Chicken Cheesesteak Recipe

While the classic Buffalo Chicken Cheesesteak is a hit on its own, there are plenty of ways to mix things up! Whether you want to turn up the heat or create a meat-free version, these variations will keep your taste buds excited. Let’s explore two delicious options: the Spicy Buffalo Chicken Cheesesteak and the Vegetarian Buffalo Chicken Cheesesteak.

Spicy Buffalo Chicken Cheesesteak

If you love a fiery kick, the Spicy Buffalo Chicken Cheesesteak is for you! To amp up the heat, consider adding sliced jalapeños or a sprinkle of red pepper flakes to the chicken mixture during cooking. This extra spice will elevate the flavor and give your cheesesteak an exciting twist. You can also use a hotter buffalo sauce or even make your own with additional hot sauce and spices. Just remember to adjust the amount based on your heat tolerance!

Another fun idea is to top your cheesesteak with spicy ranch dressing or a drizzle of sriracha before serving. This adds a creamy texture and a burst of flavor that complements the spicy chicken perfectly. Your guests will love this fiery version!

Vegetarian Buffalo Chicken Cheesesteak

For those who prefer a meatless option, the Vegetarian Buffalo Chicken Cheesesteak is a fantastic choice. Instead of chicken, you can use plant-based protein like tofu, tempeh, or even jackfruit. These ingredients absorb the buffalo sauce beautifully, giving you that signature flavor without the meat.

To prepare, simply follow the same steps as the original recipe. Sauté your chosen protein with the spices, then mix in the buffalo sauce. You can also add extra veggies like mushrooms or zucchini for added texture and nutrition. Top it off with the same provolone cheese or a dairy-free cheese alternative to keep it vegetarian-friendly.

With these variations, you can enjoy the Buffalo Chicken Cheesesteak in new and exciting ways. Whether you’re in the mood for something spicy or a vegetarian delight, these options ensure that everyone can enjoy this delicious dish!

Cooking Note for Buffalo Chicken Cheesesteak Recipe

When preparing your Buffalo Chicken Cheesesteak, there are a few important cooking notes to keep in mind. These tips will help you achieve the best flavor and texture, ensuring that your cheesesteak turns out perfectly every time.

First, make sure to use fresh ingredients. Fresh chicken, vegetables, and quality buffalo sauce will significantly enhance the overall taste of your dish. If possible, opt for homemade buffalo sauce. It allows you to control the spice level and flavor profile, making it tailored to your preferences.

Next, pay attention to the cooking times. Overcooking the chicken can lead to a dry texture, while undercooking can be unsafe. Always ensure the chicken is cooked through and reaches an internal temperature of 165°F. Using a meat thermometer can help you achieve this with ease.

Additionally, when sautéing the vegetables, don’t rush the process. Allow them to cook until they are tender and slightly caramelized. This step adds a wonderful sweetness and depth of flavor to your cheesesteak.

Another tip is to let the buffalo chicken mixture sit for a minute after cooking. This allows the flavors to meld together, making each bite even more delicious. When assembling the sandwiches, don’t be afraid to be generous with the buffalo chicken and cheese. A well-stuffed hoagie is always more satisfying!

Lastly, consider serving your Buffalo Chicken Cheesesteak with a side of crispy fries or a fresh salad. This adds a nice balance to the meal and makes it even more enjoyable. With these cooking notes in mind, you’re all set to create a fantastic Buffalo Chicken Cheesesteak that will impress your family and friends!

Serving Suggestions for Buffalo Chicken Cheesesteak Recipe

Once your Buffalo Chicken Cheesesteak is ready, it’s time to think about how to serve it! This dish is not only delicious but also versatile, making it perfect for various occasions. Here are some serving suggestions to elevate your meal and impress your guests.

  • Classic Sides: Pair your cheesesteak with classic sides like crispy French fries or sweet potato fries. The crunchiness of the fries complements the soft, cheesy sandwich perfectly.
  • Fresh Salad: A light, refreshing salad can balance the richness of the cheesesteak. Consider a simple green salad with mixed greens, cherry tomatoes, and a tangy vinaigrette. This adds a burst of freshness to your meal.
  • Coleslaw: Creamy coleslaw is another great option. Its cool, crunchy texture contrasts nicely with the warm, spicy cheesesteak. Plus, it adds a delightful crunch!
  • Pickles: Serve some dill pickles on the side for a tangy bite. The acidity of the pickles cuts through the richness of the cheese and chicken, enhancing the overall flavor experience.
  • Buffalo Sauce Dipping: For those who love extra heat, offer additional buffalo sauce for dipping. This allows everyone to customize their cheesesteak experience, making it even more enjoyable.
  • Beer Pairing: If you’re serving this dish at a gathering, consider pairing it with a cold beer. A light lager or a hoppy IPA complements the spicy flavors of the cheesesteak beautifully.

With these serving suggestions, your Buffalo Chicken Cheesesteak will be a hit at any meal. Whether it’s a casual dinner or a festive gathering, these ideas will help you create a memorable dining experience. Enjoy your delicious creation!

Tips for Perfecting Your Buffalo Chicken Cheesesteak Recipe

Creating the perfect Buffalo Chicken Cheesesteak is all about attention to detail. With a few simple tips, you can elevate your dish and impress your family and friends. Here are some helpful suggestions to ensure your cheesesteak turns out delicious every time!

  • Choose Quality Chicken: Start with fresh, high-quality chicken breasts. Organic or free-range chicken often has better flavor and texture. This will make a noticeable difference in your cheesesteak.
  • Marinate for Extra Flavor: If you have time, consider marinating the diced chicken in buffalo sauce for at least 30 minutes before cooking. This allows the chicken to absorb more flavor, making it even tastier.
  • Experiment with Spices: Don’t hesitate to add your favorite spices to the chicken mixture. A dash of cayenne pepper or chili powder can enhance the heat, while Italian seasoning can add a unique twist.
  • Use Fresh Vegetables: Fresh bell peppers and onions not only taste better but also add vibrant color to your dish. Try using different colored bell peppers for a visually appealing presentation.
  • Toast the Hoagie Rolls: For added texture, lightly toast the hoagie rolls in the oven before filling them. This creates a crispy exterior that holds up well against the juicy filling.
  • Don’t Skimp on Cheese: Be generous with the provolone cheese! A thick layer of melted cheese adds creaminess and richness to your cheesesteak, making it even more satisfying.
  • Let It Rest: After baking, let the cheesesteaks rest for a couple of minutes before serving. This allows the flavors to settle and makes it easier to handle.
  • Garnish Creatively: Don’t forget the finishing touches! A sprinkle of chopped parsley or green onions adds a pop of color and freshness. You can also drizzle ranch or blue cheese dressing on top for extra flavor.

By following these tips, you’ll be well on your way to mastering the Buffalo Chicken Cheesesteak. Each suggestion helps enhance the flavors and textures, ensuring a delightful meal that everyone will love. Happy cooking!

Breakdown of Time for Buffalo Chicken Cheesesteak Recipe

Understanding the time needed for each step in the Buffalo Chicken Cheesesteak recipe can help you plan your cooking efficiently. Here’s a breakdown of the time required for preparation and cooking, so you can enjoy this delicious meal without any stress!

Prep Time

The prep time for this Buffalo Chicken Cheesesteak recipe is approximately 15 minutes. During this time, you will gather all your ingredients, dice the chicken, and slice the vegetables. Having everything ready before you start cooking makes the process smoother and more enjoyable.

Cooking Time

The cooking time is about 20 minutes. This includes cooking the chicken, sautéing the vegetables, and baking the assembled cheesesteaks in the oven. Each step is quick, allowing you to create a flavorful meal in no time!

Total Time

In total, you can expect to spend around 35 minutes from start to finish. This makes the Buffalo Chicken Cheesesteak a perfect option for a weeknight dinner or a last-minute gathering. With just a little time and effort, you’ll have a delicious meal ready to serve!

Nutritional Information for Buffalo Chicken Cheesesteak Recipe

Understanding the nutritional content of your meals is essential for maintaining a balanced diet. The Buffalo Chicken Cheesesteak is not only delicious but also provides a good amount of protein and other nutrients. Here’s a breakdown of the nutritional information per serving:

Calories

550 calories. This calorie count includes the chicken, cheese, and hoagie roll, making it a hearty meal. While it’s a bit higher in calories, it’s packed with flavor and satisfaction, perfect for a filling lunch or dinner.

Protein

40 grams of protein. This high protein level comes primarily from the chicken and cheese, making it a great option for those looking to boost their protein intake. Protein is essential for muscle repair and overall health, so you can feel good about enjoying this cheesesteak!

Sodium

1,200 milligrams of sodium. This sodium level is mainly due to the buffalo sauce and cheese. If you’re concerned about sodium, consider using low-sodium buffalo sauce or cheese alternatives to reduce the overall sodium content.

In summary, the Buffalo Chicken Cheesesteak is a flavorful and protein-rich meal. While it does have a higher calorie and sodium content, it can be enjoyed as part of a balanced diet. Just remember to pair it with fresh sides for a well-rounded meal!

FAQs about Buffalo Chicken Cheesesteak Recipe

Can I use a different type of cheese for the Buffalo Chicken Cheesesteak?

Absolutely! While provolone cheese is a classic choice for Buffalo Chicken Cheesesteak, you can easily switch it up. Cheddar cheese adds a sharp flavor that pairs well with the spicy chicken. Mozzarella is another great option, offering a mild taste and excellent meltability. If you’re looking for a creamier texture, consider using gouda or even a blend of cheeses. Feel free to experiment and find the cheese that suits your taste best!

How can I make the Buffalo Chicken Cheesesteak spicier?

If you love heat, there are several ways to spice up your Buffalo Chicken Cheesesteak! First, you can add sliced jalapeños or diced serrano peppers to the chicken mixture while cooking. This will give your dish an extra kick. Another option is to use a hotter buffalo sauce or mix in some sriracha or hot sauce to the buffalo sauce. For an added layer of flavor, sprinkle red pepper flakes on top before serving. Just remember to adjust the spice level according to your preference!

What sides pair well with Buffalo Chicken Cheesesteak?

Buffalo Chicken Cheesesteak is a hearty meal that pairs well with a variety of sides. Classic options include crispy French fries or sweet potato fries, which add a satisfying crunch. A fresh salad with mixed greens and a tangy vinaigrette can balance the richness of the cheesesteak. Creamy coleslaw is another excellent choice, providing a cool contrast to the spicy sandwich. For a fun twist, consider serving it with pickles or a side of buffalo sauce for dipping. These sides will enhance your meal and make it even more enjoyable!

Conclusion on Buffalo Chicken Cheesesteak Recipe

In conclusion, the Buffalo Chicken Cheesesteak is a delightful dish that brings together bold flavors and satisfying textures. This recipe is not only easy to prepare but also allows for plenty of customization, making it perfect for any occasion. Whether you’re hosting a game day gathering, enjoying a family dinner, or simply craving something delicious, this cheesesteak is sure to impress.

With its tender chicken, spicy buffalo sauce, sautéed vegetables, and gooey cheese, each bite is a burst of flavor. Plus, the versatility of this recipe means you can easily adjust the spice level or swap out ingredients to suit your taste. From the classic version to spicy or vegetarian variations, there’s a Buffalo Chicken Cheesesteak for everyone!

As you embark on your cooking adventure, remember the tips and serving suggestions provided. They will help you create a memorable meal that your family and friends will love. So, gather your ingredients, follow the steps, and enjoy the process of making this mouthwatering dish.

We hope you enjoy your Buffalo Chicken Cheesesteak as much as we do! Happy cooking, and don’t forget to share your delicious creations with others. Bon appétit!

Creamy Garlic Chicken Recipe for a Delicious Dinner.

Introduction to Creamy Garlic Chicken Recipe

Creamy Garlic Chicken Recipe. This dish is not just a meal; it’s an experience that brings comfort and joy to your dining table. Imagine tender chicken breasts enveloped in a rich, creamy sauce infused with the aromatic essence of garlic. It’s a dish that’s perfect for family dinners, special occasions, or even a cozy night in.

What Makes the Creamy Garlic Chicken Recipe Special?

What sets this recipe apart is its simplicity and flavor. The combination of garlic and cream creates a luscious sauce that elevates the chicken to new heights. Each bite is a burst of savory goodness, making it hard to resist going back for seconds. Plus, it’s quick to prepare, making it ideal for busy weeknights.

Creamy Garlic Chicken Recipe can adapt to your preferences. It’s also a great way to sneak in some extra vegetables or alternative proteins, ensuring everyone at the table is satisfied.

In the following sections, we will dive deeper into the ingredients, preparation steps, and variations of this delightful recipe. Get ready to impress your family and friends with a dish that’s as delicious as it is easy to make!

Ingredients for Creamy Garlic Chicken Recipe

Creamy Garlic Chicken Recipe, you’ll need a few simple yet flavorful ingredients. Each component plays a vital role in crafting the rich and creamy sauce that makes this dish so special. Here’s what you’ll need:

  • 2 pounds boneless, skinless chicken breasts: This is the star of the dish, providing a tender and juicy base.
  • 2 tablespoons olive oil: Used for cooking the chicken, it adds a nice flavor and helps achieve a golden crust.
  • 4 cloves garlic, minced: Garlic is the heart of this recipe, giving it that irresistible aroma and taste.
  • 1 cup heavy cream: This ingredient creates the creamy texture that envelops the chicken.
  • 1 cup chicken broth: It adds depth to the sauce and enhances the overall flavor.
  • 1 teaspoon dried thyme: Thyme brings a subtle earthiness that complements the dish beautifully.
  • 1 teaspoon dried oregano: Oregano adds a hint of warmth and a touch of Mediterranean flair.
  • Salt and pepper to taste: Essential for seasoning, these will enhance all the flavors in the dish.
  • 1 cup grated Parmesan cheese: This cheese melts into the sauce, adding richness and a savory kick.
  • Fresh parsley, chopped (for garnish): A sprinkle of parsley adds a pop of color and freshness to the finished dish.

Creamy Garlic Chicken Recipe a favorite at the dinner table!

Step-by-Step Preparation of Creamy Garlic Chicken Recipe

Creamy Garlic Chicken Recipe. This process is straightforward and will guide you to create a delicious meal that’s sure to impress. Let’s get started!

Step 1: Preparing the Chicken

First, take your boneless, skinless chicken breasts and pat them dry with a paper towel. This helps the chicken brown nicely. Next, season both sides of the chicken with salt and pepper. This simple seasoning enhances the chicken’s natural flavor.

In a large skillet, heat 2 tablespoons of olive oil over medium-high heat. Once the oil is hot, carefully add the seasoned chicken breasts to the skillet. Cook them for about 6-7 minutes on each side. You want them to be golden brown and cooked through. Once done, remove the chicken from the skillet and set it aside on a plate. This step is crucial as it locks in the juices, keeping the chicken tender.

Step 2: Making the Creamy Garlic Sauce

With the chicken resting, it’s time to make the creamy garlic sauce. In the same skillet, add the minced garlic. Sauté it for about 1 minute until it becomes fragrant. Be careful not to let it burn, as burnt garlic can taste bitter.

Next, pour in 1 cup of chicken broth. Bring it to a gentle simmer, scraping up any browned bits from the bottom of the skillet. These bits add incredible flavor to your sauce. Allow the broth to reduce slightly for about 3-4 minutes. This step intensifies the flavor of the sauce.

Step 3: Cooking the Chicken in the Sauce

Creamy Garlic Chicken Recipe so delightful.

Once the sauce has thickened, add in 1 cup of grated Parmesan cheese. Stir until the cheese melts and the sauce becomes smooth. Finally, return the cooked chicken to the skillet, coating it in the creamy sauce. Cook for an additional 2-3 minutes to ensure the chicken is heated through.

Step 4: Final Touches and Serving

Creamy Garlic Chicken hot, and watch as your family and friends enjoy every bite!

With these simple steps, you’ve created a delicious meal that’s perfect for any occasion. The creamy garlic sauce paired with tender chicken is sure to become a favorite in your household!

Variations of Creamy Garlic Chicken Recipe

Creamy Garlic Chicken Recipe is incredibly versatile. You can easily modify it to suit your taste or dietary needs. Here are some delightful variations to consider, ensuring that every meal feels fresh and exciting!

Adding Vegetables to the Creamy Garlic Chicken Recipe

Creamy Garlic Chicken Recipe not only boosts nutrition but also adds vibrant colors and textures. Here are a few great options:

  • Spinach: Adding fresh spinach is a fantastic way to include greens. Simply toss in a couple of handfuls during the last few minutes of cooking. The spinach will wilt quickly, blending beautifully with the creamy sauce.
  • Mushrooms: Sauté sliced mushrooms along with the garlic for an earthy flavor. They absorb the sauce, enhancing the overall taste of the dish.
  • Broccoli: Steamed or sautéed broccoli florets can be added for a crunchy texture. They pair well with the creamy sauce and add a pop of color.
  • Sun-Dried Tomatoes: For a burst of sweetness, add chopped sun-dried tomatoes. They bring a tangy flavor that complements the richness of the sauce.

Creamy Garlic Chicken Recipe more filling and nutritious. Feel free to mix and match based on what you have on hand!

Alternative Proteins for the Creamy Garlic Chicken Recipe

Creamy Garlic Chicken Recipe. Here are some tasty options:

  • Turkey: Substitute chicken with turkey breasts for a leaner option. The cooking time will be similar, ensuring a juicy result.
  • Pork Chops: Boneless pork chops can be used instead of chicken. They add a different flavor profile while still being deliciously creamy.
  • Tofu: For a vegetarian option, use firm tofu. Press and cube the tofu, then sauté it until golden before adding it to the sauce.
  • Shrimp: Shrimp cooks quickly and pairs wonderfully with garlic and cream. Add them to the sauce just a few minutes before serving for a delightful seafood twist.

Creamy Garlic Chicken Recipe, making it suitable for various dietary preferences. Enjoy experimenting with different flavors and textures!

Cooking Note for Creamy Garlic Chicken Recipe

Creamy Garlic Chicken Recipe, there are a few cooking notes to keep in mind to ensure your dish turns out perfectly every time. These tips will help you achieve the best flavor and texture, making your meal even more enjoyable.

First, always use fresh garlic for the best flavor. Fresh garlic has a vibrant taste that dried garlic simply cannot match. If you find yourself without fresh garlic, you can use garlic powder as a substitute, but the flavor will be milder.

Next, be mindful of the heat when cooking the chicken. Cooking over medium-high heat allows the chicken to brown nicely without burning. If the heat is too high, the outside may cook too quickly while the inside remains undercooked. Always check the internal temperature of the chicken; it should reach 165°F (75°C) for safe consumption.

Additionally, when adding the heavy cream, make sure to lower the heat to prevent the cream from curdling. A gentle simmer is ideal for allowing the flavors to meld without compromising the sauce’s creamy texture.

Creamy Garlic Chicken Recipe so irresistible.

By following these cooking notes, you’ll create a dish that’s not only delicious but also visually appealing. Enjoy the process, and savor the delightful aromas that fill your kitchen as you prepare this comforting meal!

Serving Suggestions for Creamy Garlic Chicken Recipe

Creamy Garlic Chicken Recipe, it’s time to think about how to serve it. The right accompaniments can elevate your meal, making it even more enjoyable. Here are some fantastic serving suggestions that pair beautifully with this creamy dish:

  • Over Pasta: Serve the creamy garlic chicken over a bed of fettuccine or spaghetti. The pasta will soak up the rich sauce, creating a delightful combination that’s hard to resist.
  • With Rice: A side of fluffy white rice or brown rice complements the creamy sauce perfectly. The rice absorbs the flavors, making each bite satisfying.
  • With Mashed Potatoes: Creamy mashed potatoes are a classic pairing. They provide a comforting base that pairs wonderfully with the garlic sauce.
  • With Crusty Bread: Serve with a loaf of crusty bread or garlic bread. This allows everyone to scoop up the creamy sauce, adding a delightful crunch to each bite.
  • On a Bed of Greens: For a lighter option, serve the chicken on a bed of fresh greens like spinach or arugula. The freshness of the greens balances the richness of the sauce.

Don’t forget to garnish your dish with freshly chopped parsley for a pop of color and added freshness. You can also sprinkle some extra Parmesan cheese on top for an extra cheesy touch!

Creamy Garlic Chicken Recipe but also create a visually appealing plate that’s sure to impress your guests. Enjoy your meal and the smiles it brings to the table!

Tips for Perfecting Your Creamy Garlic Chicken Recipe

Creamy Garlic Chicken Recipe turns out perfectly every time, consider these helpful tips. They will enhance the flavors and textures, making your dish even more delightful!

First, always start with high-quality chicken. Fresh, organic chicken breasts will yield the best flavor and texture. If possible, choose free-range chicken for a more robust taste.

Next, don’t skip the seasoning. Properly seasoning the chicken with salt and pepper before cooking is essential. This step enhances the chicken’s natural flavors and ensures a delicious base for your creamy sauce.

When cooking the chicken, avoid overcrowding the skillet. If you have more chicken than can fit comfortably, cook in batches. This allows for even browning and prevents steaming, which can lead to a less appealing texture.

For the garlic, remember that fresh is best. If you can, use a garlic press to mince the cloves. This releases more oils and flavor, making your sauce even more aromatic. Also, keep an eye on the garlic while sautéing; it can burn quickly, turning bitter.

As you prepare the sauce, consider adding a splash of white wine after sautéing the garlic. This adds depth and complexity to the flavor. Just let it simmer for a minute to cook off the alcohol before adding the chicken broth.

When incorporating the heavy cream, stir continuously to create a smooth sauce. If you prefer a lighter sauce, you can mix in some low-fat milk or Greek yogurt, as mentioned earlier. This will still give you a creamy texture without all the calories.

Lastly, let the dish rest for a few minutes before serving. This allows the flavors to meld together, making each bite even more delicious. Plus, it gives you time to set the table and prepare any sides!

Creamy Garlic Chicken Recipe to new heights. Enjoy the process and the wonderful meal you create!

Breakdown of Time for Creamy Garlic Chicken Recipe

Creamy Garlic Chicken Recipe can help you plan your cooking efficiently. Here’s a breakdown of the time you’ll need for preparation and cooking, ensuring a smooth cooking experience.

Prep Time

The prep time for this delicious dish is quite manageable. You’ll need about 10-15 minutes to gather your ingredients and prepare the chicken. This includes:

  • Patting the chicken dry and seasoning it.
  • Minced garlic preparation.
  • Measuring out the cream, broth, and spices.

With everything ready, you’ll be set to start cooking!

Cooking Time

Creamy Garlic Chicken Recipe is approximately 20-25 minutes. This includes:

  • Cooking the chicken in the skillet (about 12-14 minutes).
  • Making the creamy garlic sauce (around 8-10 minutes).

This efficient cooking time allows you to enjoy a delicious meal without spending hours in the kitchen.

Total Time

In total, you can expect to spend about 30-40 minutes from start to finish. This includes both prep and cooking time. It’s a quick and satisfying meal that’s perfect for busy weeknights or when you want to impress guests without a lot of fuss.

Creamy Garlic Chicken Recipe into your schedule, making it a go-to option for any occasion!

Nutritional Information for Creamy Garlic Chicken Recipe

Creamy Garlic Chicken Recipe not only delights your taste buds but also provides valuable nutrients. Here’s a breakdown of the nutritional information per serving, helping you make informed choices.

Calories

Creamy Garlic Chicken Recipe contains approximately 550 calories. This calorie count includes the rich ingredients like heavy cream and Parmesan cheese, which contribute to the creamy texture and flavor. While it’s a hearty meal, it’s important to enjoy it in moderation, especially if you’re watching your calorie intake.

Protein

Creamy Garlic Chicken Recipe an excellent choice for those looking to increase their protein intake, whether for muscle building or overall health. The chicken breasts are a lean source of protein, making this dish both satisfying and nutritious.

Sodium

When it comes to sodium, each serving contains around 800 milligrams. This amount can vary based on the chicken broth used and how much salt you add during cooking. If you’re watching your sodium intake, consider using low-sodium chicken broth and adjusting the salt to taste. This way, you can enjoy the creamy goodness without exceeding your daily sodium limit.

Creamy Garlic Chicken Recipe as part of a balanced diet. It’s a delicious option that provides essential nutrients while satisfying your cravings!

FAQs about Creamy Garlic Chicken Recipe

Can I make the Creamy Garlic Chicken Recipe ahead of time?

Creamy Garlic Chicken Recipe can be made ahead of time, making it a great option for meal prep. To do this, prepare the dish as directed, but stop just before adding the chicken back into the sauce. Allow the sauce to cool, then store it in an airtight container in the refrigerator for up to 3 days.

When you’re ready to serve, simply reheat the sauce in a skillet over medium heat. Add the cooked chicken and heat until warmed through. This method helps the flavors meld together, making the dish even tastier!

What can I serve with the Creamy Garlic Chicken Recipe?

Creamy Garlic Chicken Recipe. Here are some popular choices:

  • Pasta: Serve over fettuccine or spaghetti to soak up the creamy sauce.
  • Rice: Fluffy white or brown rice makes a great base for the dish.
  • Mashed Potatoes: Creamy mashed potatoes complement the sauce beautifully.
  • Steamed Vegetables: Broccoli or green beans add a healthy touch and color to your plate.
  • Crusty Bread: A side of garlic bread is perfect for dipping into the sauce.

These sides not only enhance the meal but also create a well-rounded dining experience that everyone will enjoy!

How can I make the Creamy Garlic Chicken Recipe healthier?

Creamy Garlic Chicken Recipe healthier is easy with a few simple adjustments. Here are some tips:

  • Use Low-Fat Dairy: Substitute half of the heavy cream with low-fat milk or Greek yogurt. This reduces calories while still keeping a creamy texture.
  • Choose Leaner Cuts: Opt for skinless chicken thighs instead of breasts for a juicier option with more flavor.
  • Add More Vegetables: Incorporate more veggies like spinach, zucchini, or bell peppers to increase fiber and nutrients.
  • Reduce Sodium: Use low-sodium chicken broth and limit added salt to keep sodium levels in check.
  • Serve with Whole Grains: Pair the dish with whole grain pasta or brown rice for added fiber.

Creamy Garlic Chicken Recipe while keeping it nutritious and satisfying!

Conclusion on Creamy Garlic Chicken Recipe

Creamy Garlic Chicken Recipe is a delightful dish that combines simplicity with rich flavors. It’s perfect for any occasion, whether you’re hosting a dinner party or enjoying a cozy meal at home. The tender chicken, enveloped in a creamy garlic sauce, creates a comforting experience that is hard to resist.

Creamy Garlic Chicken Recipe ensures that it can be enjoyed time and time again without feeling repetitive.

As you prepare this dish, remember to savor the process. Cooking is not just about the final product; it’s about the joy of creating something delicious. With each step, from sautéing garlic to simmering the sauce, you’re crafting a meal that will bring smiles to your table.

Creamy Garlic Chicken Recipe. Whether served over pasta, rice, or alongside fresh vegetables, this dish is sure to become a favorite in your household. Happy cooking!

Stuffed Chicken Breast with Spinach and Cream Cheese Recipe is easy!

Introduction to Stuffed Chicken Breast with Spinach and Cream Cheese Recipe

Stuffed Chicken Breast with Spinach and Cream Cheese Recipe is a fantastic choice. This dish combines tender chicken breasts with a creamy, flavorful filling that will impress your family and friends.

Not only is this recipe simple, but it also packs a punch of nutrition. Spinach is loaded with vitamins and minerals, while cream cheese adds a rich, creamy texture. Together, they create a delightful filling that complements the chicken perfectly. Plus, the addition of mozzarella and Parmesan cheeses gives it an extra layer of flavor that you won’t want to miss.

This recipe is versatile, too! You can easily customize the filling to suit your taste. Whether you prefer a little kick with some spices or want to add in some sun-dried tomatoes, the options are endless. It’s a great way to use up leftover ingredients in your fridge while creating a wholesome meal.

In this article, we’ll guide you through the ingredients, preparation steps, and cooking methods for this scrumptious dish. You’ll also find tips and variations to make it your own. So, let’s dive into the world of stuffed chicken breasts and discover how to make this delightful recipe!

Ingredients for Stuffed Chicken Breast with Spinach and Cream Cheese Recipe

Stuffed Chicken Breast with Spinach and Cream Cheese Recipe, you’ll need a few simple ingredients. Each component plays a vital role in delivering flavor and texture. Here’s what you’ll need:

  • 4 boneless, skinless chicken breasts (about 6 ounces each)
  • 8 ounces cream cheese, softened
  • 1 cup fresh spinach, chopped
  • 1/2 cup shredded mozzarella cheese
  • 1/4 cup grated Parmesan cheese
  • 2 cloves garlic, minced
  • 1 teaspoon Italian seasoning
  • Salt and pepper to taste
  • 2 tablespoons olive oil
  • 1 teaspoon paprika

These ingredients are not only easy to find but also come together to create a deliciously creamy filling. The chicken breasts serve as the perfect vessel for the rich mixture of cream cheese and spinach. The mozzarella and Parmesan add a delightful cheesiness that enhances the overall flavor.

Feel free to adjust the quantities based on your preferences or dietary needs. For instance, if you love garlic, you can add an extra clove. Or, if you want a bit more zest, consider adding some crushed red pepper flakes to the filling. The beauty of this recipe lies in its flexibility!

Now that you have your ingredients ready, let’s move on to the next step: preparing the chicken breasts for stuffing.

Step-by-Step Preparation of Stuffed Chicken Breast with Spinach and Cream Cheese Recipe

Stuffed Chicken Breast with Spinach and Cream Cheese Recipe. This section will guide you through each step, ensuring that your dish turns out perfectly every time. Let’s get started!

Step 1: Preparing the Chicken Breasts

First, you need to prepare the chicken breasts. Start by rinsing them under cold water. Pat them dry with paper towels. This step is important as it helps the chicken to sear better later on.

Next, take a sharp knife and carefully slice each chicken breast horizontally. You want to create a pocket, but be cautious not to cut all the way through. This pocket will hold the delicious filling. Once you’ve made the pockets, season the outside of the chicken breasts with salt, pepper, and a sprinkle of paprika. This will enhance the flavor of the chicken.

Step 2: Making the Spinach and Cream Cheese Filling

Now, let’s move on to the filling. In a mixing bowl, combine the softened cream cheese, chopped spinach, shredded mozzarella, grated Parmesan, minced garlic, and Italian seasoning. Use a fork or spatula to mix everything together until it’s well combined. The mixture should be creamy and slightly thick. Taste it and adjust the seasoning with salt and pepper if needed. This filling is what makes the chicken so flavorful!

Step 3: Stuffing the Chicken Breasts

With the filling ready, it’s time to stuff the chicken breasts. Take a spoonful of the cream cheese mixture and carefully fill each pocket. Make sure to pack it in well, but don’t overfill, as it may spill out during cooking. If necessary, use toothpicks to secure the openings of the chicken breasts. This will help keep the filling inside while cooking.

Step 4: Cooking the Stuffed Chicken Breasts

Now for the exciting part—cooking! Heat the olive oil in a large oven-safe skillet over medium-high heat. Once the oil is hot, carefully place the stuffed chicken breasts in the skillet. Sear them for about 3-4 minutes on each side until they are golden brown. This step adds a lovely color and flavor to the chicken.

After searing, transfer the skillet to your preheated oven. Bake the chicken for 20-25 minutes, or until the internal temperature reaches 165°F (74°C). This ensures that the chicken is fully cooked and safe to eat. Once done, remove the skillet from the oven and let the chicken rest for about 5 minutes before slicing. This resting period allows the juices to redistribute, making the chicken even juicier!

Stuffed Chicken Breast with Spinach and Cream Cheese Recipe. The next step is to explore some variations and tips to make this dish even more delightful.

Variation of Stuffed Chicken Breast with Spinach and Cream Cheese Recipe

Stuffed Chicken Breast with Spinach and Cream Cheese Recipe is already a winner, there are many ways to switch things up! Whether you want to try different fillings or explore various cooking methods, this section will provide you with exciting options to enhance your dish.

Alternative Fillings for Stuffed Chicken Breast

One of the best things about this recipe is its versatility. You can easily customize the filling to suit your taste. Here are some alternative fillings you might enjoy:

  • Sun-Dried Tomatoes: Add chopped sun-dried tomatoes for a burst of flavor. They bring a sweet and tangy taste that pairs beautifully with the creamy filling.
  • Artichoke Hearts: Chopped artichoke hearts can add a unique texture and flavor. They work well with the cream cheese and spinach.
  • Mushrooms: Sautéed mushrooms can add an earthy flavor. Just make sure to drain any excess moisture before mixing them into the filling.
  • Feta Cheese: For a Mediterranean twist, mix in crumbled feta cheese. It adds a salty, tangy flavor that complements the other ingredients.
  • Herbs: Fresh herbs like basil, parsley, or dill can brighten up the filling. They add freshness and enhance the overall taste.

Feel free to mix and match these ingredients to create your perfect stuffing. The possibilities are endless!

Cooking Methods for Stuffed Chicken Breast with Spinach and Cream Cheese Recipe

While baking is a popular method for cooking stuffed chicken breasts, there are other ways to prepare this dish. Here are some alternative cooking methods you can try:

  • Grilling: For a smoky flavor, grill the stuffed chicken breasts. Preheat your grill and cook them over medium heat for about 6-8 minutes on each side. Make sure to check the internal temperature to ensure they are fully cooked.
  • Slow Cooking: If you have more time, consider using a slow cooker. Place the stuffed chicken breasts in the slow cooker with a bit of broth. Cook on low for 4-6 hours for tender, juicy chicken.
  • Air Frying: For a healthier option, use an air fryer. Preheat the air fryer to 375°F (190°C) and cook the stuffed chicken for about 15-20 minutes, flipping halfway through.
  • Pan-Seering and Baking: You can also sear the chicken in a skillet and then finish cooking it in the oven. This method gives you a nice crust while keeping the inside moist.

Experimenting with different cooking methods can add variety to your meals. Each method brings out unique flavors and textures, making your stuffed chicken breast even more enjoyable!

Cooking Note for Stuffed Chicken Breast with Spinach and Cream Cheese Recipe

Stuffed Chicken Breast with Spinach and Cream Cheese Recipe, there are a few important cooking notes to keep in mind. These tips will help ensure that your dish turns out perfectly every time, making it a delightful meal for you and your loved ones.

First, always use a meat thermometer to check the internal temperature of the chicken. This is crucial for food safety. The chicken should reach an internal temperature of 165°F (74°C) to ensure it is fully cooked. Undercooked chicken can pose health risks, so it’s better to be safe than sorry!

Next, consider the thickness of your chicken breasts. If they are particularly thick, you may need to adjust the cooking time. Thicker breasts will require a longer baking time to cook through. Conversely, if your chicken breasts are thinner, they may cook faster. Keep an eye on them to avoid overcooking, which can lead to dry chicken.

Additionally, letting the chicken rest after cooking is essential. This resting period allows the juices to redistribute throughout the meat, resulting in a juicier and more flavorful dish. If you slice the chicken too soon, the juices may run out, leaving you with a drier meal.

Lastly, don’t hesitate to experiment with seasonings. While the recipe provides a solid base, feel free to add your favorite spices or herbs. A pinch of cayenne pepper can add a nice kick, while fresh herbs can enhance the flavor profile. The key is to make the dish your own!

Stuffed Chicken Breast with Spinach and Cream Cheese Recipe. Enjoy the process and the delicious results!

Serving Suggestions for Stuffed Chicken Breast with Spinach and Cream Cheese Recipe

Stuffed Chicken Breast with Spinach and Cream Cheese Recipe, it’s time to think about how to serve it. The right sides can elevate your meal and create a well-rounded dining experience. Here are some delightful serving suggestions that pair beautifully with this dish:

  • Roasted Vegetables: A medley of roasted vegetables, such as carrots, bell peppers, and zucchini, adds color and nutrition to your plate. Toss them in olive oil, season with salt and pepper, and roast until tender.
  • Garlic Mashed Potatoes: Creamy garlic mashed potatoes make a comforting side. The buttery flavor complements the stuffed chicken perfectly, creating a satisfying meal.
  • Quinoa Salad: A light quinoa salad with cherry tomatoes, cucumber, and a lemon vinaigrette offers a refreshing contrast to the rich chicken. It’s a healthy option that adds a nice crunch.
  • Steamed Asparagus: Steamed asparagus drizzled with a bit of lemon juice is a simple yet elegant side. Its bright flavor pairs well with the creamy filling of the chicken.
  • Cauliflower Rice: For a low-carb option, serve the stuffed chicken over cauliflower rice. It’s a great way to keep the meal light while still being filling.

Don’t forget about sauces! A drizzle of balsamic glaze or a light cream sauce can enhance the flavors of the stuffed chicken. You can also serve it with a side of marinara sauce for dipping, adding an Italian twist to your meal.

Stuffed Chicken Breast with Spinach and Cream Cheese Recipe will be a hit at the dinner table!

Tips for Perfect Stuffed Chicken Breast with Spinach and Cream Cheese Recipe

Stuffed Chicken Breast with Spinach and Cream Cheese Recipe is all about attention to detail. With a few helpful tips, you can elevate your dish and impress everyone at the dinner table. Here are some essential tips to ensure your stuffed chicken turns out delicious every time:

  • Choose Quality Chicken: Start with fresh, high-quality chicken breasts. Look for ones that are plump and have a nice color. Organic or free-range chicken can enhance the flavor and texture of your dish.
  • Soften the Cream Cheese: Make sure your cream cheese is softened before mixing. This will make it easier to blend with the other ingredients, resulting in a smooth and creamy filling.
  • Don’t Overstuff: While it’s tempting to pack in a lot of filling, avoid overstuffing the chicken breasts. This can cause the filling to spill out during cooking. A generous spoonful is usually enough!
  • Use a Meat Thermometer: To ensure your chicken is cooked perfectly, use a meat thermometer. This tool will help you avoid undercooking or overcooking the chicken. Aim for an internal temperature of 165°F (74°C).
  • Let It Rest: After cooking, let the chicken rest for about 5 minutes before slicing. This allows the juices to redistribute, making the chicken more tender and juicy.
  • Experiment with Seasonings: Don’t hesitate to get creative with your seasonings. Adding a pinch of cayenne pepper or some fresh herbs can enhance the flavor profile. Tailor the spices to your taste!
  • Pair with the Right Sides: Think about what you’ll serve alongside your stuffed chicken. Complementary sides, like roasted vegetables or a fresh salad, can enhance the overall meal experience.
  • Make Ahead: If you’re short on time, consider preparing the stuffed chicken ahead of time. You can assemble it in advance and store it in the fridge until you’re ready to cook. Just remember to adjust the cooking time if it’s cold from the fridge.

Stuffed Chicken Breast with Spinach and Cream Cheese Recipe. Each step contributes to a flavorful and satisfying dish that everyone will love. Happy cooking!

Breakdown of Time for Stuffed Chicken Breast with Spinach and Cream Cheese Recipe

Stuffed Chicken Breast with Spinach and Cream Cheese Recipe can help you plan your cooking efficiently. Here’s a detailed breakdown of the time you’ll need for preparation and cooking:

Prep Time

The prep time for this recipe is approximately 20 minutes. This includes gathering your ingredients, preparing the chicken breasts, and making the creamy spinach filling. Taking your time during this stage ensures that everything is ready for cooking. Remember, a well-prepared kitchen makes for a smoother cooking experience!

Cooking Time

Once you’ve prepped your ingredients, the cooking time will take about 25-30 minutes. This includes searing the stuffed chicken breasts for about 6-8 minutes and then baking them in the oven for 20-25 minutes. It’s essential to monitor the internal temperature to ensure the chicken is cooked through and safe to eat.

Total Time

Stuffed Chicken Breast with Spinach and Cream Cheese Recipe to take around 50-60 minutes from start to finish. This includes both prep and cooking time. It’s a manageable timeframe for a delicious and impressive meal that’s sure to please your family or guests!

Nutritional Information for Stuffed Chicken Breast with Spinach and Cream Cheese Recipe

Stuffed Chicken Breast with Spinach and Cream Cheese Recipe is essential for those who are health-conscious or following specific dietary plans. This section will break down the key nutritional components of the dish, helping you make informed choices while enjoying this delicious meal.

Calories

Stuffed Chicken Breast with Spinach and Cream Cheese Recipe contains approximately 350 calories. This makes it a satisfying option for dinner without being overly heavy. The balance of protein and healthy fats contributes to a filling meal that can keep you energized throughout the evening.

Protein

One of the standout features of this recipe is its high protein content. Each serving provides about 36 grams of protein. This is excellent for muscle repair and growth, making it a great choice for those who are active or looking to maintain a healthy lifestyle. The chicken breast is a lean source of protein, while the addition of cheese also contributes to this nutritional benefit.

Sodium

When it comes to sodium, each serving contains around 600 milligrams. While this is a reasonable amount for a savory dish, it’s important to be mindful of your overall sodium intake, especially if you are watching your salt consumption. You can reduce the sodium content by using low-sodium cheese or adjusting the amount of added salt in the recipe.

Stuffed Chicken Breast with Spinach and Cream Cheese Recipe offers a well-rounded nutritional profile. It provides a good balance of calories, protein, and flavor, making it a delightful addition to your meal rotation. Enjoy this dish knowing that it not only tastes great but also supports your dietary goals!

FAQs about Stuffed Chicken Breast with Spinach and Cream Cheese Recipe

Can I use frozen spinach for the Stuffed Chicken Breast with Spinach and Cream Cheese Recipe?

Yes, you can use frozen spinach for this recipe! Just make sure to thaw it completely and drain any excess moisture before mixing it into the filling. This will help prevent the filling from becoming too watery. Frozen spinach is a convenient option and can save you time in the kitchen.

What can I serve with Stuffed Chicken Breast with Spinach and Cream Cheese Recipe?

Stuffed Chicken Breast with Spinach and Cream Cheese Recipe. Consider serving it with roasted vegetables, garlic mashed potatoes, or a fresh salad. Quinoa or cauliflower rice also make great options for a healthy meal. These sides will complement the rich flavors of the stuffed chicken and create a well-rounded dining experience.

How do I know when the stuffed chicken is fully cooked?

The best way to check if the stuffed chicken is fully cooked is by using a meat thermometer. Insert the thermometer into the thickest part of the chicken breast. It should read 165°F (74°C) to ensure it is safe to eat. If you don’t have a thermometer, you can cut into the chicken to check that the juices run clear and the meat is no longer pink.

Can I make Stuffed Chicken Breast with Spinach and Cream Cheese Recipe ahead of time?

Absolutely! You can prepare the stuffed chicken breasts ahead of time. Assemble the chicken with the filling and store it in the refrigerator for up to 24 hours before cooking. Just remember to adjust the cooking time if the chicken is cold from the fridge. This makes it a great option for meal prep or when you have guests coming over!

Conclusion on Stuffed Chicken Breast with Spinach and Cream Cheese Recipe

Stuffed Chicken Breast with Spinach and Cream Cheese Recipe is a delightful dish that combines flavor, nutrition, and versatility. With its creamy filling and tender chicken, it’s sure to become a favorite in your household. Whether you’re cooking for family or entertaining guests, this recipe is a guaranteed crowd-pleaser.

Throughout this article, we’ve explored the ingredients, preparation steps, and various ways to customize this dish. From alternative fillings to different cooking methods, the possibilities are endless. You can easily adapt the recipe to suit your taste preferences or dietary needs, making it a truly flexible option for any meal.

Remember to pay attention to cooking notes, such as checking the internal temperature and allowing the chicken to rest. These small details can make a big difference in the final result. With a little practice, you’ll master this recipe and impress everyone with your culinary skills.

Stuffed Chicken Breast with Spinach and Cream Cheese Recipe is not just a meal; it’s an experience that brings joy to the table. Happy cooking!

Parmesan Crusted Chicken with Garlic Sauce is delicious!

Introduction to Parmesan Crusted Chicken with Garlic Sauce

Are you looking for a delicious and satisfying meal that’s easy to prepare? Look no further than Parmesan Crusted Chicken with Garlic Sauce! This dish combines tender chicken breasts with a crispy, cheesy crust that’s simply irresistible. The creamy garlic sauce adds a rich flavor that elevates the entire meal, making it perfect for family dinners or special occasions.

Not only is this recipe packed with flavor, but it’s also straightforward to make. With just a few ingredients, you can create a dish that looks and tastes gourmet. Whether you’re a seasoned cook or a beginner in the kitchen, you’ll find joy in preparing this delightful meal.

In this article, we’ll guide you through the ingredients, preparation steps, and even some variations to try. Plus, we’ll share tips to ensure your Parmesan Crusted Chicken with Garlic Sauce turns out perfectly every time. So, roll up your sleeves and get ready to impress your family and friends with this mouthwatering dish!

Ingredients for Parmesan Crusted Chicken with Garlic Sauce

To create the delightful Parmesan Crusted Chicken with Garlic Sauce, you’ll need a handful of simple yet flavorful ingredients. Here’s what you’ll need:

  • 2 large boneless, skinless chicken breasts (about 1 pound total)
  • 1 cup grated Parmesan cheese
  • 1 cup breadcrumbs
  • 1 teaspoon garlic powder
  • 1 teaspoon Italian seasoning
  • Salt and pepper to taste
  • 2 large eggs
  • 1 tablespoon olive oil
  • 2 tablespoons butter
  • 4 cloves garlic, minced
  • 1 cup heavy cream
  • 1 teaspoon Dijon mustard
  • 1 tablespoon chopped fresh parsley (for garnish)

These ingredients come together to create a dish that’s not only delicious but also visually appealing. The combination of crispy Parmesan and creamy garlic sauce makes every bite a treat. Feel free to adjust the seasonings to suit your taste. For instance, if you enjoy a bit of heat, consider adding crushed red pepper flakes to the breadcrumb mixture. This will give your Parmesan Crusted Chicken with Garlic Sauce an extra kick!

Now that you have your ingredients ready, let’s move on to the preparation steps to bring this dish to life!

Preparation of Parmesan Crusted Chicken with Garlic Sauce

Now that you have gathered all your ingredients, it’s time to dive into the preparation of your Parmesan Crusted Chicken with Garlic Sauce. This process is simple and enjoyable, allowing you to create a dish that will impress everyone at the table. Let’s break it down into easy steps!

Step 1: Preparing the Chicken

First, you need to prepare the chicken breasts. Start by rinsing them under cold water. Pat them dry with paper towels. This step is important as it helps the coating stick better. Next, you can gently pound the chicken breasts to an even thickness. This ensures they cook evenly and stay juicy. Use a meat mallet or a rolling pin, and cover the chicken with plastic wrap to avoid splatter.

Step 2: Making the Parmesan Crust

In this step, you’ll create the delicious Parmesan crust. In a shallow bowl, combine the grated Parmesan cheese, breadcrumbs, garlic powder, Italian seasoning, salt, and pepper. Mix these ingredients well until they are evenly distributed. This mixture will give your chicken a crispy and flavorful coating. The cheese adds a rich taste, while the breadcrumbs provide the perfect crunch.

Step 3: Cooking the Chicken

Now, it’s time to coat the chicken. In another bowl, whisk the eggs until they are well beaten. Dip each chicken breast into the egg mixture, allowing any excess to drip off. Then, coat the chicken thoroughly with the Parmesan breadcrumb mixture. Make sure every part of the chicken is covered for maximum flavor. Place the coated chicken on a baking sheet lined with parchment paper. Drizzle olive oil over the chicken to help it crisp up in the oven.

Preheat your oven to 400°F (200°C) and bake the chicken for 25-30 minutes. You’ll know it’s done when the coating is golden brown and the chicken is cooked through. The aroma will fill your kitchen, making it hard to wait!

Step 4: Preparing the Garlic Sauce

While the chicken is baking, you can prepare the creamy garlic sauce. In a skillet, melt the butter over medium heat. Add the minced garlic and sauté for 1-2 minutes until it becomes fragrant. Be careful not to burn the garlic, as it can turn bitter. Next, stir in the heavy cream and Dijon mustard. Bring the mixture to a gentle simmer, cooking for 3-5 minutes. Stir occasionally until the sauce thickens slightly. This creamy garlic sauce will complement your chicken perfectly!

Once the chicken is done baking, let it rest for a few minutes. This helps the juices redistribute, keeping the chicken moist. Serve the chicken topped with the creamy garlic sauce and garnish with fresh parsley. Enjoy your delicious Parmesan Crusted Chicken with Garlic Sauce!

Variation of Parmesan Crusted Chicken with Garlic Sauce

While the classic Parmesan Crusted Chicken with Garlic Sauce is a delightful dish on its own, there are many ways to switch things up! Variations can add new flavors and textures, making your meal even more exciting. Here are some creative ideas to consider:

  • Herb-Infused Crust: Add fresh herbs like basil, thyme, or oregano to the breadcrumb mixture. This will enhance the flavor and give your chicken a fresh, garden-like taste.
  • Spicy Kick: For those who enjoy a bit of heat, mix in crushed red pepper flakes or cayenne pepper into the breadcrumb mixture. This will give your Parmesan Crusted Chicken a spicy twist that’s sure to please!
  • Cheesy Variations: Try mixing different types of cheese into the crust. Cheddar, mozzarella, or even a bit of feta can add a unique flavor profile. Just remember to adjust the amount of Parmesan accordingly.
  • Vegetable Additions: Incorporate finely chopped spinach or sun-dried tomatoes into the breadcrumb mixture. This not only adds flavor but also boosts the nutritional value of your dish.
  • Stuffed Chicken: For a heartier meal, consider stuffing the chicken breasts with a mixture of cream cheese, herbs, and spinach before coating them. This will create a delicious surprise in every bite!

These variations allow you to customize your Parmesan Crusted Chicken with Garlic Sauce to suit your taste preferences. Feel free to experiment and find the combination that you love the most. Each variation brings its own unique flair, making this dish versatile and fun to prepare!

Cooking Note for Parmesan Crusted Chicken with Garlic Sauce

When preparing Parmesan Crusted Chicken with Garlic Sauce, a few cooking notes can help ensure your dish turns out perfectly every time. These tips will guide you through the cooking process, making it easier and more enjoyable.

First, always preheat your oven. This step is crucial for achieving that golden, crispy crust. If the oven isn’t hot enough, the chicken may not cook evenly, and the coating could become soggy instead of crispy. So, set your oven to 400°F (200°C) before you start preparing the chicken.

Next, consider the thickness of your chicken breasts. If they are uneven, they may cook at different rates. To avoid this, pound the chicken to an even thickness. This ensures that every piece cooks uniformly, resulting in juicy, tender chicken throughout.

Another important note is to let the chicken rest after baking. Allowing it to sit for a few minutes before serving helps the juices redistribute. This simple step keeps the chicken moist and flavorful, making each bite a delight.

When making the creamy garlic sauce, keep an eye on the heat. Cooking the garlic too quickly can lead to a bitter taste. Sauté it gently until fragrant, then add the cream and mustard. Stirring occasionally will help the sauce thicken without burning.

Lastly, don’t hesitate to adjust the seasoning. Taste the garlic sauce before serving and add more salt, pepper, or even a splash of lemon juice for brightness. Personalizing the flavors will make your Parmesan Crusted Chicken with Garlic Sauce even more enjoyable!

By following these cooking notes, you’ll be well on your way to creating a delicious and satisfying meal that everyone will love. Happy cooking!

Serving Suggestions for Parmesan Crusted Chicken with Garlic Sauce

Once your Parmesan Crusted Chicken with Garlic Sauce is ready, it’s time to think about how to serve it. The right sides can elevate your meal, making it even more delightful. Here are some tasty serving suggestions that pair perfectly with this dish:

  • Garlic Mashed Potatoes: Creamy garlic mashed potatoes are a classic side that complements the flavors of the chicken. The buttery texture pairs beautifully with the crispy crust and rich sauce.
  • Steamed Vegetables: Lightly steamed broccoli, green beans, or asparagus add a fresh touch to your plate. Their vibrant colors and crunch provide a nice contrast to the creamy chicken.
  • Caesar Salad: A crisp Caesar salad with romaine lettuce, croutons, and a tangy dressing makes for a refreshing side. The flavors of the salad balance the richness of the chicken.
  • Pasta: Serve the chicken over a bed of pasta tossed in olive oil or a light tomato sauce. This adds a hearty element to the meal and makes it even more filling.
  • Rice Pilaf: Fluffy rice pilaf with herbs and spices can soak up the creamy garlic sauce, making every bite delicious. It’s a simple yet satisfying side dish.

For a complete meal, consider adding a glass of white wine, such as Chardonnay or Sauvignon Blanc. These wines enhance the flavors of the chicken and sauce, creating a delightful dining experience.

Don’t forget to garnish your dish with fresh parsley for a pop of color and added flavor. With these serving suggestions, your Parmesan Crusted Chicken with Garlic Sauce will be a hit at the dinner table!

Tips for Perfecting Parmesan Crusted Chicken with Garlic Sauce

To make your Parmesan Crusted Chicken with Garlic Sauce truly unforgettable, consider these helpful tips. They will guide you in achieving the perfect balance of flavors and textures, ensuring that every bite is delicious.

First, choose high-quality ingredients. Fresh chicken breasts, real Parmesan cheese, and fresh garlic will elevate your dish. The better the ingredients, the better the flavor. Always opt for freshly grated Parmesan over pre-packaged cheese for a richer taste.

Next, don’t rush the coating process. Make sure to coat the chicken evenly with the egg mixture and then the breadcrumb mixture. This ensures that every bite is crispy and flavorful. Press the breadcrumbs onto the chicken gently to help them adhere better.

Another important tip is to use a wire rack on your baking sheet. This allows hot air to circulate around the chicken, helping it cook evenly and crisp up nicely. If you don’t have a wire rack, just make sure to flip the chicken halfway through baking for even browning.

When it comes to the creamy garlic sauce, taste as you go! Adjust the seasoning to your liking. If you prefer a tangier sauce, add a bit more Dijon mustard or a squeeze of lemon juice. This will brighten the flavors and enhance the overall dish.

Lastly, let the chicken rest after baking. This step is crucial for juicy chicken. Resting allows the juices to redistribute, making each slice tender and moist. Serve it warm, topped with the creamy garlic sauce and a sprinkle of fresh parsley for a beautiful presentation.

By following these tips, you’ll be well on your way to mastering the art of Parmesan Crusted Chicken with Garlic Sauce. Your family and friends will be impressed, and you’ll enjoy every delicious bite!

Breakdown of Time for Parmesan Crusted Chicken with Garlic Sauce

Understanding the time needed for each step in preparing Parmesan Crusted Chicken with Garlic Sauce can help you plan your cooking efficiently. Here’s a simple breakdown of the time required for preparation and cooking:

Prep Time

The prep time for this delicious dish is approximately 15-20 minutes. During this time, you will gather all your ingredients, prepare the chicken, and mix the breadcrumb coating. This step is essential for ensuring everything is ready when you start cooking. Taking your time during prep will make the cooking process smoother and more enjoyable.

Cooking Time

Once you have everything prepped, the cooking time is about 30-35 minutes. This includes baking the chicken for 25-30 minutes until it’s golden brown and cooked through. While the chicken is baking, you’ll also prepare the creamy garlic sauce, which takes about 5-10 minutes. This multitasking allows you to maximize your time in the kitchen.

Total Time

In total, you can expect to spend around 45-55 minutes from start to finish. This includes both prep and cooking time. With this efficient timeline, you can have a delicious meal ready to serve in less than an hour. It’s perfect for busy weeknights or when you want to impress guests without spending all day in the kitchen!

Nutritional Information for Parmesan Crusted Chicken with Garlic Sauce

Understanding the nutritional information of your meals is essential for maintaining a balanced diet. Parmesan Crusted Chicken with Garlic Sauce is not only delicious but also provides a good amount of nutrients. Here’s a breakdown of the key nutritional components of this dish:

Calories

Each serving of Parmesan Crusted Chicken with Garlic Sauce contains approximately 450 calories. This calorie count makes it a satisfying option for dinner without being overly heavy. The combination of chicken, cheese, and cream contributes to the overall calorie content, providing energy for your day.

Protein

One of the standout features of this dish is its protein content. Each serving offers about 35 grams of protein. Chicken is an excellent source of lean protein, which is vital for muscle repair and growth. Including protein in your meals can help keep you feeling full and satisfied, making this dish a great choice for a hearty dinner.

Sodium

The sodium content in Parmesan Crusted Chicken with Garlic Sauce is approximately 800 milligrams per serving. While sodium is necessary for bodily functions, it’s important to monitor your intake. If you’re watching your sodium levels, consider using low-sodium chicken broth or reducing the amount of salt in the recipe. This way, you can enjoy the flavors without exceeding your daily sodium limit.

Overall, Parmesan Crusted Chicken with Garlic Sauce is a well-rounded meal that provides essential nutrients. By being mindful of portion sizes and ingredient choices, you can enjoy this dish as part of a healthy diet. Whether you’re cooking for yourself or for family and friends, this recipe is sure to please while also offering nutritional benefits!

FAQs about Parmesan Crusted Chicken with Garlic Sauce

What can I serve with Parmesan Crusted Chicken with Garlic Sauce?

When it comes to serving Parmesan Crusted Chicken with Garlic Sauce, you have plenty of delicious options! Consider pairing it with:

  • Garlic Mashed Potatoes: Their creamy texture complements the crispy chicken perfectly.
  • Steamed Vegetables: Fresh veggies like broccoli or green beans add color and nutrition to your plate.
  • Caesar Salad: A crisp salad balances the richness of the chicken and sauce.
  • Pasta: Serve the chicken over pasta for a hearty meal that’s sure to satisfy.
  • Rice Pilaf: Fluffy rice can soak up the creamy garlic sauce, making every bite delightful.

These sides not only enhance the meal but also create a well-rounded dining experience. Enjoy experimenting with different combinations!

Can I make Parmesan Crusted Chicken with Garlic Sauce ahead of time?

Yes, you can prepare some components of Parmesan Crusted Chicken with Garlic Sauce ahead of time! You can coat the chicken breasts and store them in the refrigerator for up to 24 hours before baking. This allows the flavors to meld and makes cooking easier on the day you plan to serve it.

However, it’s best to prepare the creamy garlic sauce fresh. This ensures it remains rich and flavorful. If you want to save time, you can chop the garlic and measure out the cream and mustard in advance. This way, you can whip up the sauce quickly while the chicken bakes!

How do I store leftovers of Parmesan Crusted Chicken with Garlic Sauce?

Storing leftovers of Parmesan Crusted Chicken with Garlic Sauce is simple! Allow the chicken to cool completely before placing it in an airtight container. Store it in the refrigerator for up to 3 days. If you have leftover garlic sauce, store it separately in another container.

When you’re ready to enjoy the leftovers, reheat the chicken in the oven at 350°F (175°C) for about 15-20 minutes, or until heated through. You can warm the garlic sauce on the stovetop over low heat, stirring occasionally. This will help maintain its creamy texture!

Is Parmesan Crusted Chicken with Garlic Sauce suitable for meal prep?

Absolutely! Parmesan Crusted Chicken with Garlic Sauce is a fantastic option for meal prep. You can prepare the chicken and sauce in advance, then portion them into meal containers. This makes it easy to grab a delicious and satisfying meal during the week.

To keep the chicken crispy, consider reheating it in the oven rather than the microwave. This will help maintain the crunchy texture of the crust. Pair it with your favorite sides, and you’ll have a nutritious meal ready to go!

Conclusion on Parmesan Crusted Chicken with Garlic Sauce

In conclusion, Parmesan Crusted Chicken with Garlic Sauce is a delightful dish that brings together rich flavors and satisfying textures. This recipe is not only easy to prepare but also versatile, allowing you to customize it to your taste. Whether you stick to the classic version or try out one of the many variations, you’re sure to impress your family and friends.

The combination of crispy Parmesan crust and creamy garlic sauce creates a mouthwatering experience that is hard to resist. Plus, with its nutritional benefits, this dish can fit into a balanced diet. Remember to take your time during preparation and cooking, as these steps are key to achieving the best results.

As you serve this delicious meal, don’t forget to pair it with your favorite sides for a complete dining experience. From garlic mashed potatoes to fresh salads, the options are endless. With a little creativity, you can make every meal special.

So, gather your ingredients, roll up your sleeves, and get ready to enjoy a fantastic dinner. Your Parmesan Crusted Chicken with Garlic Sauce is sure to become a family favorite, bringing smiles and satisfaction to the table. Happy cooking!

Sweet and Sour Chicken Recipe for a Flavorful Meal

Introduction to Sweet and Sour Chicken Recipe

Sweet and sour chicken is a delightful dish that brings together a perfect balance of flavors. This recipe is not just a meal; it’s an experience that tantalizes your taste buds. The combination of tender chicken, vibrant vegetables, and a tangy sauce creates a dish that is both satisfying and enjoyable. Whether you’re cooking for family or friends, this sweet and sour chicken recipe is sure to impress.

What Makes Sweet and Sour Chicken Special?

What sets sweet and sour chicken apart from other dishes? It’s all about the harmony of flavors. The sweetness from the sugar or honey contrasts beautifully with the tanginess of apple cider vinegar. This balance makes each bite exciting. Additionally, the colorful bell peppers and juicy pineapple chunks add texture and freshness, making the dish visually appealing.

Moreover, sweet and sour chicken is versatile. You can easily customize it to suit your taste. Want it spicier? Add some chili flakes! Prefer more veggies? Toss in some broccoli or snap peas. This adaptability makes it a favorite among many. Plus, it’s a quick dish to prepare, making it perfect for busy weeknights or casual gatherings.

In this article, we will guide you through the ingredients, preparation steps, and tips to make your sweet and sour chicken recipe a hit. So, let’s dive in and discover how to create this delicious dish!

Ingredients for Sweet and Sour Chicken Recipe

To create a mouthwatering sweet and sour chicken, you’ll need a variety of fresh ingredients. Each component plays a crucial role in achieving that perfect balance of flavors. Here’s what you’ll need:

  • 2 cups boneless, skinless chicken breasts, cut into bite-sized pieces
  • 1 cup bell peppers, chopped (mix of red and green for color)
  • 1 cup pineapple chunks (fresh or canned for convenience)
  • 1 medium onion, chopped
  • 1/2 cup sugar (or honey for a healthier option)
  • 1/2 cup apple cider vinegar
  • 1/4 cup ketchup
  • 1/4 cup soy sauce (low-sodium if preferred)
  • 1 tablespoon cornstarch (for thickening the sauce)
  • 2 tablespoons vegetable oil (for cooking)
  • 1 teaspoon garlic powder
  • 1 teaspoon ginger powder
  • Salt and pepper to taste
  • Cooked rice, for serving

These ingredients come together to create a dish that is not only delicious but also visually appealing. The vibrant colors of the bell peppers and pineapple make the dish pop on your plate. Plus, the combination of sweet and tangy flavors will leave everyone wanting more!

Feel free to adjust the ingredients based on your preferences. For instance, if you love a bit of heat, consider adding some chili sauce or red pepper flakes. The beauty of this sweet and sour chicken recipe lies in its flexibility, allowing you to make it your own!

Step-by-Step Preparation of Sweet and Sour Chicken Recipe

Now that you have all your ingredients ready, it’s time to dive into the cooking process. This sweet and sour chicken recipe is straightforward and fun to make. Follow these steps to create a delicious meal that everyone will love!

Step 1: Preparing the Chicken

Start by washing your hands and ensuring your workspace is clean. Take the boneless, skinless chicken breasts and cut them into bite-sized pieces. This size helps the chicken cook evenly and makes it easy to eat. Once cut, season the chicken with salt and pepper. This simple seasoning enhances the chicken’s flavor, making it even more delicious.

Step 2: Making the Sweet and Sour Sauce

In a large bowl, combine the sugar, apple cider vinegar, ketchup, soy sauce, garlic powder, ginger powder, and cornstarch. Whisk these ingredients together until the mixture is smooth. This sauce is the star of the dish, providing that signature sweet and tangy flavor. Set the sauce aside for now; it will be added later.

Step 3: Cooking the Chicken

Heat the vegetable oil in a large skillet or wok over medium-high heat. Once the oil is hot, add the seasoned chicken pieces. Cook the chicken for about 5-7 minutes, stirring occasionally. You want the chicken to be browned and cooked through. This step is crucial, as it ensures your chicken is juicy and flavorful.

Step 4: Combining Ingredients

After the chicken is cooked, it’s time to add the vegetables. Toss in the chopped onion and bell peppers. Stir-fry these for about 3-4 minutes until they are tender-crisp. The vibrant colors of the vegetables will brighten your dish. Next, pour the sweet and sour sauce over the chicken and vegetables. Don’t forget to add the pineapple chunks! Stir everything together to ensure the sauce coats all the ingredients evenly.

Step 5: Final Touches

Allow the mixture to cook for an additional 3-5 minutes. This will help the sauce thicken and cling to the chicken and vegetables. Keep stirring occasionally to prevent sticking. Once the sauce has reached your desired thickness, it’s time to serve! Spoon the sweet and sour chicken over a bed of cooked rice. Enjoy your delicious creation!

Variations of Sweet and Sour Chicken Recipe

While the classic sweet and sour chicken recipe is a favorite, there are many ways to switch things up! Whether you want to try different proteins or explore vegetarian options, these variations will keep your meals exciting. Let’s take a look at some delicious alternatives!

Alternative Proteins

If you’re looking to change the protein in your sweet and sour chicken recipe, you have plenty of options. Here are a few tasty alternatives:

  • Pork: Substitute chicken with boneless pork tenderloin. Cut it into bite-sized pieces and follow the same cooking steps. Pork adds a rich flavor that pairs well with the sweet and sour sauce.
  • Tofu: For a plant-based option, use firm tofu. Press the tofu to remove excess moisture, then cut it into cubes. Sauté the tofu until golden brown before adding the vegetables and sauce.
  • Shrimp: Shrimp cooks quickly and adds a delightful seafood twist. Use peeled and deveined shrimp, cooking them for just a few minutes until they turn pink and opaque.
  • Beef: Thinly sliced beef, such as flank steak, can also work well. Cook it until browned, then add the vegetables and sauce for a hearty meal.

These alternative proteins can bring new flavors and textures to your sweet and sour dish. Feel free to experiment and find your favorite combination!

Vegetarian Options

If you prefer a vegetarian version of sweet and sour chicken, you can easily create a delicious meal without meat. Here are some ideas:

  • Mixed Vegetables: Use a variety of colorful vegetables like bell peppers, broccoli, snap peas, and carrots. Stir-fry them until tender-crisp, then add the sweet and sour sauce for a vibrant dish.
  • Seitan: This wheat-based protein mimics the texture of meat. Cut seitan into bite-sized pieces and sauté until golden. It absorbs flavors well, making it a great addition to the sweet and sour sauce.
  • Chickpeas: For a protein-packed option, add canned chickpeas. Rinse and drain them, then toss them in with the vegetables and sauce. They add a hearty texture and are very filling.

These vegetarian options are not only healthy but also delicious. They allow you to enjoy the sweet and sour flavors while keeping your meal meat-free!

Cooking Note for Sweet and Sour Chicken Recipe

When preparing your sweet and sour chicken, a few cooking notes can help ensure your dish turns out perfectly every time. These tips will enhance your cooking experience and improve the final result.

First, always use fresh ingredients when possible. Fresh chicken, vegetables, and pineapple will elevate the flavors of your dish. If you opt for canned pineapple, choose one packed in juice or water, avoiding syrup for a healthier option.

Next, pay attention to the cooking temperature. Medium-high heat is ideal for stir-frying. This temperature allows the chicken to brown nicely while cooking through without becoming dry. If the heat is too low, the chicken may steam instead of sear, resulting in a less flavorful dish.

Additionally, don’t overcrowd the skillet or wok. Cooking in batches may be necessary if you have a lot of chicken or vegetables. Overcrowding can lead to uneven cooking and steaming rather than stir-frying, which affects the texture and flavor.

Lastly, taste as you go! Adjust the seasoning to your preference. If you like it sweeter, add a bit more sugar or honey. If you prefer a tangier flavor, a splash more vinegar can do the trick. This flexibility allows you to create a dish that suits your taste perfectly.

By following these cooking notes, you’ll be well on your way to mastering the sweet and sour chicken recipe. Enjoy the process and the delicious results!

Serving Suggestions for Sweet and Sour Chicken Recipe

Once your sweet and sour chicken is ready, it’s time to think about how to serve it. The right side dishes and presentation can elevate your meal, making it even more enjoyable. Here are some ideas to help you create a delightful dining experience!

Ideal Side Dishes

Sweet and sour chicken pairs wonderfully with a variety of side dishes. Here are some tasty options to consider:

  • Steamed Rice: The classic choice! White or brown rice absorbs the sweet and tangy sauce beautifully, making each bite satisfying.
  • Fried Rice: For a twist, serve your sweet and sour chicken over fried rice. The added flavors of vegetables and eggs enhance the dish.
  • Quinoa: For a healthier alternative, try quinoa. It’s packed with protein and adds a nutty flavor that complements the chicken.
  • Vegetable Stir-Fry: A colorful mix of stir-fried vegetables can add extra nutrition and flavor. Broccoli, snap peas, and carrots work well!
  • Spring Rolls: These crispy treats make a great appetizer. They add a crunchy texture that contrasts nicely with the tender chicken.

These side dishes not only enhance the meal but also provide a variety of textures and flavors. Choose one or two to create a balanced plate that everyone will love!

Presentation Tips

Presentation is key when serving your sweet and sour chicken. A well-presented dish can make the meal feel special. Here are some tips to impress your guests:

  • Use Colorful Plates: Brightly colored plates can make your dish pop. White plates provide a nice contrast, allowing the vibrant colors of the chicken and vegetables to shine.
  • Garnish: Fresh herbs like cilantro or green onions can add a touch of freshness. Sprinkle them on top just before serving for a beautiful finish.
  • Layering: Serve the sweet and sour chicken over a bed of rice or quinoa. This layering creates an appealing look and makes it easy to enjoy.
  • Serve Family-Style: For a casual gathering, consider serving the dish in a large bowl. This encourages sharing and creates a warm atmosphere.

By following these presentation tips, you can turn your sweet and sour chicken into a feast for the eyes as well as the palate. Enjoy the compliments from your guests!

Tips for Perfecting Your Sweet and Sour Chicken Recipe

To make your sweet and sour chicken truly unforgettable, consider these helpful tips. They will enhance the flavors and ensure a delightful dining experience. With a few simple adjustments, you can elevate your dish to new heights!

First, marinate the chicken for extra flavor. A quick marinade of soy sauce, garlic, and ginger can infuse the chicken with delicious taste. Just 30 minutes in the marinade will make a big difference. This step adds depth to the flavor profile, making each bite more enjoyable.

Next, don’t skip the cornstarch! It’s essential for thickening the sauce. Make sure to whisk it well with the other sauce ingredients. This will help create that glossy, sticky texture that sweet and sour chicken is known for. If you prefer a thicker sauce, feel free to add a little more cornstarch mixed with water.

Also, consider adding a splash of sesame oil for a nutty flavor. Just a teaspoon can enhance the overall taste of your dish. It adds a lovely aroma and richness that complements the sweet and sour sauce beautifully.

When it comes to vegetables, feel free to get creative! Adding a variety of colors not only makes the dish more appealing but also boosts its nutritional value. Try incorporating carrots, zucchini, or even baby corn for added crunch and flavor.

Lastly, serve your sweet and sour chicken immediately after cooking. This ensures that the chicken remains tender and the vegetables stay crisp. If you let it sit too long, the sauce may become too thick, and the veggies might lose their vibrant texture.

By following these tips, you’ll be well on your way to mastering the sweet and sour chicken recipe. Enjoy the process and the delicious results!

Breakdown of Time for Sweet and Sour Chicken Recipe

Understanding the time needed for each step in your sweet and sour chicken recipe can help you plan your cooking efficiently. Here’s a simple breakdown of the time required for preparation and cooking. This way, you can enjoy your meal without feeling rushed!

Prep Time

The prep time for this sweet and sour chicken recipe is approximately 15-20 minutes. During this time, you will gather all your ingredients, wash and chop the vegetables, and cut the chicken into bite-sized pieces. Having everything ready before you start cooking makes the process smoother and more enjoyable.

Cooking Time

The cooking time for sweet and sour chicken is about 15-20 minutes. This includes browning the chicken, stir-frying the vegetables, and allowing the sauce to thicken. Cooking on medium-high heat ensures that everything cooks evenly and quickly, giving you a delicious meal in no time!

Total Time

In total, you can expect to spend around 30-40 minutes from start to finish. This includes both prep and cooking time. It’s a quick and easy recipe, perfect for busy weeknights or when you want to impress guests without spending hours in the kitchen. With this sweet and sour chicken recipe, you’ll have a delightful meal ready in no time!

Nutritional Information for Sweet and Sour Chicken Recipe

Understanding the nutritional content of your meals is essential for maintaining a balanced diet. This sweet and sour chicken recipe not only delights your taste buds but also provides valuable nutrients. Here’s a breakdown of the nutritional information per serving, so you can enjoy your meal while keeping track of your intake.

Calories

Each serving of sweet and sour chicken contains approximately 320 calories. This makes it a satisfying option for lunch or dinner without overwhelming your daily caloric intake. The combination of chicken, vegetables, and sauce provides a hearty meal that keeps you energized.

Protein Content

Protein is vital for building and repairing tissues, and this sweet and sour chicken recipe delivers! Each serving contains about 25 grams of protein. The boneless, skinless chicken breasts are an excellent source of lean protein, making this dish a great choice for those looking to increase their protein intake.

Sodium Levels

When it comes to sodium, each serving of sweet and sour chicken has around 800 milligrams. This level is typical for many savory dishes, especially those that include soy sauce. If you’re watching your sodium intake, consider using low-sodium soy sauce or adjusting the amount to suit your dietary needs. Balancing flavors while keeping sodium levels in check is key to a healthy meal.

By being aware of the nutritional information, you can enjoy your sweet and sour chicken recipe while making informed choices about your diet. This dish not only satisfies your cravings but also contributes to your overall health!

FAQs about Sweet and Sour Chicken Recipe

Can I use frozen chicken for the Sweet and Sour Chicken Recipe?

Yes, you can use frozen chicken for your sweet and sour chicken recipe! However, it’s important to thaw the chicken completely before cooking. This ensures even cooking and helps avoid any rubbery texture. You can thaw the chicken overnight in the refrigerator or use the defrost setting on your microwave. Once thawed, cut it into bite-sized pieces and follow the recipe as usual. Just remember, cooking time may vary slightly, so keep an eye on the chicken to ensure it’s fully cooked.

What can I substitute for pineapple in the Sweet and Sour Chicken Recipe?

If you’re not a fan of pineapple or simply don’t have any on hand, there are several tasty substitutes you can use. Mango chunks are a great alternative, providing a similar sweetness and tropical flavor. You can also use diced peaches or apricots for a fruity twist. If you prefer a less sweet option, try adding chopped bell peppers or even a splash of orange juice for a citrusy kick. These substitutes will still give your dish that delightful sweet and sour balance!

How can I make the Sweet and Sour Chicken Recipe healthier?

Making your sweet and sour chicken healthier is easy with a few simple adjustments. First, consider using skinless chicken thighs instead of breasts for added flavor and moisture. You can also reduce the sugar by using honey or a sugar substitute. Opt for low-sodium soy sauce to cut down on sodium levels. Additionally, increase the amount of vegetables in the dish. Adding broccoli, snap peas, or carrots not only boosts nutrition but also adds color and texture. These small changes can make your sweet and sour chicken a healthier option without sacrificing taste!

Can I prepare the Sweet and Sour Chicken Recipe in advance?

Absolutely! You can prepare your sweet and sour chicken in advance, making it a convenient option for busy days. To do this, cook the chicken and vegetables as directed, then let them cool completely. Store the dish in an airtight container in the refrigerator for up to three days. When you’re ready to serve, simply reheat it in a skillet over medium heat until warmed through. If the sauce has thickened too much, add a splash of water or broth to loosen it up. This way, you can enjoy a delicious homemade meal with minimal effort!

Conclusion on Sweet and Sour Chicken Recipe

In conclusion, the sweet and sour chicken recipe is a delightful dish that combines vibrant flavors and colorful ingredients. It’s not just a meal; it’s a celebration of taste that can bring family and friends together. With its perfect balance of sweetness and tanginess, this dish is sure to please everyone at the table.

Whether you choose to stick to the classic recipe or explore the various variations, the possibilities are endless. From alternative proteins to vegetarian options, you can customize this dish to suit your preferences. Plus, the cooking process is straightforward, making it an excellent choice for both novice and experienced cooks alike.

Remember to pay attention to the cooking notes and tips provided throughout this article. They will help you achieve the best results and make your sweet and sour chicken truly unforgettable. Don’t hesitate to experiment with flavors and ingredients to make the dish your own!

So, gather your ingredients, roll up your sleeves, and get ready to create a delicious sweet and sour chicken that will impress everyone. Enjoy the cooking process, and most importantly, savor every bite of this delightful dish!

Cheesy Hamburger Potato Casserole Recipe is a must-try!

Introduction to Cheesy Hamburger Potato Casserole Recipe

Cheesy Hamburger Potato Casserole Recipe is a delightful dish that brings warmth and satisfaction to any family meal. This casserole combines the rich flavors of ground beef, creamy cheese, and hearty potatoes, making it a perfect choice for busy weeknights or cozy gatherings. With its simple ingredients and easy preparation, it’s no wonder this recipe has become a beloved staple in many households.

What Makes This Casserole a Family Favorite?

Cheesy Hamburger Potato Casserole Recipe stands out as a family favorite. First, it’s incredibly versatile. You can easily customize it to suit your family’s tastes. Whether you prefer a little kick with jalapeños or a lighter version with ground turkey, the options are endless.

Moreover, this casserole is a one-dish wonder. It combines protein, carbs, and dairy all in one pan, making it a complete meal. This means less time spent on dishes and more time enjoying the company of loved ones. Plus, the gooey melted cheese on top is simply irresistible!

Another reason for its popularity is the ease of preparation. With just a few simple steps, you can have a delicious meal ready to bake. It’s perfect for those hectic days when you need something quick yet satisfying. And let’s not forget the leftovers! This casserole tastes even better the next day, making it a great option for meal prep.

Cheesy Hamburger Potato Casserole Recipe is not just a meal; it’s an experience. It brings families together, warms hearts, and fills bellies. So, let’s dive into the ingredients and get started on this delightful dish!

Ingredients for Cheesy Hamburger Potato Casserole Recipe

Cheesy Hamburger Potato Casserole Recipe, you’ll need a selection of simple yet flavorful ingredients. Each component plays a vital role in delivering that comforting taste we all love. Here’s what you’ll need:

  • 2 pounds ground beef: This is the star of the dish, providing rich flavor and protein.
  • 1 medium onion, diced: Adds sweetness and depth to the casserole.
  • 3 cloves garlic, minced: Infuses the dish with aromatic goodness.
  • 4 cups frozen hash browns (thawed): These serve as the hearty base, giving the casserole its comforting texture.
  • 2 cups shredded cheddar cheese: The gooey cheese is what makes this dish truly irresistible.
  • 1 can (10.5 ounces) cream of mushroom soup: This creamy element binds everything together and adds a savory flavor.
  • 1 cup milk: Helps to create a creamy consistency.
  • 1 teaspoon salt: Enhances the overall flavor of the casserole.
  • 1/2 teaspoon black pepper: Adds a touch of warmth and spice.
  • 1 teaspoon paprika: Provides a subtle smokiness and color.
  • 1/2 teaspoon garlic powder: Boosts the garlic flavor.
  • 1/2 teaspoon onion powder: Complements the fresh onion.
  • 1 cup sour cream: Adds creaminess and a slight tang.
  • 1/2 cup green onions, sliced (for garnish): These add a fresh crunch and vibrant color on top.

Cheesy Hamburger Potato Casserole Recipe that your family will love. Now, let’s move on to the step-by-step preparation!

Step-by-Step Preparation of Cheesy Hamburger Potato Casserole Recipe

Cheesy Hamburger Potato Casserole Recipe. This step-by-step guide will help you create a delicious meal that your family will adore. Let’s get started!

Step 1: Prepping the Ingredients

First things first, you need to prep your ingredients. Start by dicing the onion and mincing the garlic. This will ensure that they cook evenly and blend well with the ground beef. Next, make sure your frozen hash browns are fully thawed. You can leave them out for a bit or microwave them for a few seconds. Having everything ready will make the cooking process smoother and quicker.

Step 2: Cooking the Ground Beef

In a large skillet, heat a bit of oil over medium heat. Once hot, add the ground beef, diced onion, and minced garlic. Cook this mixture until the beef is browned and the onion becomes translucent. This usually takes about 7-10 minutes. Remember to stir occasionally to prevent sticking. After cooking, drain any excess fat to keep your casserole from becoming greasy.

Step 3: Layering the Casserole

Now it’s time to combine everything! In a large mixing bowl, add the cooked beef mixture, thawed hash browns, cream of mushroom soup, milk, salt, black pepper, paprika, garlic powder, and onion powder. Mix everything well until all the ingredients are evenly combined. Then, gently fold in 1 1/2 cups of shredded cheddar cheese and the sour cream. This will create a creamy and cheesy filling for your casserole.

Next, pour the mixture into a greased 9×13-inch baking dish. Spread it out evenly to ensure even cooking. Finally, sprinkle the remaining 1/2 cup of shredded cheddar cheese on top. This will create a deliciously gooey and golden crust as it bakes.

Step 4: Baking the Casserole

Preheat your oven to 350°F (175°C) if you haven’t done so already. Once the oven is ready, place your casserole in and bake for 45-50 minutes. You’ll know it’s done when the casserole is bubbly and the cheese on top is melted and golden brown. After baking, let it cool for about 5-10 minutes before serving. This will help the casserole set a bit, making it easier to serve.

Cheesy Hamburger Potato Casserole Recipe is ready to be enjoyed. The combination of flavors and textures will surely delight your family and friends!

Variation of Cheesy Hamburger Potato Casserole Recipe

Cheesy Hamburger Potato Casserole Recipe is a hit on its own, there are many ways to switch things up! Variations can add new flavors and textures, making this dish even more exciting. Let’s explore some alternative ingredients and different cooking methods you can try.

Alternative Ingredients to Try

Experimenting with different ingredients can lead to delightful surprises. Here are some ideas to consider:

  • Ground Meat Options: Instead of ground beef, try using ground turkey or chicken for a leaner option. You can also use sausage for a spicier kick.
  • Vegetable Additions: Add some chopped bell peppers, mushrooms, or spinach to the beef mixture for extra nutrition and flavor.
  • Cheese Varieties: While cheddar is a classic choice, feel free to mix in Monterey Jack, pepper jack, or even mozzarella for a different taste.
  • Soup Alternatives: If you’re not a fan of cream of mushroom soup, consider using cream of chicken or a homemade white sauce for a fresh twist.
  • Herbs and Spices: Enhance the flavor by adding fresh herbs like parsley or thyme. You can also try different spices like cumin or chili powder for a unique flavor profile.

Different Cooking Methods

Cheesy Hamburger Potato Casserole Recipe. Here are a few methods to consider:

  • Slow Cooker: For a hands-off approach, you can make this casserole in a slow cooker. Simply combine all the ingredients in the slow cooker and cook on low for 6-8 hours or on high for 3-4 hours. This method allows the flavors to meld beautifully.
  • Instant Pot: If you’re short on time, use an Instant Pot. Sauté the beef and onions in the pot, then add the remaining ingredients. Seal the lid and cook on high pressure for about 10 minutes. Quick and easy!
  • Skillet Version: For a quicker meal, you can make a skillet version. Cook the beef and veggies in a large skillet, then stir in the hash browns and cheese. Cook until everything is heated through and the cheese is melted.

Cheesy Hamburger Potato Casserole Recipe that suits your taste and lifestyle. Enjoy experimenting and finding your favorite version!

Cooking Note for Cheesy Hamburger Potato Casserole Recipe

Cheesy Hamburger Potato Casserole Recipe, there are a few important cooking notes to keep in mind. These tips will help ensure that your casserole turns out perfectly every time.

First, always use thawed hash browns. If you add frozen hash browns directly to the mixture, they may release excess moisture during baking. This can lead to a soggy casserole. Thawing them beforehand allows for better texture and flavor.

Next, be mindful of the cooking time. Ovens can vary in temperature, so keep an eye on your casserole as it bakes. If the cheese starts to brown too quickly, you can cover the dish with aluminum foil to prevent burning while the rest of the casserole cooks through.

Additionally, letting the casserole cool for a few minutes after baking is crucial. This resting time allows the layers to set, making it easier to serve. If you cut into it too soon, the filling may spill out, making a mess on your plate.

Cheesy Hamburger Potato Casserole Recipe that’s just right for you and your family!

Serving Suggestions for Cheesy Hamburger Potato Casserole Recipe

Cheesy Hamburger Potato Casserole Recipe is baked to perfection, it’s time to serve it up! This dish is not only delicious but also versatile when it comes to pairing it with other foods. Here are some serving suggestions to elevate your meal:

  • Fresh Salad: A crisp green salad is a perfect complement to the rich flavors of the casserole. Consider a simple garden salad with mixed greens, cherry tomatoes, and a light vinaigrette. The freshness will balance the heaviness of the casserole.
  • Garlic Bread: Serve your casserole with warm garlic bread or breadsticks. The buttery, garlicky flavor pairs wonderfully with the cheesy goodness of the dish.
  • Steamed Vegetables: Add some color and nutrition to your meal with a side of steamed vegetables. Broccoli, green beans, or carrots are great options that provide a nice crunch and contrast.
  • Pickles or Relish: For a tangy twist, serve pickles or relish on the side. Their acidity can cut through the richness of the casserole, enhancing the overall flavor experience.
  • Hot Sauce: If you enjoy a bit of heat, offer hot sauce on the table. A few dashes can add an exciting kick to each serving.

When serving, consider garnishing the casserole with additional sliced green onions or a sprinkle of fresh parsley. This not only adds a pop of color but also enhances the presentation. Your family and friends will be impressed by the beautiful and delicious meal you’ve prepared!

Cheesy Hamburger Potato Casserole Recipe is a fantastic main dish that pairs well with a variety of sides. Whether you choose a fresh salad, some garlic bread, or steamed veggies, these suggestions will help create a well-rounded and satisfying meal.

Tips for Perfecting Your Cheesy Hamburger Potato Casserole Recipe

Cheesy Hamburger Potato Casserole Recipe turns out perfectly every time, consider these helpful tips. They will enhance the flavor, texture, and overall experience of this delightful dish.

  • Use Quality Ingredients: Start with fresh, high-quality ingredients. Fresh ground beef, real cheese, and wholesome vegetables will elevate the taste of your casserole.
  • Don’t Skip the Seasoning: Seasoning is key! Make sure to taste your mixture before baking. Adjust the salt, pepper, and spices to suit your preferences. A well-seasoned dish is always more enjoyable.
  • Layering Matters: When layering your casserole, ensure even distribution of ingredients. This helps in achieving consistent flavor and texture throughout the dish.
  • Experiment with Cheese: While cheddar is a classic choice, don’t hesitate to mix different cheeses. Combining sharp cheddar with creamy mozzarella or pepper jack can add depth and excitement to the flavor.
  • Let It Rest: After baking, allow the casserole to rest for 5-10 minutes before serving. This resting period helps the layers set, making it easier to cut and serve without falling apart.
  • Garnish for Presentation: A simple garnish can make a big difference. Fresh herbs like parsley or additional green onions not only add color but also enhance the dish’s appeal.
  • Store Properly: If you have leftovers, store them in an airtight container in the refrigerator. This will keep your casserole fresh and delicious for the next meal.
  • Reheat Gently: When reheating, do so gently in the oven or microwave. This helps maintain the texture and flavor of the casserole, ensuring it tastes just as good as when it was first made.

Cheesy Hamburger Potato Casserole Recipe and impress your family and friends with a dish that’s not only tasty but also beautifully presented. Enjoy the process and happy cooking!

Breakdown of Time for Cheesy Hamburger Potato Casserole Recipe

Cheesy Hamburger Potato Casserole Recipe can help you plan your cooking efficiently. Here’s a detailed breakdown of the time you’ll need for preparation and cooking.

Prep Time

The prep time for this delicious casserole is approximately 20-25 minutes. This includes:

  • Dicing the onion and mincing the garlic.
  • Thawing the frozen hash browns if they are not already thawed.
  • Measuring out all the ingredients and getting them ready for mixing.

Taking your time during this stage ensures that everything is organized and ready to go, making the cooking process smoother.

Cooking Time

Cheesy Hamburger Potato Casserole Recipe is about 45-50 minutes. This includes:

  • Cooking the ground beef, onion, and garlic in a skillet, which takes about 10 minutes.
  • Baking the casserole in the oven until it is bubbly and the cheese is golden brown.

Make sure to keep an eye on the casserole as it bakes to ensure it doesn’t overcook.

Total Time

In total, you can expect the entire process to take around 1 hour and 10-15 minutes. This includes both prep and cooking time. Here’s a quick summary:

  • Prep Time: 20-25 minutes
  • Cooking Time: 45-50 minutes
  • Total Time: 1 hour and 10-15 minutes

Cheesy Hamburger Potato Casserole Recipe into your meal planning. Enjoy the process and the delicious results!

Nutritional Information for Cheesy Hamburger Potato Casserole Recipe

Cheesy Hamburger Potato Casserole Recipe not only satisfies your taste buds but also provides valuable nutrients. Here’s a breakdown of the nutritional information per serving:

Calories

Cheesy Hamburger Potato Casserole Recipe contains approximately 450 calories. This calorie count makes it a hearty meal option, perfect for those who need energy after a long day. The combination of ground beef, cheese, and potatoes contributes to this satisfying calorie content.

Protein

Protein is a vital nutrient for building and repairing tissues, and this casserole delivers! Each serving provides about 25 grams of protein. The ground beef and cheese are excellent sources of protein, making this dish a great choice for those looking to increase their protein intake.

Sodium

Cheesy Hamburger Potato Casserole Recipe while keeping your sodium intake in check.

Cheesy Hamburger Potato Casserole Recipe is not only delicious but also provides a good balance of calories, protein, and sodium. By being mindful of the ingredients you choose, you can enjoy this comforting dish while maintaining a healthy diet.

FAQs about Cheesy Hamburger Potato Casserole Recipe

Can I make Cheesy Hamburger Potato Casserole Recipe ahead of time?

Cheesy Hamburger Potato Casserole Recipe ahead of time. Simply follow the recipe up to the baking step, then cover the dish with plastic wrap or aluminum foil. Store it in the refrigerator for up to 24 hours before baking. When you’re ready to cook, just remove the cover and bake as directed. You may need to add a few extra minutes to the cooking time if baking from cold.

What can I substitute for potatoes in this casserole?

Cheesy Hamburger Potato Casserole Recipe, there are several options. You can use cauliflower rice for a low-carb alternative. Another option is to use cooked quinoa or even cooked pasta for a different texture. Just make sure to adjust the cooking time accordingly, as these substitutes may require less time to heat through.

How do I store leftovers of Cheesy Hamburger Potato Casserole Recipe?

Cheesy Hamburger Potato Casserole Recipe is easy! Allow the casserole to cool completely, then transfer it to an airtight container. Store it in the refrigerator for up to 3-4 days. When you’re ready to enjoy it again, simply reheat in the oven or microwave until warmed through. This makes for a quick and satisfying meal!

Can I freeze Cheesy Hamburger Potato Casserole Recipe?

Cheesy Hamburger Potato Casserole Recipe for later enjoyment! To do this, prepare the casserole as directed but do not bake it. Instead, cover it tightly with plastic wrap and then aluminum foil to prevent freezer burn. It can be frozen for up to 2-3 months. When you’re ready to bake, thaw it in the refrigerator overnight and then bake as usual. This way, you can have a delicious meal ready to go whenever you need it!

Conclusion on Cheesy Hamburger Potato Casserole Recipe

Cheesy Hamburger Potato Casserole Recipe is a delightful dish that brings comfort and satisfaction to any meal. Its combination of hearty ingredients, creamy textures, and rich flavors makes it a favorite among families. Whether you’re preparing it for a busy weeknight dinner or a cozy gathering with friends, this casserole is sure to impress.

Not only is it easy to make, but it also offers endless possibilities for customization. You can experiment with different meats, vegetables, and spices to create a version that suits your taste perfectly. Plus, the ability to prepare it ahead of time or freeze it for later adds to its convenience, making it a practical choice for any home cook.

Cheesy Hamburger Potato Casserole Recipe does more than just fill bellies; it brings people together. The warm, cheesy goodness is perfect for sharing and creates lasting memories with loved ones.

So, why not give this recipe a try? With its simple preparation and delicious results, you’ll soon see why it has become a beloved staple in many households. Happy cooking, and enjoy every cheesy bite!

Stay Connected

Get recipes via email: