Get my cookbooks

Chicken Lo Mein Recipe: A Quick and Easy Delight

Introduction to Chicken Lo Mein Recipe

What is Chicken Lo Mein?

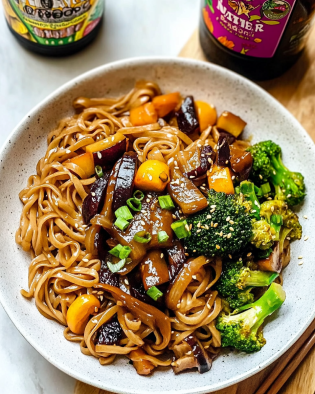
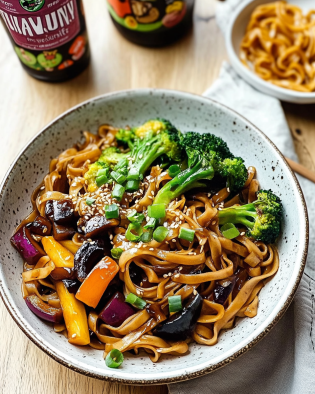
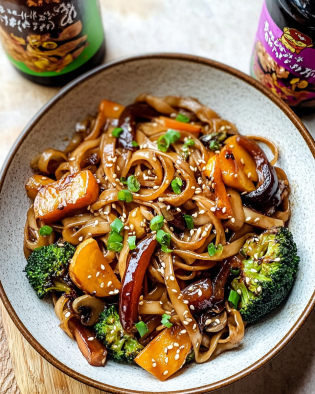
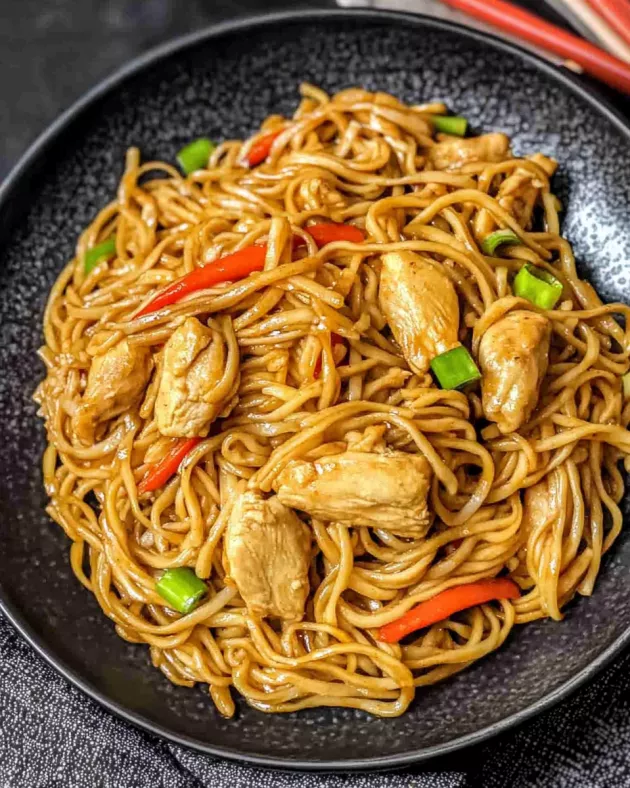
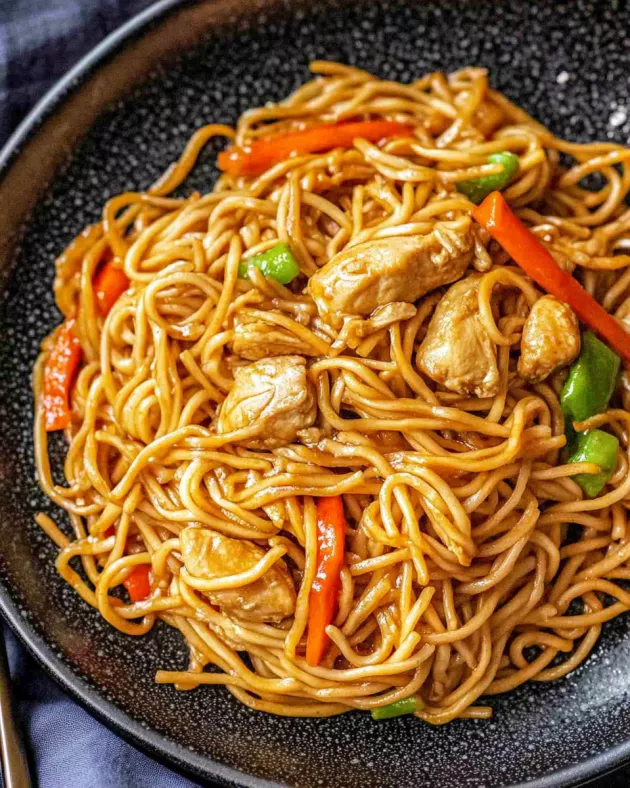
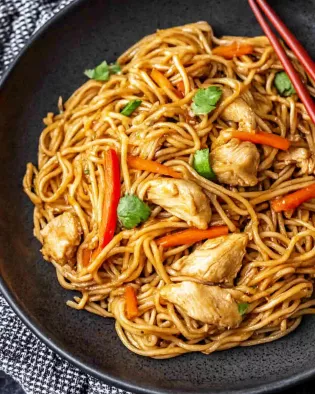
Chicken Lo Mein is a delightful dish that hails from Chinese cuisine. It features tender chicken, colorful vegetables, and soft egg noodles, all tossed together in a savory sauce. The name “Lo Mein” translates to “tossed noodles,” which perfectly describes how the ingredients come together in this dish. The combination of flavors and textures makes it a favorite among many. Whether you’re enjoying it at a restaurant or making it at home, Chicken Lo Mein is sure to satisfy your taste buds.

Why You Should Try This Chicken Lo Mein Recipe

This Chicken Lo Mein recipe is not only easy to prepare but also packed with nutrients. It offers a balanced meal with protein from the chicken, vitamins from the vegetables, and carbohydrates from the noodles. Plus, it can be made in under 30 minutes, making it perfect for busy weeknights. The best part? You can customize it to your liking! Add your favorite veggies or switch up the protein for a unique twist. With its delicious flavors and quick preparation, this Chicken Lo Mein recipe is a must-try for anyone looking to enjoy a homemade meal that feels like a treat.

Ingredients for Chicken Lo Mein Recipe

To create a delicious Chicken Lo Mein, you’ll need a variety of fresh ingredients. Here’s what you’ll need:

  • 2 cups cooked egg noodles
  • 1 tablespoon vegetable oil
  • 1 pound boneless, skinless chicken breasts, sliced thin
  • 2 cloves garlic, minced
  • 1 cup bell peppers, sliced (any color)
  • 1 cup snap peas
  • 1 cup carrots, julienned
  • 3 green onions, chopped
  • 3 tablespoons soy sauce
  • 1 tablespoon oyster sauce
  • 1 tablespoon sesame oil
  • 1 teaspoon ground ginger
  • Salt and pepper to taste

These ingredients come together to create a flavorful and satisfying dish. The combination of chicken, vegetables, and sauces provides a delightful taste experience. Feel free to adjust the quantities based on your preferences or dietary needs. For instance, if you love garlic, add an extra clove! The beauty of this Chicken Lo Mein recipe lies in its flexibility.

Now that you have your ingredients ready, let’s move on to the step-by-step preparation of this tasty meal!

Step-by-Step Preparation of Chicken Lo Mein Recipe

Step 1: Preparing the Chicken

First, let’s get the chicken ready. Start by slicing the boneless, skinless chicken breasts into thin strips. This helps them cook quickly and evenly. Next, heat 1 tablespoon of vegetable oil in a large skillet or wok over medium-high heat. Once the oil is hot, add the sliced chicken. Cook it for about 5-7 minutes, stirring occasionally, until the chicken is browned and cooked through. Make sure there’s no pink left in the center. After cooking, remove the chicken from the skillet and set it aside. This step is crucial as it ensures your chicken is juicy and flavorful.

Step 2: Cooking the Noodles

While the chicken is cooking, you can prepare the egg noodles. If you haven’t done so already, cook 2 cups of egg noodles according to the package instructions. Usually, this takes about 5-7 minutes. Once they are cooked, drain them and set them aside. It’s important to have the noodles ready before you stir-fry the vegetables. This way, everything can come together quickly, and you won’t overcook the veggies.

Step 3: Stir-Frying the Vegetables

Now, it’s time to add some color and crunch to your dish! In the same skillet where you cooked the chicken, add the minced garlic. Sauté it for about 30 seconds until it becomes fragrant. Then, toss in the sliced bell peppers, snap peas, and julienned carrots. Stir-fry these vegetables for about 3-4 minutes. You want them to be tender-crisp, which means they should still have a bit of crunch. This step adds freshness and nutrition to your Chicken Lo Mein.

Step 4: Combining Ingredients

Once the vegetables are ready, it’s time to bring everything together. Return the cooked chicken to the skillet. Then, add the cooked egg noodles along with the soy sauce, oyster sauce, sesame oil, ground ginger, salt, and pepper. Toss everything together gently. Make sure the noodles and chicken are well coated with the sauces. Cook for an additional 2-3 minutes until everything is heated through. This is where the magic happens, as all the flavors meld together beautifully!

Step 5: Final Touches

Finally, remove the skillet from the heat. Stir in the chopped green onions for a fresh burst of flavor. They add a nice crunch and a pop of color to your dish. Serve your Chicken Lo Mein hot, and enjoy the delightful combination of flavors and textures. This dish is perfect for a family dinner or a cozy night in. You’ll love how easy it is to make and how delicious it tastes!

Variations of Chicken Lo Mein Recipe

Vegetarian Options

If you’re looking for a vegetarian twist on the classic Chicken Lo Mein recipe, you’re in luck! You can easily substitute the chicken with tofu or a variety of vegetables. Tofu is a great source of protein and absorbs flavors well. Simply press and cube firm tofu, then sauté it until golden brown. You can also add mushrooms, broccoli, or zucchini for extra texture and nutrients. This way, you can enjoy a delicious and satisfying meal without meat, while still keeping the essence of the original dish.

Alternative Proteins

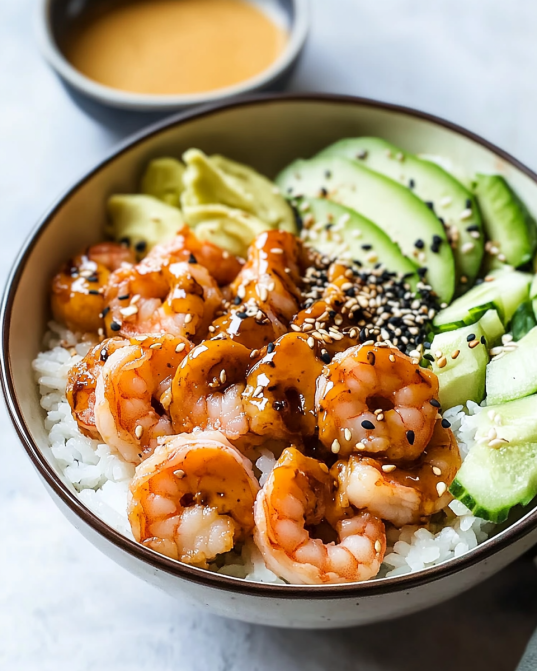
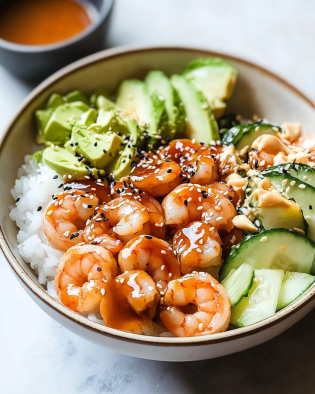
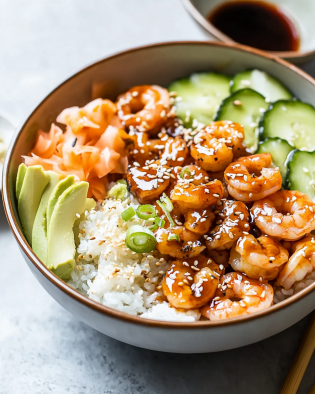
For those who prefer different proteins, there are plenty of options! Shrimp, beef, or pork can be used instead of chicken. If you choose shrimp, make sure to cook them just until they turn pink, which usually takes about 3-4 minutes. For beef or pork, slice them thinly and cook them until browned. Each protein brings its own unique flavor to the dish, allowing you to customize your Chicken Lo Mein recipe to suit your taste. Don’t hesitate to experiment with different meats to find your favorite combination!

Different Vegetable Combinations

The beauty of Chicken Lo Mein lies in its versatility. You can mix and match vegetables based on what you have on hand or what’s in season. Try adding bok choy, baby corn, or even bean sprouts for a crunchy texture. You can also include leafy greens like spinach or kale for added nutrition. The key is to keep the vegetables colorful and vibrant, which not only makes the dish visually appealing but also boosts its health benefits. Feel free to get creative and make this Chicken Lo Mein recipe your own!

Cooking Note for Chicken Lo Mein Recipe

When preparing your Chicken Lo Mein, there are a few important cooking notes to keep in mind. First, ensure that all your ingredients are prepped and ready before you start cooking. This will make the process smoother and quicker. Stir-frying is a fast cooking method, so having everything on hand will help you avoid overcooking any ingredients.

Another tip is to use high heat when stir-frying. This helps to sear the chicken and vegetables quickly, locking in their flavors and textures. If you find that your skillet or wok is getting too crowded, consider cooking in batches. This way, each ingredient gets the attention it deserves, resulting in a better overall dish.

Also, remember to adjust the seasoning to your taste. The soy sauce and oyster sauce provide a savory base, but you can always add more or less depending on your preference. If you like it spicier, a dash of chili sauce or red pepper flakes can elevate the dish. Lastly, don’t forget to taste as you go! This will help you achieve the perfect balance of flavors in your Chicken Lo Mein recipe.

Serving Suggestions for Chicken Lo Mein Recipe

When it comes to serving your Chicken Lo Mein, presentation and pairing can elevate the dining experience. Here are some delightful serving suggestions to consider:

  • Garnish with Fresh Herbs: A sprinkle of fresh cilantro or basil can add a burst of flavor and color. These herbs complement the savory notes of the dish beautifully.
  • Serve with Extra Sauce: If you love a saucy dish, consider serving additional soy sauce or a homemade stir-fry sauce on the side. This allows everyone to customize their meal to their liking.
  • Pair with Spring Rolls: For a complete meal, serve your Chicken Lo Mein alongside crispy spring rolls. They make a great appetizer and add a crunchy texture to your meal.
  • Accompany with Soup: A light soup, such as hot and sour soup or egg drop soup, can be a perfect starter. It warms up the palate and complements the flavors of the Lo Mein.
  • Offer a Side Salad: A simple cucumber or Asian-style salad can provide a refreshing contrast to the rich flavors of the Chicken Lo Mein. Tossed with a light vinaigrette, it adds a nice crunch.
  • Use Fun Serving Dishes: Consider serving your Chicken Lo Mein in colorful bowls or on a large platter. This not only makes the dish more appealing but also encourages sharing among family and friends.

These serving suggestions can enhance your Chicken Lo Mein experience, making it not just a meal, but a delightful occasion. Enjoy your delicious creation with loved ones, and don’t forget to share your culinary masterpiece!

Tips for Perfecting Your Chicken Lo Mein Recipe

To make your Chicken Lo Mein truly shine, consider these helpful tips. They will ensure that your dish is not only delicious but also visually appealing and satisfying.

  • Use Fresh Ingredients: Fresh vegetables and high-quality chicken make a big difference in flavor. Choose vibrant bell peppers, crisp snap peas, and fresh green onions for the best results.
  • Don’t Overcook the Vegetables: Aim for tender-crisp vegetables. Overcooking can lead to mushy veggies, which lose their vibrant color and crunch. Stir-fry them just until they are bright and slightly tender.
  • Marinate the Chicken: For extra flavor, consider marinating the chicken in soy sauce, ginger, and garlic for about 15-30 minutes before cooking. This adds depth to the dish.
  • Adjust the Sauce: Taste your sauce as you go. If you prefer a stronger flavor, add more soy sauce or oyster sauce. For a sweeter touch, a dash of sugar or honey can enhance the taste.
  • Cook in Batches: If you have a lot of ingredients, cook them in batches. This prevents overcrowding in the skillet, allowing everything to cook evenly and maintain its texture.
  • Experiment with Seasonings: Don’t hesitate to try different spices or sauces. Adding a splash of rice vinegar or a sprinkle of five-spice powder can elevate the flavor profile.
  • Serve Immediately: Chicken Lo Mein is best enjoyed fresh. Serve it right after cooking to keep the noodles and vegetables at their best texture.
  • Store Leftovers Properly: If you have leftovers, store them in an airtight container in the fridge. Reheat gently on the stove or in the microwave, adding a splash of water to prevent drying out.

By following these tips, you can perfect your Chicken Lo Mein recipe and impress your family and friends. Enjoy the process of cooking and the delightful flavors that come together in this beloved dish!

Breakdown of Time for Chicken Lo Mein Recipe

Prep Time

Preparing your Chicken Lo Mein is quick and easy! The prep time typically takes about 10-15 minutes. During this time, you will gather all your ingredients, slice the chicken, and chop the vegetables. Having everything ready before you start cooking will make the process smoother and more enjoyable. Remember, the key to a successful stir-fry is to have all your ingredients prepped and within reach!

Cooking Time

The cooking time for Chicken Lo Mein is approximately 15-20 minutes. This includes cooking the chicken, stir-frying the vegetables, and combining everything with the noodles and sauces. Since stir-frying is a fast cooking method, it’s important to keep an eye on the ingredients to prevent overcooking. The goal is to achieve tender chicken and crisp vegetables, all while ensuring the noodles are heated through.

Total Time

In total, you can expect to spend around 30-35 minutes from start to finish when making Chicken Lo Mein. This makes it a fantastic option for a weeknight dinner or a quick meal when you’re short on time. With just a little bit of preparation and cooking, you’ll have a delicious and satisfying dish ready to enjoy!

Nutritional Information for Chicken Lo Mein Recipe

Calories

When it comes to enjoying a delicious Chicken Lo Mein, being mindful of calories is important. Each serving of this delightful dish contains approximately 350 calories. This makes it a relatively light option for a meal, especially considering the balance of protein, carbohydrates, and healthy fats it provides. Enjoying Chicken Lo Mein can fit well into a balanced diet, allowing you to savor the flavors without overindulging.

Protein

Protein is a key component of any meal, and Chicken Lo Mein delivers! Each serving offers about 28 grams of protein. This protein comes primarily from the boneless, skinless chicken breasts used in the recipe. Protein is essential for building and repairing tissues, making it an important part of your diet. With this Chicken Lo Mein recipe, you can enjoy a satisfying meal that supports your nutritional needs.

Sodium

Sodium is another factor to consider when enjoying Chicken Lo Mein. Each serving contains around 800 milligrams of sodium. This amount is primarily from the soy sauce and oyster sauce used in the recipe. While sodium is necessary for bodily functions, it’s important to monitor your intake. If you’re watching your sodium levels, consider using low-sodium soy sauce or adjusting the amount of sauce you add. This way, you can still enjoy the flavors of Chicken Lo Mein while keeping your sodium intake in check.

FAQs about Chicken Lo Mein Recipe

Can I use other types of noodles for Chicken Lo Mein?

Absolutely! While egg noodles are traditional for Chicken Lo Mein, you can use other types of noodles as well. For instance, you can try using rice noodles, udon noodles, or even whole wheat noodles. Each type of noodle brings its own unique texture and flavor to the dish. Just be sure to adjust the cooking time according to the type of noodles you choose. This flexibility allows you to customize your Chicken Lo Mein recipe to suit your preferences!

How can I make Chicken Lo Mein gluten-free?

If you need a gluten-free version of Chicken Lo Mein, it’s quite simple! Start by using gluten-free noodles, such as rice noodles or gluten-free egg noodles. Additionally, swap out regular soy sauce for gluten-free soy sauce or tamari. These alternatives will help you enjoy the same delicious flavors without the gluten. Always check the labels to ensure all ingredients are gluten-free. With these adjustments, you can savor a tasty Chicken Lo Mein that fits your dietary needs!

What vegetables work best in Chicken Lo Mein?

When it comes to vegetables for Chicken Lo Mein, the options are endless! Some popular choices include bell peppers, snap peas, carrots, and broccoli. You can also add bok choy, baby corn, or mushrooms for extra flavor and texture. The key is to use a mix of colorful vegetables to make the dish visually appealing and nutritious. Feel free to experiment with your favorites or whatever you have on hand. The versatility of Chicken Lo Mein allows you to create a dish that’s both delicious and healthy!

Can I make Chicken Lo Mein ahead of time?

Yes, you can prepare Chicken Lo Mein ahead of time! To do this, cook the chicken, noodles, and vegetables as per the recipe. Once everything is combined, let it cool completely before storing it in an airtight container in the refrigerator. It can be kept for up to 3 days. When you’re ready to enjoy it, simply reheat it in a skillet over medium heat, adding a splash of water or soy sauce to prevent it from drying out. This makes Chicken Lo Mein a great option for meal prep or quick weeknight dinners!

Conclusion on Chicken Lo Mein Recipe

In conclusion, the Chicken Lo Mein recipe is a fantastic dish that combines flavor, nutrition, and convenience. With its tender chicken, vibrant vegetables, and savory sauces, it’s no wonder this dish is a favorite for many. Whether you’re cooking for yourself, your family, or friends, Chicken Lo Mein is sure to impress.

This recipe is not only easy to follow but also allows for plenty of customization. You can switch up the proteins, add different vegetables, or even make it vegetarian. The possibilities are endless! Plus, with a total preparation and cooking time of around 30-35 minutes, it’s perfect for busy weeknights when you want a delicious meal without spending hours in the kitchen.

As you explore this Chicken Lo Mein recipe, remember to have fun with it. Cooking is an art, and each dish you create is a reflection of your personal taste. Don’t hesitate to experiment with flavors and ingredients to make it your own. With a few simple tips and tricks, you can elevate your Chicken Lo Mein to new heights.

So, gather your ingredients, roll up your sleeves, and get ready to enjoy a delightful homemade meal. Your taste buds will thank you, and you might just find that this Chicken Lo Mein recipe becomes a regular in your dinner rotation. Happy cooking!

Crispy Oven-Baked Chicken Bites are a must-try snack!

Introduction to Crispy Oven-Baked Chicken Bites

Are you looking for a delicious and easy-to-make snack or meal? Look no further! Crispy Oven-Baked Chicken Bites are the perfect solution. These bite-sized pieces of chicken are not only tasty but also healthier than traditional fried chicken. By baking instead of frying, you can enjoy all the crunch without the extra oil and calories.

Whether you’re hosting a party, preparing a family dinner, or simply craving a savory treat, these chicken bites will surely impress. They are versatile and can be served as an appetizer, a main dish, or even as a fun finger food for kids. Plus, they are easy to customize with your favorite spices and flavors.

In this article, we will guide you through the ingredients, preparation steps, and variations of Crispy Oven-Baked Chicken Bites. You’ll also find helpful tips and serving suggestions to make your cooking experience enjoyable. So, roll up your sleeves and get ready to create a dish that everyone will love!

Ingredients for Crispy Oven-Baked Chicken Bites

To make your Crispy Oven-Baked Chicken Bites, you will need a few simple ingredients. These items are easy to find and will help you create a delicious dish that everyone will enjoy. Here’s what you’ll need:

  • 1 pound boneless, skinless chicken breasts: Cut into bite-sized pieces for easy cooking and eating.
  • 1 cup all-purpose flour: This will help create a crispy coating on the chicken.
  • 2 large eggs: Beaten eggs act as a binder, helping the breadcrumbs stick to the chicken.
  • 1 cup breadcrumbs: Panko breadcrumbs are preferred for extra crunch, but regular breadcrumbs work too.
  • 1 teaspoon garlic powder: Adds a savory flavor that enhances the chicken.
  • 1 teaspoon onion powder: Complements the garlic and adds depth to the taste.
  • 1 teaspoon paprika: Gives a lovely color and a hint of smokiness.
  • 1 teaspoon salt: Essential for bringing out the flavors in the chicken.
  • ½ teaspoon black pepper: Adds a bit of heat and enhances the overall flavor.
  • ½ teaspoon dried oregano: Offers a touch of herbal flavor that pairs well with chicken.
  • ½ teaspoon dried thyme: Complements the other herbs and adds a warm, earthy taste.
  • Cooking spray or olive oil: For drizzling, this helps achieve that golden, crispy finish.

These ingredients come together to create a delightful dish that is both satisfying and nutritious. Feel free to adjust the spices to suit your taste. Now that you have everything you need, let’s move on to the preparation steps!

Preparation of Crispy Oven-Baked Chicken Bites

Now that you have gathered all your ingredients, it’s time to prepare your Crispy Oven-Baked Chicken Bites. This process is simple and straightforward, making it easy for anyone to follow. Let’s break it down step by step!

Step 1: Preheat the Oven

First things first, preheat your oven to 400°F (200°C). This temperature is perfect for achieving that golden, crispy texture. While the oven heats up, you can focus on preparing the chicken and the breading mixture.

Step 2: Prepare the Chicken

Next, take your pound of boneless, skinless chicken breasts and cut them into bite-sized pieces. Aim for uniform sizes to ensure even cooking. This step is crucial because it helps the chicken cook thoroughly and evenly. Once cut, set the chicken aside while you prepare the breading.

Step 3: Create the Breading Mixture

In a shallow bowl, combine the all-purpose flour, garlic powder, onion powder, paprika, salt, black pepper, oregano, and thyme. Mix these dry ingredients well. This flavorful blend will give your chicken bites a delicious coating. In another bowl, beat the two large eggs until they are well combined. This egg mixture will help the breadcrumbs stick to the chicken.

Step 4: Coat the Chicken Bites

Now comes the fun part! Take each piece of chicken and coat it in the flour mixture. Make sure to shake off any excess flour. Then, dip the floured chicken into the beaten eggs, allowing any extra egg to drip off. Finally, roll the chicken in the breadcrumbs, pressing gently to ensure they adhere well. This three-step coating process is what makes your chicken bites crispy and flavorful!

Step 5: Arrange on Baking Sheet

Once all the chicken pieces are coated, it’s time to arrange them on your prepared baking sheet. Make sure to place them in a single layer, leaving some space between each piece. This spacing allows hot air to circulate, ensuring even cooking. For an extra crispy finish, lightly spray or drizzle the coated chicken bites with olive oil.

Step 6: Bake the Chicken Bites

Finally, place the baking sheet in the preheated oven. Bake the chicken bites for 15-20 minutes. Remember to flip them halfway through the cooking time for even browning. You’ll know they are done when they are golden brown and cooked through. Once baked, remove them from the oven and let them cool for a few minutes before serving. Enjoy your delicious Crispy Oven-Baked Chicken Bites!

Variation of Crispy Oven-Baked Chicken Bites

While the classic Crispy Oven-Baked Chicken Bites are already a hit, you can easily switch things up with a few variations. These twists will add exciting flavors and make your chicken bites even more enjoyable. Let’s explore two delicious variations: Spicy Crispy Oven-Baked Chicken Bites and Herb-Infused Crispy Oven-Baked Chicken Bites.

Spicy Crispy Oven-Baked Chicken Bites

If you love a little heat, then Spicy Crispy Oven-Baked Chicken Bites are perfect for you! To add some spice, simply mix in cayenne pepper or your favorite hot sauce into the egg mixture. Start with ½ teaspoon of cayenne pepper and adjust according to your taste. This will give your chicken bites a delightful kick that pairs wonderfully with the crispy coating.

For an extra layer of flavor, consider adding some crushed red pepper flakes to the breadcrumb mixture. This will not only enhance the spiciness but also add a beautiful color to your chicken bites. Serve these spicy bites with a cooling dip, like ranch or blue cheese dressing, to balance the heat. Your guests will love this fiery twist!

Herb-Infused Crispy Oven-Baked Chicken Bites

For those who prefer a more aromatic flavor, try making Herb-Infused Crispy Oven-Baked Chicken Bites. This variation is all about fresh herbs! Before you start the breading process, finely chop fresh herbs like parsley, basil, or cilantro. Mix these herbs into the breadcrumb mixture for a burst of freshness.

You can also marinate the chicken pieces in a mixture of olive oil, lemon juice, and your choice of herbs for 1-2 hours before coating. This will infuse the chicken with delightful flavors and keep it juicy. The result is a fragrant and tasty chicken bite that’s perfect for any occasion. Pair these herb-infused bites with a zesty lemon aioli for a refreshing dip!

These variations not only enhance the flavor but also allow you to customize your Crispy Oven-Baked Chicken Bites to suit your preferences. Whether you go for spicy or herb-infused, you’re sure to impress your family and friends with these delicious twists!

Cooking Note for Crispy Oven-Baked Chicken Bites

When preparing your Crispy Oven-Baked Chicken Bites, there are a few important cooking notes to keep in mind. These tips will help ensure that your chicken bites turn out perfectly crispy and flavorful every time.

First, make sure your chicken pieces are uniform in size. This helps them cook evenly, preventing some pieces from being overcooked while others remain undercooked. Aim for bite-sized pieces, about 1 to 1.5 inches in size.

Next, don’t skip the step of preheating your oven. A hot oven is essential for achieving that golden, crispy texture. If you place the chicken in a cold oven, it may not cook properly, resulting in soggy bites.

Another key point is to avoid overcrowding the baking sheet. If the chicken pieces are too close together, they will steam instead of bake, leading to a less crispy result. Use multiple baking sheets if necessary, or bake in batches to ensure proper air circulation.

For an extra crispy finish, consider using a wire rack placed on top of the baking sheet. This allows hot air to circulate around the chicken bites, enhancing their crunchiness. Just remember to lightly spray the rack with cooking spray to prevent sticking.

Lastly, keep an eye on the cooking time. Ovens can vary, so check your chicken bites a few minutes before the suggested cooking time. They should be golden brown and reach an internal temperature of 165°F (75°C) to ensure they are fully cooked.

By following these cooking notes, you’ll be well on your way to creating delicious and crispy chicken bites that everyone will love. Happy cooking!

Serving Suggestions for Crispy Oven-Baked Chicken Bites

Once your Crispy Oven-Baked Chicken Bites are ready, it’s time to think about how to serve them. These delightful bites are versatile and can be enjoyed in many ways. Here are some serving suggestions that will elevate your dish and impress your guests!

First, consider serving the chicken bites as an appetizer. Arrange them on a large platter with a variety of dipping sauces. Popular choices include ranch dressing, honey mustard, barbecue sauce, or a spicy sriracha mayo. This allows everyone to choose their favorite dip, making it a fun and interactive experience.

For a more substantial meal, serve the chicken bites alongside a fresh salad. A crisp Caesar salad or a mixed greens salad with cherry tomatoes and cucumbers pairs wonderfully with the crispy bites. The freshness of the salad complements the crunchiness of the chicken, creating a balanced meal.

If you’re hosting a game day or a casual gathering, consider making a chicken bite platter. Include a selection of sides like celery sticks, carrot sticks, and sliced bell peppers. These crunchy veggies add color and nutrition to your spread. You can also add some cheese cubes or olives for variety.

For a fun twist, try serving the chicken bites in a wrap. Use a tortilla or pita bread, and fill it with lettuce, tomatoes, and your choice of sauce. This makes for a delicious handheld meal that’s perfect for lunch or a quick dinner.

Lastly, don’t forget about garnishing! A sprinkle of fresh herbs, like parsley or cilantro, can add a pop of color and freshness to your dish. You can also add a squeeze of lemon juice over the chicken bites for a zesty finish.

With these serving suggestions, your Crispy Oven-Baked Chicken Bites will be a hit at any gathering. Enjoy the delicious flavors and the smiles on everyone’s faces!

Tips for Perfect Crispy Oven-Baked Chicken Bites

To achieve the ultimate Crispy Oven-Baked Chicken Bites, a few tips can make all the difference. These simple yet effective suggestions will help you create chicken bites that are not only crispy but also bursting with flavor. Let’s dive into some essential tips!

First, always use panko breadcrumbs for that extra crunch. Panko is lighter and airier than regular breadcrumbs, which helps create a delightful texture. If you can’t find panko, you can make your own by processing stale bread into coarse crumbs.

Next, consider marinating your chicken pieces before breading. A quick soak in buttermilk or a mixture of yogurt and spices can add moisture and flavor. This step not only enhances the taste but also helps keep the chicken juicy during baking.

Another important tip is to let the coated chicken bites rest for a few minutes before baking. This allows the breading to adhere better, resulting in a crispier finish. While you wait, preheat your oven to ensure it’s hot when the chicken goes in.

When arranging the chicken on the baking sheet, make sure to leave space between each piece. This spacing is crucial for proper air circulation, which helps achieve that golden-brown color and crispy texture. If needed, use two baking sheets to avoid overcrowding.

For an even crispier result, flip the chicken bites halfway through the baking time. This ensures that both sides get that perfect crunch. You can also rotate the baking sheet if your oven has hot spots, ensuring even cooking.

Lastly, don’t skip the final touch! A light drizzle of olive oil or a quick spray of cooking spray before baking can enhance the crispiness. This small step can make a big difference in achieving that golden-brown finish.

By following these tips, you’ll be well on your way to making perfect Crispy Oven-Baked Chicken Bites every time. Enjoy the process and the delicious results!

Breakdown of Time for Crispy Oven-Baked Chicken Bites

Understanding the time needed for each step in making Crispy Oven-Baked Chicken Bites can help you plan your cooking better. Here’s a simple breakdown of the time involved in preparing and cooking this delicious dish.

Prep Time

The prep time for Crispy Oven-Baked Chicken Bites is approximately 15-20 minutes. This includes gathering your ingredients, cutting the chicken into bite-sized pieces, and preparing the breading mixture. If you choose to marinate the chicken in buttermilk or spices, you may want to add an additional 1-2 hours for marinating. However, the actual hands-on time remains around 15-20 minutes.

Cooking Time

Once your chicken bites are coated and ready, the cooking time is about 15-20 minutes. During this time, you will bake the chicken in a preheated oven at 400°F (200°C). Remember to flip the chicken halfway through to ensure even cooking and a crispy texture. Keep an eye on them as they bake, and look for that golden brown color to know they are done!

Total Time

In total, if you do not include marinating time, you can expect to spend about 30-40 minutes from start to finish. This includes both prep and cooking time. If you decide to marinate the chicken, the total time will increase to about 1 hour and 30 minutes, but most of that time is hands-off while the chicken soaks up the flavors.

With this time breakdown, you can easily fit Crispy Oven-Baked Chicken Bites into your meal planning. Whether you’re making them for a quick weeknight dinner or a fun gathering, they are sure to be a hit!

Nutritional Information for Crispy Oven-Baked Chicken Bites

Understanding the nutritional content of your Crispy Oven-Baked Chicken Bites is essential for making informed choices about your meals. This dish is not only delicious but also provides a good balance of nutrients. Here’s a closer look at the nutritional information per serving:

Calories

Each serving of Crispy Oven-Baked Chicken Bites contains approximately 320 calories. This makes it a satisfying option for a snack or a meal without overwhelming your daily caloric intake. The combination of chicken and breadcrumbs provides a hearty yet manageable calorie count, allowing you to enjoy these bites guilt-free.

Protein

One of the standout features of this dish is its protein content. Each serving offers about 30 grams of protein. This high protein level is beneficial for muscle repair and growth, making these chicken bites a great choice for active individuals or anyone looking to maintain a balanced diet. Protein also helps keep you feeling full longer, which can aid in weight management.

Sodium

In terms of sodium, each serving contains around 600 milligrams. While this is a reasonable amount for a flavorful dish, it’s always good to be mindful of your sodium intake, especially if you are watching your salt consumption. You can reduce the sodium content by using low-sodium breadcrumbs or adjusting the amount of salt in the seasoning mix.

Overall, Crispy Oven-Baked Chicken Bites are a nutritious option that can fit well into a balanced diet. With their appealing calorie count, high protein content, and moderate sodium levels, they make for a delicious and health-conscious choice. Enjoy these bites as part of a well-rounded meal or as a tasty snack!

FAQs about Crispy Oven-Baked Chicken Bites

Can I use chicken thighs instead of chicken breasts for Crispy Oven-Baked Chicken Bites?

Absolutely! You can use chicken thighs instead of chicken breasts for your Crispy Oven-Baked Chicken Bites. Chicken thighs are juicier and more flavorful, which can enhance the overall taste of your dish. Just make sure to trim any excess fat and cut the thighs into bite-sized pieces, similar to how you would with chicken breasts. The cooking time may be slightly longer, so keep an eye on them to ensure they reach an internal temperature of 165°F (75°C).

How can I make Crispy Oven-Baked Chicken Bites gluten-free?

Making Crispy Oven-Baked Chicken Bites gluten-free is easy! Simply substitute the all-purpose flour and breadcrumbs with gluten-free alternatives. You can use gluten-free flour, such as almond flour or coconut flour, for the coating. For the breadcrumbs, look for gluten-free panko or crushed gluten-free crackers. These substitutions will help you enjoy the same delicious crunch without the gluten. Just be sure to check the labels to ensure all ingredients are gluten-free!

What dipping sauces pair well with Crispy Oven-Baked Chicken Bites?

There are many delicious dipping sauces that pair wonderfully with Crispy Oven-Baked Chicken Bites! Here are a few popular options:

  • Ranch Dressing: A classic choice that adds a creamy, tangy flavor.
  • Honey Mustard: The sweet and tangy combination is always a hit.
  • Barbecue Sauce: Perfect for those who enjoy a smoky, sweet flavor.
  • Sriracha Mayo: A spicy and creamy option that adds a kick.
  • Buffalo Sauce: For those who love heat, this sauce is a great choice!

Feel free to mix and match or create your own signature sauce to enjoy with your chicken bites!

Can I prepare Crispy Oven-Baked Chicken Bites in advance?

Yes, you can prepare Crispy Oven-Baked Chicken Bites in advance! To do this, follow the breading process and then place the coated chicken bites on a baking sheet. Cover them with plastic wrap and refrigerate for up to 24 hours before baking. When you’re ready to cook, simply preheat the oven and bake as directed. If you prefer, you can also freeze the coated chicken bites. Just make sure to freeze them in a single layer before transferring them to a freezer bag. When you’re ready to enjoy, bake them straight from the freezer, adding a few extra minutes to the cooking time.

Conclusion on Crispy Oven-Baked Chicken Bites

In conclusion, Crispy Oven-Baked Chicken Bites are a fantastic addition to any meal or gathering. They are not only easy to prepare but also offer a healthier alternative to traditional fried chicken. With their delightful crunch and savory flavors, these chicken bites are sure to please everyone at the table.

Whether you choose to stick with the classic recipe or experiment with variations like spicy or herb-infused options, the possibilities are endless. You can customize the flavors to suit your taste, making them perfect for any occasion. Plus, with the right tips and techniques, you can achieve that perfect crispy texture every time.

As you serve these delicious bites, don’t forget to pair them with your favorite dipping sauces and sides. This will enhance the overall experience and make your meal even more enjoyable. Remember, cooking is all about creativity and fun, so feel free to make these chicken bites your own!

So, gather your ingredients, follow the steps, and get ready to impress your family and friends with your culinary skills. Crispy Oven-Baked Chicken Bites are not just a dish; they are a delightful experience that brings people together. Enjoy every bite!

Creamy Four-Cheese Garlic Spaghetti is a must-try dish!

Introduction to Creamy Four-Cheese Garlic Spaghetti Recipe

Creamy Four-Cheese Garlic Spaghetti Recipe. This dish is not just a meal; it’s an experience filled with rich flavors and creamy textures that will tantalize your taste buds.

Imagine twirling perfectly cooked spaghetti around your fork, coated in a luscious sauce made from four different cheeses. The aroma of garlic wafts through the air, inviting everyone to the table. This recipe is perfect for family dinners, special occasions, or even a cozy night in. It’s simple enough for a weeknight meal yet elegant enough to impress guests.

What makes this recipe stand out? The combination of cheeses! With Parmesan, mozzarella, feta, and Pecorino Romano, each bite offers a unique flavor profile. The creamy sauce envelops the spaghetti, creating a comforting dish that warms the heart. Plus, it’s quick to prepare, making it a go-to option for busy cooks.

Creamy Four-Cheese Garlic Spaghetti Recipe is easy to follow. You’ll find that the steps are straightforward, and the ingredients are accessible. So, let’s get started on this cheesy adventure that promises to bring smiles to your dining table!

Ingredients for Creamy Four-Cheese Garlic Spaghetti Recipe

Creamy Four-Cheese Garlic Spaghetti Recipe, you’ll need a few simple yet essential ingredients. Each component plays a vital role in building the rich and creamy flavor that makes this dish so special. Here’s what you’ll need:

  • 8 ounces spaghetti: This classic pasta serves as the base for our dish. You can also use other pasta shapes if you prefer.
  • 2 tablespoons unsalted butter: Butter adds richness and depth to the sauce.
  • 4 cloves garlic, minced: Fresh garlic brings a wonderful aroma and flavor to the dish.
  • 1 cup heavy cream: This is the key ingredient that makes the sauce creamy and luxurious.
  • 1/2 cup grated Parmesan cheese: Parmesan adds a nutty flavor and helps thicken the sauce.
  • 1/2 cup shredded mozzarella cheese: Mozzarella contributes a gooey texture that melts beautifully.
  • 1/2 cup crumbled feta cheese: Feta adds a tangy kick that balances the richness of the other cheeses.
  • 1/4 cup grated Pecorino Romano cheese: This cheese brings a sharp, salty flavor that enhances the overall taste.
  • Salt and pepper to taste: These seasonings are essential for bringing out the flavors of the dish.
  • Fresh parsley, chopped (for garnish): A sprinkle of parsley adds a pop of color and freshness to your plate.

Creamy Four-Cheese Garlic Spaghetti Recipe. Now, let’s move on to the next step: preparing the pasta!

Step-by-Step Preparation of Creamy Four-Cheese Garlic Spaghetti Recipe

Creamy Four-Cheese Garlic Spaghetti Recipe. Each step is designed to ensure that your dish turns out perfectly creamy and delicious.

Step 1: Preparing the Pasta

Start by boiling a large pot of salted water. Once it’s bubbling, add the 8 ounces of spaghetti. Cook the pasta according to the package instructions until it’s al dente. This usually takes about 8 to 10 minutes. Remember, you want it firm to the bite!

After cooking, drain the spaghetti in a colander. Don’t forget to reserve 1/2 cup of the pasta water. This starchy water will help adjust the sauce later. Set the drained spaghetti aside while you prepare the sauce.

Step 2: Making the Garlic Sauce

In a large skillet, melt 2 tablespoons of unsalted butter over medium heat. As the butter melts, add 4 cloves of minced garlic. Sauté the garlic for about 1 minute. You want it fragrant but be careful not to let it burn. Burnt garlic can ruin the flavor of your sauce!

Step 3: Combining the Cheeses

Next, pour in 1 cup of heavy cream into the skillet with the garlic. Bring it to a gentle simmer. Stir in the cheeses: 1/2 cup grated Parmesan, 1/2 cup shredded mozzarella, 1/2 cup crumbled feta, and 1/4 cup grated Pecorino Romano. Keep stirring until all the cheeses melt and the sauce becomes smooth and creamy.

Step 4: Mixing Everything Together

Now it’s time to bring the spaghetti and sauce together! Add the cooked spaghetti to the skillet. Toss the pasta gently to coat it in the creamy cheese sauce. If the sauce seems too thick, gradually add some of the reserved pasta water. This will help achieve your desired consistency.

Step 5: Final Touches and Serving

Creamy Four-Cheese Garlic Spaghetti Recipe. Remove the skillet from heat and garnish with freshly chopped parsley. This adds a lovely touch of color and freshness!

Your creamy, cheesy spaghetti is now ready to serve! Dish it out onto plates and enjoy the delightful flavors. This recipe is sure to impress anyone who tries it!

Variations of Creamy Four-Cheese Garlic Spaghetti Recipe

Creamy Four-Cheese Garlic Spaghetti Recipe is delicious as is, there are many ways to customize it to suit your taste. Adding different ingredients can enhance the flavors and make the dish even more exciting. Let’s explore some tasty variations!

Adding Vegetables

Incorporating vegetables into your creamy spaghetti can add color, texture, and nutrition. Here are some great options:

  • Spinach: Fresh spinach wilts beautifully in the sauce. Add a couple of handfuls just before mixing in the spaghetti.
  • Mushrooms: Sauté sliced mushrooms with the garlic for an earthy flavor. They pair wonderfully with the creamy sauce.
  • Cherry Tomatoes: Halved cherry tomatoes add a burst of sweetness. Toss them in just before serving for a fresh touch.
  • Broccoli: Steamed broccoli florets can add a nice crunch. Mix them in with the pasta for a colorful dish.

Feel free to experiment with your favorite vegetables. They not only enhance the dish but also make it healthier!

Protein Options for Creamy Four-Cheese Garlic Spaghetti Recipe

Creamy Four-Cheese Garlic Spaghetti Recipe, there are plenty of delicious options:

  • Grilled Chicken: Sliced grilled chicken breast can make the dish heartier. It adds a nice flavor and pairs well with the cheese.
  • Shrimp: Sautéed shrimp can bring a touch of elegance. Cook them in the garlic butter before adding the cream.
  • Bacon or Pancetta: Crispy bacon or pancetta can add a savory crunch. Cook it until crispy and mix it in for a smoky flavor.
  • Tofu: For a vegetarian option, add cubed tofu. It absorbs flavors well and adds protein without meat.

These protein options can transform your creamy spaghetti into a complete meal. Choose what you love and enjoy the delicious results!

Cooking Note for Creamy Four-Cheese Garlic Spaghetti Recipe

Creamy Four-Cheese Garlic Spaghetti Recipe, there are a few important cooking notes to keep in mind. These tips will help ensure that your dish turns out perfectly every time, making your cooking experience enjoyable and stress-free.

First, always use fresh ingredients. Fresh garlic, high-quality cheeses, and good pasta can significantly enhance the flavor of your dish. Fresh ingredients not only taste better but also provide a more vibrant color and texture.

Next, pay attention to the cooking time of the spaghetti. Cooking it until it’s al dente is crucial. This means the pasta should be firm to the bite. Overcooked spaghetti can become mushy and lose its appealing texture. Remember, it will continue to cook slightly when mixed with the hot sauce.

When making the sauce, keep the heat at medium. This allows the butter to melt without burning and helps the garlic sauté evenly. If the heat is too high, the garlic can burn quickly, leading to a bitter taste in your sauce.

As you combine the cheeses, stir continuously to prevent them from clumping. A smooth sauce is key to achieving that creamy texture. If you find the sauce is too thick, don’t hesitate to add more reserved pasta water. This starchy water not only thins the sauce but also helps it cling to the pasta better.

Creamy Four-Cheese Garlic Spaghetti Recipe truly shine.

By following these cooking notes, you’ll create a delicious and satisfying meal that everyone will love. Enjoy the process and the delightful results!

Serving Suggestions for Creamy Four-Cheese Garlic Spaghetti Recipe

Creamy Four-Cheese Garlic Spaghetti Recipe, it’s time to think about how to serve it! Presentation can elevate your dish and make it even more enjoyable. Here are some delightful serving suggestions to consider:

  • Garnish with Fresh Herbs: A sprinkle of freshly chopped parsley or basil adds a pop of color and freshness. It also enhances the flavor, making each bite more delightful.
  • Pair with a Side Salad: A light, crisp salad complements the richness of the spaghetti. Consider a simple mixed greens salad with a lemon vinaigrette for a refreshing contrast.
  • Serve with Garlic Bread: Nothing pairs better with creamy pasta than warm, buttery garlic bread. It’s perfect for soaking up any leftover sauce on your plate!
  • Offer Grated Cheese on the Side: Provide extra grated Parmesan or Pecorino Romano cheese at the table. Guests can sprinkle more cheese on their servings for added flavor.
  • Include a Glass of Wine: A glass of white wine, like Chardonnay or Pinot Grigio, can enhance the dining experience. The acidity in the wine balances the creaminess of the dish beautifully.

Creamy Four-Cheese Garlic Spaghetti Recipe will surely impress everyone at the table!

Tips for Perfecting Your Creamy Four-Cheese Garlic Spaghetti Recipe

Creamy Four-Cheese Garlic Spaghetti Recipe truly exceptional, consider these helpful tips. They will guide you in achieving the perfect balance of flavors and textures, ensuring that every bite is a delight.

  • Choose Quality Ingredients: The quality of your ingredients can make a big difference. Opt for fresh garlic, high-quality cheeses, and good pasta. Fresh ingredients enhance the flavor and overall experience of your dish.
  • Don’t Rush the Garlic: When sautéing garlic, take your time. Cooking it slowly over medium heat allows the flavors to develop without burning. Burnt garlic can ruin the taste of your sauce.
  • Adjust the Creaminess: If you prefer a lighter sauce, you can reduce the amount of heavy cream. Alternatively, for a richer flavor, add a bit more cheese. Just remember to adjust the seasoning accordingly!
  • Experiment with Cheese: While this recipe calls for four specific cheeses, feel free to experiment. Try adding a bit of goat cheese for tanginess or a sharp cheddar for a different flavor profile. Each cheese brings its unique taste to the dish.
  • Use the Right Pasta: While spaghetti is traditional, don’t hesitate to try other pasta shapes. Fettuccine, penne, or even gluten-free options can work beautifully with the creamy sauce.
  • Save Some Pasta Water: Always reserve some pasta water before draining. This starchy water is a great tool for adjusting the sauce’s consistency. It helps the sauce cling to the pasta better, enhancing the overall dish.
  • Let It Rest: After mixing the pasta with the sauce, let it sit for a minute before serving. This allows the flavors to meld together, creating a more cohesive dish.
  • Garnish Generously: Don’t skip the garnish! Fresh herbs like parsley or basil not only add color but also brighten the flavors. A sprinkle of freshly cracked black pepper can also elevate the dish.

Creamy Four-Cheese Garlic Spaghetti Recipe. Each step you take will enhance the dish, making it a memorable meal for you and your loved ones!

Breakdown of Time for Creamy Four-Cheese Garlic Spaghetti Recipe

Creamy Four-Cheese Garlic Spaghetti Recipe can help you plan your cooking efficiently. Here’s a simple breakdown of the time required for preparation and cooking:

Prep Time

The prep time for this delicious dish is quite short. You’ll need about 10 minutes to gather and prepare your ingredients. This includes:

  • Measuring out the pasta and cheeses.
  • Minced garlic and chopped parsley.
  • Gathering all necessary cooking tools and utensils.

With everything ready, you’ll be set to start cooking!

Cooking Time

Creamy Four-Cheese Garlic Spaghetti Recipe is approximately 20 minutes. Here’s how it breaks down:

  • Cooking the spaghetti: 8 to 10 minutes.
  • Making the garlic sauce: 5 to 7 minutes.
  • Combining the pasta with the sauce: 2 to 3 minutes.

This quick cooking time makes it perfect for a weeknight dinner or a last-minute meal!

Total Time

In total, you can expect to spend about 30 minutes from start to finish. This includes both prep and cooking time. It’s a fantastic option for those busy days when you want something delicious without spending hours in the kitchen.

Creamy Four-Cheese Garlic Spaghetti Recipe into your schedule. Enjoy the process and the delightful meal that awaits!

Nutritional Information for Creamy Four-Cheese Garlic Spaghetti Recipe

Creamy Four-Cheese Garlic Spaghetti Recipe is not only delicious but also provides a satisfying amount of nutrients. Here’s a breakdown of the nutritional information per serving:

Calories

Each serving of this creamy pasta dish contains approximately 540 calories. This calorie count includes the rich combination of cheeses and the heavy cream, which contribute to the overall energy content. While it’s a hearty meal, it’s important to enjoy it in moderation, especially if you’re watching your calorie intake.

Protein

In terms of protein, this recipe offers about 20 grams per serving. The protein comes primarily from the cheeses and the spaghetti. Protein is essential for building and repairing tissues, making this dish a good option for those looking to increase their protein intake while enjoying a comforting meal.

Sodium

Creamy Four-Cheese Garlic Spaghetti Recipe is approximately 800 milligrams per serving. This amount can vary based on the specific brands of cheese used and how much salt is added during cooking. If you’re watching your sodium intake, consider using low-sodium cheese options or reducing the added salt in the recipe.

Overall, this dish provides a delightful balance of flavors and nutrients. It’s perfect for a special occasion or a cozy night in. Just remember to pair it with a side of vegetables or a fresh salad to enhance its nutritional value!

FAQs about Creamy Four-Cheese Garlic Spaghetti Recipe

Can I use different types of cheese in the Creamy Four-Cheese Garlic Spaghetti Recipe?

Creamy Four-Cheese Garlic Spaghetti Recipe is its versatility. While the recipe calls for Parmesan, mozzarella, feta, and Pecorino Romano, you can easily swap in your favorite cheeses. For instance, you might try using gouda for a smoky flavor or goat cheese for a tangy twist. Just keep in mind that different cheeses melt differently, so choose ones that will create a creamy texture. Experimenting with cheese can lead to delightful new flavors!

How can I make the Creamy Four-Cheese Garlic Spaghetti Recipe healthier?

Creamy Four-Cheese Garlic Spaghetti Recipe healthier is quite simple! Here are a few tips:

  • Use Whole Wheat Pasta: Swap regular spaghetti for whole wheat or gluten-free pasta. This adds more fiber and nutrients.
  • Reduce the Cream: You can cut back on the heavy cream and replace it with low-fat milk or a plant-based milk alternative. This will lower the calorie count while still keeping some creaminess.
  • Add More Vegetables: Incorporate more veggies like spinach, zucchini, or bell peppers. This boosts the nutritional value and adds color to your dish.
  • Limit the Cheese: While cheese is delicious, you can reduce the amount used or choose lower-fat cheese options. This helps cut down on calories and fat.

By making these adjustments, you can enjoy a lighter version of this creamy pasta dish without sacrificing flavor!

What can I serve with Creamy Four-Cheese Garlic Spaghetti Recipe?

Creamy Four-Cheese Garlic Spaghetti Recipe with the right sides can enhance your meal. Here are some great options:

  • Garlic Bread: A classic choice! Warm, buttery garlic bread is perfect for soaking up the creamy sauce.
  • Side Salad: A fresh salad with mixed greens, cherry tomatoes, and a light vinaigrette adds a refreshing contrast to the richness of the pasta.
  • Roasted Vegetables: Serve roasted seasonal vegetables for a healthy and colorful side. They add texture and flavor to your meal.
  • Steamed Asparagus: Lightly steamed asparagus drizzled with lemon juice complements the creamy spaghetti beautifully.

Creamy Four-Cheese Garlic Spaghetti Recipe with these delightful accompaniments!

Conclusion on Creamy Four-Cheese Garlic Spaghetti Recipe

Creamy Four-Cheese Garlic Spaghetti Recipe is a delightful dish that brings comfort and joy to any dining experience. With its rich blend of cheeses and the aromatic touch of garlic, this recipe is sure to become a staple in your kitchen. Whether you’re cooking for family, friends, or just for yourself, this pasta dish offers a satisfying meal that is both easy to prepare and incredibly delicious.

As you’ve seen, the versatility of this recipe allows for endless customization. You can add your favorite vegetables or proteins to make it your own. Plus, the tips and variations provided will help you perfect your dish, ensuring that every bite is bursting with flavor. Remember, cooking is all about creativity and enjoyment, so don’t hesitate to experiment!

Moreover, the nutritional information highlights that while this dish is indulgent, it can still fit into a balanced diet when enjoyed in moderation. Pairing it with fresh salads or roasted vegetables can enhance its nutritional value, making it a well-rounded meal.

Creamy Four-Cheese Garlic Spaghetti Recipe. We hope it brings warmth and happiness to your table, just as it has for many others. Happy cooking!

Cinnamon Roll French Toast Roll-Ups Recipe is delightful!

Introduction to Cinnamon Roll French Toast Roll-Ups Recipe

Cinnamon Roll French Toast Roll-Ups Recipe combines the best of both worlds: the warm, gooey goodness of cinnamon rolls and the comforting familiarity of French toast. This recipe is not only easy to make but also a fun way to enjoy a classic breakfast favorite. Perfect for lazy weekends or special occasions, these roll-ups are sure to impress family and friends alike.

Imagine biting into a soft, sweet roll filled with cinnamon sugar, then coated in a crispy exterior. Each bite is a burst of flavor that will make your taste buds dance with joy! Plus, the addition of a creamy icing drizzled on top takes this dish to a whole new level of deliciousness.

Whether you’re a seasoned chef or a beginner in the kitchen, this recipe is straightforward and requires minimal ingredients. With just a few simple steps, you can create a breakfast masterpiece that everyone will love. So, gather your ingredients and let’s dive into the world of Cinnamon Roll French Toast Roll-Ups!

Ingredients for Cinnamon Roll French Toast Roll-Ups Recipe

Cinnamon Roll French Toast Roll-Ups Recipe, you’ll need a few simple ingredients. Each component plays a vital role in delivering that sweet, cinnamon flavor that everyone adores. Here’s what you’ll need:

  • 1 cup granulated sugar
  • 1 tablespoon ground cinnamon
  • 8 slices of white bread
  • 4 large eggs
  • 1 cup milk
  • 1 teaspoon vanilla extract
  • 4 tablespoons unsalted butter, divided
  • 1 cup powdered sugar
  • 2 tablespoons milk (for icing)

These ingredients are easy to find and often already in your pantry. The combination of sugar and cinnamon creates a delightful filling, while the eggs and milk provide the perfect custard-like dip for the roll-ups. The butter adds richness, and the icing gives that final touch of sweetness. With these ingredients, you’re on your way to making a breakfast that will leave everyone asking for seconds!

Step-by-Step Preparation of Cinnamon Roll French Toast Roll-Ups Recipe

Cinnamon Roll French Toast Roll-Ups Recipe is simple and fun to make. Follow these easy steps to create your delicious breakfast treat.

Step 1: Preparing the Bread

First, take your slices of white bread and trim off the crusts. This step is important because it helps the bread roll up easily. After trimming, use a rolling pin to flatten each slice. Flattening the bread makes it more pliable and allows for a better filling. Aim for a thickness of about ¼ inch. This will help create a soft and chewy roll that’s perfect for soaking up the egg mixture later.

Step 2: Making the Cinnamon Filling

Next, it’s time to prepare the cinnamon filling. In a small bowl, mix together the granulated sugar and ground cinnamon. This mixture will be the star of your roll-ups, providing that sweet and spicy flavor everyone loves. Make sure to combine the sugar and cinnamon well, so every bite is packed with flavor. Set this mixture aside for later use.

Step 3: Rolling the Bread

Now, take one slice of the flattened bread and sprinkle about a tablespoon of the cinnamon sugar mixture evenly over it. Be generous, as this is what gives the roll-ups their delicious taste! After sprinkling, roll the bread slice tightly from one end to the other. Repeat this process with the remaining slices of bread. You should have a delightful collection of cinnamon-filled roll-ups ready to be dipped!

Step 4: Dipping in Egg Mixture

In a separate bowl, whisk together the eggs, milk, and vanilla extract until well combined. This mixture will create a custard-like coating for your roll-ups. Take each rolled-up piece of bread and dip it into the egg mixture, allowing it to soak for a few seconds. Make sure to coat all sides, but don’t let it get too soggy. This step is crucial for achieving that perfect French toast texture!

Step 5: Cooking the Roll-Ups

Finally, it’s time to cook your roll-ups! Heat 2 tablespoons of unsalted butter in a large skillet over medium heat. Once the butter is melted and bubbly, place the roll-ups seam-side down in the skillet. Cook them for about 2-3 minutes on each side, or until they turn golden brown. The smell will be heavenly! Once cooked, remove the roll-ups from the skillet and immediately roll them in the cinnamon sugar mixture until they are well coated. This final touch adds a delightful crunch and sweetness to each bite.

Cinnamon Roll French Toast Roll-Ups Recipe is now ready to be enjoyed. The combination of flavors and textures will surely make this dish a favorite at your breakfast table.

Variation of Cinnamon Roll French Toast Roll-Ups Recipe

Cinnamon Roll French Toast Roll-Ups Recipe is delicious on its own, there are many ways to switch things up! Adding different fillings or using various types of bread can create exciting new flavors. Let’s explore some fun alternatives that will keep your breakfast fresh and interesting.

Alternative Fillings

One of the best parts about this recipe is its versatility. You can easily customize the filling to suit your taste. Here are some tasty ideas:

  • Chocolate Chips: Add a handful of chocolate chips inside the roll-ups for a sweet surprise. The melted chocolate will create a gooey center that everyone will love.
  • Nut Butter: Spread a thin layer of peanut butter or almond butter on the flattened bread before adding the cinnamon sugar. This adds a nutty flavor and extra protein.
  • Fruit: Try adding sliced bananas or strawberries inside the roll-ups. The fruit will add a fresh taste and a pop of color.
  • Chopped Nuts: For a crunchy texture, sprinkle some chopped walnuts or pecans inside the roll-ups. This adds a delightful crunch and pairs well with the cinnamon flavor.

Feel free to mix and match these fillings to create your perfect roll-up. The possibilities are endless!

Different Bread Options

While white bread is the traditional choice for this recipe, you can experiment with different types of bread for unique flavors and textures. Here are some great alternatives:

  • Whole Wheat Bread: For a healthier option, use whole wheat bread. It adds a nutty flavor and extra fiber.
  • Croissants: For a rich and buttery taste, try using croissants. They will create a flaky and indulgent roll-up.
  • Challah or Brioche: These sweet, eggy breads are perfect for French toast. They will make your roll-ups extra soft and delicious.
  • Gluten-Free Bread: If you’re gluten-sensitive, opt for gluten-free bread. It works just as well and allows everyone to enjoy this tasty treat.

Cinnamon Roll French Toast Roll-Ups Recipe. Each variation will bring its own unique flavor, making breakfast even more exciting!

Cooking Note for Cinnamon Roll French Toast Roll-Ups Recipe

Cinnamon Roll French Toast Roll-Ups Recipe, there are a few cooking tips to keep in mind. These notes will help ensure that your roll-ups turn out perfectly every time. Let’s dive into some essential cooking advice!

First, make sure to preheat your skillet before adding the butter. A hot skillet helps achieve that golden-brown color and crispy texture. If the skillet is not hot enough, the roll-ups may cook unevenly and become soggy.

Next, be mindful of the cooking time. Each side should cook for about 2-3 minutes, but this can vary based on your stove and skillet. Keep an eye on them to prevent burning. You want them to be golden brown, not dark brown!

Additionally, avoid overcrowding the skillet. Cooking too many roll-ups at once can lower the temperature of the skillet, leading to uneven cooking. It’s better to cook in batches if necessary. This way, each roll-up gets the attention it deserves!

Lastly, let the roll-ups cool slightly before serving. This allows the icing to set a bit, making it easier to drizzle. Plus, it prevents anyone from burning their mouth on the hot filling!

Cinnamon Roll French Toast Roll-Ups that are sure to impress. Enjoy the process and the delightful aroma that fills your kitchen!

Serving Suggestions for Cinnamon Roll French Toast Roll-Ups Recipe

Cinnamon Roll French Toast Roll-Ups Recipe is ready, it’s time to think about how to serve them! Presentation can elevate your dish and make breakfast feel extra special. Here are some delightful serving suggestions that will impress your family and friends.

  • Fresh Fruit: Serve your roll-ups with a side of fresh fruit. Sliced strawberries, blueberries, or bananas add a burst of color and freshness. The natural sweetness of the fruit complements the cinnamon flavor perfectly.
  • Whipped Cream: A dollop of whipped cream on top of the roll-ups adds a creamy texture that balances the sweetness. You can even sprinkle some cinnamon on the whipped cream for an extra touch!
  • Maple Syrup: Drizzle warm maple syrup over the roll-ups for a classic breakfast experience. The syrup adds a rich sweetness that pairs beautifully with the cinnamon sugar coating.
  • Yogurt: For a healthier option, serve the roll-ups with a side of yogurt. Greek yogurt adds creaminess and a tangy flavor that contrasts nicely with the sweetness of the roll-ups.
  • Nuts: Sprinkle some chopped nuts, like pecans or walnuts, on top for added crunch. This not only enhances the flavor but also adds a delightful texture to each bite.

Cinnamon Roll French Toast Roll-Ups will surely be the star of the meal!

Tips for Perfect Cinnamon Roll French Toast Roll-Ups Recipe

Cinnamon Roll French Toast Roll-Ups Recipe turns out perfectly every time, here are some handy tips to keep in mind. These suggestions will help you achieve the best flavor and texture, making your breakfast a hit!

  • Use Fresh Bread: For the best results, use fresh bread. Stale bread can be too dry and may not roll up as easily. Fresh bread will give you a soft and fluffy texture.
  • Don’t Overfill: When adding the cinnamon sugar mixture, be careful not to overfill the roll-ups. Too much filling can cause them to burst open while cooking. A tablespoon per slice is just right!
  • Adjust Cooking Temperature: If you notice that the roll-ups are browning too quickly, lower the heat slightly. Cooking them on medium-low heat allows for even cooking without burning.
  • Experiment with Spices: Feel free to add a pinch of nutmeg or allspice to the cinnamon sugar mixture for an extra layer of flavor. These spices complement the cinnamon beautifully.
  • Let Them Rest: After cooking, let the roll-ups rest for a minute before serving. This helps the filling set a bit, making them easier to eat and enjoy.
  • Make Ahead: If you’re short on time, you can prepare the roll-ups ahead of time. Assemble them and store them in the fridge. Just cook them when you’re ready to serve!
  • Garnish Creatively: Get creative with your garnishes! A sprinkle of powdered sugar or a drizzle of chocolate sauce can elevate the presentation and taste.

Cinnamon Roll French Toast Roll-Ups that are not only delicious but also visually appealing. Enjoy the process and the delightful smiles from those who get to taste your creation!

Breakdown of Time for Cinnamon Roll French Toast Roll-Ups Recipe

Cinnamon Roll French Toast Roll-Ups Recipe can help you plan your breakfast or brunch perfectly. Here’s a simple breakdown of the time required for each step, so you can enjoy this delicious treat without any rush.

Prep Time

The prep time for this delightful recipe is approximately 15 minutes. During this time, you will gather all your ingredients, trim the bread, flatten it, and prepare the cinnamon sugar mixture. This step is crucial as it sets the foundation for your roll-ups. Make sure to take your time to ensure everything is ready for the next steps!

Cooking Time

Once your roll-ups are prepared, the cooking time will take about 10-12 minutes. This includes cooking each roll-up for 2-3 minutes on each side until they are golden brown. Depending on the size of your skillet, you may need to cook in batches. Just keep an eye on them to avoid burning!

Total Time

Cinnamon Roll French Toast Roll-Ups for a delightful breakfast or brunch that will impress everyone at the table!

Nutritional Information for Cinnamon Roll French Toast Roll-Ups Recipe

Cinnamon Roll French Toast Roll-Ups Recipe. This section will provide you with key nutritional information to help you make informed choices while enjoying this delightful breakfast. Let’s take a closer look at the calories, protein, and sodium content per serving.

Calories

Cinnamon Roll French Toast Roll-Ups Recipe contains approximately 320 calories. This calorie count includes the delicious combination of bread, eggs, milk, and the sweet cinnamon filling. While it’s a treat, it’s important to enjoy it in moderation, especially if you’re watching your calorie intake. Pairing it with fresh fruit can add nutrients without significantly increasing the calorie count!

Protein

In terms of protein, each serving provides about 8 grams. The protein comes primarily from the eggs and milk used in the recipe. Protein is essential for building and repairing tissues, making it an important part of your diet. While this dish is not a high-protein meal, it does contribute to your daily intake, especially when enjoyed as part of a balanced breakfast.

Sodium

Cinnamon Roll French Toast Roll-Ups Recipe is approximately 300 milligrams. This amount is relatively moderate, but if you are watching your sodium intake, consider using less butter or opting for low-sodium bread. Balancing your meal with fresh fruits or a side salad can also help keep your overall sodium levels in check.

Cinnamon Roll French Toast Roll-Ups while maintaining a balanced diet. Remember, it’s all about moderation and making smart choices that fit your lifestyle!

FAQs about Cinnamon Roll French Toast Roll-Ups Recipe

Can I make Cinnamon Roll French Toast Roll-Ups Recipe ahead of time?

Cinnamon Roll French Toast Roll-Ups Recipe ahead of time. Simply assemble the roll-ups and place them in an airtight container. Store them in the refrigerator for up to 24 hours. When you’re ready to enjoy them, just cook them as directed. This makes it a great option for busy mornings or special occasions when you want to save time!

What can I serve with Cinnamon Roll French Toast Roll-Ups Recipe?

Cinnamon Roll French Toast Roll-Ups Recipe. Fresh fruit, like berries or sliced bananas, adds a refreshing touch. You can also offer whipped cream or maple syrup for drizzling. For a heartier meal, consider serving scrambled eggs or bacon on the side. These additions will create a well-rounded breakfast that everyone will love!

How do I store leftover Cinnamon Roll French Toast Roll-Ups Recipe?

Cinnamon Roll French Toast Roll-Ups Recipe, storing them is easy! Place the roll-ups in an airtight container and refrigerate them. They can last for up to 3 days. To reheat, simply pop them in the microwave for about 30 seconds or warm them in a skillet over low heat. This way, you can enjoy the deliciousness again without any hassle!

Conclusion on Cinnamon Roll French Toast Roll-Ups Recipe

Cinnamon Roll French Toast Roll-Ups Recipe is a delightful and easy way to elevate your breakfast experience. With its sweet cinnamon filling and creamy icing, this dish is sure to become a favorite in your household. Whether you’re preparing it for a special occasion or a cozy weekend brunch, these roll-ups are a guaranteed hit!

Not only is this recipe simple to follow, but it also allows for creativity. You can customize the fillings and experiment with different types of bread, making each batch unique. The versatility of this dish means you can cater to various tastes and preferences, ensuring everyone at the table is satisfied.

As you gather around the breakfast table, the warm aroma of cinnamon and sugar will create a welcoming atmosphere. Each bite of these roll-ups is a delightful combination of flavors and textures that will leave you wanting more. Plus, with the tips and variations provided, you can make this recipe your own and enjoy it time and time again.

Cinnamon Roll French Toast Roll-Ups Recipe a try? Gather your ingredients, follow the steps, and watch as your family and friends delight in this scrumptious breakfast treat. Happy cooking!

New York-Style Creamy Cheesecake is a must-try dessert!

Introduction to New York-Style Creamy Cheesecake

New York-Style Creamy Cheesecake is a beloved dessert that has captured the hearts of many. Known for its rich, dense texture and smooth flavor, this cheesecake stands out from other varieties. The secret lies in its simple yet high-quality ingredients, which create a delightful balance of sweetness and creaminess.

This cheesecake is often served at special occasions, from birthdays to holidays, making it a staple in many households. Its classic flavor profile is enhanced by the addition of sour cream, which gives it a unique tanginess. The buttery graham cracker crust adds a satisfying crunch, making each bite a perfect combination of creamy and crunchy.

Whether you are a seasoned baker or a novice in the kitchen, making New York-Style Creamy Cheesecake is an enjoyable experience. The process is straightforward, and the results are always impressive. Plus, this cheesecake can be customized with various toppings and flavors, allowing you to make it your own.

In this article, we will guide you through the ingredients, preparation steps, and tips for perfecting your cheesecake. So, roll up your sleeves and get ready to create a dessert that will leave everyone asking for seconds!

Ingredients for New York-Style Creamy Cheesecake

To create a delicious New York-Style Creamy Cheesecake, you will need a selection of simple yet essential ingredients. Each component plays a vital role in achieving that rich and creamy texture that this cheesecake is famous for. Here’s what you’ll need:

  • 2 cups graham cracker crumbs: These form the base of your cheesecake, providing a crunchy texture.
  • 1/2 cup granulated sugar: This sweetens the crust and balances the flavors.
  • 1/2 cup unsalted butter, melted: This binds the crust together and adds richness.
  • 4 (8-ounce) packages cream cheese, softened: The star ingredient that gives the cheesecake its creamy consistency.
  • 1 cup granulated sugar: This is added to the filling for sweetness.
  • 1 teaspoon vanilla extract: This enhances the flavor of the cheesecake.
  • 4 large eggs: Eggs help to set the cheesecake and give it structure.
  • 1 cup sour cream: This adds a tangy flavor and creaminess to the filling.
  • 1/4 cup all-purpose flour: This helps to stabilize the cheesecake.
  • 1 tablespoon lemon juice: This brightens the flavor and adds a hint of freshness.

Gathering these ingredients will set you on the right path to making a delightful New York-Style Creamy Cheesecake. Each ingredient contributes to the overall taste and texture, ensuring that your cheesecake will be a hit at any gathering!

Step-by-Step Preparation of New York-Style Creamy Cheesecake

Now that you have all your ingredients ready, it’s time to dive into the step-by-step preparation of your New York-Style Creamy Cheesecake. This process is simple and enjoyable, allowing you to create a dessert that will impress everyone. Let’s get started!

Step 1: Preparing the Crust

First, you’ll want to prepare the crust. This step is crucial as it provides the foundation for your cheesecake. Begin by preheating your oven to 325°F (160°C). While the oven heats up, take a medium bowl and combine the graham cracker crumbs, 1/2 cup of granulated sugar, and melted butter. Mix these ingredients well until they are fully combined.

Next, press the mixture firmly into the bottom of a 9-inch springform pan. Make sure to create an even layer, as this will ensure a consistent texture. Once you’ve pressed the crust down, bake it in the preheated oven for about 10 minutes. After baking, remove it from the oven and let it cool completely. This cooling step is important, as it helps the crust set properly before adding the filling.

Step 2: Making the Cheesecake Filling

With the crust cooling, it’s time to make the cheesecake filling. In a large mixing bowl, beat the softened cream cheese using an electric mixer on medium speed. Mix it for about 2-3 minutes until it becomes smooth and creamy. Gradually add in 1 cup of granulated sugar and the vanilla extract, continuing to beat until everything is well combined.

Now, add the eggs one at a time. Mix on low speed after each addition until just blended. Be careful not to overmix, as this can lead to cracks in your cheesecake. After the eggs are incorporated, mix in the sour cream, flour, and lemon juice until the mixture is smooth and creamy. This filling is what makes your cheesecake rich and delicious!

Step 3: Baking the Cheesecake

Once your filling is ready, it’s time to bake the cheesecake. Pour the cheesecake batter over the cooled crust in the springform pan. Spread it evenly with a spatula to ensure a uniform surface. Place the pan in the preheated oven and bake for 55-60 minutes. You’ll know it’s done when the edges are set, but the center is still slightly jiggly. This slight jiggle is key to achieving that creamy texture.

Step 4: Cooling and Chilling

After baking, turn off the oven and crack the oven door open. Allow the cheesecake to cool in the oven for about 1 hour. This gradual cooling helps prevent cracks from forming on the surface. Once cooled, remove the cheesecake from the oven and let it cool to room temperature.

Finally, refrigerate the cheesecake for at least 4 hours, but overnight is best. Chilling allows the flavors to meld and the texture to firm up, making it easier to slice. Once chilled, your New York-Style Creamy Cheesecake is ready to be served!

Variation of New York-Style Creamy Cheesecake

While the classic New York-Style Creamy Cheesecake is a delightful treat on its own, there are many ways to add a personal touch. By experimenting with different flavors and crusts, you can create a cheesecake that suits your taste perfectly. Let’s explore some exciting variations!

Flavor Variations

One of the best things about cheesecake is its versatility. You can easily customize the flavor to match your preferences. Here are a few delicious ideas:

  • Chocolate Cheesecake: Add 1 tablespoon of cocoa powder to the batter for a rich chocolate flavor. You can also swirl in melted chocolate for an extra indulgent treat.
  • Fruit-Infused Cheesecake: Mix in pureed fruits like strawberries, raspberries, or blueberries into the filling. This adds a fresh taste and beautiful color.
  • Caramel Swirl Cheesecake: Drizzle caramel sauce into the batter before baking. Swirl it gently with a knife for a stunning presentation.
  • Nutty Cheesecake: Incorporate finely chopped nuts, such as pecans or walnuts, into the filling for added texture and flavor.

These flavor variations can elevate your New York-Style Creamy Cheesecake, making it a unique dessert for any occasion!

Crust Alternatives

If you want to switch things up, consider trying different crust options. Here are some tasty alternatives to the classic graham cracker crust:

  • Oreo Crust: Crush Oreo cookies and mix them with melted butter for a chocolatey twist. This crust pairs wonderfully with chocolate or vanilla cheesecake.
  • Almond Crust: Use ground almonds or almond flour mixed with butter and a bit of sugar. This gluten-free option adds a nutty flavor.
  • Shortbread Crust: For a buttery and crumbly base, use crushed shortbread cookies mixed with melted butter. This crust complements fruity cheesecakes beautifully.
  • Peanut Butter Crust: Combine crushed graham crackers with peanut butter for a nutty and sweet crust that pairs well with chocolate or caramel flavors.

These crust alternatives can add a new dimension to your New York-Style Creamy Cheesecake, making it even more enjoyable!

Cooking Note for New York-Style Creamy Cheesecake

When it comes to baking a New York-Style Creamy Cheesecake, a few cooking notes can help ensure your dessert turns out perfectly every time. These tips will guide you through the process, making it easier to achieve that rich, creamy texture and delicious flavor.

First, always use room temperature ingredients. This includes the cream cheese, eggs, and sour cream. Room temperature ingredients blend more smoothly, preventing lumps in your cheesecake. If you forget to take them out in advance, you can warm the cream cheese slightly in the microwave for about 10 seconds. Just be careful not to melt it!

Next, consider using a water bath, or bain-marie, while baking. This method involves placing your springform pan inside a larger pan filled with hot water. The steam from the water bath helps to keep the cheesecake moist and prevents it from cracking. If you choose this method, wrap the outside of your springform pan with aluminum foil to prevent water from seeping in.

Another important note is to avoid overmixing the batter. Overmixing can incorporate too much air, leading to cracks during baking. Mix just until the ingredients are combined, and remember to scrape down the sides of the bowl to ensure everything is well mixed.

Lastly, patience is key when cooling your cheesecake. Allow it to cool gradually in the oven with the door cracked open. This helps prevent sudden temperature changes that can cause cracks. After cooling, refrigerate the cheesecake for the recommended time to let the flavors develop fully.

By following these cooking notes, you’ll be well on your way to creating a stunning New York-Style Creamy Cheesecake that will impress your family and friends!

Serving Suggestions for New York-Style Creamy Cheesecake

Once your New York-Style Creamy Cheesecake is perfectly chilled and ready to serve, it’s time to think about how to present this delightful dessert. The way you serve your cheesecake can enhance its appeal and make it even more enjoyable for your guests. Here are some creative serving suggestions to consider:

  • Classic Slice: Serve a simple slice of cheesecake on a dessert plate. A dollop of whipped cream on top adds a light and airy touch.
  • Fruit Topping: Fresh berries, such as strawberries, blueberries, or raspberries, make a beautiful and tasty addition. You can also create a fruit compote by cooking down your favorite fruits with a bit of sugar.
  • Chocolate Drizzle: Drizzle melted chocolate or chocolate sauce over the cheesecake for a rich and indulgent treat. This pairs wonderfully with a chocolate variation of the cheesecake.
  • Caramel Sauce: A drizzle of warm caramel sauce adds a sweet and gooey element. This is especially delicious if you’ve made a caramel swirl cheesecake.
  • Nuts and Crunch: Sprinkle chopped nuts, like pecans or almonds, on top for added texture and flavor. This works well with both classic and nutty variations.
  • Mini Cheesecakes: For a fun twist, consider making mini cheesecakes in muffin tins. These bite-sized treats are perfect for parties and gatherings.
  • Cheesecake Parfaits: Layer cheesecake pieces with whipped cream and fruit in a glass for a beautiful and elegant dessert presentation.

When serving your New York-Style Creamy Cheesecake, don’t forget to pair it with a beverage. A cup of coffee, tea, or even a glass of dessert wine can complement the rich flavors beautifully. With these serving suggestions, your cheesecake will not only taste amazing but also look stunning on the table!

Tips for Perfecting Your New York-Style Creamy Cheesecake

Creating the perfect New York-Style Creamy Cheesecake is an art that requires attention to detail. With a few helpful tips, you can elevate your cheesecake game and impress your family and friends. Here are some essential tips to ensure your cheesecake turns out perfectly every time:

  • Use Quality Ingredients: The quality of your ingredients matters. Opt for full-fat cream cheese for a rich and creamy texture. Fresh eggs and pure vanilla extract will enhance the flavor significantly.
  • Room Temperature Ingredients: As mentioned earlier, always use room temperature ingredients. This helps them blend smoothly, resulting in a lump-free batter. Take your cream cheese, eggs, and sour cream out of the fridge ahead of time.
  • Don’t Overmix: Mix the batter just until combined. Overmixing can introduce too much air, leading to cracks during baking. Remember, a little mixing goes a long way!
  • Water Bath Method: Consider using a water bath for baking. This technique helps maintain moisture and prevents the cheesecake from cracking. Wrap your springform pan in aluminum foil to keep water out.
  • Check for Doneness: Keep an eye on your cheesecake as it bakes. The edges should be set, while the center remains slightly jiggly. This ensures a creamy texture once cooled.
  • Gradual Cooling: After baking, let your cheesecake cool gradually in the oven with the door slightly ajar. This helps prevent sudden temperature changes that can cause cracks.
  • Chill Overnight: For the best flavor and texture, refrigerate your cheesecake overnight. This allows the flavors to meld and the cheesecake to firm up perfectly.
  • Slice with Care: When it’s time to slice, use a sharp knife dipped in hot water. Wipe the knife clean between cuts for neat slices. This will make your cheesecake look as good as it tastes!

By following these tips, you’ll be well on your way to mastering the art of New York-Style Creamy Cheesecake. Each step contributes to the overall success of your dessert, ensuring that every bite is a delightful experience!

Breakdown of Time for New York-Style Creamy Cheesecake

Understanding the time required for each step in making your New York-Style Creamy Cheesecake is essential for planning. This breakdown will help you manage your time effectively, ensuring that your cheesecake turns out perfectly. Let’s take a closer look at the different time components involved in this delightful dessert.

Prep Time

The prep time for your New York-Style Creamy Cheesecake is approximately 30 minutes. This includes gathering all your ingredients, preparing the crust, and mixing the cheesecake filling. Make sure to set aside enough time to allow your cream cheese to soften, as this is crucial for a smooth batter. If you have everything ready, you can breeze through this step!

Cooking Time

Once your cheesecake is prepared, the cooking time will take about 55-60 minutes. During this time, the cheesecake will bake in the oven, allowing it to set properly. Keep an eye on it to ensure the edges are firm while the center remains slightly jiggly. This balance is key to achieving that creamy texture we all love.

Total Time

In total, you should plan for about 5 hours and 30 minutes from start to finish. This includes the prep time, cooking time, and the necessary cooling and chilling time. After baking, allow the cheesecake to cool in the oven for 1 hour, then let it reach room temperature. Finally, refrigerate it for at least 4 hours, but overnight is best for optimal flavor and texture. With this timeline, you can enjoy a delicious New York-Style Creamy Cheesecake that’s well worth the wait!

Nutritional Information for New York-Style Creamy Cheesecake

Understanding the nutritional information of your New York-Style Creamy Cheesecake can help you enjoy this delicious dessert while keeping track of your dietary needs. Below, we break down the key nutritional components per serving, allowing you to indulge with confidence.

Calories

Each slice of New York-Style Creamy Cheesecake contains approximately 350 calories. This calorie count comes from the rich ingredients used, such as cream cheese and butter. While it’s a treat, being mindful of portion sizes can help you enjoy this dessert without overindulging.

Protein

In terms of protein, each serving provides about 6 grams. The primary source of protein in this cheesecake comes from the cream cheese and eggs. Protein is essential for building and repairing tissues, making this cheesecake a satisfying option when enjoyed in moderation.

Sodium

Each slice of cheesecake contains around 300 milligrams of sodium. This sodium content is primarily from the cream cheese and butter. While sodium is necessary for bodily functions, it’s important to keep an eye on your overall intake, especially if you are watching your salt consumption.

By being aware of the nutritional information, you can enjoy your New York-Style Creamy Cheesecake as part of a balanced diet. Remember, moderation is key, and this delightful dessert can be a wonderful addition to special occasions or a sweet treat after a meal!

FAQs about New York-Style Creamy Cheesecake

What is the difference between New York-style cheesecake and regular cheesecake?

The main difference between New York-style cheesecake and regular cheesecake lies in the ingredients and texture. New York-style cheesecake is denser and creamier, thanks to the use of a higher ratio of cream cheese and sour cream. Regular cheesecake, on the other hand, may use ricotta or mascarpone cheese, resulting in a lighter texture. Additionally, New York-style cheesecake often has a buttery graham cracker crust, while other cheesecakes might use different types of crusts.

Can I make New York-style creamy cheesecake ahead of time?

Absolutely! In fact, making New York-style creamy cheesecake ahead of time is a great idea. This dessert benefits from chilling in the refrigerator for at least 4 hours, but overnight is even better. Preparing it in advance allows the flavors to meld beautifully, resulting in a richer taste. Just be sure to cover it well to prevent it from absorbing any odors from the fridge.

How do I store leftover New York-style creamy cheesecake?

To store leftover New York-style creamy cheesecake, first, make sure it is completely cooled and chilled. Cover the cheesecake with plastic wrap or aluminum foil to keep it fresh. You can also place it in an airtight container. Stored this way, it will last in the refrigerator for about 5-7 days. If you want to keep it longer, consider freezing individual slices. Wrap each slice tightly in plastic wrap and then place them in a freezer-safe bag. They can be frozen for up to 2 months.

What toppings go well with New York-style creamy cheesecake?

There are countless delicious toppings that pair wonderfully with New York-style creamy cheesecake. Here are some popular options:

  • Fresh Berries: Strawberries, blueberries, and raspberries add a burst of color and flavor.
  • Fruit Compote: A warm fruit compote made from your favorite fruits can enhance the cheesecake’s sweetness.
  • Chocolate Sauce: Drizzling chocolate sauce over the cheesecake adds a rich and indulgent touch.
  • Caramel Sauce: A drizzle of caramel sauce provides a sweet and gooey contrast to the creamy cheesecake.
  • Whipped Cream: A dollop of whipped cream adds a light and airy texture, making each bite even more delightful.
  • Nuts: Chopped nuts, like pecans or almonds, can add a crunchy texture and nutty flavor.

Feel free to mix and match these toppings to create your perfect slice of New York-style creamy cheesecake!

Conclusion on New York-Style Creamy Cheesecake

In conclusion, New York-Style Creamy Cheesecake is a timeless dessert that brings joy to any occasion. Its rich, velvety texture and delightful flavor make it a favorite among dessert lovers. Whether you’re celebrating a special event or simply indulging in a sweet treat, this cheesecake is sure to impress.

By following the steps outlined in this article, you can create a cheesecake that rivals those found in the finest bakeries. Remember to pay attention to the quality of your ingredients, as they play a crucial role in the final outcome. With a little patience and practice, you’ll master the art of making this classic dessert.

Don’t hesitate to experiment with different flavors and toppings to make your New York-Style Creamy Cheesecake uniquely yours. From chocolate swirls to fresh fruit toppings, the possibilities are endless. Each variation offers a new twist, ensuring that your cheesecake remains exciting and delicious.

So, gather your ingredients, roll up your sleeves, and embark on this delightful baking adventure. Your friends and family will surely appreciate the effort, and you’ll create lasting memories around the table. Enjoy every creamy, dreamy bite of your New York-Style Creamy Cheesecake!

Summer Pasta Salad: A Refreshing Recipe to Try Today!

Summer Pasta Salad

Introduction to Summer Pasta Salad

As the sun shines brighter and the days grow longer, I find myself craving something light and refreshing. That’s where my Summer Pasta Salad comes in! This vibrant dish is not just a feast for the eyes; it’s a quick solution for busy days filled with gatherings and outdoor fun. With its colorful medley of fresh vegetables and delightful flavors, it’s sure to impress your loved ones. Whether you’re hosting a backyard barbecue or simply enjoying a quiet evening, this pasta salad is the perfect companion for warm weather dining.

Why You’ll Love This Summer Pasta Salad

This Summer Pasta Salad is a game-changer for those hot days when you want something delicious without spending hours in the kitchen. It’s incredibly easy to whip up, taking just about 25 minutes from start to finish. The combination of fresh veggies and tangy feta creates a burst of flavor in every bite. Plus, it’s versatile enough to suit any gathering, making it a go-to recipe for summer entertaining.

Ingredients for Summer Pasta Salad

Gathering the right ingredients is half the fun of making this Summer Pasta Salad! Here’s what you’ll need:

  • Rotini pasta: This spiral-shaped pasta holds onto the dressing and veggies beautifully, making every bite a delight.
  • Cherry tomatoes: Sweet and juicy, they add a pop of color and freshness to the salad.
  • Cucumber: Crisp and refreshing, cucumbers provide a nice crunch that balances the other ingredients.
  • Bell pepper: Any color works! They bring sweetness and a vibrant hue to the mix.
  • Red onion: Finely chopped, it adds a zesty kick that complements the other flavors.
  • Black olives: These add a briny depth, enhancing the Mediterranean vibe of the dish.
  • Feta cheese: Creamy and tangy, feta crumbles elevate the salad with a rich flavor.
  • Fresh basil: Chopped basil brings a fragrant, herbal note that brightens the entire dish.
  • Olive oil: A drizzle of good-quality olive oil ties everything together, adding richness.
  • Red wine vinegar: This adds a tangy zing that balances the richness of the olive oil.
  • Garlic powder: A sprinkle of garlic powder infuses the salad with a subtle warmth.
  • Salt and pepper: Essential for seasoning, they enhance all the flavors in the salad.

For those looking to customize, consider adding grilled chicken or chickpeas for extra protein. If feta isn’t your thing, mozzarella balls can be a delightful substitute. You can find the exact quantities for each ingredient at the bottom of the article, ready for printing!

How to Make Summer Pasta Salad

Creating this Summer Pasta Salad is a breeze! Follow these simple steps, and you’ll have a colorful dish ready to impress in no time.

Step 1: Cook the Pasta

Start by boiling a pot of salted water. Once it’s bubbling, add the rotini pasta. Cook it according to the package instructions until it’s al dente. This usually takes about 8-10 minutes. Remember, you want it firm enough to hold its shape in the salad. After cooking, drain the pasta and rinse it under cold water. This stops the cooking process and cools it down quickly.

Step 2: Combine the Vegetables

In a large mixing bowl, toss together the cherry tomatoes, diced cucumber, bell pepper, red onion, and black olives. Each ingredient adds its own unique flavor and texture. The vibrant colors will make your salad visually appealing. Don’t be shy—mix them well! This is where the fun begins, and you can already smell the freshness.

Step 3: Prepare the Dressing

In a small bowl, whisk together the olive oil, red wine vinegar, garlic powder, salt, and pepper. This dressing is the magic that brings everything together. Taste it as you go! Adjust the seasoning if needed. A little extra vinegar can brighten the flavors, while more olive oil adds richness.

Step 4: Mix Everything Together

Pour the dressing over the pasta and vegetable mixture. Gently toss everything together until the pasta and veggies are well-coated. Be careful not to mash the ingredients; you want to keep that lovely texture. Add the crumbled feta cheese and chopped basil last, folding them in delicately to maintain their shape.

Step 5: Chill and Serve

Cover the bowl with plastic wrap or a lid and refrigerate for at least 30 minutes. This chilling time allows the flavors to meld beautifully. When you’re ready to serve, give it a quick stir. You can enjoy this Summer Pasta Salad chilled or at room temperature. Either way, it’s a refreshing treat!

Tips for Success

  • Use fresh, seasonal vegetables for the best flavor and crunch.
  • Don’t overcook the pasta; it should be al dente for the perfect texture.
  • Let the salad chill for at least 30 minutes to enhance the flavors.
  • Feel free to customize with your favorite veggies or proteins.
  • Make it a day ahead for even better taste as the flavors develop.

Equipment Needed

  • Large pot: For boiling pasta; a deep skillet can work in a pinch.
  • Colander: To drain the pasta; a slotted spoon can also do the job.
  • Mixing bowl: A large bowl for combining ingredients; any big bowl will suffice.
  • Whisk: For mixing the dressing; a fork can be a handy alternative.

Variations

  • Protein Boost: Add grilled chicken, shrimp, or chickpeas for a heartier salad.
  • Vegan Option: Swap feta for avocado or a vegan cheese alternative to keep it plant-based.
  • Grain Swap: Use quinoa or farro instead of rotini for a different texture and added nutrition.
  • Herb Infusion: Experiment with fresh herbs like dill or parsley for a unique flavor twist.
  • Spicy Kick: Toss in some diced jalapeños or a sprinkle of red pepper flakes for heat.

Serving Suggestions

  • Pair with grilled chicken or fish for a complete meal.
  • Serve alongside crusty bread or garlic knots for a satisfying crunch.
  • Complement with a chilled white wine or sparkling water for a refreshing drink.
  • Garnish with extra basil leaves for a beautiful presentation.

FAQs about Summer Pasta Salad

Curious about this delightful Summer Pasta Salad? Here are some common questions I often hear, along with answers to help you make the most of this refreshing dish.

Can I make Summer Pasta Salad ahead of time?

Absolutely! In fact, making it a day ahead allows the flavors to meld beautifully. Just store it in the fridge, and give it a quick stir before serving.

What can I substitute for feta cheese?

If feta isn’t your favorite, mozzarella balls or even crumbled goat cheese can be great alternatives. They’ll still provide that creamy texture and delicious flavor.

How long does Summer Pasta Salad last in the fridge?

This salad can last up to 3 days in the fridge. Just keep it covered to maintain freshness. However, it’s best enjoyed within the first couple of days.

Can I add more vegetables to the salad?

Definitely! Feel free to toss in your favorite veggies like zucchini, carrots, or even artichoke hearts. The more colorful, the better!

Is this Summer Pasta Salad gluten-free?

To make it gluten-free, simply swap the rotini pasta for a gluten-free pasta option. The rest of the ingredients are naturally gluten-free, so you’re good to go!

Final Thoughts

Every bite of this Summer Pasta Salad is like a little celebration of summer itself. The vibrant colors and fresh flavors remind me of sun-soaked picnics and laughter-filled gatherings. It’s a dish that brings people together, whether you’re sharing it at a barbecue or enjoying it on a quiet evening at home. Plus, the ease of preparation means you can spend less time in the kitchen and more time making memories. I hope this recipe becomes a staple in your summer repertoire, bringing joy and deliciousness to your table all season long!

Summer Pasta Salad
jhessica

Summer Pasta Salad: A Refreshing Recipe to Try Today!

A refreshing and colorful Summer Pasta Salad perfect for warm weather gatherings.
Prep Time 15 minutes
Cook Time 10 minutes
Total Time 25 minutes
Servings: 6 servings
Course: Salad
Cuisine: Mediterranean
Calories: 250

Ingredients
  

  • 8 ounces rotini pasta
  • 1 cup cherry tomatoes halved
  • 1 cup cucumber diced
  • 1 cup bell pepper diced (any color)
  • 1/2 cup red onion finely chopped
  • 1/2 cup black olives sliced
  • 1/2 cup feta cheese crumbled
  • 1/4 cup fresh basil chopped
  • 1/4 cup olive oil
  • 2 tablespoons red wine vinegar
  • 1 teaspoon garlic powder
  • Salt and pepper to taste

Method
 

  1. Cook the rotini pasta according to package instructions until al dente. Drain and rinse under cold water to cool.
  2. In a large bowl, combine the cooked pasta, cherry tomatoes, cucumber, bell pepper, red onion, black olives, feta cheese, and fresh basil.
  3. In a small bowl, whisk together the olive oil, red wine vinegar, garlic powder, salt, and pepper.
  4. Pour the dressing over the pasta salad and toss gently to combine all ingredients evenly.
  5. Cover the bowl and refrigerate for at least 30 minutes to allow the flavors to meld.
  6. Serve chilled or at room temperature.

Nutrition

Serving: 1servingCalories: 250kcalCarbohydrates: 30gProtein: 7gFat: 12gSaturated Fat: 3gPolyunsaturated Fat: 9gCholesterol: 15mgSodium: 400mgFiber: 2gSugar: 3g

Notes

  • For added protein, consider mixing in grilled chicken or chickpeas.
  • Substitute the feta cheese with mozzarella balls for a different flavor profile.

Tried this recipe?

Let us know how it was!

Teriyaki Noodles with Roasted Vegetables Recipe is easy!

Introduction to Teriyaki Noodles with Roasted Vegetables Recipe

Teriyaki Noodles with Roasted Vegetables Recipe is a fantastic choice. This dish combines the delightful flavors of teriyaki sauce with a colorful array of roasted vegetables. It’s not only tasty but also packed with nutrients, making it a perfect option for lunch or dinner.

Imagine twirling your fork around a bowl of whole wheat spaghetti or udon noodles, coated in a savory teriyaki sauce. The roasted vegetables add a sweet and smoky flavor, creating a delightful contrast. Plus, this recipe is versatile! You can easily customize it to suit your taste preferences or dietary needs.

Whether you’re a busy parent, a student, or just someone who loves good food, this recipe is for you. It takes minimal time to prepare and cook, allowing you to enjoy a wholesome meal without spending hours in the kitchen. So, let’s dive into the ingredients and get started on this mouthwatering journey!

Ingredients for Teriyaki Noodles with Roasted Vegetables Recipe

Teriyaki Noodles with Roasted Vegetables Recipe, you’ll need a variety of fresh ingredients. Here’s what you’ll need:

  • 8 ounces of whole wheat spaghetti or udon noodles
  • 2 tablespoons of vegetable oil
  • 1 red bell pepper, sliced
  • 1 yellow bell pepper, sliced
  • 1 medium zucchini, sliced
  • 1 cup of broccoli florets
  • 1 cup of snap peas
  • 1/4 cup of Kikkoman teriyaki sauce
  • 2 tablespoons of soy sauce
  • 1 tablespoon of sesame oil
  • 1 teaspoon of garlic powder
  • 1 teaspoon of ginger powder
  • 1 tablespoon of sesame seeds (optional)
  • 2 green onions, sliced (for garnish)

These ingredients come together to create a vibrant and flavorful dish. The combination of whole wheat noodles and fresh vegetables ensures you’re getting a healthy meal. The teriyaki sauce adds a sweet and savory touch, while the sesame oil gives it a nutty flavor. Feel free to adjust the quantities based on your preferences or the number of servings you need!

Now that you have your ingredients ready, let’s move on to the next step: preparing the vegetables!

Step-by-Step Preparation of Teriyaki Noodles with Roasted Vegetables Recipe

Teriyaki Noodles with Roasted Vegetables Recipe. Follow these simple steps to create a delicious meal that everyone will love!

Step 1: Preparing the Vegetables

First, let’s get those vegetables ready! Start by washing all your fresh produce thoroughly. This step is important to remove any dirt or pesticides. Next, slice the red and yellow bell peppers into thin strips. Then, take the zucchini and cut it into rounds. For the broccoli, break it into small florets. Finally, rinse the snap peas and set everything aside. Having your vegetables prepped will make the cooking process smoother and quicker.

Step 2: Roasting the Vegetables

Preheat your oven to 425°F (220°C). While the oven heats up, grab a large baking sheet. Toss the sliced bell peppers, zucchini, broccoli florets, and snap peas in a bowl with 2 tablespoons of vegetable oil, garlic powder, and ginger powder. Make sure all the veggies are well-coated. Spread them out in a single layer on the baking sheet. This helps them roast evenly. Roast the vegetables for about 15-20 minutes, or until they are tender and slightly caramelized. The roasting process brings out their natural sweetness!

Step 3: Cooking the Noodles

While the vegetables are roasting, it’s time to cook the noodles. Bring a large pot of water to a boil. Add the whole wheat spaghetti or udon noodles and cook according to the package instructions. Usually, this takes about 8-10 minutes. Once they are cooked, drain the noodles in a colander and set them aside. Make sure not to rinse them, as you want to keep the starch that helps the sauce stick!

Step 4: Making the Teriyaki Sauce

In a large skillet, heat the cooked noodles over medium heat. Pour in 1/4 cup of Kikkoman teriyaki sauce, 2 tablespoons of soy sauce, and 1 tablespoon of sesame oil. Stir everything together to coat the noodles evenly. This should take about 2-3 minutes. The heat will help the flavors meld together, creating a delicious base for your dish.

Step 5: Combining Noodles and Vegetables

Once the vegetables are done roasting, it’s time to combine everything! Carefully add the roasted vegetables to the skillet with the noodles. Gently toss everything together to ensure the noodles and veggies are well mixed. Cook for an additional 2 minutes to allow the flavors to blend. Your kitchen will smell amazing at this point!

Teriyaki Noodles with Roasted Vegetables Recipe is almost ready to serve. Just a few more steps, and you’ll be enjoying this delightful dish!

Variations of Teriyaki Noodles with Roasted Vegetables Recipe

Teriyaki Noodles with Roasted Vegetables Recipe lies in its versatility. You can easily modify it to suit your taste or dietary needs. Let’s explore some exciting variations that can elevate your dish even further!

Adding Protein Options

For those looking to boost their protein intake, there are several delicious options to consider. Grilled chicken is a popular choice. Simply season and grill the chicken breast, then slice it and toss it with the noodles and vegetables. Shrimp is another fantastic option. Sauté the shrimp in a bit of sesame oil until they turn pink, then mix them in. If you prefer a plant-based option, tofu works wonderfully too! Just cube the tofu, pan-fry it until golden, and add it to your dish. Each of these proteins adds a unique flavor and texture, making your meal even more satisfying.

Alternative Vegetable Combinations

Feel free to get creative with your vegetable choices! Seasonal vegetables can add freshness and variety. Carrots, for instance, can be sliced into thin rounds or julienned for a sweet crunch. Mushrooms, such as shiitake or button, can add an earthy flavor. You might also consider adding baby corn, asparagus, or even bok choy for a different twist. The key is to choose vegetables that you enjoy and that complement the teriyaki sauce. Mixing and matching will keep your meals exciting and flavorful!

Teriyaki Noodles with Roasted Vegetables Recipe can be a new dish every time you make it. Enjoy experimenting with different proteins and vegetables to find your perfect combination!

Cooking Note for Teriyaki Noodles with Roasted Vegetables Recipe

Teriyaki Noodles with Roasted Vegetables Recipe, there are a few important cooking notes to keep in mind. These tips will help ensure that your dish turns out perfectly every time!

First, always use fresh ingredients. Fresh vegetables not only taste better but also provide more nutrients. When selecting your vegetables, look for vibrant colors and firm textures. This will enhance the overall flavor and presentation of your dish.

Next, pay attention to the cooking times. Overcooking the vegetables can lead to a mushy texture. Aim for a tender yet crisp finish. Roasting them until they are slightly caramelized will bring out their natural sweetness, making your dish even more delicious.

Additionally, when cooking the noodles, be sure to follow the package instructions closely. Different types of noodles may have varying cooking times. Undercooking them slightly can be beneficial, as they will continue to cook when combined with the hot teriyaki sauce and vegetables.

Lastly, don’t hesitate to adjust the sauce to your taste. If you prefer a sweeter flavor, add a bit more teriyaki sauce. For a saltier kick, a splash of soy sauce can do the trick. Taste as you go, and feel free to make it your own!

Teriyaki Noodles with Roasted Vegetables Recipe that everyone will love. Happy cooking!

Serving Suggestions for Teriyaki Noodles with Roasted Vegetables Recipe

Teriyaki Noodles with Roasted Vegetables Recipe is ready, it’s time to think about how to serve it! Presentation can elevate your meal, making it even more enjoyable. Here are some delightful serving suggestions to consider:

  • Bowls: Serve the noodles in deep bowls for a cozy feel. This allows everyone to twirl their noodles easily and enjoy the colorful vegetables.
  • Garnishes: Don’t forget to sprinkle sesame seeds and sliced green onions on top. These add a nice crunch and a pop of color, enhancing the dish’s visual appeal.
  • Side Dishes: Pair your teriyaki noodles with a light side salad. A simple cucumber salad with a splash of rice vinegar can complement the flavors beautifully.
  • Chopsticks: For an authentic touch, serve with chopsticks! This adds a fun element to the meal and encourages everyone to dig in.
  • Extra Sauce: Consider serving extra teriyaki sauce on the side. This allows guests to add more flavor to their liking, making the dish even more customizable.

Teriyaki Noodles with Roasted Vegetables Recipe a hit at any gathering. Enjoy your meal with family and friends, and watch as they savor every bite!

Tips for Perfecting Teriyaki Noodles with Roasted Vegetables Recipe

Teriyaki Noodles with Roasted Vegetables Recipe truly shine, consider these helpful tips. They will guide you in creating a dish that is not only delicious but also visually appealing and satisfying!

First, always taste as you cook. This is key to achieving the perfect balance of flavors. If you find the dish too salty, add a splash of water or a bit more vegetable. On the other hand, if it’s not sweet enough, a drizzle of honey or extra teriyaki sauce can enhance the flavor.

Next, don’t overcrowd the baking sheet when roasting vegetables. If the veggies are too close together, they will steam instead of roast. This can prevent that lovely caramelization. Spread them out evenly to ensure they roast beautifully.

Another tip is to use a variety of colors in your vegetables. Not only does this make the dish more visually appealing, but it also ensures a range of nutrients. Aim for a rainbow of veggies, including greens, reds, yellows, and purples.

Additionally, consider marinating your protein if you choose to add one. A quick marinade in teriyaki sauce or soy sauce can infuse your chicken, shrimp, or tofu with extra flavor. Just remember to adjust the cooking time accordingly.

Lastly, serve your dish immediately after cooking. This ensures that the noodles remain warm and the vegetables stay crisp. If you let it sit too long, the noodles may become soggy, and the vibrant colors of the veggies may fade.

Teriyaki Noodles with Roasted Vegetables Recipe to new heights. Enjoy the process and the delicious results!

Breakdown of Time for Teriyaki Noodles with Roasted Vegetables Recipe

Teriyaki Noodles with Roasted Vegetables Recipe can help you plan your cooking efficiently. Here’s a simple breakdown of the time required for preparation and cooking:

Prep Time

The prep time for this recipe is approximately 15 minutes. This includes washing and slicing all the vegetables, as well as measuring out the sauces and oils. Having everything ready before you start cooking will make the process smoother and more enjoyable.

Cooking Time

The cooking time is about 25-30 minutes. This includes roasting the vegetables for 15-20 minutes and cooking the noodles for 8-10 minutes. While the noodles are cooking, you can prepare the teriyaki sauce and combine everything in the skillet. This multitasking helps save time!

Total Time

Teriyaki Noodles with Roasted Vegetables Recipe a quick and satisfying meal option for busy weeknights or when you want to impress guests without spending hours in the kitchen.

With this time breakdown, you can easily fit this delicious dish into your schedule. Enjoy the cooking process and the delightful flavors that await you!

Nutritional Information for Teriyaki Noodles with Roasted Vegetables Recipe

Teriyaki Noodles with Roasted Vegetables Recipe not only delights your taste buds but also provides a healthy option for your meals. Here’s a breakdown of the key nutritional information per serving:

Calories

Teriyaki Noodles with Roasted Vegetables Recipe contains approximately 320 calories. This makes it a satisfying yet light meal option. The combination of whole wheat noodles and fresh vegetables ensures that you’re getting a nutritious dish without excessive calories. It’s perfect for those looking to enjoy a hearty meal while keeping an eye on their caloric intake.

Protein

In terms of protein, this recipe offers about 10 grams per serving. The protein content comes primarily from the whole wheat noodles and any additional protein you may choose to add, such as chicken, shrimp, or tofu. If you’re looking to increase the protein content, consider adding grilled chicken or tofu, which can significantly boost the overall protein levels in your meal.

Sodium

The sodium content in this dish is approximately 600 milligrams per serving. This includes the sodium from the teriyaki sauce and soy sauce. If you’re watching your sodium intake, you can opt for low-sodium versions of these sauces. Additionally, adjusting the amount of sauce used can help you control the sodium levels while still enjoying the delicious flavors of the dish.

Teriyaki Noodles with Roasted Vegetables Recipe is a well-rounded meal that provides essential nutrients while being flavorful and satisfying. It’s a great choice for anyone looking to enjoy a healthy and delicious dish!

FAQs about Teriyaki Noodles with Roasted Vegetables Recipe

Can I use gluten-free noodles for this recipe?

Teriyaki Noodles with Roasted Vegetables Recipe. Options like rice noodles or gluten-free spaghetti work well. Just be sure to follow the cooking instructions on the package, as cooking times may vary. This way, you can enjoy a delicious meal without worrying about gluten!

What vegetables work best for roasting in this recipe?

Teriyaki Noodles with Roasted Vegetables Recipe, the options are endless! Bell peppers, zucchini, broccoli, and snap peas are fantastic choices. However, you can also try carrots, asparagus, or mushrooms. The key is to choose vegetables that roast well and complement the teriyaki sauce. Feel free to mix and match based on your preferences or what’s in season!

How can I store leftovers of Teriyaki Noodles with Roasted Vegetables?

Teriyaki Noodles with Roasted Vegetables Recipe is simple! Allow the dish to cool completely before transferring it to an airtight container. You can keep it in the refrigerator for up to 3 days. When you’re ready to enjoy it again, simply reheat in the microwave or on the stovetop. If the noodles seem dry, add a splash of water or extra teriyaki sauce to bring back the moisture. Enjoy your delicious leftovers!

Conclusion on Teriyaki Noodles with Roasted Vegetables Recipe

Teriyaki Noodles with Roasted Vegetables Recipe is a delightful dish that brings together vibrant flavors and nutritious ingredients. It’s not just a meal; it’s an experience that can be enjoyed by everyone, from busy families to health-conscious individuals. The combination of whole wheat noodles, fresh vegetables, and savory teriyaki sauce creates a satisfying and wholesome dish that is sure to please.

This recipe is incredibly versatile, allowing you to customize it based on your preferences. Whether you choose to add protein, swap out vegetables, or adjust the sauces, the possibilities are endless. Plus, with the easy-to-follow steps, you can whip up this delicious meal in no time!

Teriyaki Noodles with Roasted Vegetables Recipe, remember that cooking is not just about the food. It’s about creating memories with loved ones and sharing moments of joy. So, don’t hesitate to experiment and make this dish your own. Happy cooking, and enjoy every flavorful bite!

Teriyaki Shrimp Sushi Bowl Recipe is a must-try dish!

Introduction to Teriyaki Shrimp Sushi Bowl Recipe

What is a Teriyaki Shrimp Sushi Bowl?

A Teriyaki Shrimp Sushi Bowl is a delightful dish that combines the flavors of traditional sushi with the ease of a bowl meal. This recipe features succulent shrimp cooked in a sweet and savory teriyaki sauce, served over fluffy sushi rice. Topped with fresh vegetables like avocado, cucumber, and carrots, it offers a colorful and nutritious meal. The beauty of this dish lies in its simplicity and versatility, making it perfect for both busy weeknights and special occasions.

Why You Should Try This Recipe

There are many reasons to try the Teriyaki Shrimp Sushi Bowl Recipe. First, it’s quick and easy to prepare, taking less than 30 minutes from start to finish. This makes it an excellent choice for families or anyone looking for a delicious meal without spending hours in the kitchen. Second, the combination of flavors and textures is simply irresistible. The tender shrimp, creamy avocado, and crunchy vegetables create a satisfying experience in every bite.

Moreover, this recipe is highly customizable. You can easily swap out ingredients based on your preferences or dietary needs. Whether you want to add more veggies, switch the protein, or even try different sauces, the possibilities are endless. Plus, it’s a healthy option packed with protein, vitamins, and minerals, making it a great addition to your meal rotation.

So, gather your ingredients and get ready to enjoy a delicious Teriyaki Shrimp Sushi Bowl that will impress your family and friends!

Ingredients for Teriyaki Shrimp Sushi Bowl Recipe

To create a mouthwatering Teriyaki Shrimp Sushi Bowl, you’ll need a selection of fresh ingredients. Here’s what you’ll need:

  • 1 pound large shrimp – peeled and deveined for easy cooking.
  • 1 cup sushi rice – this will be the base of your bowl.
  • 2 cups water – for cooking the sushi rice.
  • 1/4 cup soy sauce – adds a savory depth to the dish.
  • 1/4 cup honey – provides a touch of sweetness to balance the flavors.
  • 2 tablespoons rice vinegar – enhances the taste of the rice.
  • 1 tablespoon sesame oil – adds a nutty flavor.
  • 1 avocado – sliced for creaminess.
  • 1 cucumber – thinly sliced for crunch.
  • 1 carrot – julienned for a pop of color.
  • 2 green onions – sliced for freshness.
  • 1 tablespoon sesame seeds – for garnish and added texture.
  • Seaweed sheets – cut into strips (optional) for an authentic touch.

These ingredients come together to create a delicious and visually appealing dish. The combination of shrimp, fresh vegetables, and flavorful sauce makes this bowl a delightful meal. Feel free to adjust the quantities based on your preferences or the number of servings you need. Now that you have your ingredients ready, let’s move on to the preparation steps!

Step-by-Step Preparation of Teriyaki Shrimp Sushi Bowl Recipe

Step 1: Preparing the Shrimp

To start, you need to prepare the shrimp. First, ensure that your shrimp are peeled and deveined. This makes them easier to cook and eat. If you bought frozen shrimp, thaw them in cold water for about 15 minutes. Once thawed, pat them dry with a paper towel. This helps them cook evenly. Next, season the shrimp lightly with salt and pepper. This simple step enhances their natural flavor. Now, your shrimp are ready for cooking!

Step 2: Making the Teriyaki Sauce

Now, let’s make the teriyaki sauce. In a small saucepan, combine the soy sauce, honey, rice vinegar, and sesame oil. Stir the mixture well to combine all the ingredients. Place the saucepan over medium heat. Allow it to heat for about 3-5 minutes. You want the sauce to thicken slightly. Keep an eye on it to prevent burning. Once it reaches the right consistency, remove it from the heat. Set the sauce aside for later use.

Step 3: Cooking the Rice

Next, it’s time to cook the sushi rice. Rinse the rice under cold water until the water runs clear. This step removes excess starch and prevents the rice from becoming too sticky. In a medium saucepan, combine the rinsed rice and 2 cups of water. Bring the mixture to a boil over high heat. Once boiling, reduce the heat to low and cover the saucepan. Let it simmer for 18-20 minutes or until the water is absorbed. After cooking, remove the saucepan from heat and let it sit covered for 10 minutes. Finally, fluff the rice with a fork and set it aside.

Step 4: Assembling the Bowl

Now that everything is ready, it’s time to assemble your sushi bowls! Start by dividing the cooked sushi rice among four bowls. Make sure to create a nice base for your toppings. Next, add the cooked shrimp on top of the rice. Pour half of the teriyaki sauce over the shrimp, ensuring they are well coated. This adds flavor and moisture to the dish. Now, it’s time to add the fresh vegetables!

Step 5: Adding Toppings

For the final touch, add the sliced avocado, cucumber, and julienned carrot to each bowl. These toppings not only add color but also provide a variety of textures. Sprinkle sliced green onions on top for a burst of freshness. Drizzle the remaining teriyaki sauce over the bowls for extra flavor. If you like, you can also add sesame seeds for a delightful crunch. For an authentic touch, include seaweed strips as a garnish. Your Teriyaki Shrimp Sushi Bowl is now ready to enjoy!

Variations of Teriyaki Shrimp Sushi Bowl Recipe

Alternative Proteins

If shrimp isn’t your favorite, don’t worry! There are plenty of alternative proteins you can use in your Teriyaki Sushi Bowl. Chicken is a popular choice. Simply grill or sauté bite-sized pieces until they are cooked through. You can also use salmon or tuna for a seafood twist. Both options pair wonderfully with teriyaki sauce. For a quick option, consider using canned tuna or pre-cooked chicken strips. These alternatives will still give you that delicious flavor while keeping the meal exciting!

Vegetarian Options

For those who prefer a vegetarian meal, there are many tasty options! Tofu is a fantastic substitute for shrimp. Firm tofu can be cubed and sautéed until golden brown. You can also use edamame for a protein boost. Simply steam or boil them until tender. Another great option is to add a variety of vegetables like bell peppers, zucchini, or snap peas. These will add color and crunch to your bowl. Don’t forget to use a plant-based teriyaki sauce to keep it vegetarian-friendly!

Different Rice Choices

While sushi rice is traditional, you can switch it up with different types of rice. Brown rice is a healthier option, providing more fiber and nutrients. Quinoa is another great choice, offering a nutty flavor and extra protein. For a low-carb option, consider using cauliflower rice. It’s light and absorbs flavors well. Each rice type brings its unique taste and texture, allowing you to customize your Teriyaki Sushi Bowl to your liking!

Cooking Note for Teriyaki Shrimp Sushi Bowl Recipe

When preparing your Teriyaki Shrimp Sushi Bowl, there are a few cooking notes to keep in mind to ensure the best results. First, always use fresh shrimp if possible. Fresh shrimp not only taste better but also have a firmer texture. If you must use frozen shrimp, make sure to thaw them properly. This helps maintain their quality and flavor.

Next, pay attention to the cooking time for the shrimp. Overcooking can make them tough and rubbery. Cook them just until they turn pink and opaque, which usually takes about 2-3 minutes per side. This quick cooking method keeps them juicy and tender.

Additionally, when making the teriyaki sauce, feel free to adjust the sweetness to your liking. If you prefer a sweeter sauce, add a bit more honey. For a saltier flavor, increase the soy sauce. Taste the sauce as it cooks to find the perfect balance for your palate.

Lastly, don’t hesitate to experiment with the toppings. The beauty of a sushi bowl is its versatility. You can add pickled vegetables, radishes, or even a soft-boiled egg for extra richness. Each addition can enhance the overall flavor and presentation of your dish.

By keeping these cooking notes in mind, you’ll create a delicious Teriyaki Shrimp Sushi Bowl that’s sure to impress everyone at the table!

Serving Suggestions for Teriyaki Shrimp Sushi Bowl Recipe

When it comes to serving your Teriyaki Shrimp Sushi Bowl, presentation is key! A beautifully arranged bowl not only looks appetizing but also enhances the dining experience. Here are some serving suggestions to elevate your dish:

  • Use Colorful Bowls: Choose vibrant bowls that contrast with the colors of your ingredients. This makes the dish visually appealing and inviting.
  • Garnish Creatively: Add a sprinkle of sesame seeds or chopped herbs like cilantro or parsley on top for a fresh touch. You can also place a slice of lime or lemon on the side for a zesty kick.
  • Serve with Sides: Pair your sushi bowl with sides like miso soup or a simple seaweed salad. These complement the flavors and add variety to the meal.
  • Offer Extra Sauce: Serve additional teriyaki sauce on the side for those who love extra flavor. This allows everyone to customize their bowl to their taste.
  • Include Chopsticks: For an authentic sushi experience, provide chopsticks alongside forks. This adds a fun element to the meal and encourages everyone to dig in!

These serving suggestions will not only enhance the look of your Teriyaki Shrimp Sushi Bowl but also make it a delightful experience for your guests. Enjoy the smiles and compliments as everyone savors this delicious dish!

Tips for Perfecting Your Teriyaki Shrimp Sushi Bowl Recipe

Creating the perfect Teriyaki Shrimp Sushi Bowl is all about attention to detail and a few helpful tips. Here are some suggestions to ensure your dish turns out delicious every time:

  • Choose Quality Ingredients: Always opt for fresh, high-quality shrimp. Fresh shrimp not only taste better but also have a firmer texture. If using frozen shrimp, ensure they are properly thawed before cooking.
  • Rinse the Rice Thoroughly: Rinsing the sushi rice is crucial. It removes excess starch, preventing the rice from becoming overly sticky. This step helps achieve the perfect texture for your sushi bowl.
  • Monitor Cooking Times: Keep a close eye on the shrimp while cooking. Overcooking can lead to a rubbery texture. Cook them just until they turn pink and opaque, which usually takes about 2-3 minutes per side.
  • Customize the Sauce: Feel free to adjust the teriyaki sauce to suit your taste. If you prefer a sweeter sauce, add more honey. For a saltier flavor, increase the soy sauce. Tasting as you go will help you find the perfect balance.
  • Experiment with Toppings: The beauty of a sushi bowl lies in its versatility. Don’t hesitate to add different toppings like pickled ginger, radishes, or even a soft-boiled egg. Each addition can enhance the flavor and presentation.
  • Let the Rice Rest: After cooking, let the rice sit covered for 10 minutes. This resting period allows the rice to steam and become fluffy, making it the perfect base for your bowl.
  • Serve Immediately: For the best experience, serve your sushi bowls right after assembling. This ensures that the ingredients are fresh and the flavors are vibrant.

By following these tips, you’ll be well on your way to creating a Teriyaki Shrimp Sushi Bowl that’s not only delicious but also visually stunning. Enjoy the process and have fun experimenting with flavors!

Breakdown of Time for Teriyaki Shrimp Sushi Bowl Recipe

Prep Time

The prep time for your Teriyaki Shrimp Sushi Bowl is quite manageable. You’ll need about 10-15 minutes to gather and prepare all your ingredients. This includes rinsing the sushi rice, peeling and deveining the shrimp, and slicing the vegetables. Having everything ready before you start cooking will make the process smoother and more enjoyable.

Cooking Time

Once you have everything prepped, the cooking time is approximately 20-25 minutes. This includes cooking the sushi rice, making the teriyaki sauce, and sautéing the shrimp. The rice takes about 18-20 minutes to cook, while the shrimp only need about 5-6 minutes. This quick cooking time allows you to enjoy a delicious meal without spending too long in the kitchen.

Total Time

In total, you can expect to spend around 30-40 minutes from start to finish. This includes both prep and cooking time. It’s a perfect option for a weeknight dinner or a weekend treat. With such a short time commitment, you can enjoy a flavorful and healthy Teriyaki Shrimp Sushi Bowl without the hassle!

Nutritional Information for Teriyaki Shrimp Sushi Bowl Recipe

Calories

Each serving of the Teriyaki Shrimp Sushi Bowl contains approximately 450 calories. This makes it a satisfying meal that won’t weigh you down. The balance of protein, healthy fats, and carbohydrates provides energy for your day. Enjoying this bowl can be part of a healthy diet, especially when paired with fresh vegetables.

Protein

In terms of protein, this dish offers about 25 grams per serving. The shrimp is an excellent source of lean protein, which is essential for muscle repair and growth. Including protein in your meals helps keep you feeling full longer, making this sushi bowl a great option for lunch or dinner.

Sodium

The sodium content in each serving is around 800 milligrams. This comes mainly from the soy sauce used in the teriyaki sauce. If you’re watching your sodium intake, consider using low-sodium soy sauce. This simple swap can help reduce the overall sodium content while still delivering that delicious umami flavor.

Overall, the Teriyaki Shrimp Sushi Bowl is a nutritious choice that combines flavor and health benefits. With its balanced macronutrients, it’s a meal you can feel good about enjoying!

FAQs about Teriyaki Shrimp Sushi Bowl Recipe

Can I use frozen shrimp for this recipe?

Yes, you can definitely use frozen shrimp for your Teriyaki Shrimp Sushi Bowl! Just make sure to thaw them properly before cooking. To do this, place the frozen shrimp in a bowl of cold water for about 15 minutes. Once thawed, pat them dry with a paper towel. This helps ensure they cook evenly and maintain their delicious flavor. Using frozen shrimp is a convenient option that still allows you to enjoy this tasty dish!

What can I substitute for rice in a sushi bowl?

If you’re looking for alternatives to rice in your sushi bowl, there are several great options! Brown rice is a healthier choice, offering more fiber and nutrients. Quinoa is another excellent substitute, providing a nutty flavor and extra protein. For a low-carb option, consider using cauliflower rice. It’s light and absorbs flavors well, making it a fantastic base for your Teriyaki Shrimp Sushi Bowl. Each of these alternatives brings its unique taste and texture, allowing you to customize your meal to your liking!

How do I store leftovers of the Teriyaki Shrimp Sushi Bowl?

Storing leftovers of your Teriyaki Shrimp Sushi Bowl is easy! First, let the bowl cool down to room temperature. Then, transfer the leftovers to an airtight container. You can store them in the refrigerator for up to 2-3 days. When you’re ready to enjoy your leftovers, simply reheat the shrimp and rice in the microwave. Add fresh toppings like avocado and green onions just before serving to keep them crisp and vibrant. This way, you can savor the delicious flavors of your sushi bowl even on busy days!

Is this recipe gluten-free?

The Teriyaki Shrimp Sushi Bowl can be made gluten-free with a few simple adjustments. The main ingredient to watch out for is soy sauce, which typically contains gluten. To make your dish gluten-free, use a gluten-free soy sauce or tamari instead. This alternative provides the same savory flavor without the gluten. With this swap, you can enjoy a delicious and satisfying Teriyaki Shrimp Sushi Bowl that fits your dietary needs!

Conclusion on Teriyaki Shrimp Sushi Bowl Recipe

In conclusion, the Teriyaki Shrimp Sushi Bowl is a delightful and versatile dish that brings the flavors of sushi into a convenient bowl format. With its combination of succulent shrimp, fluffy sushi rice, and fresh vegetables, this recipe is not only delicious but also visually appealing. Whether you’re preparing a quick weeknight dinner or impressing guests at a gathering, this bowl is sure to be a hit.

Moreover, the recipe’s flexibility allows you to customize it according to your preferences. You can easily swap proteins, choose different rice options, or add a variety of toppings to suit your taste. This adaptability makes it a fantastic choice for anyone looking to explore new flavors or accommodate dietary needs.

As you prepare your Teriyaki Shrimp Sushi Bowl, remember to enjoy the process. Cooking can be a fun and rewarding experience, especially when you’re creating something as vibrant and tasty as this dish. So, gather your ingredients, follow the steps, and savor every bite of your homemade sushi bowl.

We hope you give this Teriyaki Shrimp Sushi Bowl Recipe a try. It’s a meal that not only nourishes the body but also delights the senses. Happy cooking!

Marry Me Chicken Meatballs Recipe will impress everyone!

Introduction to Marry Me Chicken Meatballs Recipe

Are you looking for a dish that will impress your loved ones? Look no further than the Marry Me Chicken Meatballs Recipe! This delightful meal combines tender chicken meatballs with a rich marinara sauce and gooey mozzarella cheese. It’s a dish that not only tastes amazing but also brings a sense of warmth and comfort to your dining table.

What makes this recipe truly special is its perfect blend of flavors and textures. The ground chicken is mixed with fresh herbs, spices, and cheese, creating a savory base. When baked, the meatballs become golden brown and juicy. Then, they are lovingly coated in marinara sauce and topped with melted mozzarella, making each bite a heavenly experience.

What Makes Marry Me Chicken Meatballs Special?

So, what sets Marry Me Chicken Meatballs apart from other meatball recipes? First, the combination of ingredients is simply irresistible. The use of ground chicken keeps the dish light yet satisfying. Plus, the addition of Parmesan cheese and fresh parsley elevates the flavor profile, making it a standout choice for any occasion.

Another reason to love this recipe is its versatility. You can easily customize it to suit your dietary needs or personal preferences. Whether you want to spice things up with red pepper flakes or substitute ground turkey, the options are endless. This adaptability makes it a go-to recipe for families and gatherings alike.

Finally, the name itself—Marry Me Chicken—hints at the romance and joy this dish can bring. It’s perfect for date nights, family dinners, or any time you want to impress someone special. With its delicious taste and heartwarming presentation, these meatballs might just win over hearts and taste buds alike!

Ingredients for Marry Me Chicken Meatballs Recipe

To create the mouthwatering Marry Me Chicken Meatballs, you’ll need a selection of fresh and flavorful ingredients. Each component plays a vital role in achieving the perfect balance of taste and texture. Here’s what you’ll need:

  • 1 pound ground chicken: This is the star of the dish, providing a lean and tender base for the meatballs.
  • 1/2 cup breadcrumbs: Breadcrumbs help bind the meatballs together while adding a delightful texture.
  • 1/4 cup grated Parmesan cheese: This cheese adds a rich, savory flavor that enhances the overall taste.
  • 1/4 cup chopped fresh parsley: Fresh parsley not only adds color but also a burst of freshness.
  • 1/4 cup minced onion: Onions bring sweetness and depth to the meatball mixture.
  • 2 cloves garlic, minced: Garlic adds a wonderful aroma and flavor that elevates the dish.
  • 1 large egg: The egg acts as a binder, helping to hold the meatballs together.
  • 1 teaspoon Italian seasoning: This blend of herbs infuses the meatballs with classic Italian flavors.
  • 1/2 teaspoon salt: Salt enhances all the flavors in the dish.
  • 1/4 teaspoon black pepper: A touch of black pepper adds a mild heat.
  • 1/2 cup marinara sauce: This sauce is essential for coating the meatballs and adding moisture.
  • 1/2 cup shredded mozzarella cheese: The gooey mozzarella on top creates a deliciously cheesy finish.

Feel free to adjust these ingredients based on your preferences. For instance, if you want a spicier kick, consider adding crushed red pepper flakes to the meatball mixture. You can also substitute ground turkey or beef for the ground chicken if you prefer. The beauty of this recipe lies in its flexibility, allowing you to make it your own!

Step-by-Step Preparation of Marry Me Chicken Meatballs Recipe

Now that you have all your ingredients ready, it’s time to dive into the preparation of your Marry Me Chicken Meatballs. This step-by-step guide will help you create these delicious meatballs with ease. Let’s get started!

Step 1: Preparing the Chicken Mixture

First, grab a large mixing bowl. In this bowl, combine the ground chicken, breadcrumbs, grated Parmesan cheese, chopped parsley, minced onion, minced garlic, egg, Italian seasoning, salt, and black pepper. Use your hands or a spatula to mix everything together until it’s well combined. Make sure not to overmix, as this can make the meatballs tough. Just mix until all the ingredients are evenly distributed.

Step 2: Forming the Meatballs

Once your chicken mixture is ready, it’s time to form the meatballs. Take a small amount of the mixture, about the size of a golf ball, and roll it between your palms to create a round shape. Aim for meatballs that are about 1.5 inches in diameter. Place each meatball on a baking sheet lined with parchment paper. This will help prevent sticking and make cleanup easier.

Step 3: Cooking the Meatballs

Now, preheat your oven to 400°F (200°C). Once the oven is hot, place the baking sheet with the meatballs inside. Bake them for about 20 minutes, or until they are cooked through and golden brown. You can check for doneness by cutting one meatball in half; it should be no longer pink in the center. The aroma of the baking meatballs will fill your kitchen, making it hard to wait!

Step 4: Making the Sauce

While the meatballs are baking, it’s the perfect time to prepare the marinara sauce. In a small saucepan, pour in the marinara sauce and heat it over medium heat. Stir occasionally to prevent it from sticking to the bottom. You want the sauce to be warm and ready for the meatballs once they come out of the oven. This step adds a lovely layer of flavor to the dish.

Step 5: Combining Meatballs and Sauce

After the meatballs are done baking, carefully remove them from the oven. Transfer the meatballs into the saucepan with the warm marinara sauce. Gently stir to coat each meatball in the sauce. This step is crucial as it ensures that every bite is bursting with flavor. Finally, sprinkle the shredded mozzarella cheese over the meatballs and cover the saucepan. Let it sit for a few minutes until the cheese melts beautifully.

And there you have it! Your Marry Me Chicken Meatballs are now ready to be served. The combination of juicy meatballs, rich sauce, and melted cheese is sure to impress anyone at your table.

Variations of Marry Me Chicken Meatballs Recipe

One of the best things about the Marry Me Chicken Meatballs Recipe is its versatility. You can easily adapt it to fit different dietary needs or to explore new flavors. Let’s take a look at some alternative ingredients and flavor variations that can make this dish even more exciting!

Alternative Ingredients for Different Diets

If you or your guests have specific dietary preferences, don’t worry! There are plenty of alternatives you can use without sacrificing taste. Here are some options:

  • Ground Turkey or Beef: If you prefer a different protein, ground turkey or beef can be used instead of chicken. Both options will still yield delicious meatballs.
  • Gluten-Free Breadcrumbs: For those who are gluten-sensitive, simply swap regular breadcrumbs for gluten-free ones. This small change keeps the meatballs just as tasty.
  • Vegan Option: To make a vegan version, use plant-based ground meat and flaxseed meal mixed with water as a binder instead of egg. You can also use nutritional yeast for a cheesy flavor.
  • Low-Fat Cheese: If you’re watching your fat intake, opt for low-fat mozzarella cheese. It melts well and still adds that cheesy goodness.

These alternatives allow everyone to enjoy the Marry Me Chicken Meatballs, regardless of their dietary restrictions. Feel free to mix and match based on what you have on hand!

Flavor Variations to Try

Want to spice things up? There are many ways to add unique flavors to your Marry Me Chicken Meatballs. Here are some fun ideas:

  • Spicy Kick: Add crushed red pepper flakes or diced jalapeños to the meatball mixture for a fiery twist. This will give your dish a delightful heat.
  • Herb Infusion: Experiment with different herbs like basil, oregano, or thyme. These can enhance the flavor and give your meatballs a fresh taste.
  • Cheesy Surprise: Mix in some shredded cheese directly into the meatball mixture. This will create gooey pockets of cheese inside each meatball.
  • Sweet and Savory: For a unique flavor, add a tablespoon of honey or maple syrup to the marinara sauce. This will balance the acidity of the tomatoes with a hint of sweetness.

These flavor variations can transform your Marry Me Chicken Meatballs into a new culinary experience each time you make them. Don’t hesitate to get creative and find the combinations that you love best!

Cooking Note for Marry Me Chicken Meatballs Recipe

When preparing the Marry Me Chicken Meatballs, there are a few cooking notes to keep in mind to ensure your dish turns out perfectly every time. These tips will help you achieve the best flavor and texture, making your meatballs a hit at any gathering.

First, always use fresh ingredients. Fresh herbs, garlic, and onions can significantly enhance the flavor of your meatballs. Dried herbs can work in a pinch, but fresh ingredients bring a vibrant taste that dried ones simply can’t match.

Next, be mindful of the mixing process. When combining the ingredients, mix just until everything is incorporated. Overmixing can lead to tough meatballs. You want them to be tender and juicy, so gentle handling is key.

Another important note is to ensure your meatballs are uniform in size. This helps them cook evenly. If some meatballs are larger than others, they may not cook through at the same rate, leading to some being overcooked while others are undercooked. Aim for about 1.5 inches in diameter for consistent results.

Additionally, consider using a meat thermometer to check for doneness. Chicken should reach an internal temperature of 165°F (75°C) to be safe to eat. This ensures that your meatballs are not only delicious but also safe for you and your guests.

Lastly, don’t skip the resting time after cooking. Allowing the meatballs to sit in the marinara sauce for a few minutes before serving helps them absorb the flavors. This step makes each bite even more delightful!

By following these cooking notes, you’ll be well on your way to creating mouthwatering Marry Me Chicken Meatballs that everyone will love. Happy cooking!

Serving Suggestions for Marry Me Chicken Meatballs Recipe

Once your Marry Me Chicken Meatballs are ready, it’s time to think about how to serve them. The right side dishes and creative serving ideas can elevate your meal and make it even more enjoyable. Here are some suggestions to consider!

Best Side Dishes to Pair

Choosing the right side dishes can complement the flavors of your meatballs beautifully. Here are some tasty options:

  • Pasta: A classic choice! Serve your meatballs over a bed of spaghetti or penne. The marinara sauce will blend perfectly with the pasta, creating a comforting meal.
  • Garlic Bread: Crispy garlic bread is a fantastic side. It’s perfect for soaking up the extra marinara sauce and adds a delightful crunch.
  • Steamed Vegetables: For a healthier option, consider serving steamed broccoli, green beans, or zucchini. These veggies add color and nutrition to your plate.
  • Caesar Salad: A fresh Caesar salad with crisp romaine lettuce, croutons, and Parmesan cheese pairs well with the rich flavors of the meatballs.
  • Rice or Quinoa: For a gluten-free option, serve the meatballs with fluffy rice or quinoa. Both options absorb the sauce nicely and provide a hearty base.

These side dishes not only enhance the meal but also provide a variety of textures and flavors that everyone will enjoy!

Creative Serving Ideas

Want to impress your guests with a unique presentation? Here are some creative serving ideas for your Marry Me Chicken Meatballs:

  • Meatball Sub: Transform your meatballs into a delicious sub sandwich. Place them in a hoagie roll, top with marinara sauce and melted cheese, and serve with a side of chips.
  • Meatball Skewers: For a fun appetizer, thread meatballs onto skewers with cherry tomatoes and basil leaves. Drizzle with balsamic glaze for an elegant touch.
  • Meatball Pizza: Use the meatballs as a topping for homemade or store-bought pizza. Add marinara sauce and cheese, then bake until bubbly and golden.
  • Stuffed Peppers: Hollow out bell peppers and fill them with meatball mixture before baking. This creates a colorful and nutritious dish that’s sure to impress.
  • Meatball Salad Bowl: Create a hearty salad bowl with mixed greens, roasted vegetables, and meatballs on top. Drizzle with your favorite dressing for a fresh meal.

These creative serving ideas can turn your Marry Me Chicken Meatballs into a show-stopping dish that’s perfect for any occasion. Enjoy experimenting with different presentations and flavors!

Tips for Perfecting Marry Me Chicken Meatballs Recipe

To ensure your Marry Me Chicken Meatballs turn out perfectly every time, consider these helpful tips. They will guide you in achieving the best flavor, texture, and overall presentation. Let’s dive into some expert advice!

First, always start with high-quality ground chicken. Fresh chicken not only tastes better but also has a better texture. If possible, buy it from a trusted butcher or grocery store. This small change can make a big difference in your meatballs.

Next, don’t skip the resting time after mixing the ingredients. Allowing the meatball mixture to rest for about 10 minutes can help the flavors meld together. This step also makes it easier to form the meatballs, as the mixture will be less sticky.

When forming the meatballs, use a cookie scoop or your hands to ensure uniform size. This helps them cook evenly. If you find the mixture too sticky, wet your hands with a little water before rolling. This will prevent sticking and make the process smoother.

For added flavor, consider searing the meatballs in a skillet before baking. This step creates a delicious crust on the outside, enhancing the overall taste. Just be sure to finish cooking them in the oven to ensure they are cooked through.

Another tip is to use a meat thermometer to check for doneness. Chicken meatballs should reach an internal temperature of 165°F (75°C). This ensures they are safe to eat and perfectly cooked.

Lastly, let the meatballs sit in the marinara sauce for a few minutes before serving. This allows them to soak up the sauce, making each bite even more flavorful. Plus, it gives the cheese time to melt beautifully on top.

By following these tips, you’ll be well on your way to creating mouthwatering Marry Me Chicken Meatballs that will impress everyone at your table. Happy cooking!

Breakdown of Time for Marry Me Chicken Meatballs Recipe

Understanding the time needed for each step in the Marry Me Chicken Meatballs Recipe can help you plan your cooking efficiently. Here’s a detailed breakdown of the time required for preparation and cooking, so you can enjoy this delicious dish without any stress!

Prep Time

The prep time for the Marry Me Chicken Meatballs is approximately 15 to 20 minutes. During this time, you will gather all your ingredients, chop the parsley and onion, mince the garlic, and mix everything together in a bowl. This step is crucial as it sets the foundation for your meatballs. Make sure to take your time to ensure everything is well-prepared!

Cooking Time

Once your meatballs are formed, the cooking time is about 20 minutes. You will bake the meatballs in a preheated oven at 400°F (200°C) until they are golden brown and cooked through. After baking, you’ll need an additional 5 minutes to warm the marinara sauce and melt the mozzarella cheese on top. This brings the total cooking time to around 25 minutes.

Total Time

In total, you can expect the entire process—from prep to serving—to take about 40 to 45 minutes. This makes the Marry Me Chicken Meatballs a quick and easy option for a weeknight dinner or a special occasion. With just a little time and effort, you’ll have a delicious meal ready to impress your family and friends!

Nutritional Information for Marry Me Chicken Meatballs Recipe

Understanding the nutritional content of your meals is essential for maintaining a balanced diet. The Marry Me Chicken Meatballs Recipe not only delights your taste buds but also provides valuable nutrients. Here’s a breakdown of the nutritional information per serving, so you can enjoy this dish with confidence!

Calories

Each serving of Marry Me Chicken Meatballs contains approximately 320 calories. This makes it a satisfying yet moderate option for a meal. The combination of lean ground chicken, cheese, and marinara sauce contributes to the overall calorie count while providing essential nutrients.

Protein Content

One of the standout features of this recipe is its high protein content. Each serving offers about 28 grams of protein. This is primarily due to the ground chicken, which is a great source of lean protein. Protein is vital for muscle repair and growth, making these meatballs a fantastic choice for active individuals or anyone looking to maintain a healthy diet.

Sodium Levels

When it comes to sodium, each serving contains around 600 milligrams. While this is a reasonable amount for a flavorful dish, it’s always good to be mindful of your sodium intake, especially if you are watching your salt consumption. You can reduce sodium levels by using low-sodium marinara sauce or adjusting the amount of added salt in the recipe.

Overall, the Marry Me Chicken Meatballs Recipe is a nutritious option that balances flavor and health. With its delicious ingredients and impressive protein content, it’s a meal that you can feel good about serving to your family and friends!

FAQs about Marry Me Chicken Meatballs Recipe

Can I make Marry Me Chicken Meatballs ahead of time?

Absolutely! You can prepare the Marry Me Chicken Meatballs ahead of time. Simply mix the ingredients and form the meatballs, then cover them and refrigerate for up to 24 hours before baking. This not only saves time but also allows the flavors to meld together, enhancing the taste. When you’re ready to cook, just bake them as directed. If you prefer, you can also freeze the uncooked meatballs for later use. Just remember to thaw them in the fridge before baking for the best results!

What can I substitute for chicken in this recipe?

If you want to switch things up, there are several great substitutes for chicken in this recipe. Ground turkey is a popular choice and offers a similar texture and flavor. You can also use ground beef or pork if you prefer a richer taste. For a healthier option, consider using ground turkey breast. If you’re looking for a plant-based alternative, try using a plant-based ground meat substitute. These options will still yield delicious meatballs while catering to different dietary preferences.

How do I store leftovers of Marry Me Chicken Meatballs?

Storing leftovers is easy! Allow the Marry Me Chicken Meatballs to cool completely before transferring them to an airtight container. They can be stored in the refrigerator for up to 3 days. When you’re ready to enjoy them again, simply reheat in the microwave or on the stovetop until warmed through. If you want to keep them longer, consider freezing the leftovers. Just make sure to separate them with parchment paper to prevent sticking, and they can last in the freezer for up to 3 months.

Can I freeze Marry Me Chicken Meatballs?

Yes, you can freeze Marry Me Chicken Meatballs! To do this, prepare the meatballs as directed but do not cook them. Place the uncooked meatballs on a baking sheet lined with parchment paper and freeze them until solid. Once frozen, transfer them to a freezer-safe bag or container. They can be stored in the freezer for up to 3 months. When you’re ready to cook, you can bake them straight from the freezer, just add a few extra minutes to the cooking time. This makes for a quick and easy meal option on busy days!

Conclusion on Marry Me Chicken Meatballs Recipe

In conclusion, the Marry Me Chicken Meatballs Recipe is a delightful dish that combines flavor, comfort, and versatility. With its tender chicken meatballs, rich marinara sauce, and gooey mozzarella, this recipe is sure to impress anyone who tries it. Whether you’re cooking for a special occasion or a cozy family dinner, these meatballs are a fantastic choice.

Not only is this recipe easy to follow, but it also allows for plenty of customization. You can adjust the ingredients to fit various dietary needs or experiment with different flavors to keep things exciting. From adding a spicy kick to making it vegan-friendly, the possibilities are endless!

Moreover, the nutritional benefits of this dish make it a smart option for those looking to maintain a balanced diet. With a good amount of protein and moderate calories, you can enjoy a satisfying meal without any guilt. Plus, the ability to prepare and store leftovers makes it a practical choice for busy weeknights.

So, gather your ingredients, roll up your sleeves, and get ready to create a dish that might just win hearts and taste buds alike. The Marry Me Chicken Meatballs Recipe is not just a meal; it’s an experience that brings people together. Enjoy every bite and the smiles that come with it!

Chicken Shawarma Wraps Recipe: A Flavorful Delight!

Introduction to Chicken Shawarma Wraps Recipe

Chicken Shawarma Wraps are a delightful dish that brings the flavors of the Middle East right to your kitchen. These wraps are not only delicious but also easy to prepare, making them a favorite for many. The combination of marinated chicken, fresh vegetables, and creamy sauce wrapped in warm pita bread creates a satisfying meal that everyone will love.

What Makes Chicken Shawarma Wraps Special?

What sets Chicken Shawarma Wraps apart is their unique blend of spices. The marinade, which includes cumin, coriander, and paprika, infuses the chicken with rich flavors. This dish is versatile, allowing you to customize it with your favorite toppings. Whether you prefer a tangy tahini sauce or a zesty garlic sauce, the options are endless. Plus, the freshness of the vegetables adds a crunchy texture that complements the tender chicken perfectly.

The Popularity of Chicken Shawarma Wraps

Chicken Shawarma Wraps have gained immense popularity worldwide. They are often found in food trucks, restaurants, and homes alike. The reason for this popularity is simple: they are delicious, filling, and can be enjoyed on the go. Many people appreciate the balance of flavors and the ease of preparation. As a result, Chicken Shawarma Wraps have become a go-to meal for busy families and food enthusiasts. With just a few ingredients and steps, you can create a dish that feels special and tastes amazing.

Ingredients for Chicken Shawarma Wraps Recipe

To create the perfect Chicken Shawarma Wraps, you’ll need a selection of fresh ingredients that come together to make a flavorful meal. Here’s what you’ll need:

  • 1 pound boneless, skinless chicken thighs
  • 2 tablespoons olive oil
  • 2 teaspoons ground cumin
  • 2 teaspoons ground coriander
  • 1 teaspoon paprika
  • 1 teaspoon ground turmeric
  • 1 teaspoon garlic powder
  • 1 teaspoon onion powder
  • 1/2 teaspoon cayenne pepper (optional)
  • Salt and pepper to taste
  • 4 large pita breads or flatbreads
  • 1 cup lettuce, shredded
  • 1 cup tomatoes, diced
  • 1/2 cup cucumber, diced
  • 1/2 cup red onion, thinly sliced
  • 1/2 cup tahini sauce or garlic sauce

These ingredients are not only easy to find but also come together to create a delicious and satisfying meal. The chicken thighs provide a juicy base, while the spices add depth and warmth. Fresh vegetables bring a crunch that balances the dish perfectly. Finally, the sauce ties everything together, making each bite a burst of flavor.

Feel free to adjust the ingredients based on your preferences. For instance, if you prefer chicken breasts, they can be used instead of thighs. You can also add more vegetables or different sauces to make the wraps your own. The beauty of Chicken Shawarma Wraps lies in their versatility!

Step-by-Step Preparation of Chicken Shawarma Wraps Recipe

Now that you have all your ingredients ready, it’s time to dive into the preparation of your Chicken Shawarma Wraps. This step-by-step guide will help you create a delicious meal that’s sure to impress your family and friends.

Step 1: Marinating the Chicken

Marinating the chicken is a crucial step that enhances the flavor. Start by taking a large bowl and adding the olive oil, ground cumin, ground coriander, paprika, ground turmeric, garlic powder, onion powder, cayenne pepper, salt, and pepper. Mix these ingredients well until they form a smooth marinade.

Next, add the boneless, skinless chicken thighs to the bowl. Make sure each piece is thoroughly coated with the marinade. This is where the magic happens! Cover the bowl with plastic wrap and place it in the refrigerator. Let the chicken marinate for at least one hour. For the best flavor, consider marinating it overnight. The longer it sits, the more flavorful it becomes!

Step 2: Cooking the Chicken

Once your chicken has marinated, it’s time to cook it. Preheat your grill or skillet over medium-high heat. This ensures that the chicken cooks evenly and gets a nice char. Place the marinated chicken thighs on the grill or skillet. Cook them for about 6-7 minutes on each side. You want the chicken to be fully cooked, reaching an internal temperature of 165°F.

After cooking, remove the chicken from the heat and let it rest for a few minutes. This resting period allows the juices to redistribute, keeping the chicken moist and tender. Once rested, slice the chicken into thin strips. These strips will be the star of your wraps!

Step 3: Preparing the Wraps

While the chicken is resting, it’s a great time to prepare your wraps. Gather your large pita breads or flatbreads. If you prefer, you can warm them slightly in a skillet or microwave for a few seconds. This makes them more pliable and easier to roll.

Next, chop your fresh vegetables. Dice the tomatoes and cucumber, shred the lettuce, and thinly slice the red onion. Having everything ready will make assembling the wraps a breeze!

Step 4: Assembling the Chicken Shawarma Wraps

Now comes the fun part—assembling your Chicken Shawarma Wraps! Start by placing a generous amount of sliced chicken in the center of each pita or flatbread. Then, layer on the shredded lettuce, diced tomatoes, cucumber, and red onion. Don’t forget to drizzle your choice of tahini sauce or garlic sauce over the top. This adds a creamy texture and enhances the flavors.

Finally, roll up the wraps tightly, tucking in the sides as you go. This helps keep all the delicious fillings inside. Serve your Chicken Shawarma Wraps immediately while they’re warm and fresh. Enjoy every bite of this flavorful meal!

Variations of Chicken Shawarma Wraps Recipe

While the classic Chicken Shawarma Wraps are a hit, there are many ways to switch things up! Whether you’re looking for vegetarian options or want to explore different sauces and toppings, these variations will keep your meals exciting and flavorful.

Vegetarian Options

If you’re looking for a meat-free alternative, you can easily create delicious vegetarian Shawarma Wraps. One popular option is to substitute the chicken with marinated grilled vegetables. Consider using bell peppers, zucchini, and eggplant. Simply toss these veggies in olive oil and your favorite spices, then grill them until tender.

Another great choice is to use chickpeas. You can roast them with spices like cumin and paprika for a crunchy texture. Additionally, tofu is an excellent protein source. Marinate it just like the chicken and grill or sauté until golden brown. These vegetarian options are not only tasty but also packed with nutrients!

Different Sauces and Toppings

The sauce can make or break your Chicken Shawarma Wraps. While tahini and garlic sauce are traditional favorites, don’t hesitate to experiment! A spicy harissa sauce can add a kick, while a yogurt-based sauce can provide a cooling effect. You might also try a zesty lemon tahini dressing for a fresh twist.

When it comes to toppings, the sky’s the limit! Add sliced jalapeños for heat, or sprinkle some feta cheese for a salty bite. Fresh herbs like parsley or mint can brighten up the flavors. You can even include pickled vegetables for an extra crunch. These variations allow you to customize your wraps to suit your taste and mood!

Cooking Note for Chicken Shawarma Wraps Recipe

When preparing Chicken Shawarma Wraps, a few cooking notes can help ensure your dish turns out perfectly every time. First, always choose high-quality chicken thighs. They are juicier and more flavorful than chicken breasts, making them ideal for this recipe. If you do opt for chicken breasts, be mindful of the cooking time, as they can dry out more quickly.

Next, marinating the chicken is essential. The longer you let it sit, the more the flavors will penetrate the meat. If you’re short on time, even a quick 30-minute marinade can still enhance the taste. However, for the best results, aim for at least one hour or overnight.

When cooking the chicken, ensure your grill or skillet is preheated. This step is crucial for achieving a nice sear and locking in the juices. If you’re using a skillet, consider adding a splash of water or broth while cooking. This can help keep the chicken moist and tender.

Lastly, don’t rush the resting period after cooking. Allowing the chicken to rest for a few minutes before slicing helps retain its juices. This simple step can make a big difference in the overall texture and flavor of your wraps.

By following these cooking notes, you’ll create Chicken Shawarma Wraps that are not only delicious but also memorable. Enjoy the process and the delightful flavors that come together in this wonderful dish!

Serving Suggestions for Chicken Shawarma Wraps Recipe

When it comes to serving Chicken Shawarma Wraps, the presentation and accompanying sides can elevate your meal to a whole new level. Here are some delightful serving suggestions that will complement your wraps and make your dining experience even more enjoyable.

First, consider serving your Chicken Shawarma Wraps with a side of crispy fries or sweet potato fries. The crunchiness of the fries pairs wonderfully with the tender chicken and fresh vegetables. You can also opt for a side of roasted vegetables, which adds a healthy touch and enhances the meal’s flavor profile.

Another great option is to include a refreshing salad. A simple cucumber and tomato salad dressed with lemon juice and olive oil can provide a light and zesty contrast to the rich flavors of the wraps. You might also try a tabbouleh salad, which features parsley, bulgur, and mint for a fresh and herby side.

If you want to add a bit of flair, consider serving your wraps with a small bowl of hummus or baba ganoush. These dips are perfect for spreading on the wraps or enjoying with pita chips. They add a creamy texture and a burst of flavor that complements the spices in the chicken.

For a fun twist, you can create a Shawarma platter. Arrange the wraps alongside a variety of toppings and sauces, allowing everyone to customize their meal. Include options like pickled vegetables, olives, and different sauces to create a vibrant and interactive dining experience.

Lastly, don’t forget about beverages! A refreshing drink can enhance your meal. Consider serving your Chicken Shawarma Wraps with a cool mint lemonade or a yogurt-based drink like ayran. These beverages not only quench your thirst but also balance the spices in the wraps.

With these serving suggestions, your Chicken Shawarma Wraps will be a hit at any gathering. Enjoy the delicious flavors and the joy of sharing this delightful meal with family and friends!

Tips for Perfect Chicken Shawarma Wraps Recipe

Creating the perfect Chicken Shawarma Wraps is all about attention to detail. Here are some helpful tips to ensure your wraps turn out delicious every time. With these tricks, you’ll impress your family and friends with your culinary skills!

First, always use fresh ingredients. Fresh vegetables not only taste better but also add vibrant colors to your wraps. Look for crisp lettuce, ripe tomatoes, and firm cucumbers. The freshness of these ingredients enhances the overall flavor of your dish.

Next, don’t skip the marinating step. Marinating the chicken is crucial for infusing it with flavor. If you have time, let the chicken marinate overnight. This allows the spices to penetrate deeply, resulting in a more flavorful meal. If you’re in a hurry, even a quick 30-minute marinade can make a difference.

When cooking the chicken, ensure your grill or skillet is hot before adding the meat. A hot cooking surface helps to sear the chicken, locking in the juices and creating a delicious crust. This step is key to achieving tender and juicy chicken.

Another tip is to slice the chicken against the grain. This technique helps to keep the meat tender and easy to chew. After cooking, let the chicken rest for a few minutes before slicing. This resting period allows the juices to redistribute, making each bite juicy and flavorful.

For the wraps, don’t overfill them. While it’s tempting to add lots of ingredients, overstuffing can make rolling difficult. Aim for a balanced amount of chicken and veggies, allowing for easy wrapping. Tuck in the sides as you roll to keep everything secure.

Lastly, serve your Chicken Shawarma Wraps immediately after assembling. This ensures that the pita bread remains warm and soft, while the vegetables stay crisp. If you need to prepare them in advance, consider wrapping them in foil to keep them warm until serving.

By following these tips, you’ll create Chicken Shawarma Wraps that are not only delicious but also visually appealing. Enjoy the process and the wonderful flavors that come together in this delightful dish!

Breakdown of Time for Chicken Shawarma Wraps Recipe

Understanding the time needed for each step in the Chicken Shawarma Wraps recipe can help you plan your cooking efficiently. Here’s a breakdown of the time required for preparation, cooking, and the total time to enjoy this delicious meal.

Prep Time

The prep time for Chicken Shawarma Wraps is approximately 15-20 minutes. This includes gathering your ingredients, marinating the chicken, and chopping the vegetables. If you choose to marinate the chicken overnight, you can save time on the day of cooking. Just remember to plan ahead!

Cooking Time

Cooking the chicken takes about 12-15 minutes. You’ll need around 6-7 minutes per side on the grill or skillet. This ensures the chicken is cooked through and reaches the safe internal temperature of 165°F. After cooking, allow the chicken to rest for a few minutes before slicing. This resting time is essential for juicy chicken.

Total Time

In total, if you include marinating time, the Chicken Shawarma Wraps recipe can take anywhere from 1 hour to overnight, depending on how long you choose to marinate the chicken. If you skip the overnight marination, the total time for preparation and cooking is about 30-35 minutes. This makes it a quick and satisfying meal option for busy days!

Nutritional Information for Chicken Shawarma Wraps Recipe

Understanding the nutritional content of your meals is essential for maintaining a balanced diet. Chicken Shawarma Wraps are not only delicious but also provide a good mix of nutrients. Here’s a breakdown of the nutritional information for one serving of this delightful dish.

Calories

Each serving of Chicken Shawarma Wraps contains approximately 450 calories. This makes it a satisfying meal that can fit into various dietary plans. The calorie count comes from the combination of chicken, pita bread, and fresh vegetables, providing energy for your day.

Protein

Protein is a vital nutrient for building and repairing tissues. Each serving of Chicken Shawarma Wraps offers about 30 grams of protein. The chicken thighs are the primary source of this protein, making the wraps a great option for those looking to increase their protein intake. This high protein content helps keep you feeling full and satisfied.

Sodium

When it comes to sodium, each serving contains around 800 milligrams. While this is a reasonable amount for a meal, it’s essential to be mindful of your overall sodium intake throughout the day. You can reduce sodium levels by using low-sodium sauces or adjusting the amount of salt in the marinade. This way, you can enjoy your Chicken Shawarma Wraps while keeping your health in check.

Overall, Chicken Shawarma Wraps are a nutritious choice that combines protein, healthy fats, and fresh vegetables. They make for a balanced meal that can be enjoyed any day of the week!

FAQs about Chicken Shawarma Wraps Recipe

Can I use a different type of meat for Chicken Shawarma Wraps?

Absolutely! While chicken is the star of this recipe, you can easily substitute it with other meats. Beef or lamb can be used for a richer flavor. Just remember to adjust the cooking time based on the type of meat you choose. If you prefer a lighter option, turkey is also a great choice. For a vegetarian twist, consider using marinated tofu or tempeh. Each option brings its own unique taste to the wraps!

How can I make Chicken Shawarma Wraps spicier?

If you love a bit of heat, there are several ways to spice up your Chicken Shawarma Wraps. First, you can add cayenne pepper to the marinade for an extra kick. If you want more heat, consider including sliced jalapeños or serrano peppers in your wraps. Another option is to drizzle a spicy sauce, like sriracha or harissa, over the top before rolling them up. These additions will surely satisfy your spicy cravings!

What are the best sides to serve with Chicken Shawarma Wraps?

When it comes to sides, there are plenty of delicious options to complement your Chicken Shawarma Wraps. A fresh tabbouleh salad, made with parsley, tomatoes, and bulgur, pairs wonderfully with the wraps. You might also enjoy serving crispy fries or sweet potato fries for a satisfying crunch. For a lighter option, a simple cucumber and tomato salad dressed with lemon juice is refreshing. Hummus or baba ganoush can also be great dips to enjoy alongside your wraps!

Can I prepare Chicken Shawarma Wraps in advance?

Yes, you can prepare Chicken Shawarma Wraps in advance, making them a convenient option for busy days. You can marinate the chicken the night before and cook it when you’re ready. If you want to assemble the wraps ahead of time, consider keeping the ingredients separate until serving. This way, the pita bread stays soft, and the vegetables remain fresh. Just wrap them tightly in foil or plastic wrap to keep them from drying out. Enjoy your delicious wraps whenever you’re ready!

Conclusion on Chicken Shawarma Wraps Recipe

In conclusion, Chicken Shawarma Wraps are a fantastic dish that combines rich flavors, fresh ingredients, and a touch of creativity. This recipe is not only easy to follow but also allows for plenty of customization. Whether you stick to the classic version or explore various vegetarian options, the result is always delicious.

These wraps are perfect for any occasion, from casual family dinners to gatherings with friends. The marinated chicken, paired with crisp vegetables and creamy sauce, creates a satisfying meal that everyone will enjoy. Plus, the versatility of Chicken Shawarma Wraps means you can adapt them to suit your taste preferences or dietary needs.

As you prepare your Chicken Shawarma Wraps, remember to have fun with the process. Experiment with different spices, sauces, and toppings to make the dish your own. With each bite, you’ll experience a burst of flavor that transports you to the vibrant streets of the Middle East.

So, gather your ingredients, roll up your sleeves, and get ready to enjoy a delightful meal that’s sure to impress. Happy cooking!

Stay Connected

Get recipes via email: