Get my cookbooks

Lemon Ricotta Pasta Recipe is a must-try dish!

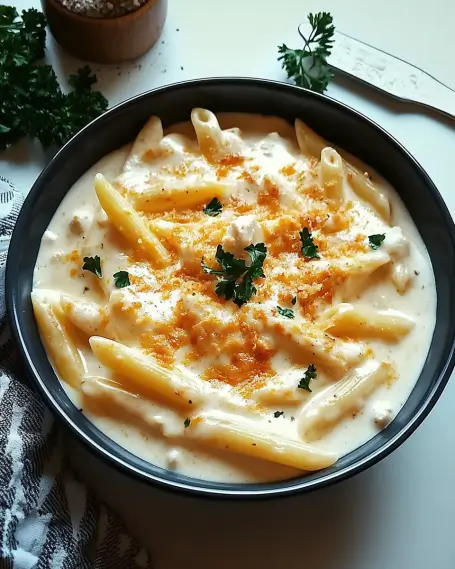
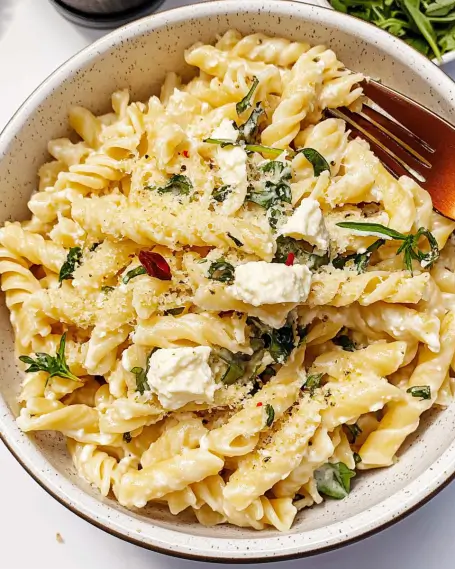
Introduction to Lemon Ricotta Pasta Recipe

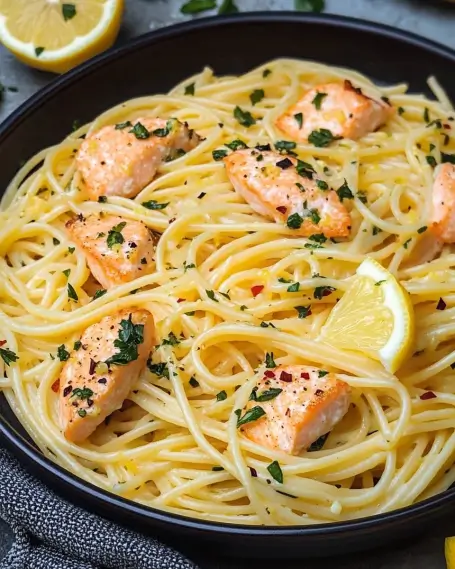
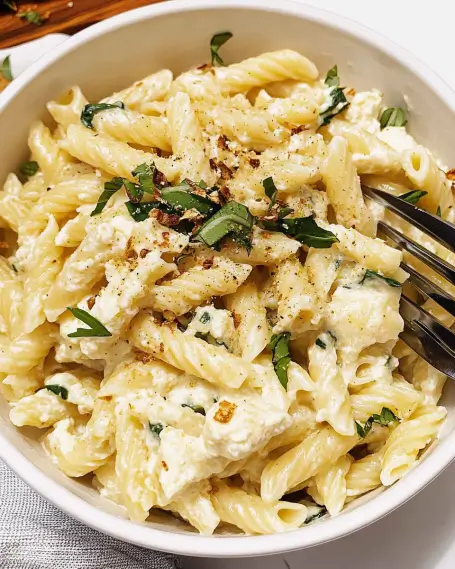
Welcome to the delightful world of Lemon Ricotta Pasta! This dish is not just a meal; it’s an experience that brings together the creamy richness of ricotta cheese and the bright, zesty flavor of lemon. Perfect for a quick weeknight dinner or a special occasion, this recipe is sure to impress your family and friends.

What Makes Lemon Ricotta Pasta Special?

What sets Lemon Ricotta Pasta apart from other pasta dishes? First, it’s the simplicity of the ingredients. With just a few pantry staples, you can create a dish that feels gourmet. The creamy ricotta cheese blends beautifully with the fresh lemon juice and zest, creating a sauce that is both light and satisfying.

Moreover, this recipe is incredibly versatile. You can easily customize it to suit your taste. Whether you prefer it with added vegetables or a protein boost, the options are endless. Plus, it’s a great way to incorporate fresh herbs, like basil, which adds a pop of color and flavor.

Another reason to love this dish is its quick preparation time. In less than 30 minutes, you can have a delicious meal on the table. This makes it perfect for busy evenings when you want something tasty without spending hours in the kitchen.

In summary, Lemon Ricotta Pasta is special because it combines simplicity, versatility, and speed. It’s a dish that not only satisfies your hunger but also delights your taste buds. So, let’s dive into the ingredients and get started on this delightful culinary journey!

Ingredients for Lemon Ricotta Pasta Recipe

To create the perfect Lemon Ricotta Pasta, you’ll need a handful of fresh and simple ingredients. Each component plays a vital role in building the dish’s flavor and texture. Here’s what you’ll need:

  • 8 ounces pasta: Choose spaghetti or fettuccine for a delightful base.
  • 1 cup ricotta cheese: This creamy cheese is the star of the dish, providing richness.
  • 1 lemon: You’ll need both the zest and juice for that bright, zesty flavor.
  • 1/2 cup grated Parmesan cheese: This adds a savory depth to the sauce.
  • 2 tablespoons olive oil: Use this for sautéing garlic and enhancing flavor.
  • 2 cloves garlic: Minced garlic brings a wonderful aroma and taste.
  • Salt and pepper: Essential for seasoning to your liking.
  • Fresh basil leaves: These are perfect for garnishing and adding freshness.
  • 1/4 teaspoon red pepper flakes (optional): For those who enjoy a little heat!

Gathering these ingredients is the first step toward creating a delicious Lemon Ricotta Pasta. Each item contributes to the overall flavor, making this dish a delightful experience. Now that you have everything ready, let’s move on to the preparation steps!

Step-by-Step Preparation of Lemon Ricotta Pasta Recipe

Now that you have all your ingredients ready, it’s time to dive into the cooking process! This step-by-step guide will help you create a delicious Lemon Ricotta Pasta that’s sure to impress. Let’s get started!

Step 1: Cook the Pasta

Begin by bringing a large pot of salted water to a boil. Once boiling, add your 8 ounces of pasta. You can choose either spaghetti or fettuccine, depending on your preference. Cook the pasta according to the package instructions until it reaches an al dente texture. This usually takes about 8 to 10 minutes.

While the pasta cooks, remember to reserve 1 cup of the pasta water before draining. This starchy water will help create a creamy sauce later. After reserving the water, drain the pasta and set it aside. This step is crucial, as it ensures your pasta is perfectly cooked and ready to absorb the delicious sauce.

Step 2: Prepare the Lemon Ricotta Sauce

In a large skillet, heat 2 tablespoons of olive oil over medium heat. Once the oil is hot, add 2 cloves of minced garlic. Sauté the garlic for about 1 minute, just until it becomes fragrant. Be careful not to let it burn, as burnt garlic can ruin the flavor of your sauce.

Next, reduce the heat to low and add 1 cup of ricotta cheese, along with the zest and juice of 1 lemon. Stir everything together until it’s well combined and creamy. The lemon juice will add a refreshing zing, while the ricotta provides a rich base for your sauce.

Step 3: Combine Pasta and Sauce

Now it’s time to bring everything together! Gradually add the reserved pasta water to the skillet, a little at a time. This will help you achieve your desired sauce consistency. You want it to be creamy but not too thick.

Once the sauce is ready, add the drained pasta to the skillet. Toss the pasta gently to coat it in the lemon ricotta sauce. Then, stir in 1/2 cup of grated Parmesan cheese. This will enhance the flavor and add a lovely creaminess to the dish. Season with salt, pepper, and red pepper flakes if you like a bit of heat.

Step 4: Garnish and Serve

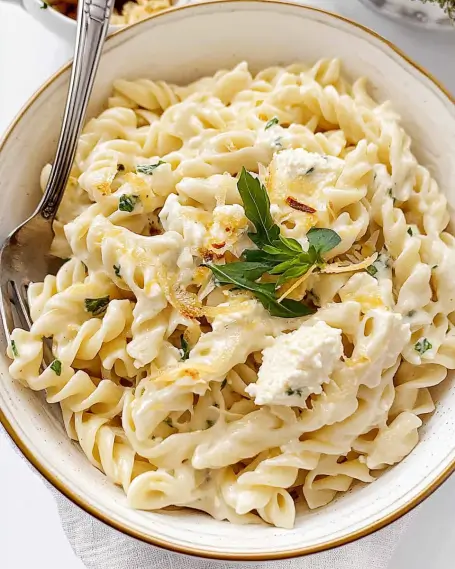
Your Lemon Ricotta Pasta is almost ready! Serve it immediately for the best taste. Garnish each plate with fresh basil leaves and additional Parmesan cheese if desired. The vibrant green of the basil adds a beautiful touch and a burst of flavor.

Enjoy your delicious Lemon Ricotta Pasta! This dish is perfect for sharing with family or friends, and it’s sure to become a favorite in your household.

Variations of Lemon Ricotta Pasta Recipe

While the classic Lemon Ricotta Pasta is delightful on its own, there are many ways to customize it. Adding vegetables or proteins can enhance the dish, making it even more satisfying. Let’s explore some tasty variations!

Adding Vegetables to Lemon Ricotta Pasta

Incorporating vegetables into your Lemon Ricotta Pasta not only boosts its nutritional value but also adds color and texture. Here are some great options:

  • Spinach: Fresh spinach wilts beautifully in the warm pasta, adding a lovely green color and a mild flavor.
  • Cherry Tomatoes: Halved cherry tomatoes bring a sweet burst of flavor. Sauté them briefly with the garlic for a delicious addition.
  • Zucchini: Sliced or spiralized zucchini can add a nice crunch. Sauté it until tender before mixing it into the pasta.
  • Peas: Sweet peas add a pop of color and sweetness. Toss them in during the last minute of cooking the pasta.

Feel free to mix and match these vegetables based on your preferences. They not only enhance the dish but also make it more filling and nutritious!

Protein Options for Lemon Ricotta Pasta

If you’re looking to add some protein to your Lemon Ricotta Pasta, there are plenty of delicious options. Here are a few ideas:

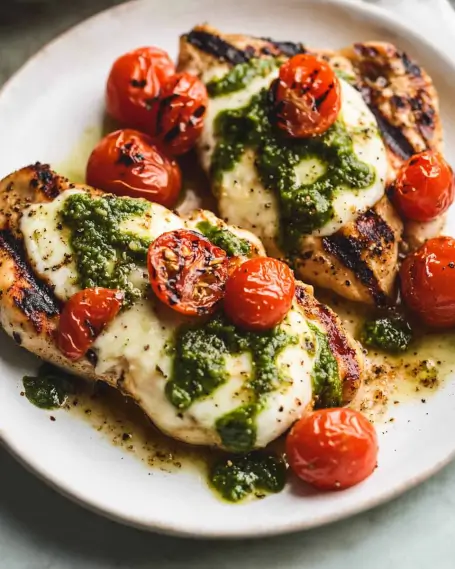
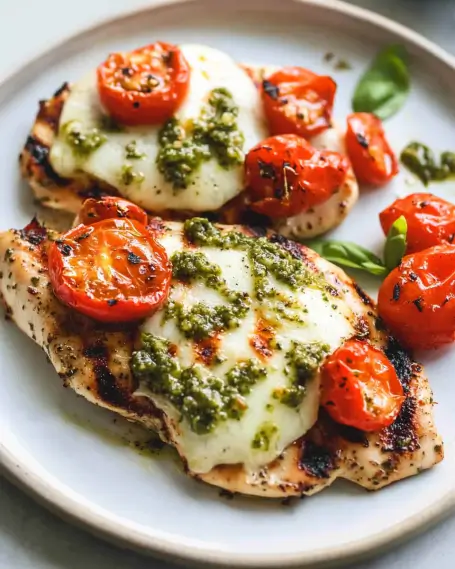
  • Grilled Chicken: Sliced grilled chicken breast adds a hearty element. It pairs wonderfully with the creamy sauce.
  • Shrimp: Sautéed shrimp can bring a touch of elegance. Cook them in the skillet before adding the sauce for a seafood twist.
  • Tofu: For a vegetarian option, try adding cubed, sautéed tofu. It absorbs flavors well and adds protein.
  • Italian Sausage: Crumbled and cooked Italian sausage can add a savory depth to the dish. It’s perfect for those who enjoy a bit of spice.

These protein options can transform your Lemon Ricotta Pasta into a complete meal. Choose one or combine a few for a heartier dish that everyone will love!

Cooking Note for Lemon Ricotta Pasta Recipe

When preparing your Lemon Ricotta Pasta, there are a few important cooking notes to keep in mind. These tips will help ensure that your dish turns out perfectly every time. Let’s take a look!

First, always use high-quality ingredients. Fresh ricotta cheese and a ripe lemon will significantly enhance the flavor of your pasta. The zest and juice from a fresh lemon provide a bright, zesty taste that bottled lemon juice simply cannot match.

Next, pay attention to the cooking time of your pasta. Cooking it to al dente is crucial. This means the pasta should be firm to the bite. Overcooked pasta can become mushy and won’t hold up well in the sauce. Remember, the pasta will continue to cook slightly after you drain it, so it’s best to err on the side of undercooking it just a bit.

Additionally, when combining the pasta with the sauce, do so gently. Tossing the pasta too vigorously can break it apart, especially if you’re using delicate noodles like fettuccine. A gentle toss will help keep the pasta intact while ensuring it’s well-coated with the creamy sauce.

Lastly, don’t forget to taste as you go! Adjust the seasoning with salt and pepper according to your preference. If you like a bit of heat, the red pepper flakes can be added to your liking. This is your dish, so make it just the way you enjoy it!

By following these cooking notes, you’ll create a Lemon Ricotta Pasta that’s not only delicious but also visually appealing. Enjoy the process, and happy cooking!

Serving Suggestions for Lemon Ricotta Pasta Recipe

Once your Lemon Ricotta Pasta is ready, it’s time to think about how to serve it! Presentation can elevate your dish, making it even more enjoyable. Here are some delightful serving suggestions to enhance your dining experience:

  • Plate it Up: Serve the pasta in shallow bowls or on large plates. This allows the creamy sauce to spread out beautifully, showcasing the vibrant colors of the dish.
  • Garnish Generously: Don’t skimp on the garnishes! Fresh basil leaves not only add a pop of color but also a burst of flavor. You can also sprinkle extra grated Parmesan cheese on top for a rich finish.
  • Pair with a Side Salad: A light side salad complements the richness of the pasta. Consider a simple arugula salad with lemon vinaigrette for a refreshing contrast.
  • Serve with Crusty Bread: A slice of crusty bread or garlic bread is perfect for soaking up any leftover sauce. It adds a satisfying crunch to your meal.
  • Wine Pairing: If you enjoy wine, consider pairing your Lemon Ricotta Pasta with a crisp white wine, like Pinot Grigio or Sauvignon Blanc. These wines enhance the lemony flavors of the dish.
  • Make it a Family Style Meal: For a cozy gathering, serve the pasta in a large bowl at the center of the table. Let everyone help themselves, creating a warm and inviting atmosphere.

These serving suggestions will not only make your Lemon Ricotta Pasta look appealing but also enhance the overall dining experience. Enjoy sharing this delicious dish with your loved ones!

Tips for Perfecting Your Lemon Ricotta Pasta Recipe

Creating the perfect Lemon Ricotta Pasta is all about attention to detail. With a few simple tips, you can elevate this dish to new heights. Here are some helpful suggestions to ensure your pasta turns out delicious every time:

  • Use Fresh Ingredients: Fresh ricotta cheese and a ripe lemon make a world of difference. The zest and juice from a fresh lemon will brighten the dish, while high-quality ricotta adds creaminess.
  • Don’t Overcook the Pasta: Aim for al dente pasta. This means it should be firm to the bite. Overcooked pasta can become mushy and won’t hold the sauce well. Remember, it will continue to cook slightly after draining.
  • Reserve Pasta Water: Always save some pasta water before draining. This starchy water is key to achieving the right sauce consistency. Add it gradually to the sauce until you reach your desired creaminess.
  • Mix Gently: When combining the pasta with the sauce, toss gently. This helps keep the pasta intact and ensures it’s evenly coated without breaking apart.
  • Season to Taste: Taste your dish as you go! Adjust the seasoning with salt and pepper according to your preference. If you enjoy a bit of heat, add red pepper flakes to your liking.
  • Experiment with Herbs: Fresh herbs can enhance the flavor of your dish. Besides basil, consider adding parsley or chives for a different twist. They add freshness and color.
  • Serve Immediately: Lemon Ricotta Pasta is best enjoyed fresh. Serve it right after mixing to keep the sauce creamy and the pasta warm.
  • Try Different Pasta Shapes: While spaghetti and fettuccine are popular choices, don’t hesitate to experiment with other pasta shapes. Penne or farfalle can add a fun twist to your dish.

By following these tips, you’ll be well on your way to mastering the art of Lemon Ricotta Pasta. Each step contributes to a dish that’s not only delicious but also visually appealing. Enjoy the cooking process and the delightful flavors that come together in this wonderful recipe!

Breakdown of Time for Lemon Ricotta Pasta Recipe

Understanding the time needed for each step in the Lemon Ricotta Pasta recipe can help you plan your cooking efficiently. Here’s a simple breakdown of the time required for preparation and cooking:

Prep Time

The prep time for this delightful dish is quite short. You’ll need about 10 minutes to gather and prepare your ingredients. This includes measuring out the pasta, ricotta, and cheese, as well as zesting and juicing the lemon. If you’re chopping garlic or any vegetables, add a few extra minutes. Overall, aim for around 10 to 15 minutes for prep.

Cooking Time

Once you’re ready to cook, the actual cooking time is approximately 15 to 20 minutes. This includes boiling the pasta, sautéing the garlic, and mixing everything together. The pasta usually takes about 8 to 10 minutes to cook, while the sauce comes together in just a few minutes. So, you can expect the cooking process to be quick and efficient!

Total Time

In total, you’re looking at about 25 to 35 minutes from start to finish. This makes Lemon Ricotta Pasta a fantastic option for a weeknight dinner or a last-minute meal. With its quick preparation and cooking time, you can enjoy a delicious, homemade dish without spending hours in the kitchen!

Nutritional Information for Lemon Ricotta Pasta Recipe

Understanding the nutritional content of your meals is essential for maintaining a balanced diet. The Lemon Ricotta Pasta is not only delicious but also provides a good mix of nutrients. Here’s a breakdown of the nutritional information per serving:

Calories

Each serving of Lemon Ricotta Pasta contains approximately 400 calories. This makes it a satisfying meal that can fit into various dietary plans. The combination of pasta, ricotta, and Parmesan cheese contributes to the calorie count, providing energy for your day.

Protein

In terms of protein, this dish offers about 14 grams per serving. The ricotta cheese and Parmesan cheese are excellent sources of protein, which is essential for muscle repair and overall health. If you choose to add protein options like chicken or shrimp, the protein content will increase, making it even more filling.

Sodium

The sodium content in Lemon Ricotta Pasta is around 600 milligrams per serving. This includes the salt used during cooking and the sodium present in the cheeses. If you’re watching your sodium intake, consider using low-sodium cheese or reducing the amount of added salt. Balancing flavors with fresh herbs can also help reduce the need for extra salt.

Overall, Lemon Ricotta Pasta is a nutritious option that provides a good balance of calories, protein, and flavor. Enjoy this delightful dish while being mindful of your dietary needs!

FAQs about Lemon Ricotta Pasta Recipe

Can I use a different cheese in the Lemon Ricotta Pasta Recipe?

Absolutely! While ricotta cheese is the star of this dish, you can experiment with other cheeses. For a lighter option, consider using cottage cheese. It has a similar texture but is lower in fat. If you prefer a stronger flavor, goat cheese can add a tangy twist. Just remember that each cheese will slightly change the taste and creaminess of the sauce, so choose one that suits your palate!

How can I make Lemon Ricotta Pasta Recipe vegan?

Making Lemon Ricotta Pasta vegan is simple! Start by substituting the ricotta cheese with a plant-based alternative. You can use vegan ricotta, which is often made from nuts or tofu. Additionally, replace the Parmesan cheese with nutritional yeast for a cheesy flavor without dairy. Finally, ensure that your pasta is egg-free, as some pasta varieties contain eggs. With these adjustments, you can enjoy a delicious vegan version of this delightful dish!

What type of pasta works best for Lemon Ricotta Pasta Recipe?

While spaghetti and fettuccine are popular choices, you can use any pasta shape you like! Penne, farfalle, or even whole wheat pasta can work beautifully. The key is to choose a pasta that will hold the creamy sauce well. Just make sure to cook it according to the package instructions for the best texture. Feel free to get creative with your pasta choice!

Can I prepare Lemon Ricotta Pasta Recipe in advance?

Yes, you can prepare some components of the Lemon Ricotta Pasta in advance! You can cook the pasta and make the sauce ahead of time. However, it’s best to combine them just before serving to keep the pasta from becoming mushy. If you do prepare it in advance, store the pasta and sauce separately in the refrigerator. When you’re ready to eat, simply reheat the sauce and toss it with the pasta. This way, you’ll enjoy a fresh and delicious meal!

Conclusion on Lemon Ricotta Pasta Recipe

In conclusion, the Lemon Ricotta Pasta recipe is a delightful dish that combines simplicity, flavor, and versatility. With just a few fresh ingredients, you can create a meal that is both satisfying and impressive. The creamy ricotta cheese paired with the bright zest and juice of lemon creates a sauce that is light yet rich, making it perfect for any occasion.

This recipe is not only quick to prepare but also allows for endless customization. Whether you choose to add vegetables, proteins, or even experiment with different cheeses, the possibilities are truly endless. Each variation can bring a new twist to this classic dish, ensuring that it never gets boring.

Moreover, the nutritional benefits of Lemon Ricotta Pasta make it a great choice for a balanced meal. With a good mix of protein, carbohydrates, and healthy fats, it can fit into various dietary preferences. Plus, it’s a fantastic way to incorporate fresh ingredients into your diet.

So, whether you’re cooking for yourself, your family, or hosting friends, Lemon Ricotta Pasta is sure to impress. It’s a dish that brings joy to the table and can be enjoyed by everyone. We hope you give this recipe a try and experience the delightful flavors for yourself. Happy cooking!

Lemon Butter Salmon Pasta Recipe is a must-try dish!

Introduction to Lemon Butter Salmon Pasta Recipe

If you’re looking for a delightful dish that combines the richness of salmon with the zesty brightness of lemon, then the Lemon Butter Salmon Pasta Recipe is just for you! This dish is not only easy to prepare but also packed with flavor and nutrients. It’s perfect for a weeknight dinner or a special occasion. The creamy sauce, paired with tender salmon and fresh spinach, creates a meal that is both satisfying and elegant.

Why You Should Try This Recipe

There are many reasons to give this Lemon Butter Salmon Pasta Recipe a try. First, it’s a quick meal that can be made in under 30 minutes, making it ideal for busy evenings. Second, the combination of lemon and butter enhances the natural flavors of the salmon, creating a dish that is both refreshing and comforting. Plus, it’s a great way to incorporate healthy fats and protein into your diet.

Moreover, this recipe is versatile. You can easily customize it by adding your favorite vegetables or swapping out the salmon for another protein. Whether you’re cooking for yourself or entertaining guests, this dish is sure to impress. The vibrant colors and rich flavors will make your dining experience memorable.

So, gather your ingredients and get ready to whip up a delicious Lemon Butter Salmon Pasta that will leave everyone asking for seconds!

Ingredients for Lemon Butter Salmon Pasta Recipe

To create the delightful Lemon Butter Salmon Pasta, you’ll need a few simple yet flavorful ingredients. Each component plays a vital role in bringing this dish to life. Here’s what you’ll need:

  • 8 ounces linguine or spaghetti
  • 2 tablespoons olive oil
  • 1 pound salmon fillets
  • Salt and pepper, to taste
  • 2 tablespoons unsalted butter
  • 3 cloves garlic, minced
  • 1 cup heavy cream
  • 1 lemon, zested and juiced
  • 1 cup grated Parmesan cheese
  • 2 cups fresh spinach
  • Fresh parsley, chopped (for garnish)

These ingredients come together to create a creamy, zesty sauce that perfectly complements the salmon and pasta. The fresh spinach adds a pop of color and nutrition, making this dish not only delicious but also visually appealing. Make sure to gather everything before you start cooking, as it will help streamline the process and ensure you don’t miss any key components!

Step-by-Step Preparation of Lemon Butter Salmon Pasta Recipe

Now that you have all your ingredients ready, it’s time to dive into the step-by-step preparation of the Lemon Butter Salmon Pasta Recipe. This process is straightforward and will guide you through each stage, ensuring a delicious outcome. Let’s get started!

Step 1: Preparing the Salmon

First, you need to prepare the salmon. Start by rinsing the salmon fillets under cold water. Pat them dry with a paper towel. This helps to remove excess moisture, allowing for a better sear. Next, season both sides of the salmon with salt and pepper. This simple seasoning enhances the flavor of the fish.

In a large skillet, heat 2 tablespoons of olive oil over medium-high heat. Once the oil is hot, carefully place the salmon fillets in the skillet. Cook for about 4-5 minutes on each side. You’ll know the salmon is ready when it flakes easily with a fork. Once cooked, remove the salmon from the skillet and set it aside on a plate. This step is crucial as it allows the salmon to rest while you prepare the rest of the dish.

Step 2: Cooking the Pasta

While the salmon is cooking, you can prepare the pasta. Bring a large pot of salted water to a boil. Add 8 ounces of linguine or spaghetti to the boiling water. Cook according to the package instructions until the pasta is al dente. This usually takes about 8-10 minutes.

Once the pasta is cooked, drain it in a colander, but remember to reserve ½ cup of the pasta water. This starchy water will help to adjust the sauce’s consistency later. Set the drained pasta aside while you move on to the next step.

Step 3: Making the Lemon Butter Sauce

Now, let’s make the delicious lemon butter sauce! In the same skillet where you cooked the salmon, reduce the heat to medium. Add 2 tablespoons of unsalted butter and let it melt. Once melted, add 3 cloves of minced garlic. Sauté the garlic for about 1 minute until it becomes fragrant. Be careful not to burn it, as burnt garlic can taste bitter.

Next, pour in 1 cup of heavy cream, along with the zest and juice of 1 lemon. Stir everything together and let it simmer for 2-3 minutes. This simmering will help the flavors meld together and slightly thicken the sauce. After that, add 1 cup of grated Parmesan cheese. Stir until the cheese is melted and the sauce is smooth. If the sauce seems too thick, add a bit of the reserved pasta water until you reach your desired consistency.

Step 4: Combining Ingredients

It’s time to bring everything together! Start by adding 2 cups of fresh spinach to the sauce. Cook for another minute until the spinach wilts. Then, flake the cooked salmon into bite-sized pieces and gently fold it into the pasta and sauce mixture. Finally, add the cooked pasta to the skillet and toss everything together until well combined. Make sure the pasta is coated in the creamy sauce.

Before serving, taste the dish and adjust the seasoning with salt and pepper if needed. Your Lemon Butter Salmon Pasta is now ready to be enjoyed!

Variations of Lemon Butter Salmon Pasta Recipe

While the classic Lemon Butter Salmon Pasta is delicious on its own, there are many ways to customize this dish. By adding different vegetables or swapping out the protein, you can create a unique meal that suits your taste. Let’s explore some exciting variations!

Adding Vegetables

Incorporating vegetables into your Lemon Butter Salmon Pasta not only enhances the flavor but also boosts its nutritional value. Here are some great options:

  • Cherry Tomatoes: Halve some cherry tomatoes and add them to the sauce. They will add a burst of sweetness and color.
  • Asparagus: Cut asparagus into bite-sized pieces and sauté them with the garlic. They add a nice crunch and earthy flavor.
  • Zucchini: Spiralize or slice zucchini and toss it in with the pasta. It’s a great way to sneak in more veggies!
  • Broccoli: Steam or blanch broccoli florets and mix them in for added texture and nutrients.

Feel free to mix and match these vegetables based on what you have on hand. The key is to choose fresh, vibrant options that complement the lemony sauce.

Alternative Proteins

If you’re looking to switch up the protein in your Lemon Butter Salmon Pasta, there are plenty of delicious alternatives. Here are a few ideas:

  • Chicken: Grilled or sautéed chicken breast can be a great substitute. Season it well to enhance the flavor.
  • Shrimp: Cooked shrimp adds a delightful seafood twist. Sauté them in the same skillet for a quick and easy option.
  • Tofu: For a vegetarian option, use firm tofu. Sauté it until golden brown for added texture.
  • Scallops: If you’re feeling fancy, sear some scallops for a luxurious touch to your pasta.

These alternative proteins can be seasoned similarly to the salmon, ensuring that the dish remains flavorful and satisfying. Experimenting with different proteins allows you to enjoy this recipe in various ways!

Cooking Note for Lemon Butter Salmon Pasta Recipe

When preparing the Lemon Butter Salmon Pasta, there are a few cooking notes to keep in mind to ensure the best results. These tips will help you achieve a delicious and satisfying dish every time.

First, always use fresh ingredients whenever possible. Fresh salmon, garlic, and spinach will enhance the flavors of your dish significantly. If you can, opt for wild-caught salmon, as it tends to have a richer taste and better texture.

Next, be mindful of the cooking times. Salmon can easily overcook, leading to a dry texture. Keep an eye on it while it cooks. The salmon should be opaque and flake easily with a fork when done. If you prefer your salmon medium-rare, aim for a slightly shorter cooking time.

When making the lemon butter sauce, remember to stir continuously after adding the cream and cheese. This will help prevent the sauce from sticking to the bottom of the skillet and ensure a smooth, creamy consistency. If the sauce thickens too much, don’t hesitate to add more reserved pasta water to loosen it up.

Lastly, taste as you go! Adjust the seasoning with salt and pepper to suit your preference. A little extra lemon juice can also brighten the flavors if you desire more zing. This dish is all about balance, so feel free to tweak it to your liking.

By following these cooking notes, you’ll create a Lemon Butter Salmon Pasta that is not only delicious but also visually appealing. Enjoy the process and savor the delightful flavors!

Serving Suggestions for Lemon Butter Salmon Pasta Recipe

Once you’ve prepared your Lemon Butter Salmon Pasta, it’s time to think about how to serve it. The right sides and drinks can elevate your meal, making it even more enjoyable. Here are some fantastic serving suggestions to complement your dish.

Pairing with Sides

When it comes to sides, you want to choose options that balance the richness of the pasta while adding freshness. Here are some great side dishes to consider:

  • Garlic Bread: A classic choice, garlic bread is perfect for soaking up the creamy sauce. You can make it easily by spreading butter and minced garlic on slices of baguette and toasting them in the oven.
  • Caesar Salad: A crisp Caesar salad adds a refreshing crunch. The tangy dressing pairs well with the lemony flavors of the pasta.
  • Roasted Vegetables: Roasted asparagus, bell peppers, or zucchini can add color and nutrition to your meal. Simply toss them with olive oil, salt, and pepper, then roast until tender.
  • Steamed Broccoli: Lightly steamed broccoli is a healthy side that complements the pasta beautifully. Its vibrant green color also adds visual appeal to your plate.

These sides not only enhance the meal but also provide a variety of textures and flavors that work well with the Lemon Butter Salmon Pasta.

Wine Pairing Recommendations

Choosing the right wine can elevate your dining experience. Here are some wine pairing recommendations that go wonderfully with Lemon Butter Salmon Pasta:

  • Sauvignon Blanc: This white wine is known for its crisp acidity and citrus notes, making it a perfect match for the lemony flavors in the dish.
  • Chardonnay: A lightly oaked Chardonnay can complement the creamy sauce beautifully. Its buttery notes will enhance the richness of the pasta.
  • Pinot Grigio: This wine is light and refreshing, with a hint of fruitiness that pairs well with seafood dishes like salmon.
  • Rosé: A dry rosé offers a nice balance of fruit and acidity, making it a versatile choice for this meal.

When selecting a wine, consider your personal taste preferences. The right pairing can enhance the flavors of your Lemon Butter Salmon Pasta, making your meal even more delightful!

Tips for Perfecting Your Lemon Butter Salmon Pasta Recipe

To ensure your Lemon Butter Salmon Pasta turns out perfectly every time, consider these helpful tips. They will guide you through the cooking process and help you achieve a delicious and satisfying dish.

First, always start with high-quality ingredients. Fresh salmon, vibrant spinach, and real Parmesan cheese will make a noticeable difference in flavor. If possible, choose wild-caught salmon for its superior taste and texture.

Next, pay attention to the cooking times. Salmon can go from perfectly cooked to overdone quickly. Aim for a medium doneness, where the salmon is still slightly pink in the center. This will keep it moist and tender.

When cooking the pasta, make sure to salt the water generously. This adds flavor to the pasta itself. Also, remember to reserve that pasta water! It’s a secret weapon for adjusting the sauce’s consistency later.

As you prepare the lemon butter sauce, stir continuously after adding the cream and cheese. This helps prevent the sauce from sticking to the skillet and ensures a smooth, creamy texture. If the sauce thickens too much, simply add a splash of the reserved pasta water to loosen it up.

Don’t forget to taste as you go! Adjust the seasoning with salt, pepper, and even a little extra lemon juice if you want more brightness. This dish is all about balance, so feel free to tweak it to your liking.

Lastly, consider garnishing your dish with fresh herbs like parsley or basil. Not only do they add a pop of color, but they also enhance the overall flavor. A sprinkle of freshly grated Parmesan on top can also elevate the presentation.

By following these tips, you’ll create a Lemon Butter Salmon Pasta that is not only delicious but also visually stunning. Enjoy the cooking process and savor every bite of this delightful dish!

Breakdown of Time for Lemon Butter Salmon Pasta Recipe

Understanding the time needed for each step in the Lemon Butter Salmon Pasta Recipe can help you plan your cooking efficiently. Here’s a breakdown of the time required for preparation and cooking, so you can enjoy this delicious meal without any rush.

Prep Time

The prep time for this recipe is approximately 10-15 minutes. During this time, you will gather all your ingredients, wash and dry the salmon, mince the garlic, and zest and juice the lemon. Having everything ready before you start cooking will make the process smoother and more enjoyable.

Cooking Time

The cooking time for the Lemon Butter Salmon Pasta is about 15-20 minutes. This includes cooking the pasta, searing the salmon, and preparing the creamy lemon butter sauce. Each step is quick, allowing you to have a delicious meal on the table in no time!

Total Time

In total, you can expect to spend around 30-35 minutes from start to finish. This makes it a perfect option for a weeknight dinner or when you have guests over. With just a little bit of time, you can create a flavorful and satisfying dish that everyone will love!

Nutritional Information for Lemon Butter Salmon Pasta Recipe

Understanding the nutritional content of your meals is essential for maintaining a balanced diet. The Lemon Butter Salmon Pasta Recipe not only delights your taste buds but also provides valuable nutrients. Here’s a breakdown of the key nutritional information for this delicious dish.

Calories

650 calories. This calorie count includes the rich ingredients like salmon, heavy cream, and Parmesan cheese, which contribute to the overall energy content of the meal. While it’s a hearty dish, it’s also packed with nutrients that can fuel your body.

Protein

35 grams of protein. Salmon is an excellent source of high-quality protein, which is essential for muscle repair and growth. Additionally, the pasta and cheese contribute to the protein content, making this dish a satisfying option for those looking to increase their protein intake.

Sodium

800 milligrams. This amount can vary based on the specific ingredients used, such as the type of broth or cheese. If you’re watching your sodium intake, consider using low-sodium broth or cheese alternatives to help reduce the overall sodium content without sacrificing flavor.

Overall, the Lemon Butter Salmon Pasta Recipe offers a balanced mix of calories, protein, and sodium, making it a delicious and nutritious choice for any meal. Enjoy this delightful dish while being mindful of your dietary needs!

FAQs about Lemon Butter Salmon Pasta Recipe

Can I use frozen salmon for this recipe?

Yes, you can use frozen salmon for the Lemon Butter Salmon Pasta Recipe! Just make sure to thaw it properly before cooking. You can do this by placing the salmon in the refrigerator overnight or using the defrost setting on your microwave. Once thawed, follow the same cooking instructions as you would for fresh salmon. Keep in mind that frozen salmon may take a minute or two longer to cook, so check for doneness by ensuring it flakes easily with a fork.

What can I substitute for butter in the lemon butter sauce?

If you’re looking for a substitute for butter in the lemon butter sauce, there are several options available. You can use olive oil or coconut oil for a healthier alternative. Both will provide a nice flavor while keeping the sauce creamy. For a dairy-free option, consider using vegan butter or margarine. These substitutes will still give you that rich taste without the dairy. Just remember to adjust the quantity as needed, as some alternatives may have a stronger flavor.

How can I make this recipe gluten-free?

Making the Lemon Butter Salmon Pasta gluten-free is quite simple! The main ingredient to replace is the pasta. You can use gluten-free pasta made from rice, quinoa, or lentils. These options are widely available in grocery stores. Just cook the gluten-free pasta according to the package instructions, and follow the rest of the recipe as usual. This way, you can enjoy the same delicious flavors without the gluten!

Can I prepare the sauce in advance?

Yes, you can prepare the lemon butter sauce in advance! To do this, simply follow the sauce-making steps up to the point of adding the spinach and salmon. Once the sauce is ready, let it cool and store it in an airtight container in the refrigerator. When you’re ready to serve, reheat the sauce gently on the stove over low heat. Add the spinach and flaked salmon just before mixing in the cooked pasta. This will ensure that everything is fresh and flavorful when you serve it!

Conclusion on Lemon Butter Salmon Pasta Recipe

In conclusion, the Lemon Butter Salmon Pasta Recipe is a delightful dish that brings together the rich flavors of salmon, the creaminess of the sauce, and the zesty brightness of lemon. It’s not just a meal; it’s an experience that can elevate any dining occasion. Whether you’re cooking for family, friends, or just treating yourself, this recipe is sure to impress.

With its simple preparation and quick cooking time, you can enjoy a gourmet meal without spending hours in the kitchen. The versatility of this dish allows you to customize it with your favorite vegetables or proteins, making it suitable for various dietary preferences. Plus, the nutritional benefits of salmon and fresh ingredients make it a wholesome choice for any meal.

As you embark on your culinary journey with this Lemon Butter Salmon Pasta, remember to savor each step. From selecting fresh ingredients to plating your dish, every moment contributes to the final result. Don’t hesitate to experiment with flavors and make it your own. After all, cooking is about creativity and joy!

So, gather your ingredients, follow the steps, and enjoy a plate of Lemon Butter Salmon Pasta that is not only delicious but also a feast for the eyes. Bon appétit!

Cheesy Pizza Pasta Bake Recipe is a family favorite!

Introduction to Cheesy Pizza Pasta Bake Recipe

Cheesy Pizza Pasta Bake Recipe is just what you need! This delightful meal brings together the comforting flavors of pizza and the heartiness of pasta, making it a perfect choice for family dinners or gatherings with friends. Imagine a warm, cheesy dish that fills your home with a delicious aroma, inviting everyone to the table.

This recipe is not only easy to prepare but also customizable. You can add your favorite toppings, switch up the meats, or even make it vegetarian. With just a few simple ingredients, you can create a dish that pleases even the pickiest eaters. Plus, it’s a great way to use up leftover ingredients you might have in your fridge.

Cheesy Pizza Pasta Bake Recipe is sure to become a staple in your kitchen. So, roll up your sleeves and get ready to enjoy a comforting meal that’s packed with flavor and fun!

Ingredients for Cheesy Pizza Pasta Bake Recipe

Cheesy Pizza Pasta Bake Recipe, you’ll need a few simple ingredients. Gather the following items to ensure your dish is packed with flavor and cheesy goodness:

  • 8 ounces penne pasta
  • 1 tablespoon olive oil
  • 1 small onion, diced
  • 2 cloves garlic, minced
  • 1 pound ground beef or Italian sausage
  • 1 teaspoon Italian seasoning
  • 1/2 teaspoon red pepper flakes (optional)
  • 1 jar (24 ounces) marinara sauce
  • 1 cup sliced pepperoni
  • 1 cup shredded mozzarella cheese
  • 1/2 cup grated Parmesan cheese
  • Fresh basil leaves for garnish (optional)

These ingredients come together to create a delightful blend of flavors. The penne pasta serves as the perfect base, while the ground meat adds heartiness. The marinara sauce brings a rich tomato flavor, and the cheeses create that irresistible gooey texture we all love. Don’t forget the pepperoni for that classic pizza taste!

Cheesy Pizza Pasta Bake Recipe is versatile, allowing you to make it your own!

Preparation of Cheesy Pizza Pasta Bake Recipe

Cheesy Pizza Pasta Bake Recipe. Follow these simple steps to create a delicious meal that everyone will love!

Step 1: Preheat the Oven

First things first, preheat your oven to 375°F (190°C). This step is crucial as it ensures your pasta bake cooks evenly and the cheese melts perfectly. While the oven heats up, you can move on to the next steps.

Step 2: Cook the Pasta

Next, bring a large pot of salted water to a boil. Add the 8 ounces of penne pasta and cook according to the package instructions until it’s al dente. This usually takes about 8-10 minutes. Once cooked, drain the pasta and set it aside. Remember, you want the pasta to have a little bite to it, as it will continue to cook in the oven.

Step 3: Prepare the Sauce

In a large skillet, heat 1 tablespoon of olive oil over medium heat. Add the diced onion and sauté for about 3-4 minutes until it becomes soft and translucent. Then, add 2 cloves of minced garlic and cook for an additional minute until fragrant. This step adds a wonderful aroma to your dish!

Now, it’s time to add the meat. Stir in 1 pound of ground beef or Italian sausage. Cook until it’s browned and fully cooked, breaking it apart with a spoon as it cooks. Once done, drain any excess fat to keep your dish from becoming greasy.

Step 4: Combine Ingredients

Cheesy Pizza Pasta Bake Recipe.

Step 5: Assemble the Bake

Now, it’s time to transfer the pasta mixture to a greased 9×13-inch baking dish. Spread it out evenly. Top it with the remaining pepperoni, followed by 1 cup of shredded mozzarella cheese and 1/2 cup of grated Parmesan cheese. This cheesy layer is what makes the dish so irresistible!

Step 6: Bake in the Oven

Place the baking dish in the preheated oven and bake for 20-25 minutes. You’ll know it’s ready when the cheese is bubbly and golden brown. Once done, remove it from the oven and let it cool for a few minutes. This cooling time helps the dish set, making it easier to serve.

Cheesy Pizza Pasta Bake Recipe is now ready to be enjoyed. Serve it warm and watch as everyone digs in with delight!

Variation of Cheesy Pizza Pasta Bake Recipe

Cheesy Pizza Pasta Bake Recipe is incredibly versatile. You can easily modify it to suit different tastes and dietary preferences. Here are a couple of variations that you can try!

Vegetarian Options

If you’re looking for a meat-free alternative, the vegetarian version of this dish is just as delicious! Instead of using ground beef or Italian sausage, consider these tasty substitutes:

  • Sautéed Mushrooms: Use a mix of button and portobello mushrooms for a hearty texture.
  • Bell Peppers: Add diced bell peppers for a sweet crunch.
  • Zucchini: Sliced zucchini adds moisture and flavor.
  • Spinach or Kale: Layer in some fresh spinach or kale before baking for added nutrients.

Cheesy Pizza Pasta Bake Recipe colorful and appealing. You can still use the same marinara sauce and cheeses to keep that classic pizza taste!

Meat Lover’s Twist

If you want to take your dish to the next level, try the meat lover’s twist! This variation is perfect for those who can’t get enough of savory meats. Here’s how to amp up the protein:

  • Italian Sausage: Use spicy or sweet Italian sausage for a flavor boost.
  • Cooked Bacon: Crumble crispy bacon on top for a smoky flavor.
  • Ham or Salami: Add diced ham or salami for an extra layer of taste.
  • Ground Turkey: For a leaner option, substitute ground beef with ground turkey.

Cheesy Pizza Pasta Bake Recipe even more satisfying. The combination of different meats creates a rich and hearty dish that’s sure to please any crowd!

Feel free to mix and match these variations to create your perfect cheesy pasta bake. The possibilities are endless, and the result will always be a comforting, delicious meal!

Cooking Note for Cheesy Pizza Pasta Bake Recipe

Cheesy Pizza Pasta Bake Recipe, there are a few cooking notes to keep in mind. These tips will help ensure your dish turns out perfectly every time!

First, always remember to cook the pasta al dente. This means it should be firm to the bite. Since the pasta will continue to cook in the oven, starting with al dente ensures it won’t become mushy. If you prefer a firmer texture, you can even reduce the cooking time by a minute or two.

Next, when sautéing the onions and garlic, keep an eye on the heat. Cooking them over medium heat allows the flavors to develop without burning. If you notice them browning too quickly, lower the heat slightly. This step is crucial for building a flavorful base for your sauce.

Cheesy Pizza Pasta Bake Recipe from becoming greasy. If you’re using lean ground beef or turkey, this step may not be necessary, but it’s always good to check.

When mixing the ingredients, be sure to combine everything thoroughly. This ensures that every bite is packed with flavor. You want the marinara sauce to coat the pasta evenly, so take your time with this step.

Lastly, let the dish cool for a few minutes after baking. This cooling time allows the cheese to set, making it easier to serve. If you cut into it right away, it may fall apart. Patience is key to enjoying a beautifully layered pasta bake!

Cheesy Pizza Pasta Bake Recipe that’s sure to impress your family and friends. Happy cooking!

Serving Suggestions for Cheesy Pizza Pasta Bake Recipe

Cheesy Pizza Pasta Bake Recipe is out of the oven and cooled slightly, it’s time to serve it up! This dish is not only delicious but also very versatile when it comes to pairing it with other foods. Here are some serving suggestions to elevate your meal:

  • Garlic Bread: Serve warm garlic bread on the side. The buttery, garlicky flavor complements the cheesy pasta bake perfectly.
  • Side Salad: A fresh garden salad with mixed greens, cherry tomatoes, and a light vinaigrette adds a refreshing crunch. It balances the richness of the pasta.
  • Steamed Vegetables: Consider serving steamed broccoli, green beans, or carrots. These veggies add color and nutrients to your meal.
  • Coleslaw: A tangy coleslaw can provide a nice contrast to the warm, cheesy dish. The crunchiness of the slaw is a delightful addition.
  • Extra Cheese: For cheese lovers, offer extra grated Parmesan or mozzarella on the side. This allows guests to customize their servings!

Cheesy Pizza Pasta Bake Recipe with fresh basil leaves before serving. This not only adds a pop of color but also enhances the flavor with a hint of freshness.

These serving suggestions will help create a well-rounded meal that everyone will enjoy. Whether it’s a family dinner or a gathering with friends, your cheesy pasta bake will surely be the star of the table!

Tips for Perfecting Your Cheesy Pizza Pasta Bake Recipe

Cheesy Pizza Pasta Bake Recipe truly unforgettable, consider these helpful tips. They will guide you in achieving the perfect balance of flavors and textures, ensuring that every bite is a delight!

First, always taste your sauce. Before mixing it with the pasta, give the marinara sauce a quick taste. If it needs a little more flavor, consider adding a pinch of salt, a dash of sugar, or even a splash of balsamic vinegar. These small adjustments can elevate the overall taste of your dish.

Next, don’t skimp on the cheese! The gooey, melted cheese is what makes this dish so comforting. Use a combination of cheeses for added flavor. While mozzarella is a must, mixing in some provolone or fontina can create a richer taste. You can also sprinkle some shredded cheese on top during the last few minutes of baking for an extra cheesy crust.

Another tip is to let your ingredients cool slightly before combining them. If the pasta and meat mixture is too hot, it can cause the cheese to melt too quickly, resulting in a less appealing texture. Allowing it to cool for a few minutes helps maintain that perfect cheesy stretch.

For added flavor, consider incorporating fresh herbs. Chopped parsley or oregano can be mixed into the pasta before baking. This will infuse the dish with a fresh, aromatic quality that complements the rich flavors of the cheese and sauce.

Cheesy Pizza Pasta Bake Recipe cool for a few minutes. Then, cut it into squares and serve it on a colorful plate. Garnishing with fresh basil or a sprinkle of red pepper flakes can make your dish look as good as it tastes!

Cheesy Pizza Pasta Bake Recipe that’s not only delicious but also visually appealing. Enjoy the process and happy cooking!

Breakdown of Time for Cheesy Pizza Pasta Bake Recipe

Prep Time

Cheesy Pizza Pasta Bake Recipe is a breeze! The prep time typically takes about 15-20 minutes. This includes gathering your ingredients, chopping the onion and garlic, and cooking the pasta. If you have everything ready, you can move quickly through this stage. Remember, the more organized you are, the smoother the process will be!

Cooking Time

Once you’ve prepped your ingredients, the cooking time is around 30-35 minutes. This includes sautéing the onions and garlic, browning the meat, and baking the pasta mixture in the oven. The baking time is crucial for achieving that bubbly, golden cheese topping that everyone loves. Keep an eye on it during the last few minutes to ensure it doesn’t overcook!

Total Time

Cheesy Pizza Pasta Bake Recipe that will impress your family and friends!

Nutritional Information for Cheesy Pizza Pasta Bake Recipe

Cheesy Pizza Pasta Bake Recipe not only satisfies your taste buds but also provides valuable nutrients. Here’s a breakdown of the nutritional information per serving:

Calories

Cheesy Pizza Pasta Bake Recipe contains approximately 450 calories. This makes it a hearty meal that can keep you full and satisfied. The combination of pasta, meat, and cheese contributes to the calorie count, providing energy for your day.

Protein

Cheesy Pizza Pasta Bake Recipe helps support muscle growth and repair. The ground beef or Italian sausage, along with the cheese, are excellent sources of protein that make this dish both filling and nutritious.

Sodium

Cheesy Pizza Pasta Bake Recipe, it’s good to be mindful of sodium intake. Each serving contains around 800 milligrams of sodium. This amount can vary based on the specific ingredients you use, especially if you opt for pre-made marinara sauce or processed meats. To reduce sodium, consider using low-sodium options or making your own sauce.

Cheesy Pizza Pasta Bake Recipe is a delicious and satisfying meal that can fit into a balanced diet. By being aware of the nutritional information, you can enjoy this comforting dish while making informed choices about your health!

FAQs about Cheesy Pizza Pasta Bake Recipe

Can I use gluten-free pasta for the Cheesy Pizza Pasta Bake Recipe?

Cheesy Pizza Pasta Bake Recipe. Many brands offer gluten-free penne or other shapes that work just as well. Just be sure to follow the cooking instructions on the package, as gluten-free pasta may have different cooking times. This way, everyone can enjoy this delicious dish, regardless of dietary restrictions!

How can I make the Cheesy Pizza Pasta Bake Recipe spicier?

Cheesy Pizza Pasta Bake Recipe. First, you can increase the amount of red pepper flakes in the sauce. Additionally, consider adding diced jalapeños or banana peppers for an extra kick. If you want to go bold, try using spicy Italian sausage instead of regular ground meat. These additions will surely satisfy your craving for spice!

Can I prepare the Cheesy Pizza Pasta Bake Recipe ahead of time?

Cheesy Pizza Pasta Bake Recipe ahead of time! Simply follow the recipe up to the baking step, then cover the dish with plastic wrap or aluminum foil and refrigerate it for up to 24 hours. When you’re ready to bake, remove the cover and let it sit at room temperature for about 30 minutes before placing it in the oven. This ensures even cooking and a deliciously cheesy result!

What are some good side dishes to serve with Cheesy Pizza Pasta Bake Recipe?

Cheesy Pizza Pasta Bake Recipe with the right side dishes can enhance your meal. Here are some great options:

  • Garlic Bread: A classic choice that complements the cheesy flavors.
  • Caesar Salad: Crisp romaine lettuce with creamy dressing adds a refreshing touch.
  • Roasted Vegetables: Seasonal veggies like zucchini, bell peppers, and carrots provide color and nutrients.
  • Coleslaw: A tangy slaw can balance the richness of the pasta bake.
  • Fruit Salad: A light fruit salad can offer a sweet contrast to the savory dish.

These side dishes will create a well-rounded meal that everyone will enjoy!

Conclusion on Cheesy Pizza Pasta Bake Recipe

Cheesy Pizza Pasta Bake Recipe is a delightful dish that brings comfort and joy to any table. With its rich flavors, gooey cheese, and hearty ingredients, it’s no wonder this recipe has become a favorite among families and friends alike. Whether you’re enjoying it on a cozy weeknight or serving it at a festive gathering, this pasta bake is sure to impress.

Not only is it easy to prepare, but it also offers endless possibilities for customization. You can switch up the meats, add your favorite vegetables, or even make it vegetarian. The versatility of this dish means that you can cater to different tastes and dietary needs, making it a go-to recipe for any occasion.

Cheesy Pizza Pasta Bake Recipe is perfect for sharing laughter, stories, and good times. So, don’t hesitate to whip up this comforting dish and make it a part of your culinary repertoire.

We hope you enjoy making and sharing this recipe as much as we do. Happy cooking, and may your kitchen always be filled with the delightful aroma of cheesy goodness!

Creamy Swiss Chicken Casserole Recipe is a must-try!

Introduction to Creamy Swiss Chicken Casserole Recipe

Welcome to the delightful world of casseroles! Today, we’re diving into a comforting dish that’s sure to become a family favorite: the Creamy Swiss Chicken Casserole. This recipe combines tender chicken, creamy sauce, and a crunchy topping, making it a perfect meal for any occasion. Whether you’re hosting a dinner party or simply looking for a cozy weeknight meal, this casserole is both satisfying and easy to prepare.

What Makes This Recipe Special?

What sets the Creamy Swiss Chicken Casserole apart is its rich flavor and creamy texture. The combination of Swiss cheese and sour cream creates a luscious sauce that envelops the chicken and vegetables. Plus, the stuffing mix on top adds a delightful crunch that contrasts beautifully with the creamy filling. This dish is not only delicious but also versatile. You can easily customize it with your favorite vegetables or spices, making it a go-to recipe for any season.

A Brief History of Casseroles

Casseroles have a long and storied history in the culinary world. Originating in France, the term “casserole” refers to both the dish and the cooking method. Traditionally, casseroles were made in deep, oven-safe dishes, allowing for slow cooking and melding of flavors. Over the years, casseroles have evolved into a beloved comfort food in many cultures, especially in the United States. They became popular during the 1950s, as busy families sought quick and easy meal solutions. Today, casseroles remain a staple in many households, offering convenience and warmth in every bite.

Ingredients for Creamy Swiss Chicken Casserole Recipe

To create the delicious Creamy Swiss Chicken Casserole, you’ll need a few simple ingredients. Each component plays a vital role in building the flavors and textures that make this dish so special. Here’s what you’ll need:

  • 2 cups cooked chicken, shredded: Use rotisserie chicken for convenience or cook your own for a fresher taste.
  • 1 can (10.5 ounces) cream of chicken soup: This adds creaminess and depth to the casserole.
  • 1 cup sour cream: For a rich and tangy flavor that complements the chicken.
  • 1 cup Swiss cheese, shredded: This cheese melts beautifully, creating a creamy texture.
  • 1 cup chicken broth: Helps to keep the casserole moist and flavorful.
  • 1 teaspoon garlic powder: Adds a savory kick to the dish.
  • 1 teaspoon onion powder: Enhances the overall flavor profile.
  • 1 teaspoon dried thyme: A classic herb that brings warmth and earthiness.
  • 1 teaspoon black pepper: For a touch of spice.
  • 1 package (6 ounces) stuffing mix: This provides a crunchy topping that contrasts with the creamy filling.
  • 1/2 cup butter, melted: Helps to moisten the stuffing mix and adds richness.
  • 1 cup frozen mixed vegetables: A colorful mix of peas, carrots, and corn for added nutrition.
  • Fresh parsley, chopped: For garnish, adding a pop of color and freshness.

Gathering these ingredients is the first step toward creating a comforting meal that your family will love. Each item contributes to the overall taste and texture of the Creamy Swiss Chicken Casserole, making it a delightful dish for any occasion.

Step-by-Step Preparation of Creamy Swiss Chicken Casserole Recipe

Now that you have all your ingredients ready, it’s time to dive into the preparation of your Creamy Swiss Chicken Casserole. This step-by-step guide will help you create a delicious meal that’s sure to impress. Let’s get started!

Step 1: Prepping the Chicken

First, you need to prepare the chicken. If you’re using rotisserie chicken, simply shred it into bite-sized pieces. This saves time and adds great flavor. If you prefer to cook your own chicken, boil or bake it until fully cooked, then shred it. Make sure to remove any skin or bones. The shredded chicken is the star of this dish, so ensure it’s tender and juicy!

Step 2: Preparing the Sauce

Next, it’s time to whip up the creamy sauce. In a large mixing bowl, combine the cream of chicken soup, sour cream, and chicken broth. Stir well until the mixture is smooth. Then, add the garlic powder, onion powder, dried thyme, and black pepper. Mix everything together until well combined. This sauce will coat the chicken and vegetables, creating a rich and flavorful base for your casserole.

Step 3: Assembling the Casserole

Now, let’s assemble the casserole! Start by adding the shredded chicken to the sauce mixture. Then, toss in the frozen mixed vegetables. Stir gently to ensure everything is evenly coated. Once combined, pour the chicken and sauce mixture into your greased 9×13-inch baking dish. Spread it out evenly to create a nice base for the stuffing topping.

Step 4: Baking the Casserole

Finally, it’s time to bake! In a separate bowl, mix the stuffing mix with the melted butter until the stuffing is well coated. Sprinkle this mixture evenly over the chicken and sauce in the baking dish. This will create a deliciously crunchy topping. Place the casserole in the preheated oven and bake for 30-35 minutes. You’ll know it’s ready when the casserole is bubbly and the stuffing is golden brown. Once done, let it cool for about 5 minutes before serving. Enjoy your delightful Creamy Swiss Chicken Casserole!

Variation of Creamy Swiss Chicken Casserole Recipe

While the classic Creamy Swiss Chicken Casserole is delicious on its own, there are many ways to switch things up! Whether you want to cater to dietary preferences or simply try something new, these variations will keep your meals exciting. Let’s explore some alternative ingredients and different cooking methods.

Alternative Ingredients

Changing a few ingredients can transform your casserole into a new dish. Here are some ideas:

  • Cheese Options: If Swiss cheese isn’t your favorite, try using cheddar, mozzarella, or even pepper jack for a spicy kick.
  • Vegetable Choices: Feel free to add or substitute vegetables. Broccoli, spinach, or bell peppers can add color and nutrition.
  • Protein Variations: Instead of chicken, you can use turkey, cooked ham, or even a plant-based protein for a vegetarian option.
  • Soup Alternatives: Swap the cream of chicken soup for cream of mushroom or even a homemade white sauce for a different flavor profile.
  • Stuffing Mix Variations: Experiment with different stuffing mixes, such as cornbread or herb-flavored, to change the taste and texture.

These alternative ingredients allow you to customize the casserole to your liking, making it a versatile dish for any occasion.

Different Cooking Methods

Besides the traditional oven baking, there are other cooking methods you can try for your Creamy Swiss Chicken Casserole:

  • Slow Cooker: For a hands-off approach, assemble the casserole in a slow cooker. Cook on low for 4-6 hours or on high for 2-3 hours. This method allows the flavors to meld beautifully.
  • Instant Pot: If you’re short on time, use an Instant Pot. Sauté the chicken and vegetables first, then add the sauce ingredients. Cook on high pressure for about 10 minutes, followed by a quick release.
  • Skillet Method: For a quicker meal, cook everything in a large skillet. Combine the chicken, sauce, and vegetables, then top with stuffing and cover until heated through.

These cooking methods not only save time but also offer different textures and flavors, making your Creamy Swiss Chicken Casserole a delightful experience every time!

Cooking Note for Creamy Swiss Chicken Casserole Recipe

When preparing your Creamy Swiss Chicken Casserole, a few cooking notes can help ensure your dish turns out perfectly every time. These tips will guide you through the process and enhance the overall flavor and texture of your casserole.

First, always use cooked chicken. This can be rotisserie chicken, which is convenient, or you can boil or bake your own. Just make sure it’s fully cooked and tender. Shredding the chicken into bite-sized pieces allows it to mix well with the sauce and ensures every bite is flavorful.

Next, pay attention to the sauce. Mixing the cream of chicken soup, sour cream, and chicken broth thoroughly is essential. This creates a smooth base that coats the chicken and vegetables evenly. If you prefer a thicker sauce, you can reduce the amount of chicken broth slightly.

When adding the frozen mixed vegetables, there’s no need to thaw them first. They will cook perfectly in the oven, adding color and nutrition to your casserole. Just make sure to stir them in well so they’re evenly distributed throughout the dish.

For the stuffing topping, ensure it’s well coated with melted butter. This not only adds flavor but also helps achieve that golden-brown color during baking. If you like a crunchier topping, you can bake the casserole a little longer, but keep an eye on it to prevent burning.

Lastly, let the casserole cool for a few minutes after baking. This allows the flavors to settle and makes serving easier. Enjoy your delicious Creamy Swiss Chicken Casserole with family and friends!

Serving Suggestions for Creamy Swiss Chicken Casserole Recipe

Once your Creamy Swiss Chicken Casserole is baked to perfection, it’s time to think about how to serve it. This dish is hearty and satisfying on its own, but pairing it with the right side dishes can elevate your meal even further. Let’s explore some delightful side dishes and presentation tips to make your dinner truly special.

Side Dishes to Pair

Choosing the right side dishes can enhance the flavors of your casserole. Here are some great options:

  • Green Salad: A fresh green salad with mixed greens, cherry tomatoes, and a light vinaigrette adds a refreshing contrast to the creamy casserole.
  • Garlic Bread: Serve warm garlic bread on the side for a deliciously crunchy addition that complements the creamy texture of the casserole.
  • Steamed Vegetables: Lightly steamed vegetables, such as broccoli or green beans, provide a nutritious and colorful side that balances the richness of the dish.
  • Rice or Quinoa: A side of fluffy rice or quinoa can soak up the delicious sauce from the casserole, making every bite even more enjoyable.
  • Coleslaw: A tangy coleslaw can add a crunchy texture and a bit of acidity, which helps cut through the creaminess of the casserole.

These side dishes not only complement the Creamy Swiss Chicken Casserole but also add variety to your meal, making it more satisfying and enjoyable.

Presentation Tips

Presentation is key when serving your Creamy Swiss Chicken Casserole. Here are some tips to make your dish look as good as it tastes:

  • Garnish: Sprinkle freshly chopped parsley over the casserole just before serving. This adds a pop of color and freshness that brightens the dish.
  • Serving Dish: Use a beautiful baking dish or a colorful serving platter to showcase your casserole. A visually appealing dish can make the meal feel more special.
  • Portion Control: Serve the casserole in individual portions for a more elegant presentation. Use a spatula to carefully scoop out servings, ensuring each plate has a nice amount of stuffing on top.
  • Accompanying Sauces: Consider serving a small bowl of extra sauce or gravy on the side for those who want a little more flavor.
  • Table Setting: Set the table with nice plates, utensils, and napkins. A well-set table enhances the dining experience and makes the meal feel festive.

With these serving suggestions and presentation tips, your Creamy Swiss Chicken Casserole will not only taste amazing but also look inviting and delicious on the table. Enjoy your meal with family and friends!

Tips for Perfecting Your Creamy Swiss Chicken Casserole Recipe

To ensure your Creamy Swiss Chicken Casserole turns out perfectly every time, it’s essential to keep a few tips in mind. These insights will help you avoid common pitfalls and make the most of your cooking experience. Let’s dive into some common mistakes to avoid and how to store and reheat your casserole effectively.

Common Mistakes to Avoid

Even the best cooks can make mistakes! Here are some common errors to watch out for:

  • Using Raw Chicken: Always use cooked chicken for this recipe. Raw chicken will not cook properly in the casserole and can lead to food safety issues.
  • Not Mixing Ingredients Well: Ensure that the sauce ingredients are mixed thoroughly. This helps to coat the chicken and vegetables evenly, enhancing the flavor throughout the dish.
  • Overbaking: Keep an eye on your casserole while it bakes. Overbaking can lead to dry chicken and burnt stuffing. Aim for a bubbly filling and golden-brown topping.
  • Skipping the Cooling Time: Allow the casserole to cool for a few minutes before serving. This helps the flavors meld and makes it easier to serve without falling apart.
  • Ignoring Seasoning: Don’t forget to taste your mixture before baking. Adjust the seasoning to your preference, as this can make a big difference in flavor.

Storage and Reheating Tips

Storing and reheating your Creamy Swiss Chicken Casserole properly can help maintain its deliciousness. Here’s how to do it:

  • Storing Leftovers: Allow the casserole to cool completely before transferring it to an airtight container. It can be stored in the refrigerator for up to 3-4 days.
  • Freezing: If you want to save some for later, you can freeze the casserole. Wrap it tightly in plastic wrap and then in aluminum foil. It can be frozen for up to 2-3 months.
  • Reheating: To reheat, thaw the casserole in the refrigerator overnight if frozen. Then, bake it in a preheated oven at 350°F (175°C) for about 20-30 minutes, or until heated through. You can cover it with foil to prevent the top from browning too much.
  • Microwave Option: If you’re in a hurry, you can reheat individual portions in the microwave. Heat in short intervals, stirring in between, until warmed through.

By following these tips, you’ll be well on your way to creating a perfect Creamy Swiss Chicken Casserole every time. Enjoy the process and the delicious results!

Breakdown of Time for Creamy Swiss Chicken Casserole Recipe

Understanding the time needed for each step of the Creamy Swiss Chicken Casserole recipe can help you plan your cooking efficiently. Here’s a breakdown of the time required for preparation, cooking, and the total time needed to enjoy this delicious dish.

Prep Time

The prep time for the Creamy Swiss Chicken Casserole is approximately 15-20 minutes. This includes gathering your ingredients, shredding the cooked chicken, and mixing the sauce. If you’re using rotisserie chicken, this step will be quicker. Just remember to have everything ready before you start assembling the casserole!

Cooking Time

Once your casserole is assembled, the cooking time is about 30-35 minutes. During this time, the casserole will bake in the oven, allowing the flavors to meld together beautifully. You’ll know it’s done when the top is golden brown and the filling is bubbly. Keep an eye on it to ensure it doesn’t overcook!

Total Time

In total, you can expect the Creamy Swiss Chicken Casserole to take around 50-55 minutes from start to finish. This includes both prep and cooking time. It’s a quick and easy meal that’s perfect for busy weeknights or when you want to impress guests without spending hours in the kitchen. Enjoy your cooking adventure!

Nutritional Information for Creamy Swiss Chicken Casserole Recipe

Understanding the nutritional content of your meals is essential for maintaining a balanced diet. The Creamy Swiss Chicken Casserole is not only delicious but also provides a good amount of nutrients. Here’s a breakdown of the key nutritional information per serving:

Calories

Each serving of the Creamy Swiss Chicken Casserole contains approximately 350 calories. This makes it a hearty meal option that can satisfy your hunger without overwhelming your daily caloric intake. The combination of chicken, cheese, and vegetables contributes to this calorie count, providing energy for your day.

Protein

Protein is an essential nutrient for building and repairing tissues, and this casserole delivers! Each serving contains about 25 grams of protein. The shredded chicken and Swiss cheese are excellent sources of protein, making this dish a great choice for those looking to increase their protein intake. It’s perfect for active individuals or anyone needing a nutritious meal.

Sodium

While the Creamy Swiss Chicken Casserole is tasty, it’s important to be mindful of sodium intake. Each serving has around 800 milligrams of sodium. This is primarily due to the cream of chicken soup and chicken broth. If you’re watching your sodium levels, consider using low-sodium versions of these ingredients. This small adjustment can help you enjoy the casserole while keeping your sodium intake in check.

Overall, the Creamy Swiss Chicken Casserole is a balanced meal that provides a good mix of calories, protein, and flavor. Enjoy it as part of a varied diet, and feel free to customize it with healthier ingredients to suit your nutritional needs!

FAQs about Creamy Swiss Chicken Casserole Recipe

Can I make this casserole ahead of time?

Absolutely! Making the Creamy Swiss Chicken Casserole ahead of time is a great way to save time on busy days. You can prepare the casserole up to the point of baking. Simply cover it tightly with plastic wrap or aluminum foil and store it in the refrigerator for up to 24 hours. When you’re ready to bake, just remove the cover and pop it in the oven. You may need to add a few extra minutes to the cooking time if it’s cold from the fridge. This makes it a perfect dish for meal prep or entertaining guests!

What can I substitute for Swiss cheese?

If Swiss cheese isn’t your favorite, don’t worry! There are plenty of delicious alternatives you can use. Cheddar cheese is a popular choice, offering a sharp flavor that pairs well with the creamy sauce. Mozzarella is another great option, providing a mild taste and gooey texture. For those who enjoy a bit of spice, pepper jack cheese can add a nice kick. Feel free to mix and match different cheeses to find the combination that you love best!

How do I store leftovers?

Storing leftovers from your Creamy Swiss Chicken Casserole is easy! Allow the casserole to cool completely before transferring it to an airtight container. It can be stored in the refrigerator for up to 3-4 days. If you want to keep it longer, consider freezing it. Wrap the casserole tightly in plastic wrap and then in aluminum foil. It can be frozen for up to 2-3 months. When you’re ready to enjoy it again, thaw it in the refrigerator overnight and reheat in the oven or microwave until warmed through. This way, you can savor the deliciousness of your casserole even after the first serving!

Conclusion on Creamy Swiss Chicken Casserole Recipe

In conclusion, the Creamy Swiss Chicken Casserole is a delightful dish that brings comfort and satisfaction to any meal. With its creamy sauce, tender chicken, and crunchy topping, it’s no wonder this recipe has become a family favorite. Not only is it easy to prepare, but it also allows for endless variations, making it a versatile option for any occasion.

Whether you’re cooking for a busy weeknight dinner or hosting a gathering, this casserole is sure to impress. The combination of flavors and textures creates a dish that is both hearty and delicious. Plus, with the tips and variations provided, you can easily customize it to suit your taste preferences or dietary needs.

As you embark on your cooking journey with the Creamy Swiss Chicken Casserole, remember to enjoy the process. Cooking is not just about the final dish; it’s about the love and care you put into each step. So gather your ingredients, invite your loved ones to join you, and create a meal that will warm hearts and fill bellies.

We hope this recipe inspires you to make your own Creamy Swiss Chicken Casserole and share it with family and friends. Happy cooking!

Sweet Potato Noodle Stir-Fry Recipe is a must-try!

Introduction to Sweet Potato Noodle Stir-Fry Recipe

Sweet Potato Noodle Stir-Fry Recipe is a fantastic choice. This dish combines the unique texture of sweet potato noodles with vibrant vegetables, making it both colorful and nutritious.

Sweet potato noodles, also known as dangmyeon, are a popular ingredient in many Asian cuisines. They are gluten-free and packed with vitamins, making them a great alternative to traditional wheat noodles. Not only do they add a delightful sweetness to your stir-fry, but they also provide a satisfying chewiness that will keep you coming back for more.

This stir-fry is not just about the noodles; it’s also loaded with fresh vegetables like carrots, bell peppers, and spinach. These ingredients not only enhance the flavor but also boost the nutritional value of the dish. Plus, the quick cooking method ensures that you retain the vibrant colors and crunch of the veggies.

Whether you’re a busy professional, a student, or a parent looking for a family-friendly meal, this recipe is perfect for you. It’s easy to customize, allowing you to add your favorite proteins or vegetables. In just a few simple steps, you can whip up a delightful meal that’s sure to impress.

Sweet Potato Noodle Stir-Fry Recipe is not only a feast for the eyes but also a treat for your taste buds!

Ingredients for Sweet Potato Noodle Stir-Fry Recipe

Sweet Potato Noodle Stir-Fry Recipe, you’ll need a variety of fresh ingredients. Here’s what you’ll need:

  • 8 ounces sweet potato noodles (dangmyeon)
  • 2 tablespoons vegetable oil
  • 1 small onion, thinly sliced
  • 1 medium carrot, julienned
  • 1 bell pepper (red or green), thinly sliced
  • 1 cup spinach, chopped
  • 3 cloves garlic, minced
  • 3 tablespoons soy sauce
  • 1 tablespoon sesame oil
  • 1 tablespoon sugar
  • 1 teaspoon sesame seeds
  • Salt and pepper to taste
  • 2 green onions, chopped

These ingredients come together to create a delightful blend of flavors and textures. The sweet potato noodles serve as a fantastic base, while the vegetables add crunch and color. The garlic and soy sauce bring a savory depth, making every bite satisfying.

Feel free to adjust the quantities based on your preferences or the number of servings you need. This recipe serves four, but it’s easy to scale up or down. Now that you have your ingredients ready, let’s move on to the preparation steps!

Preparation of Sweet Potato Noodle Stir-Fry Recipe

Sweet Potato Noodle Stir-Fry Recipe. This section will guide you through each step, ensuring that your dish turns out delicious and satisfying. Let’s get started!

Step 1: Preparing the Sweet Potato Noodles

First, you need to cook the sweet potato noodles. Follow the package instructions carefully. Usually, this involves boiling them in water for a few minutes until they are tender. Once cooked, drain the noodles and rinse them under cold water. This step helps to stop the cooking process and keeps the noodles from becoming mushy. Set them aside for later use.

Step 2: Chopping the Vegetables

Next, it’s time to chop your vegetables. Start by slicing the onion thinly. Then, julienne the carrot into thin strips. For the bell pepper, slice it into thin pieces as well. Finally, chop the spinach into smaller pieces. Having all your vegetables prepped and ready will make the cooking process smooth and quick.

Step 3: Cooking the Protein (if applicable)

If you’re adding protein to your stir-fry, now is the time to cook it. You can use chicken, beef, or tofu, depending on your preference. Heat a little vegetable oil in your skillet or wok over medium heat. Cook the protein until it’s fully cooked through, then remove it from the pan and set it aside. This step adds extra flavor and makes your stir-fry more filling.

Step 4: Stir-Frying the Ingredients

In the same skillet or wok, add the vegetable oil and heat it over medium heat. Start by adding the sliced onion and sauté it for about 2-3 minutes until it becomes translucent. Then, toss in the carrot and bell pepper. Stir-fry these vegetables for another 3-4 minutes until they begin to soften. Finally, add the minced garlic and chopped spinach, cooking for an additional 1-2 minutes until the spinach wilts. This method keeps the vegetables crisp and colorful.

Step 5: Adding the Sauce

Now it’s time to bring everything together! Add the cooked sweet potato noodles to the skillet. Pour in the soy sauce, sesame oil, and sugar. Toss everything together gently until well combined and heated through. This step ensures that every noodle and vegetable is coated in the delicious sauce. Season with salt and pepper to taste. Before serving, sprinkle sesame seeds and chopped green onions on top for an extra burst of flavor.

Sweet Potato Noodle Stir-Fry Recipe is ready to be enjoyed. The combination of flavors and textures will surely delight your taste buds!

Variation of Sweet Potato Noodle Stir-Fry Recipe

Sweet Potato Noodle Stir-Fry Recipe is its versatility. You can easily modify it to suit your dietary preferences or to use up ingredients you have on hand. Let’s explore some delicious variations!

Vegetarian Options

If you’re looking for a vegetarian twist, you’re in luck! This stir-fry is naturally vegetarian-friendly. You can enhance the dish by adding more vegetables. Consider including mushrooms, zucchini, or broccoli for added flavor and nutrition. You can also toss in some edamame or chickpeas for extra protein. These additions not only make the dish heartier but also add a variety of textures and colors.

For a bit of spice, try adding some red pepper flakes or a splash of sriracha. This will give your stir-fry a nice kick! You can also experiment with different sauces, like teriyaki or hoisin, to change the flavor profile. The possibilities are endless!

Protein Alternatives

Sweet Potato Noodle Stir-Fry Recipe, there are plenty of options. Chicken and beef are popular choices, but you can also use shrimp or fish for a lighter meal. If you prefer plant-based proteins, tofu is an excellent option. It absorbs flavors well and adds a nice texture to the dish.

For a quick protein boost, consider using pre-cooked options like rotisserie chicken or canned beans. These can save you time and still provide a satisfying meal. Just remember to adjust the cooking time accordingly to ensure everything is heated through.

Sweet Potato Noodle Stir-Fry Recipe will always be a delightful and nutritious choice!

Cooking Note for Sweet Potato Noodle Stir-Fry Recipe

Sweet Potato Noodle Stir-Fry Recipe, there are a few cooking notes to keep in mind. These tips will help you achieve the best results and ensure your dish is both delicious and visually appealing.

First, make sure to cook the sweet potato noodles according to the package instructions. Overcooking can lead to mushy noodles, which can affect the overall texture of your stir-fry. Rinsing them under cold water after cooking is crucial. This step not only stops the cooking process but also helps to remove excess starch, preventing the noodles from sticking together.

Next, when stir-frying, it’s important to keep the heat at medium to high. This allows the vegetables to cook quickly while retaining their crunch. If the heat is too low, the vegetables may become soggy instead of crisp. Stir frequently to ensure even cooking and to prevent burning.

Additionally, consider the order in which you add your ingredients. Start with the vegetables that take longer to cook, like carrots and bell peppers, and finish with quicker-cooking items like spinach and garlic. This method ensures that all ingredients are cooked perfectly without losing their vibrant colors and nutrients.

Lastly, don’t be afraid to experiment with flavors! Adjust the soy sauce, sesame oil, and sugar to suit your taste. If you enjoy a bit of heat, adding chili paste or fresh ginger can elevate the dish. Remember, cooking is all about personal preference, so feel free to make this recipe your own!

Sweet Potato Noodle Stir-Fry Recipe that’s not only tasty but also visually stunning. Enjoy the process and happy cooking!

Serving Suggestions for Sweet Potato Noodle Stir-Fry Recipe

Sweet Potato Noodle Stir-Fry Recipe is ready, it’s time to think about how to serve it! Presentation can enhance the dining experience, making your meal even more enjoyable. Here are some delightful serving suggestions to consider:

  • Garnish with Fresh Herbs: Adding fresh herbs like cilantro or basil can elevate the flavor. Sprinkle them on top just before serving for a burst of freshness.
  • Pair with a Protein: If you’ve added protein to your stir-fry, consider serving it alongside grilled chicken or shrimp. This adds variety and makes the meal more filling.
  • Serve with a Side Salad: A light salad with a tangy dressing complements the stir-fry beautifully. Try a simple cucumber and tomato salad for a refreshing contrast.
  • Offer Extra Sauce: Some people love extra sauce! Serve additional soy sauce or a homemade dipping sauce on the side for those who want more flavor.
  • Use Bowls or Plates: For a cozy feel, serve the stir-fry in deep bowls. This makes it easy to mix everything together and enjoy every bite.
  • Accompany with Rice: If you want to make the meal heartier, serve the stir-fry over a bed of steamed rice or quinoa. This adds a nice texture and helps soak up the delicious sauce.

Sweet Potato Noodle Stir-Fry Recipe but also provide a delightful dining experience. Whether you’re hosting a dinner party or enjoying a quiet meal at home, these ideas will make your dish shine!

Tips for Perfecting Your Sweet Potato Noodle Stir-Fry Recipe

Sweet Potato Noodle Stir-Fry Recipe truly shine, consider these helpful tips. They will guide you in achieving the best flavor and texture, ensuring that every bite is delightful!

  • Choose Fresh Ingredients: Fresh vegetables not only taste better but also add vibrant colors to your dish. Look for crisp carrots, bright bell peppers, and fresh spinach. The fresher the ingredients, the more flavorful your stir-fry will be!
  • Prep Ahead: To save time, chop your vegetables and prepare your sauce in advance. This way, when you start cooking, everything is ready to go. It makes the cooking process smoother and more enjoyable.
  • Don’t Overcrowd the Pan: When stir-frying, avoid adding too many ingredients at once. Overcrowding can lead to steaming instead of frying, which makes the vegetables soggy. Cook in batches if necessary to maintain that perfect crunch.
  • Adjust the Sauce: Taste your sauce before adding it to the stir-fry. If you prefer a sweeter flavor, add a bit more sugar. For a saltier kick, increase the soy sauce. Tailor the sauce to your liking for the best results!
  • Use High Heat: Stir-frying works best at high heat. This helps to quickly cook the ingredients while keeping them crisp. Make sure your skillet or wok is hot before adding the oil and vegetables.
  • Finish with a Squeeze of Lime: For a zesty twist, squeeze fresh lime juice over the stir-fry just before serving. This adds a refreshing brightness that complements the sweetness of the sweet potato noodles.
  • Experiment with Spices: Don’t hesitate to add your favorite spices or herbs. A pinch of ginger or a dash of chili powder can elevate the flavor profile. Get creative and make the dish your own!

Sweet Potato Noodle Stir-Fry Recipe. Enjoy the cooking process and savor the delicious results!

Breakdown of Time for Sweet Potato Noodle Stir-Fry Recipe

Sweet Potato Noodle Stir-Fry Recipe can help you plan your cooking efficiently. Here’s a simple breakdown of the time required for preparation and cooking:

Prep Time

Preparing your ingredients is a crucial step in making this stir-fry. The prep time typically takes about 15-20 minutes. This includes:

  • Cooking the sweet potato noodles (5-7 minutes)
  • Chopping the vegetables (10-15 minutes)
  • Cooking any protein, if desired (5-10 minutes)

Having everything ready before you start cooking will make the process smoother and quicker.

Cooking Time

Sweet Potato Noodle Stir-Fry Recipe is around 10-15 minutes. This includes:

  • Sautéing the onion and other vegetables (5-7 minutes)
  • Stir-frying the noodles with the sauce (5-8 minutes)

Cooking at the right temperature ensures that your vegetables remain crisp and colorful.

Total Time

In total, you can expect to spend about 25-35 minutes from start to finish. This includes both prep and cooking time. It’s a quick and easy meal that’s perfect for busy weeknights or when you want something healthy without spending hours in the kitchen!

Sweet Potato Noodle Stir-Fry Recipe into your schedule. Enjoy the process and the delicious results!

Nutritional Information for Sweet Potato Noodle Stir-Fry Recipe

Sweet Potato Noodle Stir-Fry Recipe is not only delicious but also packed with nutrients. Here’s a breakdown of the key nutritional information per serving:

Calories

Each serving of this delightful stir-fry contains approximately 220 calories. This makes it a great option for those looking to enjoy a satisfying meal without consuming too many calories. The sweet potato noodles provide a healthy source of carbohydrates, while the vegetables add fiber and essential vitamins.

Protein

In terms of protein, this recipe offers about 4 grams per serving. While this may seem modest, you can easily boost the protein content by adding your choice of protein, such as chicken, beef, tofu, or shrimp. This flexibility allows you to tailor the dish to meet your dietary needs while still enjoying the delicious flavors.

Sodium

Sweet Potato Noodle Stir-Fry Recipe is around 600 milligrams per serving. This is primarily due to the soy sauce used in the recipe. If you’re watching your sodium intake, consider using low-sodium soy sauce or reducing the amount of soy sauce added. This way, you can enjoy the flavors without compromising your health goals.

Sweet Potato Noodle Stir-Fry Recipe is a nutritious and balanced meal option. With its combination of healthy ingredients, it provides a good source of energy while being low in calories. Enjoy this dish as part of a well-rounded diet, and feel free to customize it to suit your nutritional needs!

FAQs about Sweet Potato Noodle Stir-Fry Recipe

Can I use regular noodles instead of sweet potato noodles?

Yes, you can use regular noodles if you prefer! However, keep in mind that the texture and flavor will differ. Sweet potato noodles offer a unique chewiness and a hint of sweetness that regular noodles do not. If you choose to use traditional wheat noodles, cook them according to the package instructions and adjust the cooking time as needed. This way, you can still enjoy a delicious stir-fry!

How do I store leftovers of Sweet Potato Noodle Stir-Fry?

Storing leftovers is easy! Allow the stir-fry to cool completely before transferring it to an airtight container. You can keep it in the refrigerator for up to 3 days. When you’re ready to enjoy it again, simply reheat it in a skillet over medium heat or in the microwave until warmed through. Just be cautious not to overcook it, as the noodles may become mushy.

What vegetables work best in a Sweet Potato Noodle Stir-Fry?

Sweet Potato Noodle Stir-Fry Recipe. Some great options include:

  • Broccoli
  • Zucchini
  • Mushrooms
  • Snow peas
  • Bell peppers (any color)
  • Carrots
  • Spinach or kale

Feel free to mix and match based on your preferences or what you have on hand. The key is to choose fresh, colorful vegetables that will add both flavor and nutrition to your dish!

Is the Sweet Potato Noodle Stir-Fry Recipe gluten-free?

Sweet Potato Noodle Stir-Fry Recipe can be gluten-free! Sweet potato noodles are naturally gluten-free, making them a great alternative to traditional wheat noodles. However, be cautious with the soy sauce, as regular soy sauce contains gluten. To keep the dish gluten-free, opt for a gluten-free soy sauce or tamari. This way, you can enjoy a delicious stir-fry without any gluten concerns!

Conclusion on Sweet Potato Noodle Stir-Fry Recipe

Sweet Potato Noodle Stir-Fry Recipe is a delightful and nutritious meal that is perfect for any occasion. Its vibrant colors, fresh ingredients, and satisfying flavors make it a favorite among many. Whether you’re cooking for yourself, your family, or friends, this dish is sure to impress.

Not only is it quick and easy to prepare, but it also offers endless possibilities for customization. You can add your favorite proteins, experiment with different vegetables, or adjust the sauce to suit your taste. This flexibility allows you to create a unique stir-fry every time, ensuring that you never get bored with the same recipe.

Moreover, the nutritional benefits of sweet potato noodles and fresh vegetables make this dish a healthy choice. With its low calorie count and rich source of vitamins, it fits well into a balanced diet. Plus, it’s gluten-free, making it accessible for those with dietary restrictions.

Sweet Potato Noodle Stir-Fry Recipe a try? Gather your ingredients, follow the simple steps, and enjoy a delicious meal that’s both satisfying and good for you. Happy cooking!

Grilled Chicken Margherita is a must-try recipe today!

Introduction to Grilled Chicken Margherita Recipe

Grilled Chicken Margherita is a delightful dish that brings together fresh ingredients and bold flavors. This recipe is not just a meal; it’s an experience that captures the essence of Italian cuisine. With juicy chicken breasts topped with vibrant cherry tomatoes, creamy mozzarella, and fragrant basil, every bite is a celebration of taste. Whether you’re hosting a summer barbecue or enjoying a cozy dinner at home, this dish is sure to impress.

What Makes Grilled Chicken Margherita Special?

What sets Grilled Chicken Margherita apart is its simplicity and freshness. The combination of grilled chicken with the classic Margherita toppings creates a perfect harmony of flavors. The juicy chicken serves as a canvas for the toppings, allowing the sweetness of the tomatoes and the creaminess of the mozzarella to shine through. Plus, the addition of fresh basil adds a burst of herbal aroma that elevates the dish.

Another reason this recipe stands out is its versatility. You can easily customize it to suit your taste preferences. Want a smoky flavor? Marinate the chicken in balsamic vinegar. Prefer a vegetarian option? Substitute the chicken with grilled eggplant or zucchini. The possibilities are endless!

Moreover, this dish is not only delicious but also nutritious. With a good balance of protein, healthy fats, and low carbs, it fits well into various dietary plans. So, whether you’re looking to impress guests or simply enjoy a healthy meal, Grilled Chicken Margherita is the perfect choice.

Ingredients for Grilled Chicken Margherita Recipe

To create the perfect Grilled Chicken Margherita, you’ll need a handful of fresh and flavorful ingredients. Each component plays a vital role in bringing this dish to life. Here’s what you’ll need:

  • 2 large boneless, skinless chicken breasts
  • 1 teaspoon salt
  • 1/2 teaspoon black pepper
  • 1 tablespoon olive oil
  • 1 cup cherry tomatoes, halved
  • 1 cup fresh mozzarella balls, drained
  • 1/4 cup fresh basil leaves, chopped
  • 1 tablespoon balsamic glaze
  • 1 teaspoon garlic powder

These ingredients are not only easy to find but also contribute to the dish’s vibrant flavors. The chicken breasts provide a hearty base, while the cherry tomatoes add a sweet burst. Fresh mozzarella brings creaminess, and basil offers a refreshing herbal note. The olive oil and balsamic glaze enhance the overall taste, making every bite a delight.

For those looking to experiment, consider marinating the chicken in balsamic vinegar and garlic for a smoky flavor. You can also swap out cherry tomatoes for sun-dried tomatoes for a different twist. With these ingredients, you’re well on your way to creating a delicious Grilled Chicken Margherita that everyone will love!

Step-by-Step Preparation of Grilled Chicken Margherita Recipe

Now that you have all your ingredients ready, it’s time to dive into the preparation of your Grilled Chicken Margherita. This step-by-step guide will help you create a delicious meal that’s sure to impress. Let’s get started!

Step 1: Marinating the Chicken

Begin by marinating the chicken breasts. This step is crucial for adding flavor and tenderness. In a bowl, mix the salt, black pepper, and garlic powder. Then, drizzle the olive oil over the chicken breasts. Rub the seasoning mixture all over the chicken, ensuring it’s evenly coated. For an extra flavor boost, consider letting the chicken marinate for at least 30 minutes. This allows the spices to penetrate the meat, making it even tastier.

Step 2: Preparing the Toppings

While the chicken marinates, prepare the toppings. Start by halving the cherry tomatoes and placing them in a bowl. Next, drain the fresh mozzarella balls and set them aside. Chop the fresh basil leaves finely. This will add a lovely aroma and flavor to your dish. Having everything ready will make the cooking process smoother and more enjoyable.

Step 3: Grilling the Chicken

Once your chicken is marinated, it’s time to grill! Preheat your grill to medium-high heat. Place the chicken breasts on the grill and cook for about 6-7 minutes on each side. You want the internal temperature to reach 165°F for safe consumption. During the last few minutes of grilling, add the halved cherry tomatoes and mozzarella balls on top of each chicken breast. Close the grill lid to help the cheese melt beautifully.

Step 4: Assembling the Dish

After grilling, remove the chicken from the grill and let it rest for about 5 minutes. This resting period allows the juices to redistribute, keeping the chicken moist. Once rested, place each chicken breast on a serving plate. Top with the melted mozzarella and grilled cherry tomatoes. This colorful presentation will make your dish look as good as it tastes!

Step 5: Final Touches

To finish off your Grilled Chicken Margherita, drizzle balsamic glaze over the top. This adds a sweet and tangy flavor that complements the dish perfectly. Finally, sprinkle the chopped fresh basil over the chicken for a burst of color and freshness. Your Grilled Chicken Margherita is now ready to be served!

Enjoy this delightful dish with family and friends, and watch as they savor every bite. With these simple steps, you’ll create a meal that’s not only delicious but also visually appealing.

Variations of Grilled Chicken Margherita Recipe

While the classic Grilled Chicken Margherita is a hit, there are many ways to switch things up! Whether you want to try different proteins, explore vegetarian options, or enhance the flavors, these variations will keep your meals exciting. Let’s dive into some delicious alternatives!

Alternative Proteins

If you’re looking to change the protein in your Grilled Chicken Margherita, there are several tasty options. For instance, boneless chicken thighs can be used instead of breasts. They are juicier and add a rich flavor. You can also try turkey cutlets for a leaner option. If you prefer seafood, grilled shrimp or salmon can be delightful substitutes. Just remember to adjust the cooking time based on the protein you choose. Each alternative brings its unique taste, making your dish special!

Vegetarian Options

For those who prefer a meatless meal, there are fantastic vegetarian options! Grilled eggplant or zucchini can serve as a hearty base. Simply slice the vegetables, season them, and grill until tender. Another great choice is portobello mushrooms. Their meaty texture makes them a perfect substitute for chicken. Top these veggies with the same cherry tomatoes, mozzarella, and basil for a delicious vegetarian Grilled Margherita. You won’t miss the meat at all!

Flavor Enhancements

To elevate the flavors of your Grilled Chicken Margherita, consider adding some extra ingredients. A sprinkle of red pepper flakes can add a nice kick. You might also try using pesto instead of olive oil for a herby twist. For a smoky flavor, marinate the chicken in smoked paprika or chipotle sauce before grilling. Additionally, experimenting with different cheeses, like goat cheese or feta, can create a unique taste. These enhancements will take your dish to the next level!

With these variations, you can enjoy Grilled Chicken Margherita in many exciting ways. Whether you’re in the mood for a different protein, a vegetarian delight, or enhanced flavors, there’s something for everyone!

Cooking Note for Grilled Chicken Margherita Recipe

When preparing your Grilled Chicken Margherita, a few cooking notes can help ensure your dish turns out perfectly every time. These tips will guide you through the grilling process and enhance the overall flavor and texture of your meal.

First, always preheat your grill. This step is crucial for achieving those beautiful grill marks and ensuring even cooking. A hot grill helps to sear the chicken, locking in moisture and flavor. If your grill isn’t hot enough, the chicken may end up dry and less flavorful.

Next, consider using a meat thermometer. This handy tool takes the guesswork out of cooking chicken. Insert the thermometer into the thickest part of the chicken breast. When it reads 165°F, your chicken is safe to eat and perfectly cooked. This ensures that your chicken remains juicy and tender.

Another important note is to let the chicken rest after grilling. This resting period allows the juices to redistribute throughout the meat. If you cut into the chicken too soon, those delicious juices will run out, leaving you with a dry piece of meat. Aim for about 5 minutes of resting time before slicing or serving.

Lastly, don’t be afraid to experiment with your grilling technique. If you have a gas grill, you can control the heat easily. For charcoal grills, create zones of heat by placing coals on one side. This allows you to sear the chicken on high heat and then move it to a cooler side to finish cooking without burning.

By following these cooking notes, you’ll elevate your Grilled Chicken Margherita to new heights. Enjoy the process, and remember that practice makes perfect!

Serving Suggestions for Grilled Chicken Margherita Recipe

Once your Grilled Chicken Margherita is ready, it’s time to think about what to serve alongside it. The right side dishes and beverages can enhance your meal, making it even more enjoyable. Here are some delightful suggestions to complement your dish!

Side Dishes to Pair

When it comes to side dishes, you want to choose options that balance the flavors of the Grilled Chicken Margherita. Here are a few tasty ideas:

  • Garlic Bread: A classic choice, garlic bread is perfect for soaking up any extra balsamic glaze. Its crispy texture pairs wonderfully with the juicy chicken.
  • Caprese Salad: This fresh salad, made with tomatoes, mozzarella, and basil, echoes the flavors of your main dish. Drizzle with olive oil and balsamic for added flavor.
  • Grilled Vegetables: Seasonal vegetables like zucchini, bell peppers, and asparagus can be grilled alongside the chicken. Their smoky flavor complements the dish beautifully.
  • Quinoa Salad: A light quinoa salad with cucumbers, cherry tomatoes, and a lemon vinaigrette adds a refreshing touch. It’s healthy and filling!
  • Roasted Potatoes: Crispy roasted potatoes seasoned with herbs make for a hearty side. They add a satisfying crunch to your meal.

These side dishes not only enhance the flavors of your Grilled Chicken Margherita but also create a well-rounded meal that everyone will love.

Wine Pairing Recommendations

To elevate your dining experience, consider pairing your Grilled Chicken Margherita with the right wine. Here are some excellent options:

  • Sauvignon Blanc: This white wine is crisp and refreshing, making it a perfect match for the fresh flavors of the dish. Its acidity complements the tomatoes and basil beautifully.
  • Chardonnay: A lightly oaked Chardonnay can add a creamy texture that pairs well with the mozzarella. Look for one with bright fruit flavors.
  • Pinot Grigio: This light and zesty wine enhances the dish without overpowering it. Its fruity notes work well with the grilled chicken.
  • Rosé: A dry rosé offers a lovely balance of fruitiness and acidity, making it a versatile choice for grilled dishes.
  • Chianti: If you prefer red wine, a Chianti can be a great option. Its earthy notes complement the grilled flavors and the balsamic glaze.

Choosing the right wine can elevate your meal, making it a memorable experience. Enjoy your Grilled Chicken Margherita with these delightful pairings!

Tips for Perfecting Your Grilled Chicken Margherita Recipe

To ensure your Grilled Chicken Margherita turns out perfectly every time, consider these helpful tips. From selecting the right chicken to mastering grilling techniques, these insights will enhance your cooking experience. Let’s explore!

Choosing the Right Chicken

The quality of chicken you choose can significantly impact the flavor and texture of your dish. Opt for fresh, organic, boneless, skinless chicken breasts for the best results. These breasts are not only tender but also free from added hormones and antibiotics. If you prefer a juicier option, boneless chicken thighs are a great alternative. They have more fat, which keeps them moist during grilling. Always check for a bright pink color and avoid any chicken with a grayish hue. Fresh chicken will yield the best flavor in your Grilled Chicken Margherita.

Best Grilling Techniques

Grilling is an art, and mastering the techniques can elevate your dish. First, always preheat your grill to medium-high heat. This ensures even cooking and helps achieve those beautiful grill marks. When placing the chicken on the grill, avoid moving it around too much. Let it sear for 6-7 minutes on one side before flipping. This allows for a nice crust to form. If you’re using a charcoal grill, create two heat zones: one for searing and another for indirect cooking. This way, you can sear the chicken and then move it to the cooler side to finish cooking without burning.

Additionally, consider using a grill basket for the cherry tomatoes and mozzarella. This prevents them from falling through the grates and allows for even cooking. Lastly, always use a meat thermometer to check for doneness. This ensures your chicken reaches the safe internal temperature of 165°F, keeping it juicy and flavorful.

Storage and Reheating Tips

If you have leftovers, proper storage is key to maintaining flavor and texture. Allow the grilled chicken to cool completely before placing it in an airtight container. Store it in the refrigerator for up to 3 days. For longer storage, consider freezing the chicken. Wrap it tightly in plastic wrap and then place it in a freezer-safe bag. It can last up to 3 months in the freezer.

When reheating, avoid using the microwave, as it can dry out the chicken. Instead, reheat it in the oven at 350°F for about 10-15 minutes, or until warmed through. You can also reheat it on the grill for a few minutes, which will help retain its moisture and flavor. Enjoy your Grilled Chicken Margherita even days later with these simple storage and reheating tips!

Breakdown of Time for Grilled Chicken Margherita Recipe

Understanding the time needed for each step in your Grilled Chicken Margherita recipe can help you plan your meal better. Here’s a simple breakdown of the time required for preparation and cooking. This will ensure you have everything ready when it’s time to serve!

Prep Time

The prep time for your Grilled Chicken Margherita is approximately 15-20 minutes. This includes gathering your ingredients, marinating the chicken, and preparing the toppings. If you choose to marinate the chicken for longer, you can extend this time to 30 minutes or more. However, the actual hands-on time remains around 15-20 minutes, making it a quick and easy dish to prepare.

Cooking Time

Once you’re ready to grill, the cooking time will take about 12-15 minutes. This includes grilling the chicken for 6-7 minutes on each side. During the last few minutes, you’ll add the cherry tomatoes and mozzarella, allowing them to melt. This short cooking time ensures that your chicken remains juicy and flavorful while the toppings get perfectly cooked.

Total Time

In total, you can expect the entire process, from prep to serving, to take around 30-35 minutes. This makes Grilled Chicken Margherita a fantastic option for a weeknight dinner or a quick meal for guests. With minimal time spent in the kitchen, you can enjoy a delicious and satisfying dish that everyone will love!

Nutritional Information for Grilled Chicken Margherita Recipe

Understanding the nutritional content of your meals is essential for maintaining a balanced diet. The Grilled Chicken Margherita is not only delicious but also packed with nutrients. Here’s a closer look at the nutritional information for this delightful dish.

Calories

Each serving of Grilled Chicken Margherita contains approximately 320 calories. This makes it a great option for those looking to enjoy a flavorful meal without consuming too many calories. The combination of lean protein from the chicken and healthy fats from the olive oil contributes to a satisfying dish that keeps you full.

Protein Content

One of the standout features of this recipe is its high protein content. Each serving provides about 40 grams of protein. This is excellent for muscle repair and growth, making it a perfect choice for active individuals. Protein is also essential for overall health, helping to keep you energized throughout the day.

Sodium Levels

In terms of sodium, each serving contains around 600 milligrams. While this is a moderate amount, it’s important to be mindful of your overall sodium intake, especially if you are watching your salt consumption. You can reduce sodium levels by using low-sodium salt or skipping the added salt altogether. This way, you can enjoy your Grilled Chicken Margherita while keeping your dietary needs in check.

Overall, the Grilled Chicken Margherita is a nutritious meal option that balances flavor and health. With its low calorie count, high protein content, and manageable sodium levels, it’s a dish you can feel good about serving to your family and friends!

FAQs about Grilled Chicken Margherita Recipe

Can I use boneless chicken thighs instead of breasts?

Absolutely! Boneless chicken thighs are a great alternative to chicken breasts. They are juicier and have a richer flavor, making them perfect for grilling. Just remember that thighs may take a little longer to cook, so check the internal temperature to ensure they reach 165°F for safe consumption.

What can I substitute for fresh basil?

If you don’t have fresh basil on hand, there are several substitutes you can use. Fresh parsley or oregano can provide a similar herbal flavor. Dried basil is another option, but use it sparingly, as it is more concentrated than fresh. You can also try arugula or spinach for a different twist, adding a fresh green element to your dish.

How do I know when the chicken is fully cooked?

The best way to know if your chicken is fully cooked is by using a meat thermometer. Insert it into the thickest part of the chicken breast. When it reads 165°F, your chicken is safe to eat. Additionally, the juices should run clear, and the meat should no longer be pink inside. This ensures that your Grilled Chicken Margherita is both delicious and safe to enjoy!

Can I make this recipe ahead of time?

Yes, you can prepare parts of the Grilled Chicken Margherita ahead of time! You can marinate the chicken and store it in the refrigerator for up to 24 hours. This allows the flavors to develop even more. You can also prepare the toppings in advance. Just assemble and grill the chicken when you’re ready to serve. This makes it a convenient option for busy weeknights or gatherings!

Conclusion on Grilled Chicken Margherita Recipe

In conclusion, the Grilled Chicken Margherita is a delightful dish that combines fresh ingredients with bold flavors. It’s not just a meal; it’s a celebration of taste that can be enjoyed on various occasions. Whether you’re hosting a summer barbecue or preparing a cozy dinner at home, this recipe is sure to impress your family and friends.

With its juicy chicken breasts topped with vibrant cherry tomatoes, creamy mozzarella, and fragrant basil, every bite is a burst of flavor. Plus, the nutritional benefits make it a smart choice for those looking to maintain a balanced diet. The high protein content and low calorie count ensure that you can enjoy this dish without any guilt.

Moreover, the versatility of the Grilled Chicken Margherita allows you to customize it to your liking. From alternative proteins to vegetarian options and flavor enhancements, the possibilities are endless. This adaptability makes it a go-to recipe for any occasion.

So, gather your ingredients, fire up the grill, and get ready to create a dish that will leave everyone asking for seconds. With the tips and variations provided, you can perfect your Grilled Chicken Margherita and make it your own. Enjoy the process, and most importantly, enjoy every delicious bite!

Creamy Mushroom Asparagus Chicken Penne is a must-try dish!

Introduction to Creamy Mushroom Asparagus Chicken Penne

Are you looking for a delicious and comforting meal that’s easy to prepare? Look no further than Creamy Mushroom Asparagus Chicken Penne! This delightful dish combines tender chicken, fresh asparagus, and earthy mushrooms, all enveloped in a rich and creamy sauce. It’s perfect for a family dinner or a cozy night in. Plus, it’s a great way to sneak in some veggies while satisfying your pasta cravings!

What Makes Creamy Mushroom Asparagus Chicken Penne Special?

What sets this dish apart is its wonderful blend of flavors and textures. The penne pasta serves as a hearty base, while the chicken adds protein and substance. The sautéed mushrooms bring an umami richness, and the asparagus adds a crisp, fresh bite. Together, they create a symphony of taste that’s both comforting and satisfying.

Moreover, the creamy sauce made from heavy cream and Parmesan cheese elevates the dish to a whole new level. It coats the pasta beautifully, making every bite a creamy delight. The addition of garlic and Italian seasoning enhances the flavor profile, making it a dish that everyone will love.

Whether you’re cooking for a special occasion or just a regular weeknight dinner, Creamy Mushroom Asparagus Chicken Penne is sure to impress. It’s not just a meal; it’s an experience that brings warmth and joy to your table. So, let’s dive into the ingredients and preparation steps to create this mouthwatering dish!

Ingredients for Creamy Mushroom Asparagus Chicken Penne

To create the delightful Creamy Mushroom Asparagus Chicken Penne, you’ll need a selection of fresh and flavorful ingredients. Each component plays a vital role in building the dish’s rich taste and creamy texture. Here’s what you’ll need:

  • 8 ounces penne pasta: This pasta shape holds the sauce well, making every bite delicious.
  • 1 pound boneless, skinless chicken breasts: Cut into bite-sized pieces, the chicken adds protein and heartiness.
  • 1 tablespoon olive oil: Used for cooking the chicken, it adds a nice flavor and helps prevent sticking.
  • 1 cup sliced mushrooms: These earthy delights bring a rich umami flavor to the dish.
  • 1 cup asparagus: Trimmed and cut into 1-inch pieces, asparagus adds a fresh crunch.
  • 3 cloves garlic: Minced garlic enhances the overall flavor with its aromatic qualities.
  • 1 cup heavy cream: This is the star of the sauce, providing a creamy and luxurious texture.
  • 1 cup grated Parmesan cheese: Adds a salty, nutty flavor that complements the cream.
  • Salt and pepper: Essential for seasoning, these enhance the flavors of all ingredients.
  • 1 teaspoon Italian seasoning: A blend of herbs that adds depth and warmth to the dish.
  • Fresh parsley: Chopped for garnish, it adds a pop of color and freshness.

With these ingredients on hand, you’re ready to embark on a culinary adventure. Each item contributes to the overall harmony of flavors, making your Creamy Mushroom Asparagus Chicken Penne a dish to remember. Now, let’s move on to the step-by-step preparation to bring this delightful meal to life!

Step-by-Step Preparation of Creamy Mushroom Asparagus Chicken Penne

Now that you have all your ingredients ready, it’s time to dive into the cooking process! Follow these simple steps to create your Creamy Mushroom Asparagus Chicken Penne. Each step is designed to ensure that your dish turns out perfectly creamy and delicious.

Step 1: Preparing the Ingredients

Before you start cooking, it’s important to prepare all your ingredients. Begin by measuring out the penne pasta, chicken, and vegetables. Slice the mushrooms and trim the asparagus into 1-inch pieces. Mince the garlic cloves as well. Having everything ready will make the cooking process smooth and enjoyable. Remember, a little prep goes a long way!

Step 2: Cooking the Chicken

In a large skillet, heat 1 tablespoon of olive oil over medium heat. Once the oil is hot, add the bite-sized chicken pieces. Season them with salt and pepper to taste. Cook the chicken for about 5-7 minutes, stirring occasionally. You want it to be browned and cooked through. Once done, remove the chicken from the skillet and set it aside. This step is crucial as it builds the base flavor for your dish.

Step 3: Sautéing the Vegetables

In the same skillet, add the sliced mushrooms and asparagus. Sauté them for about 4-5 minutes until they become tender. The mushrooms will release their moisture, and the asparagus will brighten in color. After that, add the minced garlic and cook for an additional minute. The aroma will be delightful! This step adds a fresh and earthy flavor to your Creamy Mushroom Asparagus Chicken Penne.

Step 4: Making the Creamy Sauce

Now, reduce the heat to low and pour in the heavy cream. Stir in the grated Parmesan cheese and Italian seasoning. Allow the sauce to cook for 2-3 minutes until it thickens slightly. This creamy sauce is what makes your dish so special! It should be rich and velvety, coating the pasta beautifully. Don’t forget to taste and adjust the seasoning with salt and pepper if needed.

Step 5: Combining Everything

Finally, return the cooked chicken to the skillet. Add the drained penne pasta and toss everything together until well combined. Make sure the pasta is coated in that luscious creamy sauce. Cook for an additional minute to heat everything through. Your Creamy Mushroom Asparagus Chicken Penne is almost ready to serve! Garnish with fresh parsley for a pop of color and freshness.

And there you have it! A step-by-step guide to creating a delicious and comforting meal. Now, let’s explore some variations of this dish to suit different tastes and dietary needs.

Variations of Creamy Mushroom Asparagus Chicken Penne

While the original Creamy Mushroom Asparagus Chicken Penne is a delightful dish, there are many ways to adapt it to suit different dietary preferences and tastes. Here are two popular variations that you can try!

Vegetarian Option

If you want to enjoy a meat-free version, simply omit the chicken and replace it with hearty vegetables. You can use extra mushrooms, bell peppers, or even zucchini for added flavor and texture. To maintain the protein content, consider adding chickpeas or white beans. These ingredients will not only enhance the dish but also keep it filling and satisfying.

Follow the same cooking steps, sautéing the vegetables until tender. Then, proceed with the creamy sauce as usual. This vegetarian option is just as creamy and delicious, making it a perfect choice for those who prefer plant-based meals. Plus, it’s a great way to enjoy the vibrant flavors of mushrooms and asparagus!

Gluten-Free Adaptation

For those who need a gluten-free meal, you can easily adapt this recipe by using gluten-free penne pasta. Many brands offer excellent alternatives made from rice, corn, or quinoa. These options cook similarly to traditional pasta, ensuring you won’t miss out on the texture.

When preparing the dish, follow the same steps as outlined in the original recipe. Just be sure to check the labels on your heavy cream and Parmesan cheese to ensure they are gluten-free. This adaptation allows everyone to enjoy the creamy goodness of Mushroom Asparagus Chicken Penne without worrying about gluten!

With these variations, you can cater to different dietary needs while still enjoying the rich flavors of this beloved dish. Now, let’s move on to some cooking notes to help you perfect your Creamy Mushroom Asparagus Chicken Penne!

Cooking Note for Creamy Mushroom Asparagus Chicken Penne

When preparing Creamy Mushroom Asparagus Chicken Penne, a few cooking notes can help you achieve the best results. These tips will ensure that your dish turns out creamy, flavorful, and visually appealing.

First, always use fresh ingredients. Fresh mushrooms and asparagus not only enhance the flavor but also add vibrant colors to your dish. If possible, choose seasonal vegetables for the best taste. Fresh produce can make a significant difference in the overall quality of your meal.

Next, be mindful of the cooking times. Overcooking the chicken can lead to a dry texture, while undercooking it can be unsafe. Aim for a golden-brown color on the chicken, ensuring it’s cooked through. Similarly, when sautéing the vegetables, keep an eye on them. You want them tender but still crisp, preserving their nutrients and bright colors.

Another important note is to adjust the creaminess to your liking. If you prefer a lighter sauce, consider using half-and-half instead of heavy cream. This substitution will still provide a creamy texture but with fewer calories. You can also add a splash of chicken broth for extra flavor without adding too much cream.

Lastly, don’t forget to taste as you go! Adjust the seasoning with salt, pepper, or even a pinch of red pepper flakes for a bit of heat. Each ingredient contributes to the overall flavor, so tasting ensures a well-balanced dish.

By following these cooking notes, you’ll be well on your way to creating a delicious and satisfying Creamy Mushroom Asparagus Chicken Penne. Now, let’s explore some serving suggestions to elevate your dining experience!

Serving Suggestions for Creamy Mushroom Asparagus Chicken Penne

Once your Creamy Mushroom Asparagus Chicken Penne is ready, it’s time to think about how to serve it! Presentation can elevate your meal, making it even more enjoyable. Here are some delightful serving suggestions to enhance your dining experience:

  • Garnish with Fresh Herbs: A sprinkle of freshly chopped parsley or basil adds a pop of color and freshness. It also enhances the dish’s aroma, making it more inviting.
  • Pair with a Side Salad: A light side salad with mixed greens, cherry tomatoes, and a simple vinaigrette complements the richness of the pasta. The crispness of the salad balances the creamy texture of the dish.
  • Serve with Garlic Bread: Warm, buttery garlic bread is a perfect accompaniment. It’s great for soaking up any leftover creamy sauce on your plate!
  • Offer Grated Cheese: Provide extra grated Parmesan cheese at the table. Guests can sprinkle more cheese on their servings, enhancing the flavor even further.
  • Wine Pairing: Consider serving a glass of white wine, such as Chardonnay or Sauvignon Blanc. These wines complement the creamy sauce and the flavors of the chicken and vegetables.

These serving suggestions not only enhance the visual appeal of your Creamy Mushroom Asparagus Chicken Penne but also create a well-rounded meal. Whether it’s a family dinner or a gathering with friends, these tips will help you impress your guests and make the dining experience memorable. Now, let’s move on to some tips for perfecting your dish!

Tips for Perfecting Creamy Mushroom Asparagus Chicken Penne

To ensure your Creamy Mushroom Asparagus Chicken Penne turns out perfectly every time, consider these helpful tips. Each suggestion is designed to enhance the flavor, texture, and overall experience of this delightful dish.

  • Use Quality Ingredients: The quality of your ingredients can make a big difference. Opt for fresh, organic vegetables and high-quality chicken. Fresh ingredients not only taste better but also contribute to a more vibrant dish.
  • Don’t Overcook the Pasta: When cooking the penne, aim for al dente. This means the pasta should be firm to the bite. It will continue to cook slightly when mixed with the sauce, so undercooking it just a bit is ideal.
  • Experiment with Seasonings: While the recipe calls for Italian seasoning, feel free to experiment! Adding a pinch of red pepper flakes can give your dish a nice kick. Fresh herbs like thyme or rosemary can also add depth to the flavor.
  • Adjust the Creaminess: If you prefer a lighter dish, consider using half-and-half or even a plant-based cream. This will still give you a creamy texture without being too heavy.
  • Let It Rest: After combining all the ingredients, let the dish sit for a few minutes before serving. This allows the flavors to meld together, enhancing the overall taste.
  • Save Some Pasta Water: If your sauce seems too thick, reserve a bit of the pasta cooking water. Adding a splash can help loosen the sauce while adding extra flavor.
  • Serve Immediately: Creamy Mushroom Asparagus Chicken Penne is best enjoyed fresh. The longer it sits, the creamier the sauce can become, which may not be to everyone’s liking. Serve it hot for the best experience!

By following these tips, you’ll be well on your way to mastering the art of making Creamy Mushroom Asparagus Chicken Penne. Each step contributes to a dish that is not only delicious but also visually appealing. Now, let’s break down the time needed to prepare this delightful meal!

Breakdown of Time for Creamy Mushroom Asparagus Chicken Penne

Understanding the time required for each step in preparing Creamy Mushroom Asparagus Chicken Penne can help you plan your cooking efficiently. Here’s a breakdown of the time you’ll need for preparation and cooking:

Prep Time

Preparing your ingredients is an essential step that sets the stage for a smooth cooking process. For this recipe, you can expect to spend about 15 minutes on prep time. This includes measuring out the pasta, cutting the chicken into bite-sized pieces, slicing the mushrooms, trimming the asparagus, and mincing the garlic. Having everything ready will make the cooking process much more enjoyable!

Cooking Time

The cooking time for Creamy Mushroom Asparagus Chicken Penne is approximately 20 minutes. This includes cooking the chicken, sautéing the vegetables, and making the creamy sauce. Each step is quick, allowing you to create a delicious meal in no time. The actual cooking process is straightforward and can be done while the pasta is boiling, making it efficient.

Total Time

In total, you’ll need about 35 minutes to prepare and cook your Creamy Mushroom Asparagus Chicken Penne. This makes it a perfect option for a weeknight dinner when you want something tasty without spending hours in the kitchen. With just a little bit of time, you can enjoy a comforting and satisfying meal that everyone will love!

Nutritional Information for Creamy Mushroom Asparagus Chicken Penne

Understanding the nutritional content of your meals is essential for maintaining a balanced diet. Creamy Mushroom Asparagus Chicken Penne is not only delicious but also provides a good mix of nutrients. Here’s a breakdown of the nutritional information per serving, so you can enjoy this dish while being mindful of your dietary needs.

Calories

Each serving of Creamy Mushroom Asparagus Chicken Penne contains approximately 550 calories. This calorie count includes the rich flavors from the heavy cream, chicken, and pasta. While it’s a hearty meal, it’s important to enjoy it in moderation, especially if you’re watching your calorie intake. Pairing it with a light salad can help balance your meal.

Protein

One of the standout features of this dish is its protein content. Each serving provides about 35 grams of protein, primarily from the chicken and Parmesan cheese. Protein is essential for muscle repair and growth, making this dish a great option for those looking to maintain a healthy diet. It’s especially beneficial after a workout or a long day!

Sodium

The sodium content in Creamy Mushroom Asparagus Chicken Penne is around 800 milligrams per serving. This amount can vary based on the specific brands of ingredients used, especially the Parmesan cheese and any added salt. If you’re watching your sodium intake, consider using low-sodium chicken broth or cheese alternatives. Adjusting the seasoning can help you enjoy this dish while keeping your sodium levels in check.

By being aware of the nutritional information, you can enjoy Creamy Mushroom Asparagus Chicken Penne as part of a balanced diet. It’s a satisfying meal that provides essential nutrients, making it a great choice for any occasion. Now, let’s move on to some frequently asked questions about this delightful dish!

FAQs about Creamy Mushroom Asparagus Chicken Penne

Can I use other types of pasta for Creamy Mushroom Asparagus Chicken Penne?

Absolutely! While penne pasta is a fantastic choice for this dish, you can easily swap it for other pasta types. Fusilli, farfalle, or even spaghetti can work well. Just keep in mind that different shapes may hold the sauce differently. For instance, fusilli’s twists can capture more sauce, making each bite flavorful. So, feel free to experiment with your favorite pasta shape!

How can I make Creamy Mushroom Asparagus Chicken Penne healthier?

Making Creamy Mushroom Asparagus Chicken Penne healthier is simple! Start by using whole grain or legume-based pasta for added fiber and nutrients. You can also reduce the amount of heavy cream by substituting half-and-half or using a plant-based cream alternative. Adding more vegetables, like spinach or bell peppers, can boost the nutritional value without sacrificing flavor. Lastly, consider using less cheese or opting for a lower-fat cheese option to cut down on calories while still enjoying that cheesy goodness!

What can I substitute for heavy cream in Creamy Mushroom Asparagus Chicken Penne?

If you’re looking for a substitute for heavy cream, there are several options! Half-and-half is a great choice for a lighter sauce while still providing creaminess. You can also use coconut milk for a dairy-free option, which adds a unique flavor. For a lower-calorie alternative, try using Greek yogurt mixed with a bit of milk to achieve a creamy texture. Just remember to add it at the end of cooking to prevent curdling. These substitutes will help you maintain the creamy texture of your dish while catering to your dietary needs!

Conclusion on Creamy Mushroom Asparagus Chicken Penne

In conclusion, Creamy Mushroom Asparagus Chicken Penne is a delightful dish that brings together a wonderful mix of flavors and textures. With its creamy sauce, tender chicken, and vibrant vegetables, it’s a meal that can satisfy both the palate and the soul. Whether you’re cooking for family or friends, this dish is sure to impress and create lasting memories around the dinner table.

Not only is it easy to prepare, but it also offers versatility. You can adapt it to suit various dietary preferences, making it a go-to recipe for any occasion. From the vegetarian option to gluten-free adaptations, there’s something for everyone. Plus, with the tips and variations provided, you can customize the dish to your liking, ensuring that it remains a favorite in your household.

As you embark on your culinary journey with Creamy Mushroom Asparagus Chicken Penne, remember to enjoy the process. Cooking is not just about the final dish; it’s about the joy of creating something delicious. So, gather your ingredients, follow the steps, and savor every bite of this creamy delight. Your taste buds will thank you!

Now that you have all the knowledge and tips at your fingertips, it’s time to get cooking. Embrace the warmth and comfort that this dish brings, and share it with those you love. Happy cooking!

Buffalo Chicken Alfredo Penne Recipe is a must-try!

Introduction to Buffalo Chicken Alfredo Penne Recipe

If you’re looking for a dish that combines creamy goodness with a spicy kick, then the Buffalo Chicken Alfredo Penne Recipe is just what you need. This delightful meal brings together the rich flavors of Alfredo sauce and the zesty heat of buffalo chicken, creating a perfect harmony that will tantalize your taste buds. Whether you’re cooking for a family dinner or a casual gathering with friends, this recipe is sure to impress.

Imagine tender pieces of chicken coated in a spicy buffalo sauce, mixed with al dente penne pasta, and enveloped in a creamy Alfredo sauce. It’s comfort food at its finest! Plus, it’s easy to prepare, making it a great option for busy weeknights or special occasions. With just a few simple ingredients, you can whip up a dish that feels indulgent yet satisfying.

This Buffalo Chicken Alfredo Penne Recipe not only delivers on flavor but also offers versatility. You can customize it to suit your preferences, whether you want to add extra veggies or adjust the spice level. So, roll up your sleeves and get ready to dive into a delicious culinary adventure that will leave everyone asking for seconds!

Ingredients for Buffalo Chicken Alfredo Penne Recipe

To create the mouthwatering Buffalo Chicken Alfredo Penne, you’ll need a handful of simple ingredients. Each component plays a vital role in delivering that rich, creamy, and spicy flavor profile. Here’s what you’ll need:

  • 2 cups penne pasta: This pasta shape holds the sauce beautifully, making every bite delicious.
  • 1 tablespoon olive oil: Used for cooking the chicken, it adds a nice flavor and helps prevent sticking.
  • 1 pound boneless, skinless chicken breasts: Cut into bite-sized pieces for quick cooking and easy eating.
  • 1 teaspoon garlic powder: This adds a savory depth to the dish.
  • 1 teaspoon onion powder: Enhances the overall flavor with a hint of sweetness.
  • 1 teaspoon paprika: Provides a subtle smokiness and a beautiful color.
  • Salt and pepper to taste: Essential for seasoning the chicken and balancing flavors.
  • 1 cup buffalo sauce: The star of the show! Choose your favorite brand or make your own for a personal touch.
  • 1 cup heavy cream: This creates the creamy Alfredo sauce that complements the buffalo flavor.
  • 1 cup shredded mozzarella cheese: Adds a gooey, cheesy texture that everyone loves.
  • 1/2 cup grated Parmesan cheese: For a rich, nutty flavor that enhances the creaminess.
  • 2 tablespoons chopped fresh parsley: A lovely garnish that adds a pop of color and freshness.

With these ingredients on hand, you’re all set to create a dish that’s not only satisfying but also bursting with flavor. Gather your ingredients, and let’s move on to the next step of preparing this delightful Buffalo Chicken Alfredo Penne!

Step-by-Step Preparation of Buffalo Chicken Alfredo Penne Recipe

Now that you have all your ingredients ready, it’s time to dive into the cooking process! Follow these simple steps to create your Buffalo Chicken Alfredo Penne. Each step is designed to ensure that your dish turns out perfectly delicious.

Step 1: Cook the Penne Pasta

Start by bringing a large pot of salted water to a boil. Once boiling, add the 2 cups of penne pasta. Cook according to the package instructions until the pasta is al dente, which usually takes about 8-10 minutes. Stir occasionally to prevent sticking. Once cooked, drain the pasta in a colander and set it aside. This will be the base of your dish, so make sure it’s cooked just right!

Step 2: Prepare the Buffalo Chicken

In a large skillet, heat 1 tablespoon of olive oil over medium heat. Once the oil is hot, add the bite-sized pieces of chicken. Season the chicken with 1 teaspoon of garlic powder, 1 teaspoon of onion powder, 1 teaspoon of paprika, and salt and pepper to taste. Cook the chicken for about 6-8 minutes, stirring occasionally, until it’s browned and cooked through. The spices will create a wonderful aroma, making your kitchen smell amazing!

Step 3: Make the Alfredo Sauce

After the chicken is cooked, stir in 1 cup of buffalo sauce. Let it cook for an additional 2-3 minutes. This allows the chicken to absorb the spicy flavor of the buffalo sauce. Next, reduce the heat to low and pour in 1 cup of heavy cream. Stir well to combine the ingredients. Allow the mixture to simmer for 2-3 minutes, creating a creamy and flavorful sauce that will coat the pasta beautifully.

Step 4: Combine Ingredients

Now it’s time to bring everything together! Add the cooked penne pasta to the skillet with the buffalo chicken and sauce. Toss everything together until the pasta is well coated in the creamy buffalo sauce. Then, stir in 1 cup of shredded mozzarella cheese and 1/2 cup of grated Parmesan cheese. Keep stirring until the cheeses melt and create a rich, creamy texture. This is where the magic happens!

Step 5: Serve and Enjoy

Once everything is combined and creamy, remove the skillet from heat. Serve your Buffalo Chicken Alfredo Penne hot, garnished with 2 tablespoons of chopped fresh parsley for a pop of color. This dish is perfect for sharing, so grab some plates and enjoy the delicious flavors with family and friends. Get ready for compliments!

Variations of Buffalo Chicken Alfredo Penne Recipe

While the classic Buffalo Chicken Alfredo Penne is a crowd-pleaser, there are plenty of ways to switch things up! Whether you’re looking for a vegetarian option or want to add an extra kick, these variations will keep your meals exciting and flavorful.

Vegetarian Option

If you want to enjoy the creamy goodness of Buffalo Chicken Alfredo Penne without the meat, you can easily make a vegetarian version. Instead of chicken, use hearty vegetables like bell peppers, zucchini, or mushrooms. Simply sauté the veggies in olive oil until they are tender. Then, season them with garlic powder, onion powder, and paprika just like you would with the chicken. Toss the cooked penne pasta with the sautéed veggies and the buffalo sauce, followed by the creamy Alfredo sauce. This way, you’ll still get that delicious buffalo flavor while keeping it meat-free!

Spicy Additions

If you love heat, consider adding some spicy elements to your Buffalo Chicken Alfredo Penne. You can mix in sliced jalapeños or crushed red pepper flakes to the chicken while it cooks. For an extra layer of flavor, try adding a splash of hot sauce to the Alfredo sauce. You can also top your dish with spicy buffalo ranch dressing or serve it with a side of spicy pickles. These additions will elevate the heat level and make your dish even more exciting!

With these variations, you can customize your Buffalo Chicken Alfredo Penne to suit your taste preferences. Whether you’re in the mood for a vegetarian delight or a spicy kick, these options ensure that every meal is a new adventure!

Cooking Note for Buffalo Chicken Alfredo Penne Recipe

When preparing the Buffalo Chicken Alfredo Penne, there are a few important cooking notes to keep in mind. These tips will help you achieve the best results and ensure that your dish is both delicious and satisfying.

First, always use fresh ingredients whenever possible. Fresh chicken and high-quality buffalo sauce can significantly enhance the flavor of your dish. If you opt for homemade buffalo sauce, you can control the spice level to suit your taste.

Next, be mindful of the cooking times. Overcooking the chicken can lead to a dry texture, while undercooking can pose food safety risks. Make sure the chicken is cooked through and reaches an internal temperature of 165°F (75°C). Using a meat thermometer can help you check this easily.

Additionally, when cooking the penne pasta, remember to salt the water generously. This step is crucial as it adds flavor to the pasta itself. Cooking the pasta until it’s al dente will ensure it holds up well when mixed with the creamy sauce.

Lastly, if you find the sauce too thick, you can thin it out with a splash of chicken broth or additional cream. Conversely, if it’s too thin, let it simmer a bit longer to thicken up. Adjusting the consistency to your liking will make a big difference in the overall enjoyment of the dish.

By keeping these cooking notes in mind, you’ll be well on your way to creating a mouthwatering Buffalo Chicken Alfredo Penne that everyone will love!

Serving Suggestions for Buffalo Chicken Alfredo Penne Recipe

Once your Buffalo Chicken Alfredo Penne is ready, it’s time to think about how to serve it! This dish is not only delicious but also visually appealing, making it perfect for any occasion. Here are some serving suggestions to elevate your dining experience:

  • Garnish with Fresh Herbs: A sprinkle of chopped fresh parsley or basil adds a vibrant touch. It enhances the dish’s appearance and provides a fresh flavor contrast to the creamy sauce.
  • Pair with a Side Salad: A crisp green salad with a light vinaigrette complements the richness of the pasta. Consider using mixed greens, cherry tomatoes, and cucumbers for a refreshing side.
  • Serve with Garlic Bread: Warm, buttery garlic bread is a classic side that pairs perfectly with creamy pasta dishes. It’s great for soaking up any leftover sauce!
  • Offer Extra Buffalo Sauce: For those who love a spicy kick, serve additional buffalo sauce on the side. This allows guests to customize their heat level.
  • Include a Cheese Platter: A small cheese platter with assorted cheeses can be a delightful addition. Include some crackers and fruits for a balanced snack before the main course.
  • Wine Pairing: Consider serving a chilled glass of white wine, like Sauvignon Blanc or Chardonnay. These wines complement the creamy flavors of the dish beautifully.

These serving suggestions will not only enhance the presentation of your Buffalo Chicken Alfredo Penne but also create a well-rounded meal that everyone will enjoy. Whether it’s a family dinner or a gathering with friends, these ideas will make your dining experience even more special!

Tips for Perfecting Buffalo Chicken Alfredo Penne Recipe

To ensure your Buffalo Chicken Alfredo Penne turns out perfectly every time, consider these helpful tips. They will guide you in achieving the best flavor and texture, making your dish a hit with everyone!

  • Choose Quality Ingredients: Start with fresh, high-quality chicken and buffalo sauce. The better the ingredients, the tastier your dish will be. If you can, opt for homemade buffalo sauce to control the spice level.
  • Don’t Overcook the Chicken: Keep an eye on the chicken while it cooks. Overcooking can make it dry. Aim for a golden brown color and ensure it reaches an internal temperature of 165°F (75°C).
  • Perfect Pasta Cooking: Always cook the penne pasta until it’s al dente. This means it should be firm to the bite. It will continue to cook slightly when mixed with the sauce, so avoid mushy pasta!
  • Adjust the Creaminess: If you prefer a creamier sauce, feel free to add more heavy cream or cheese. Conversely, if it’s too thick, a splash of chicken broth can help thin it out.
  • Mix in Veggies: For added nutrition and flavor, consider mixing in vegetables like spinach, broccoli, or bell peppers. They not only enhance the dish but also add a pop of color.
  • Let It Rest: After cooking, let the dish sit for a few minutes before serving. This allows the flavors to meld together, making each bite even more delicious.
  • Garnish Generously: Don’t skip the garnish! Fresh parsley or even crumbled blue cheese can elevate the dish visually and add a burst of flavor.
  • Experiment with Spices: Feel free to adjust the spices to your liking. If you enjoy heat, add more paprika or even cayenne pepper for an extra kick.

By following these tips, you’ll be well on your way to mastering the Buffalo Chicken Alfredo Penne Recipe. Each step will help you create a dish that’s not only flavorful but also visually appealing. Enjoy the cooking process and the delicious results!

Breakdown of Time for Buffalo Chicken Alfredo Penne Recipe

Understanding the time needed for each step of the Buffalo Chicken Alfredo Penne Recipe can help you plan your cooking efficiently. Here’s a simple breakdown of the time required for preparation and cooking, so you can enjoy this delicious dish without any rush!

Prep Time

The prep time for this recipe is approximately 15 minutes. During this time, you’ll gather all your ingredients, chop the chicken into bite-sized pieces, and measure out the spices and sauces. Having everything ready before you start cooking will make the process smoother and more enjoyable.

Cooking Time

The cooking time for the Buffalo Chicken Alfredo Penne is about 20 minutes. This includes cooking the penne pasta, sautéing the chicken, and making the creamy Alfredo sauce. Each step is quick, allowing you to create a flavorful meal in no time!

Total Time

In total, you can expect to spend around 35 minutes from start to finish. This makes it a perfect option for busy weeknights or when you want to impress guests without spending hours in the kitchen. With just a little bit of time, you’ll have a delicious Buffalo Chicken Alfredo Penne ready to serve!

Nutritional Information for Buffalo Chicken Alfredo Penne Recipe

Understanding the nutritional content of your meals is essential, especially when cooking delicious dishes like Buffalo Chicken Alfredo Penne. This section will provide you with key nutritional information to help you make informed choices while enjoying this flavorful recipe.

Calories

Each serving of Buffalo Chicken Alfredo Penne contains approximately 620 calories. This calorie count includes the rich flavors from the chicken, pasta, and creamy sauces. While it’s a hearty meal, it’s important to balance it with lighter options throughout the day.

Protein

One of the standout features of this dish is its protein content. Each serving provides about 36 grams of protein, primarily from the chicken and cheese. Protein is vital for muscle repair and growth, making this dish a great option for those looking to maintain a healthy diet.

Sodium

The sodium content in Buffalo Chicken Alfredo Penne is approximately 1,200 milligrams per serving. This number can vary based on the type of buffalo sauce used and any additional seasonings. If you’re watching your sodium intake, consider using low-sodium buffalo sauce or adjusting the salt added during cooking.

By keeping these nutritional facts in mind, you can enjoy your Buffalo Chicken Alfredo Penne while being aware of its health benefits and considerations. It’s all about balance, so savor every bite while also thinking about your overall dietary needs!

FAQs about Buffalo Chicken Alfredo Penne Recipe

Can I use a different type of pasta for Buffalo Chicken Alfredo Penne Recipe?

Absolutely! While penne pasta is a great choice for this dish, you can easily substitute it with other pasta types. Options like rotini, fusilli, or even fettuccine work well. Just keep in mind that different pasta shapes may alter the overall texture and how well the sauce clings to the pasta. Choose your favorite, and enjoy the delicious flavors of Buffalo Chicken Alfredo!

How can I make Buffalo Chicken Alfredo Penne Recipe healthier?

There are several ways to lighten up your Buffalo Chicken Alfredo Penne. First, consider using whole wheat or gluten-free pasta for added fiber. You can also substitute half-and-half for heavy cream to reduce calories and fat. Additionally, adding more vegetables, like spinach or broccoli, can boost the nutritional value. Lastly, using lean chicken breast and a low-sodium buffalo sauce can help keep the dish healthier without sacrificing flavor!

Can I prepare Buffalo Chicken Alfredo Penne Recipe in advance?

Yes, you can prepare Buffalo Chicken Alfredo Penne in advance! To do this, cook the pasta and chicken as directed, then combine them with the sauce. However, it’s best to store the pasta and sauce separately if you plan to reheat it later. This helps prevent the pasta from becoming mushy. When you’re ready to serve, simply reheat the sauce and mix it with the pasta for a quick and easy meal!

What can I serve with Buffalo Chicken Alfredo Penne Recipe?

Buffalo Chicken Alfredo Penne pairs wonderfully with a variety of sides. A fresh green salad with a light vinaigrette is a great choice to balance the richness of the dish. Garlic bread is another classic option, perfect for soaking up any leftover sauce. You might also consider serving it with roasted vegetables or a cheese platter for a delightful appetizer. These sides will enhance your meal and create a well-rounded dining experience!

Conclusion on Buffalo Chicken Alfredo Penne Recipe

In conclusion, the Buffalo Chicken Alfredo Penne Recipe is a delightful fusion of flavors that brings together the creamy richness of Alfredo sauce and the bold heat of buffalo chicken. This dish is not only easy to prepare but also offers a satisfying meal that can please a crowd. Whether you’re hosting a dinner party or enjoying a cozy night in, this recipe is sure to impress.

With its simple ingredients and straightforward steps, you can create a delicious meal in just about 35 minutes. The versatility of this dish allows you to customize it to your liking, whether you prefer a vegetarian option or want to crank up the heat with spicy additions. Plus, the nutritional benefits, including a good amount of protein, make it a hearty choice for any occasion.

As you gather around the table to enjoy this flavorful dish, remember that cooking is not just about the food; it’s about the memories you create with family and friends. So, don’t hesitate to share your culinary creations and enjoy the compliments that come your way!

Now that you have all the tools and tips to make the perfect Buffalo Chicken Alfredo Penne, it’s time to roll up your sleeves and get cooking. Enjoy every bite of this delicious meal, and happy cooking!

Cheesy Chicken Mozzarella Bake Recipe is a must-try!

Introduction to Cheesy Chicken Mozzarella Bake Recipe

Cheesy Chicken Mozzarella Bake Recipe is a delightful dish that combines tender chicken, rich marinara sauce, and gooey cheese, all baked to perfection. This recipe is not only easy to prepare but also packed with flavor, making it a perfect choice for busy weeknights or cozy gatherings.

What Makes the Cheesy Chicken Mozzarella Bake Recipe Special?

What sets this recipe apart is its simplicity and versatility. First, it uses ingredients that are often found in your pantry, making it a convenient option. The combination of shredded chicken and marinara sauce creates a savory base, while the melted mozzarella and Parmesan cheeses add a creamy texture that is simply irresistible.

Moreover, this dish is highly adaptable. You can easily customize it by adding your favorite vegetables or using different types of cheese. Whether you prefer a classic flavor or want to experiment with new ingredients, this recipe allows for creativity in the kitchen.

Cheesy Chicken Mozzarella Bake Recipe is a crowd-pleaser. It serves six, making it ideal for family dinners or potlucks. Plus, it’s a great way to use leftover chicken, reducing food waste while still providing a hearty meal. With its comforting flavors and satisfying texture, this dish is sure to become a favorite in your home.

Ingredients for Cheesy Chicken Mozzarella Bake Recipe

Cheesy Chicken Mozzarella Bake Recipe, you’ll need a few simple ingredients. These items are not only easy to find but also work together to create a delicious meal. Here’s what you’ll need:

  • 2 cups cooked chicken, shredded
  • 1 cup marinara sauce
  • 1 cup shredded mozzarella cheese
  • 1/2 cup grated Parmesan cheese
  • 1 teaspoon Italian seasoning
  • 1/2 teaspoon garlic powder
  • 1/4 teaspoon black pepper
  • 1/4 teaspoon salt
  • 1 cup cooked pasta (penne or rotini works well)
  • Fresh basil leaves for garnish (optional)

These ingredients come together to create a dish that is not only flavorful but also satisfying. The shredded chicken provides protein, while the marinara sauce adds a rich, tangy flavor. The combination of mozzarella and Parmesan cheeses gives the bake its signature cheesy goodness. Plus, the Italian seasoning and garlic powder enhance the overall taste, making every bite a delight.

Cheesy Chicken Mozzarella Bake Recipe a fantastic option for any night of the week!

Step-by-Step Preparation of Cheesy Chicken Mozzarella Bake Recipe

Cheesy Chicken Mozzarella Bake Recipe. This step-by-step guide will help you create a delicious meal that everyone will enjoy. Let’s get started!

Step 1: Prepping the Chicken

First, you need to prepare the chicken. If you have leftover cooked chicken, that’s perfect! Simply shred it into bite-sized pieces. If you’re starting with raw chicken, cook it thoroughly in a skillet or bake it in the oven until it reaches an internal temperature of 165°F (75°C). Once cooked, let it cool slightly before shredding. This step is crucial as it ensures your chicken is tender and easy to mix with the other ingredients.

Step 2: Preparing the Sauce

Next, it’s time to prepare the sauce. In a large mixing bowl, combine the shredded chicken with the marinara sauce. Add the Italian seasoning, garlic powder, black pepper, and salt. Stir everything together until the chicken is well coated with the sauce. This mixture will be the flavorful base of your bake, so make sure it’s mixed well. The aroma of the spices will make your kitchen smell amazing!

Step 3: Assembling the Dish

Now, let’s assemble the dish! Take your cooked pasta and add it to the chicken and sauce mixture. Stir gently until the pasta is evenly coated. Then, transfer this mixture into a greased 9×13-inch baking dish. Spread it out evenly to ensure every bite is packed with flavor. Finally, sprinkle the shredded mozzarella cheese and grated Parmesan cheese generously over the top. This cheesy layer will create a delicious crust as it bakes.

Step 4: Baking the Cheesy Chicken Mozzarella Bake

Cheesy Chicken Mozzarella Bake Recipe is now ready to be enjoyed!

Variations of Cheesy Chicken Mozzarella Bake Recipe

Cheesy Chicken Mozzarella Bake Recipe is not only delicious but also highly adaptable. You can easily make variations to suit your taste or dietary needs. Here are some fun ideas to enhance your dish!

Adding Vegetables to the Cheesy Chicken Mozzarella Bake Recipe

Cheesy Chicken Mozzarella Bake Recipe is by adding vegetables. Not only do they add color, but they also provide essential vitamins and minerals. Here are some great options:

  • Spinach: Fresh or frozen spinach can be mixed in with the chicken and sauce. It wilts down nicely and adds a lovely green color.
  • Bell Peppers: Diced bell peppers add a sweet crunch. You can use any color, such as red, yellow, or green.
  • Mushrooms: Sliced mushrooms bring an earthy flavor. Sauté them first for a richer taste before adding them to the mix.
  • Zucchini: Chopped zucchini is another great addition. It cooks quickly and blends well with the other ingredients.

Feel free to mix and match these vegetables based on what you have on hand. Adding veggies not only enhances the flavor but also makes your meal more filling and nutritious!

Alternative Cheeses for the Cheesy Chicken Mozzarella Bake Recipe

Cheesy Chicken Mozzarella Bake Recipe. While mozzarella and Parmesan are classic choices, there are many other cheeses that can add unique flavors:

  • Cheddar: Sharp cheddar cheese can give your bake a tangy kick. Mix it with mozzarella for a delightful combination.
  • Monterey Jack: This cheese melts beautifully and adds a creamy texture. It’s perfect for a gooey topping.
  • Feta: Crumbled feta cheese can add a salty, tangy flavor. It pairs well with spinach and other Mediterranean ingredients.
  • Gouda: Smoked gouda can introduce a rich, smoky flavor to your dish. It’s a great way to elevate the taste.

Cheesy Chicken Mozzarella Bake Recipe even more exciting. Don’t hesitate to try new combinations to find your favorite!

Cooking Note for Cheesy Chicken Mozzarella Bake Recipe

Cheesy Chicken Mozzarella Bake Recipe, there are a few important cooking notes to keep in mind. These tips will help ensure that your dish turns out perfectly every time, making it a delightful experience for you and your family.

First, always use cooked chicken. This can be leftover chicken, rotisserie chicken, or chicken that you’ve cooked specifically for this recipe. Using cooked chicken saves time and ensures that the meat is tender and flavorful. If you opt to cook raw chicken, make sure it reaches an internal temperature of 165°F (75°C) to ensure it’s safe to eat.

Next, consider the type of pasta you use. While penne and rotini are great choices, you can also experiment with other pasta shapes. Just make sure to cook the pasta al dente, as it will continue to cook in the oven. This prevents the pasta from becoming mushy and helps maintain a nice texture in your bake.

Additionally, be mindful of the baking time. Ovens can vary, so keep an eye on your dish as it bakes. You want the cheese to be melted and bubbly, with a golden crust on top. If you notice that the cheese is browning too quickly, you can cover the dish with aluminum foil to prevent burning while it finishes cooking.

Lastly, let the dish cool for a few minutes before serving. This cooling time allows the flavors to meld together and makes it easier to cut and serve. Plus, it helps prevent burns from the hot cheese and sauce.

Cheesy Chicken Mozzarella Bake Recipe that is sure to impress everyone at the table. Enjoy the process and happy cooking!

Serving Suggestions for Cheesy Chicken Mozzarella Bake Recipe

Cheesy Chicken Mozzarella Bake Recipe is ready, it’s time to think about how to serve it. This dish is not only delicious but also versatile, making it easy to pair with various sides and accompaniments. Here are some delightful serving suggestions to enhance your meal:

  • Garlic Bread: A classic choice! Serve warm garlic bread on the side. The crispy texture and buttery flavor complement the cheesy bake perfectly.
  • Green Salad: A fresh green salad adds a nice crunch. Toss together mixed greens, cherry tomatoes, cucumbers, and a light vinaigrette for a refreshing contrast.
  • Steamed Vegetables: Steamed broccoli, green beans, or carrots can add color and nutrition to your plate. They’re easy to prepare and provide a healthy balance to the meal.
  • Caesar Salad: For a heartier side, consider a Caesar salad. The creamy dressing and crunchy croutons pair wonderfully with the cheesy flavors of the bake.
  • Roasted Potatoes: Crispy roasted potatoes seasoned with herbs can be a satisfying addition. They add a nice texture and flavor that complements the dish.

Cheesy Chicken Mozzarella Bake Recipe with fresh basil leaves before serving. This adds a pop of color and a burst of flavor that elevates the dish. You can also offer extra marinara sauce on the side for those who love a little more sauce with their meal.

Cheesy Chicken Mozzarella Bake Recipe will be a hit at the dinner table. Enjoy the delightful combination of flavors and the smiles on your loved ones’ faces!

Tips for Perfecting Your Cheesy Chicken Mozzarella Bake Recipe

Cheesy Chicken Mozzarella Bake Recipe truly shine, consider these helpful tips. They will guide you in creating a dish that is not only delicious but also visually appealing. Let’s dive into some expert advice!

First, ensure your chicken is well-seasoned. If you’re using plain cooked chicken, consider marinating it beforehand. A simple marinade of olive oil, lemon juice, and herbs can enhance the flavor significantly. This extra step will make your chicken even more delicious in the bake.

Next, don’t skimp on the cheese! While the recipe calls for a cup of mozzarella and half a cup of Parmesan, feel free to add more if you love cheese. A generous layer of cheese on top creates a delightful, gooey crust that everyone will enjoy. Just remember to keep an eye on it while baking to prevent burning.

Another tip is to let your pasta cool slightly before mixing it with the chicken and sauce. This helps prevent the cheese from melting too quickly when you combine everything. It also ensures that the pasta doesn’t absorb too much sauce, keeping it perfectly al dente.

For added flavor, consider toasting your breadcrumbs before sprinkling them on top. This simple step adds a crunchy texture and a nutty flavor that complements the creamy cheese. You can mix the breadcrumbs with a little olive oil and Italian seasoning for an extra kick.

Cheesy Chicken Mozzarella Bake Recipe rest for a few minutes after baking. This resting time allows the flavors to meld together and makes it easier to serve. Plus, it helps the cheese set slightly, so each slice holds its shape better.

Cheesy Chicken Mozzarella Bake Recipe to new heights. Enjoy the process and the delicious results!

Breakdown of Time for Cheesy Chicken Mozzarella Bake Recipe

Cheesy Chicken Mozzarella Bake Recipe can help you plan your cooking efficiently. Here’s a simple breakdown of the time required for preparation and cooking.

Prep Time

The prep time for this delicious dish is approximately 15-20 minutes. This includes gathering your ingredients, shredding the chicken, and mixing everything together. If you’re using leftover chicken, this time can be reduced even further. Just make sure to have all your ingredients ready to go!

Cooking Time

Once your dish is assembled, the cooking time is about 25-30 minutes. During this time, the cheese will melt and bubble, creating that irresistible golden crust. Keep an eye on it to ensure it doesn’t overcook. If you notice the cheese browning too quickly, you can cover the dish with aluminum foil.

Total Time

Cheesy Chicken Mozzarella Bake Recipe to take around 40-50 minutes from start to finish. This includes both prep and cooking time. It’s a quick and satisfying meal that’s perfect for busy weeknights or when you want to impress guests without spending hours in the kitchen.

With this time breakdown, you can easily fit this delightful dish into your schedule. Enjoy the process and the delicious results!

Nutritional Information for Cheesy Chicken Mozzarella Bake Recipe

Cheesy Chicken Mozzarella Bake Recipe not only satisfies your taste buds but also provides valuable nutrients. Let’s break down the nutritional information for this delicious dish.

Calories in Cheesy Chicken Mozzarella Bake Recipe

Cheesy Chicken Mozzarella Bake Recipe contains approximately 350 calories. This makes it a hearty yet manageable option for dinner. The calorie count comes from the combination of chicken, cheese, pasta, and marinara sauce, all of which contribute to the overall energy content of the dish. If you’re watching your calorie intake, consider pairing it with a light salad or steamed vegetables to create a well-rounded meal.

Protein Content in Cheesy Chicken Mozzarella Bake Recipe

One of the standout features of this recipe is its protein content. Each serving provides about 30 grams of protein. This high protein level comes primarily from the shredded chicken and cheese, making it an excellent choice for those looking to increase their protein intake. Protein is essential for muscle repair and growth, making this dish a great post-workout meal or a filling dinner option.

Sodium Levels in Cheesy Chicken Mozzarella Bake Recipe

Cheesy Chicken Mozzarella Bake Recipe contains around 600 milligrams. While this is a reasonable amount for a main dish, it’s important to be mindful of your overall sodium intake throughout the day. If you’re concerned about sodium levels, consider using low-sodium marinara sauce or reducing the amount of added salt in the recipe. This way, you can enjoy the flavors without exceeding your daily sodium limit.

Cheesy Chicken Mozzarella Bake Recipe is not only delicious but also offers a good balance of calories, protein, and sodium. By being aware of these nutritional aspects, you can enjoy this comforting dish while keeping your dietary goals in mind.

FAQs about Cheesy Chicken Mozzarella Bake Recipe

Can I use frozen chicken for the Cheesy Chicken Mozzarella Bake Recipe?

Cheesy Chicken Mozzarella Bake Recipe. However, it’s important to thaw the chicken completely before cooking. You can do this by placing it in the refrigerator overnight or using the defrost setting on your microwave. Once thawed, cook the chicken until it reaches an internal temperature of 165°F (75°C). After cooking, shred the chicken and proceed with the recipe as usual. Using frozen chicken can be a convenient option, especially if you’re short on time!

How can I make the Cheesy Chicken Mozzarella Bake Recipe healthier?

Cheesy Chicken Mozzarella Bake Recipe healthier is easy with a few simple swaps. Here are some tips:

  • Whole Wheat Pasta: Substitute regular pasta with whole wheat pasta for added fiber and nutrients.
  • Low-Fat Cheese: Use low-fat mozzarella and Parmesan cheese to reduce the overall fat content while still enjoying that cheesy goodness.
  • Add Vegetables: Incorporate more vegetables like spinach, zucchini, or bell peppers. This not only boosts nutrition but also adds flavor and texture.
  • Reduce Sodium: Opt for low-sodium marinara sauce and limit the added salt in the recipe. This helps keep the sodium levels in check.

Cheesy Chicken Mozzarella Bake Recipe without sacrificing taste!

What sides pair well with the Cheesy Chicken Mozzarella Bake Recipe?

Cheesy Chicken Mozzarella Bake Recipe can enhance the meal experience. Here are some delicious options:

  • Garlic Bread: A classic side that complements the cheesy flavors perfectly.
  • Mixed Green Salad: A fresh salad with a light vinaigrette adds a refreshing crunch.
  • Steamed Vegetables: Broccoli, green beans, or carrots provide a healthy balance to the meal.
  • Caesar Salad: This hearty salad pairs well with the richness of the bake.
  • Roasted Potatoes: Crispy roasted potatoes seasoned with herbs make for a satisfying addition.

Cheesy Chicken Mozzarella Bake Recipe but also create a well-rounded meal that everyone will enjoy!

Conclusion on Cheesy Chicken Mozzarella Bake Recipe

Cheesy Chicken Mozzarella Bake Recipe is a delightful dish that brings comfort and satisfaction to any meal. Its combination of tender chicken, rich marinara sauce, and gooey cheese creates a flavor explosion that is hard to resist. Whether you’re cooking for your family or hosting friends, this recipe is sure to impress.

Not only is it easy to prepare, but it also allows for plenty of customization. You can add your favorite vegetables or experiment with different cheeses to make it your own. This versatility makes it a fantastic option for any occasion, from casual weeknight dinners to festive gatherings.

Cheesy Chicken Mozzarella Bake Recipe can fit into a healthy diet. By making simple adjustments, you can cater to various dietary needs while still enjoying a delicious meal.

So, why not give this recipe a try? Gather your ingredients, follow the steps, and enjoy the delightful aroma that fills your kitchen as it bakes. Your family and friends will surely appreciate the effort, and you’ll love the smiles on their faces as they dig into this cheesy goodness. Happy cooking!

Hearty Beef and Potato Skillet is a must-try recipe!

Introduction to Hearty Beef and Potato Skillet

Are you looking for a comforting meal that’s both delicious and easy to prepare? Look no further than the Hearty Beef and Potato Skillet! This dish combines the rich flavors of ground beef with tender potatoes, creating a satisfying meal that warms the soul. Perfect for busy weeknights or cozy family dinners, this skillet recipe is sure to become a favorite in your household.

The beauty of the Hearty Beef and Potato Skillet lies in its simplicity. With just a handful of ingredients, you can whip up a nutritious and filling dish in no time. The combination of beef and potatoes provides a hearty base, while the addition of spices and seasonings elevates the flavor profile. Plus, it’s versatile! You can easily customize it to suit your taste preferences or dietary needs.

Whether you’re a seasoned cook or a beginner in the kitchen, this recipe is straightforward and forgiving. It allows for creativity, so feel free to experiment with different vegetables or spices. In this article, we’ll guide you through the ingredients, preparation steps, and variations to make your Hearty Beef and Potato Skillet truly your own.

So, roll up your sleeves and get ready to create a dish that not only satisfies hunger but also brings joy to your dining table. Let’s dive into the ingredients you’ll need to get started!

Ingredients for Hearty Beef and Potato Skillet

To create a delicious Hearty Beef and Potato Skillet, you’ll need a few simple ingredients. Each component plays a vital role in building the flavors and textures of this dish. Here’s what you’ll need:

  • 1 pound ground beef: This is the star of the dish, providing protein and rich flavor.
  • 4 medium potatoes, diced (about 4 cups): Potatoes add heartiness and absorb the delicious broth.
  • 1 medium onion, chopped: Onions bring sweetness and depth to the skillet.
  • 2 cloves garlic, minced: Garlic adds a wonderful aroma and enhances the overall taste.
  • 1 cup beef broth: This adds moisture and richness to the dish.
  • 1 teaspoon paprika: Paprika gives a subtle smokiness and vibrant color.
  • 1 teaspoon dried oregano: Oregano adds an earthy flavor that complements the beef.
  • 1 teaspoon salt: Salt enhances all the flavors in the dish.
  • ½ teaspoon black pepper: Black pepper adds a hint of spice.
  • 2 tablespoons olive oil: Olive oil is used for sautéing the vegetables and beef.
  • 1 cup shredded cheddar cheese (optional): Cheese adds creaminess and a delicious topping.
  • Fresh parsley, chopped (for garnish): Parsley adds a pop of color and freshness.

These ingredients come together to create a comforting and satisfying meal. Feel free to adjust the quantities based on your preferences or dietary needs. Now that you have your ingredients ready, let’s move on to the step-by-step preparation of your Hearty Beef and Potato Skillet!

Step-by-Step Preparation of Hearty Beef and Potato Skillet

Now that you have gathered all your ingredients, it’s time to dive into the cooking process! This step-by-step guide will help you create a delicious Hearty Beef and Potato Skillet that your family will love. Let’s get started!

Step 1: Preparing the Ingredients

Before you start cooking, it’s essential to prepare your ingredients. Begin by washing and peeling the potatoes. Then, dice them into small cubes, about half an inch in size. This size ensures they cook evenly and quickly. Next, chop the onion and mince the garlic. Having everything ready will make the cooking process smoother and more enjoyable.

Step 2: Cooking the Beef

In a large skillet, heat the olive oil over medium heat. Once the oil is hot, add the chopped onion and minced garlic. Sauté them for about 3-4 minutes until the onion becomes translucent. This step releases wonderful aromas that will fill your kitchen!

Next, add the ground beef to the skillet. Use a spatula to break it apart as it cooks. Stir occasionally, allowing it to brown evenly. This should take about 5-7 minutes. If there’s excess fat, drain it off to keep your dish from becoming greasy.

Step 3: Adding the Potatoes

Once the beef is browned, it’s time to add the diced potatoes. Stir them into the skillet, ensuring they mix well with the beef and onions. This combination creates a hearty base for your dish. Now, pour in the beef broth, which will add moisture and flavor. Bring the mixture to a boil, and watch as the ingredients start to come together!

Step 4: Incorporating Vegetables and Seasonings

After the mixture reaches a boil, it’s time to add your seasonings. Sprinkle in the paprika, dried oregano, salt, and black pepper. These spices will enhance the flavor of your Hearty Beef and Potato Skillet. Stir everything together, making sure the potatoes are well-coated with the seasonings. This step is crucial for a delicious outcome!

Step 5: Simmering to Perfection

Now, reduce the heat to low and cover the skillet. Let it simmer for about 20-25 minutes. During this time, the potatoes will become tender, soaking up all the flavors from the beef and spices. Remember to stir occasionally to prevent sticking. If you want to add cheese, sprinkle it on top during the last 5 minutes of cooking. Cover again to let it melt beautifully.

Once the potatoes are tender and the cheese is melted, your Hearty Beef and Potato Skillet is ready to serve! Garnish with fresh parsley for a pop of color and freshness. Enjoy your delicious meal!

Variations of Hearty Beef and Potato Skillet

The Hearty Beef and Potato Skillet is a versatile dish that can be easily adapted to suit different tastes and dietary preferences. Whether you want to switch up the protein, add more vegetables, or experiment with spices, there are plenty of ways to make this dish your own. Let’s explore some exciting variations!

Alternative Proteins

If you’re looking for a lighter option, consider swapping out the ground beef for alternative proteins. Ground turkey or chicken can be great substitutes. They provide a similar texture while being lower in fat. For a vegetarian twist, try using lentils or black beans. These options are not only nutritious but also add a unique flavor to your skillet. Just remember to adjust the cooking time as needed, especially for lentils, which may require a bit more liquid and time to cook through.

Different Vegetables to Include

Adding vegetables is a fantastic way to boost the nutrition of your Hearty Beef and Potato Skillet. You can toss in bell peppers, peas, or corn for a pop of color and flavor. Carrots and green beans also work well, adding sweetness and crunch. Feel free to get creative! Just make sure to chop the vegetables into small pieces so they cook evenly with the potatoes. This not only enhances the dish but also makes it more visually appealing.

Spicing It Up: Flavor Variations

If you love bold flavors, consider spicing up your Hearty Beef and Potato Skillet. You can add a pinch of cayenne pepper for heat or a splash of Worcestershire sauce for depth. Fresh herbs like thyme or rosemary can also elevate the taste. For a smoky flavor, try adding chipotle powder or smoked paprika. These variations will give your dish a unique twist, making it exciting every time you prepare it!

With these variations, you can easily customize your Hearty Beef and Potato Skillet to fit your family’s preferences. Enjoy experimenting and discovering new flavors that you love!

Cooking Note for Hearty Beef and Potato Skillet

When preparing your Hearty Beef and Potato Skillet, there are a few important cooking notes to keep in mind. These tips will help ensure that your dish turns out perfectly every time, making your cooking experience enjoyable and stress-free.

First, always use a large skillet. A spacious skillet allows for even cooking and prevents overcrowding. This is crucial for browning the beef properly and ensuring that the potatoes cook evenly. If your skillet is too small, the ingredients may steam instead of sauté, which can affect the flavor and texture.

Next, consider the type of ground beef you use. Lean ground beef is a great choice as it has less fat, making your dish healthier. However, if you prefer a richer flavor, you can opt for ground beef with a higher fat content. Just remember to drain any excess fat after browning to keep the dish from becoming greasy.

Additionally, be mindful of the size of your potato cubes. Cutting them into uniform pieces ensures they cook at the same rate. If some pieces are larger than others, you may end up with unevenly cooked potatoes—some may be tender while others remain hard.

Lastly, don’t rush the simmering process. Allowing the skillet to simmer for the full 20-25 minutes is essential for the potatoes to absorb the flavors of the broth and seasonings. Stir occasionally to prevent sticking and ensure even cooking. If you find that the mixture is getting too thick, feel free to add a splash more beef broth or water to maintain the desired consistency.

By following these cooking notes, you’ll create a Hearty Beef and Potato Skillet that is not only delicious but also a joy to prepare. Happy cooking!

Serving Suggestions for Hearty Beef and Potato Skillet

Once your Hearty Beef and Potato Skillet is ready, it’s time to think about how to serve it! This dish is not only filling but also visually appealing, making it perfect for family dinners or gatherings. Here are some delightful serving suggestions to enhance your meal experience:

  • Serve with a Side Salad: A fresh green salad pairs wonderfully with the hearty flavors of the skillet. Consider a simple mixed greens salad with a light vinaigrette. The crispness of the salad will balance the richness of the beef and potatoes.
  • Accompany with Bread: Crusty bread or warm dinner rolls are great for soaking up the delicious broth. You can also serve garlic bread for an extra flavor boost. This combination makes for a comforting meal that everyone will enjoy.
  • Top with Fresh Herbs: While you already garnish with parsley, consider adding other fresh herbs like cilantro or chives. This adds a burst of freshness and color to your dish, making it even more appetizing.
  • Pair with a Beverage: A hearty meal deserves a good drink! Consider serving your Hearty Beef and Potato Skillet with a glass of red wine or a refreshing iced tea. These beverages complement the flavors beautifully.
  • Make it a Family Style Meal: Instead of plating individual servings, consider serving the skillet directly from the pan. This creates a warm, inviting atmosphere where everyone can help themselves. It’s a great way to encourage conversation and connection at the dinner table.

These serving suggestions will elevate your Hearty Beef and Potato Skillet experience. Whether you’re enjoying a quiet family dinner or hosting friends, these ideas will make your meal even more special. Enjoy every bite!

Tips for Making the Best Hearty Beef and Potato Skillet

Creating the perfect Hearty Beef and Potato Skillet is all about attention to detail and a few helpful tips. With these suggestions, you can enhance the flavors and textures of your dish, ensuring it turns out delicious every time. Here are some tips to keep in mind:

  • Choose Quality Ingredients: Start with fresh, high-quality ingredients. Opt for grass-fed ground beef if possible, as it tends to have better flavor and nutrition. Fresh potatoes and vegetables will also make a noticeable difference in taste.
  • Season Generously: Don’t be shy with your seasonings! The right amount of salt and spices can elevate your dish. Taste as you go, adjusting the seasonings to suit your preferences. Remember, you can always add more, but you can’t take it out!
  • Let It Rest: After cooking, let your Hearty Beef and Potato Skillet sit for a few minutes before serving. This resting time allows the flavors to meld together, making each bite even more delicious.
  • Experiment with Cheese: If you’re a cheese lover, try different types! While cheddar is a classic choice, consider using Monterey Jack, pepper jack, or even crumbled feta for a unique twist. Each cheese brings its own flavor profile to the dish.
  • Use Leftovers Creatively: If you have leftovers, don’t let them go to waste! Use them as a filling for tacos, burritos, or even as a topping for baked potatoes. This way, you can enjoy your Hearty Beef and Potato Skillet in new and exciting ways.
  • Incorporate Fresh Herbs: Fresh herbs can brighten up your dish. Consider adding chopped basil, thyme, or rosemary at the end of cooking for a burst of flavor. They add freshness and a lovely aroma that enhances the overall experience.
  • Adjust Cooking Time for Different Potatoes: If you’re using different types of potatoes, such as sweet potatoes or red potatoes, be aware that they may require different cooking times. Keep an eye on them to ensure they’re cooked to perfection.

By following these tips, you’ll be well on your way to making the best Hearty Beef and Potato Skillet. Each suggestion helps to enhance the dish, making it a delightful meal for you and your loved ones. Happy cooking!

Breakdown of Time for Hearty Beef and Potato Skillet

Understanding the time required for each step in preparing your Hearty Beef and Potato Skillet can help you plan your cooking efficiently. Here’s a detailed breakdown of the time you’ll need for preparation and cooking:

Prep Time

The prep time for your Hearty Beef and Potato Skillet is approximately 15-20 minutes. This includes washing, peeling, and dicing the potatoes, as well as chopping the onion and mincing the garlic. Having everything ready before you start cooking will make the process smoother and more enjoyable.

Cooking Time

The cooking time for this dish is about 30-35 minutes. This includes:

  • Sautéing the onion and garlic: 3-4 minutes
  • Cooking the ground beef: 5-7 minutes
  • Simmering the potatoes and seasonings: 20-25 minutes
  • Melting the cheese (if using): 5 minutes

Total Time

In total, you can expect to spend about 45-55 minutes from start to finish. This includes both prep and cooking time. With this efficient timeline, you can have a delicious Hearty Beef and Potato Skillet ready to serve in no time!

Nutritional Information for Hearty Beef and Potato Skillet

Understanding the nutritional content of your meals is essential for maintaining a balanced diet. The Hearty Beef and Potato Skillet not only satisfies your hunger but also provides valuable nutrients. Here’s a breakdown of the key nutritional information for this delicious dish:

Calories

Each serving of the Hearty Beef and Potato Skillet contains approximately 450 calories. This makes it a filling option for lunch or dinner. The combination of ground beef and potatoes provides a hearty meal that can keep you energized throughout the day. If you’re looking to reduce calories, consider using leaner meat or reducing the amount of cheese.

Protein

Protein is an essential nutrient for building and repairing tissues. Each serving of this skillet dish offers about 30 grams of protein. The ground beef is a significant source of protein, making this meal a great choice for those looking to increase their protein intake. If you opt for ground turkey or chicken, the protein content will remain similar, ensuring you still get a healthy dose of this vital nutrient.

Sodium

The sodium content in each serving of the Hearty Beef and Potato Skillet is approximately 800 milligrams. While sodium is necessary for bodily functions, it’s important to monitor your intake. If you’re watching your sodium levels, consider using low-sodium beef broth or reducing the added salt in the recipe. This way, you can enjoy the flavors without compromising your health.

Overall, the Hearty Beef and Potato Skillet is a nutritious meal that provides a good balance of calories, protein, and essential nutrients. By being mindful of ingredient choices, you can easily adjust the nutritional content to fit your dietary needs while still enjoying a delicious and satisfying dish.

FAQs about Hearty Beef and Potato Skillet

Can I make Hearty Beef and Potato Skillet ahead of time?

Absolutely! You can prepare your Hearty Beef and Potato Skillet ahead of time. Simply follow the recipe up to the point of simmering. Once the dish is cooked, let it cool completely before transferring it to an airtight container. Store it in the refrigerator for up to three days. When you’re ready to enjoy it, reheat it on the stove over low heat, adding a splash of beef broth if needed to keep it moist. This makes it a great option for meal prep!

What can I substitute for beef in Hearty Beef and Potato Skillet?

If you want to substitute beef in your Hearty Beef and Potato Skillet, there are several delicious options. Ground turkey or chicken works well and provides a lighter alternative. For a vegetarian option, consider using lentils, black beans, or even crumbled tofu. These substitutes will still give you a hearty texture while catering to different dietary preferences. Just remember to adjust the cooking time as needed, especially for lentils, which may require more liquid and time to cook through.

How do I store leftovers of Hearty Beef and Potato Skillet?

Storing leftovers of your Hearty Beef and Potato Skillet is easy! Allow the dish to cool completely, then transfer it to an airtight container. You can keep it in the refrigerator for up to three days. When you’re ready to eat, simply reheat it on the stove or in the microwave. If you find the mixture has thickened, add a little beef broth or water to restore its creamy consistency. Enjoy your leftovers without any hassle!

Can I freeze Hearty Beef and Potato Skillet?

Yes, you can freeze your Hearty Beef and Potato Skillet! To do this, let the dish cool completely before placing it in a freezer-safe container. Make sure to leave some space at the top, as the mixture may expand when frozen. It can be stored in the freezer for up to three months. When you’re ready to enjoy it, thaw it in the refrigerator overnight and reheat it on the stove. This makes for a convenient meal option on busy days!

Conclusion on Hearty Beef and Potato Skillet

In conclusion, the Hearty Beef and Potato Skillet is a delightful dish that brings comfort and satisfaction to any meal. With its simple ingredients and straightforward preparation, it’s perfect for both novice cooks and seasoned chefs. This recipe not only fills your belly but also warms your heart, making it an ideal choice for family dinners or gatherings with friends.

As you’ve seen, the versatility of this dish allows for endless customization. Whether you choose to swap proteins, add extra vegetables, or experiment with spices, the Hearty Beef and Potato Skillet can easily adapt to your taste preferences. This flexibility ensures that you can enjoy it time and time again without it ever feeling repetitive.

Moreover, the nutritional benefits of this meal make it a smart choice for those looking to maintain a balanced diet. With a good balance of protein, carbohydrates, and essential nutrients, it provides the energy needed for your day. Plus, the option to make it ahead of time or freeze leftovers adds convenience to your busy lifestyle.

So, gather your ingredients, follow the steps, and create your own Hearty Beef and Potato Skillet. Enjoy the process of cooking and the joy of sharing this delicious meal with your loved ones. We hope this recipe becomes a cherished part of your culinary repertoire, bringing warmth and happiness to your dining table for years to come!

Stay Connected

Get recipes via email: