Chocolate Granola Cups with Peanut Butter Filling

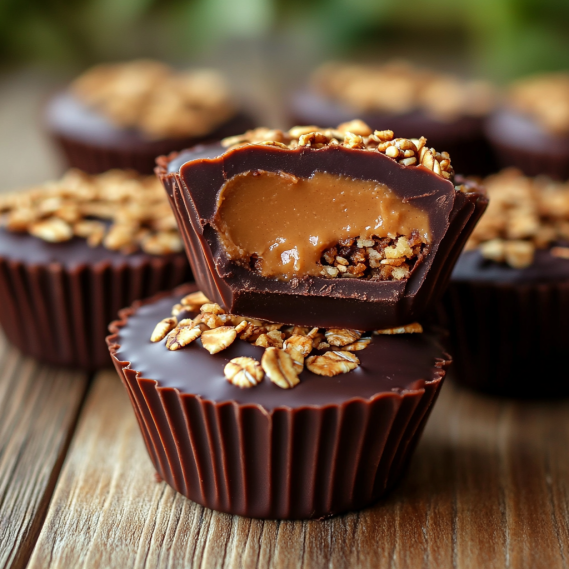
Imagine coming home after a long day, feeling tired but craving something sweet. The idea of chocolate and peanut butter makes you think of happy memories. That’s what Chocolate Granola Cups with Peanut Butter Filling offer, a mix of crunchy homemade granola and creamy peanut butter.

These treats are a chocolate recipe that’s both a snack and a sweet escape. They’re perfect for any time, whether you’re in a rush in the morning or enjoying a quiet evening. So, let’s make these unforgettable sweet treats together! You can find the full recipe details here: Chocolate Granola Cups with Peanut Butter.

Key Takeaways

  • Delightful blend of chocolate and peanut butter for an indulgent snack.
  • Made with simple ingredients, promoting healthy snacking.
  • Perfect for breakfast or on-the-go treats.
  • Easy to customize with toppings like banana slices or nuts.
  • No baking required—ideal for quick preparation.

Why You’ll Love Chocolate Granola Cups

Chocolate Granola Cups with Peanut Butter Filling are a tasty mix of flavors and textures. They offer a sweet and salty taste with a crunchy feel. These treats not only satisfy your cravings but also give you a nutritional boost.

A Perfect Balance of Flavors

The flavors in these granola cups are truly special. Dark chocolate and creamy peanut butter blend perfectly. You can add honey for sweetness or roasted nuts for saltiness. Each bite is a delightful experience, making them a great choice for any craving.

Nutritious Ingredients

These granola cups are packed with good stuff for your body. They have whole grains for fiber and peanut butter for healthy fats. Dark chocolate adds antioxidants, making them tasty and healthy. Enjoying these cups means you’re treating yourself right.

Ingredients You’ll Need

Making tasty Chocolate Granola Cups needs careful picking of ingredients. Knowing your options is key to making the perfect snack. This part covers the main ingredients, like chocolate, granola, and peanut butter.

Real Chocolate vs. Cocoa Powder

Choosing between real chocolate and cocoa powder is important. Real chocolate adds a deep, rich flavor to your granola cups. It’s full of healthy fats and antioxidants.

Cocoa powder, though, is lower in calories but has a similar taste. Your choice depends on what you like and your diet. Both add something special to your treats, so try them out to see what you prefer.

The Best Granola Choices

Granola choices are vast, so picking the right one is key. Store-bought granolas are easy and consistent, but homemade lets you control what goes in. For a healthy snack, pick granolas with less sugar and more fiber.

Whole grain granolas add extra nutrients, making them great for your Chocolate Granola Cups.

Choosing the Right Peanut Butter

Peanut butter can make your granola cups even better. You can choose smooth or crunchy, each with its own feel. Opt for natural peanut butter without added sugars for a healthier choice.

Look for brands with simple ingredients for the best taste and health benefits. Your favorite peanut butter style will make your treats special and healthy.

Step-by-Step Recipe Guide

Making Chocolate Granola Cups is a fun journey in homemade snacks. This guide gives you simple steps to make cooking easier and the results delicious. Follow this guide for a chocolate recipe that everyone will enjoy.

Preparing the Granola Mixture

First, get your ingredients ready: oats, nuts, honey, and chocolate chips. In a bowl, mix the oats and nuts for texture. In a saucepan, melt the honey and chocolate over low heat until it’s smooth.

Then, mix the wet ingredients with the dry ones until everything is well-coated.

Forming the Cups

Now, prepare your muffin tin. You can use cupcake liners or grease each cup to prevent sticking. Fill each cup with the granola mixture, pressing it down to make it stick together after baking.

Make sure the mixture is evenly distributed. This will help the cups be the same size and texture.

Making the Peanut Butter Filling

For the filling, mix creamy peanut butter with a bit of powdered sugar until it’s smooth. You can adjust the sweetness to your liking. Once the granola cups cool, fill each one with the peanut butter mixture.

Tips for Perfect Granola Cups

To make the perfect granola cup, follow some key baking tips. Knowing the right baking time and how to avoid sticking are important. These tips will help you make delicious granola cups.

Choosing the Right Baking Time

The baking time is key for perfect granola cups. Bake at 325°F for 15-20 minutes. Watch them closely because oven temperatures can differ.

They should be lightly golden when done. This ensures they’re crunchy but not overcooked. Try different times to find your ideal texture.

Avoiding Sticking Issues

Sticky granola cups are a problem. But, there are easy fixes. Use non-stick spray or silicone liners in your muffin tins.

Both prevent sticking and make cleaning easy. Let the cups cool a bit in the pan. Then, use a butter knife to gently loosen them. These tips will make baking stress-free.

Variations to Try

Chocolate Granola Cups are perfect for making your own special treats. You can add different ingredients to make them healthier and tastier. Let’s explore some fun ways to add nuts and seeds, and try out different sweeteners.

Adding Nuts or Seeds

Adding nuts and seeds makes your granola cups crunchy and nutritious. Here are some great choices:

  • Chopped almonds for a classic taste.
  • Walnuts for added omega-3 fatty acids.
  • Pumpkin seeds for a seasonal twist.
  • Sunflower seeds to enhance texture and flavor.

By choosing your favorites, you can make each bite of your chocolate granola cups a delightful surprise.

Sweeteners to Consider

Trying different sweetening options can change the taste of your granola cups. Here are some options to try:

SweetenerFlavor ProfileNotes
HoneyFloral and sweetGreat for moistness in desserts.
Agave SyrupMild and neutralLower glycemic index than sugar.
Maple SyrupRich and earthyWonderful addition for fall flavors.
Coconut SugarCaramel-likeRich in minerals compared to refined sugar.

Trying these sweeteners can make your chocolate granola cups even better. They’ll be delicious and just right for you.

Storing Your Granola Cups

Keeping your Chocolate Granola Cups fresh is key. Using the right storage tips makes them even more enjoyable. Whether you’re enjoying them at home or on the go, knowing how to store them is important.

Best Storage Methods

For the best taste, store them in airtight containers. Glass or plastic containers with tight lids are perfect. They keep moisture out and keep the texture right.

Place parchment paper between layers to stop them from sticking. Some prefer resealable bags, but make sure to remove air for the best keeping snacks fresh.

How Long They Last

The shelf life of your granola cups depends on storage. At room temperature, they last about two weeks. Refrigeration can extend this to three weeks.

Freezing is the best option, lasting up to three months. Just thaw what you need in the fridge before eating. For more tips, check out this resource.

Serving Suggestions

Enhancing your experience with Chocolate Granola Cups is easy with different serving ideas. These treats are even better with fresh fruits or a glass of milk. Each pairing brings its own flavor and texture, making them great for breakfast, snacks, or dessert.

Pairing with Fruits

Pairing snacks with fruits makes Chocolate Granola Cups even tastier. Fresh berries like strawberries or blueberries add natural sweetness. Bananas, sliced and next to the cups, add a creamy touch.

These fruits not only taste great but also look good. They’re perfect for sharing.

Enjoying with a Glass of Milk

A glass of milk is the classic drink to go with Chocolate Granola Cups. Choose whole, almond, or oat milk for a satisfying taste. The milk’s creaminess pairs well with the chocolate and peanut butter.

Health Benefits of Chocolate & Peanut Butter

Dark chocolate and peanut butter are great for healthy snacking. They offer a tasty treat and important nutrients for well-being.

Nutritional Perks of Dark Chocolate

Dark chocolate, rich in cacao, has many health benefits. It’s full of antioxidants that fight free radicals and help the heart. Eating dark chocolate regularly can improve blood flow and heart function.

Choosing dark chocolate can make your snacks healthier without losing flavor.

Benefits of Peanut Butter

Peanut butter is another key ingredient in these cups. It’s full of protein and healthy fats, boosting energy. It also helps you feel full, leading to healthier snacking.

Adding peanut butter to your snacks makes them taste better and adds important nutrients for your health.

For a tasty and healthy treat, try the Chocolate Peanut Butter Granola Cups. They combine great taste with health benefits from these nutrient-rich foods.

Chocolate Granola Cups for Special Diets

Chocolate granola cups can be made for everyone. They’re perfect for those looking for gluten-free snacks or vegan desserts. It’s easy to make them fit all diets.

Gluten-Free Alternatives

For gluten-free granola cups, start with certified gluten-free oats. Many brands have gluten-free granola mixes. This way, you get great flavors without gluten.

Make sure to check the labels. This ensures that all ingredients are gluten-free. So, even those with gluten sensitivities can enjoy these treats.

Vegan Options

For vegan chocolate granola cups, try almond or cashew butter instead of peanut butter. It adds a unique taste and keeps it plant-based. Use maple syrup or agave nectar for sweetness instead of honey.

These changes make the cups vegan-friendly. Now, anyone can enjoy them while following vegan guidelines.

Fun Ways to Decorate

Getting creative with your Chocolate Granola Cups adds fun and flavor. Whether it’s for a party or a simple snack, decorating can turn treats into delightful masterpieces. With a few creative toppings, you can make your treats look great.

Topping Ideas for Presentation

There are many ways to decorate your granola cups. Consider using:

  • Shredded coconut for a tropical vibe
  • Colorful sprinkles to add excitement
  • Drizzles of chocolate for an indulgent touch
  • Chopped nuts for added crunch
  • Fresh berries for a pop of color and flavor

These toppings not only make your presentation better. They also add a delightful texture and taste that goes well with the granola cups.

Incorporating Seasonal Flavors

Seasonal recipes can keep your Chocolate Granola Cups exciting all year. Try adding:

  • Pumpkin spice during autumn for a cozy flavor
  • Mint extract in winter for a refreshing twist
  • Fresh fruits like strawberries in spring for a fruity touch
  • Cinnamon during the holidays for warmth

By using these flavors, you can make each treat a celebration of the season. It’s a great way to elevate your decorating snacks game.

Final Thoughts on Chocolate Granola Cups

Chocolate Granola Cups are more than just a tasty treat. They are a perfect mix of deliciousness and health. The blend of chocolate and peanut butter is both sweet and nutritious. It’s a great choice for any snack time.

Exploring different flavors is exciting. You can add nuts, cinnamon, or try different butters. Each change makes the recipe special. It’s a fun way to get creative and find your favorite version.

Starting with Chocolate Granola Cups is a great idea. They let you enjoy good taste while making healthy choices. With a few ingredients and some creativity, you can make these treats a regular part of your diet.


FAQ

Can I use store-bought granola for the Chocolate Granola Cups?

Absolutely! Store-bought granola can save time. Just pick a kind that’s low in sugar and made with wholesome ingredients for the best results.

How can I make these granola cups vegan?

To make the Chocolate Granola Cups vegan, use dairy-free chocolate. Also, make sure your peanut butter doesn’t have any dairy.

What are some alternative sweeteners I can use for the peanut butter filling?

Honey, maple syrup, and agave syrup are great alternatives. They add sweetness without losing flavor in your peanut butter filling.

How should I store my Chocolate Granola Cups for freshness?

Store them in an airtight container at room temperature. They last 5-7 days. For longer storage, freeze them!

Can I add nuts or seeds to the granola mixture?

Yes! Adding nuts or seeds boosts nutrition. It also adds crunch and flavor to your granola cups.

What type of chocolate should I use for these cups?

Dark chocolate is best for its rich flavor and health benefits. But, milk chocolate works too if you like it sweeter.

Can I make the granola cups ahead of time?

Definitely! Prepare them ahead and store them. Just keep them in an airtight container to stay fresh.

What are some fun ways to decorate my Chocolate Granola Cups?

Decorate with shredded coconut, chocolate drizzles, or edible glitter. It adds a fun and festive touch!

Are Chocolate Granola Cups a healthy snack option?

Yes! They’re made with nutritious ingredients like granola and peanut butter. They’re a healthy snack full of energy-boosting nutrients.

What other fillings can I try in my granola cups?

Try almond butter, Nutella, or yogurt for different flavors. Just make sure they hold up well as cups.

Perfect Chocolate Chip Pancakes Recipe | Quick & Easy

Imagine a lazy Sunday morning with the sun shining in. The kitchen fills with the sweet smell of Chocolate Chip Pancakes. It’s a moment that brings back happy memories and family times.

You don’t need to be a pro to make this easy pancake recipe. In a few simple steps, you can turn a regular morning into a special treat. Warm, fluffy pancakes with chocolate chips are ready to delight everyone at the table.

These pancakes are great for any day, whether it’s a regular breakfast or a weekend brunch. They’re sure to make everyone smile. Let’s make this quick and easy recipe together!

Key Takeaways

  • Chocolate Chip Pancakes are perfect for a cozy breakfast experience.
  • This recipe is quick and easy, making it accessible for everyone.
  • These pancakes are loved by both kids and adults alike.
  • An ideal homemade breakfast option for any occasion.
  • Incorporate fun add-ins to customize your pancakes.

Why Chocolate Chip Pancakes Make a Great Breakfast

Chocolate chip pancakes are loved by many for their mix of nostalgia and joy. They are a classic breakfast treat that brings back happy memories of mornings with family. The fluffy pancakes with chocolate chips are a treat for everyone. They’re not just tasty but also bring people together.

The Comfort Food Factor

The comfort of chocolate chip pancakes is undeniable. Each bite offers a mix of rich flavors that satisfy. They’re a top pick for breakfast comfort, making everyone feel welcome. Their sweetness and warmth can brighten up any morning.

Ideal for Any Age

Kids love these pancakes because of the fun and sweet chocolate chips. They make breakfast fun for kids. Grown-ups enjoy how easy they are to make and the homemade taste. They’re perfect for families of all ages.

Perfect for Any Occasion

Chocolate chip pancakes are great for any time. They’re perfect for a quick breakfast or a special brunch. You can add fresh fruits or syrup to make them even more special. They always impress, no matter the occasion.

Ingredients You’ll Need for Success

Making the perfect chocolate chip pancakes is easy with the right ingredients. Having these items ready makes cooking fun and ensures tasty results. Whether you’re making classic pancakes or trying new recipes, the right ingredients are key.

Essential Pantry Staples

  • All-purpose flour
  • Baking powder
  • Granulated sugar
  • Eggs
  • Milk
  • Vanilla extract
  • Salt

These ingredients work well together. Flour gives the pancakes structure, and baking powder makes them light. Eggs help them stick together, and milk keeps them moist. Vanilla adds a special touch to the flavor.

Fun Add-Ins to Enhance Flavor

Adding fun ingredients can make your pancakes even better. Try adding:

  • Sliced bananas
  • Chopped nuts (walnuts, almonds, or pecans)
  • Seasonal fruits (berries, peaches, or apples)
  • Cinnamon or nutmeg for warmth

These extras add texture and excitement. Don’t be afraid to mix and match to create your own special pancake recipes. They’re sure to be a hit at breakfast.

Step-by-Step Guide to Making Pancake Batter

Making the perfect pancake batter is key to getting those fluffy pancakes everyone loves. This easy pancake recipe will walk you through each step. Follow these steps for delicious results.

Mixing Dry Ingredients

First, gather all your dry ingredients. In a large bowl, mix flour, baking powder, sugar, and a pinch of salt. Whisk until everything is well mixed and there are no lumps. This step is important for your pancakes to rise right.

Incorporating Wet Ingredients

Now, add the wet ingredients. In another bowl, mix milk, eggs, and melted butter. Slowly add this mix to the dry ingredients. Stir gently with a spatula or spoon. Don’t overmix; a few lumps are okay for a tender texture.

Tips for Achieving the Right Consistency

The last step is getting the batter just right. It should be thick but pourable. If it’s too thick, add a bit of milk. If it’s too thin, add flour. Let the batter rest for a few minutes. This makes your pancakes even fluffier.

Choosing the Right Chocolate Chips

Choosing the right chocolate chips is key for great chocolate chip pancakes. The type of chocolate affects flavor, texture, and overall taste. Whether you prefer traditional or specialty chocolate, there’s something for everyone.

Dark vs. Milk Chocolate

Dark chocolate has a deep, rich flavor that balances with pancake sweetness. Milk chocolate, on the other hand, is creamier and sweeter. It’s a classic choice for many. Try both to see which you like best.

Specialty Chocolate Options

Looking to try something new? Specialty chocolate chips are out there. White chocolate adds a sweet touch that’s great with fruit. Flavored chips like mint or caramel can add a fun twist. Check out different chocolate chip options to find your new favorite.

Cooking Techniques for Fluffy Pancakes

Making perfect chocolate chip pancakes is more than just using the right ingredients. It’s also about mastering cooking techniques. Getting the skillet temperature right is key to avoid burnt or undercooked pancakes. This lets you confidently follow an easy pancake recipe.

Optimal Skillet Temperature

The perfect skillet temperature for pancakes is about 375°F (190°C). This heat melts chocolate chips smoothly without ruining the pancake’s texture. To check the skillet, drop a few water drops. If they quickly evaporate, it’s ready for batter.

This method ensures a golden outside and a soft inside. It’s a simple trick for perfect pancakes.

Perfecting the Flip

Knowing when to flip pancakes is important for their look and feel. Watch for bubbles on the surface. This means it’s time to turn them. Use a spatula to lift the edge and check for color before flipping.

A quick but careful flip keeps the pancake’s shape. This technique makes your pancakes irresistibly fluffy and impressive.

For more tips on making great chocolate chip pancakes, check out this easy pancake recipe. It offers more advice for success.

Tips for Serving Your Pancakes

Chocolate chip pancakes are not just tasty; they can also make your brunch or breakfast special. Add some flair to your pancakes with creative serving ideas. Move away from the usual butter and syrup for a fun twist that will wow your guests.

Creative Serving Ideas

Try out exciting toppings to make your pancakes a real treat. Here are some ideas:

  • Add a dollop of whipped cream for a light touch.
  • Top with Greek yogurt for extra protein.
  • Include fresh fruits like strawberries, bananas, or blueberries for sweetness and color.
  • Drizzle nut butter for a rich, nutty taste.

Pairing with Syrups and Fruits

Choosing the right syrup can really enhance the taste. Go for classic maple syrup or try something new like caramel or chocolate sauce. These combinations can make your pancakes a memorable and balanced meal, ideal for brunch. Want a recipe to start with? Check out this chocolate chip pancakes recipe for inspiration.

Making Them Healthier

If you love chocolate chip recipes but want a healthier version, there are easy changes you can make. These tweaks can turn your homemade breakfast into a nutritious treat. You can enjoy your favorite flavors without losing out on health.

Whole Wheat Flour Alternatives

Using whole wheat flour can boost the fiber in your pancakes. This change not only helps with digestion but also adds a nutty taste that goes well with chocolate chips. If you want something lighter, mix whole wheat with all-purpose flour. This keeps the texture right while adding health perks.

Reducing Sugar Without Sacrificing Flavor

Lowering sugar doesn’t mean your pancakes have to be less sweet. Try using honey or mashed bananas to sweeten them. These natural sweeteners add a touch of sweetness and extra nutrients, making your breakfast healthier.

Storage Tips for Leftover Pancakes

Leftover chocolate chip pancakes can be enjoyed again with the right storage. Keeping them fresh lets you enjoy them later. Whether you refrigerate or freeze, keeping quality is important.

Best Practices for Refrigeration

For refrigerating pancakes, let them cool first. Stack them with parchment paper to prevent sticking. Use an airtight container to keep them moist and flavorful. Try to eat them within three to four days for the best taste.

Reheating Methods for Quality

Reheating pancakes is easy and keeps them tasty. Here are some ways to do it:

  • Toaster: Great for a crispy outside. Just pop them in until warm.
  • Oven: Preheat to 350°F. Place on a baking sheet for 10 minutes for even heat.
  • Microwave: Place on a microwave-safe plate with a damp paper towel. Heat for 30 seconds to 1 minute. This keeps them moist but be careful not to overheat.

These methods help your pancakes stay delicious, reducing waste and making meal prep easier.

Variations to Try

Trying different versions of classic chocolate chip pancakes can make cooking fun. It lets everyone enjoy these treats, tailored to their diet. You can find vegan or gluten-free options that are just as tasty.

Vegan Chocolate Chip Pancakes

To make vegan chocolate chip pancakes, use plant-based ingredients. Try almond milk or oat milk instead of regular milk. Flaxseed mixed with water is a great egg substitute.

This mix not only adds texture but also nutrients. It makes these pancakes just as good as the original.

Gluten-Free Options

If you can’t have gluten, there are many flour substitutes. Almond flour and oat flour are great for gluten-free pancakes. They offer a rich taste and keep the pancakes fluffy.

Conclusion: Enjoy Your Perfect Chocolate Chip Pancakes!

Now you know how to make chocolate chip pancakes. It’s time to enjoy the yummy results of your breakfast adventure. These pancakes are not just tasty but also make memories at the breakfast table.

Making chocolate chip pancakes is fun to do with family. It brings joy and starts the day with smiles.

Share Your Pancake Creations

Share your pancake recipes and creations on social media. Every pancake tells a story, whether it’s classic or creative. This is a great way to inspire friends and family to join in the fun.

Join the Pancake Lovers Community

Connect with other pancake lovers who share your passion. The pancake community loves to share ideas and tips. It’s a great way to find new recipes and appreciate the joy of chocolate chip pancakes.


FAQ

Can I make chocolate chip pancakes without eggs?

Absolutely! You can use mashed bananas, applesauce, or flaxseed mixed with water. These options make a vegan version that’s fluffy.

What’s the secret to fluffy pancakes?

To get fluffy pancakes, don’t overmix the batter. Just stir until it’s combined. Let it sit for a few minutes before cooking. Fresh baking powder helps them rise well.

How do I store leftover chocolate chip pancakes?

Keep leftover pancakes in an airtight container in the fridge for up to 3 days. Or freeze them for longer. Reheat in a toaster or oven to keep them fluffy.

What can I use instead of all-purpose flour?

Try whole wheat flour or gluten-free options like oat or almond flour. They add unique flavors and textures to your pancakes.

How can I customize my chocolate chip pancakes?

Add nuts, berries, or cinnamon for extra taste. Try different chocolate chip recipes to find your favorite!

What toppings do you recommend for serving pancakes?

Top with whipped cream, fresh fruits, yogurt, or maple or chocolate syrup. A sprinkle of powdered sugar adds a sweet touch!

Are chocolate chip pancakes a good option for brunch gatherings?

Yes! They’re loved by everyone, making them great for brunch. Offer various toppings for a fun breakfast experience!

Decadent Easy Turtle Bars Recipe | Quick & Tasty!

The holidays bring magic to the kitchen, with smells and laughter everywhere. Last winter, I was in a busy kitchen with family, all looking for a sweet treat. We found a turtle bars recipe that had everything: buttery shortbread, caramel, and chocolate.

Kids were laughing as they unwrapped caramels and poured chocolate. Adults were arguing over nuts or no nuts. These Easy Turtle Bars became our favorite dessert for fun gatherings and cozy nights.

They’re quick to make, with only 20 minutes of prep time. They turn simple ingredients into a rich, delicious treat. If you want a chocolate dessert that will wow everyone, let’s make these bars together! For the full recipe and tips, visit this link.

Key Takeaways

  • Easy Turtle Bars are a delectable mix of shortbread, caramel, and chocolate.
  • Perfect for holiday gatherings or any quick dessert need.
  • Preparation takes just 20 minutes, making them a simple treat to whip up.
  • Customizable with or without nuts for personal preference.
  • A delightful dessert option that’s great for involving children in the kitchen.

What Are Easy Turtle Bars?

Easy Turtle Bars are a tasty treat that combines flavors of favorite candies into a bar. They have a rich, layered dessert that looks and tastes great. With sweet chocolate, caramel, and a crunchy texture, they’re perfect for any event.

A Delicious Dessert Overview

This dessert overview shows why turtle bars are loved by many. They mix textures in a way that’s both pleasing and comforting. Each bite is a melt-in-your-mouth experience, making them great for any gathering.

Main Ingredients to Note

The main ingredients in these turtle bars are simple and easy to find. The key parts are:

  • Shortbread cookie base: This gives a rich, buttery taste.
  • Creamy caramel sauce: Adds a sweet, creamy layer.
  • Semi-sweet chocolate: Provides a rich contrast on top.
  • Chopped pecans: Add a nice crunch and nutty flavor.

Knowing these ingredients is key for making this turtle bars recipe just right. Each part affects the taste and texture, making for a delicious dessert.

Why You’ll Love This Recipe

Easy Turtle Bars are perfect for many occasions. They’re great for birthday parties or cozy family gatherings. Their look and taste are sure to impress everyone, making them a hit at any event.

Whether you’re serving them at a holiday feast or a potluck, these bars are always a crowd-pleaser.

Perfect for Any Occasion

There are countless occasions for turtle bars, including:

  • Birthday celebrations
  • Holiday festivities
  • Family movie nights
  • Bake sales
  • Potlucks

These bars are a treat for all gatherings. They impress friends and family with their appealing presentation and indulgent taste.

Quick and Simple Preparation

This recipe is a breeze to make. Even novice bakers can whip up these treats in no time. It’s a quick dessert that saves time and lets you enjoy the moment.

The minimal effort needed makes Easy Turtle Bars ideal for busy lives. They ensure more time for making memories and enjoying delicious desserts.

Essential Ingredients for Easy Turtle Bars

Making the perfect easy turtle bars starts with the right ingredients. Each part is key to the delicious layers of flavor and texture. Here’s what you need for this turtle bars recipe.

Shortbread Cookie Base

The shortbread base is the foundation of easy turtle bars. It’s made with flour, sugar, butter, and a bit of salt. Softened butter is important for a tender crust. Mixing it well gives a nice crunch and flavor.

Rich Caramel Sauce

The caramel sauce is what makes these bars special. You can make it from scratch or buy it. It should be smooth and a bit thick. This layer adds flavor to every bite.

Chocolate Topping

The final touch is a layer of melted chocolate. Use semi-sweet chocolate chips or bars. Melting it right is key to avoid a grainy texture. This chocolate layer adds to the sweet caramel and crunchy pecans, making it a treat for your taste buds.

Step-by-Step Preparation Guide

Making turtle bars is a fun journey through flavors. This guide will help you make the shortbread, caramel, and chocolate topping.

Making the Shortbread Base

First, preheat your oven to 350°F and grease a baking dish. Mix the shortbread ingredients until crumbly. Press it into the dish.

Bake until it’s lightly golden. Let it cool. This helps the caramel stick better.

Preparing the Caramel Layer

To make caramel, melt it on the stovetop or in the microwave. Pour it over the cooled shortbread. Spread it out.

Let it set for a few minutes. Or, chill it in the fridge. This keeps each layer unique.

Melting the Chocolate Topping

To make the chocolate topping, melt it in a double boiler or microwave. Stir every 30 seconds. Pour it over the caramel.

Spread it evenly. Sprinkle chopped pecans on top while it’s warm. This makes the bars look great.

Tips for the Best Turtle Bars

Creating the perfect Easy Turtle Bars requires attention to detail. Choosing the right ingredients and preparation methods is key. This ensures your dessert is a hit.

Choosing Quality Ingredients

For the best taste and texture, use top-notch ingredients. Real butter makes the shortbread base rich. Choose semi-sweet chocolate you love for better flavor. Fresh pecans add a nice crunch.

Time-Saving Techniques

Save time by using smart tips. Make the shortbread base a day early to rest. Store-bought caramel saves time without losing flavor. Pre-measuring ingredients makes the process faster.

Customizing Your Bars

Customizing Easy Turtle Bars is fun. Try different chocolates, like milk or dark, for your taste. Add sea salt or toppings like shredded coconut or nuts for a unique twist.

Serving Suggestions for Turtle Bars

Enjoying easy turtle bars can be even better with the right serving suggestions. These treats are tasty alone but also great with other flavors. Here are some ways to make your dessert time special.

Pairing with Ice Cream

Turtle bars and ice cream are a match made in dessert heaven. Try them with creamy vanilla or rich caramel ice cream. The ice cream’s creaminess balances the chocolate and pecans perfectly.

For an extra treat, drizzle caramel or chocolate sauce over the ice cream. It adds a rich, indulgent flavor.

Ideal Beverages to Complement

Drinks can make your turtle bars even more enjoyable. Hot drinks like coffee or hot cocoa bring out the chocolate flavors. It makes each bite more delightful.

For a unique twist, try a glass of dessert wine. It pairs well with the bars’ sweetness. It lets guests explore different flavors that enhance their meal.

Serving SuggestionsPairing Options
Ice CreamVanilla, Caramel
Hot BeveragesCoffee, Hot Cocoa
Dessert WineSweet White, Port

Variations on Easy Turtle Bars

Exploring different versions of easy turtle bars can make your dessert experience even better. If you want a nut-free option, it’s easy to make. Just remove the pecans and add sunflower seeds or a crunchy biscuit topping. This way, you keep the great taste that makes these bars so loved.

Nut-Free Alternative

Nuts add texture and flavor to desserts, but you can also enjoy nut-free turtle bars. Using sunflower seeds gives a similar crunch without the nuts. You can also try other crunchy toppings that fit your diet.

Adding a Peanut Butter Layer

Adding a peanut butter layer is a tasty twist. Heat the peanut butter until it’s smooth, then spread it over the caramel layer. Finish with chocolate for a unique treat that peanut butter fans will love.

These variations open up new possibilities beyond the classic recipe. Be creative and make your turtle bars special at parties. Enjoy the fun flavors and textures of each unique version.

For more ideas, check out the Easy Turtle Bars recipe for inspiration.

Perfecting Your Turtle Bars

Making turtle bars can be a fun challenge. To get it right, watch out for common mistakes. Each layer must be made with care for a treat everyone will enjoy.

Avoiding Common Mistakes

Many bakers overcook the shortbread or caramel. It’s important to find the right balance. The shortbread should be lightly golden, and the caramel smooth and grain-free.

Achieving the Right Texture

The texture of turtle bars is key. Let each layer cool before adding the next. This keeps each layer distinct and adds to the dessert’s appeal.

Celebrating Special Occasions with Turtle Bars

Easy Turtle Bars are perfect for any festive gathering. They can be made to fit any theme, making them great for all-year celebrations. Turtle bars are loved for both casual and formal events.

Ideal for Holidays

Turtle bars are a hit for holiday desserts with their rich flavors. Add seasonal decorations to make them even more special. Try drizzling melted chocolate in holiday colors or topping them with seasonal candies.

They taste amazing and look great, making them a standout choice for winter, birthdays, and more.

Perfect for Parties and Gatherings

Turtle bars are a crowd-pleaser for parties, potlucks, or casual meetups. They can be made ahead of time, served chilled or at room temperature. This makes them easy to serve.

Impress your guests with their rich flavor and textures. Turtle bars are sure to make a lasting impression, perfect for any gathering.

Conclusion: Your Next Dessert Adventure Awaits!

Easy Turtle Bars are the perfect treat for anyone looking for something quick yet impressive. They mix sweet, crunchy, and creamy textures in a way that pleases every sweet tooth. This makes them a hit for any event or just for a special treat.

Are you ready to try your hand at baking? This article gives you all the tips and steps to make these delicious Turtle Bars. Each bite is a mix of flavors that will make everyone want more.

So, put on your apron and start this fun dessert journey. The joy of baking and the happiness of enjoying a homemade treat are just around the corner with every batch of Easy Turtle Bars!


FAQ

What are Easy Turtle Bars made of?

Easy Turtle Bars have layers of buttery shortbread, rich caramel sauce, smooth chocolate, and crunchy pecans. They are a decadent treat.

How long does it take to make Easy Turtle Bars?

It takes about 30 minutes to prepare Easy Turtle Bars. Then, they need 2 hours to cool. So, you can enjoy them in about 2.5 hours.

Can I make Easy Turtle Bars ahead of time?

Yes! You can make Easy Turtle Bars ahead of time. Store them in the fridge for up to a week. Or, freeze them for even longer, just wrap them well.

What can I use instead of pecans in the recipe?

If you want a nut-free option, try sunflower seeds or omit them. You can also use crushed cookies for extra texture.

How should I store leftover Turtle Bars?

Keep leftover Turtle Bars in an airtight container at room temperature for a few days. Or, refrigerate them for up to a week. For freezing, wrap them in plastic wrap and foil, then in a container.

Can I make these bars with a different type of chocolate?

Absolutely! You can use milk, dark, or white chocolate. Just remember, the taste will change with different chocolates.

What is the best way to melt chocolate for the topping?

To melt chocolate, use a double boiler or microwave it in short bursts (30 seconds at a time). Stir between each interval to avoid burning.

Are there any vegan alternatives for this recipe?

Yes! For a vegan version, use vegan butter, dairy-free caramel, and non-dairy chocolate. They will be just as delicious!

Can I customize the toppings for my Turtle Bars?

Definitely! Try adding different toppings like shredded coconut, sea salt, or extra chocolate. It’s a great way to make them your own.

Bananas Foster Cinnamon Rolls Recipe | Indulge Today

Imagine waking up to the warm scent of freshly baked gourmet cinnamon rolls. It’s a Sunday morning ritual that beckons you to indulge. Today, we’re taking it to the next level with a delightful twist: Bananas Foster Cinnamon Rolls.

Merging the rich, buttery flavors of classic New Orleans-style Bananas Foster with the comforting goodness of breakfast pastries, these rolls are not just a treat but an experience. Perfect for brunch with friends or a decadent dessert, this recipe captures the soul of indulgence. Every bite is as memorable as your best mornings.

Key Takeaways

  • Bananas Foster Cinnamon Rolls blend gourmet flavors with classic breakfast pastries.
  • These rolls are perfect for brunch or as a luxurious dessert recipe.
  • Fresh bananas and a rich sauce elevate the traditional cinnamon roll.
  • Simple steps make it easy to create this decadent treat at home.
  • Customize the recipe for personal tastes and dietary needs.

What Are Bananas Foster Cinnamon Rolls?

Bananas Foster cinnamon rolls mix two favorite treats into one. They take the classic Bananas Foster flavors and add them to warm, gooey cinnamon rolls. This creates a unique banana dessert that’s both indulgent and irresistible.

Origin of Bananas Foster

Bananas Foster was born in the 1950s in New Orleans. Chef Paul Blangé created it. It’s made with bananas cooked in butter and brown sugar, with a hint of rum for extra richness.

This dessert became famous for its warm, rich flavors. It’s often flamed at the table, adding to its charm.

The Appeal of Cinnamon Rolls

Cinnamon rolls hold a special spot in many hearts. Their soft texture and sweet cinnamon filling offer a comforting treat. They’re perfect for breakfast or dessert, satisfying sweet cravings.

The aroma of cinnamon rolls baking is irresistible. It makes them even more appealing.

Combining Flavors for a Delightful Treat

Mixing Bananas Foster with cinnamon rolls creates a dessert dream. The caramelized bananas and rich sauce make the cinnamon rolls even better. This fusion is a perfect way to enjoy both banana desserts and cinnamon rolls.

Ingredients You’ll Need

To make Bananas Foster Cinnamon Rolls, you need quality ingredients. Each one adds its special touch to the pastries. Here’s what you’ll need:

Fresh Bananas

Ripe bananas are key for this recipe. Their sweetness and moisture make the rolls taste amazing. Choose bananas that are a bit overripe for the best flavor.

Cinnamon Roll Dough

You can make your own dough or buy it. The dough is the base of these pastries. Homemade dough lets you customize, while store-bought saves time for delicious treats.

Brown Sugar and Butter

Brown sugar and butter are vital for the Bananas Foster flavor. Brown sugar brings deep sweetness, and butter makes the sauce creamy. Together, they make your cinnamon rolls extra special.

Toppings and Extras

Add toppings like chopped nuts or caramel for extra flavor and look. These extras make your treats stand out. Feel free to get creative with them.

Step-by-Step Instructions

Making Bananas Foster Cinnamon Rolls is a fun process. It combines different flavors into a tasty treat. Follow these easy steps to make sure your rolls are perfect, great for any baking or dessert ideas.

Making the Dough

Start by making the cinnamon roll dough. Mix flour, yeast, milk, and eggs for a soft dough. Knead it until smooth, then let it rise in a warm place for about 1 hour. This makes the dough fluffy, adding to the rolls’ appeal.

Preparing the Bananas Foster Sauce

While the dough rises, make the Bananas Foster sauce. Melt butter in a skillet and mix in brown sugar until it bubbles. Add sliced bananas for a caramelized flavor. This sauce makes the rolls incredibly tasty. Drizzling it over the dough prepares them for a sweet dessert.

Assembling the Rolls

Once the dough has risen, roll it out on a floured surface. Spread the Bananas Foster sauce over the dough, covering every inch. Roll the dough into a log, then cut it into big pieces. Each roll will have gooey sweetness, tempting everyone with its smell.

Baking to Perfection

Put the rolls in a greased baking dish, leaving a little space between them. Let them rest for 30 minutes for a final rise. Preheat the oven and bake until they’re golden, about 25-30 minutes. The kitchen will fill with a delicious smell, showing why these rolls are so loved. Enjoy your hard work and share your success with others using this detailed guide.

Tips for Perfect Cinnamon Rolls

Making perfect cinnamon rolls needs focus and the right methods. Knowing your ingredients, managing dough, and baking evenly are key. These tips will help you make your homemade pastries even better.

The Importance of Room Temperature Ingredients

Using ingredients at room temperature is essential. Eggs, milk, and butter mix better, making a dough that rises well. This step is key for fluffy cinnamon rolls.

How to Achieve the Right Dough Consistency

The dough should be soft but not too sticky. Add flour slowly while mixing. This helps you get the right texture for light rolls.

Ensuring Even Baking

To bake rolls evenly, rotate the tray halfway through. This avoids hot spots and ensures all pastries are perfectly baked.

Customizing Your Rolls

Bananas Foster Cinnamon Rolls are a blank canvas for your creativity. You can add crunch or unique spices to make them your own. Let’s dive into some fun ways to make these gourmet treats unforgettable.

Add Nuts for Extra Crunch

Adding nuts changes the texture and taste of your rolls. Try using chopped walnuts or pecans in the filling. They add a nice crunch that balances out the soft dough.

Experiment with Different Spices

Spices like nutmeg or cardamom can take your rolls to the next level. They add a warm flavor that goes great with the bananas. This makes your cinnamon rolls even more delicious.

Using Dairy-Free Alternatives

If you’re looking for dairy-free options, there are great alternatives. Use coconut oil or almond milk instead of butter and milk. These changes keep the flavor rich and make sure everyone can enjoy them.

Customization OptionBenefitsExamples
Add NutsEnhances texture and flavorWalnuts, Pecans
Different SpicesElevates flavor profileNutmeg, Cardamom
Dairy-Free AlternativesInclusive for all dietsCoconut Oil, Almond Milk

Serving Suggestions

Bananas Foster Cinnamon Rolls are amazing breakfast treats. They add richness to any meal. Enjoy them with coffee or tea for a cozy start to your day.

Pairing with Coffee or Tea

Pairing these cinnamon rolls with drinks makes them even better. Coffee’s bold taste pairs well with their sweetness. Herbal or chai teas offer a nice contrast. Try different coffee or teas to find your favorite.

Ideal Occasions for Serving

These rolls are perfect for special times. They’re great for holiday breakfasts, brunch parties, or weekend treats. Sharing them with loved ones makes for unforgettable moments.

Presentation Ideas

How you present these rolls matters a lot. Serve them on fancy platters for a beautiful look. A sprinkle of powdered sugar or a drizzle of icing makes them even more appealing. Add fresh bananas or toasted nuts for extra color and texture.

Storing Leftovers

To keep your Bananas Foster Cinnamon Rolls tasty, proper storage is key. These sweet treats can stay fresh with a few simple steps.

Refrigeration Tips

Store leftover gourmet cinnamon rolls in an airtight container. This keeps their texture and taste. Make sure the container is tightly sealed to avoid drying out.

Reheating Methods

Reheating brings back the rolls’ warm, gooey goodness. The microwave is quick, or try the oven for a crispier roll. Preheat to 350°F, wrap in foil, and heat for 10-15 minutes.

Freezing for Later Enjoyment

Freezing is great for preparing ahead. Freeze before baking for quick access to cinnamon rolls. Store in a freezer-safe container or bag for up to three months. Thaw overnight in the fridge before baking.

Healthier Alternatives

Making your banana desserts healthier can be fun. Try using whole wheat flour in your cinnamon roll dough. It adds fiber and a nutty taste that goes great with bananas.

Whole Wheat Dough Options

Choosing whole wheat flour boosts your cinnamon rolls’ nutrition. It helps with digestion and keeps you full longer. This makes your banana desserts tasty and fulfilling.

Sweetener Substitutes

Changing how you sweeten your treats can make a big difference. Use natural sweeteners like maple syrup, honey, or agave nectar. They cut down calories but keep the flavor of your banana desserts.

Reducing Sugar in the Recipe

Less sugar in the dough and sauce is a smart move. It lets you enjoy the sweetness without too much sugar. This way, your cinnamon rolls are a treat that’s good for you.

Common Mistakes to Avoid

Baking perfect Bananas Foster Cinnamon Rolls needs careful attention. Avoiding common mistakes can make your baking better and your desserts more delicious. Here are some mistakes to avoid:

Overbaking Your Rolls

Overbaking can make your rolls dry and unappetizing. Watch the oven timer closely and check for doneness a few minutes early. The rolls should be golden and feel firm to the touch.

Not Preparing the Sauce Properly

The Bananas Foster sauce is key for flavor. Make sure to prepare it right, letting the butter and brown sugar melt fully before adding bananas. If the sauce isn’t spread evenly, the rolls might taste different in some spots.

Skipping the Proofing Step

Proofing is vital for fluffy, light rolls. Skipping it can make your rolls dense. Give your dough enough time to rise for light, airy results. For more tips on yeast baking, check out the essential advice here.

Nutritional Information

Knowing the nutritional facts of Bananas Foster Cinnamon Rolls is key for those who want to enjoy them without worrying about their diet. Each roll is a delightful mix of flavors and nutrients. It’s a treat that satisfies your sweet tooth and offers health benefits too.

Caloric Breakdown per Roll

ComponentAmount (per roll)
Calories320
Total Fat14g
Saturated Fat8g
Carbohydrates45g
Fiber2g
Sugars18g
Protein4g

Vitamins and Minerals in Bananas

Bananas are a key part of these cinnamon rolls’ nutritional profile. They add important vitamins and minerals, including:

  • Potassium: Helps keep your heart healthy and blood pressure in check.
  • Vitamin C: Boosts your immune system and keeps your skin healthy.
  • Vitamin B6: Supports your metabolism and brain function.

Balancing Indulgence with Nutrition

Enjoying these gourmet cinnamon rolls doesn’t mean you have to forget about nutrition. You can adjust serving sizes and add fruits or nuts to make your meal healthier. By eating these treats mindfully, you can indulge without losing sight of your health goals.

Feedback and Variations

Trying a new recipe is always exciting. We want to hear about your Bananas Foster Cinnamon Rolls! Whether they were a hit or a fun try, sharing your story can inspire others. Cooking is all about creativity, and every baker brings their own twist to classics.

Share Your Experience

As you enjoy this dessert, think about how you can make it your own. Maybe you added chocolate, nuts, or different fruits? Your ideas could help others create their own cinnamon roll masterpieces. We’d love for you to share your creations with us.

Ideas from Our Readers

Our readers have shared some great ideas, like caramel drizzle or different fruits in the filling. Each variation adds something special, making the recipe even more enjoyable. These changes cater to different tastes and encourage everyone to try new things in the kitchen.


FAQ

What makes Bananas Foster Cinnamon Rolls unique?

Bananas Foster Cinnamon Rolls mix the famous Bananas Foster flavors with cinnamon rolls. This creates a gourmet treat perfect for breakfast or dessert.

Can I use store-bought dough for this recipe?

Yes! Using store-bought cinnamon roll dough saves time. It makes it easy to enjoy these pastries without making dough from scratch.

How can I customize my Bananas Foster Cinnamon Rolls?

You can add nuts for crunch or try different spices like nutmeg. You can also use dairy-free alternatives to fit your diet.

What are some great toppings for these rolls?

Top your rolls with caramel sauce, chopped nuts, or powdered sugar. These add sweetness and enhance the banana theme.

How should I store leftover cinnamon rolls?

Store leftovers in an airtight container in the fridge. Reheat them in the microwave or oven. You can also freeze them for later.

Can I make these rolls healthier?

Yes! Use whole wheat flour and natural sweeteners like maple syrup. Reducing sugar makes them a balanced treat.

What are some common mistakes to avoid when baking these rolls?

Avoid overbaking, which dries out the rolls. Make sure to prepare the sauce right and don’t skip proofing. This keeps the rolls fluffy.

Are there variations of the classic recipe I can try?

Yes! Try adding chocolate chips or other fruits. This lets you get creative and try new dessert ideas.

Easter Chocolate Lasagna: A Sweet Holiday Treat

As spring arrives, families come together for Easter. They share laughter and traditions, with the kitchen buzzing. In the heart of this celebration, Easter Chocolate Lasagna stands out. It’s a treat that delights chocolate fans and brings people closer.

This dessert is a mix of creamy layers and a crunchy cookie base. It’s perfect for those who love chocolate. It’s also great for hosts who want to wow their guests without spending too much time in the kitchen.

Key Takeaways

  • Easter Chocolate Lasagna is a festive, layered dessert perfect for Easter celebrations.
  • This dessert combines creamy layers and a sweet cookie crust, making it a chocolate lover’s dream.
  • It’s an easy-to-make treat that can impress guests and family alike.
  • This delicious dessert brings families together, creating sweet memories.
  • It’s versatile, allowing room for creativity and personalization.

What is Easter Chocolate Lasagna?

Easter Chocolate Lasagna is a fun twist on traditional desserts. It’s a hit at holiday gatherings. This easy dessert combines lasagna layers with sweet ingredients, making it a crowd-pleaser. Its stunning look and rich taste make it a favorite for Easter celebrations.

A Fun Twist on Traditional Desserts

This chocolate lasagna recipe turns the classic dish into a sweet treat. Instead of pasta, it uses cookie crust and creamy fillings. It’s a playful way to enjoy Easter, loved by both kids and adults.

The Layers of Deliciousness

Easter Chocolate Lasagna has many layers, each with its own flavor and texture. It starts with a cookie crust, then a mix of cream cheese and whipped cream. Next, it’s topped with chocolate pudding. The final touch is whipped cream, making it both beautiful and delicious. This dessert is perfect for satisfying your sweet tooth and adding to the festive atmosphere.

Ingredients for Easter Chocolate Lasagna

To make a tasty Easter Chocolate Lasagna, you need a few key ingredients. This recipe is easy to follow and makes a dessert that everyone will love. Getting the right ingredients is important for a great dessert.

Essential Items You’ll Need

  • Chocolate wafer cookies for the crust
  • Cream cheese for the creamy filling
  • Whipped topping to add lightness
  • Chocolate pudding mix for rich flavor

Optional Toppings for Extra Flair

After you make your lasagna, think about adding some extra toppings. You could use colorful sprinkles, Easter candies, or fresh fruit. These add a fun touch to your dessert. For more ideas, check out this chocolate lasagna recipe. With the right ingredients, your dessert will be a hit at any event.

Step-by-Step Preparation Guide

Making a chocolate lasagna recipe is fun for everyone. It’s a great dessert for Easter, with layers of taste and texture. Here’s how to make it easily.

Preparing the Cookie Crust

Begin by crushing chocolate wafer cookies into crumbs. Mix these crumbs with melted butter until it sticks together well. Press this mix into the bottom of your dish. It’s the tasty base of your dessert.

Crafting the Creamy Layers

In a bowl, mix cream cheese, sugar, and whipped topping until smooth. This creamy layer is key to a great lasagna. It’s loved by all, and you can try new flavors too. But, the classic mix is always a hit.

Assembling the Lasagna

Now, put the crust and creamy layer together. Layer cookie crust, creamy filling, and chocolate pudding in your dish. Make sure each layer is even for a beautiful look. Chill it for a few hours before serving. This lets all the flavors mix well. For more ideas, check out this link.

Creative Variations to Try

Want to add your own twist to your Easter dessert? Try creative variations of the chocolate lasagna recipe. These changes keep the original’s charm but add new flavors and textures. They’re sure to wow your guests and family.

Fruit-Infused Chocolate Lasagna

A Fruit-Infused Chocolate Lasagna adds a fresh twist. Mix in slices of strawberries, blueberries, or raspberries with the creamy layers. This adds a sweet and vibrant touch to the rich chocolate.

Nutty Chocolate Lasagna

For a richer taste, try the Nutty Chocolate Lasagna. Add layers of chopped nuts like pecans or walnuts. This adds a crunchy texture and a nutty flavor that complements the chocolate.

VariationKey IngredientsFlavor Profile
Fruit-Infused Chocolate LasagnaFresh fruits, chocolate pudding, whipped toppingLight, refreshing, sweet
Nutty Chocolate LasagnaChopped nuts, chocolate pudding, cream cheeseRich, crunchy, nutty

These creative twists let you add your personal touch to your Easter dessert. Mixing up flavors can make a classic chocolate lasagna into a special dish for your celebrations. For more ideas, check out this chocolate lasagna recipe.

Tips for Perfecting Your Lasagna

Making an easy Easter dessert like Easter Chocolate Lasagna is fun. With a few tips, your dessert will be perfect every time. Here are some key practices to follow.

Avoiding Common Mistakes

To get the best results, remember these tips:

  • Ensure your ingredients are at room temperature. This makes the mixture smoother.
  • Give the pudding enough time to set before layering.
  • Be careful with uneven servings. Even layers are key for a great look.

Ensuring Even Layers

Balance each layer for a beautiful dessert. Here’s how to do it:

  • Spread layers evenly with a spatula on the base.
  • Measure ingredients for consistent layers.
  • Press gently but firmly to help layers stick without squishing them.

Serving Suggestions for Easter Gatherings

When you serve Easter Chocolate Lasagna, think about how to make it special. Pair it with fresh fruits to bring out its rich flavors. Bright berries or zesty citrus can make your lasagna even more enjoyable.

Pairing with Fresh Fruits

Strawberries, raspberries, or oranges are great with your chocolate lasagna. They add a refreshing touch to the sweet and creamy layers. You can serve them on the side or sprinkle them on top for a burst of color and taste.

Presentation Ideas for the Table

A stunning presentation can make your dessert stand out. Use fancy serving dishes to show off your lasagna’s layers. Add a dollop of whipped cream and some seasonal decorations like flowers or themed tablecloths. These touches will make your Easter treats unforgettable for your guests.

Dietary Considerations

When making Easter Chocolate Lasagna, it’s key to think about everyone’s dietary needs. A few simple changes can make this sweet treat available to all. This way, everyone can enjoy the holiday treats without any worries.

Gluten-Free Options

For gluten-free options, swap traditional cookies with gluten-free ones. Schar and Pamela’s offer tasty alternatives that keep the dessert’s taste and texture. These changes make the dessert inclusive and keep the celebration spirit alive.

Vegan Alternatives

For vegan options, use dairy-free cream cheese and whipped toppings instead of regular ones. Choose plant-based milk for the pudding to keep it creamy and delicious. These swaps show we care about everyone’s dietary needs and want to include them in the fun.

Storing Leftovers Safely

Keeping your Easter Chocolate Lasagna fresh is key. Proper storage keeps the taste and quality of this dessert. Follow some simple steps to keep it delicious.

Best Practices for Refrigeration

First, put the lasagna in an airtight container. This stops air from getting in, which helps prevent drying or spoilage. If you have a lot, divide it into smaller containers. This makes it easier to grab a piece. Don’t forget to label each container with the date.

How Long Does It Last?

This chocolate lasagna can stay fresh for 3 to 4 days in the fridge. Enjoying it within this time keeps its flavors and texture. A bit of care in storage lets you enjoy it beyond Easter.

Why Easter Chocolate Lasagna Is a Family Favorite

Easter Chocolate Lasagna is more than a dessert; it’s a family favorite that brings everyone together. Each layer is not just about taste; it’s about the memories made around the table. Making this dessert is as fun as eating it, creating a joyful atmosphere.

This Easter dessert is special because it connects families, even kids. Kids learn to cook and join a family tradition. They help with the layers and toppings, learning teamwork and creativity.

Year after year, making Easter Chocolate Lasagna becomes a comforting tradition. It’s not just a sweet treat; it’s a symbol of family togetherness and joy. Families create memories that last, keeping the tradition alive for years to come.


FAQ

What makes Easter Chocolate Lasagna an easy dessert option?

Easter Chocolate Lasagna is simple to make. It doesn’t need baking, which is great for busy hosts. The steps are easy and quick, letting you enjoy the holiday.

Can I use different flavors in my chocolate lasagna recipe?

Yes! You can try new flavors like peanut butter, vanilla, or fruit. This makes your Easter dessert special and suits different tastes.

How can I make this dessert gluten-free?

For a gluten-free version, use gluten-free chocolate wafer cookies. This way, you can enjoy the rich layers without gluten.

What are some decorative toppings for my Easter dessert?

Use colorful sprinkles, Easter candies, or fresh berries to decorate. These add to the dessert’s look and taste.

How can I store leftovers safely?

Store leftovers in an airtight container in the fridge. This keeps it fresh for 3 to 4 days, so you can enjoy it later.

Is Easter Chocolate Lasagna suitable for kids to help with?

Yes! Kids can help with assembling and decorating. It’s a fun way for them to learn and make holiday treats.

Can I prepare Easter Chocolate Lasagna in advance?

Definitely! You can make it a day or two before. Just keep it in the fridge until serving time.