


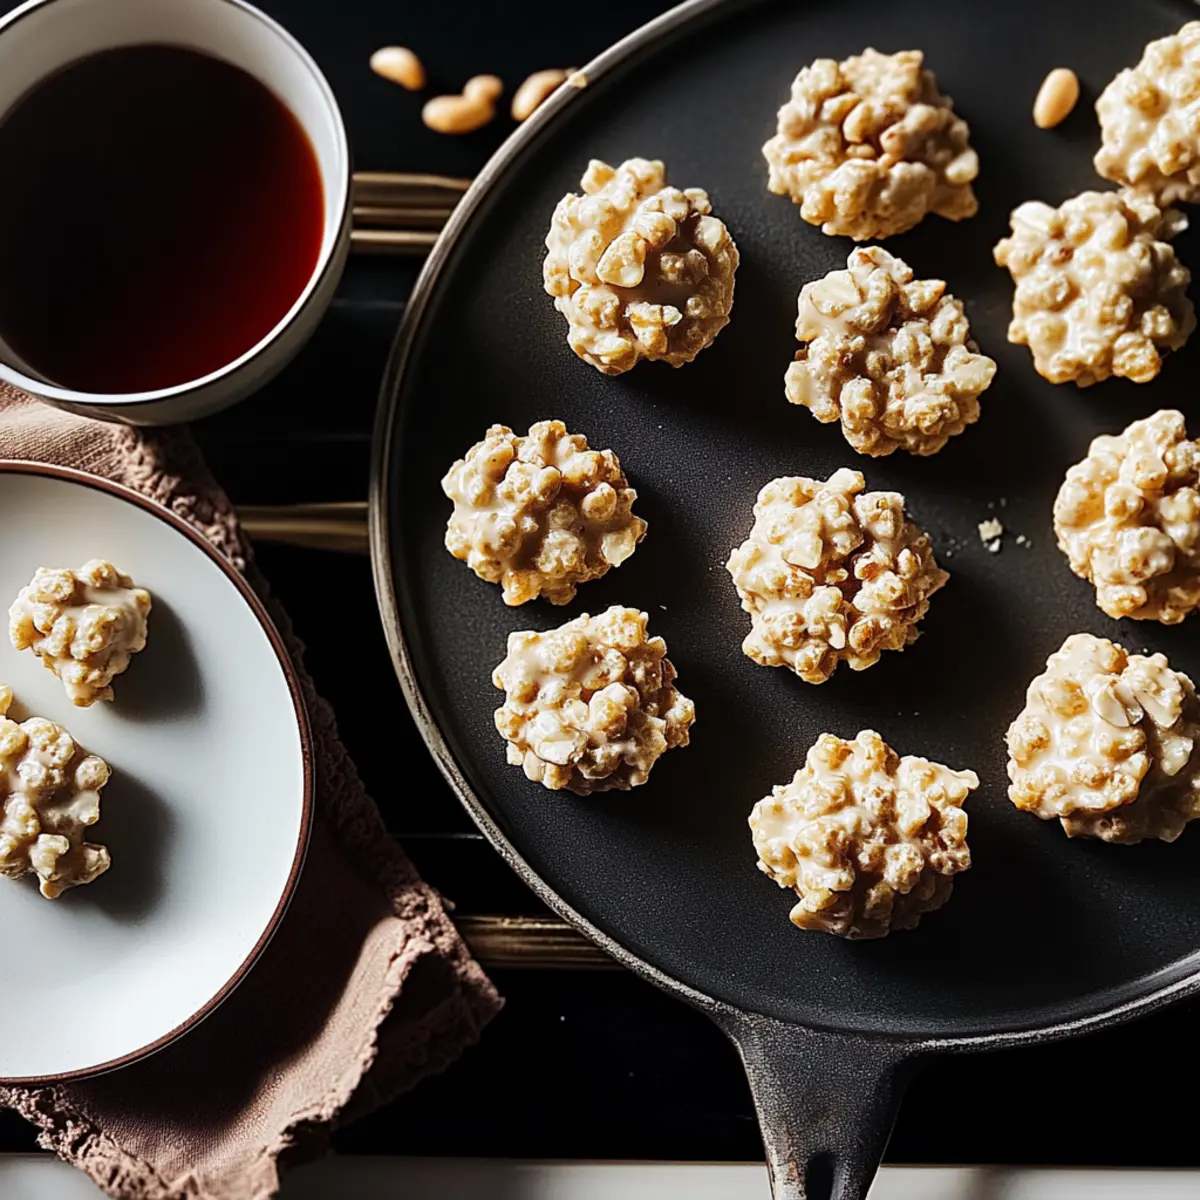
As I stood in my kitchen, the gentle aroma of melting white chocolate wafted around me, instantly transporting me to my childhood holiday baking days. There’s something magical about creating these Easy 15-Minute White Chocolate Snowflakes that combines the sweetness of creamy chocolate with the satisfying crunch of Rice Krispies. In just a quarter of an hour, you’ll have a nostalgic treat that’s perfect for last-minute holiday gifting or indulging on cozy evenings. Not only are these delightful bites quick to whip up, but they also bring a fun twist to traditional snacking with their sweet-salty contrast. Ready to add a sprinkle of joy to your next gathering? Let’s dive into the recipe!
Why Are White Chocolate Snowflakes Irresistible?
Simplicity reigns supreme in this delightful recipe, requiring just a few ingredients and minimal time. Versatile options mean you can easily customize them; swap white chocolate for dark or even use Cheerios instead of Rice Krispies! Quick and easy to prepare, these treats are ready in just 15 minutes – perfect for unexpected guests or holiday parties. Nostalgic vibes are sure to create cherished memories as you whip up these sweet bites, reminiscent of joyous moments in your kitchen. Enjoy them with a warm cup of cocoa or gift them during the festive season. For more delicious holiday recipes, check out my Chocolate Fudge Cupcakes and Easter Chocolate Lasagna.
White Chocolate Snowflakes Ingredients
• Create your delicious White Chocolate Snowflakes with this simple ingredient list!
For the Treats
- White Chocolate – The star of the show, providing a creamy, sweet delight; feel free to substitute with dark or milk chocolate for a different taste.
- Rice Krispies – Adds a satisfying crunch; use Cheerios if you’re looking for an alternative cereal option.
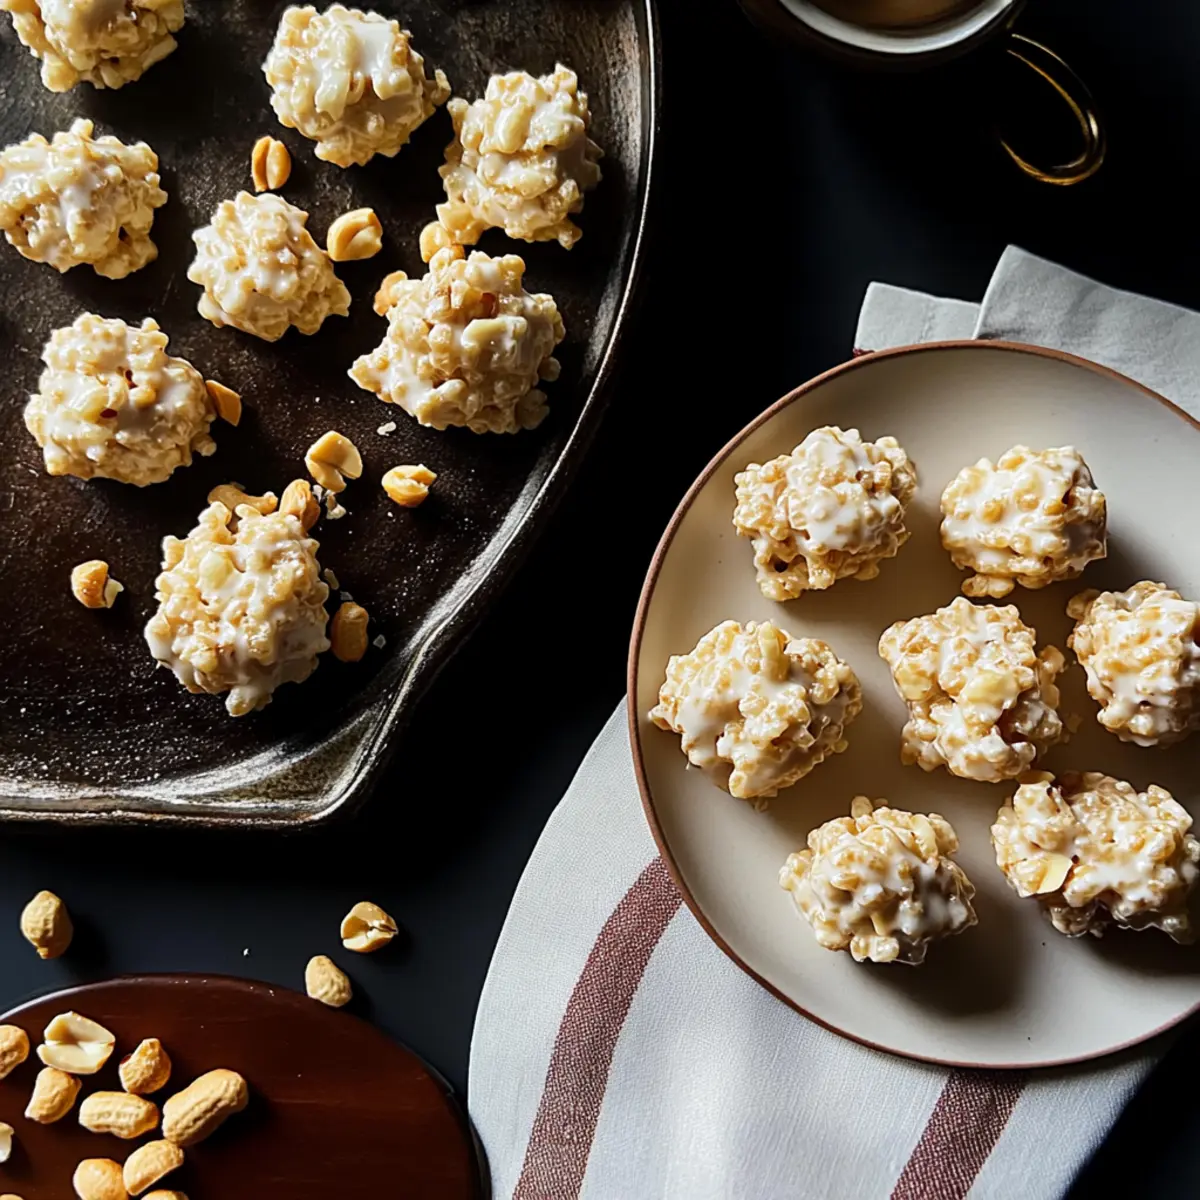
- Salted Peanuts – They introduce a lovely salty contrast to the sweetness; unsalted nuts can be used for a milder flavor, or pretzels can add extra crunch.
Optional Add-ons
- Dried Fruits – For a chewy surprise, mix in your choice of dried fruits such as cranberries or raisins.
- Flavored Extracts – A splash of peppermint or vanilla can elevate the flavor profile, adding a unique twist to your snowflakes!
Step‑by‑Step Instructions for White Chocolate Snowflakes
Step 1: Melt the White Chocolate
Begin by setting up a double boiler: fill a pot with about an inch of water and bring it to a gentle simmer over low heat. Place a heatproof bowl on top, ensuring it doesn’t touch the water. Add your white chocolate to the bowl and stir continuously for 5-7 minutes until it’s fully melted and silky smooth. Keep a close eye to avoid overheating; you want it perfectly melted, not burnt!
Step 2: Combine the Ingredients
Once your white chocolate is smooth, remove the bowl from the heat. Quickly add in the Rice Krispies and salted peanuts, stirring gently to coat every morsel evenly in the delicious chocolate. This should take about 1-2 minutes. Make sure the crunch of the Rice Krispies stays intact while mixing, creating a delightful texture for your White Chocolate Snowflakes.
Step 3: Shape the Snowflakes
Prepare a baking sheet by lining it with parchment paper for easy cleanup and to prevent sticking. Using a rounded teaspoon, scoop mounds of the chocolate mixture and drop them onto the prepared baking sheet. Space them a few inches apart to allow for slight spreading. Aim for about 12-15 mounds, forming delightful clusters resembling snowflakes!
Step 4: Chill to Set
Place the baking sheet in the refrigerator and allow the White Chocolate Snowflakes to chill uncovered for at least 30 minutes. This cooling step is crucial as it helps the chocolate harden and firm up, ensuring your treats have the perfect crisp finish. After this time, check that the chocolate has set completely before serving.
Step 5: Serve and Enjoy
Once the White Chocolate Snowflakes are hardened, they are ready to be enjoyed! You can present them on a festive plate for gatherings or package them as sweet gifts. Store any leftovers in an airtight container in the refrigerator to maintain their delightful crunch, and savor these treats over the following week as a comforting snack.
What to Serve with Easy 15-Minute Chocolate-Covered Snowflakes
Create a memorable dessert spread that charms the senses and elevates any gathering.
-
Festive Fruit Salad: A refreshing mix of seasonal fruits adds a vibrant contrast to the richness of the snowflakes, balancing sweetness with natural acidity. Toss in a hint of mint for a burst of freshness!
-
Creamy Hot Cocoa: Cozy up with steaming mugs of rich hot cocoa, perfectly pairing the snowflakes’ sweetness with chocolatey warmth, making every bite feel like a warm hug.
-
Caramelized Apples: Warm, buttery caramelized apples offer a delightful, sweet-sour contrast. The smooth and silky texture complements the crunch of the snowflakes beautifully.
-
Spiced Chai Latte: Infuse your dessert table with the aromatic flavors of spiced chai. This warm drink complements the creamy white chocolate snowflakes and adds a touch of warmth and comfort.
-
Gingerbread Cookies: These spiced treats bring a cozy winter vibe and contrast well with the sweet and salty flavors of the snowflakes. They make for a delightful pairing during the holiday season.
-
Mini Cheesecakes: Silky and rich, mini cheesecakes provide a creamy counterpart to the crunchy texture of the chocolate-covered snowflakes. These little delights are an impressive addition to any dessert spread.
-
Milk or Dark Chocolate Dipping Sauce: Enhance your snacking experience by serving a warm chocolate sauce for dipping, adding layers of indulgence that deepens the delightful flavors of the snowflakes.
-
Coffee or Espresso: A cup of rich, dark coffee sharpens the sweetness of the snowflakes, making every bite a satisfying experience. The bitterness of the coffee enhances the sweetness delicately.
White Chocolate Snowflakes Variations & Substitutions
Feel free to let your creativity shine with these delightful variations that will elevate your White Chocolate Snowflakes!
-
Dark Chocolate: Switch white chocolate for dark chocolate for a richer, deeper flavor that perfectly complements the sweetness.
-
Milk Chocolate: Opt for milk chocolate instead of white for a creamier taste—delicious for chocolate lovers!
-
Nut Alternatives: Substitute peanuts with almonds or walnuts for a different nutty crunch. Try mixing multiple nuts for an even more satisfying texture!
-
Cereal Swaps: Use Cheerios, Cornflakes, or even crushed pretzels to add a little extra flavor and crunch to your treats. Each cereal brings a unique twist to the experience.
-
Dried Fruits: Fold in dried cranberries or cherries to introduce a chewy and tangy aspect that balances the sweetness beautifully.
-
Flavored Extracts: Enhance your recipe with a teaspoon of peppermint or orange extract for a festive flair! This gives a refreshing taste that makes these treats truly stand out.
-
Spicy Kick: For those who love a bit of heat, sprinkle some cayenne pepper or chili powder into the mixture. It’s a surprising twist that can make them even more enjoyable.
-
Serving Idea: For a snowy presentation, dust your White Chocolate Snowflakes with powdered sugar before serving. It adds an elegant touch and resembles fresh snowfall!
Don’t forget to pair these delightful treats with a warm drink, like cocoa or a comforting spiced chai. Looking for more indulgent ideas? Check out my Chocolate Granola Cups or whip up some tasty Chocolate Chip Pancakes for a comforting breakfast option!
How to Store and Freeze White Chocolate Snowflakes
Airtight Container: Store your White Chocolate Snowflakes in an airtight container in the refrigerator to maintain their delightful crunch, best enjoyed within 1 week.
Freezer: For longer storage, freeze the snowflakes by placing them in a freezer-safe container, separating layers with parchment paper, where they can last for up to 2 months.
Reheating: If you prefer a soft texture, let the frozen treats thaw in the fridge overnight before enjoying. Avoid reheating in the microwave, as it can melt the chocolate coating.
Room Temperature: These treats are best kept in the fridge, but if you plan to serve them at a gathering, they can sit at room temperature for about 2 hours before the chocolate begins to soften.
Make Ahead Options
These White Chocolate Snowflakes are a fantastic treat to prepare ahead of time, making your busy days a little sweeter! You can mix the chocolate with the Rice Krispies and salted peanuts up to 24 hours in advance, then drop the mounds onto the baking sheet. Just cover them with plastic wrap and refrigerate until you’re ready to chill and set them. This keeps the treats fresh and prevents the chocolate from melting. When you’re ready to serve, simply pop them in the fridge for about 30 minutes to firm up, and you’ll have delightful, homemade treats that are just as delicious as when freshly made!
Expert Tips for White Chocolate Snowflakes
-
Use Quality Chocolate: Choose high-quality white chocolate for the best flavor. Avoid chocolate chips, as they often have stabilizers that can impact melting.
-
Gentle Heat: When melting the chocolate, use low heat and stir continuously to prevent it from seizing. High heat can burn the chocolate quickly, ruining the texture.
-
Proper Coating: Ensure Rice Krispies are well-coated in chocolate. If the mixture appears dry, add more melted chocolate to enhance both taste and binding—this helps create cohesive White Chocolate Snowflakes.
-
Chill Thoroughly: Allow enough time for the treats to chill completely in the refrigerator. Uneven cooling can lead to a soft center instead of a satisfying crunch.
-
Experiment with Flavors: Don’t hesitate to add a splash of flavored extracts or dried fruits. This can elevate your White Chocolate Snowflakes and make them uniquely yours!
-
Storage Tips: Store your snowflakes in an airtight container. This keeps them fresh and crunchy; they’re best enjoyed within a week for optimal taste!

White Chocolate Snowflakes Recipe FAQs
How do I know if my white chocolate is the right consistency?
Absolutely! When melted correctly, quality white chocolate should be smooth and glossy without any lumps. If it looks grainy or thick, you may have overheated it. Always melt at a low temperature and stir continuously for a silky finish.
How should I store leftovers?
To keep your White Chocolate Snowflakes fresh and crunchy, store them in an airtight container in the refrigerator. They’re best enjoyed within one week to maintain their delightful texture.
Can I freeze the White Chocolate Snowflakes?
Yes! For longer storage, freeze your snowflakes in a freezer-safe container, layering parchment paper between them to prevent sticking. They can last up to 2 months in the freezer. When you’re ready to enjoy, let them thaw in the fridge overnight for the best texture.
What if my chocolate seizes while melting?
Very tricky! If your white chocolate seizes and becomes grainy, it usually means it came into contact with moisture. Try adding a small amount of vegetable oil or melted cocoa butter to salvage it. Otherwise, start fresh with a new batch and ensure your bowl and utensils are completely dry.
Can I make these treats gluten-free or vegan?
Certainly! To make gluten-free White Chocolate Snowflakes, ensure your Rice Krispies are labeled gluten-free. For a vegan option, use plant-based chocolate and substitute the salted peanuts with roasted seeds or dairy-free crunch options.
What can I do if I want to add more flavor?
Absolutely, the more the merrier! For an extra flavor twist, consider adding a splash of vanilla or almond extract when mixing in the Rice Krispies and peanuts. Dried fruits like cranberries or apricots also provide a lovely chewy contrast, elevating your snowflakes to a personalized treat!

Irresistible White Chocolate Snowflakes in Just 15 Minutes
Ingredients
Equipment
Method
- Begin by setting up a double boiler and melt the white chocolate, stirring continuously for 5-7 minutes until smooth.
- Once melted, remove from heat and quickly stir in the Rice Krispies and salted peanuts, coating them evenly.
- Prepare a lined baking sheet and scoop mounds of the mixture onto it, forming clusters resembling snowflakes.
- Chill the baking sheet in the refrigerator for at least 30 minutes until the chocolate hardens.
- Once hardened, serve on a festive plate or package them as gifts.