


“Why are we serving dirt at the party?” my friend asked, eyes wide as I unveiled a tray of whimsical Zombie Dirt Pudding Cups. This no-bake Halloween treat is the perfect way to combine fun and festivity while steering clear of the usual sugary traps. Layered with creamy white chocolate pudding and crushed Mint Oreos, these delightful cups look spooky yet taste divine—making them a hit with kids and adults alike. They come together in just 10 minutes, providing a stress-free way to celebrate the season without getting bogged down in complicated recipes. Plus, they’re completely customizable, allowing for creativity with flavors and decorations. Ready to dig in and discover how to create this hauntingly delicious dessert?
Why are these pudding cups so popular?
Crowd-Pleasing Appeal: These Zombie Dirt Pudding Cups are a guaranteed hit at any Halloween gathering, delighting both kids and adults with their spooky look and delicious flavors.
No-Bake Convenience: With a simple 10-minute preparation time, you can whip up a batch without the hassle of baking, making it perfect for busy party hosts.
Customizable Fun: Want to mix things up? Feel free to swap Mint Oreos for your favorite flavor or add themed decorations, like chocolate spiders, to capture the Halloween spirit!
Textural Delight: The combination of creamy pudding and crunchy Oreo crumbs creates a fun contrast that keeps everyone coming back for more.
Quick and Easy: If you love easy-to-make desserts, check out other delightful options like Easter Dirt Cups for your next celebration!
Zombie Dirt Pudding Cups Ingredients
• Create your spooky delight with these easy-to-find items!
For the Pudding Base
- Instant White Chocolate Pudding Mix – Ensure to use instant mix, as cook-and-serve won’t achieve the right texture.
- Whole Milk – Chilled milk is crucial for setting the pudding; substitutions like skim milk may lead to a softer consistency.
- Green Food Coloring – A few drops will help achieve that festive Halloween hue; adjust for preferred color intensity.
- Cool Whip – This adds a light, creamy texture; for a fresher option, consider homemade stabilized whipped cream.
For the Crunchy Layer
- Mint Oreos – These provide the signature “dirt” and a delightful minty flavor; regular Oreos work too for a different twist.
For Spooky Decorations
- Large and Small Candy Eyeballs – Use these to give your pudding cups a fun zombie effect; customize quantity based on preference.
- Bone or Skeleton Sprinkles – Optional for an extra touch of Halloween flair!
Step‑by‑Step Instructions for Zombie Dirt Pudding Cups
Step 1: Prepare the Oreos
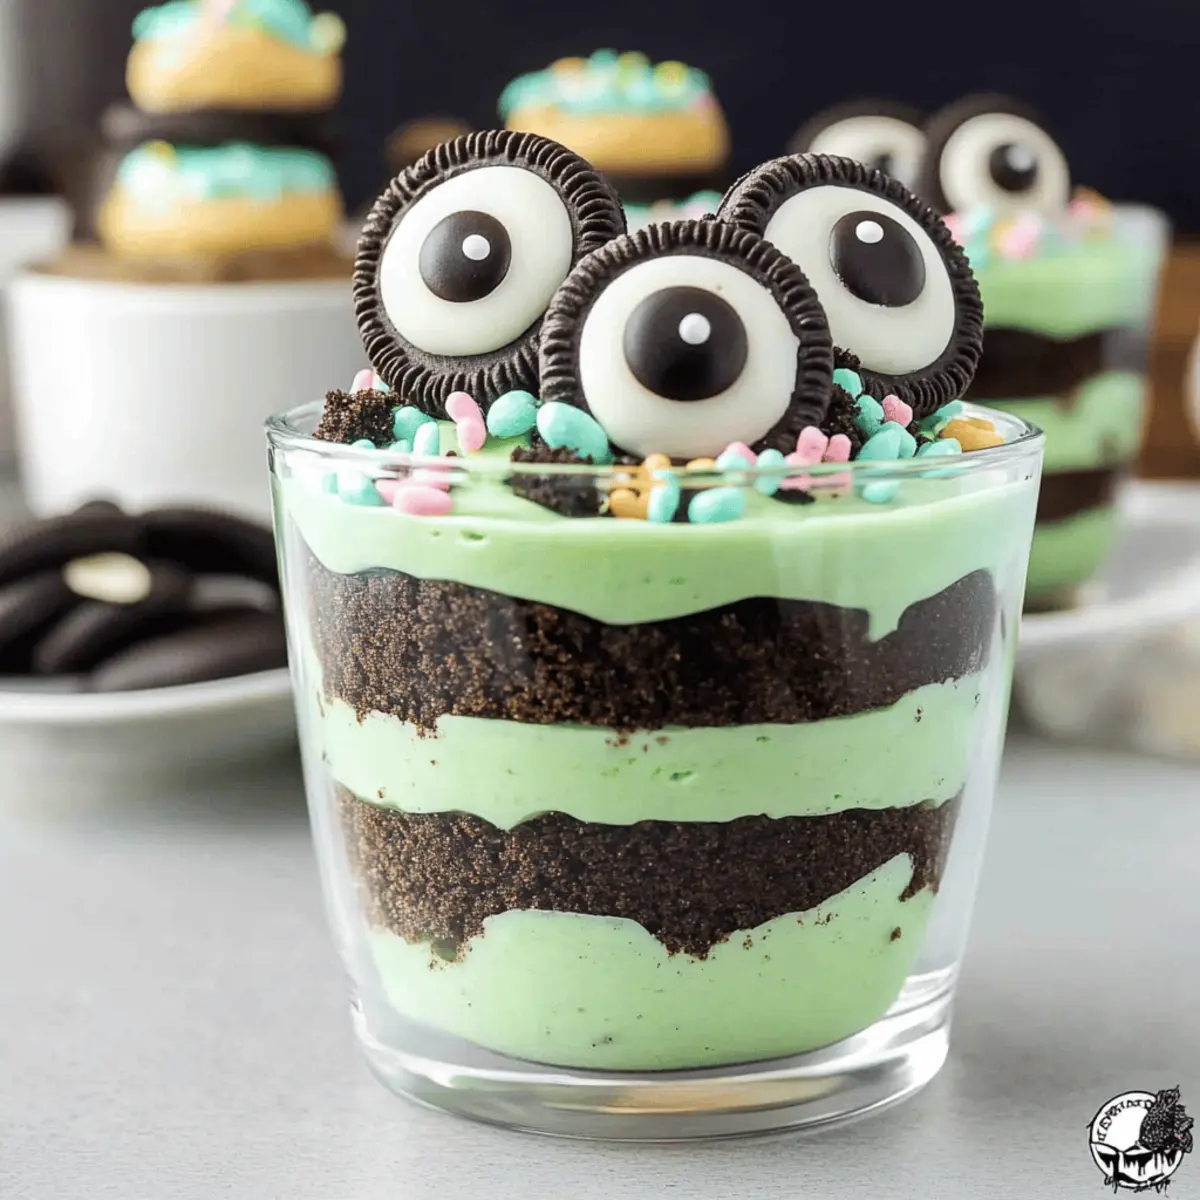
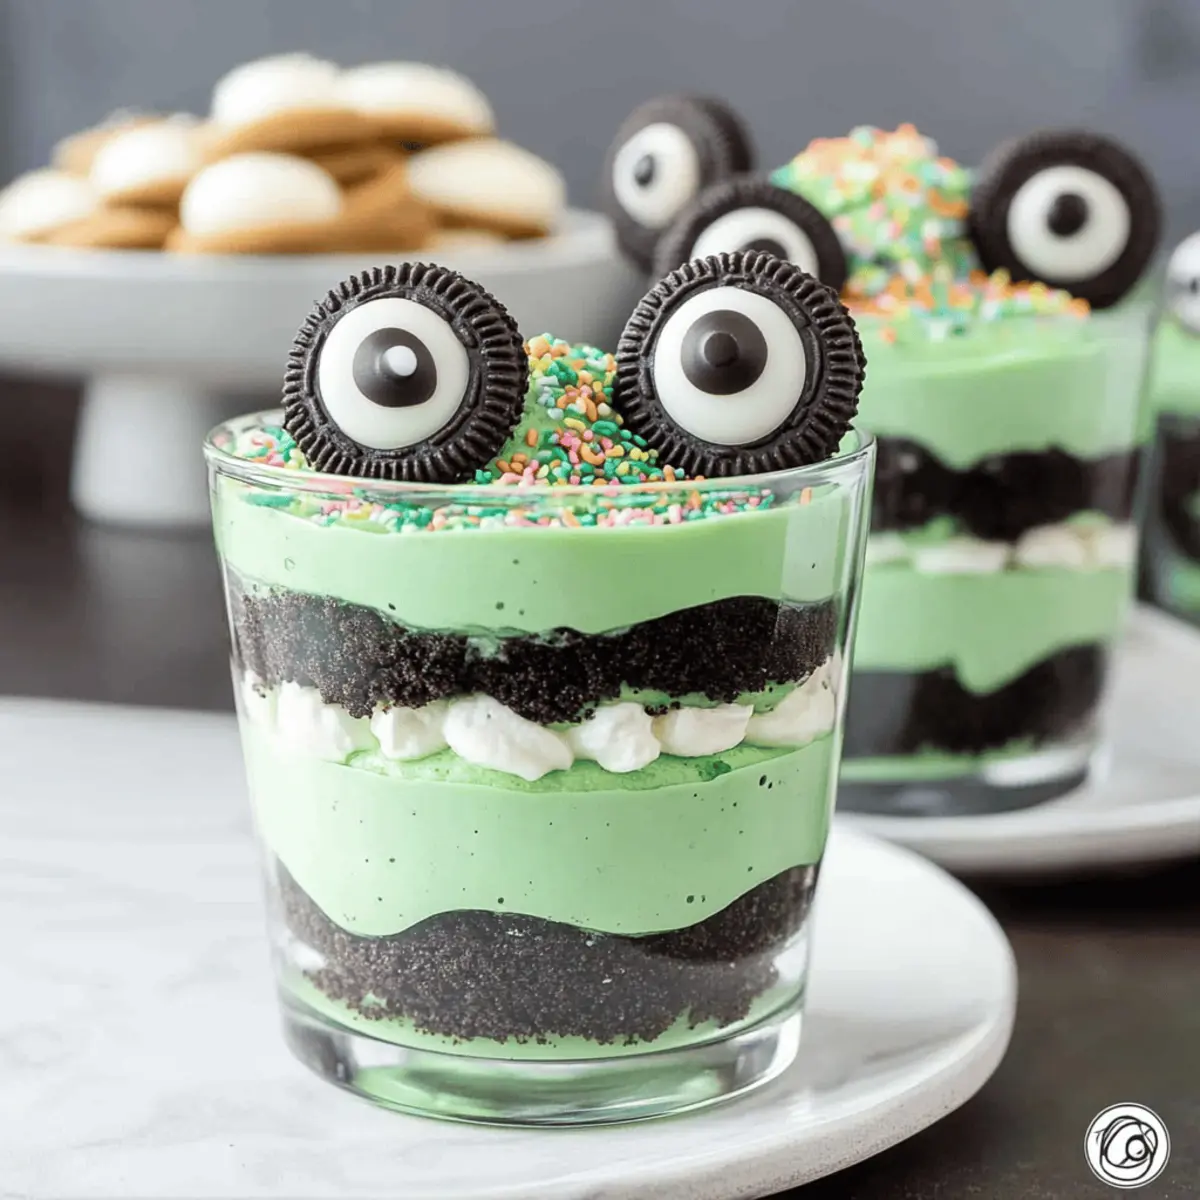
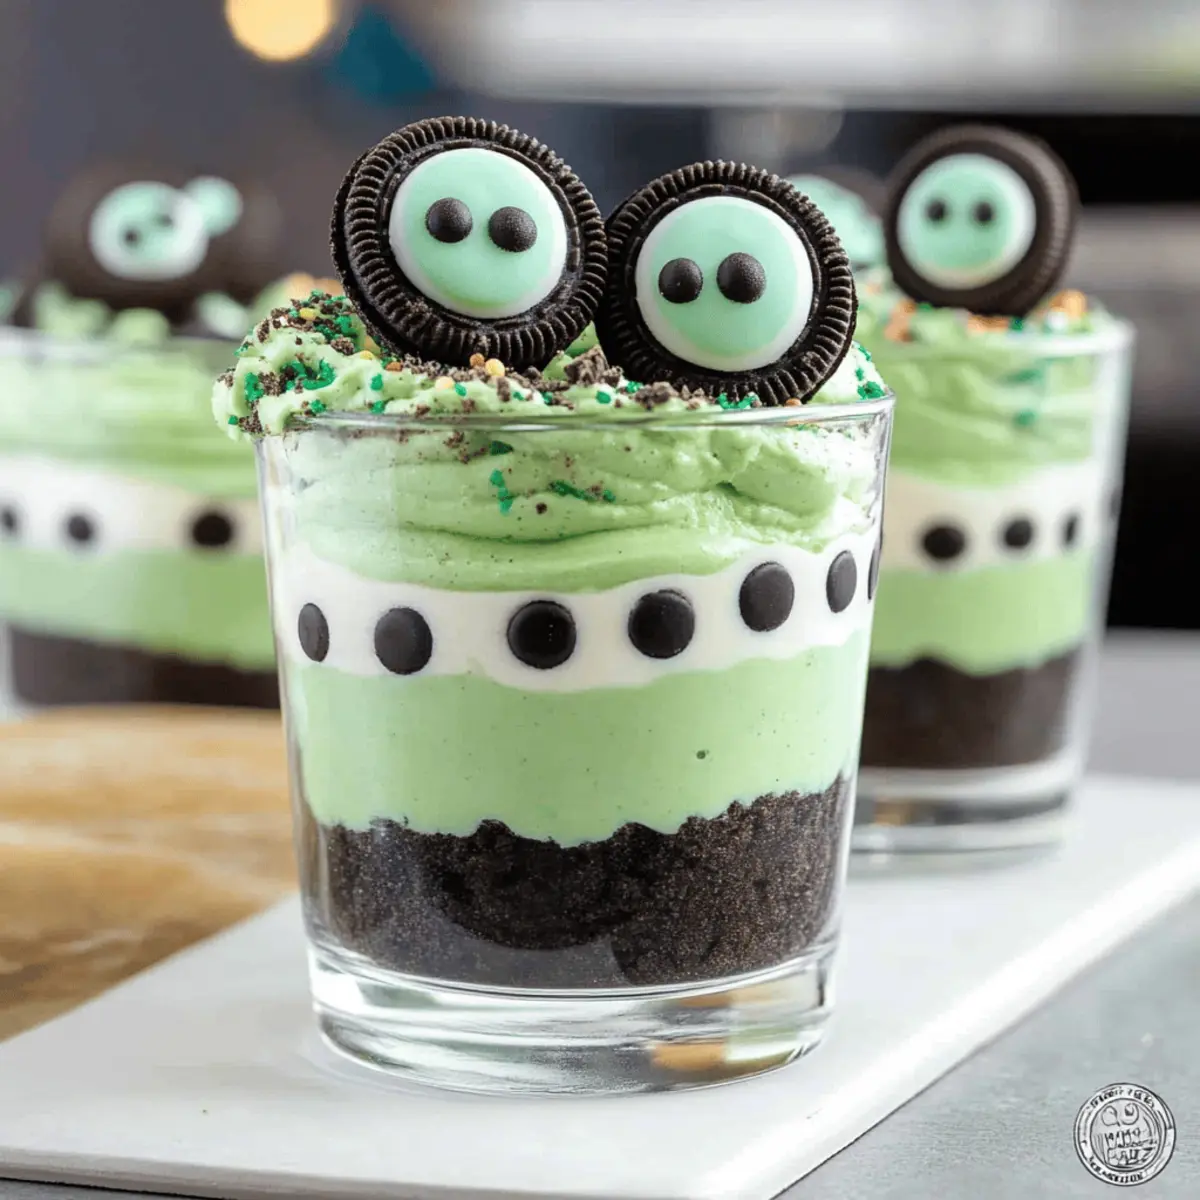
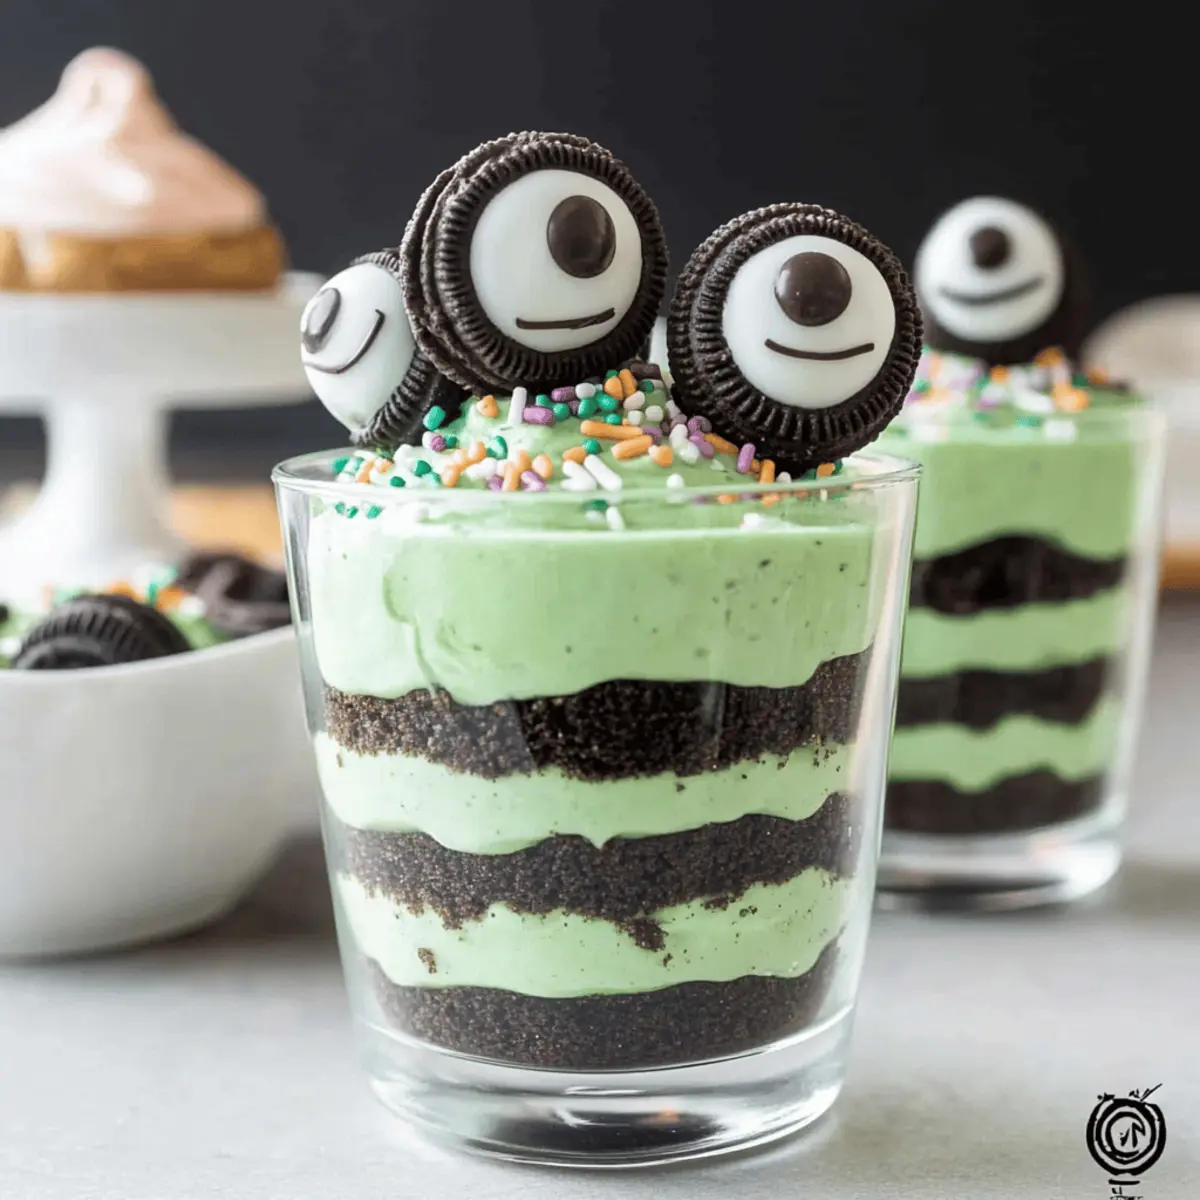
Begin by twisting open 12 Mint Oreos, keeping one side with the filling intact. Set aside the Oreo halves with filling for decoration later. In a food processor, crush the remaining Oreo sides until they turn into fine crumbs, resembling dirt. This will create the base layer for your Zombie Dirt Pudding Cups.
Step 2: Whisk the Pudding Mixture
In a large mixing bowl, combine 2 cups of chilled whole milk with the instant white chocolate pudding mix. Whisk vigorously for 1-2 minutes until the mixture thickens and becomes creamy. Add a few drops of green food coloring, whisking until you achieve a festive, vibrant hue. This green pudding will serve as the eye-catching layer of your dessert.
Step 3: Incorporate the Cool Whip
Gently fold in 8 ounces of Cool Whip into the green pudding mixture using a spatula. Be careful not to deflate the Cool Whip; strive for a smooth and airy consistency. This step brings lightness to the pudding and ensures a delightful texture in your Zombie Dirt Pudding Cups.
Step 4: Layer the Ingredients
Take your serving cups and start layering by adding a tablespoon of crushed Oreos at the bottom. Follow this with a layer of the green pudding mixture, then repeat the process until each cup is filled, finishing with a generous topping of Oreo crumbs for that signature “dirt” look.
Step 5: Chill and Set
Once all cups are filled, place them in the refrigerator for at least one hour. This chilling time allows the pudding to set properly, resulting in a smooth and firm texture. Make sure your Zombie Dirt Pudding Cups are well-covered to keep them fresh while chilling.
Step 6: Add Spooky Decorations
After the pudding has set, remove the cups from the refrigerator and get creative with decorations. Place large and small candy eyeballs on top of the Oreo crumb layer to give them a fun and spooky appearance. Optional bone or skeleton sprinkles can be added for an extra Halloween flair.
Step 7: Serve and Enjoy
These delightfully creepy Zombie Dirt Pudding Cups are now ready to serve at your Halloween gathering! Ensure they are kept refrigerated until you’re ready to showcase them, maintaining their tasty crunch. Dive into this fun dessert, perfect for both kids and adults alike!
Storage Tips for Zombie Dirt Pudding Cups
-
Fridge: Store your Zombie Dirt Pudding Cups in the refrigerator for up to 2-3 days. Make sure they are well-covered to maintain freshness and prevent absorption of odors.
-
Airtight Containers: If you have leftovers, transfer them to airtight containers. This will help preserve the creamy texture and keep the Oreo crumbs from getting soggy.
-
Reheating: These pudding cups are best enjoyed chilled and do not require reheating. Simply take them out of the fridge right before serving.
-
Refreshing Crunch: For that delightful crunch, sprinkle fresh Oreo crumbs on top before serving leftovers for the ultimate Zombie Dirt Pudding experience!
Make Ahead Options
These Zombie Dirt Pudding Cups are perfect for busy home cooks looking to save time during the Halloween rush! You can prepare the creamy pudding mixture and layer it with crushed Oreos up to 24 hours in advance. Simply follow the layering instructions, cover the cups tightly, and refrigerate them. This not only allows the flavors to meld together beautifully but also keeps the dessert fresh. When you’re ready to serve, add the candy eyeballs and any additional sprinkles right before presenting them to your guests to ensure they stay vibrant and fun. Enjoy the stress-free benefits of meal prep with this delightful dessert!
What to Serve with Zombie Dirt Pudding Cups
Looking to create an unforgettable Halloween spread? These delightful treats are begging to be complemented by festive flavors and textures!
-
Mummy Hot Dogs: These fun, wrapped treats are easy to make and capture the Halloween spirit, pairing perfectly with the sweetness of pudding cups.
-
Candy Corn Waffles: Brighten your table with these colorful, sweet waffles, adding a crunchy texture that contrasts beautifully with the creamy pud.
-
Spooky Cheese Platter: Offer a selection of eerie cheeses and crispy crackers for a savory balance to the sweet Zombie Dirt Pudding Cups.
-
Witch’s Brew Punch: A refreshing fruity drink that blends sweet and tangy flavors, enhancing the playful vibe of your dessert while keeping everyone hydrated.
-
Chocolate Spider Cookies: These spooky treats not only mirror the theme but also deliver a rich chocolate flavor that echoes the Oreo crunch in the pudding.
-
Gummy Worms: An easy way to add creepy fun, toss some gummy worms on top of the pudding cups or on the side for extra playful delight.
-
Frankenstein Brownies: Rich and fudgy, these brownies bring a chocolate blast that pairs wonderfully with the light texture of the pudding.
-
Pumpkin Spice Popcorn: The crunchy, spiced popcorn adds a fun snack element that contrasts with the creamy treats—great for munching while enjoying the spooky atmosphere.
-
Caramel Corn: Give your guests a sweet and crunchy diversion from the pudding with this classic Halloween treat, which brings an extra layer of sweetness.
Zombie Dirt Pudding Cups Variations
Feel free to unleash your creative spirit and customize these spooky delights to match your taste buds!
-
Flavor Twist: Swap Mint Oreos for a different flavored Oreo, like peanut butter, for a unique take on classic dirt pudding cups.
Imagine the combination of peanut butter pudding and chocolate “dirt,” creating a luscious flavor that will leave everyone guessing! -
Homemade Pudding: Use homemade pudding for a fresher taste instead of instant pudding mix.
Infuse your pudding with vanilla or almond extract to elevate the flavor profile. Your guests will appreciate the extra love! -
Decorative Additions: Decorate with themed candies like gummy worms and chocolate spiders for an even spookier look.
This adds a fun texture and festive touch that will delight both kids and adults alike! -
Vegan Version: Substitute milk with almond milk and Cool Whip with coconut whipped cream to make a dairy-free treat.
These adjustments do not compromise the creamy goodness while catering to a vegan diet! -
Layered Surprise: Add a layer of fruit puree or jelly underneath the pudding for extra sweetness and a pop of color.
The fruity layer balances the creamy pudding and provides a delightful surprise in every spoonful!
For even more dessert ideas, try these delicious treats like Easter Dirt Cups or get inspired by Chocolate Granola Cups with Peanut Butter Filling for your next celebration!
-
Add Some Heat: Incorporate a pinch of cayenne pepper or spicy chocolate chips to the Oreo crumbs for a surprising kick.
This unexpected flavor twist will excite adventurous palate and create a buzz at your Halloween party! -
Crunchy Alternatives: Replace the Oreo crumbs with crushed pretzels or rice krispies for a different texture experience.
This fun change might just become your new favorite way to enjoy these spooky cups!
Expert Tips for Zombie Dirt Pudding Cups
-
Chill for Best Results: Always refrigerate your Zombie Dirt Pudding Cups until serving. This keeps the texture creamy and fresh, enhancing the overall experience.
-
Crush Oreos Thoroughly: Make sure to crush the Oreos into fine crumbs. Larger chunks won’t create the desired “dirt” look and can disrupt the smooth layering of the dessert.
-
Gentle Mixing: When folding in the Cool Whip, do so gently to maintain its lightness. This ensures that your pudding remains airy and fluffy instead of heavy.
-
Customize with Flair: Feel free to swap Mint Oreos with flavors that excite you, like peanut butter or pumpkin spice, for a unique twist on this classic treat.
-
Decorate Just Before Serving: To keep the decorations fresh and appealing, add candy eyeballs and sprinkles right before serving. This prevents them from becoming soggy in the pudding.
Zombie Dirt Pudding Cups Recipe FAQs
What type of Oreos should I use for Zombie Dirt Pudding Cups?
Absolutely! Mint Oreos provide a delightful flavor and fit the Halloween theme perfectly. However, if you’re not a fan of mint, feel free to substitute with regular Oreos or even try fun flavors like peanut butter or pumpkin spice for your Zombie Dirt Pudding Cups!
How should I store leftovers of Zombie Dirt Pudding Cups?
To keep your Zombie Dirt Pudding Cups fresh, store them in the refrigerator in an airtight container for up to 2-3 days. Covering them well helps prevent them from absorbing fridge odors and keeps the creamy texture intact. Enjoy them chilled for the best experience!
Can I freeze Zombie Dirt Pudding Cups?
While it’s possible to freeze these pudding cups, I recommend against it for the best quality. The creamy texture can become grainy once thawed. If you’re planning to freeze, you can prepare the layers separately: freeze the green pudding mixture and Oreo crumbs in airtight containers for up to 3 months, then assemble and decorate after thawing.
What if my pudding doesn’t thicken properly?
If you find your pudding mixture isn’t thickening as expected, ensure that you’re using instant pudding mix and that your milk is chilled. If the mixture still seems runny, whisk a bit longer—an extra minute can make a difference. If it’s still not thickening, try adding a bit more pudding mix gradually until you achieve the desired consistency.
Are Zombie Dirt Pudding Cups pet-friendly?
Not at all! Be cautious because some ingredients, like chocolate from the Oreos, are toxic to pets. If you have pets, ensure they stay away from the Zombie Dirt Pudding Cups for their safety!
Can I make this dessert ahead of time?
Yes! You can prepare the Zombie Dirt Pudding Cups a day in advance. Simply layer them up and store them in the refrigerator. This not only saves time on the day of your gathering but allows the flavors to meld beautifully. Just remember to add decorations right before serving for that fresh look!
Deliciously Fun Zombie Dirt Pudding Cups for Halloween Delight
Ingredients
Equipment
Method
- Begin by twisting open 12 Mint Oreos, keeping one side with the filling intact. Set aside the halves for decoration later.
- In a food processor, crush the remaining Oreo sides until they turn into fine crumbs.
- In a large mixing bowl, combine 2 cups of chilled whole milk with the instant white chocolate pudding mix and whisk for 1-2 minutes until thickened.
- Add a few drops of green food coloring and whisk until a festive hue is achieved.
- Gently fold in 8 ounces of Cool Whip into the green pudding mix while being careful not to deflate.
- Layer crushed Oreos, then green pudding mixture in serving cups, finishing with a topping of Oreo crumbs.
- Refrigerate for at least one hour to allow the pudding to set properly.
- After setting, add candy eyeballs and sprinkles as decorations before serving.
- Serve and enjoy chilled.