


As the cool autumn air begins to weave its way through the trees, a hint of mischief fills the atmosphere. It’s the perfect season for indulgent treats like Easy Halloween Bark, where creative cooking meets festive fun! This delightful recipe combines creamy white chocolate with vibrant candy melts and playful sprinkles, making it not just a holiday favorite but also an effortlessly engaging project for the whole family. Not only is it quick to prepare, but it also serves as a gorgeous centerpiece for parties or a delicious gift for friends. With endless customization options for colors and toppings, you can let your imagination run wild! Ready to unleash a little Halloween magic in your kitchen? Let’s dive into this colorful, crunchy delight!
Why is Halloween Bark so irresistible?
Easy to Make: The straightforward process requires minimal cooking skills, allowing everyone to join in the fun, from kids to seasoned chefs.
Colorful Fun: A vibrant mix of candy melts creates a treat that’s as visually appealing as it is delicious, perfect for impressing guests or bringing holiday cheer to any gathering.
Endless Customization: You can easily swap out colors and toppings to match different holidays or personal tastes, making it a versatile go-to for all occasions.
Quick to Prepare: In just under an hour, you can whip up this delightful treat, making it an excellent last-minute option for parties or surprise gifts.
Crowd Pleaser: Whether shared with kids at home or served at a Halloween bash, this bark is guaranteed to steal the show and delight everyone who tries it!
Halloween Bark Ingredients
• Create your delightful Halloween Bark with these simple ingredients!
For the Bark
- White Chocolate Chips (24 ounces) – Provides a sweet and creamy base; substitute with white chocolate bars if you prefer a richer flavor.
- Black Candy Melts (2 ounces) – Adds a spooky color; feel free to use any color you like based on your theme.
- Purple Candy Melts (2 ounces) – Brightens up the festive look; other colors can replace them to match different celebrations.
- Orange Candy Melts (2 ounces) – Essential for that Halloween vibe; can be swapped with food coloring mixed into white chocolate if necessary.
For the Toppings
- Halloween Sprinkles – Brings fun and excitement; alternatively, use small candies like M&Ms for extra crunch and color.
- Food Coloring – An optional ingredient for custom candy melt shades to enhance creativity in your Halloween Bark.
With these ingredients, you’re on your way to crafting a deliciously festive treat that’s sure to wow!
Step‑by‑Step Instructions for Halloween Bark
Step 1: Prepare Your Workspace
Start by lining a large baking sheet with a Silpat mat or parchment paper, ensuring that it’s flat and corners are secured. This will help prevent the Halloween Bark from sticking. With your workspace ready, gather all necessary ingredients for a smooth, enjoyable cooking experience.
Step 2: Melt the White Chocolate
Place 24 ounces of white chocolate chips in a heat-proof bowl over a pot of simmering water. Stir frequently for about 5–7 minutes, or until the chocolate is fully melted and smooth. Be cautious to avoid any steam contacting the chocolate, which can cause it to seize up, ensuring a silky base for your Halloween Bark.
Step 3: Melt the Candy Melts
In separate bowls, place 2 ounces each of black, purple, and orange candy melts. Use the double boiler method to melt them, stirring gently for 3–5 minutes until each color is smooth and glossy. Alternatively, you may microwave them in 30-second intervals, stirring in between, for convenient melting without constant supervision.
Step 4: Spread the White Chocolate
Once melted, pour the smooth white chocolate onto the lined baking sheet, using a spatula to spread it evenly to about 1/4-inch thickness. This will form the base of your Halloween Bark, creating a perfect canvas for the colorful candy layers to come.
Step 5: Swirl in the Candy Melts
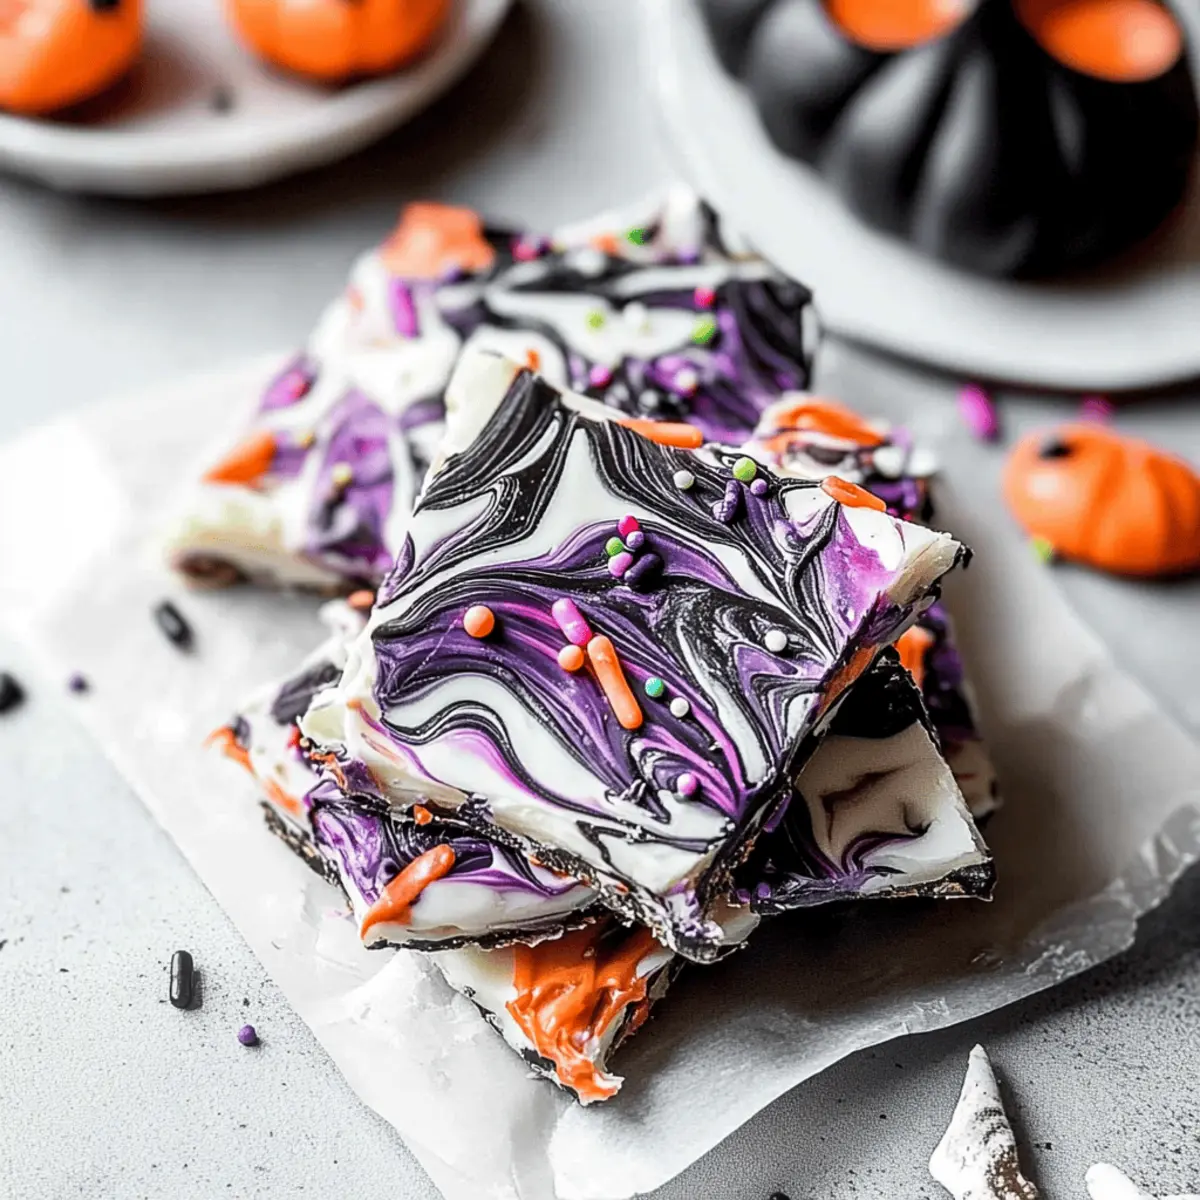
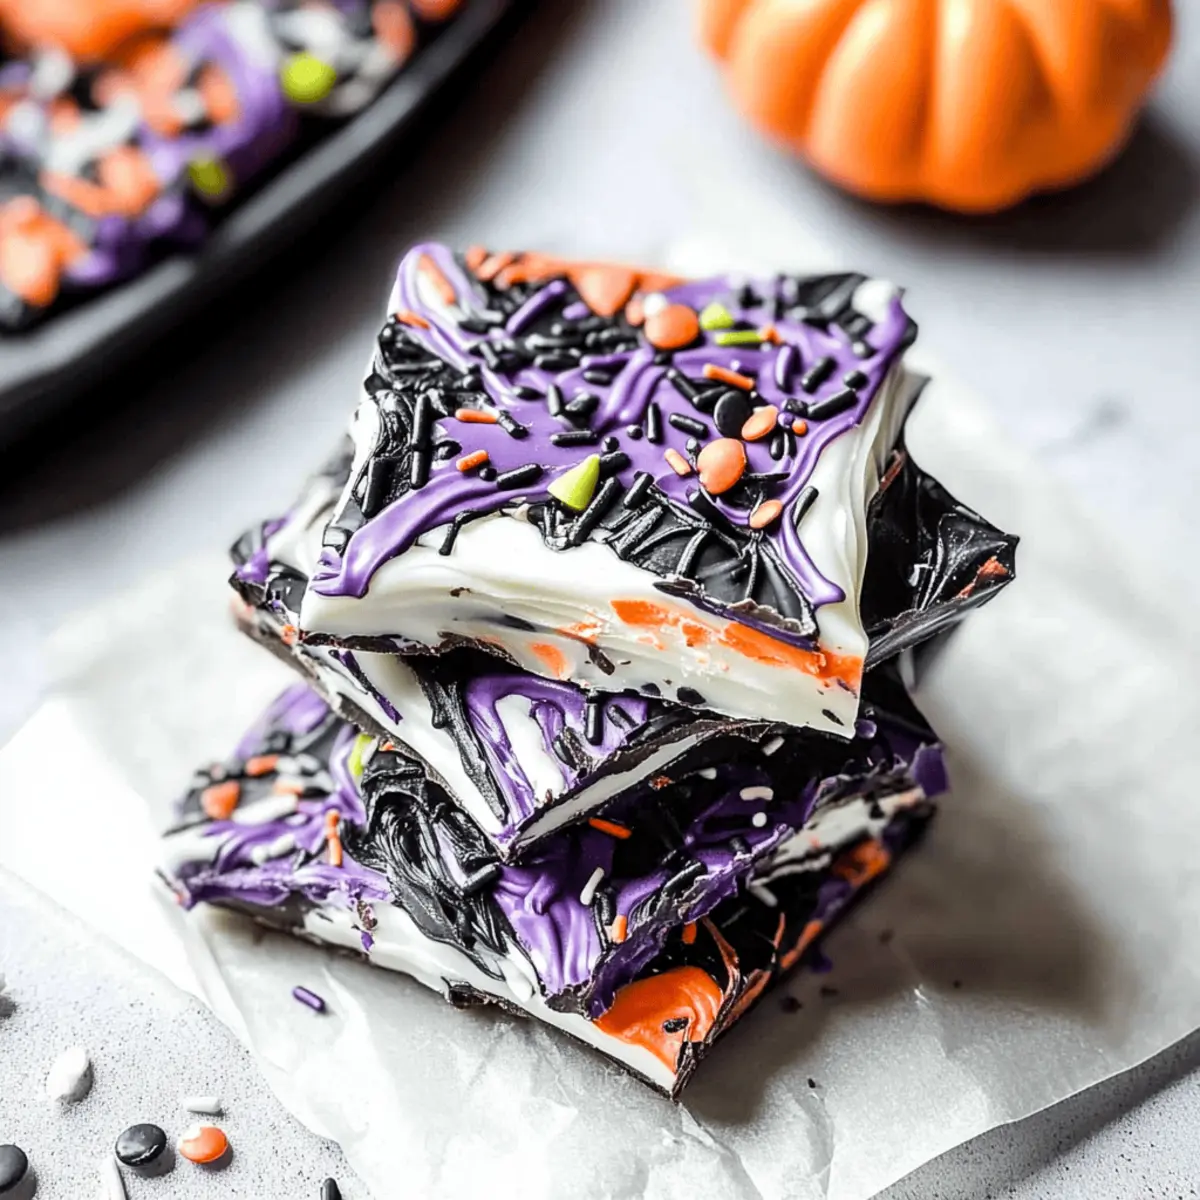
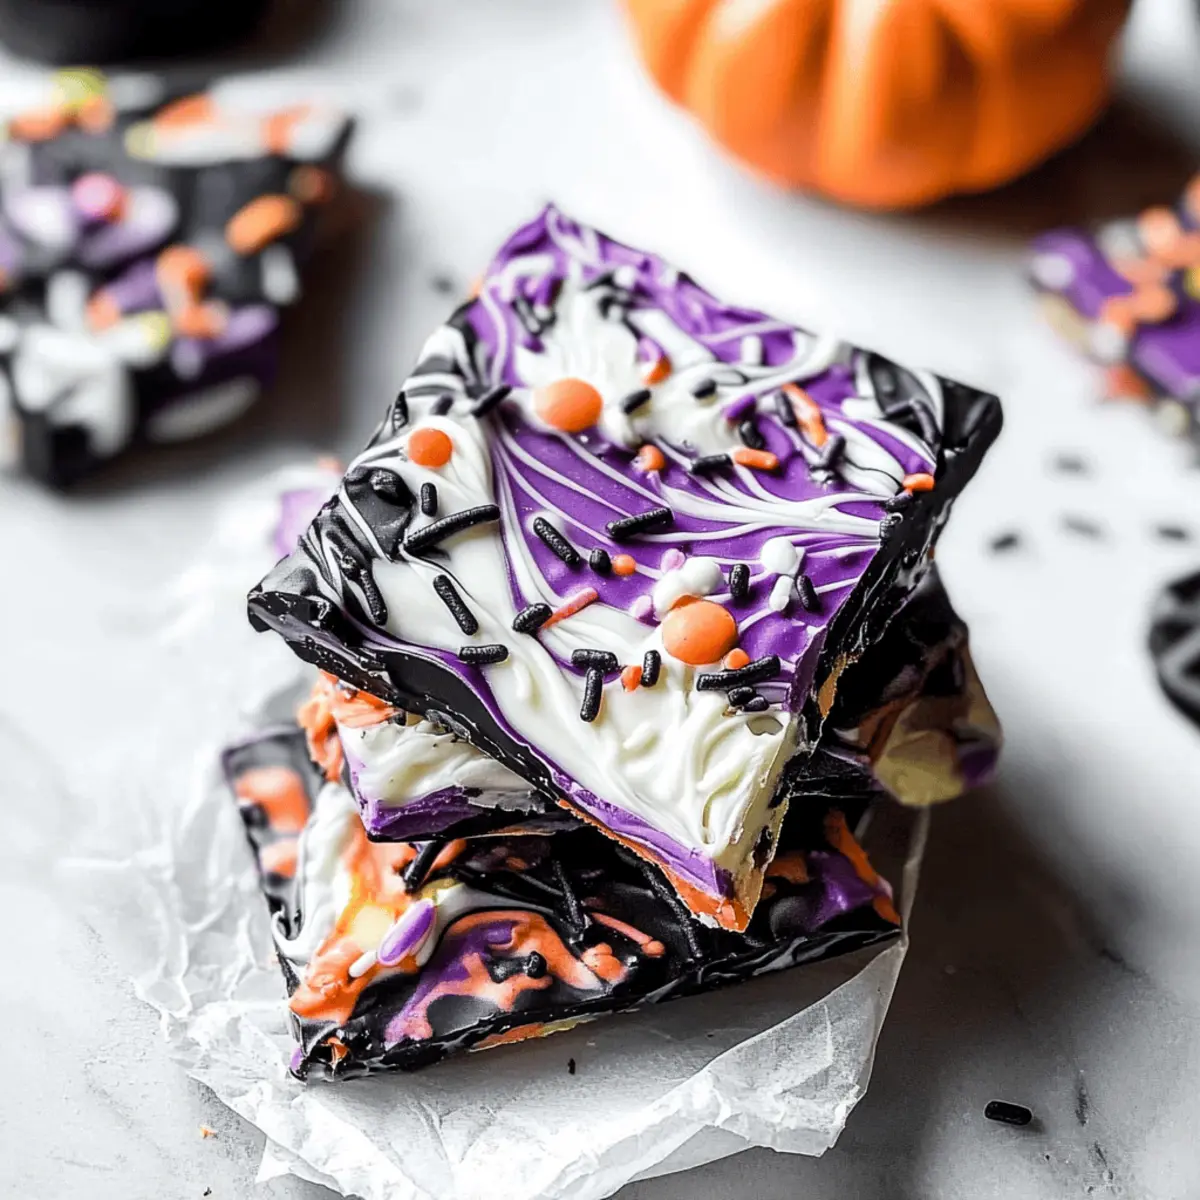
Drop spoonfuls of the melted candy melts onto the white chocolate. Using a toothpick, swirl the colors together gently to create a marbled effect. Take care not to overmix, as you want to see distinct colored swirls in the finished Halloween Bark.
Step 6: Add Toppings
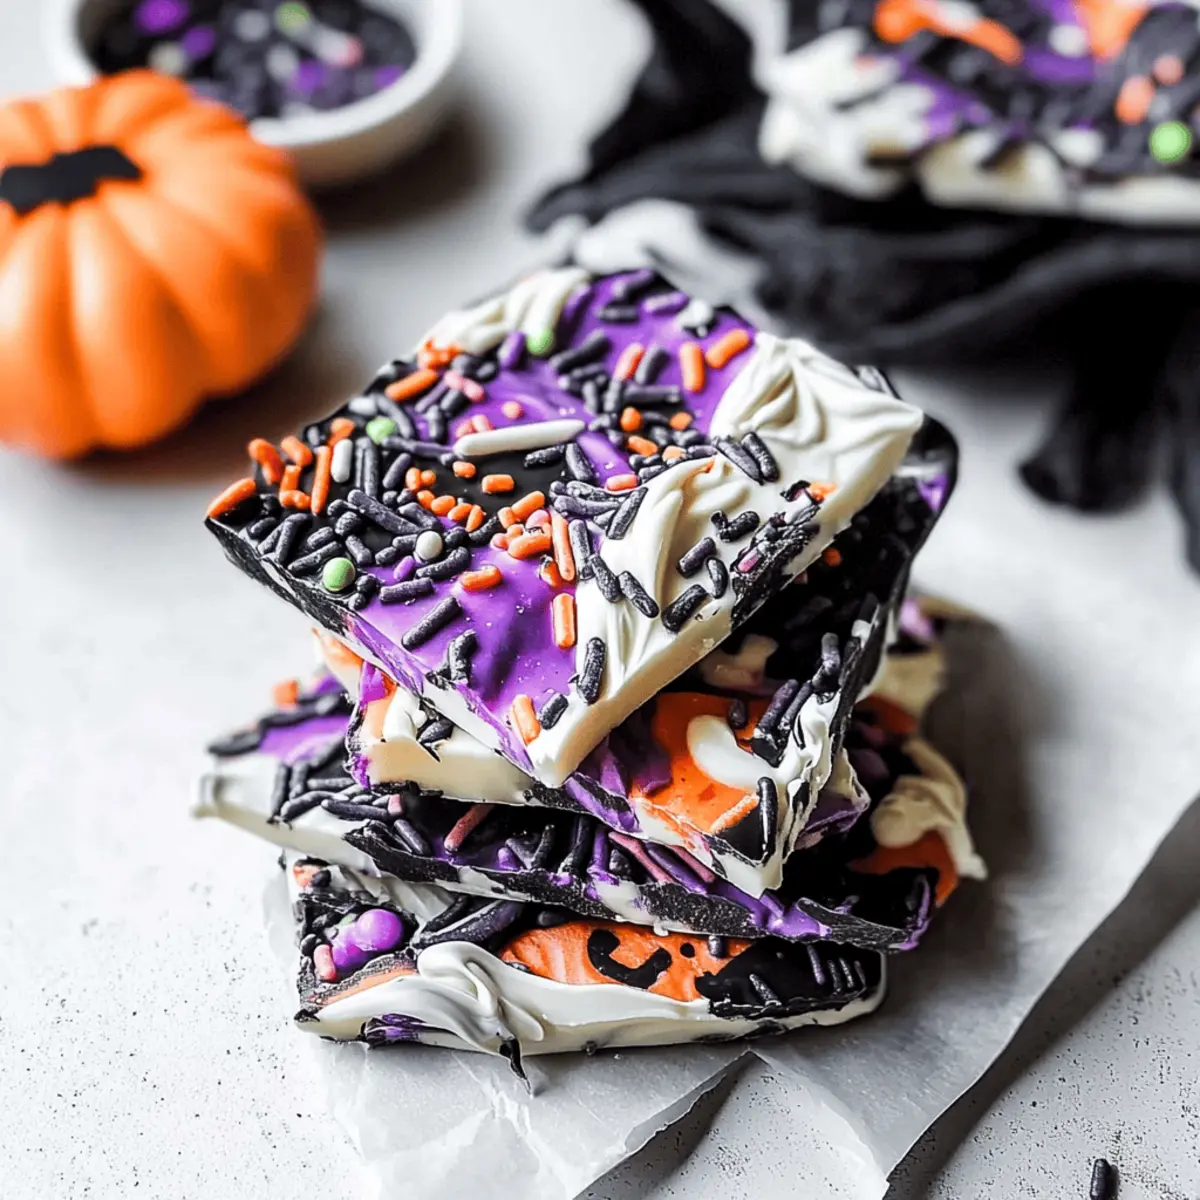
Now it’s time to have some fun! Sprinkle your choice of Halloween sprinkles and candies over the top of the chocolate mixture, ensuring a generous and festive decoration. This not only adds color but also extra crunch for a delightful texture in each bite of your Halloween Bark.
Step 7: Set the Bark
Place the prepared baking sheet in the refrigerator for about 30 minutes or leave it at room temperature for about 2 hours. You’ll know it’s ready when the chocolate is fully hardened and feels firm to the touch. This step is key for achieving that satisfying snap when you break the bark.
Step 8: Cut into Pieces
Once the Halloween Bark has set, remove it from the refrigerator. Carefully lift the edges of the parchment paper to transfer the bark to a cutting board. Use a sharp knife to cut it into approximately 16 pieces of desired size, showcasing the vibrant colors and festive shapes within each piece.
Make Ahead Options
These Easy Halloween Bark treats are perfect for meal prep enthusiasts! You can melt the white chocolate and candy melts, then store them separately in airtight containers for up to 3 days. Just remember to refrigerate the melted candies to maintain their texture. On the day you plan to serve, simply follow the last steps: spread the melted white chocolate, swirl in the candy, and add your favorite sprinkles. Once set—either in the fridge for 30 minutes or at room temperature for 2 hours—cut the bark into pieces, and you’ll have a festive treat ready to impress guests without the stress, making it an ideal option for busy weeknights or holiday gatherings!
How to Store and Freeze Halloween Bark
Room Temperature: Store Halloween Bark in an airtight container at room temperature for up to 2-3 weeks, ensuring it remains fresh and crunchy.
Fridge: For longer storage, place the container in the fridge. This can extend the shelf life to about 4 weeks, but be mindful that it may lose some crunchiness.
Freezer: If you want to keep it even longer, you can freeze Halloween Bark for up to 3 months. Wrap it tightly in plastic wrap and then place it in a freezer-safe bag to prevent freezer burn.
Reheating: Avoid reheating; instead, let frozen bark thaw in the fridge overnight. Enjoy the delightful crunch without compromising its texture!
What to Serve with Easy Halloween Bark?
To create a whimsical gathering that celebrates the spirit of Halloween, consider these delightful pairings!
-
Festive Fruit Salad: A colorful mix of autumn fruits adds a fresh, juicy contrast, brightening your spread and offering a refreshing palate cleanse after the sweet bark.
-
Pumpkin Spice Latte: This warm, spiced drink complements the sweetness of the bark perfectly, evoking cozy vibes and the essence of fall in every comforting sip.
-
Ginger Snap Cookies: With their crunchy texture and spicy kick, these cookies provide a lovely contrast to the sweet, creamy bark, inviting guests to savor both treats.
-
Chocolate-Covered Pretzels: Combining salty and sweet, they add a crunchy bite alongside the Halloween Bark, making for the ultimate snack pairing.
-
Candy Corn Cupcakes: A whimsical dessert that ties back to classic Halloween flavors, these cupcakes delight with their sweetness while coordinating beautifully with your Halloween-themed treats.
-
Apple Cider Float: A refreshing twist! Top warm apple cider with a scoop of vanilla ice cream for a cozy drink that matches the festive vibes of the Halloween Bark.
Bring together these delicious complements to make your Halloween celebration even more magical!
Halloween Bark: Fun Variations Await!
Feel free to get creative with your Halloween Bark to enhance flavors and textures that suit your family’s taste!
- Dairy-Free: Swap white chocolate chips with dairy-free chocolate chips for a delicious vegan version.
- Nutty Twist: Add chopped nuts like almonds or pecans for an extra crunchy texture; they pair wonderfully with the sweetness.
- Extra Flavor: Mix in a teaspoon of vanilla or almond extract with the melted chocolate for a delightful flavor boost.
- Spicy Kick: Sprinkle a pinch of cayenne or chili powder on top before it sets for a surprising twist; the heat beautifully contrasts with the sweetness!
- Fruit Fun: Toss in dried fruit like cranberries or cherries among the sprinkles for a chewy surprise in each bite.
- Colorful Celebration: Use pastel candy melts for Easter or red and blue melts for the Fourth of July—this bark can be festive all year round!
- Layered Delight: Create two layers by letting the first layer set partially, spreading a second color of melted chocolate over it before topping with sprinkles.
- Chocolate Lovers: Mix dark or milk chocolate into the white chocolate blend to achieve a rich, decadent flavor that chocolate enthusiasts will adore.
With so many options, you can make this Halloween Bark uniquely yours—let your imagination run wild and enjoy making it with your loved ones! If you’re interested in more festive ideas, check out our guide on holiday treat decoration techniques and our collection of creative bark recipes.
Expert Tips for Halloween Bark
-
Melt Order Matters: Start with the candy melts first since they set slower than white chocolate, ensuring a smoother mixing process.
-
Heat Control: Use a double boiler or microwave, keeping an eye on the timing; overheating can cause chocolate to seize, ruining your Halloween Bark.
-
Toothpick Technique: When swirling the candy melts, use a light hand to create distinct swirls. Overmixing will give you muddy colors instead of vibrant, festive patterns.
-
Storing Wisely: To keep your Halloween Bark fresh, store it in an airtight container at room temperature, where it can last for 2-3 weeks without losing its crunch.
-
Mix It Up: Don’t hesitate to experiment with seasonal themes by changing the colors or toppings; this allows you to enjoy Halloween Bark for various celebrations throughout the year!
Halloween Bark Recipe FAQs
What kind of white chocolate should I use for Halloween Bark?
Absolutely! You can use either white chocolate chips or bars for your Halloween Bark. Chocolate bars will provide a richer flavor, while chips melt smoothly and are easier to find in stores. Just make sure they don’t contain any additives that could affect the melting process!
How should I store my Halloween Bark?
To keep your Halloween Bark fresh, store it in an airtight container at room temperature for up to 2-3 weeks. If you want it to last longer, placing it in the refrigerator can extend its shelf life to about 4 weeks. However, keep in mind that refrigeration might make the bark slightly less crunchy.
Can I freeze Halloween Bark?
Yes, you can freeze Halloween Bark! To do this, wrap it tightly in plastic wrap, ensuring there’s no air exposure, and then place it in a freezer-safe bag. It will maintain its quality for up to 3 months. When you want to enjoy it, simply let it thaw in the fridge overnight.
What can I do if my candy melts are not melting properly?
Very! If your candy melts aren’t melting smoothly, make sure you’re using a double boiler method or microwave them in short intervals. Stir frequently to avoid overheating. If they seize, you can add a small teaspoon of vegetable oil to help restore smoothness, but be careful not to add too much!
Are there any dietary considerations for Halloween Bark?
Definitely important! While this recipe is vegetarian, always check for specific dietary needs. If you have a nut allergy, ensure that the chocolate and candy melts are nut-free. If you’re making it for kids or pets, be cautious with any toppings, like sprinkles or gummies, that may contain allergens.
Deliciously Colorful Halloween Bark That's Super Easy to Make
Ingredients
Equipment
Method
- Line a large baking sheet with a Silpat mat or parchment paper.
- Melt 24 ounces of white chocolate chips over simmering water, stirring until smooth.
- In separate bowls, melt 2 ounces each of black, purple, and orange candy melts using the double boiler method.
- Pour the melted white chocolate onto the lined baking sheet and spread it evenly.
- Drop spoonfuls of the melted candy melts onto the white chocolate and swirl them together.
- Sprinkle Halloween sprinkles and candies over the chocolate mixture.
- Refrigerate for about 30 minutes or let it set at room temperature for 2 hours.
- Once set, lift the bark using parchment and cut into about 16 pieces.