


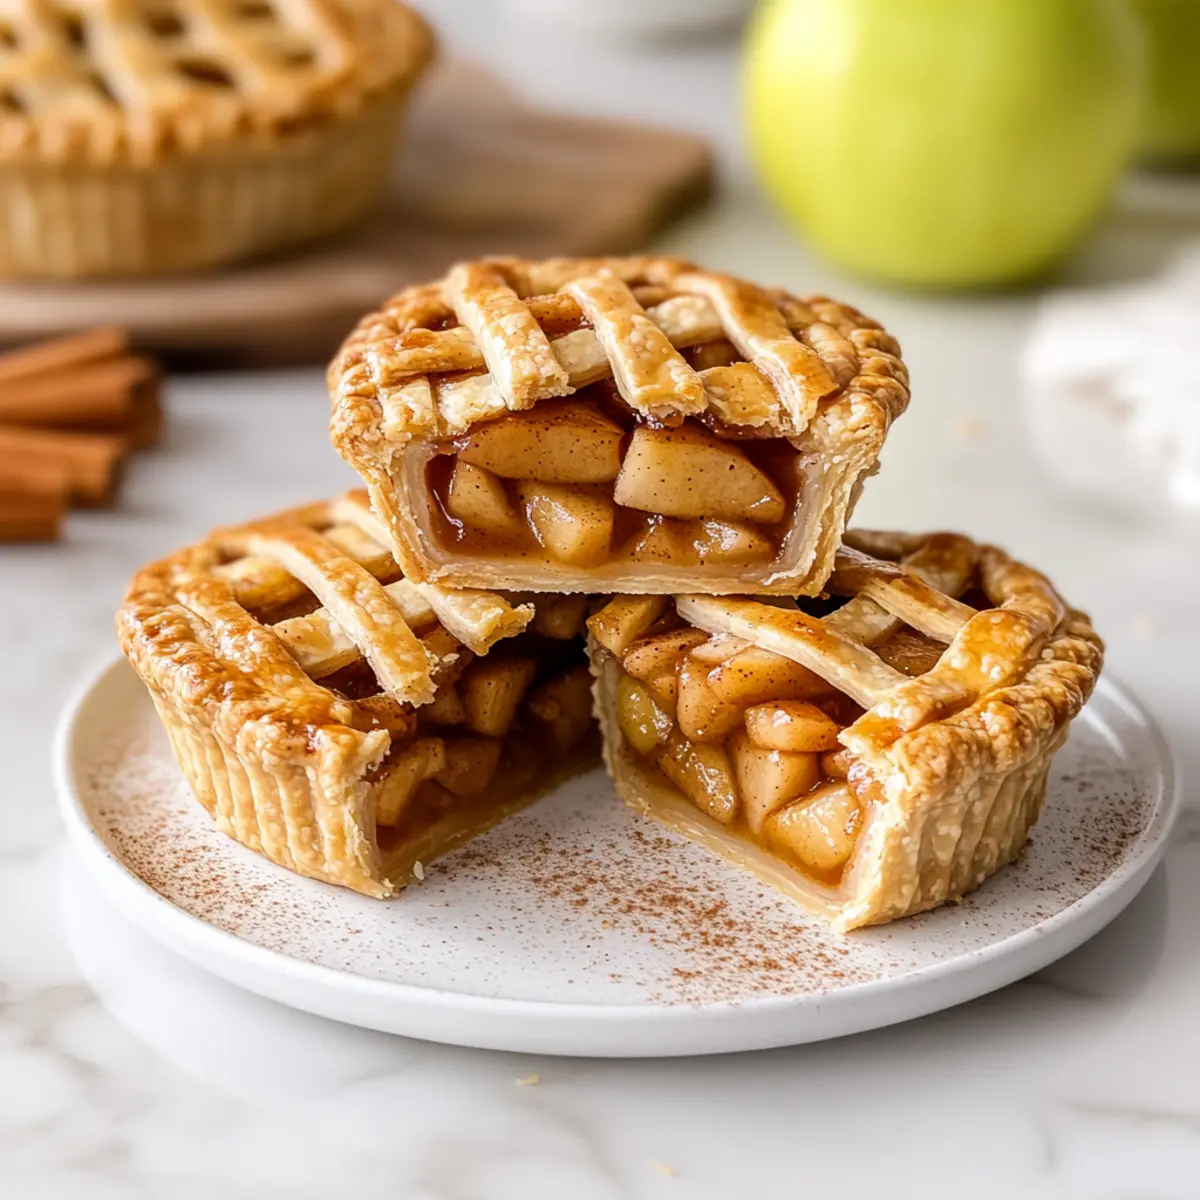
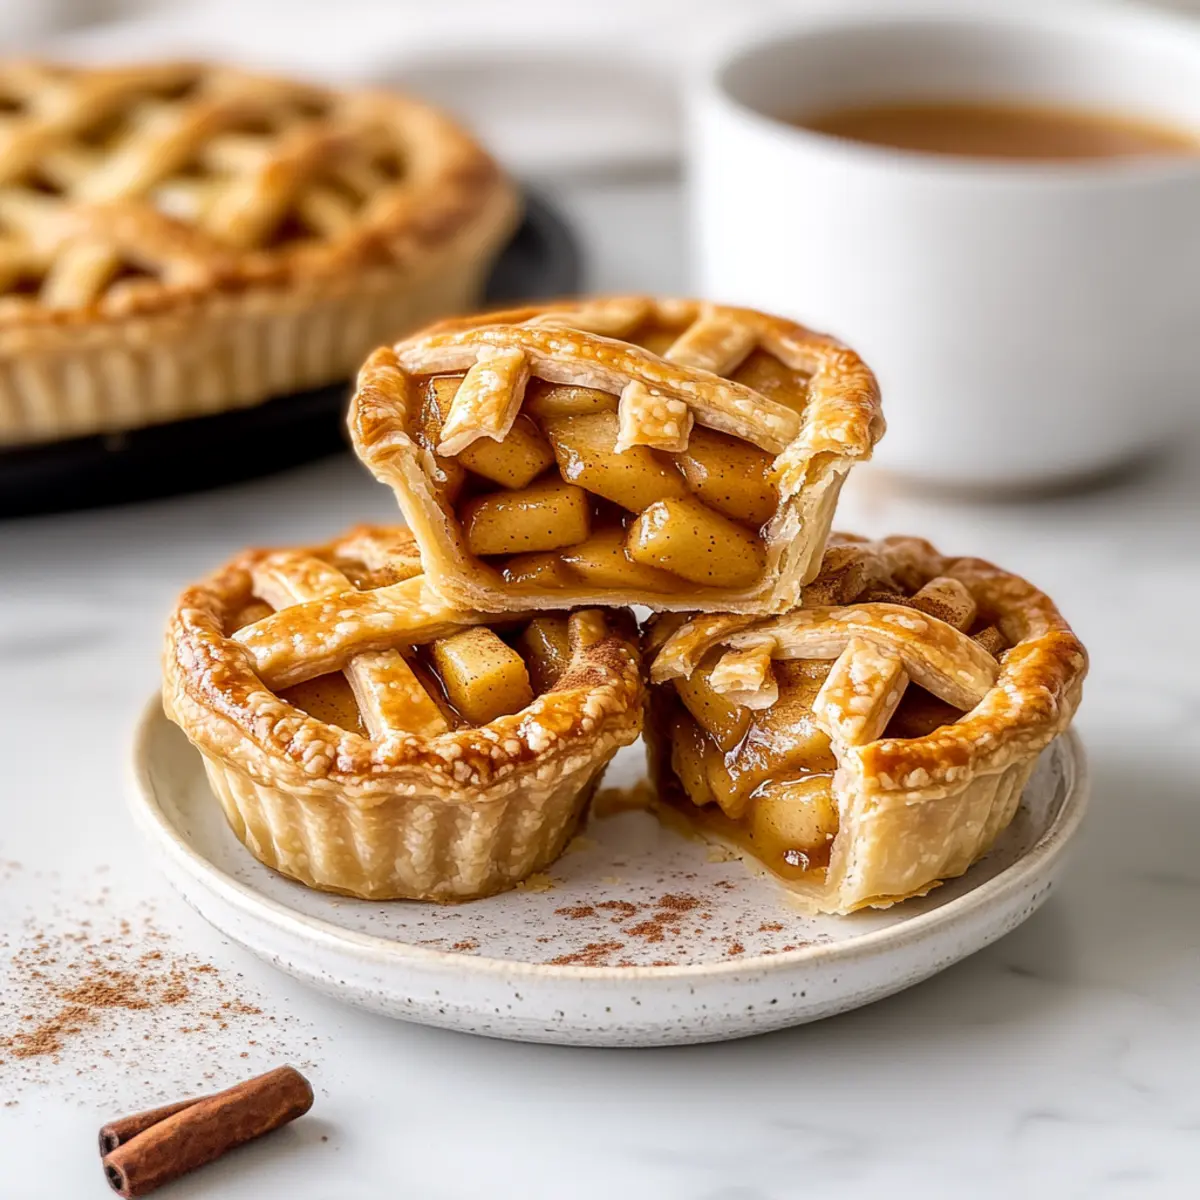
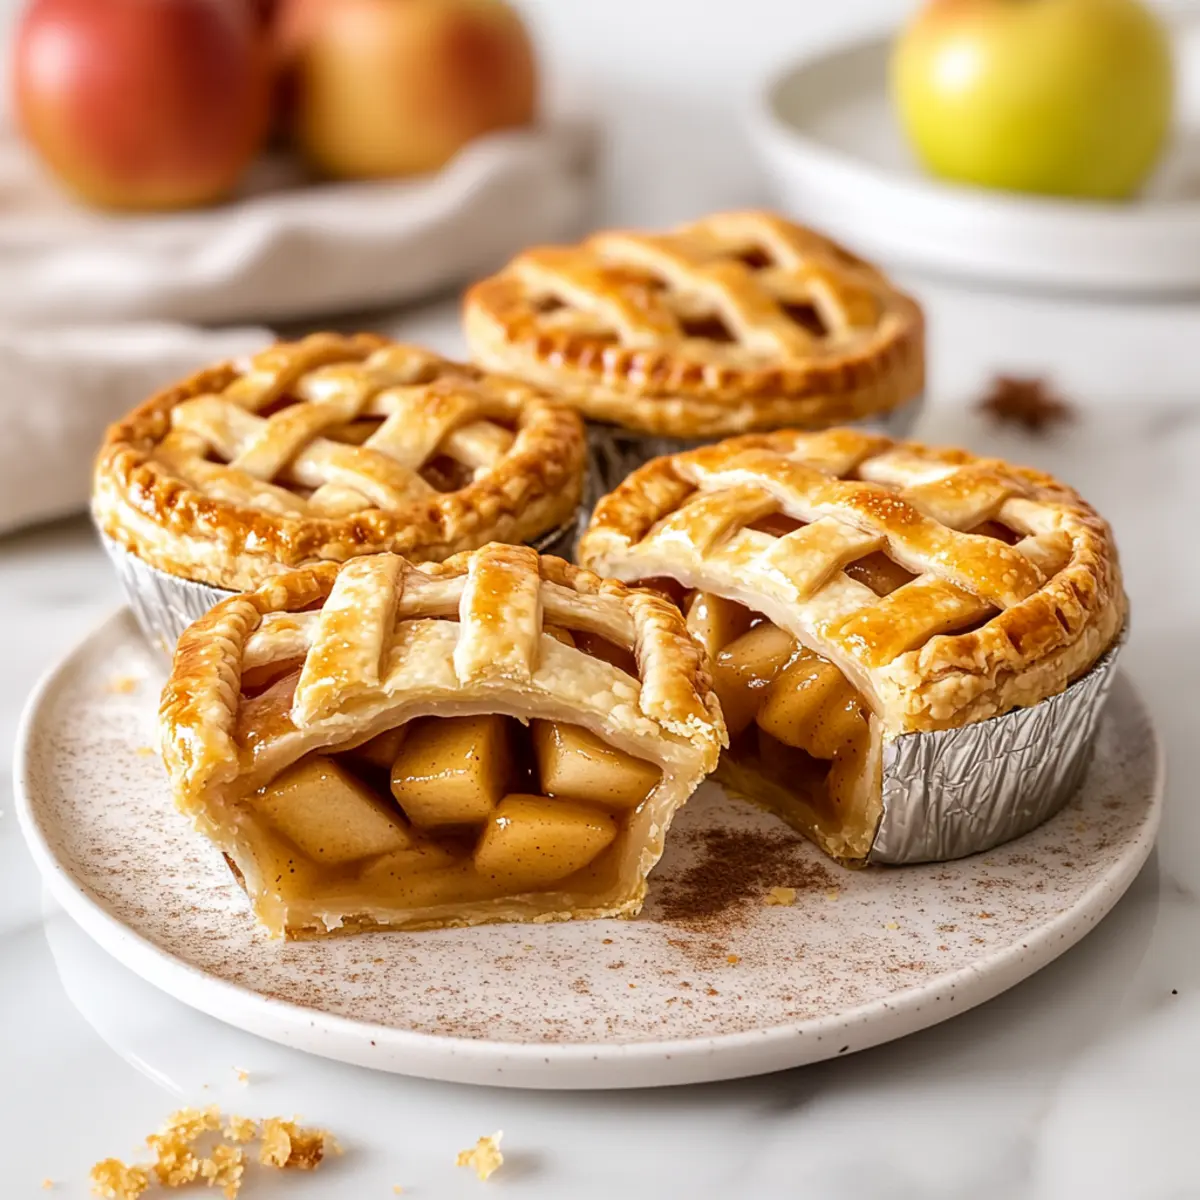
The kitchen is filled with the sweet, warm aroma of cinnamon and baked apples, transporting me to autumn days of harvest festivals and cozy gatherings. Today, I’m excited to share my recipe for Bakery-Style Mini Apple Pies with Lattice Top, the perfect hand-held dessert that captures those beloved autumn flavors. These delightful mini pies combine the sophistication of a bakery treat with the sheer joy of homemade goodness, making them an ideal choice for any occasion. They’re not just quick to prepare but also an easy crowd-pleaser that will leave everyone wanting more. Whether enjoyed warm from the oven or cooled to perfection, their charming presentation and delightful taste are sure to win hearts. Ready to dive into a delicious baking adventure? Let’s get started!

Why Are These Mini Pies Irresistible?
Simplicity at Its Best: The straightforward preparation means you can whip these up without fuss, ideal for both novice and seasoned bakers.
Autumn Flavor Explosion: Each bite bursts with the warm spices of cinnamon and nutmeg, perfectly complementing the sweet apple filling.
Hand-held Delight: Enjoy them anywhere, making them perfect for gatherings or cozy evenings at home.
Impressive Presentation: The lattice top adds a beautiful touch, showcasing the delectable filling and elevating your baking game.
Crowd Favorite: They disappear fast, leaving your guests raving about your baking skills—perfect for any occasion.
Versatile Options: Feel free to experiment with other fruits or toppings for a unique twist that everyone will love!
Mini Apple Pie Ingredients
For the Filling
- Large Apples – Use Granny Smith or Honeycrisp for the best balance of sweetness and tartness.
- Salted Butter – This adds richness and assists in creating a wonderfully flaky crust; unsalted can be used too, just adjust the salt in your recipe.
- Brown Sugar – Choose light or dark brown sugar; dark has a deeper flavor that pairs beautifully with the apples.
- Ground Cinnamon – A key spice that enhances the apple filling’s flavor; you can substitute with apple pie spice if desired.
- Ground Nutmeg – Freshly grated nutmeg delivers a brighter flavor, adding warmth to your filling.
- Fresh Lemon Juice – Balances the sweetness of the apples and prevents browning; lime juice makes a fine substitute.
- Cornflour (Cornstarch) – This thickener prevents sogginess in the filling; ensure it’s well mixed to eliminate clumps.
- Cold Water – Used to create a slurry with cornflour, ensuring the filling reaches the right thickness.
For the Pastry
- Frozen Shortcrust Pastry – Provides that classic buttery, flaky texture; feel free to use homemade pastry for an extra touch of love.
- Large Egg – Essential for the egg wash, giving the mini pies a golden and glossy finish.
These Mini Apple Pie ingredients combine to create a delightful and charming dessert, perfect for celebrating that wonderful autumn spirit!
Step‑by‑Step Instructions for Bakery-Style Mini Apple Pies with Lattice Top
Step 1: Prepare Filling
Begin by peeling and dicing your large apples into small chunks, aiming for a uniform size for even cooking. In a medium saucepan, melt the salted butter over medium heat. Add the diced apples, brown sugar, ground cinnamon, ground nutmeg, and fresh lemon juice. Stirring occasionally, allow this mixture to simmer for about 5-8 minutes until the apples are slightly tender but still al dente, filling your kitchen with a mouthwatering aroma.
Step 2: Thicken Filling
In a small bowl, mix cornflour with cold water to create a smooth slurry. Once your apple mixture is simmering, stir in this slurry and continue cooking for an additional 2-3 minutes until the filling thickens and becomes glossy. Remove the saucepan from heat and let the apple filling cool completely, allowing the flavors to meld beautifully while you prepare the pastry.
Step 3: Preheat Oven
While your filling cools, preheat the oven to 180°C (356°F). Line a baking tray with parchment paper to prevent sticking during baking. This step ensures that your mini apple pies cook evenly and have that perfect golden-brown crust. Set the prepared baking tray aside as you move on to cut the pastry.
Step 4: Cut Pastry
Take your frozen shortcrust pastry out of the freezer and let it soften slightly for a few minutes. Using a round cutter, cut out circles for the bases of the mini pies, ensuring they are about 10cm in diameter. Then, with a pastry wheel or knife, cut long strips about 1.5cm wide for the lattice top. This intricate weaving will make your Bakery-Style Mini Apple Pies visually stunning.
Step 5: Assemble Pies
On each pastry round, spoon a generous amount of the cooled apple filling, but be careful not to overfill to avoid leakage during baking. Taking the prepared strips, weave them over the filling in a lattice pattern. Trim any excess pastry if needed, and use a fork to crimp the edges tightly, sealing your pies beautifully. This step enhances both the appearance and the texture of your mini pies.
Step 6: Egg Wash
In a small bowl, whisk the large egg until it’s fully combined. Using a pastry brush, generously apply the egg wash over the lattice tops of your mini pies. This will not only give them a lovely golden color but also a glossy finish when baked, enhancing the allure of your freshly made mini apple pies.
Step 7: Bake
Carefully place the assembled mini pies onto your lined baking tray, making sure to leave some space between each pie. Transfer the tray to the preheated oven and bake for 20-25 minutes, or until the crusts are golden brown and firm to the touch. The delightful aromas will permeate your home, making this the most inviting baking experience.
Step 8: Cool
Once baked, remove the tray from the oven and allow the mini apple pies to cool on a wire rack for about 10 minutes. This cooling step helps the filling set properly, making them easier to handle. Serve warm or let them cool to room temperature—either way, these delicious Bakery-Style Mini Apple Pies will surely brighten your autumn days!
What to Serve with Bakery-Style Mini Apple Pies
The magic of autumn gets even better with delightful accompaniments that enhance your mini pies’ charming flavors.
-
Vanilla Bean Ice Cream: A classic pairing that adds creamy richness, making each bite even more indulgent. The cold ice cream contrasts beautifully with the warm pies.
-
Salted Caramel Drizzle: Enhances sweetness with a hint of savory depth, creating a luxurious experience that elevates every mouthful.
-
Whipped Cream: Light, airy, and sweet, this fluffy topping balances the spiced apple filling. A dollop can turn your mini pies into a delightful dessert centerpiece.
-
Hot Apple Cider: An ideal beverage for autumn, its warm spices mirror those in the mini pies, creating a harmonious flavor experience that wraps you in cozy vibes.
-
Crushed Nuts: Sprinkling toasted walnuts or pecans offers a satisfying crunch and nutty richness, adding texture and depth to your pie enjoyment.
-
Pumpkin Spice Latte: The warm, spiced flavors complement your apple treats, bringing in a comforting, festive feel perfect for cozy gatherings.
-
Caramelized Pears: A sophisticated side that introduces a different fruit flavor profile while continuing the theme of warm, spiced sweetness.
-
Cheese Platter: Sharp Cheddar or creamy Brie pairs wonderfully, providing a savory contrast that balances the sweetness of the pies.
-
Sweet Chocolate Sauce: An unexpected yet delightful drizzle can add a gourmet touch, making your mini pies even more enticing and indulgent.
Storage Tips for Mini Apple Pies
Room Temperature: Store unbaked mini apple pies in a cool, dry place for up to 24 hours. This allows the flavors to meld without compromising freshness.
Fridge: Keep baked mini apple pies in an airtight container in the fridge for up to 3 days. This helps retain their flaky texture and delicious filling.
Freezer: Freeze baked mini apple pies for up to a month. Wrap them tightly in plastic wrap and then in foil to maintain quality.
Reheating: To restore crispness, reheat your frozen mini apple pies at 180°C (356°F) for about 10 minutes before serving. Enjoy these delightful treats warm!
Variations & Substitutions for Mini Apple Pies
Feel free to explore different flavors and textures by customizing your Mini Apple Pies!
-
Fruit Swap: Replace apples with diced pears or mixed berries for a unique twist on the traditional flavor. Try combining fruits for a delightful medley!
-
Puff Pastry: Use puff pastry instead of shortcrust for a lighter and airier crust that puffs beautifully. Just be mindful of the different baking times!
-
Nutty Addition: Incorporate chopped walnuts or pecans into the filling for added crunch and nuttiness. The texture contrasts deliciously with the soft apples!
-
Spice Variations: Experiment by adding a dash of ginger or allspice to your filling for a spicy kick. Just a little will elevate the flavors to new heights!
-
Dried Fruit: Try adding a handful of raisins or dried cranberries to the filling for a hint of sweetness and chewy texture. It’s a tasty surprise in each bite!
-
Gluten-Free Option: Use gluten-free pastry for a safe and delicious alternative. There are several ready-made options that work beautifully!
-
Heat It Up: Add a pinch of cayenne pepper or a few slices of jalapeño to the apple filling for an unexpected spicy element that contrasts with the sweetness.
-
Caramel Drizzle: For a delightful finish, drizzle caramel sauce on top after baking. It adds a rich, sweet layer that pairs wonderfully with the warm filling!
Ultimately, these adaptable variations ensure you can enjoy Mini Apple Pies all year round, making each batch something special! For other creative pie ideas, check out Delicious Fruit Tart Recipes or explore Other Hand-Held Desserts to expand your dessert repertoire.
Make Ahead Options
These Bakery-Style Mini Apple Pies are perfect for meal prep enthusiasts! You can prepare the apple filling up to 3 days in advance; just ensure it’s cooled completely before storing it in an airtight container in the refrigerator to maintain its quality. Alternatively, the unbaked mini pies can be assembled and refrigerated for up to 24 hours before baking, preventing sogginess by keeping the pastry fresh. When you’re ready to serve, simply brush with egg wash and pop them in the preheated oven for 20-25 minutes until golden brown. With these make-ahead options, you’ll have delicious, homemade mini pies ready with minimal effort on busy weeknights!
Expert Tips for Mini Apple Pies
- Thicken Filling Well: Ensure your apple filling is thick; if it’s too runny, simply add more cornflour slurry for perfect consistency.
- Avoid Overfilling: Be cautious not to overfill the mini pies; this can lead to delightful leaks that might ruin your beautiful lattice tops.
- Secure Edges Firmly: Crimp the edges of the pastry well to ensure a tight seal; this prevents filling from escaping during baking and enhances presentation.
- Chill Sticky Pastry: If your pastry becomes too sticky while handling, place it in the freezer for 5 minutes to make it easier to work with.
- Experiment with Flavor: Don’t hesitate to try different spice blends or fruit fillings; tweaking the traditional recipe can yield a unique twist on your mini apple pies.
Mini Apple Pies Recipe FAQs
What type of apples are best for this recipe?
Absolutely! For the sturdiest and most flavorful filling, I recommend using Granny Smith or Honeycrisp apples. Their natural sweetness, balanced with a bit of tartness, makes them ideal for baking, as they hold their shape and offer great flavor. You can also mix these with sweeter apples like Fuji for a tasty twist if desired.
How should I store leftover mini apple pies?
Very! Store baked mini apple pies in an airtight container in the fridge to keep them fresh for up to 3 days. Allow them to cool completely before sealing. If you’d like to keep them longer, feel free to freeze them! Just wrap tightly in plastic wrap and then foil, and they’ll maintain their good taste for up to a month.
Can I freeze unbaked mini apple pies?
Of course! To freeze unbaked mini apple pies, prepare them as instructed (without egg wash) and place them in a single layer on a baking sheet. Flash freeze them for about an hour, then transfer to a freezer bag. They can be frozen this way for up to 24 hours. When you’re ready to bake, just brush the tops with egg wash and bake straight from the freezer, adding a few extra minutes to the baking time.
What if my apple filling is too runny?
No worries! If your apple filling ends up runny, which can happen, simply make another slurry of 1 tablespoon cornstarch mixed with 2 tablespoons of cold water, stirring it into your apple mixture over low heat until it thickens. This should take about 2-3 minutes, so keep stirring until you achieve your desired thickness!
Are these mini pies suitable for those with allergies?
Always consider dietary needs! This recipe contains gluten (from the pastry) and dairy (from the butter and egg). If you need a gluten-free option, you can use gluten-free pie crusts or alternative flours. For dairy-free versions, use a margarine or plant-based butter, and ensure the egg wash is replaced with a dairy-free alternative or omitted entirely—your mini pies will still taste fabulous!
Crispy Mini Apple Pies that Will Brighten Your Autumn Days
Ingredients
Equipment
Method
- Peel and dice apples into small chunks. Melt butter in a saucepan over medium heat. Add apples, brown sugar, cinnamon, nutmeg, and lemon juice. Simmer for 5-8 minutes.
- Mix cornflour with cold water in a small bowl to create a slurry. Stir into apple mixture and cook for an additional 2-3 minutes until thickened.
- Preheat the oven to 180°C (356°F) and line a baking tray with parchment paper.
- Soften the frozen pastry slightly. Cut out pastry circles about 10cm in diameter and strips for the lattice.
- Spoon the cooled apple filling onto each pastry round. Weave pastry strips over the filling in a lattice pattern.
- Crimp edges to seal. Whisk egg and apply the wash over the lattice tops.
- Bake in preheated oven for 20-25 minutes until golden brown.
- Allow to cool on a wire rack for about 10 minutes before serving.