


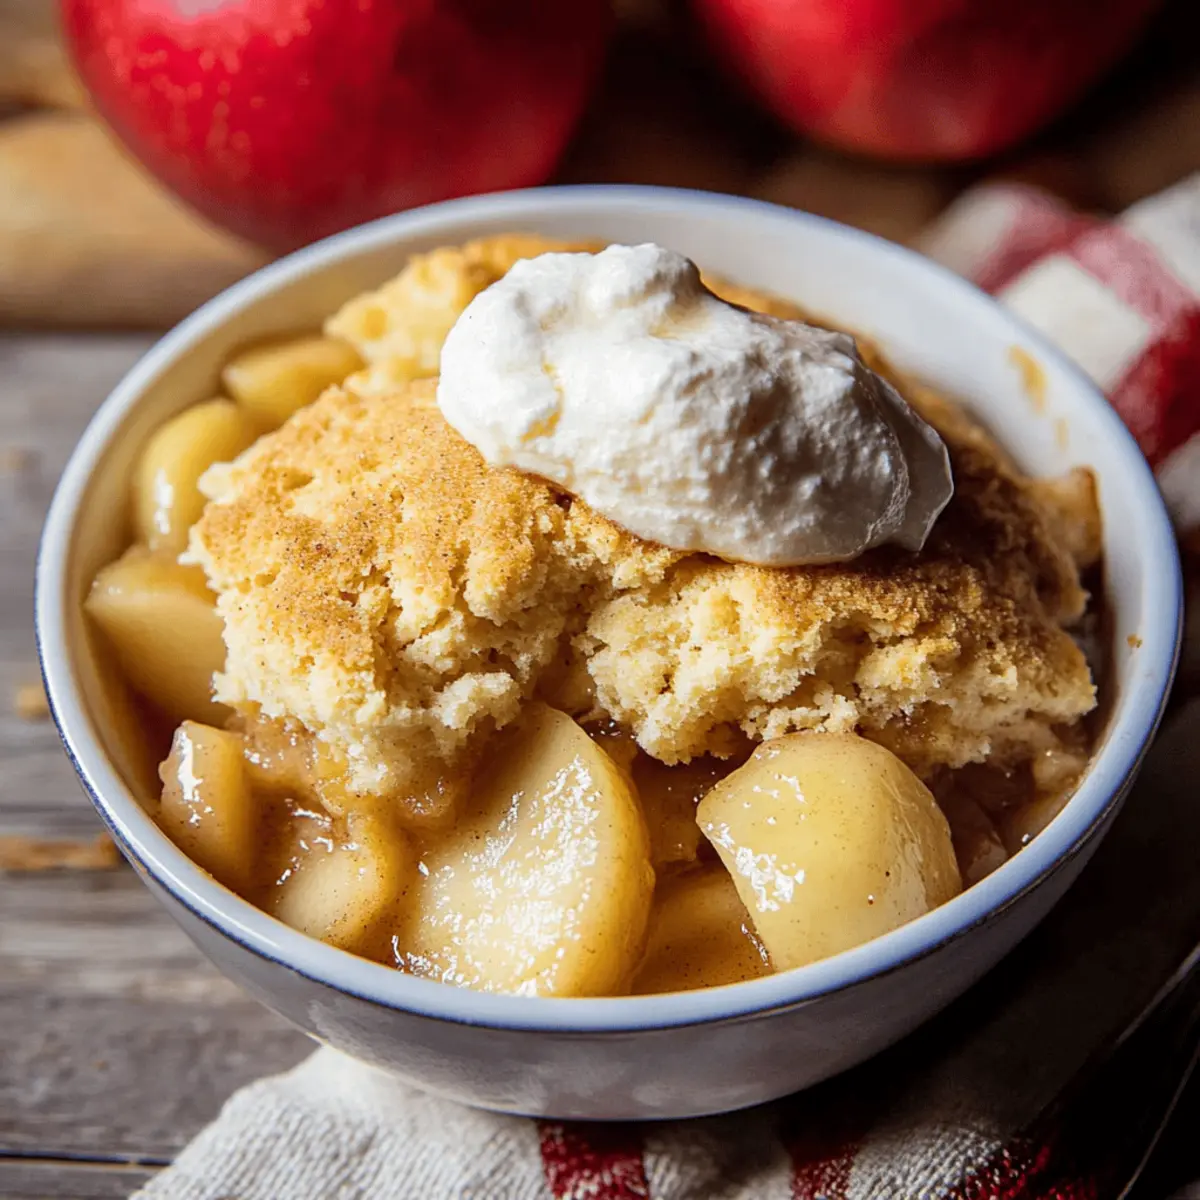
As I unwrapped the warm, buttery biscuit topping of my latest creation, an inviting aroma of cinnamon and tender apples filled my kitchen, transporting me straight to autumn afternoons spent in my grandmother’s home. This No-Fail Gluten-Free Apple Cobbler is not just a delightful dessert; it’s a comforting treat that allows you to indulge without worry. Whether you’re a novice baker or a seasoned pro, this apple cobbler recipe is your ticket to effortless baking success. Perfect for gatherings or a cozy night in, it features juicy spiced apples beneath a fluffy, golden crust that delights the senses. Plus, it’s designed to easily accommodate dietary preferences, making it a versatile choice for any occasion. So, are you ready to create a dessert that feels like a warm hug? Let’s dive into this delicious recipe together!
Why is this Apple Cobbler a Must-Try?
Simplicity at its finest: This No-Fail Gluten-Free Apple Cobbler combines easy-to-follow steps with readily available ingredients, making it perfect for bakers of all levels.
Irresistible flavors await you: A delightful mix of sweet, spiced apples and flaky, buttery biscuit topping will have your taste buds singing.
Customizable options are endless: Whether you’re looking for a dairy-free treat or want to switch up the apple varieties, the flexibility of this recipe caters to your dietary needs.
Perfect for gatherings: Impress family and friends with this comforting dessert that’s sure to be the star of any event, reminiscent of cherished family gatherings.
Pair it with a scoop of ice cream or a dollop of whipped cream for an extra indulgent experience, just like with my Cheesy Hamburger Potato or Cozy Broccoli Cheddar recipes!
Apple Cobbler Recipe Ingredients
• Dive into this delightful Apple Cobbler Recipe with flavorful ingredients that create a comforting dessert experience!
For the Apple Filling
- Granulated Sugar – Provides sweetness; coconut sugar can offer a lower glycemic option.
- Brown Sugar – Adds depth and moisture; can be replaced with more granulated sugar if necessary.
- Water – Creates a syrupy base for the filling; no substitution needed.
- Lemon Juice – Brightens flavor and balances sweetness; lime juice works well as an alternative.
- Cornstarch – Thickens the filling; arrowroot powder is a good substitute.
- Vanilla Extract – Enhances flavor; try almond extract for a unique twist.
- Ground Cinnamon – Adds warmth and spice; can reduce or replace it with nutmeg.
- Ground Nutmeg – Provides a nutty flavor; allspice can be used if nutmeg is unavailable.
- Salt – Balances flavors; it’s essential and should be included.
- Golden Delicious Apples – Main flavor and structure of the cobbler; other baking apples like Fuji or Honeycrisp can also be used.
For the Biscuit Topping
- Unsalted Butter – Enhances flavor and texture; substitute with vegan butter for a dairy-free version.
- Gluten-Free All-Purpose Flour – Provides structure; Cup4Cup is a recommended brand, but be aware that other blends may need adjustments.
- Baking Powder – Helps the topping rise; ensure it’s gluten-free.
- Milk – Adds moisture; any plant-based milk can replace dairy milk for a dairy-free option.
- Coarse Sugar – Optional topping for extra texture; regular sugar can work if coarse isn’t available.
For Serving
- Ice Cream/Whipped Cream – Serving suggestion for added richness; consider dairy-free varieties if you need them.
Step‑by‑Step Instructions for No-Fail Gluten-Free Apple Cobbler with Buttery Biscuit Topping
Step 1: Preheat the Oven
Begin by preheating your oven to 400°F (200°C) and greasing an 11×7-inch or 2-quart baking dish with a little butter or cooking spray. This will help achieve that crispy, golden crust on your No-Fail Gluten-Free Apple Cobbler. Set the greased dish aside while you prepare the apple filling, letting the anticipation build!
Step 2: Prepare the Apple Filling
In a large mixing bowl, combine granulated sugar, brown sugar, water, lemon juice, cornstarch, ground cinnamon, nutmeg, and salt. Stir to mix thoroughly. Add the chopped apples and grated apple, ensuring they’re well-coated in the mixture. Transfer this delicious filling to your prepared baking dish. Pour melted butter over the top, cover the dish with foil, and bake for 20 minutes, allowing the apples to soften beautifully.
Step 3: Make the Biscuit Topping
While the apple filling is baking, grab a separate bowl and whisk together gluten-free all-purpose flour, granulated sugar, baking powder, and salt. Cut in the cold, unsalted butter using a pastry cutter or your fingers until the mixture resembles coarse crumbs. Gradually stir in milk until a soft, cohesive dough forms, ready to sit atop your apple delight.
Step 4: Assemble the Cobbler
After removing the apple filling from the oven, drop spoonfuls of the biscuit dough over the top, letting some apples peek through for that rustic appeal. Brush the tops of the biscuits lightly with milk and sprinkle with coarse sugar if you like a little extra crunch. This final touch will make your apple cobbler even more inviting!
Step 5: Bake the Cobbler
Return the uncovered baking dish to the oven and bake for an additional 35-40 minutes. You’ll know it’s ready when the biscuit topping is golden brown and a toothpick inserted into the center comes out clean. Enjoy the delicious aromas wafting through your kitchen as you wait for your No-Fail Gluten-Free Apple Cobbler to finish baking.
Step 6: Cool and Serve
Once baked, take the cobbler out of the oven and let it cool for about 30-60 minutes. This waiting time allows the filling to thicken up beautifully. Once cooled slightly, serve warm on its own or with a scoop of vanilla ice cream or a dollop of whipped cream for an indulgent treat that highlights the luscious apple filling and buttery topping!
Helpful Tricks for Apple Cobbler
-
Grate an Apple: Adding grated apple to the filling enhances texture and natural thickening, creating a luscious base for your cobbler.
-
Cover Initially: Covering the apple filling with foil for the first phase of baking helps steam the apples, softening them quickly and ensuring they absorb those delightful flavors.
-
Choose Your Flour Wisely: Ensure your gluten-free all-purpose flour contains a good binding agent. This prevents a crumbly topping and promotes a deliciously fluffy texture in your apple cobbler.
-
Let It Cool: Allow the cobbler to rest for 30-60 minutes before serving. This patience is key to achieving a beautifully thickened filling that holds up well on the plate.
-
Experiment with Apples: Use different apple varieties for varied flavors and textures, transforming your traditional apple cobbler into something uniquely delicious!
Apple Cobbler Recipe Variations
Feel free to explore your creativity with this recipe, making it truly your own with delightful twists!
- Different Apples: Swap Golden Delicious for Granny Smith, Honeycrisp, or Fuji for a unique flavor profile.
- Dairy-Free Delight: Use vegan butter and almond milk to adapt this recipe for a comforting dairy-free treat.
- Nutty Crunch: Stir in chopped walnuts or pecans to the biscuit topping for an extra crunch that’ll surprise your taste buds.
- Spicy Notes: Add a dash of ginger or cardamom to the apple filling for a fragrant twist that evokes cozy autumn vibes.
- Crispy Topping: For added texture, sprinkle oats on top of the biscuit rounds before baking – perfect for a hearty finish!
- Sweet Alternative: If you enjoy a richer sweetness, try substituting granulated sugar with maple syrup in the apple filling.
- Berry Good: Mix in a handful of blueberries or raspberries with the apples for a burst of juicy flavor that’s both refreshing and sweet.
- Caramel Drizzle: Before serving, drizzle warmed caramel sauce over the top for an indulgent touch that takes this cobbler to the next level.
This apple cobbler recipe is super versatile—if you’re in the mood for something hearty yet cozy, you might also enjoy my Mexican Taco Soup or Shepherd’s Pie Soup for a comforting twist on classic dishes!
How to Store and Freeze Apple Cobbler
-
Room Temperature: Keep the apple cobbler covered at room temperature for up to 3 days to maintain its delightful texture and flavor.
-
Fridge: Store in an airtight container in the refrigerator for up to 1 week. This will help preserve the freshness of the juicy fruit filling.
-
Freezer: For longer storage, wrap the cooled cobbler tightly in plastic wrap and then in aluminum foil. It can be frozen for up to 3 months.
-
Reheating: To enjoy your apple cobbler again, reheat it in the oven at 350°F (175°C) for about 15-20 minutes, until warmed through and the biscuit topping regains its fluffy texture.
Make Ahead Options
These No-Fail Gluten-Free Apple Cobblers are ideal for busy home cooks looking to streamline their meal prep! You can prepare the apple filling and biscuit topping separately and refrigerate them up to 24 hours in advance. To do this, simply mix the apple filling ingredients together and store it in an airtight container, while the prepared biscuit dough can be wrapped in plastic. When you’re ready to bake, take the filling out of the fridge and spread the biscuit topping over it before baking. This ensures your dessert is just as delicious and fresh as if made on the same day, saving you valuable time while keeping flavor intact!
What to Serve with No-Fail Gluten-Free Apple Cobbler with Buttery Biscuit Topping
Indulge in a heartwarming meal by pairing your delicious cobbler with simple sides that elevate the experience.
- Vanilla Ice Cream: The cold creaminess provides a perfect contrast to the warm, baked apples, creating a comforting and classic dessert combination.
- Whipped Cream: Light and fluffy, a dollop of whipped cream adds airiness and richness that complements the spiced filling beautifully.
- Cinnamon Sugar Dusting: Sprinkle a little cinnamon sugar over the top for a delightful touch of sweetness that enhances the dessert’s warm, comforting flavors.
- Fresh Berry Medley: A vibrant mix of raspberries, blueberries, and strawberries brings a refreshing balance while adding a pop of color to your plate.
- Toasted Nuts: Add texture and a nutty flavor with toasted pecans or walnuts, offering a delicious crunch that contrasts perfectly with the soft biscuit topping.
- Herbal Tea: Pair with a soothing cup of chamomile or ginger tea for a comforting beverage that complements the sweet and spiced apple flavors.
- Cheddar Cheese Slice: For an unexpected twist, enjoy a slice of sharp cheddar cheese alongside your cobbler. The savory notes provide a delicious counterbalance to the sweetness.
- Caramel Drizzle: Add a touch of decadence by drizzling warm caramel sauce over the cobbler for an extra indulgent experience.
No-Fail Gluten-Free Apple Cobbler with Buttery Biscuit Topping Recipe FAQs
How do I select the best apples for this recipe?
When choosing apples for your No-Fail Gluten-Free Apple Cobbler, opt for varieties like Golden Delicious, Fuji, or Honeycrisp. These apples not only provide a balanced sweetness but also hold their shape during baking, helping to create that perfect texture. Look for firm apples without dark spots or bruises, as these can affect the taste and quality of your cobbler.
What is the best way to store leftover apple cobbler?
To store your apple cobbler, keep it covered at room temperature for up to 3 days. If you wish to extend its shelf life, transfer it to an airtight container and refrigerate for up to a week. This method helps keep the flavors fresh and the filling juicy. When you’re ready to enjoy it again, simply reheat it in the oven for the best texture.
Can I freeze the apple cobbler for later?
Absolutely! To freeze your apple cobbler, let it cool completely after baking. Then, wrap it tightly in plastic wrap, followed by aluminum foil to prevent freezer burn. You can freeze it for up to 3 months. When you’re ready to enjoy it, thaw it overnight in the fridge, then reheat in the oven at 350°F (175°C) for about 15-20 minutes until warmed through.
What if my biscuit topping turns out too dry or crumbly?
If your biscuit topping ends up dry, it might be due to overmixing the dough or not using enough moisture. When making the topping, be sure to gently combine the ingredients until just blended. Additionally, if it seems too dry, you could add a splash more milk to achieve a softer dough. Remember to handle the mixture lightly to keep that fluffy texture!
Are there any allergy considerations for this recipe?
Yes, this No-Fail Gluten-Free Apple Cobbler is naturally free from gluten, making it a great choice for those with gluten intolerance. However, if you are catering to dairy allergies, make sure to substitute unsalted butter with a plant-based alternative and use non-dairy milk. Always double-check the labels on your gluten-free flour to ensure it meets your dietary needs.
What can I serve with the apple cobbler?
For an extra special treat, serve your apple cobbler warm with a scoop of vanilla ice cream or a dollop of whipped cream. If you’re looking for a dairy-free option, consider coconut ice cream or whipped coconut cream. The creamy addition beautifully complements the warm, spiced apples and buttery biscuit topping, elevating your dessert experience!

Irresistible Apple Cobbler Recipe with Buttery Biscuit Topping
Ingredients
Equipment
Method
- Preheat your oven to 400°F (200°C) and grease the baking dish.
- Combine the filling ingredients and transfer to the prepared baking dish.
- Make the biscuit topping, then drop spoonfuls over the apple filling.
- Bake uncovered for 35-40 minutes until the topping is golden brown.
- Let the cobbler cool for 30-60 minutes before serving.