


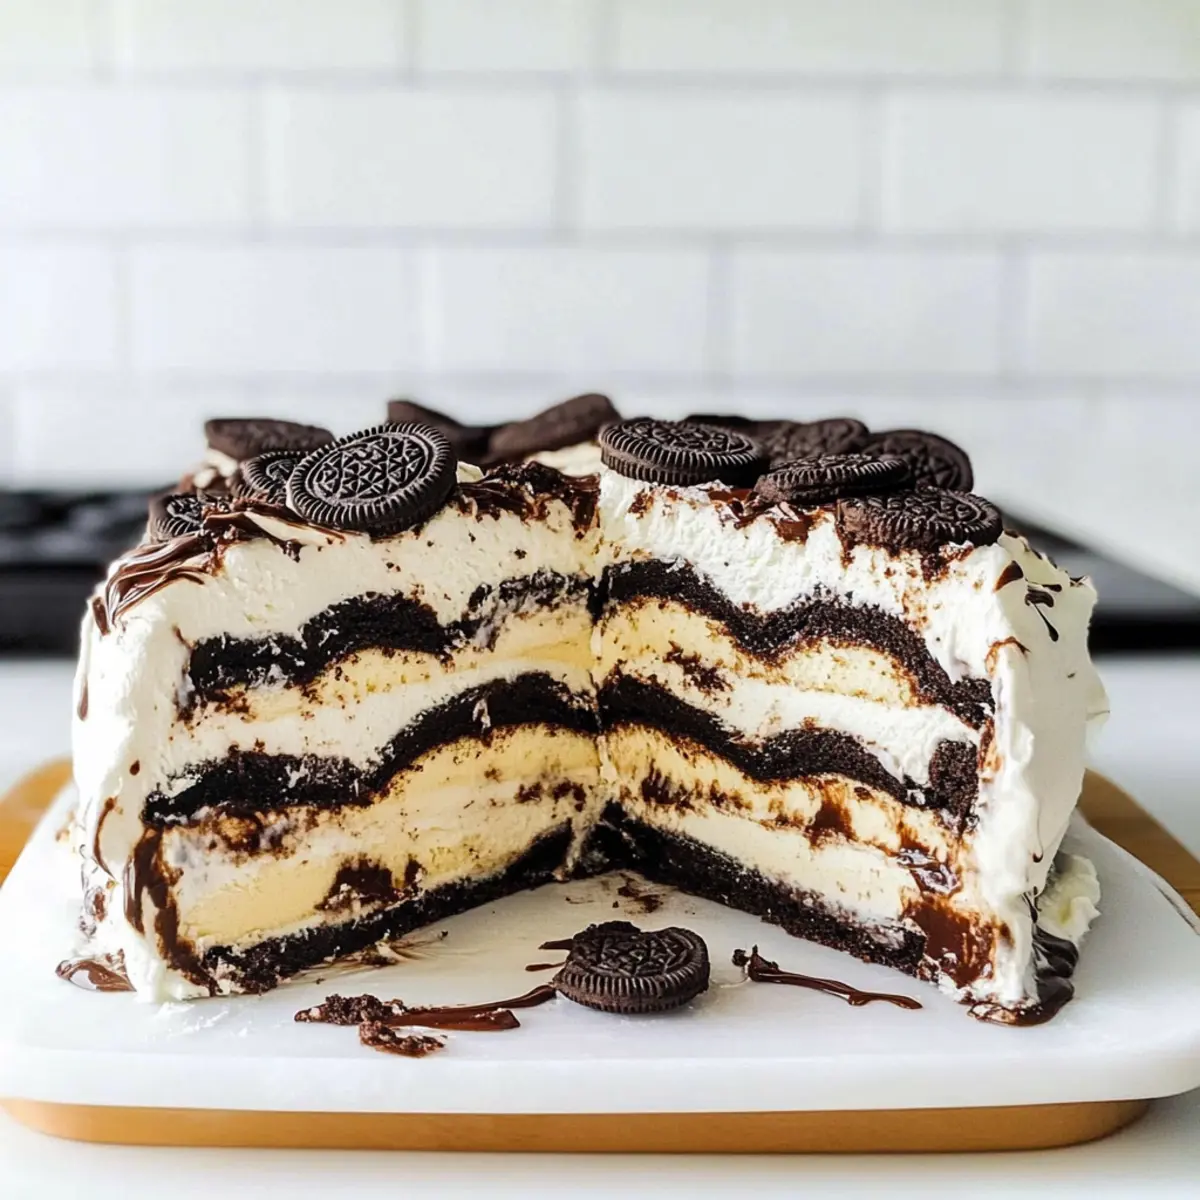
As the sun begins to warm the air and summer gatherings come into full swing, nothing beats the cooling comfort of a dessert that invites smiles and laughter. That’s where my Easy Ice Cream Sandwich Dessert Cake comes in! This delightful no-bake treat layers creamy ice cream sandwiches with rich hot fudge, fluffy whipped cream, and crunchy Oreo goodness. Plus, it takes mere minutes to assemble, leaving you more time to enjoy the sun and your friends. Whether it’s a backyard BBQ or a birthday celebration, this cake is a guaranteed crowd-pleaser that’s as fun to make as it is to eat. Ready to dive into summer with this simple yet indulgent delight?
Why Is This Cake So Irresistible?
No-Bake Ease: You won’t need to turn on the oven for this dessert! Perfect for hot summer days when you want something delicious without the heat of baking.
Crowd-Pleasing Delight: This cake brings smiles to faces, making it the perfect addition to backyard BBQs, birthdays, or any gathering.
Flavor Combinations: With layers of vanilla ice cream, rich hot fudge, and crunchy Oreos, each bite is a thrilling flavor explosion.
Quick Assembly: Just a few simple steps make this dessert a breeze to put together—ideal for busy hosts looking to impress!
Fun and Versatile: Feel free to swap in your favorite cookies or ice cream sandwich flavors for a personalized twist. This is your canvas for creativity!
If you want more easy dessert ideas, check out our no-bake dessert recipes. You’ll be inspired!
Ice Cream Sandwich Cake Ingredients
• Get ready to gather your tasty essentials!
For the Cake Layers
- Ice Cream Sandwiches – Choose your favorite brand or flavor for a creamy base.
- Hot Fudge Sauce – This will bring rich chocolate goodness; chocolate syrup can work in a pinch.
- Whipped Topping (Cool Whip) – Light and fluffy, or use homemade for a fresh touch.
- Oreo Cookies – Crushed for a delightful crunch; substitute with chocolate wafer cookies if preferred.
Feel free to get creative with your Ice Cream Sandwich Cake by mixing and matching different flavors for a truly unique summer dessert experience!
Step‑by‑Step Instructions for Easy Ice Cream Sandwich Dessert Cake
Step 1: Prepare the Dish
Begin by lining an 8×8-inch freezer-safe dish with parchment paper. This will help with easy removal later. Ensure the paper overlaps the edges so you can easily pull out your Ice Cream Sandwich Dessert Cake after freezing.
Step 2: Warm the Fudge
Microwave 1 cup of hot fudge sauce for about 20-30 seconds, or until it becomes smooth and spreadable. Keep an eye on it to prevent overheating. This warm fudge will create a delicious layer in your cake, adding to its indulgent flavor.
Step 3: Layer the Sandwiches
Start with your ice cream sandwiches, placing a full layer at the bottom of the prepared dish. If necessary, trim the sandwiches to fit snugly. This creamy base will be essential for your Easy Ice Cream Sandwich Dessert Cake, so arrange them closely together.
Step 4: Add the Fudge
Using a spatula, spread half of the warmed hot fudge sauce evenly over the first layer of ice cream sandwiches. Make sure to cover the sandwiches thoroughly, allowing the rich chocolate flavor to soak in, enhancing the dessert’s overall taste.
Step 5: Whipped Topping Layer
Next, spread half of the whipped topping (Cool Whip) over the fudge layer. Aim for an even distribution to ensure each bite has a fluffy, creamy texture. The whipped topping will help balance out the richness of the fudge and sandwiches beautifully.
Step 6: Sprinkle Oreos
Evenly sprinkle half of the crushed Oreo cookies over the whipped topping layer. This will add a delightful crunch to your Easy Ice Cream Sandwich Dessert Cake, enhancing the texture with each mouthful.
Step 7: Repeat the Layers
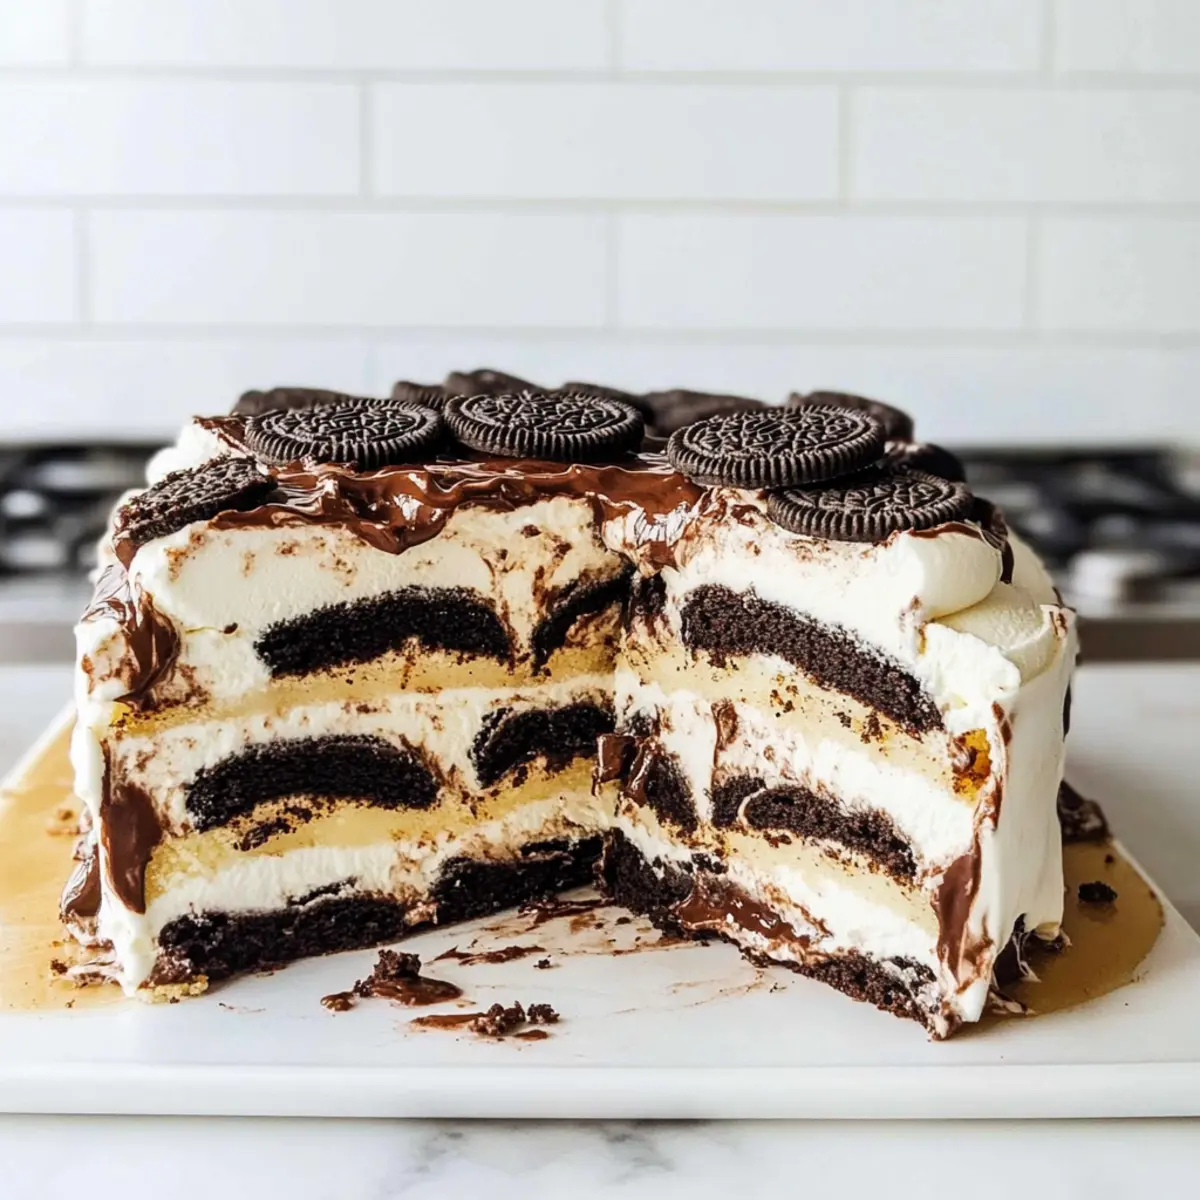
For the second round, repeat the process by adding another layer of ice cream sandwiches, followed by the remaining hot fudge, whipped topping, and crushed Oreos. This will create a stunning layered effect that not only looks tempting but offers diverse flavors.
Step 8: Freeze the Cake
Cover the dish loosely with plastic wrap and place it in the freezer for at least 6 hours, or ideally overnight. This chilling time allows the layers to meld together, creating a solid but creamy Ice Cream Sandwich Dessert Cake ready to delight your guests.
Step 9: Serve the Cake
Once fully frozen, remove your cake from the freezer and let it sit at room temperature for about 10 minutes. This will make slicing easier. Cut into squares and serve your Easy Ice Cream Sandwich Dessert Cake with a smile, enjoying the cool creaminess that awaits!
Ice Cream Sandwich Cake Variations
Feel free to experiment and tailor this ice cream sandwich cake to your taste, creating delightful surprises in every bite!
-
Different Cookies: Swap out Oreo cookies for your favorite cookies, like chocolate chip or peanut butter, for a personalized twist. Adding different types of cookies can completely transform the flavor profile and add exciting textures.
-
Alternative Ice Cream Flavors: Use different flavors of ice cream sandwiches, such as mint chocolate chip or cookie dough, to create a mixed flavor delight. This is a fun way to cater to everyone’s preferences, turning a classic into a fun adventure.
-
Fruity Layers: Add sliced strawberries or bananas between layers for a refreshing fruitiness. The natural sweetness of the fruit pairs perfectly with the creamy goodness, making every bite a little taste of summer.
-
Nutty Crunch: Incorporate chopped nuts, like pecans or almonds, in the Oreo layer for an extra crunch. This will not only enhance the texture but also add a delightful nutty flavor that complements the sweetness.
-
Spicy Kick: Drizzle some cinnamon or a hint of cayenne pepper in the hot fudge for a spiced version. A little heat can elevate the dessert and surprise your guests with an unexpected twist.
-
Chocolate Lovers: Layer in chocolate chips or mini M&Ms between the ice cream sandwiches or on top for an extra chocolatey treat. This is a perfect choice for chocolate lovers looking to amp up their indulgence.
-
Vegan Version: Use dairy-free ice cream sandwiches and coconut whipped cream for a vegan-friendly dessert. This way, everyone can join in on the fun without missing out!
Feel free to be creative with this Easy Ice Cream Sandwich Dessert Cake, and don’t forget to check out our collection of mouthwatering no-bake dessert recipes for even more inspiration!
Make Ahead Options
These Easy Ice Cream Sandwich Dessert Cakes are perfect for busy cooks looking to save time! You can prepare the cake up to 24 hours in advance by assembling all the layers (ice cream sandwiches, hot fudge, whipped topping, and Oreos) and freezing it overnight. Make sure to cover the dish well with plastic wrap to prevent freezer burn and maintain that delicious creamy texture. When it’s time to serve, just remove the cake from the freezer and let it sit for about 10 minutes to soften before slicing. This thoughtful prep will ensure a refreshing treat is ready to impress your guests, making your summer gatherings delightful with minimal effort!
How to Store and Freeze Ice Cream Sandwich Cake
Fridge: This dessert can be stored in the fridge for up to 3 days, covered with plastic wrap to maintain freshness and prevent freezer burn.
Freezer: For long-term storage, keep the Ice Cream Sandwich Cake in the freezer for up to one week. Make sure it’s tightly wrapped in plastic wrap or in an airtight container to preserve its texture.
Reheating: Allow the cake to thaw in the refrigerator overnight when you’re ready to enjoy it again. For a quicker thaw, leave it at room temperature for about 10 minutes before slicing.
Portioning: Consider cutting the cake into individual slices and storing them separately. This way, each slice can be easily accessed and enjoyed, extending its appealing freshness!
Expert Tips for Ice Cream Sandwich Cake
-
Layering Technique: Pay attention to how you layer the ice cream sandwiches. Placing them upright can help fill gaps and create a sturdier structure.
-
Cutting Tips: For perfect slices, dip a sharp knife in warm water before cutting through the layers. This technique helps maintain the gorgeous look of your Ice Cream Sandwich Cake.
-
Thawing Time: Allow the cake to sit at room temperature for about 10 minutes before serving. This softens the layers, making for easier cutting and a delightful texture.
-
Flavor Infusion: Feel free to try different flavors of ice cream sandwiches. Mixing flavors adds a fun twist that can elevate the overall experience of your Ice Cream Sandwich Cake.
-
Storage Solutions: If you have leftovers, slice and store them in an airtight container. This keeps them fresh for up to a week and makes it easy to enjoy anytime!
What to Serve with Easy Ice Cream Sandwich Dessert Cake
As you get ready to indulge in this delightful summer treat, think about enhancing your meal experience with complementary sides and beverages.
-
Fresh Fruit Salad: A vibrant mix of seasonal fruits adds a refreshing contrast to the rich sweetness of the cake. Consider using berries, melons, and citrus for a burst of color and flavor.
-
Chocolate Drizzle: Elevate the already decadent cake by drizzling extra hot fudge or chocolate sauce on top. It enhances the chocolate notes, creating a truly indulgent dessert experience.
-
Creamy Coleslaw: This crunchy and tangy side dish balances out the rich flavors of the cake, offering a nice textural contrast at summer gatherings.
-
Grilled Pineapple Slices: The smoky sweetness of grilled pineapple brings warmth and an inviting tropical note that pairs beautifully with the ice cream sandwich layers.
-
Soda Floats: For a whimsical drink, serve up classic soda floats made from root beer or cola and vanilla ice cream to keep the creamy dessert theme going.
-
Lemonade or Iced Tea: A refreshing glass of homemade lemonade or iced tea perfectly complements the cake’s sweetness without overshadowing its rich flavors.
With these delicious additions, you’ll create a festive atmosphere for any summer gathering while leaving your guests smiling and satisfied!
Ice Cream Sandwich Cake Recipe FAQs
How do I choose the best ice cream sandwiches for this cake?
Absolutely! When selecting ice cream sandwiches, look for ones with a higher ice cream content for a creamier texture. Check the expiration date, and avoid any with visible freezer burn or hard, unyielding ice cream. The brand you choose can also make a difference—opt for one that boasts a flavor profile you love!
How should I store leftover Ice Cream Sandwich Cake?
Very! You can store this delicious dessert in the fridge for up to 3 days, tightly covered with plastic wrap to maintain its freshness. For longer-term storage, keep the cake in the freezer, where it can last for up to one week. Just ensure it’s wrapped well, or it’s best to slice it beforehand for easy access.
Can I freeze this Ice Cream Sandwich Cake? How?
Yes, indeed! To freeze your Ice Cream Sandwich Dessert Cake, wrap it tightly in plastic wrap or place it in an airtight container after it has fully set. This prevents freezer burn and maintains its delightful texture. If properly stored, it should keep its deliciousness for up to one week. When you’re ready to enjoy, let it thaw in the refrigerator overnight or at room temperature for about 10 minutes before serving.
What should I do if my cake is too soft to slice?
If you find your cake too soft, don’t worry! Just let it freeze for an additional hour. When ready to cut, dip a sharp knife in warm water, then wipe it dry before slicing into the cake. This method will help cut through the layers easily, ensuring beautiful, clean slices that look as delightful as they taste!
Are there any dietary considerations I should keep in mind?
Indeed! If you’re serving this Ice Cream Sandwich Cake at a gathering, check with your guests about potential allergies. Some ice cream sandwiches may contain nuts or gluten, and whipped toppings could have dairy or ingredients that trigger allergies. For a safer option, consider using gluten-free cookies or dairy-free alternatives if needed!
No-Bake Ice Cream Sandwich Cake for Summer Bliss
Ingredients
Equipment
Method
- Prepare the Dish: Line an 8x8-inch freezer-safe dish with parchment paper.
- Warm the Fudge: Microwave 1 cup of hot fudge sauce for 20-30 seconds until smooth.
- Layer the Sandwiches: Place a full layer of ice cream sandwiches at the bottom of the dish.
- Add the Fudge: Spread half of the warmed hot fudge sauce over the ice cream sandwiches.
- Whipped Topping Layer: Spread half of whipped topping over the fudge layer.
- Sprinkle Oreos: Evenly sprinkle half of the crushed Oreo cookies over the whipped topping.
- Repeat the Layers: Repeat the process with another layer of ingredients.
- Freeze the Cake: Cover and freeze for at least 6 hours or overnight.
- Serve the Cake: Let sit at room temperature for 10 minutes before slicing and serving.