


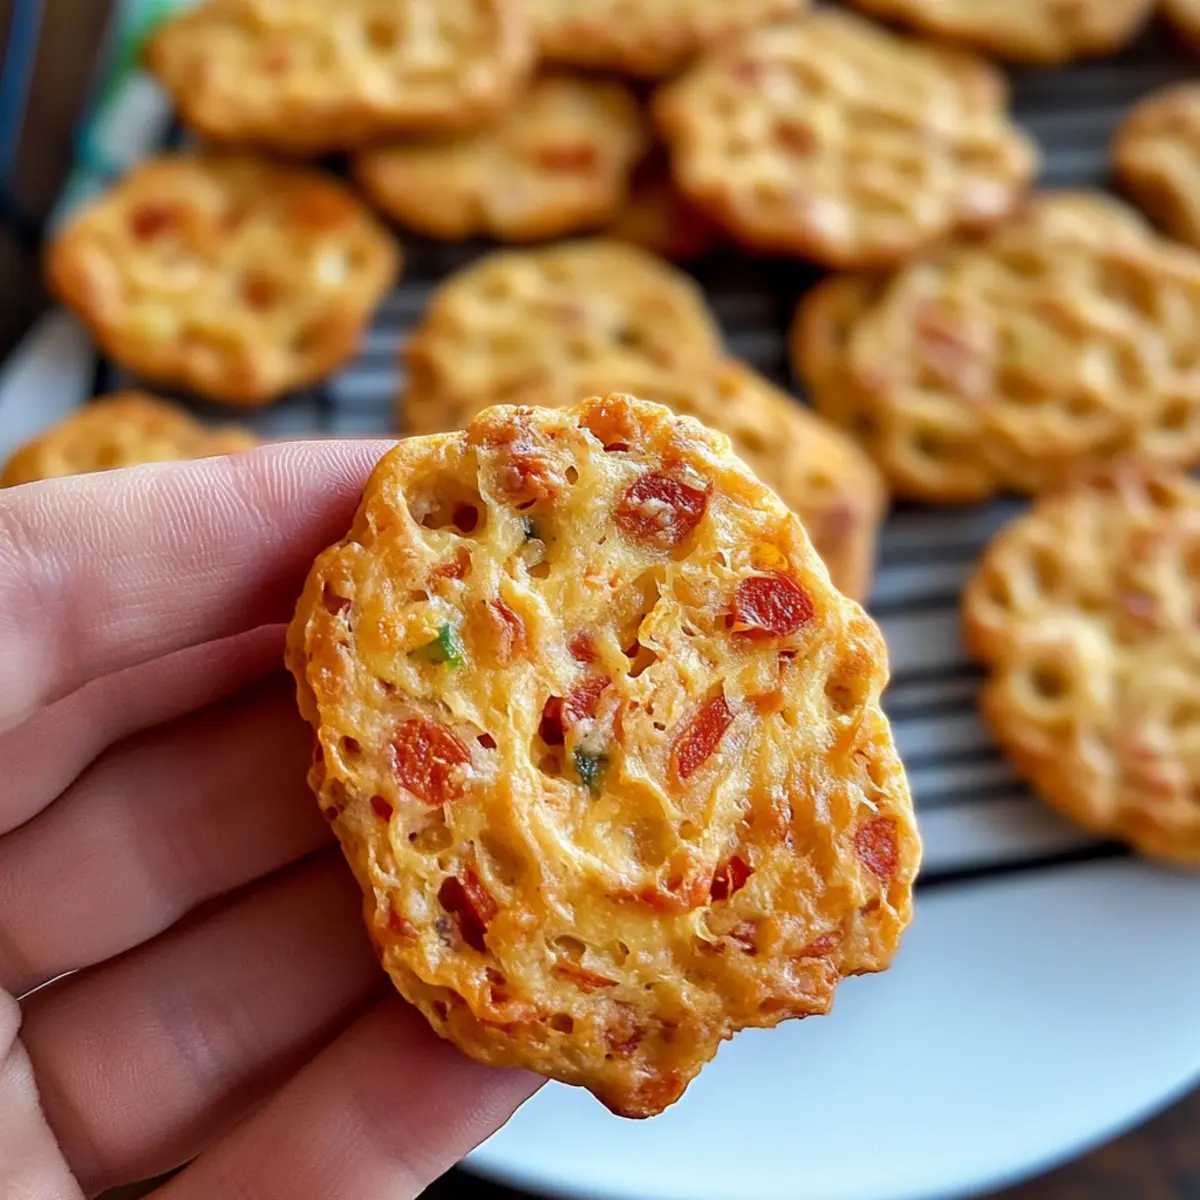
A delightful crunch filled my kitchen as I rolled out the dough, the promise of homemade Pimento Cheese Crackers dancing in the air. These morsels are an irresistible appetizer, blending the creamy, zesty goodness of pimento cheese with a light, crisp exterior. Best of all, they’re quick and easy to whip up, making them the perfect treat for any gathering—whether it’s a cozy family get-together or a festive soirée with friends. With just a few simple ingredients, you can impress your guests (or yourself!) and trade takeout for a heartwarming homemade snack. Ready to dive into a world of cheesy, crispy goodness? Let’s get cooking!

Why are Pimento Cheese Crackers a Must-Try?
Simplicity: This recipe is incredibly easy to follow, making it perfect for both novice and experienced cooks. Delicious Flavor: The creamy, tangy pimento cheese creates a delightful taste that will have your guests coming back for more. Versatile Appeal: Whether served on their own or with dips like guacamole or Buffalo Blue Cheese Dip, these crackers fit right into any gathering. Quick Prep: With just a mix, roll, slice, and bake method, you can have these tasty bites ready in no time. Plus, for variations, check out how you can spice things up with chopped jalapeños!
Pimento Cheese Cracker Ingredients
For the Dough
• Pimento Cheese – Adds rich, cheesy flavor; use homemade or store-bought based on your preference.
• Unsalted Butter – Provides moisture and richness; ensure it’s softened for easy mixing.
• All-Purpose Flour – Creates the structure of the cracker; can substitute with gluten-free flour if desired.
• Salt – Enhances the overall flavor; adjust to taste.
For Serving
• Dips (optional) – Pair with guacamole or Buffalo Blue Cheese Dip for an extra flavor boost.
Step-by-Step Instructions for Easy Pimento Cheese Crackers
Step 1: Mix the Cheese and Butter
In a medium mixing bowl, combine the pimento cheese and softened butter. Using a spatula or a wooden spoon, mix until the ingredients are fully blended and creamy, which should take about 2-3 minutes. This mixture forms the flavorful base of your Easy Pimento Cheese Crackers, so ensure it’s smooth without any lumps before moving on.
Step 2: Add the Flour and Salt
Gradually fold in the all-purpose flour and salt into the cheesy mixture using the spatula. As you mix, you’ll notice the dough coming together—it should be soft but not sticky. This process typically takes around 3-5 minutes. Once combined, gently knead the dough with your hands for about a minute until it is cohesive and ready for shaping.
Step 3: Shape and Chill the Dough
Roll the dough into a log, aiming for a diameter of about 1.5 inches. Once shaped, wrap the log tightly in plastic wrap and refrigerate for at least 1 hour. Chilling is essential for Easy Pimento Cheese Crackers, as it firms up the dough, making it easier to slice later on. You’ll know it’s ready when it feels firm to the touch.
Step 4: Preheat the Oven
While the dough chills, preheat your oven to 350°F (175°C). This gradual heating process ensures that your oven is ready to perfectly bake the crackers, resulting in a nice golden color. Take this time to prepare a baking sheet by lining it with parchment paper, which will make transferring the crackers easier once sliced.
Step 5: Slice the Chilled Log
Once the dough has chilled, unwrap the log and place it on a cutting board. Using a sharp knife, carefully slice the log into ¼ inch rounds, forming the crackers. Arrange the slices on the prepared baking sheet, spacing them about 1 inch apart to allow for even baking. The crispy texture of Easy Pimento Cheese Crackers will develop beautifully with this spacing.
Step 6: Bake the Crackers
Place the baking sheet in the preheated oven and bake for 20-22 minutes. Keep an eye on the crackers, looking for them to be lightly browned around the edges. This color indicates that they are perfectly baked and ready to come out. The enticing aroma will fill your kitchen as they bake!
Step 7: Cool and Store
Once baked, carefully remove the Easy Pimento Cheese Crackers from the oven. Allow them to cool completely on the baking sheet; they’ll continue to crisp up during this time. After cooling, store any leftovers in an airtight container for up to 2 days to maintain their delicious crunch. Enjoy these delightful appetizers at your next gathering!
Make Ahead Options
These Easy Pimento Cheese Crackers are perfect for busy home cooks looking to save time without sacrificing flavor! You can prep the dough up to 24 hours in advance by rolling it into a log, wrapping it in plastic wrap, and refrigerating it. Alternatively, if you want to get even further ahead, the unbaked log can be frozen for up to 3 months—just thaw it overnight in the fridge before slicing and baking. To maintain the crackers’ crispiness, ensure they cool completely before storing any leftovers in an airtight container for up to 2 days. When ready to serve, just bake straight from chilled; you’ll have delicious, homemade appetizers ready with minimal effort!
Expert Tips for Pimento Cheese Crackers
- Choose Quality Cheese: Use high-quality pimento cheese for the best flavor. If it’s too watery, adjust flour until the mixture is just right.
- Wrap Well: When chilling, wrap the dough tightly to prevent it from drying out. A well-chilled log is easier to slice evenly.
- Watch the Bake Time: Keep an eye on your crackers—they’re ready when edges are lightly browned. Overbaking can lead to dryness.
- Cooling Is Key: Allow the Easy Pimento Cheese Crackers to cool completely to achieve that perfect crispy texture.
- Storage Tips: Store leftovers in an airtight container for up to 2 days, but they’re best enjoyed fresh!
What to Serve with Easy Pimento Cheese Crackers?
A delightful crunch filled my kitchen as I rolled out the dough, promising a feast for the senses.
-
Creamy Guacamole: The velvety texture of guacamole pairs perfectly with the crispy crackers, adding a refreshing twist and healthy fats.
-
Buffalo Blue Cheese Dip: This spicy, tangy dip complements the savory flavors of the crackers, creating a bold and exciting flavor contrast that will have guests raving.
-
Fresh Veggies: A colorful platter of crunchy cucumbers, carrots, and bell peppers adds a crisp, refreshing element that balances the rich cheese.
-
Herbed Cream Cheese: Spreadable cream cheese infused with fresh herbs enhances the overall creaminess and adds an aromatic layer, making each bite even better.
-
Sparkling Wine: Bubbles add elegance and a festive feel, lifting the overall experience while complementing the salty, cheesy flavors of the crackers.
-
Apple Slices: Sweet, crisp apple slices provide a delightful contrast, their natural sweetness playing beautifully against the tangy pimento cheese.
-
Roasted Nuts: Crunchy, seasoned nuts bring earthy notes and additional texture, making them a delightful nibble alongside these crispy treats.
-
Mixed Berry Salad: A light salad featuring strawberries and blueberries can add a touch of sweetness that refreshes the palate, perfect for balancing the savory flavors.
-
Olives and Pickles: Tart, briny bites of olives and pickles serve to cleanse the palate while enhancing the richness of the pimento cheese.
How to Store and Freeze Pimento Cheese Crackers
Fridge: Store your Easy Pimento Cheese Crackers in an airtight container for up to 2 days, ensuring they maintain their delightful crunch.
Freezer: If you want to enjoy later, freeze the unbaked dough log wrapped tightly in plastic wrap. It can last in the freezer for up to 2 months.
Reheating: When ready to bake from frozen, thaw the log in the refrigerator overnight before slicing and baking as directed. This ensures fresh, crunchy crackers every time!
Cooling: Allow the crackers to cool completely on the baking sheet; this step is crucial for maintaining that perfect crispy texture before storing.
Pimento Cheese Crackers Variations
Feel free to get creative with your Pimento Cheese Crackers and make them your own!
-
Spicy Twist: Add chopped jalapeños or a pinch of cayenne to your pimento cheese for an extra kick. The vibrant flavors will dance in every bite!
-
Cheese Swap: Try using a flavored cheese spread like pepper jack or a tangy goat cheese. Each option brings a unique twist that will delight your taste buds.
-
Herby Delight: Incorporate fresh herbs like chopped chives or dill into the dough for a fragrant addition. The scent of herbs baking will add a delightful homemade touch.
-
Nutty Crunch: Fold in finely chopped nuts like pecans or almonds for a delightful crunch. This adds an unexpected texture that complements the creamy filling beautifully.
-
Dairy-Free Option: Substitute pimento cheese with a vegan cheese spread for a dairy-free version. These crackers will still be delicious and perfect for a crowd!
-
Garlic Infusion: Mix in some fresh minced garlic or garlic powder with the cheese for added depth of flavor. The warm, aromatic scent of garlic will fill your kitchen and elevate your snacks.
-
Sweet & Savory: Incorporate a tablespoon of honey into the cheese mix for a sweet twist that contrasts deliciously with the savory cracker. This unexpected flavor combo will wow your guests!
For additional munching ideas, pair your lovely crackers with homemade dips or spreads like a refreshing avocado dip or the ever-popular Buffalo Blue Cheese Dip, enhancing your snack experience even more!

Pimento Cheese Crackers Recipe FAQs
Which type of pimento cheese should I use?
Absolutely! You can use either homemade or store-bought pimento cheese for this recipe. If using store-bought, make sure it’s not too wet—this can affect the dough consistency. I recommend checking for a balance of creaminess and flavor to ensure the best results.
How should I store Pimento Cheese Crackers?
After baking, allow your Easy Pimento Cheese Crackers to cool completely on the baking sheet; this is key for maintaining their crispiness. Once cooled, store them in an airtight container at room temperature for up to 2 days. Don’t skip this cooling step—it’s what keeps that delightful crunch you love!
Can I freeze Pimento Cheese Crackers?
Yes, you can! For freezing, wrap the unbaked dough log tightly in plastic wrap and then place it in a resealable plastic bag. It can be stored in the freezer for up to 2 months. When you’re ready to enjoy, simply thaw the log in the refrigerator overnight before slicing and baking. This way, you can have freshly baked crackers anytime you desire!
What should I do if my dough is sticky?
If you find that the dough is sticky while rolling, don’t worry! Just sprinkle a little extra flour onto your hands and work surface to make it manageable. Knead in more flour, a tablespoon at a time, until the texture is soft but not sticky. This ensures easy handling and evenly shaped crackers!
Are Pimento Cheese Crackers safe for my pet?
Generally, while pimento cheese can be a yummy treat for humans, it’s best to avoid giving it to pets. Cheese can upset their stomachs, and the spices used in pimento cheese can be harmful too. Always check for any ingredients that might be unsafe for your furry friends before sharing!
Can I make these crackers gluten-free?
Very much so! If you need them gluten-free, simply substitute the all-purpose flour in the recipe with a gluten-free flour blend. Ensure that the flour you’re using is suitable for baking, as this will help retain the texture and structure of the Easy Pimento Cheese Crackers. Adjust as needed to achieve a soft dough!

Crispy Pimento Cheese Crackers for Perfect Party Appetizers
Ingredients
Equipment
Method
- In a medium mixing bowl, combine the pimento cheese and softened butter. Mix until fully blended and creamy (2-3 minutes).
- Gradually fold in the all-purpose flour and salt into the cheesy mixture using a spatula. Knead the dough for about a minute until cohesive.
- Roll the dough into a log (1.5 inches in diameter). Wrap tightly in plastic wrap and refrigerate for at least 1 hour.
- Preheat your oven to 350°F (175°C). Line a baking sheet with parchment paper.
- Once chilled, unwrap the log and slice into ¼ inch rounds. Arrange slices on the baking sheet, 1 inch apart.
- Bake for 20-22 minutes until lightly browned around the edges.
- Remove from oven and cool completely on the baking sheet. Store leftovers in an airtight container for up to 2 days.