


As I prepped for this year’s Halloween bash, I stumbled upon a fun idea that transformed my kitchen into a festive workshop: Mozzarella Cheese Skulls! These adorable, spooky treats are not only a hit with guests but also simple to whip up, making them perfect for any home chef looking to impress. With minimal ingredients and a quick baking time, these mozzarella skulls can elevate your charcuterie board or even serve as a fun party appetizer. Plus, they’re vegetarian-friendly, so everyone can enjoy them without a second thought. Ready to add a little fright to your feast? Let’s dive into how to create these delightful spooky snacks!
Why Are Mozzarella Cheese Skulls Incredible?
Unforgettable Presentation: These mozzarella cheese skulls are sure to steal the show at your Halloween party! Their unique shape makes them a striking addition to any plate, elevating your charcuterie display in seconds.
Quick to Prepare: With only a few ingredients and a baking time of just 8-10 minutes, these skulls are a breeze to create, even for busy home chefs.
Vegetarian-Friendly: Perfect for guests with dietary restrictions, everyone can indulge in these spooky snacks without worry.
Versatile Serving Options: Whether served alone or paired with vibrant dips like pesto or balsamic glaze, these cheese skulls can easily suit various palates. If you’re looking for more delightful party ideas, consider making a Strawberry Cheesecake Dump or our Banana Grilled Cheese for a unique twist!
Crowd-Pleaser: Impress your friends with this playful take on a classic treat — it’s guaranteed to make your celebration a memorable one!
Mozzarella Cheese Skulls Ingredients
For the Cheese Skulls
• Mini Mozzarella Balls – These small, cherry-sized mozzarella are perfect for shaping; feel free to use regular mozzarella if needed.
• Silicone Skull Molds – Use heat-safe molds to shape the mozzarella into fun skulls; ensure they can withstand the oven temperature.
Optional Dipping Sauces
• Balsamic Glaze – Drizzle this sweet-and-tangy glaze for added flavor and a beautiful presentation.
• Pesto – A bright, fresh dip that pairs wonderfully with the creamy mozzarella skeletons.
Create these Mozzarella Cheese Skulls yet, and let them be the spooky star of your Halloween celebration!
Step‑by‑Step Instructions for Mozzarella Cheese Skulls
Step 1: Preheat the Oven
Start by preheating your oven to 350°F (175°C). This ensures that as soon as your mozzarella cheese skulls are ready, they will bake evenly and adequately soften. Preheating is crucial, so while you prepare your ingredients, let that oven work its magic!
Step 2: Prepare the Mozzarella
Take your mini mozzarella balls and use a paper towel to blot away excess moisture. This step is vital to achieving a solid shape when baked. Squeeze the balls gently to remove any liquid without breaking them, ensuring your mozzarella cheese skulls will maintain their spooky form.
Step 3: Fill the Molds
Carefully place one dried mini mozzarella ball into each cavity of your silicone skull molds. Ensure they fit snugly without any gaps, as this will help maintain their shape during the baking process. Your molds should be heat-safe to withstand the oven temperature, ready for the transformation ahead!
Step 4: Bake the Mozzarella
Slide your filled molds into the preheated oven and bake for 8-10 minutes. Keep an eye on them; you want the mozzarella to soften but not melt completely. Once slightly soft, they will be ready to mold into the perfect skull shape that will delight your guests.
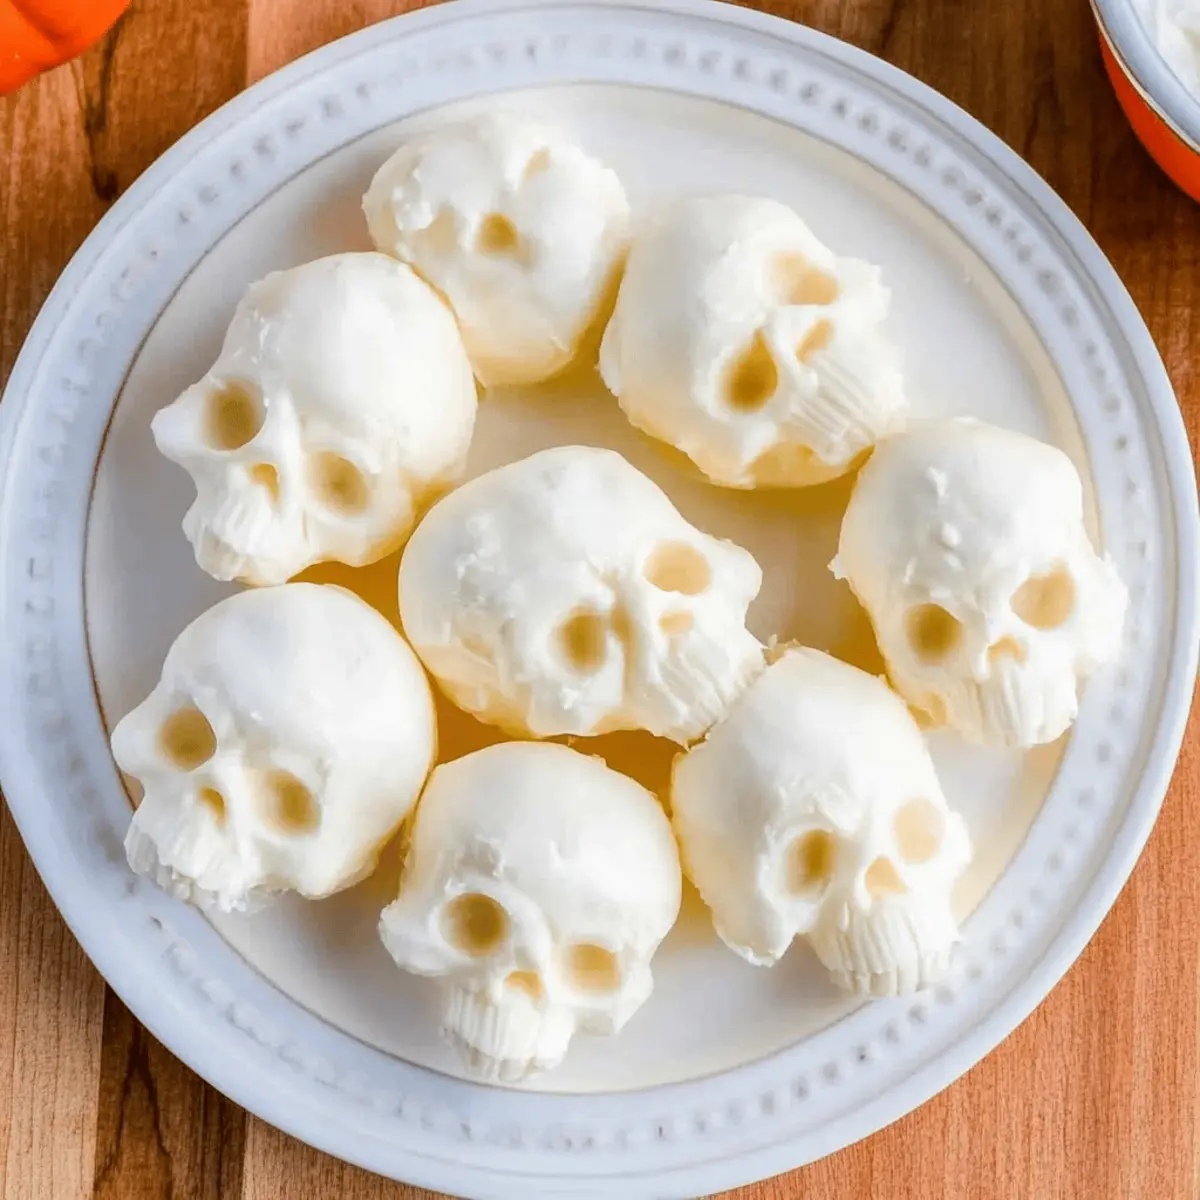
Step 5: Shape the Cheese Skulls
After baking, carefully remove the molds from the oven using oven mitts. While the mozzarella is still warm, use the back of a spoon to press down gently on each mozzarella ball, shaping them into the skull form. Be light-handed to retain the integrity of the delicious cheese.
Step 6: Cool and Unmold
Transfer the molds to the refrigerator and chill for about 10 minutes. This cooling step helps the mozzarella cheese skulls firm up and hold their cute, spooky shapes. Once cool, gently unmold each skull by turning the mold upside down and tapping it to release the cheese.
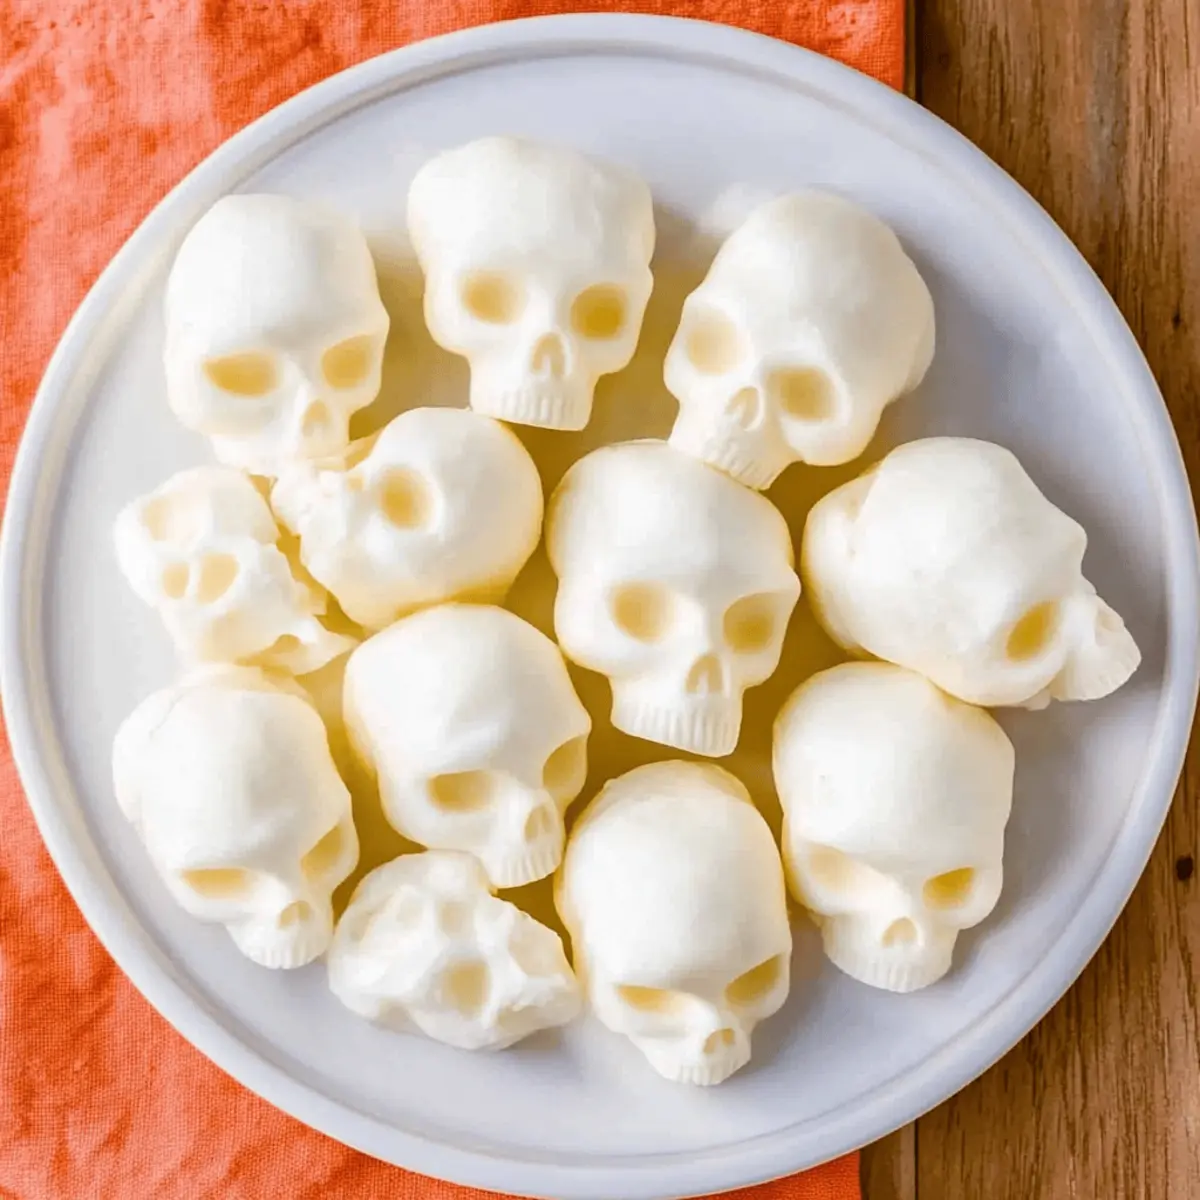
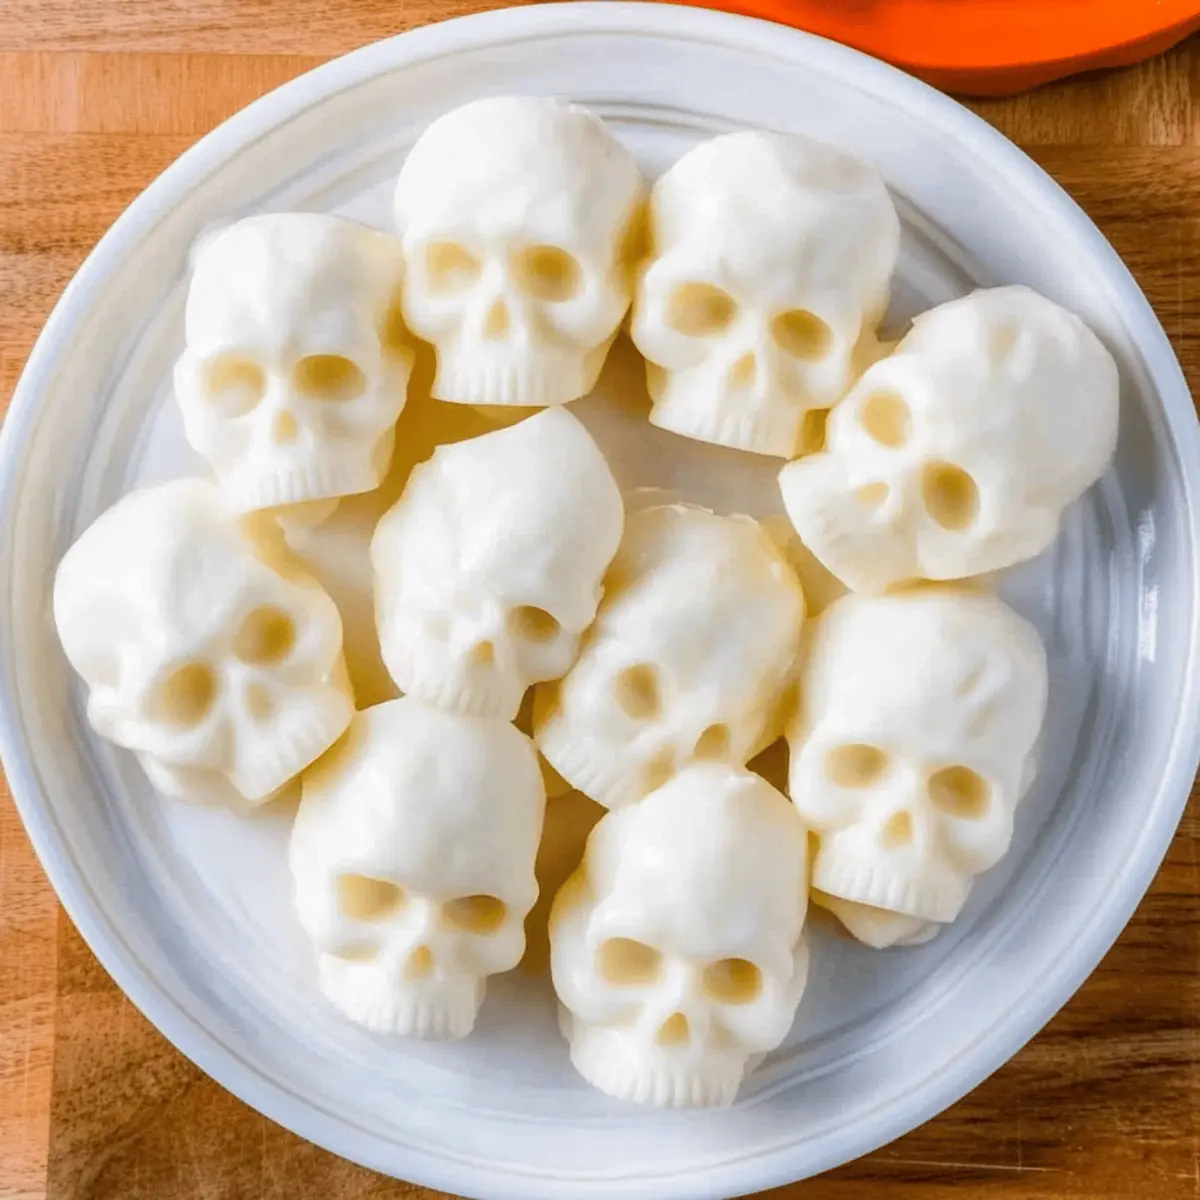
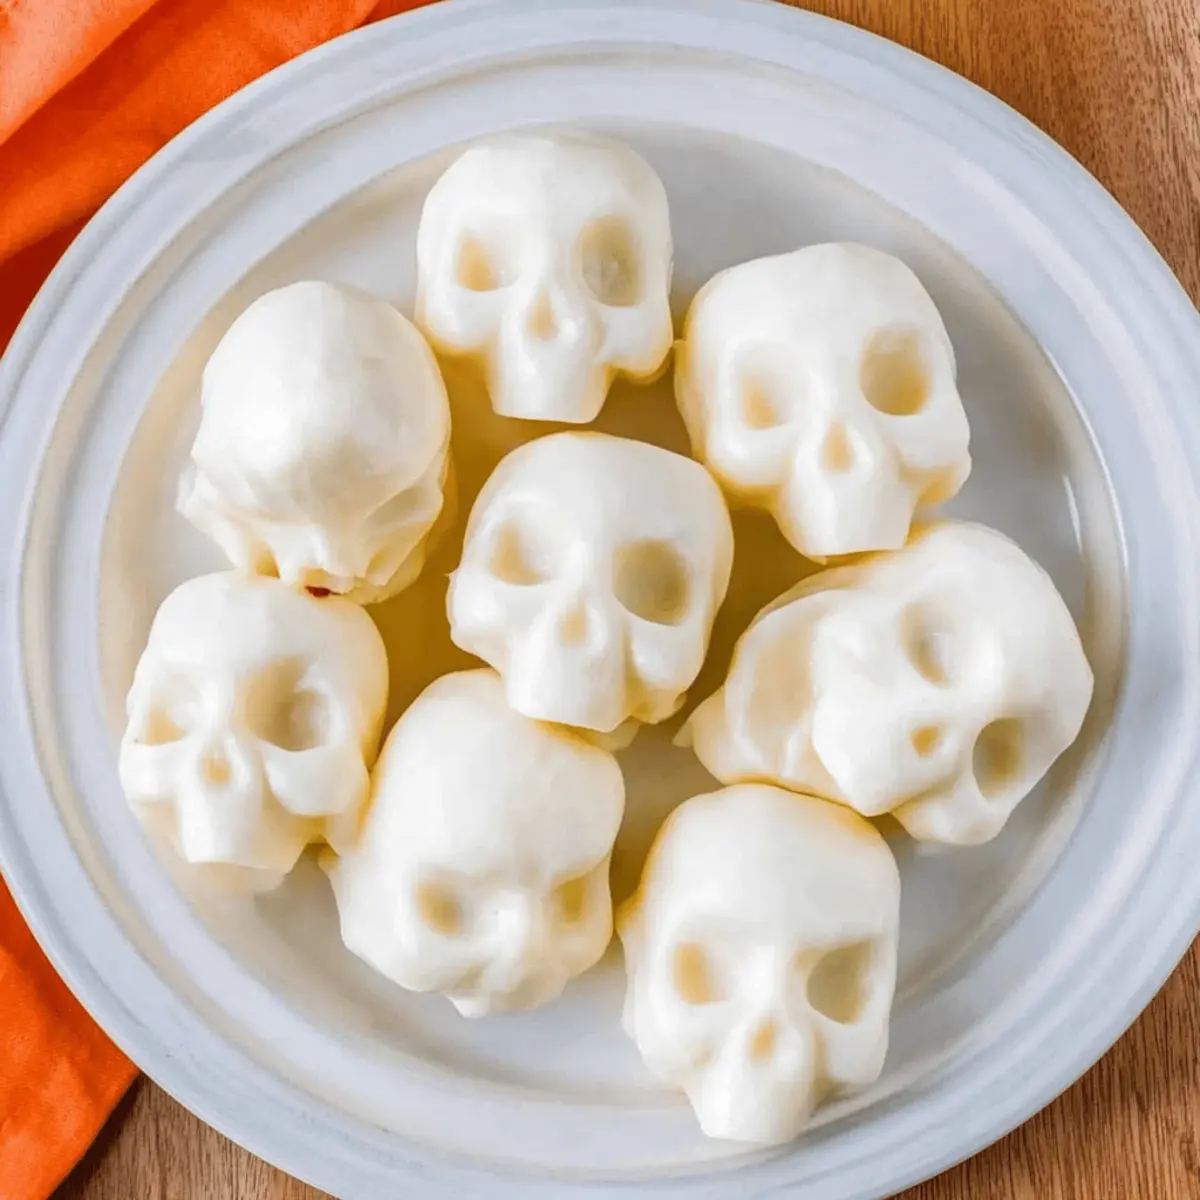
Step 7: Serve Your Mozzarella Cheese Skulls
Now that your mozzarella cheese skulls are perfectly shaped, it’s time to showcase them! Arrange them on a festive platter and consider serving them with balsamic glaze or pesto for dipping. These spooky treats are sure to be a hit at your Halloween gathering.
Expert Tips for Mozzarella Cheese Skulls
• Drying is Key: Ensure your mozzarella balls are adequately dried before baking; excess moisture can make them lose shape and gooeyness.
• Gentle Pressure: Use a light hand when pressing the mozzarella into the molds; pressing too hard may cause them to lose their cute skull shape.
• Quality Molds: Opt for high-quality, heat-safe silicone molds; flimsy or low-quality molds may melt, affecting your spooky presentation.
• Experiment with Flavors: Don’t hesitate to infuse your mozzarella with herbs or spices before molding for an extra flavor twist to your cheese skulls.
• Serving Style: Present your mozzarella cheese skulls on a vibrant platter adorned with festive decor to enhance visual appeal and engage your guests.
What to Serve with Spooky Mozzarella Cheese Skulls?
Create a breathtaking Halloween spread that your guests will rave about long after the festivities!
- Black Bean Salad: This zesty side dish brings a delightful crunch and earthy flavor that beautifully contrasts the creamy mozzarella, enhancing every bite.
- Pumpkin Spice Hummus: A seasonal twist, this smooth, sweet dip adds a warm palate surprise when enjoyed alongside the cheese skulls, making it a perfect pair!
- Garlic Butter Breadsticks: The soft, buttery texture of these breadsticks complements the cheese and serves as a perfect vessel for any leftover dips. Each bite is a comforting delight!
- Mixed Greens Salad: Fresh greens tossed in a light vinaigrette offer a bright contrast to the richness of the mozzarella, balancing your Halloween feast beautifully.
- Spooky Sangria: A festive punch with dark fruits and a hint of spice, this drink adds a whimsical touch to your appetizer spread while keeping your guests refreshed.
- Chocolate Pumpkin Pudding Cups: End your meal on a sweet note with rich chocolate and smooth pumpkin. These adorable cups are both decadent and playful, channeling the Halloween spirit!
- Caramel Apple Slices: Crisp apple slices dipped in sweet caramel provide a fun, fruity addition to your spread. They are sure to evoke nostalgic Halloween memories!
- Deviled Eyeball Eggs: Elevate your appetizer table with these fun treats that surprise with flavor and look perfect next to your spooky mozzarella skulls.
- Roasted Vegetable Platter: A colorful assortment of roasted seasonal vegetables will add vibrant textures and a savory depth alongside the cheese, creating a well-rounded meal.
Storage Tips for Mozzarella Cheese Skulls
Fridge: Keep your mozzarella cheese skulls in an airtight container in the refrigerator for up to 2 days. This helps retain their creamy texture and delightful shape.
Freezer: For longer storage, place the molded mozzarella in a single layer on a baking sheet and freeze until solid. Transfer to a freezer-safe bag and store for up to 2 months.
Reheating: When ready to enjoy, thaw the mozzarella in the fridge overnight before using. Reheat gently in the oven or microwave on low power to avoid melting completely.
Serving Fresh: While these mozzarella cheese skulls can be stored, they are best fresh to maintain that melt-in-your-mouth quality that delights everyone at your Halloween gathering.
Mozzarella Cheese Skulls Variations
Feel free to unleash your creativity and customize these delightful treats for a truly unique experience!
- Herb-Infused: Add some dried Italian herbs like oregano or basil to the mozzarella before baking for a burst of flavor.
- Spooky Spices: Mix in a pinch of smoked paprika or garlic powder to give your skulls a delicious smoky twist.
- Veggie Surprise: Incorporate finely chopped spinach or sun-dried tomatoes into the mozzarella for a colorful, nutritious pop.
- Colorful Molds: Use themed molds that resonate with other holidays, like pumpkins for fall or bats for Halloween, for different occasions. They’re perfect for family gatherings year-round!
- Cheesy Blend: Try mixing mozzarella with sharp cheddar for an extra flavorful bite that cheese lovers will adore.
- Dippity-Do: Serve these skulls with an array of dips, from creamy avocado to homemade salsa, to elevate your snack game even further!
- Crunch Factor: For extra texture, sprinkle some crushed crackers or seasoned breadcrumbs on top before baking for a delightful crunch.
- Spicy Kick: If you’re feeling adventurous, add a dash of red pepper flakes to the mozzarella for a fiery surprise that’ll awaken your taste buds!
As you get creative, don’t forget to pair these fun snacks with a vibrant dish like our Strawberry Cheesecake to create a colorful and festive table!
Make Ahead Options
These Mozzarella Cheese Skulls are perfect for meal prep, allowing you to enjoy a stress-free party planning experience! You can prepare the mozzarella balls up to 24 hours in advance; simply follow the initial steps of drying and filling the molds but skip the baking. After placing the filled molds in the refrigerator, they’ll keep fresh and ready for baking just before serving. When it’s time to impress your guests, preheat your oven and bake for 8-10 minutes until they soften, then shape and cool as directed. This way, you save time and ensure your spooky treats are just as delicious, making your Halloween gathering a breeze!
Mozzarella Cheese Skulls Recipe FAQs
What kind of mozzarella should I use?
Absolutely! Mini mozzarella balls are perfect for this recipe, but you can use regular mozzarella balls if you prefer. Just make sure to cut them into smaller, manageable chunks for easy molding.
How should I store the mozzarella cheese skulls after making them?
I recommend storing your mozzarella cheese skulls in an airtight container in the refrigerator. They will stay fresh for up to 2 days, retaining their delicious taste and spooky shape.
Can I freeze mozzarella cheese skulls?
Yes, you can! For freezing, place the molded mozzarella cheese skulls in a single layer on a baking sheet and freeze them until solid. Then, transfer the skulls to a freezer-safe bag, and they can be stored for up to 2 months. When you’re ready to enjoy them, thaw them in the fridge overnight and reheat them gently.
How can I avoid the cheese from melting too much in the oven?
Very! To prevent your mozzarella from melting completely, keep an eye on them as they bake. Aim for 8-10 minutes at 350°F (175°C); you want them slightly softened but still maintaining their shape. Also, ensure they are well-dried before placing them in the oven.
Are mozzarella cheese skulls suitable for vegetarians?
Absolutely! These mozzarella cheese skulls are vegetarian-friendly, making them a perfect party appetizer for everyone to enjoy. Just make sure to check any sauces or dipping options you plan to serve alongside them for dietary restrictions.
Melt-in-Your-Mouth Mozzarella Cheese Skulls for Halloween
Ingredients
Equipment
Method
- Preheat your oven to 350°F (175°C) to ensure even baking.
- Blot excess moisture from the mini mozzarella balls with a paper towel for better shape.
- Place one dried mozzarella ball into each cavity of your silicone skull molds.
- Bake in the preheated oven for 8-10 minutes until mozzarella is softened but not melted.
- Gently press down on each mozzarella ball with the back of a spoon to shape them into skulls.
- Chill the molds in the refrigerator for about 10 minutes to firm up the shapes.
- Unmold the cheese skulls and serve on a festive platter with optional dipping sauces.